


|
|
|
#1
 08-07-2009, 01:46 AM
|
||||
|
||||
|
How to Make Aluminum Clad Card Stock
How to Make Aluminum Clad Card Stock (Part I)
By Gil Russell Edited by Leif Ohlsson 7 August 2009 I wonder how many times modelers have experimented with ordinary aluminum foil in attempts to recreate a natural aluminum finish on their models. One method, developed for plastic models, applies aluminum foil in a manner similar to the method used for gold leaf. The underlying surface has to include all the desired detail before the foil is applied. Thinking about applying this to card stock took me around the block several times resulting in several shattered preconceived notions along the way. The strange part of this story is that the solution shown here is non toxic and uses commonly available materials. A large variety of glues capable of bonding aluminum to paper were tried. One theory (a mishap of preconceived notions) was that to maintain flat unwrinkled paper a non-water based glue would be required. The problem with non-water based glues is that they generally require a fairly aromatic thinning agent. A goal was set early on to minimize the exposure to volatile organic solvents (VOCs). The VOC glue tests produced some interesting results but had to be eliminated from consideration due to their toxicity (3M spray adhesive produced an easy to layup assembly but failed to yield a smooth mirror like surface). Smoothing Aluminum Foil The first small breakthrough was discovering a method to flatten the aluminum foil in preparation for bonding it to the card stock. The trick is to mist a pane of glass with a water spray before carefully applying and smoothing out a sheet of aluminum foil onto the glass (shiny side down). The water adheres the foil tightly to the glass pane and in effect clamps it to the glass.  Figure 1 Water Misted Glass Pane Aluminum foil thicknesses vary from manufacturer to manufacturer and have a direct affect on the use as described here. Reynolds Wrap Heavy Duty Aluminum Foil is used exclusively in this tutorial. I found it to be consistently thicker than other brands. Use heavy duty or extra heavy duty foil for models requiring moderate compound curves.  Figure 2 Laying Out the Aluminum Foil  Figure 3 Smoothing the Foil 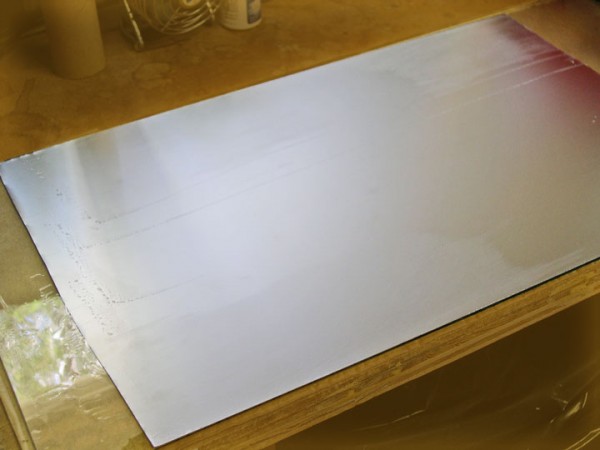 Figure 4 Smoothed Aluminum Foil The strength of the paper to aluminum bond depends to a great extent on the aluminum foils surface condition. The foil has a minute amount of residual manufacturing lubricant left on its surface (yes its edible). It will interfere with the bond if its not removed. Use a 3M style scrub pad with window cleaner sprayed on the aluminum. Scrub the aluminum surface using a circular motion to scour the entire surface well.  Figure 5 Cleaning the Aluminum  Figure 6 Removing Cleaning Residue  Figure 7 Final Cleaning with Alcohol  Figure 8 Aluminum Ready for Bonding 
|
| Google Adsense |
|
#2
08-07-2009, 01:55 AM
|
||||
|
||||
|
How to Make Aluminum Clad Card Stock
How to Make Aluminum Clad Card Stock (Part II)
By Gil Russell Edited by Leif Ohlsson 7 August 2009 Adhesive After rejecting VOC based adhesives water based glues were tried. PVA based (Polyvinyl Acetate) white glue and Carpenters (Aliphatic Resin) yellow glue did not achieve a good aluminum bond (It will work in a pinch but leaves unbounded voids). An ideal bond fails a peel test paper first. Aleenes Original Tacky Glue was tried next and it surprisingly passed the peel test. After several practice runs I became proficient in producing nearly perfect aluminum clad panels every time. Bonding the Paper to the Aluminum Using a fairly fresh tube of Tacky Glue spread a pattern approximately the size of the paper thats to be glued to the aluminum.  Figure 9 Applying Glue Pattern to the Aluminum 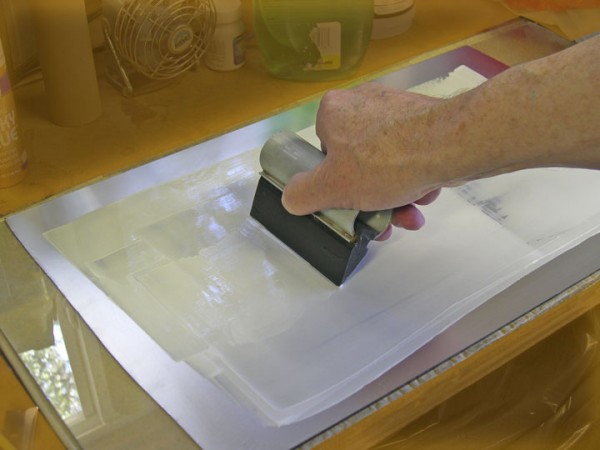 Figure 10 Spreading the Glue into a Film  Figure 11 Aluminum Ready for Bonding 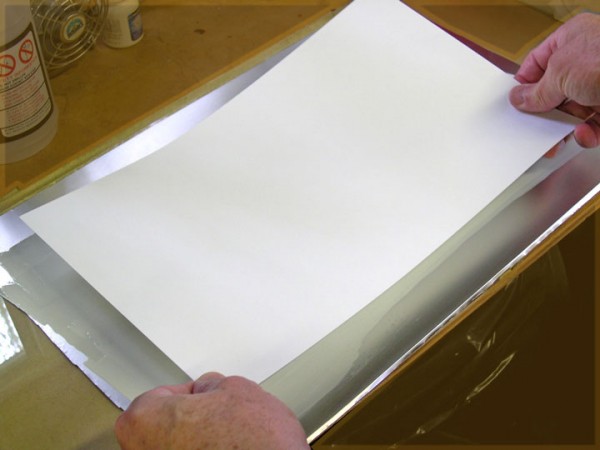 Figure 12 Placing the Paper  Figure 13 Burnishing the Paper  Figure 14 Burnishing the Edges  Figure 15 Cutting the Paper Out of the Foil  Figure 16 Sheet Curl  Figure 17 Rolling the Curl Out of the Sheet Resulting Aluminum Clad Sheet:  Figure 18 Finished Aluminum Clad Card Stock Sheet Legal size card stock was used in this tutorial. I recommend practicing with smaller sizes till youre familiar with the process before moving on to larger pieces. Most any weight paper can be used as long as the surface is fairly smooth. Rougher surface textures require a thicker glue film application with longer drying times. Sheets of tracing vellum make easy to apply overlay panels for models. I regularly put the aluminum clad card stock through an inkjet printer to print part patterns on the paper backside. Remember to mirror reverse the pattern before printing. A piece of adhesive backed shelf paper applied to the aluminum surface will protect the surface during the model building process.
|
|
#3
08-07-2009, 03:38 AM
|
||||
|
||||
|
Great tutorial! Thanks!
|
|
#4
08-07-2009, 05:02 AM
|
||||
|
||||
|
Very well presented Gil. This will work wonders for those who work in the larger scales,
and I would love to try it in my scale, but fear the thickness and stiffness just would not conform in the small scales. Gil, you are truly a pioneer and a serious asset to the hobby.
__________________
Ray Respect the Paper, RESPECT IT! GET OFF MY LAWN!
|
|
#5
08-07-2009, 05:06 AM
|
||||
|
||||
|
Gil,
Thanks you soooo much. Great tutorial. Thanks, also, for the hard work of experimenting.
|
| Google Adsense |
|
#7
08-07-2009, 05:56 AM
|
||||
|
||||
|
Thanks, this is really nice. Thanks for showing us.
WIFE...!!! wheres the foil......!!!??
|
|
#8
08-07-2009, 05:58 AM
|
||||
|
||||
|
Outstanding tutorial, thank you Gil (and Leif for the fine presentation).
In my travels searching for Reynolds "Heavy Duty" (easily found in most grocery stores) and "Extra Heavy Duty" (scarce) aluminum foils, a visit to the Reynolds website (link) reveals an apparent re-branding of their foils. I wonder if the now named "Heavy Strength" and "Super Strength" foils are equivalent in weights to Heavy Duty and Extra Heavy Duty foils respectively? Also, I found (and ordered) a roll of 0.003" inch thick aluminum foil from McMaster-Carr. It's 6" and and comes in a 50' roll (link). I believe Reynolds "Extra Heavy Duty" foil is approximately this thickness. Truly great work work Gil, thanks again! Mike
|
|
#10
08-07-2009, 06:43 AM
|
||||
|
||||
|
excellent tutorial
(I run another forum that offers tutorials, and I really value a well explained and well detailed tutorial!) can you show us some uses for the "alumi-card" (patent pending...if you use the name, I want a cut!) I'm just curious as to how well it cuts and forms? How small of a part have you created with the "alumi-card"? and what about printing on it?...will it even go through a printer?
__________________
SUPPORT ME PLEASE: PaperModelShop Or, my models at ecardmodels: Dave'sCardCreations
|
| Google Adsense |
 |
|
|


 Linear Mode

