


|
|
|
#1
 08-04-2009, 05:25 PM
|
|||
|
|||
|
Mixing and Color Matching Watercolor Pencils
Mixing and Matching Watercolor Pencils for Card Modeling
Mixing and matching watercolor pencils for use in card modeling can present a challenge at times. The first difficulty usually encountered, is the initial selection of the proper individual colors to mix, in order to match the color of the printed model. The second is the ability to quantify the amount of each required color, so it can be matched and easily replicated when additional amounts are needed. This tutorial attempts to minimize the amount of trial and error involved when color matching and produce repeatable results. For this tutorial, we will be mixing watercolor pencil pigments with glue. Water based PVA (white glue) can be colored using water based media, to use as a filler for small voids, gluing particularly conspicuous parts together or smoothing edge seams in paper models. This tutorial can also be used for mixing watercolor pencil pigments for edge coloring. Tools and Supplies 1.Set of water color pencils, preferably a 24 color set. 2.Manual pencil sharpener. 3.White, water based glue of your choice, I prefer Elmer's Glue- All. 4.A cup of water. 5.An artists color wheel available at art supply and craft stores. 6.110 lb. Card stock (vellum finish) with a printed graduated grid. 7.Toothpicks 8.A glass file is optional 9.And of course, a model to match colors with. 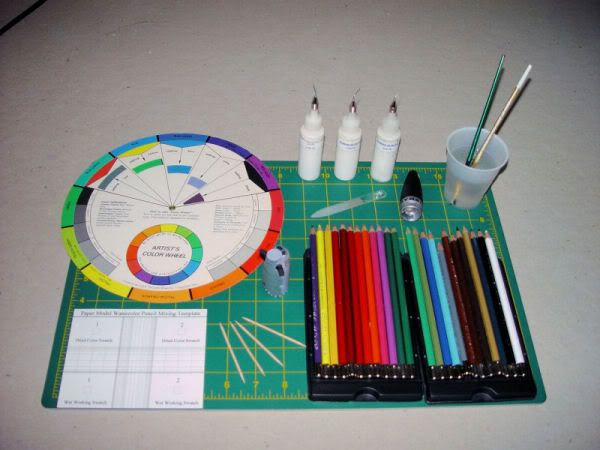 The first step is to look at the outer ring of the artists color wheel and select the color that most closely matches the color of the model the glue will be applied to. Then rotate the wheel until the window under that color or colors, is as close a match to your model as possible. The picture below reveals that Blue-Violet and White will have to be mixed. This gives you a solid starting point to work with. 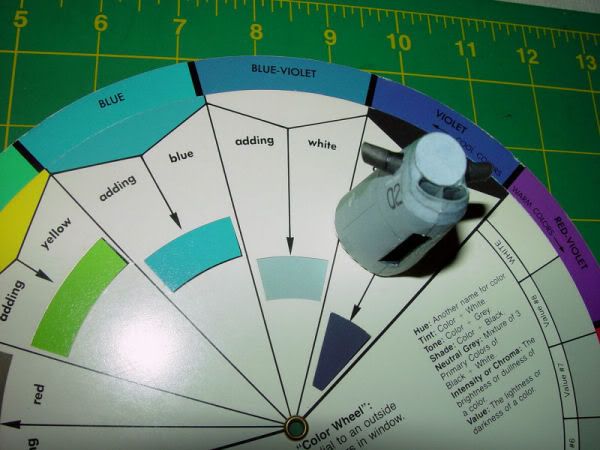 Then select water color pencils that most closely match those on the color wheel that are to be mixed. This next picture shows the pencils that I selected for this project. 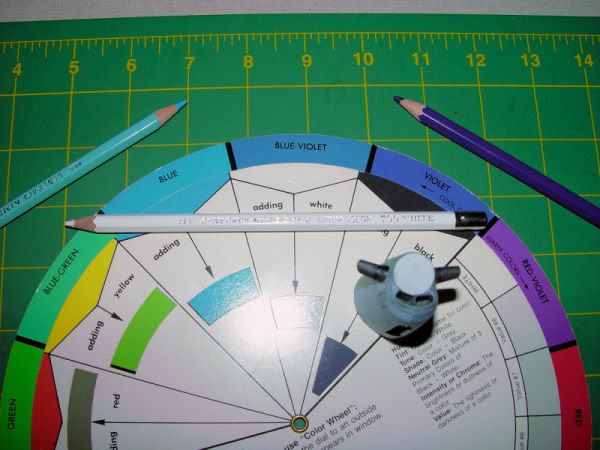 Notice whether the individual pencil colors are darker or lighter than those shown on the outer ring of the color wheel. In this instance, the violet pencil is darker, so we will apply a smaller quantity of this color than the others. We should also apply more of the white because it takes more to produce the desired lightening effect. Now we have our starting colors and an idea as to the relative quantity of each color to use. For our first attempt at matching the desired color, we apply the water color pencil to adjacent grid locations on our mixing sheet. This is done so that we know how much of each color is being mixed, allowing us to accurately adjust later if our first try does not match the model. It is important that the mixing sheet has a vellum surface texture (not to be confused with vellum paper) because it has a finish that allows more of the watercolor pencil to be deposited on the paper. In the picture below, grid locations have been chosen based on the relative quantity of each color required. The watercolor pencil is applied dry, to the rough texture of the paper until saturated, in such a way, as the area is very smooth and will not readily accept any more watercolor pigment. This helps to assure us of repeatability in the future.  Recall that we want less of the violet than any of the other colors, so we try half as much as the blue. The larger rectangle below the blue contains the white, since we need more of the white than any other color. 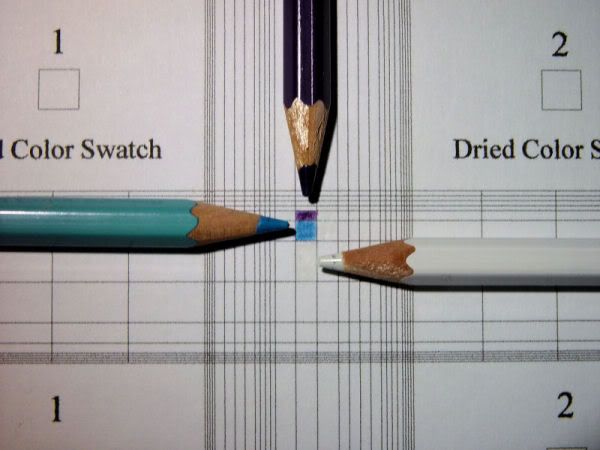 Next, we apply our PVA water based white glue to cover the grid areas we have colored. After that. it is extremely important to put a drop of water on top of the glue. This allows the water based pigment to dissolve more easily as you mix them. The water will contact the pencil media on the paper before fully mixing with the glue and works quickly as well as efficiently. So do not thin the glue before applying over the colored grid locations. Here the drop of water is floating on top of the glue prior to mixing. 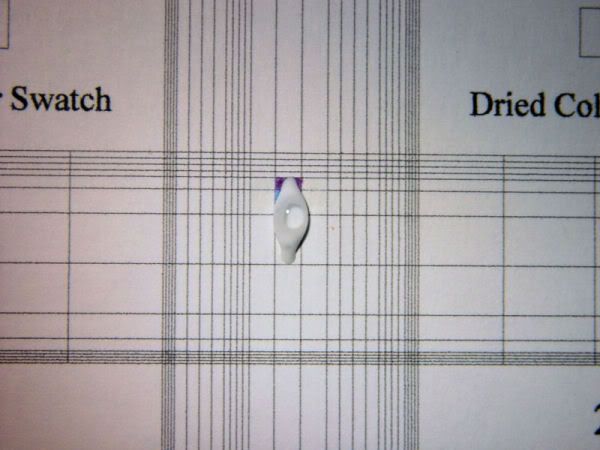 Then we mix the colors and the glue using mostly the side of a toothpick. After that, move the glue to the square used to evaluate the colored glue. This first attempt looks too violet when compared to the model. 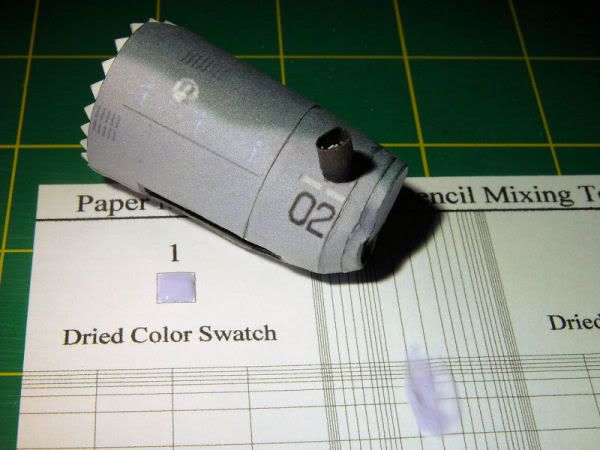 Therefore we will use half of the amount of violet used in our first try. The next photo shows the quantity of colors used for our second try. 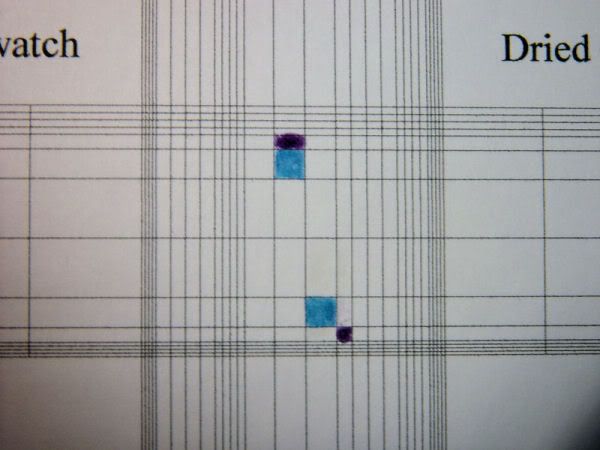 > >On only the second try, we have adequately matched the glue color to the model, as you can see in the photo below. 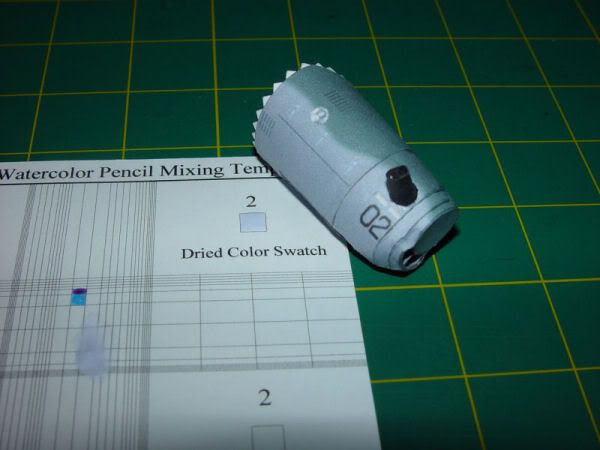 Now apply the colored glue to the model and enjoy the results. In the photo below, I have mixed more glue for applying to the model, using the same grid locations and again we have a match, which is one of the reasons for using this technique. 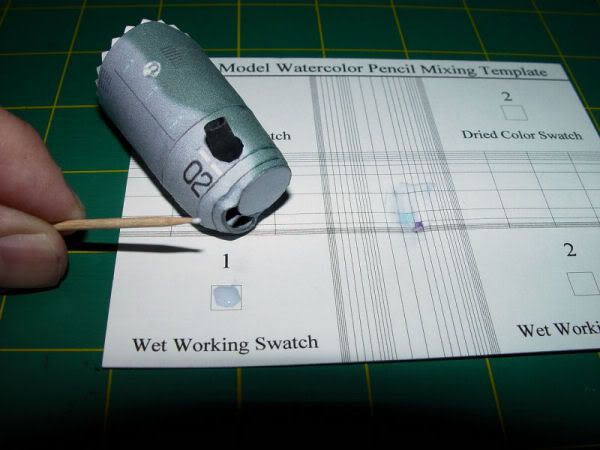 The only thing not covered yet, is why we added a glass file as an optional tool for this technique. It is used to carefully sand raised areas of the dried , colored glue on your model. It often leaves an appearance that looks like the paper the model is printed on and removes the semi gloss appearance of dried colored glue. You can also use the file to sharpen the end of the toothpicks used to apply the colored glue to a very fine point. The photographs of the aircraft part used for illustration purposes in this document, was built from the freely available Super Tucano model from the paperinside.com website. Many thanks to Claudio Dias for making this fantastic model available to modelers worldwide. It is a very nice model. 
|
| Google Adsense |
|
#2
08-04-2009, 06:48 PM
|
|||
|
|||
|
Thanks for the tutorial Denny! Coloring edges after a model has been assembled frustrates me. This is a great help. Could you post the template for the graduated grid here or is it something that could be bought?
|
|
#3
08-04-2009, 07:01 PM
|
||||
|
||||
|
Very precise and detailed. Thank you! Actually, there are other uses, too. In fact, I am sure this would work with any paint.
__________________
Maj Charles Davenport, USAF (Ret)
|
|
#10
08-05-2009, 09:25 AM
|
||||
|
||||
|
Hello Denny,
for more than 15 years I used this method; as a member of the navy league I recommend heartly the Faber-Castell "Albrecht Duerer" range ... 12 grey shades and all not fade out after years ... I pick with a tweezer the watercolour after sharpenen direct onto my mixing tablet .. With lovely greetings the Wilfried
|
| Google Adsense |
 |
|
|


 Linear Mode

