


|
|
|
#71
 03-24-2013, 05:55 PM
|
||||
|
||||
|
I used heavy cardboard tubes from coat hangers as spars, puts wings the wigs straight out. In fact i used one spar all way thru.....Rich

__________________
F-1 Rules 
|
|
#72
03-24-2013, 06:09 PM
|
||||
|
||||
|
I though a straight through spar would pull the wings too far back, but that wing position looks good Rich. Off to shed to find a bit o' wood, but the coat hanger tubes are an excellent idea.
 Johnny.  Don't even think about doin' what yer did to those bee-eaters to me. Lewd things with little fingers indeed !!!
|
|
#74
03-25-2013, 12:03 PM
|
||||
|
||||
|
Quote:
Johnny.
|
|
#75
03-25-2013, 01:04 PM
|
||||
|
||||
|
And now the daily update ...
Page 5 of the instsructions is now complete. It now has a full set of body feathers and some legs, but no feet yet. 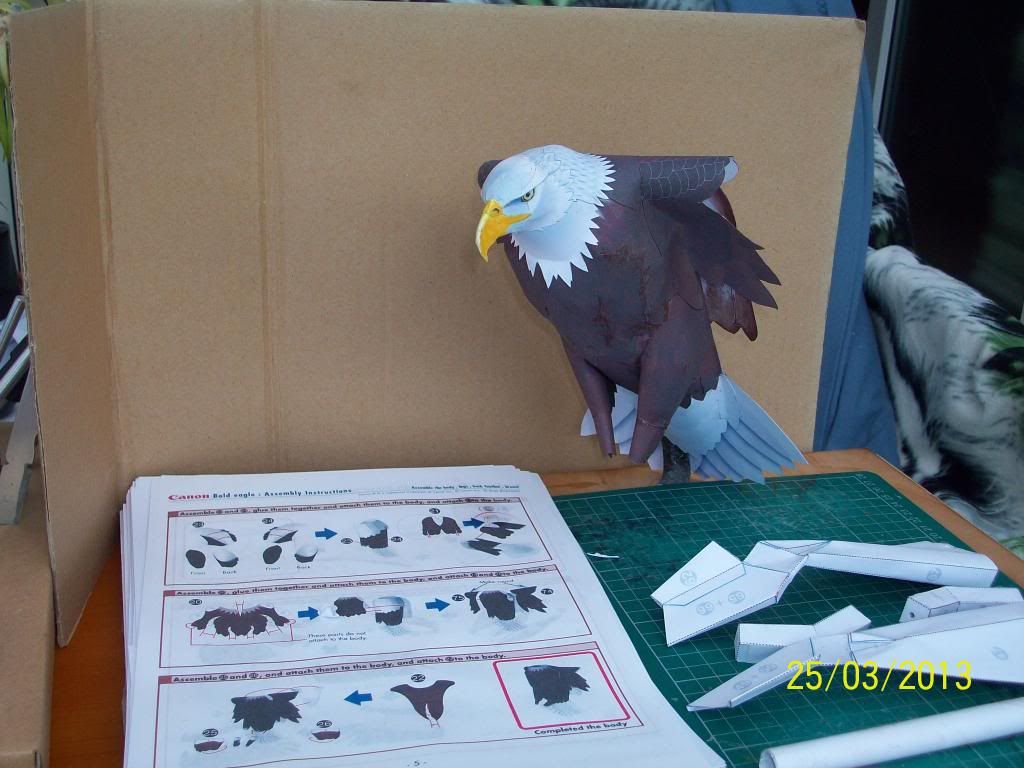 I was iffy about fitting some of these parts without a wing to wrap them around to better indicate exactly where to glue, but by leaving many tabs unglued, the required positioning gradually became clearer as I progressed. Some parts are still just tucked into place, and I won't actually glue them until the wings are in place. Why is it with most bird models (Johan's excepted) the instructions tell you to make up the head first. It than sits there looking at you, and is usually one of the last things to be fitted. Sorry to break traditions and that, but I've stuck it on now. Keep on snippin' Johnny.
|
| Google Adsense |
|
#76
03-25-2013, 01:14 PM
|
||||
|
||||
|
I have found that with some bird models it is better to leave the head until last. The neck opening allows you to reach inside and apply pressure to glue tabs on other parts when attaching, assuring a firm bond for the most part.
__________________
~Doug~ AC010505 EAMUS CATULI! Audere est Facere THFC 19**-20** R.I.P. it up, Tear it up, Have a Ball
|
|
#77
03-25-2013, 01:52 PM
|
||||
|
||||
|
Oh the feet!....they were a bit of a pain, did not fit that good, I found mine had some gaps and the part of the toes that go into the main part of the foot need to be trimmed to fit. I filled the gaps with white glue and after drying painted them with some craft paint I mixed to match color.......Rich

__________________
F-1 Rules
|
|
#79
03-25-2013, 02:29 PM
|
||||
|
||||
|
Doug ... that exactly makes my point ... Johan's model birds would be impossible to make if the head went on too soon, so he doesn't tell you to make it until the body is ready to receive it. Like near the end.
I just wonder why most others tell you to make the head first, then put it to one side until you're ready for it ... usually like near the end ? With the Eagle, there's just the wings and feet left to go, so there's no reason for the head to wait on the side any longer. I haven't started the feet yet Rich, but they look very similar in construction to the feet on the two Canon owls that I've recently made. Admittedly, the method wasn't too clear at first, but having made four feet for the owls, hopefully the eagle feet shouldn't give me too much trouble. Rich, your eagle looks like it's suspended on just one thread, so I assume you have found the centre of gravity point ? Give us a clue where that might be mate. I got it first time with the Falcon, but My barn Owl ended up with four pin holes in it's back before I found the sweet spot. I never did find a balance spot on the Osprey as it's balance point is too high and it tips sideways, so had to go for a two loop harness. Johnny.
|
|
#80
03-25-2013, 02:35 PM
|
||||
|
||||
|
My eagle is held up with some monofilament fishing line, a loop around the neck and one around the tail. One line with slip loop on each end.....Rich
__________________
F-1 Rules
|
| Google Adsense |
 |
|
|


 Linear Mode

