


|
|
|
#11
 11-26-2014, 02:07 PM
|
||||
|
||||
|
I watch with pleasure, love Johan Scherft's work and this particular bird
ASAF 
|
|
#12
11-26-2014, 02:59 PM
|
||||
|
||||
|
On the bird models that I have done, generally there are almost no sharp creases. A few (mostly fold over tabs), but not many. Doing the crease and then making it less sharp with a dowel should work just fine
__________________
A fine is a tax when you do wrong. A tax is a fine when you do well.
|
|
#13
11-27-2014, 02:42 PM
|
||||
|
||||
|
Continuing on...Step 3
Here again is the Wing assembly. This appears to be the lower end of the main wings, which would be visible at the back of the finished bird... with a boxed-in assembly (part #6) inside. The top of part #6, a flap, has holes for the "legs"(Parts #7 and #8). 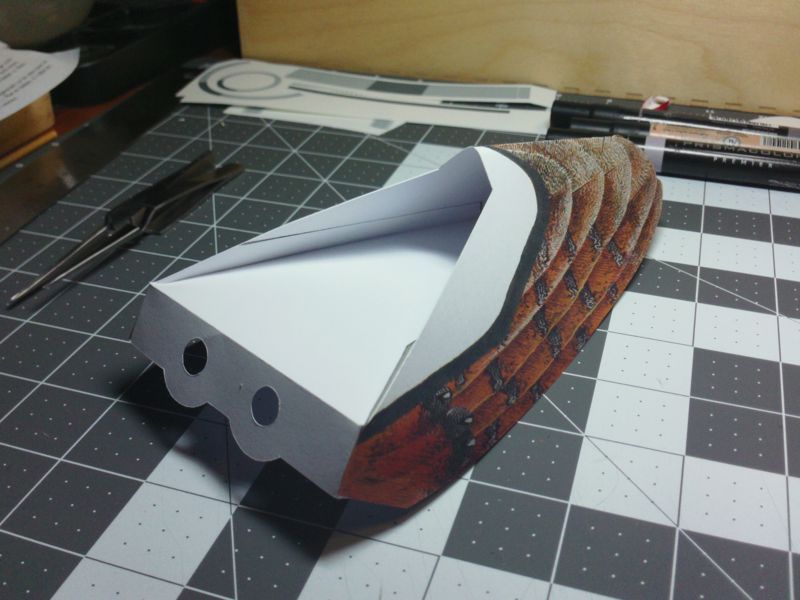 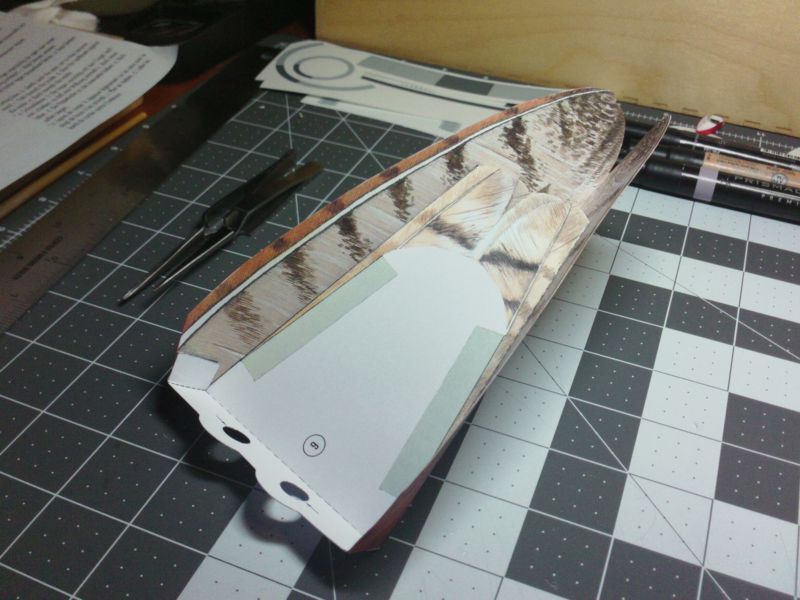 ... Then, the "legs" are just two rolled tubes, parts #7 and #8. I was a little perplexed by the band of artwork near the centers of the tubes ...I assume only a small part of these supports is visible when completed? Patience will reveal I assume. I was not sure of which end is up (with the tubes). The two "slitted" ends are similar, but a little different (in length). I ended up cutting the slits in both ends and then I noticed the little arrows on the sides of the tubes...that should line up with two small arrows at the holes in Part #6.  The tubes also fit in at an angle, so you end up with what you see in the next photo. 
__________________
SUPPORT ME PLEASE: PaperModelShop Or, my models at ecardmodels: Dave'sCardCreations
|
|
#14
11-27-2014, 03:11 PM
|
||||
|
||||
|
Step IV (4)...has me completely confused.
I have been staring at the diagram...and the parts ...and I cannot decide what to do next. I need help. Heres an attempt at illustrating things... 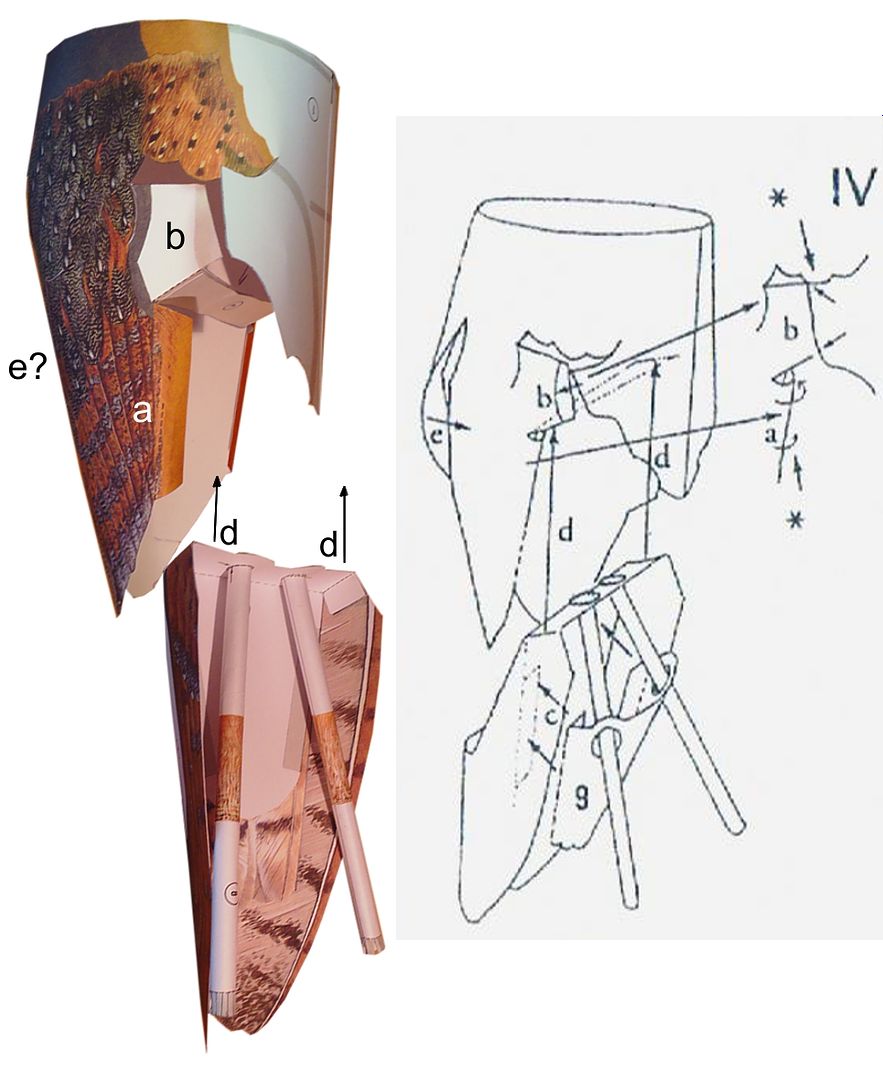 a. Flaps that appear to fold inwards. There are some dotted fold lines about halfway up the tab. These fold lines do not line up with the top inner corners, which interfer with the fitting of the lower assembly (attachment d) ALSO...the little inset diagram appears to show a rolled tab, not folded? [There is a note in the instructions. It says: "a. Glue carefully, so it fits exactly. b. Roll."] b. Is a flap with a coloured area that almost looks like an overlap/glue location. However, it requires you to twist and almost buckle the front part to get it to line up on that tab. c. Fitting of Part 9 seems straightforward. d. Mating of lower section to upper section at the cross brace seems straightforward. e. I have absolutely no idea what this is. Johan? you here? somebody explain all this to me?!
__________________
SUPPORT ME PLEASE: PaperModelShop Or, my models at ecardmodels: Dave'sCardCreations
|
|
#15
11-27-2014, 06:27 PM
|
||||
|
||||
|
You've got your work cut out there mate. But should look great when built.
|
| Google Adsense |
|
#16
11-28-2014, 02:57 AM
|
|||
|
|||
|
This looks fantastic, Dave.
-RunwayOneSixRight (Matthew)
|
|
#17
11-28-2014, 11:15 AM
|
||||
|
||||
|
Dave, it might be worth your while emailing Johan via his website www.johanscherft.com or contacting him on facebook https://www.facebook.com/papercraftjohanscherft
But be aware that Johan is a busy full time artist in many fields, not primarily a papercraft designer. It can take a few days for him to notice incoming messages, and he is a little embarrassed by his English skills (which are actually quite good), but once you make contact, I've found him very friendly and helpful. The owl is quite an old publication, so he may struggle to remember details, but he will try his best for you. Keep on snippin' ... Johnny.
|
|
#18
11-28-2014, 11:44 AM
|
||||
|
||||
|
yeah thanks John.
I've actually already had personal communications with Johan. It was me who invited him to come join this site a while back. At first I wanted to put this to the community. I know others here have built this model. I hadn't anticipated such serious build issues myself. If I have to, I will contact Johan...
__________________
SUPPORT ME PLEASE: PaperModelShop Or, my models at ecardmodels: Dave'sCardCreations
|
|
#19
12-14-2014, 09:34 AM
|
||||
|
||||
|
Not bothering to seek out any more help on this...
need to get moving (Xmas is coming fast!). I decided to crease and fold those side tabs. I have a feeling they are supposed to be rolled (curved over) so why the partial dotted line? But I can't figure out the proper connection and a folded tab makes it simpler. I am also unsure about the side overlapping flaps. (Seen just right of picture center) Each side of the body has these two overlaps, but I don't know whether they go under or over, and exactly how much. The coloured area looks like a glue overlap, but it actually does not line up properly. Once again, I will just wing it. 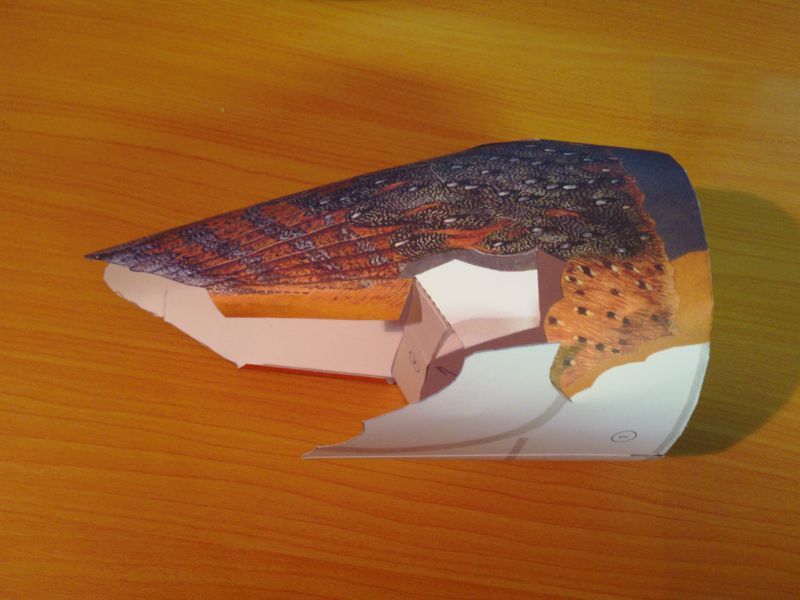 ... Ater I glued the lower body sections together and set them aside, I assembled the chicken legs. Very straightforward...just preform, pre-roll the parts into a tubular leg and glue...clamp until set. Also assemble the two "ankle" feathers....they will cover the connection to the feet.  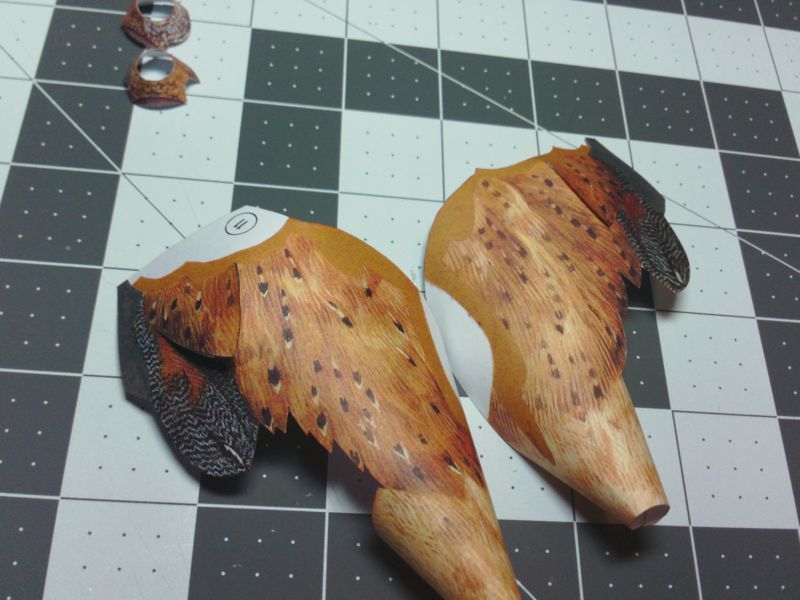 ... There are also a few overlapping feather cuts to make. I think its all pretty obvious at this point. 
__________________
SUPPORT ME PLEASE: PaperModelShop Or, my models at ecardmodels: Dave'sCardCreations
|
|
#20
12-14-2014, 09:47 AM
|
||||
|
||||
|
Fitting the legs to the body takes some attention.
Dry fitting the parts gives you an understanding of where they will fit. You have to get all the overlaps lined up and get all the feathers interlocked into all the correct edge cutouts. And do all this with glue everywhere! As I said, after dry fitting a few times, I got the hang of the placement and then just pushed and pulled everything into place. 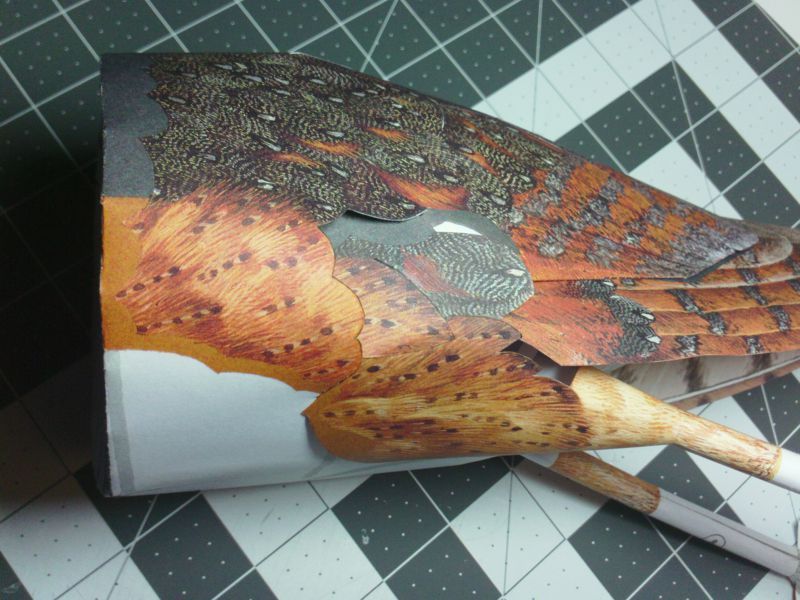 ... As you see, I could not get the inner edges of the legs to line up with the shaded areas. At this point, I was unsure about how accurate I needed to be... but it turns out, you do need to get all these shaded overlaps as accurately as possible. 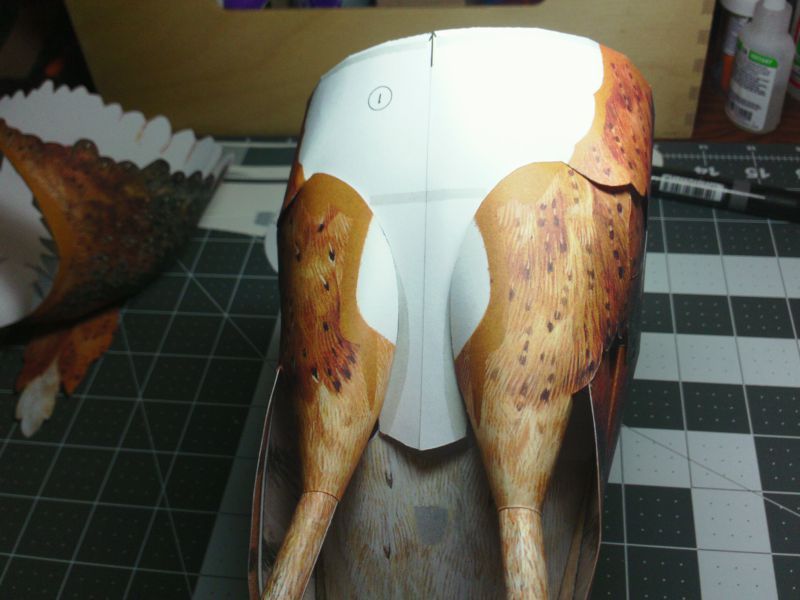 ... After the legs were fairly secure, I started gluing down the side overlapping feathers. Once again, not sure if this is the correct procedure. But some of the feathers stood up too much, revealing shaded areas underneath. Plus, I liked the idea of strengthening the connections with more glue. 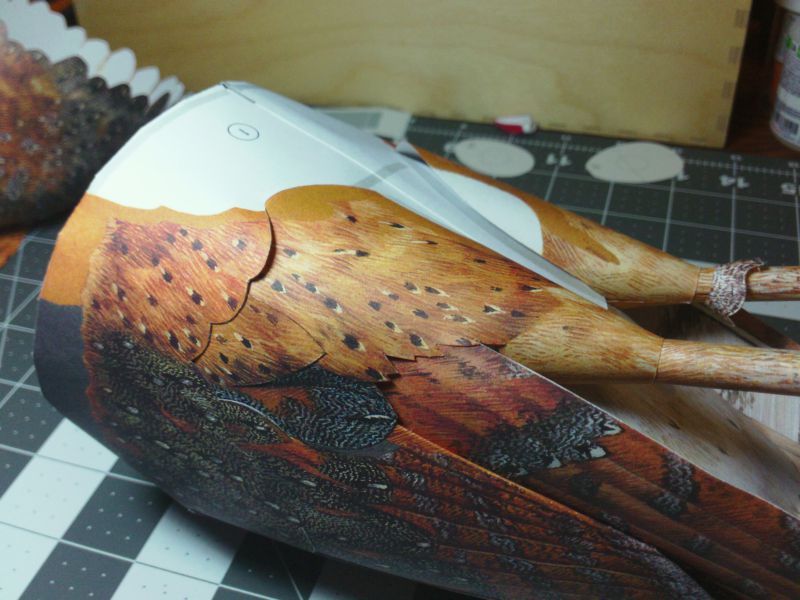 ... Next, I slipped the leg (tubes) into the upper base. (The base is built in two parts, upper and lower) 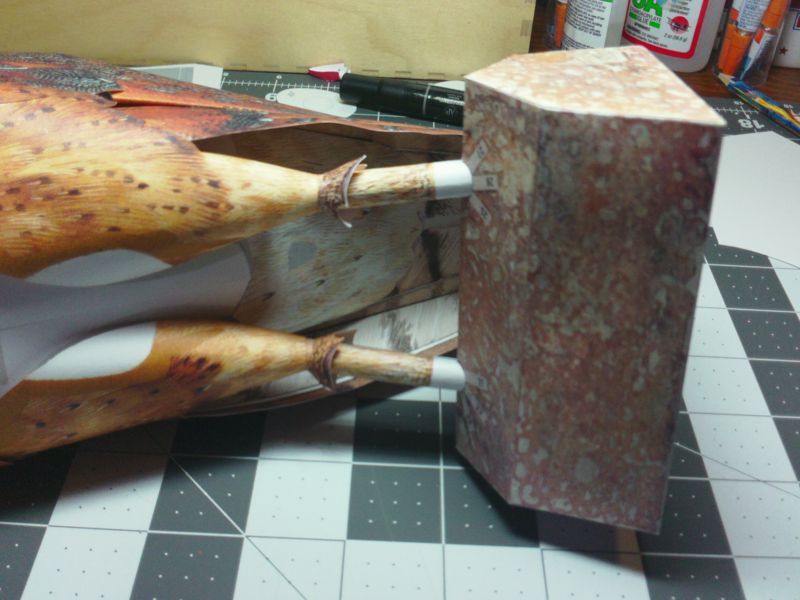
__________________
SUPPORT ME PLEASE: PaperModelShop Or, my models at ecardmodels: Dave'sCardCreations
|
| Google Adsense |
 |
|
|


 Linear Mode

