|
Bristol T188
The Bristol T.188
This is a plane that came to my attention just recently and so I set aside my other projects and jumped into this one feet first. It is a very interesting plane and I will attempt to document my design as I go along. So here we go.
First here is the link to the plane itself to give you some background.
 http://en.wikipedia.org/wiki/Bristol_188
I use Sketchup to design with so I started off with an image of the wings top and bottom from a three view set of drawings.
http://en.wikipedia.org/wiki/Bristol_188
I use Sketchup to design with so I started off with an image of the wings top and bottom from a three view set of drawings.
 From here I import this image into Sketchup and then scale it so that it is the proper size. I use ScaleCalc to take the actual dimensions of the plane from the web information and then set it to 1:32 which is what size this model is going to be built.
So
1. Get image to work with
2. Import into Sketchup as Image
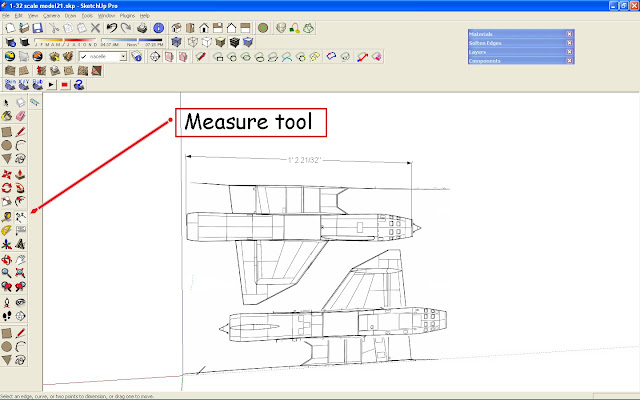
3. Use measure tool to determine a know distance in image
4. Scale this distance with the scale tool to dimension of final size as determined by Scale Calc

5.Now you have the starting point. So put this on a separate layer and name it image
 6.Make image transparent so that you can see the lines that you are about to draw on it
 7. Zoom in and draw single lines for cross sections of engine nacelle
 8. Hide image so you can work with the lines you have just drawn

9. Now rotate the image so you can see the lines in perspective

10. Use circle tool to snap to midpoint of line and drag circle to outside of line. Segment count is important when you are drawing in details as this will give you the right number of divisions when you unfold it in Pepkura and export the dxf file for adding details .


11. Now erase lines from circles to arrive at formers of Nacell

12. Now establish center points for each circle and make them each a individual group

13. You now have all formers made and grouped in the proper place for lofting the lines.

14. Starting with one end highlight the group by touching the circles perimeter and then move to the next one
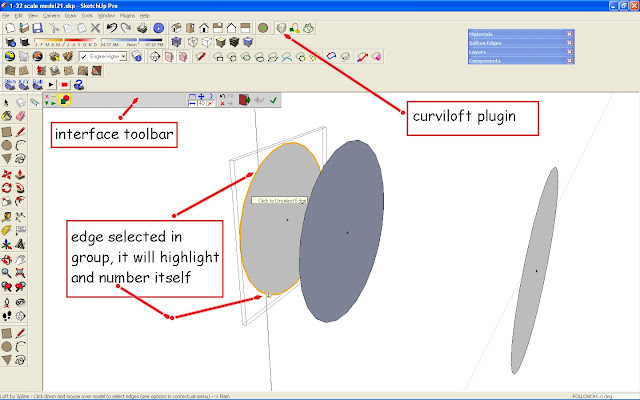
15. You will notice that it numbers them one than two. This is going to make your first skin section

16. Hit the green checkmark and your skin is applied former to former

17. Change the segment to one. This is important step when you go to unfold this in Pepekura. Mutiple segements look nice, but they cause a lot of problems in the unfold

19. Hit the green check again to complete the skin and it will make itself a group and finish

20. Now you have a Engine Nacell completed

__________________
Mike Dixon
Anything in paper is fine with me
|