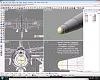
Time to start designing, starting with the fuselage
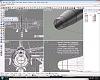
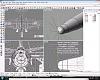
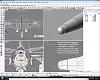
Open up the 3-view again, and make sure there aren't any extra lines on it. (I dunno what happened to mine, it didn't look like this when it left Photoshop)

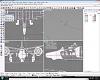
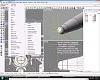
Based on the 3-view, and a few images, the fuselage is a simple round tube. So begin by selecting the circle with 2 points, and draw several circles at points along the fuselage when ever it changes sizes, starting at the top and ending at the bottom of the fuselage.
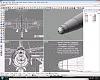
Once you're satisfied that you've got the general shape of the fuselage covered, time to fill it in. Go to surface> loft
Select 2 circles that are next to each other and press enter. Make sure the seam is on the bottom.

In the little dialog box, make sure "Rebuild with XX Control points" is selected, and set to 50. the more control points, the closer to the actual shape you want it will be.
Notice you can't really see what you just drew...
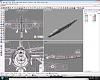
Click in the Perspective window and click in it
Then go to View> Shaded to take care of that

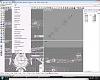
Continue lofting, making sure to select surface edge (It automatically lines up the seams, saving some work)

Almost done with the fuselage
Normally, fuselage noses come to a point and you can just keep lofting. But this particular plane has a rounded nose. This leads to the difficult decision to use petals.(Sorry guys) Start off by selecting arc, and clicking on the top and bottom of the last circle of the fuselage...

Then pull out to a rounded arc

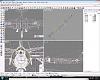
Next up is to select the arc, type "revolve" in the command line, and press enter/ Then click the center of the arc, and the center of the circle (make sure the center snap is turned on) move the arc around 360 degrees until you get a half sphere.
Draw a line starting at the center of the half sphere, and extending strait up beyond it. Then go to transform> Array> Polar, pick the center of the sphere again and type in an even number, in this case I used 10.
Select all 10 lines, then go to curve> curve from objects> project.

From the front view, select the sphere to project onto.

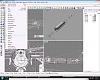
And you get this (This is also how you do panel lines, but more on that later)
Now, select the nose piece, and click the "Split" button
Select the projected lines, and press enter
And you have petals!
The fuselage is finished. Next up is the Canopy, wings, engines, tails and landing gear. Then panel lines.