I am posting this tutorial for two main reasons:
to help guide you through the assembly of the P47 Engine Cowl assembly (which can be a tricky assembly for some).
and because it involves a number of important techniques that can be of use in other areas of an aircraft model build.
In just these six parts, we use straight and curving cuts, inside and outside radiuses.
You have to roll hoops, use straight and tabbed joiner strips, build domed shapes,
deal with butt edge seams and install laminated formers.
This is a very straightforward assembly and can yield impressive results if you follow some basic practices.
Patience is a big factor here.
Allow glue and connections time to cure and strengthen.
Don't rush the build.
Use good sharp tools and cut with straightedges whenever possible.
Lets go...
The P47 kit houses a "fake" engine in a front "cowling" that attaches to the flat end of the fuselage.
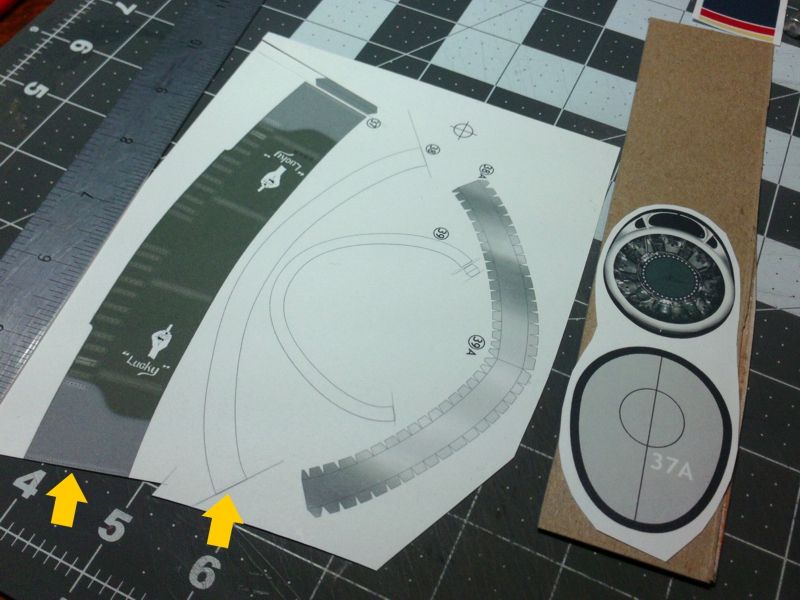
It involves these six parts, two of which are formers and need to be laminated to thicker cardboard. (.75- 1mm thickness)
You can get away without scoring any parts for folding, but normally this is where you would do your pre-scoring.
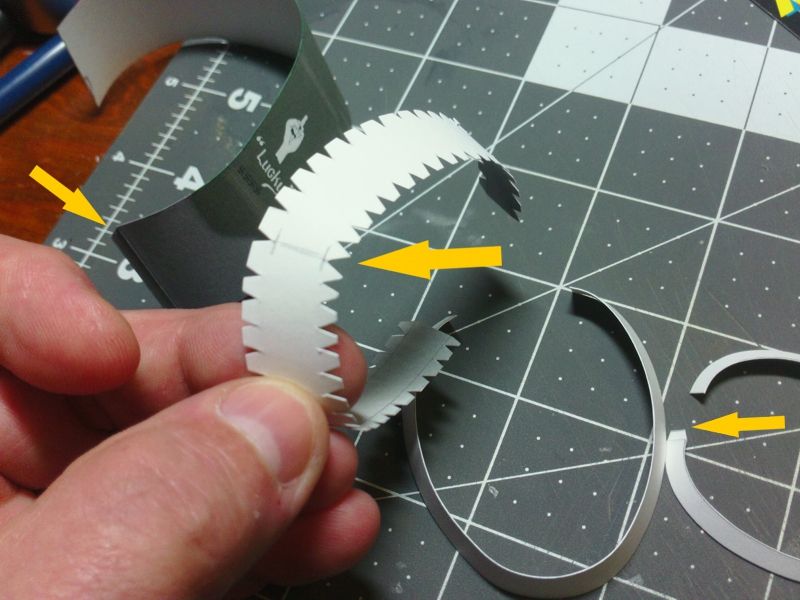
Carefully cut out all the parts...I like to cut directly on top of the lines leaving as little of the edge lines as possible.
Its extremely important to cut the ends of the hoop parts with a straight edge.
These ends will butt join, and need to fit together tightly and evenly.
A scalpel or hobby knife and straightedge will give you the best seams
...
Once all my parts are cut out, I like to start preforming them into the rough shapes they need to be.
I use fingers, my palm, markers and pencils, and round dowels to shape the curving hoop parts.
Even the tabbed joiner strip must be curved to match, but remember to keep the printed side inside.
Make sure the hoop ends are properly curved and the seams must line up as evenly as possible.
You can also edge colour at this point, before you attach any joiner strips or tabs.

...
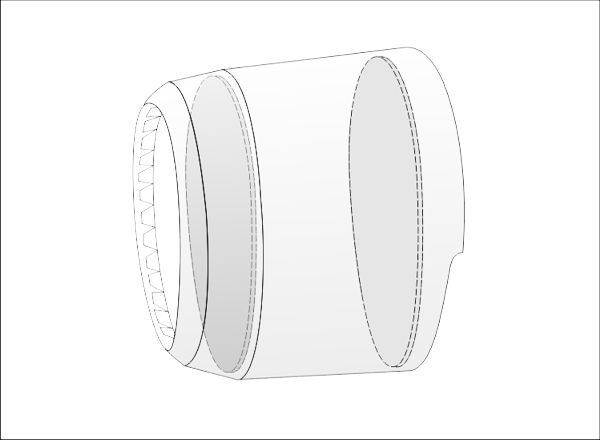
The large tabbed joiner strip fits inside the center section of the three hoop sections.
This will be your first assembly.
The tabbed inner strip is marked with a centerline at the center bottom location.
The ends of the strip are actually to the top.
It goes upside down, compared to the outer part of the cowl, which has its connecting seam at the bottom.
Use the center mark to locate the outer part, but you may need to transfer that centerline to the
blank side of the part. (Just hold the part up to a light, and trace the line on the blank side)