Hello everybody,
let's go into and win fight for the
tenths of a millimeter when gluing the
puzzle pieces onto the small
transportation plate!

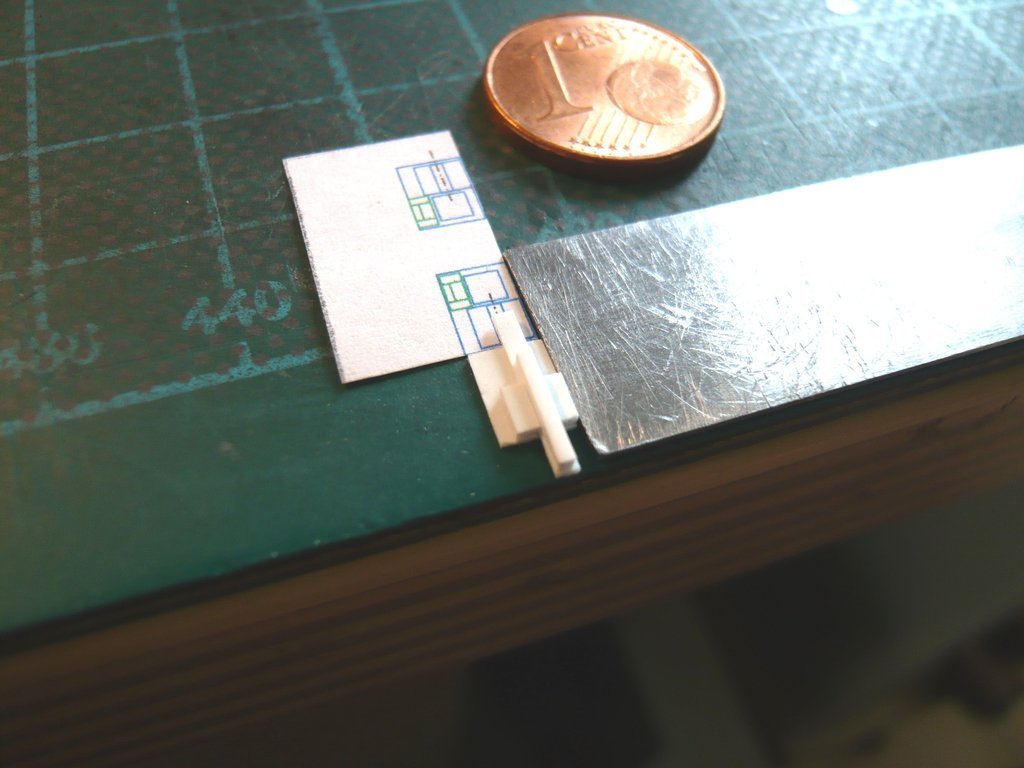
First I intended to do the
Tie-down Lug Plate, the three parts of which I glued one after the other with
Methyl Ethyl Ketone (MEK). To do this, I put the middle disc with the snippet and the outer disc on a
needle (Ø 0,5 mm), on which I can align both parts precisely beforehand, after which I then paint a brush stroke with
MEK, which is enough to glue them together.
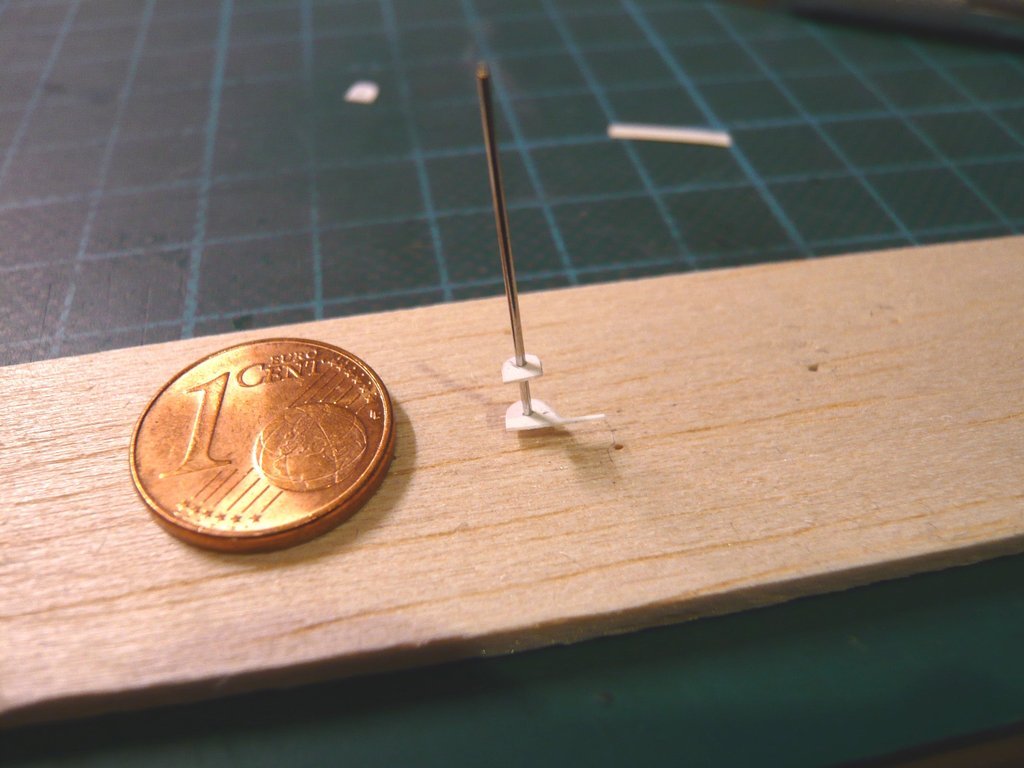
Since the hold of the needle on the
Balsa board was not stable enough,

I've clamped the needle in a clamp and clamped it firmly to the tabletop. After that I was able to align the panes in peace and carefully wet the edges with MEK with the tip of the brush. The bonding can be accelerated by blowing lightly on the splice immediately afterwards, which means that the MEK quickly evaporates and the parts are connected in no time, which I learned from a friend at a trade fair.

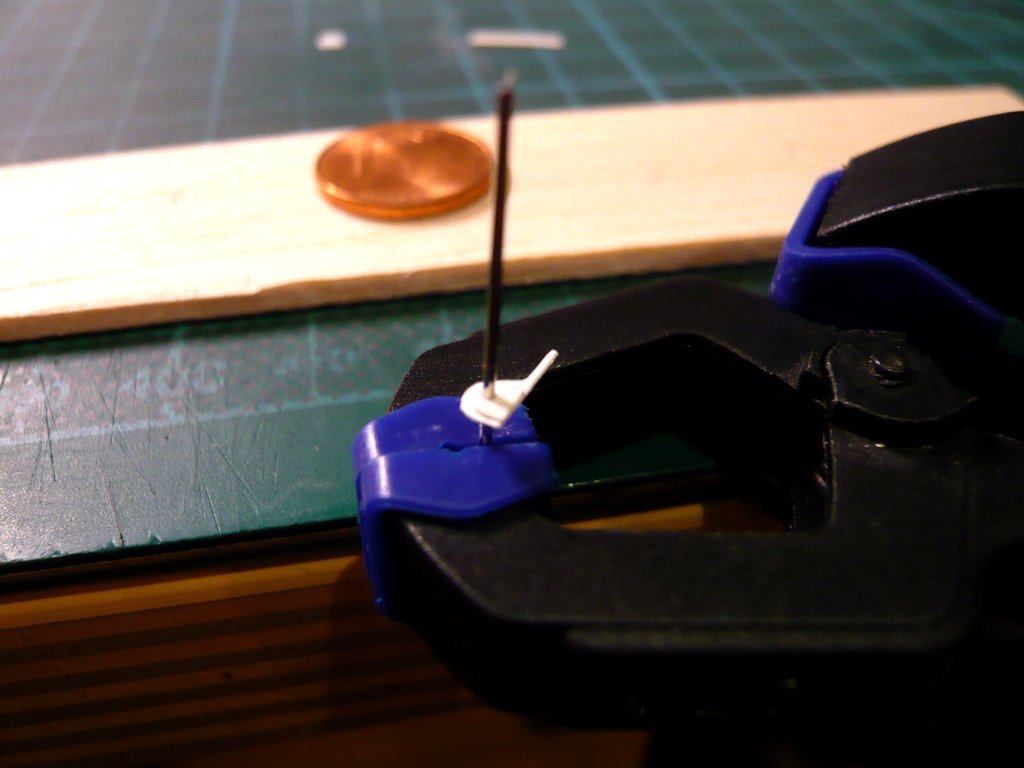
Then the needle was clamped around and the other disc was glued on the back in the same way.
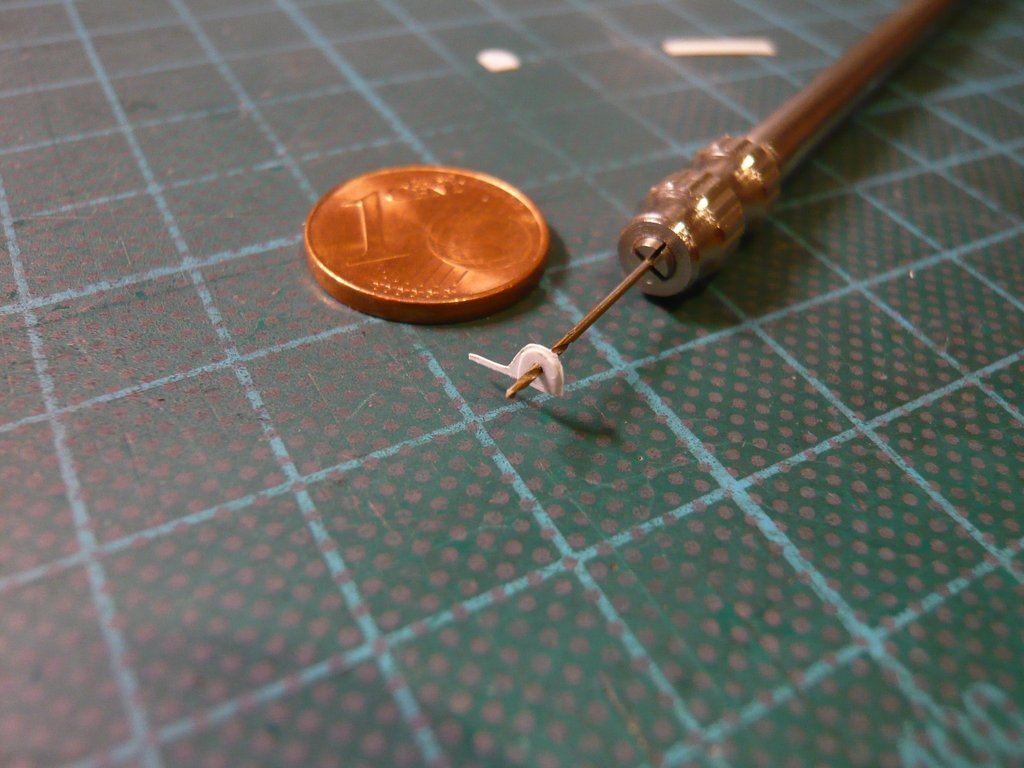
Then the opening was re-drilled a little and the thickness of the plate was measured,
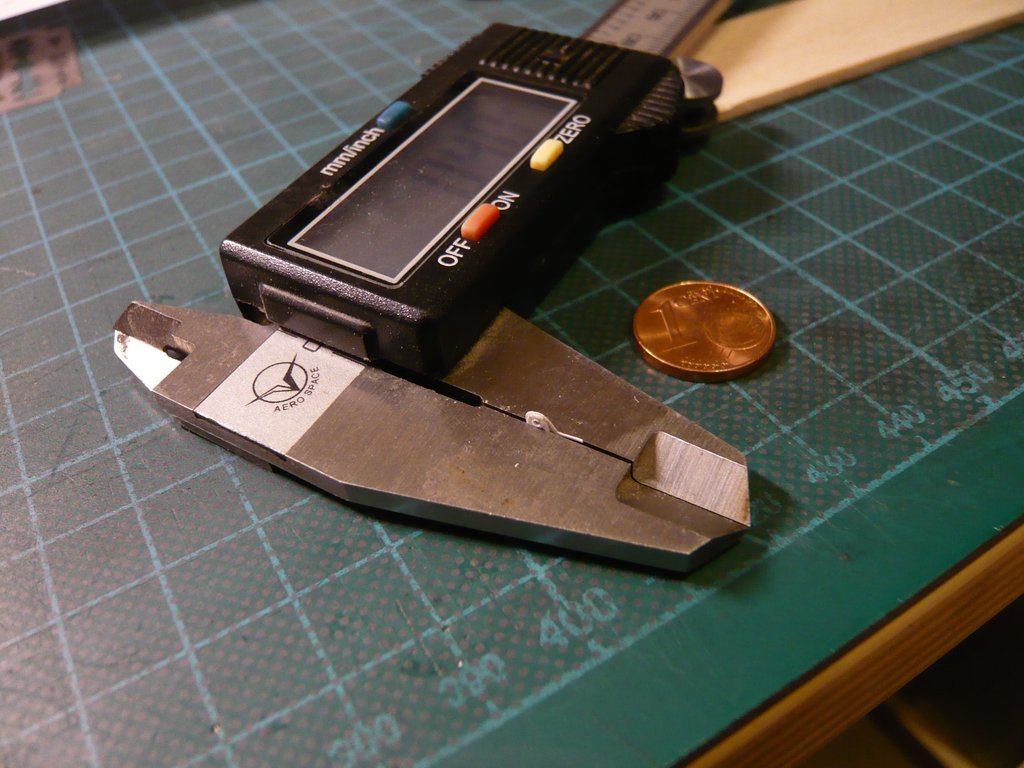
which actually stayed within the predetermined range with
0,4 mm.

Then I put the two
Hold-down Clevis Plates) on a stick from both sides and measured the thickness of this arrangement,

which with
0,79 mm also remained within the required range (
≤ 0,8 mm), which cannot be seen on the caliper rule,
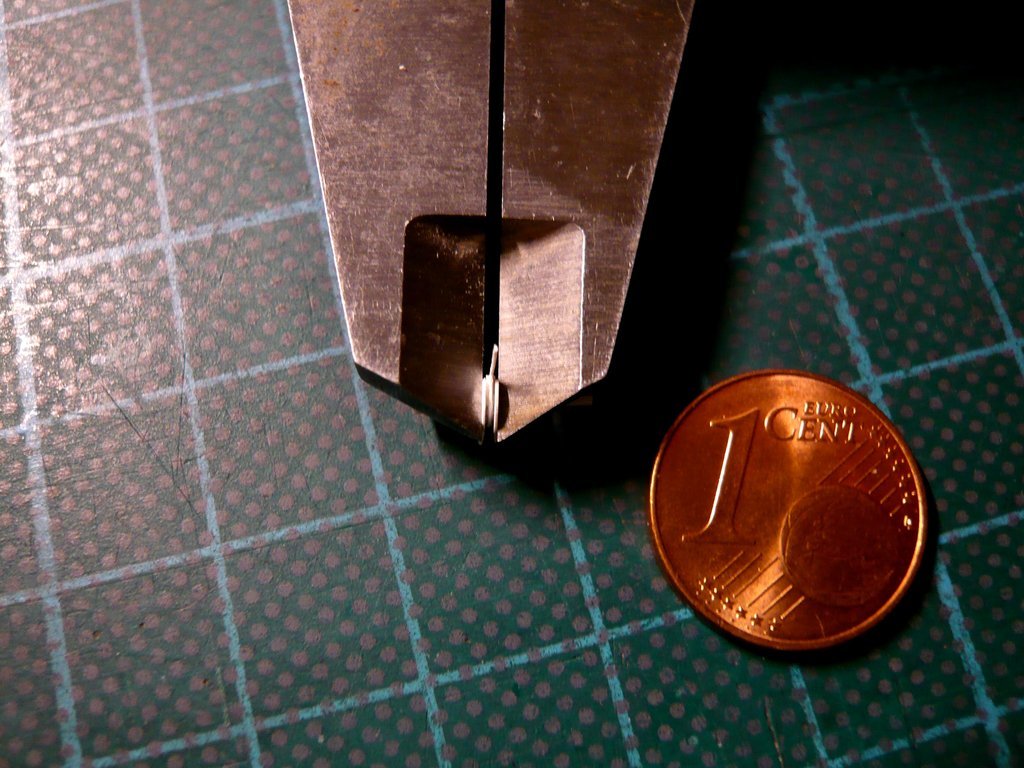
and you just have to believe me.
After that, I could go about gluing the
Clevis brackets to the smaller
transportation plate with a clear conscience, which I had to think carefully about beforehand, based on the drawing.

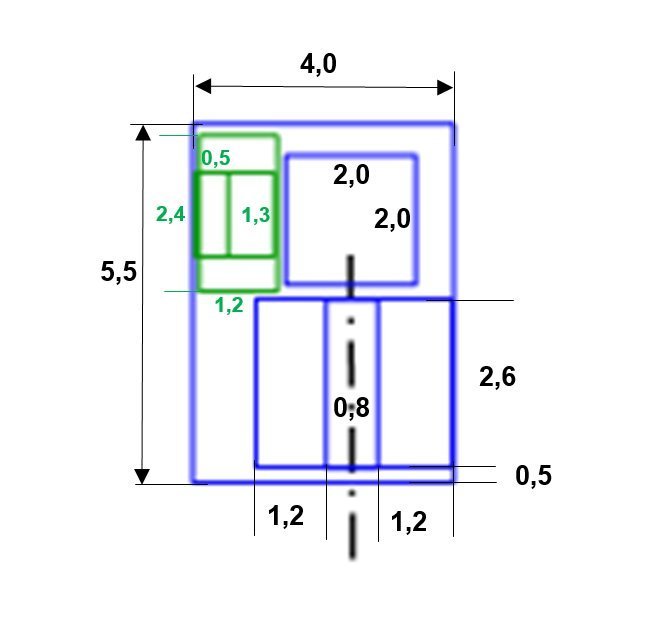
These are the two brackets under which the small
base plate of the
hold-down fork has to fit, for which I have in mind a detachable connection, like at the original, whereby the
Clevises can be plugged in for
vertical transportation and pulled out for
horizontal transportation, what of course complicates the whole thing a bit.

For this I came up with the following solution.

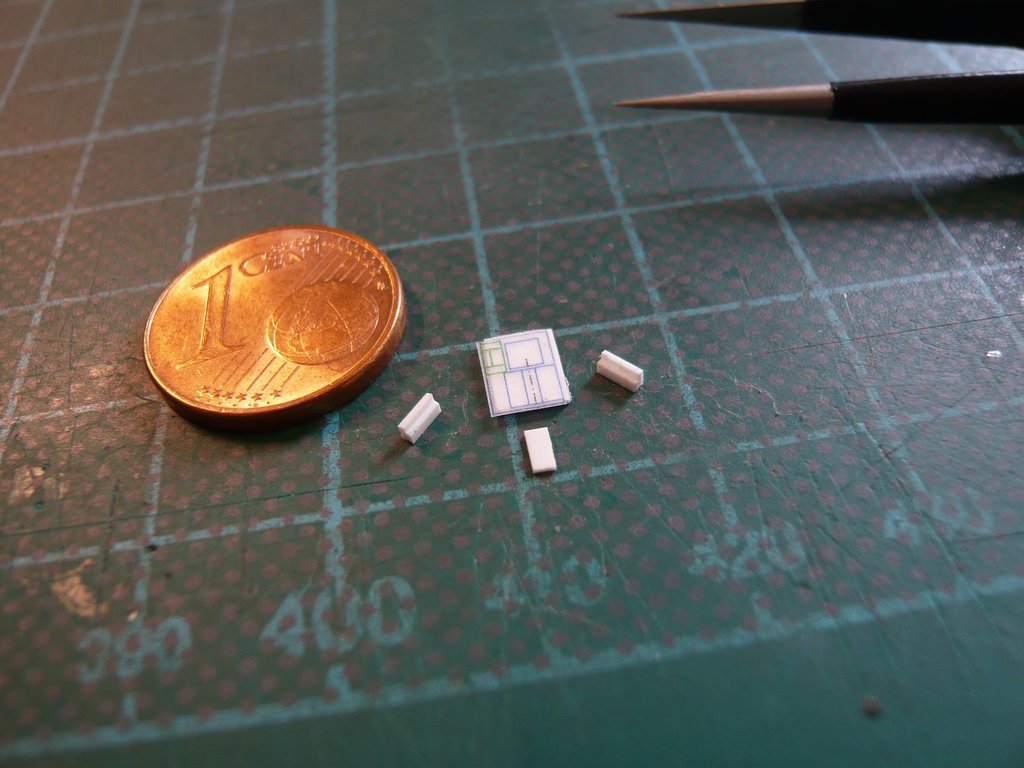
The underside of the outer bracket I've dabbed a drop of the normal
Revell glue and set it down with the tweezers against the stop of the steel ruler and immediately checked and slightly corrected its position. Then I supported the gluing with some MEK on both sides and checked the lower free space with a
strip (0,4 mm x 1,5 mm).
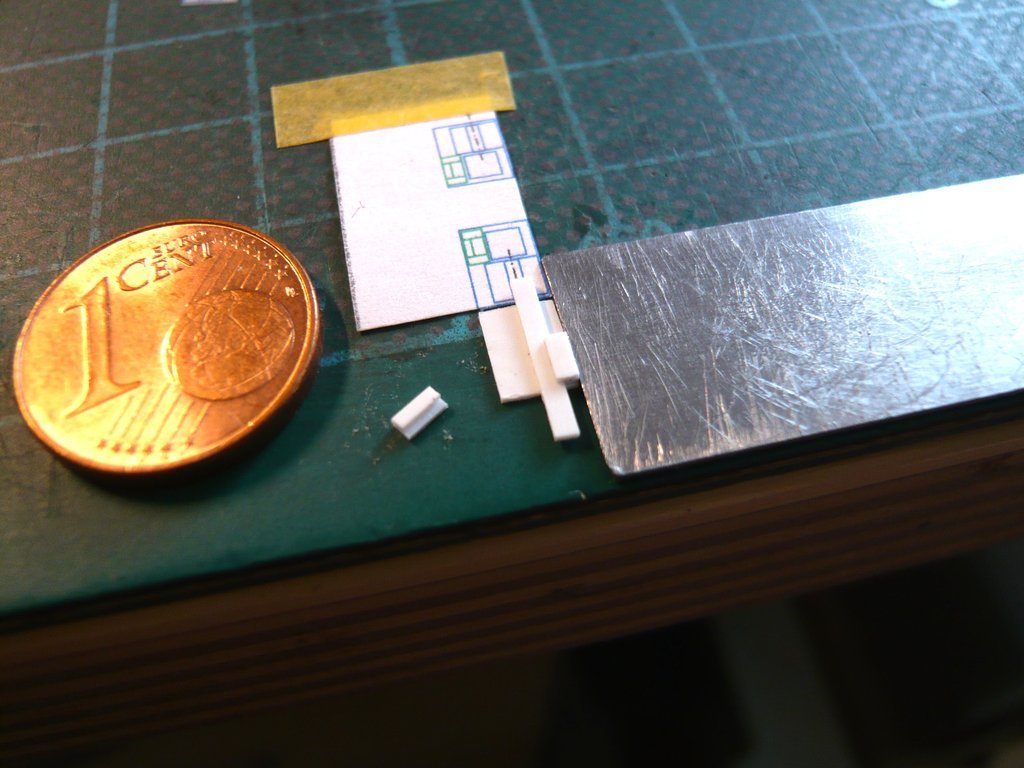
Gluing the other bracket was inevitably more difficult, which is why I checked its arrangement beforehand and thought about how best to proceed, especially since everything is quickly glued together with the MEK, and inseparably so,

which of course shouldn't happen.