Let's complete (sorta) the tailplane section by doing the horizontal stabs.
A few builds ago I hit upon the idea of making interlocking internal spars for these. (A word of caution, the method I am about to detail does involve a bit of guestimating but could likely be improved with the help of some blueprints and photos). The port and starboard stabs will be given a 4-layer internal former in the same way as the vertical fin and rudder. However, there will be a male and female tab and slot which will run through a cutout in the fuselage and allow the builder to fix firmly in place straight and level.
Where this gets a bit fiddly is figuring out a) how wide the aft fuselage section will be and thus b) how far apart and at what angle the spars need to connect. To this end, I usually cut out the whole centre of the female former in order to provide adjustment before commiting to glue everything. You can see in the pictures how the male former was also cut smaller and smaller to get this correct too.
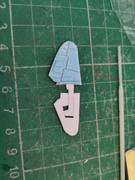
The formers themselves are made by tracing round the skin parts, insetting by around 3-4mm and then chamfering the edges. When the skin parts are burnished it gives a great fit of a curved leading and trailing edge. The male part's surface skin is glued on first, with the control surfaces separated and glued on to make the hinge join. If viable I try to pinch the section to emulate the way elevators and rudders are tapered on real aircraft so the aerodynamics work when moved to an angle. At this scale it is hardly noticible. The female part is glued on on one side only, as we need to then push the male tab through the fuselage and locate it in the female slot before everything is glued closed.
Another consideration, especially on the kit was how to fit the horizontal and the vertical tabs inside a small space - after a bit of trimming they sat nice and snug and actually help keep each other in place. White PVA and then some superglue was used to ensure the 90 deg angles would hold.
The eagle-eyed will notice I made a howler by gluing the skin upside down, so the colours are wrong and also the chamfered fit doesn't work. This will be retcified by making some fairing pieces for the inboard joins, and when the model is painted.