


|
|
|
#1
 07-10-2018, 01:39 PM
|
||||
|
||||
|
Mixed-media Patoroch Land Raider
Hi everyone,
for the last couple of weeks I've been scratchbuilding one of Eli Patoroch's Land Raider models (the Land_Raider_II_2009 model). It's a mixed-media build, using about 80% papercraft. For paper, I'm using a mixture of printed card stock (199g/m^2), thick card (from cereal boxes) and thick cardboard (from some packaging). I'm adding plastic rod to some areas, such as the hinges on the doors, and I plan to use a fair bit of it on the weapons. I might use some apoxie sculpt to fill in some hard-to-patch areas, but that'll come later. The most obvious departure from pure papercraft is in the tank tracks: I built a couple of these out of a mixture of the index card and cereal boxes and again the plastic rod, then made a mold using silicon caulk, then cast it using casting plaster. So while not pure papercraft, I did use papercraft in the process. Enough talk, here are some pictures of the initial construction: 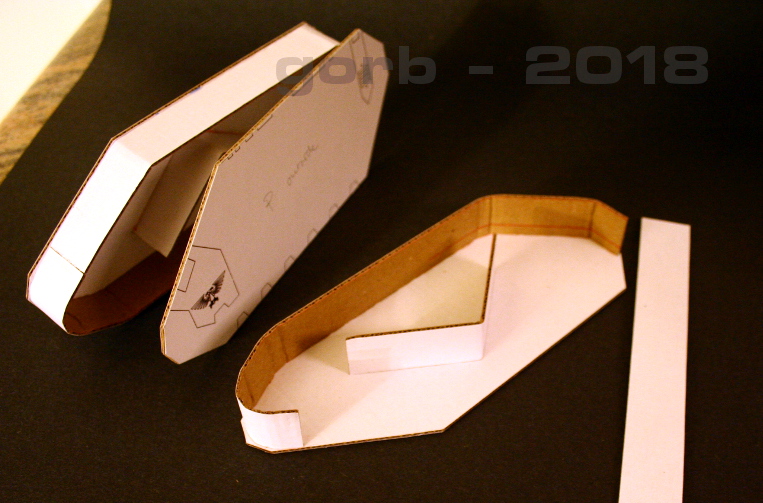 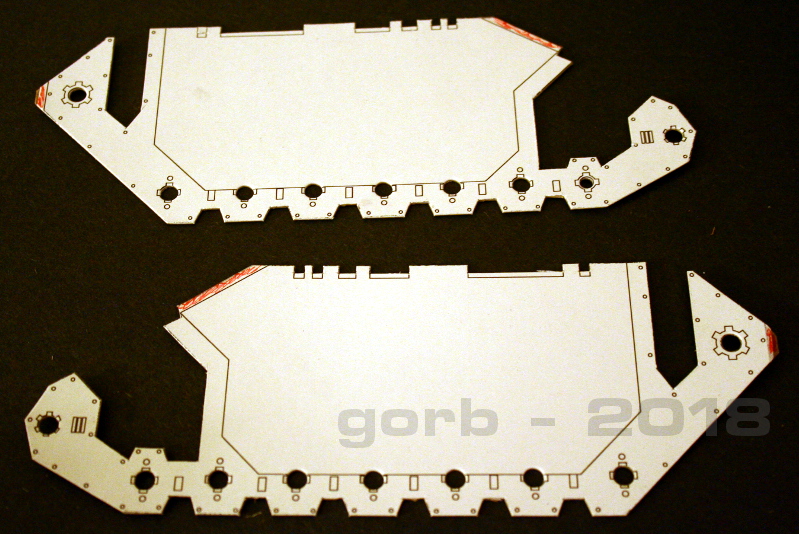 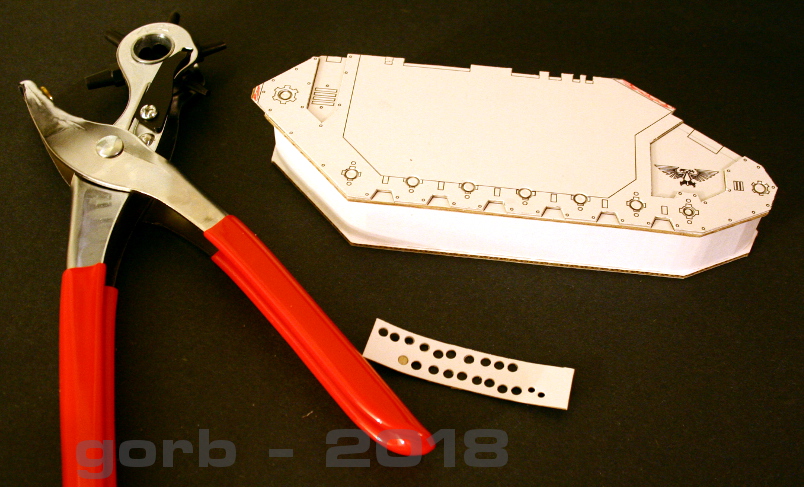 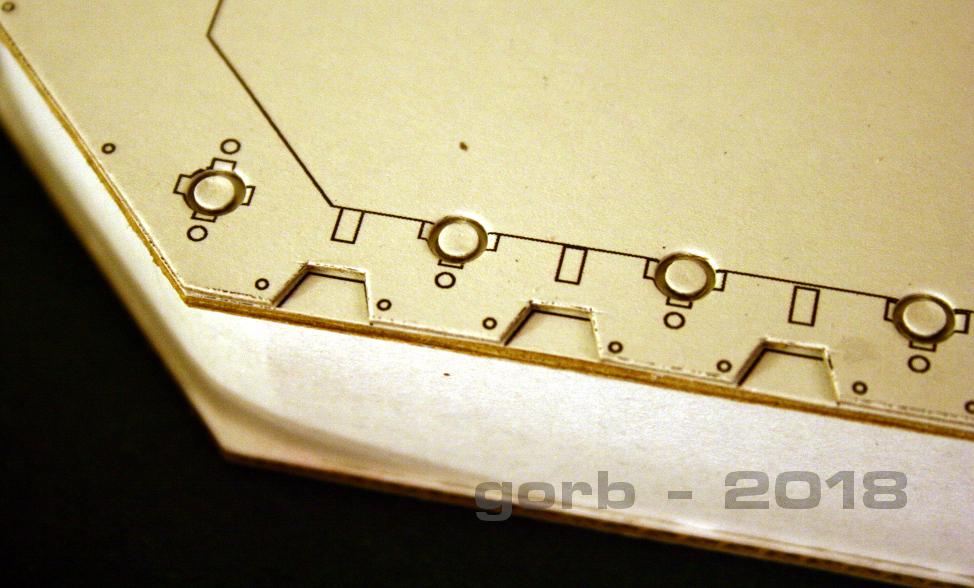  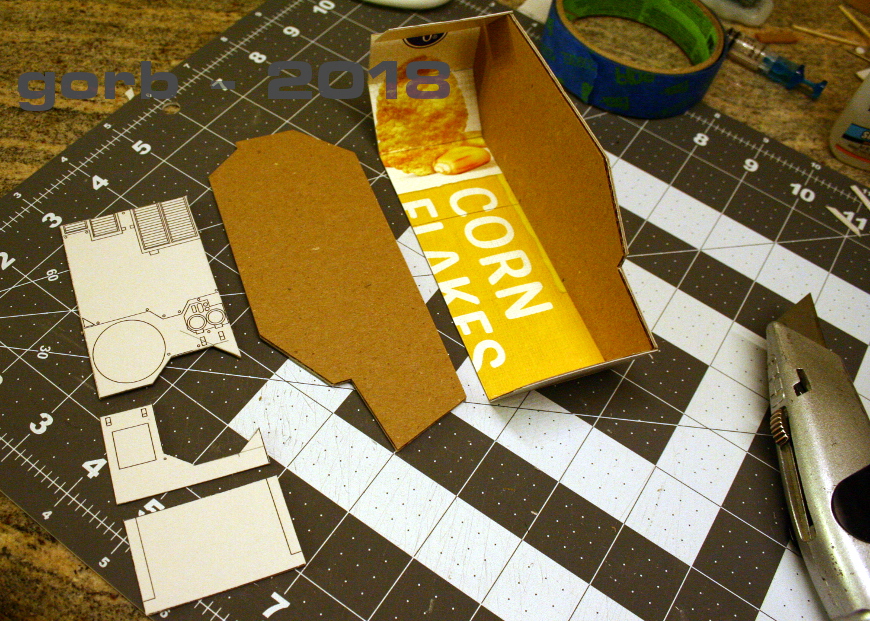

|
| Google Adsense |
|
#2
07-10-2018, 01:42 PM
|
||||
|
||||
|
That's a nice first post!
Thanks for sharing your photos and techniques with us. 
__________________
Rubén Andrés Martínez A.
|
|
#3
07-10-2018, 02:09 PM
|
||||
|
||||
|
Looking good so far! I've built several of his WH40K kits (threads in here somewhere), and I love them. They really build up into great looking models, rivaling the overpriced resin kits of the same vehicles.
__________________
Regards, Don I don't always build models, but when I do... I prefer paper. Keep your scissors sharp, my friends.
|
|
#4
07-10-2018, 03:33 PM
|
||||
|
||||
|
Thanks for the encouragement, Rubén!
Don, yes I like the way he uses the layers on the models, he doesn't leave a lot of detail out. Luckily most of these older wh40k models are basically boxes with stuff glued on, I think the original construction methods were very similar to what Eli does. Here is the tank track construction I mentioned. I used Eli's tracks as a template, and glued the pieces to a piece of paper that I later glued to a thicker cardboard piece, for making the mold. Keep in mind: at this point, I had no idea whether this was going to work! So I tried to keep the shapes basic, to (a) save my fingers (b) save my patience and (c) manage my expectations. After gluing everything together, I primed it with black rattle-can primer, then varnished it with some minwax. I'll get into why I did this in the next update, where I show my mold-making process. (BTW I think I figured out how to do the thumbnail-image posting now, so I'll spare your scroll-wheel from now on)
|
|
#5
07-10-2018, 03:58 PM
|
||||
|
||||
|
!Warning: this post contains very little papercraft!
This post shows the tank track mold making and casting processes. I got this right through a bit of trial and error... In the first image, you can see the primed & varnished tank tracks covered in a thinned silicone caulk mixture. I use about a 30:70 mixture of lighter fluid mixed with Type I silicone caulk. I apply this in a thin-ish layer, just so it brushes over details easily. (This is the reason for first priming the master model, then applying varnish: the primer seals the piece, so that the varnish has a sealed surface to smooth over. Without the varnish, the silicone grabs onto the rough surface of the primed master; without the primer, the varnish sinks into the surface and again the silicone grabs onto the rough surface of the master - you end up with your master embedded in very hard to remove silicone) After the thinned silicone has dried (about an hour or so), I apply a thicker layer of silicone, which I prepare by dunking silicone caulk into a container filled with water and some dishwashing liquid. I massage the silicone in the water for about 2 minutes, trying to expose all of the silicone to the water (the soap is just there to make sure the silicone doesn't stick to my hands). I then take the silicone and apply it on top of the dried silicone, so that the mold will have some volume. You can see this in the second image. This can be left to dry, preferably overnight, before making the first cast. I do this in a Hirst-arts-fashion, by pouring some casting plaster into the mold, scraping the excess off, and then letting it dry for a bit. You can see this in the 3rd image. The plaster I use is called Skullduggery Perfect Cast, but you can probably use any kind of plaster or dental stone for it. The 4th and 5th images shows the results of the cast: perfect little tank tracks. They are not super strong, but I will be gluing them onto the surface I made in the tread hulls, so it all turns out pretty good.
|
| Google Adsense |
|
#7
07-13-2018, 06:38 PM
|
|||
|
|||
|
What no frosted flakes
|
|
#8
07-13-2018, 06:40 PM
|
||||
|
||||
|
Added headlights and engine exhausts.
The headlights are discs, the larger ones have some thin guage electric wire I scrounged from work as cages. The exhaust pipes were made from Starb*cks drinking straws, so I guess technically not plastic? Ha. In the process, also learned how to unglue something stuck with CA, by using acetone: I accidentally stuck the headlights too high up the hull, and had to unglue them. It was nasty: even with the acetone, the glue didn't seem to want to dissolve, so I had to use my hobbyknife, and in the end damaged some parts of the hull surface... If anyone has a trick they'd like to share, I'm all ears
|
|
#10
07-14-2018, 06:32 AM
|
||||
|
||||
|
Really incredible work.
__________________
Regards, Don I don't always build models, but when I do... I prefer paper. Keep your scissors sharp, my friends.
|
| Google Adsense |
 |
| Tags |
| landraider, mixedmedia, wh40k |
|
|


 Linear Mode

