


|
|
|
#1
 08-02-2008, 09:20 PM
|
||||
|
||||
|
M3 Stuart Honey
Here's a fun little project that I started working on since I finished up the Panzer. It's an other free armor model that can be downloaded at www.fk.konradus.com. While not nearly as complex as some, it has many nice little details that can be enhanced with some additional layering here and there.
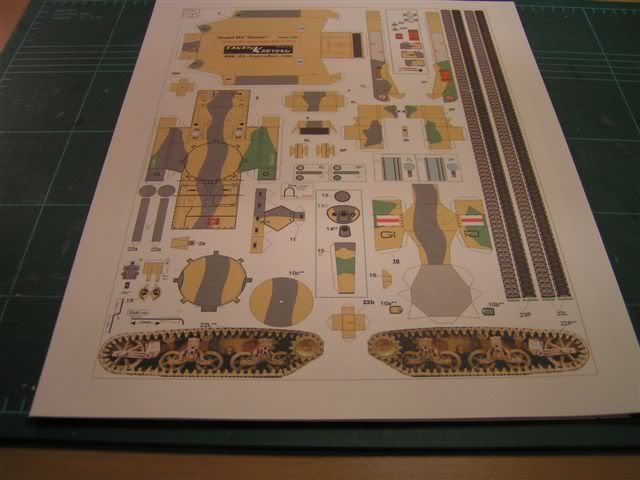 I really like the photographic details of the running gear, It looks very realistic and three dimensional however the assembly is quite simple. I plan to do some extensive layering here to make it really pop. 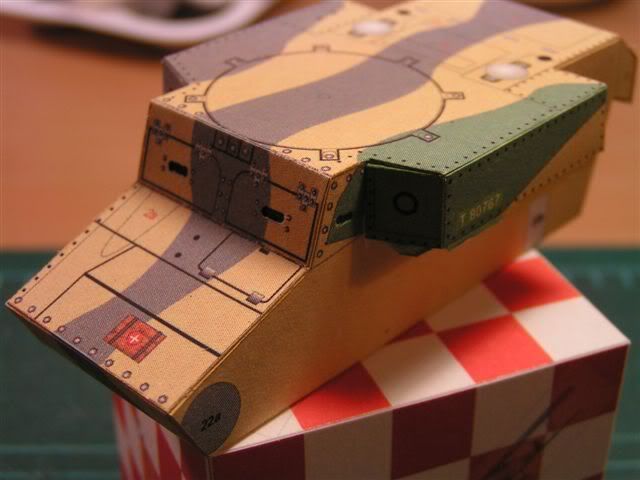 here is the main part of the hull - I reinforced the inside with some heavy chipboard and added some gussets to keep everything square. 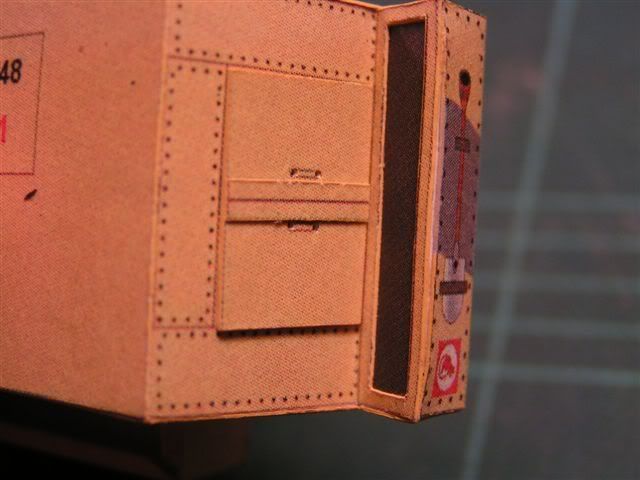 Here is the first of the layering that I added. I recessed the grille and built up the rear hatches. I plan to add wire handles to the doors as I get further along. 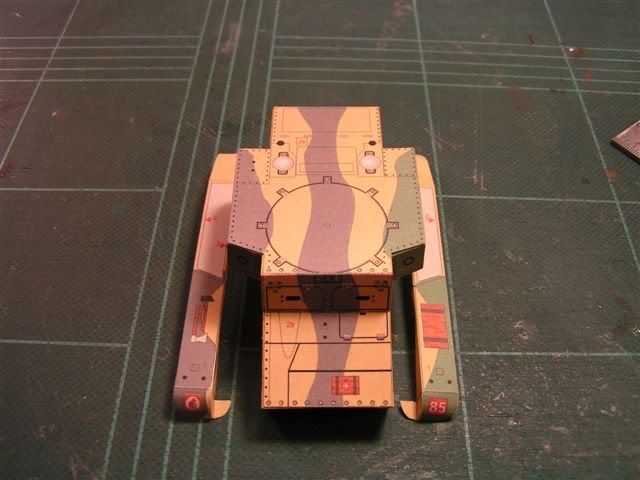 Left and right fenders are assembled and ready to go. That's it for now... 
|
| Google Adsense |
|
#2
08-03-2008, 07:10 AM
|
||||
|
||||
|
Outstanding, Kevin!
The M-3 was a very widely used and famous tank, and very capable within its limitations of size and firepower. It looks very attractive in the 7th Armored Division Desert Rat camo, and I see that this build is up to the usual KCStevens standard of excellence. I look forward to seeing how you deal with the undercarriage. Don
|
|
#3
08-03-2008, 08:41 AM
|
||||
|
||||
|
Good to see you on this one, Kevin. I've wanted to try it for a year or two now, but wasn't sure how to "help" the running gear. I also like the photo approach, but I think it does need some layering to add dimension. Best of luck on it and I'll be watching with interest!
Chris
|
|
#4
08-05-2008, 09:59 PM
|
||||
|
||||
|
Don and Chris,
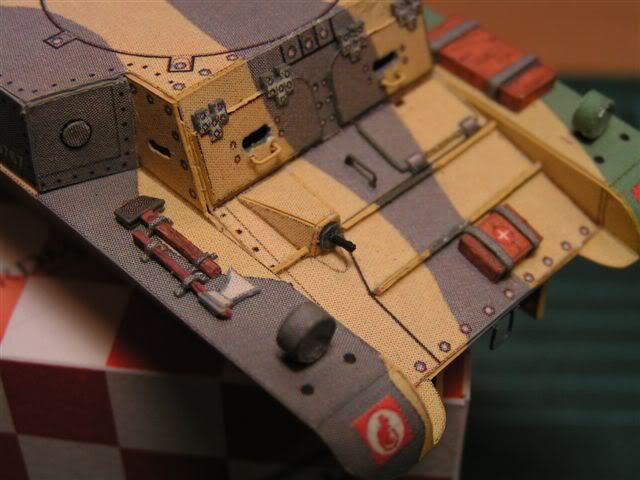
Thanks for your kind words. I should be getting to undercarrage shortly. Right now I'm still trying to decide how I want to build it. Every time I think about it, I come up with another idea. I've printed out four copys so I think that should be enough material to get the effect that I going for, I just have to figure it all out. Progress on the Stewart is moving along nicely...I have added the fenders, hatches and a few other little pieces to the hull. 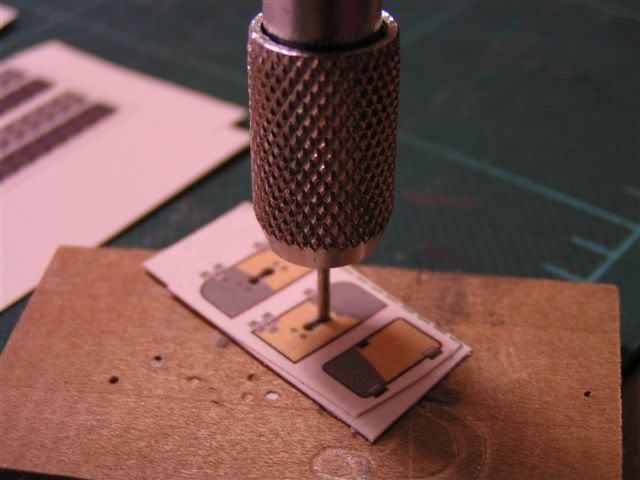 I punched out the little portholes with a 1.0mm punch that I made from a length of an old printer ink refill kit that is mounted in my pin-vice.  The hatches are made up of two layers of 67# bristol which when laminated together come out to be about .018" thick. 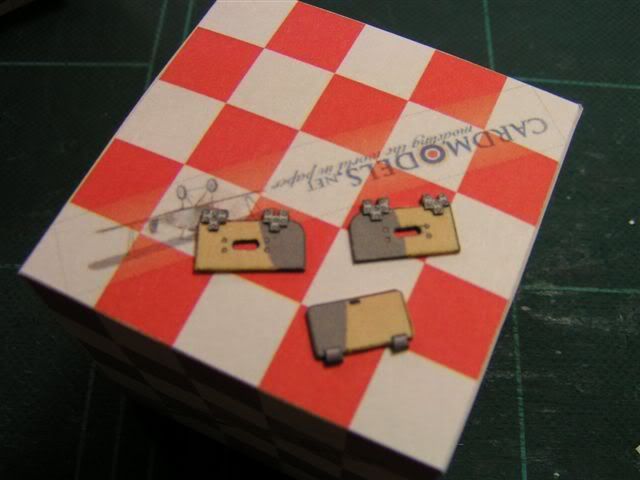 Added the hinges as layer number three. 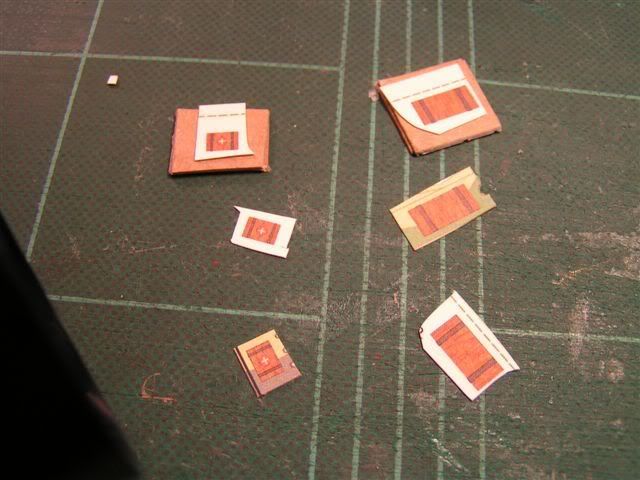 Boxes were mounted to two layers of chipboard - about 1.5- 2.0mm thick Extra pieces were cut out to skin the sides and ends 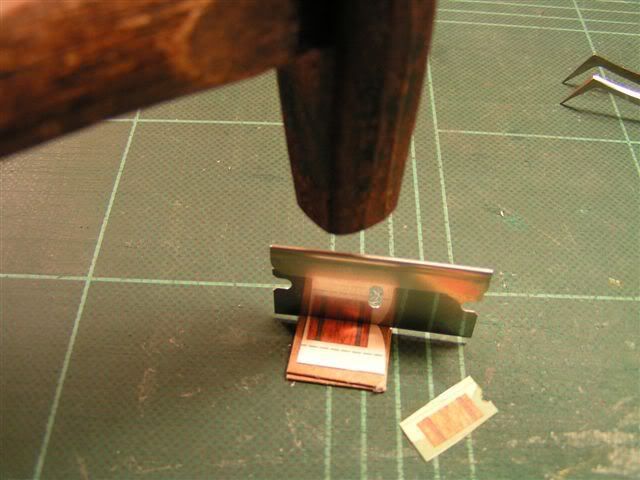 Tapping the single edge razor with a hammer makes quick clean cuts through thick stock. 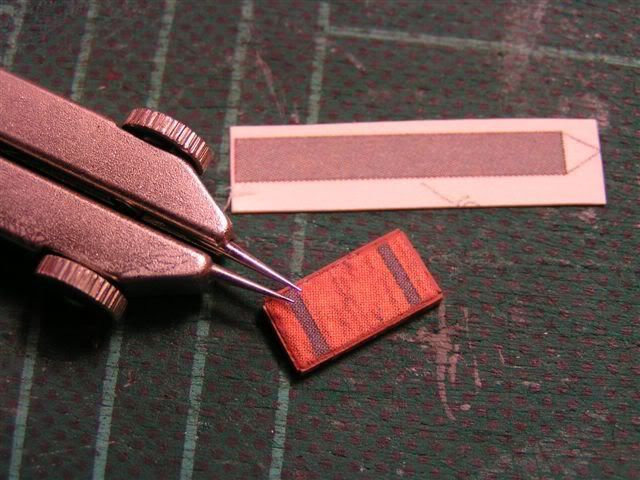 Used some matching grey stock from an extra part to make the hold-downs as seen below 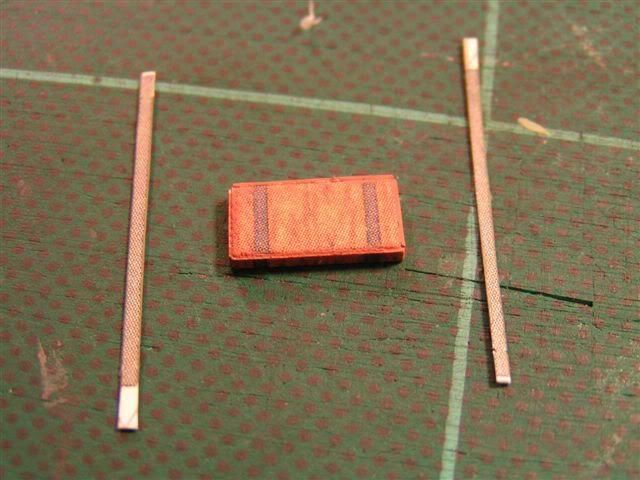 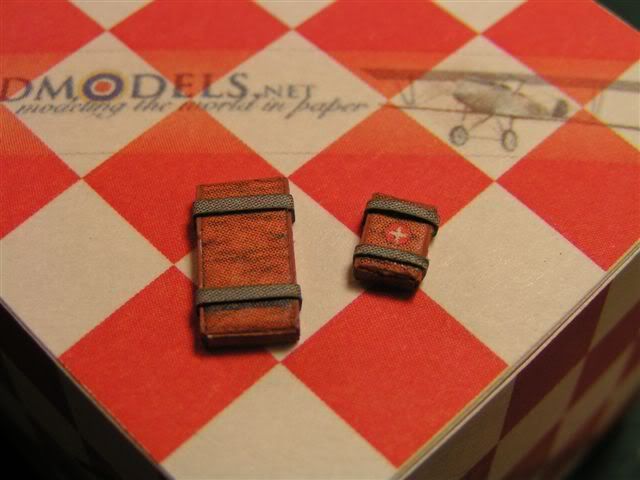 Finished boxes - Much nicer than just the single layer that printed out on the sheet. 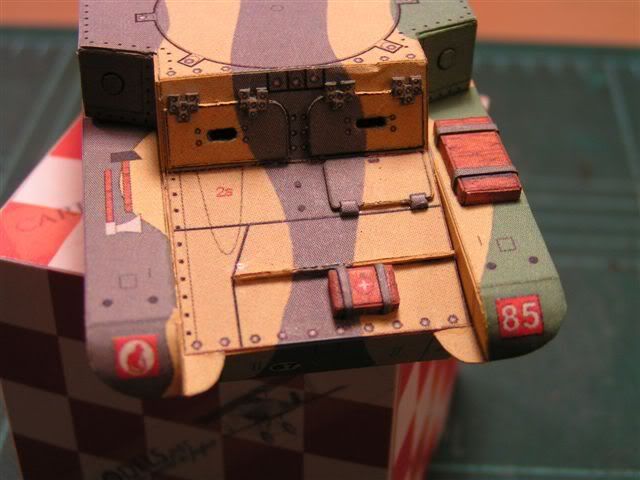 Here is everything mounted to the hull.
|
|
#5
08-05-2008, 10:04 PM
|
||||
|
||||
|
Great job!!
__________________
Sit quietly, doing nothing, spring comes, and the grass grows by itself. ") http://www.usswhiteriver.com/
|
| Google Adsense |
|
#8
08-16-2008, 09:26 PM
|
||||
|
||||
|
Another update
I've been slowly adding more little details to the Stewart....Here is an update of my progress so far...
 In the picture above you can see that I added little wire grab handles to the hatch covers and the tools with wood handles that were carved out of toothpicks. I still have to add the wire guards that go around the headlamps.... 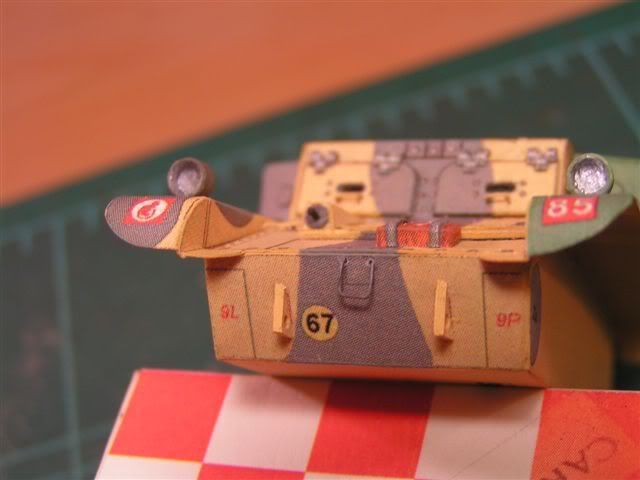 Here you can see the front step that was made out of a small piece of wire...It looks better in person, the macro photography tends to enlarge all the little imperfections. The inside of the headlights were painted with silver paint and then a clear plastic disk was glued on the front as the lens... 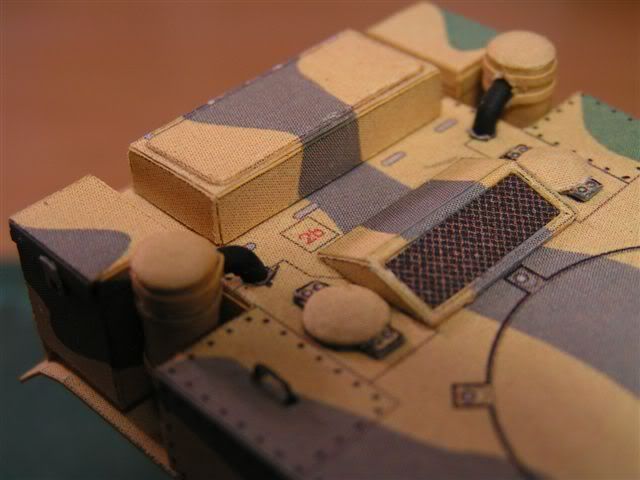 Here you can see what I believe are the air filters..? (the cylinder shaped objects) I made my own from some excess yellow paper from another copy that I printed out. I did not like the color of the original parts from the download, the color was a silvery light blue and did not match the yellow color of the rest of the hull. I also did not like the way the hoses were designed so I made my own from the shaft of a q-tip that was reduced in diameter by about half then bent to 90 degrees, reinforced with CA and painted black... 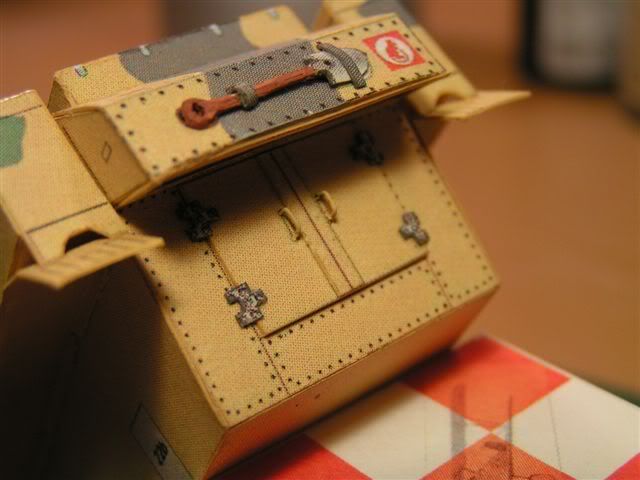 In this last photo you can see that I added a shovel that was made from the extra copy. I also added hinges and wire handles to the rear doors. That's it for now, I still have a few more little pieces to add to the hull before I begin working on the running gear.... I'll keep you posted.
|
|
#10
09-03-2008, 10:55 PM
|
||||
|
||||
|
Work on running gear continues...
I've been working on the Stewart's running gear. As you can see from the pictures below I've got one side completed and one more to go.
I like the way the running gear for this model was designed. Its simple construction and photo realistic parts makes it look a lot more complicated than it really is. The original part is to be mounted onto a 1.0MM piece of card stock, then a one piece track is to be glued around it - very simple. I took things a step further...To get more of a 3-d effect, I cut out different layers from 3 copies and mounted them to some chip board from the back of an old tablet. I used a fourth copy of the opposite side (on regular old printer paper) to glue on the reverse side of the running gear. I also added little rubber blocks to the tracks which I cut out of an other copy - I seems like when ever a build a model I print out at least 2 or 3 extra copies so that I can do a lot of layering. 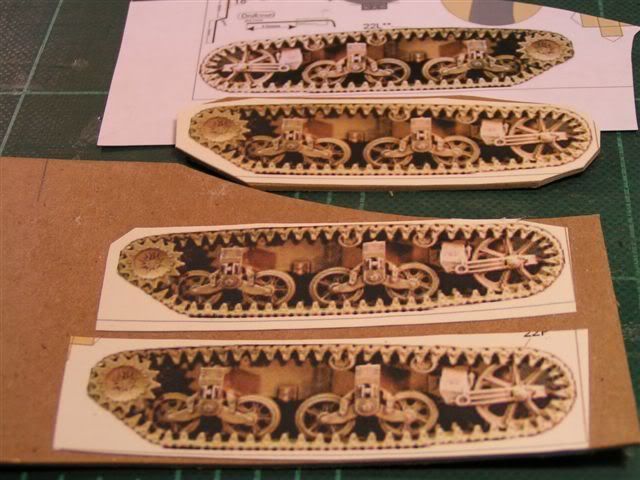 This picture shows the 4 copies that I used to cerate the 3-d effect that you see below. The opposite copy on the top is used for the reverse (back side) of the running gear. 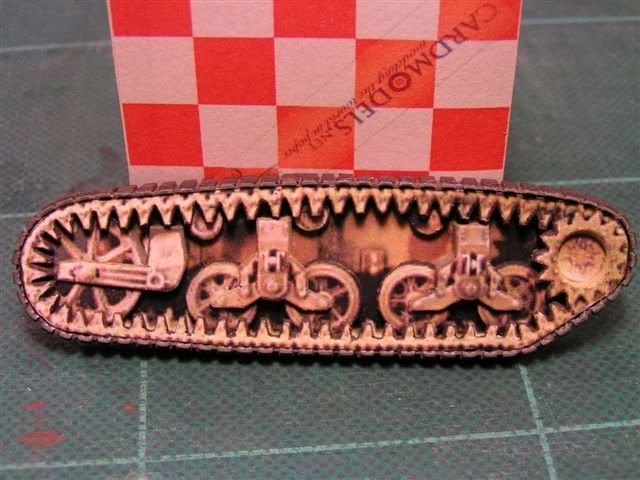 One side complete and ready to go...I think if I had it to do over again, I would like cut out all of the "black" space around the road wheels under the hull and the little empty spaces in the wheels and take-up rollers. Oh well, a person can drive themselves crazy with all the little details. 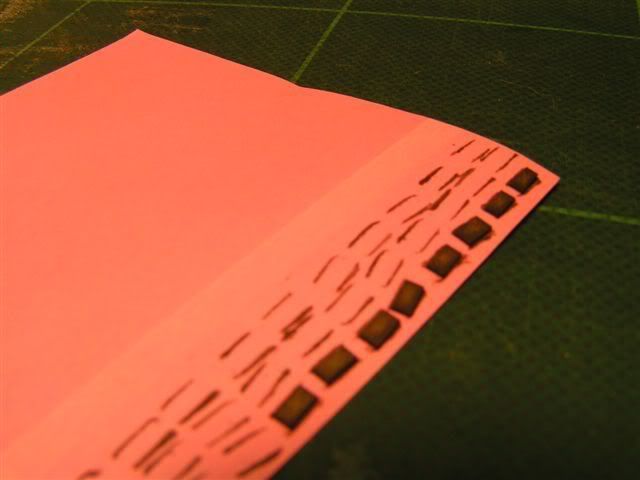 Here is a little trick that I use to paint the edges of the rubber track blocks. I use the sticky part of a post-it note to hold the tiny pieces in place while I paint them. I also used this same technique on the grouser bars of the panzer that I just built. 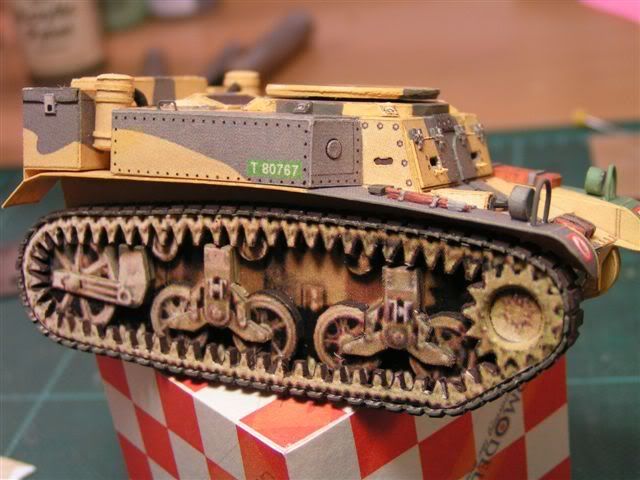 I propped the completed side up against the hull to get an idea of it's going to look like when finished. One thing that I have to change is the thickness of the two mounting blocks that get glued onto the side of the hull to accept the running gear. Since I built up so many layers, the gear is much thicker than it was origionaly designed to be, the blocks from the original design are now too thick and the track extends too far out from the side. This is an easy fix, I will simply cut the blocks out of a piece of 1.0mm chip board rather than build them from the original parts sheet. That's it for now...I hope to finish up the other side in the next couple of days. Then I can begin working on the turret.
|
| Google Adsense |
 |
|
|


 Linear Mode

