


|
|
|
#601
 03-18-2022, 06:50 AM
|
||||
|
||||
|
Quote:
You can check my first post, where I described tools and materials i will use. Click here for first post
__________________
Welcome to my gallery 
|
|
#602
03-23-2022, 01:52 PM
|
||||
|
||||
|
Elevating mechanism with supporting rack
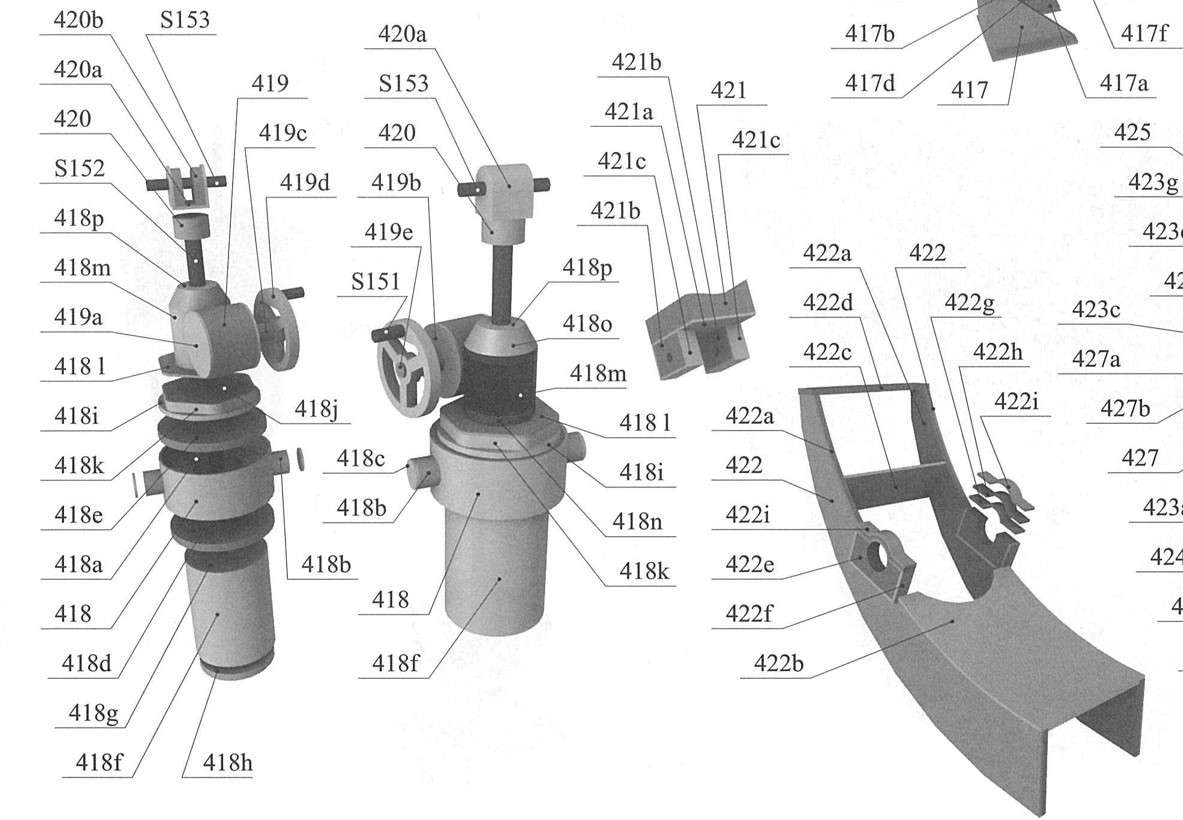   There are several thing to pay attention on: Manuel handle must be glued about 30 degrees to forward axel Rack mounting hinges better be assembled on the elevating cylinder and then glued to rack Main gun mounting point consists of base itself and plate (another point to designer) Base better be glued to the gun and plate to elevating mechanism. This way it will be easier to connect both later. 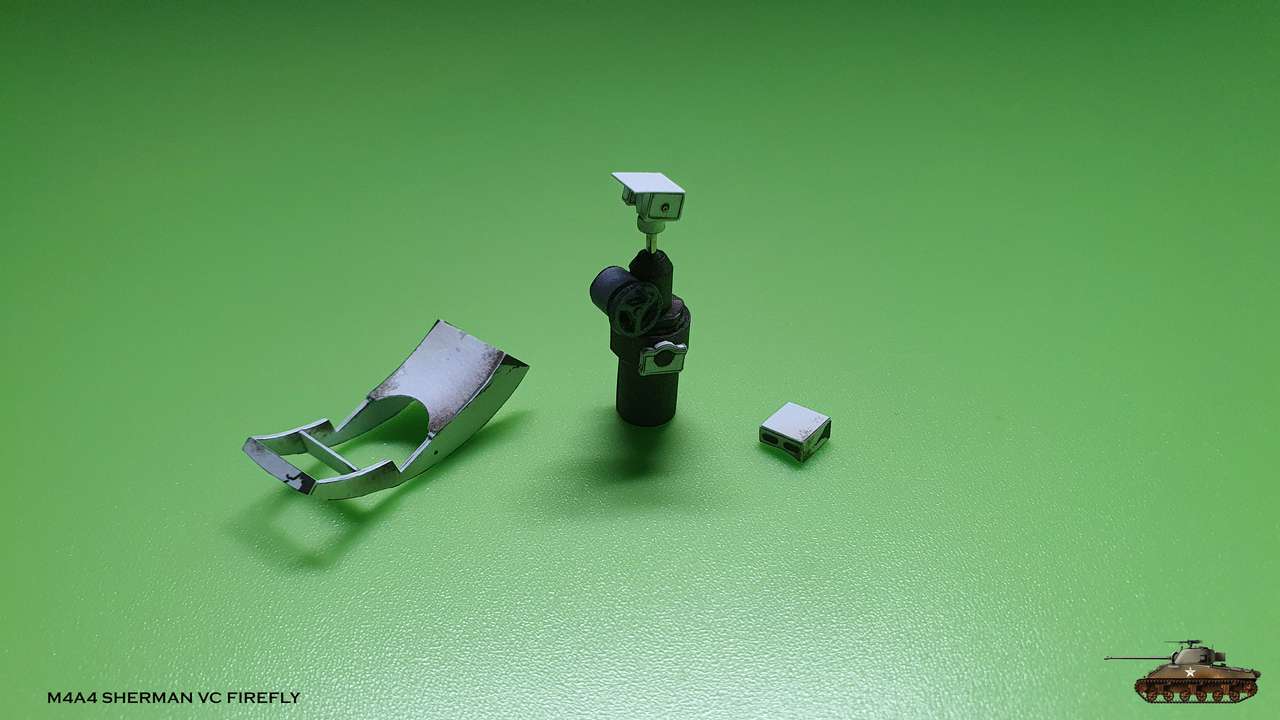  Here you can see offset manual handle 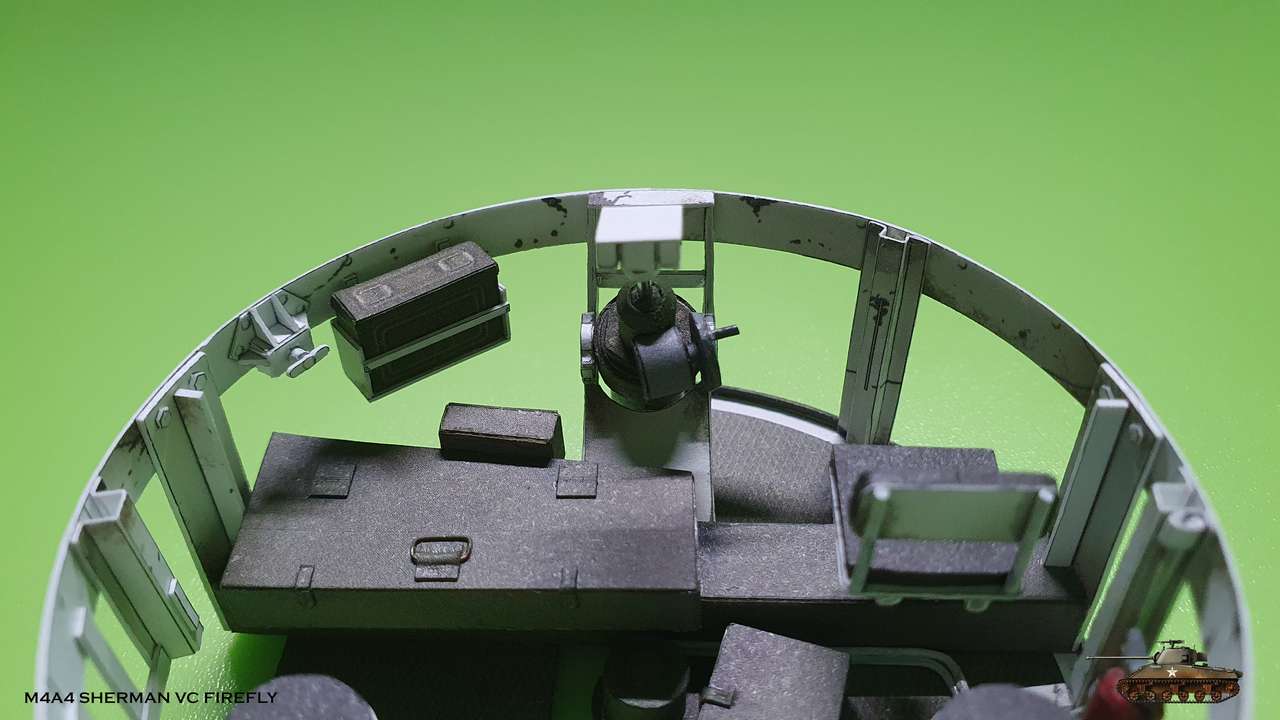 Base glued to main gun  Plate glued to elevating mechanism   Everything is moveable
__________________
Welcome to my gallery
|
|
#603
03-23-2022, 03:45 PM
|
||||
|
||||
|
looking good Igor
__________________
David........... Paper modelling gives you a happy high. currently building. c GAZ 51 ALG 17, wagon 111a. unex DH411 excavator and spitfire Mk 9
|
|
#604
03-23-2022, 06:01 PM
|
||||
|
||||
|
Wonderful details.
|
|
#606
03-28-2022, 11:46 AM
|
||||
|
||||
|
Thanks David, Michael and Kevin
Last bits.. Turret hydraulic travers gear 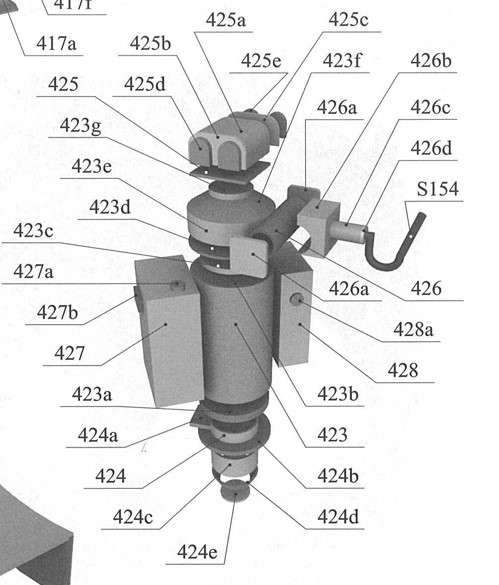  On the left oil reservoir, on the right control box, on the top hydraulic switches. And funny looking handle is gunner's power traversing control handle. This is only a half of whole mechanism. 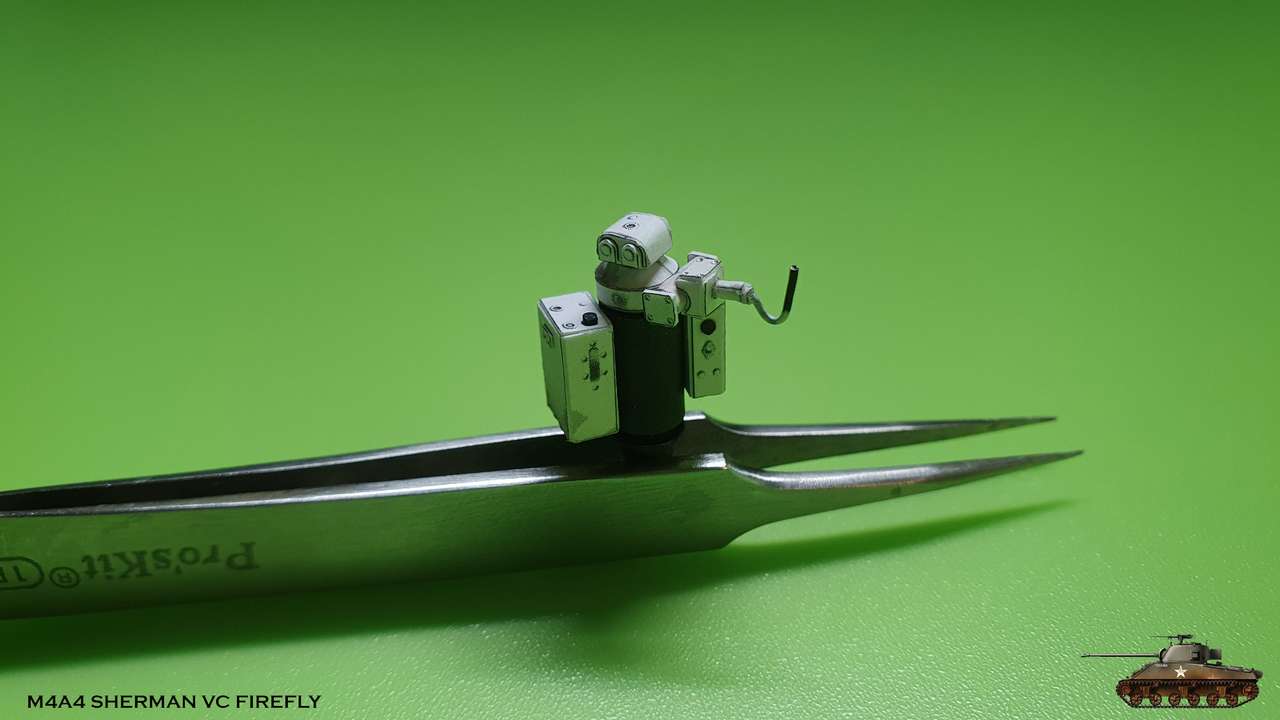  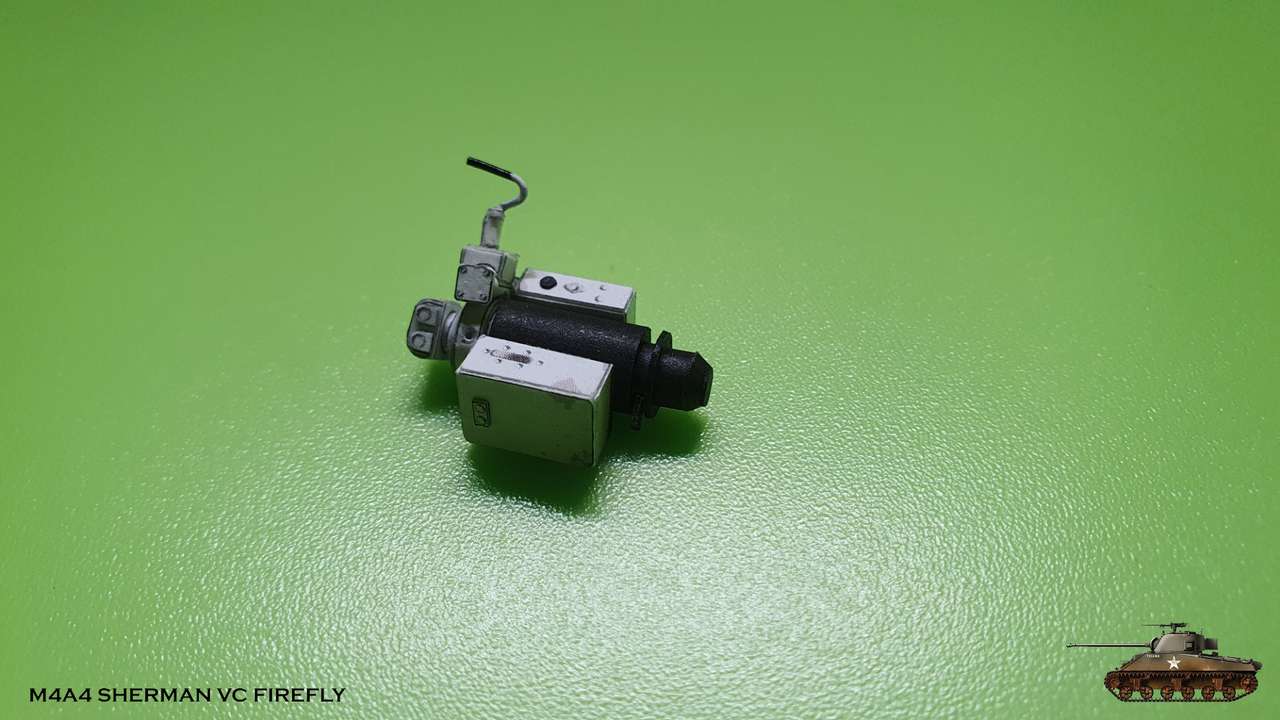
__________________
Welcome to my gallery Last edited by Igor; 03-28-2022 at 12:00 PM.
|
|
#607
03-28-2022, 01:42 PM
|
||||
|
||||
|
Excellent highly detailed tank.
|
|
#608
03-30-2022, 03:54 AM
|
||||
|
||||
|
Wonderful details, Igor. The model is very fascinating. In my younger years I built numerous 1:35 Tamiya plastic military models but never built a 1:25 paper one. As your work is highly inspirational, it might be a good idea to consider building one....
Erik
|
|
#609
04-03-2022, 02:27 PM
|
||||
|
||||
|
Thanks Michael and Erik
Second part of hydraulic travers gear - manual controls 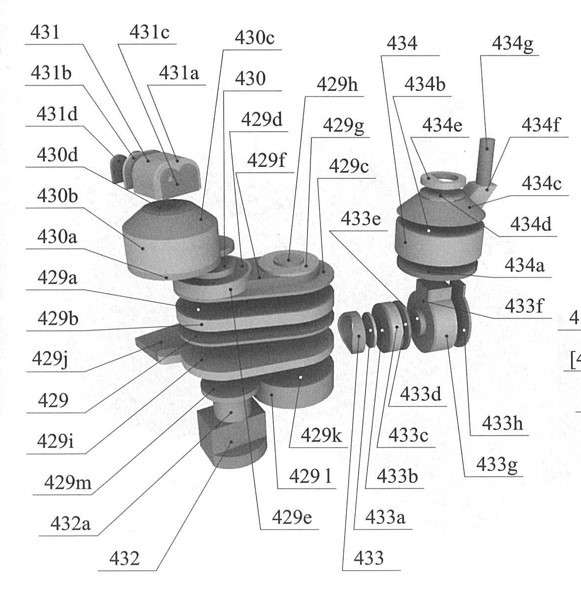 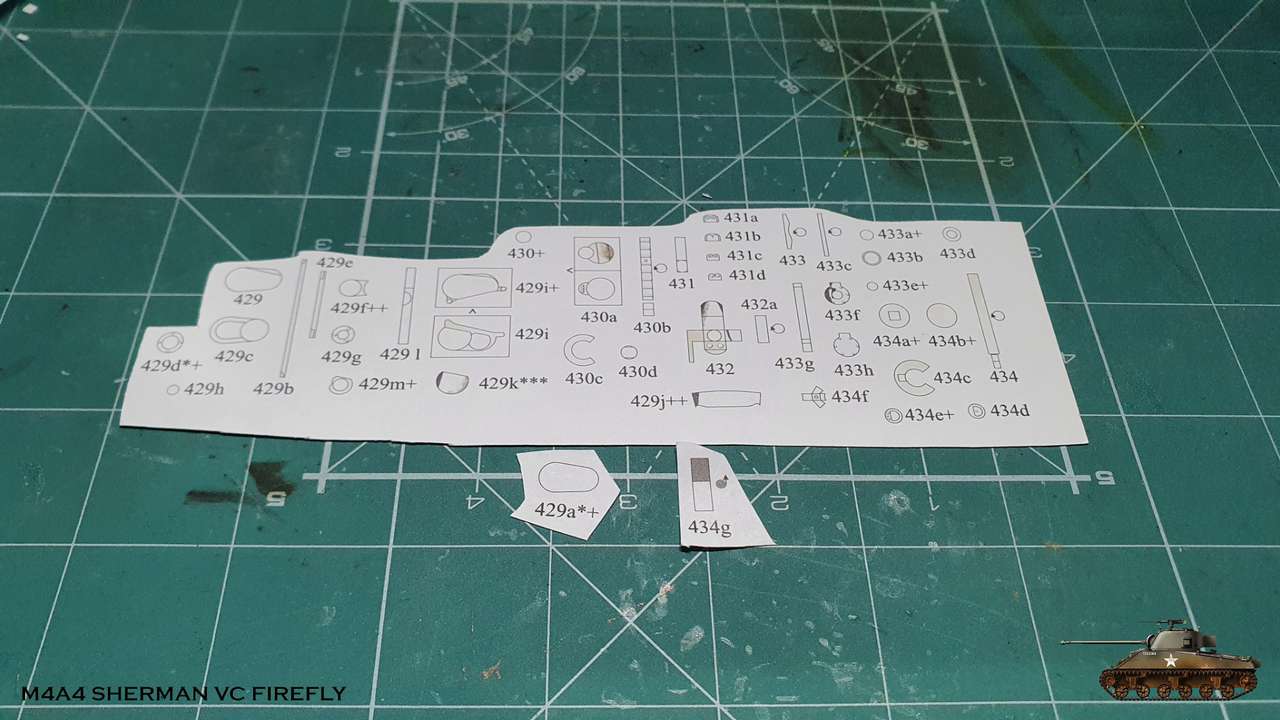 I want to notice that there are no markings how to glue parts in angle to each other, so you must figure it out by 3D drawings only 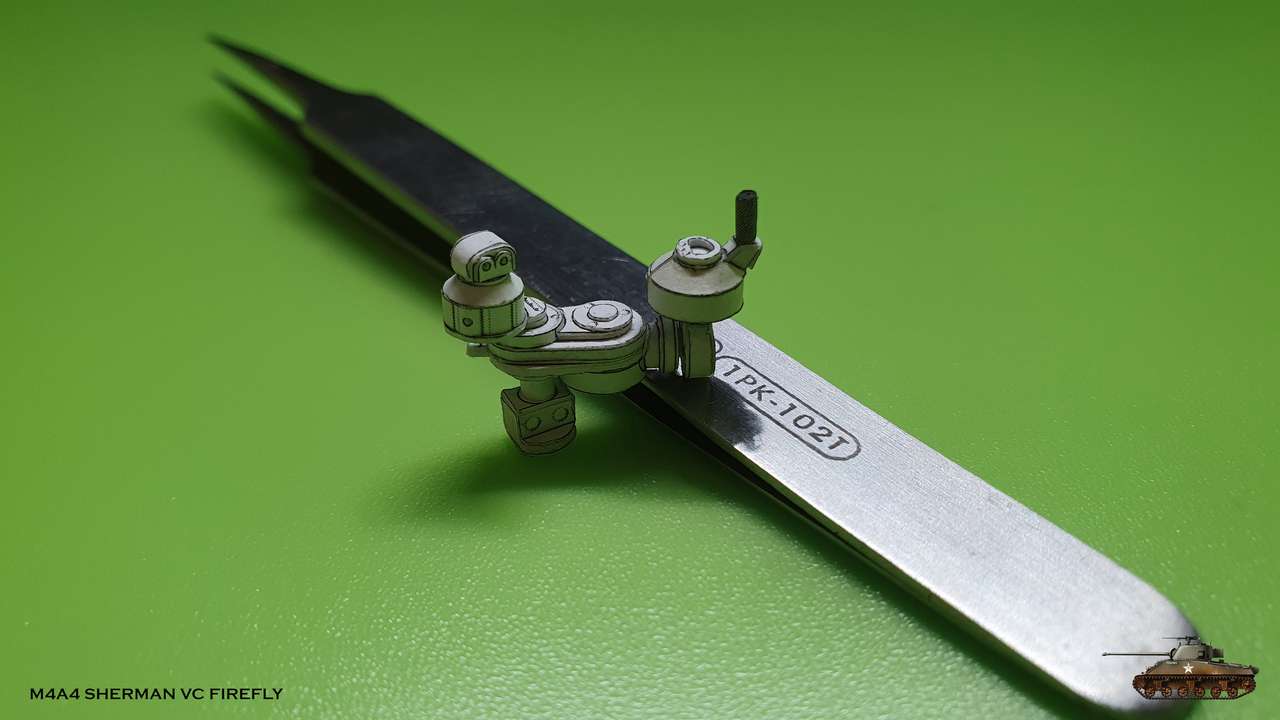 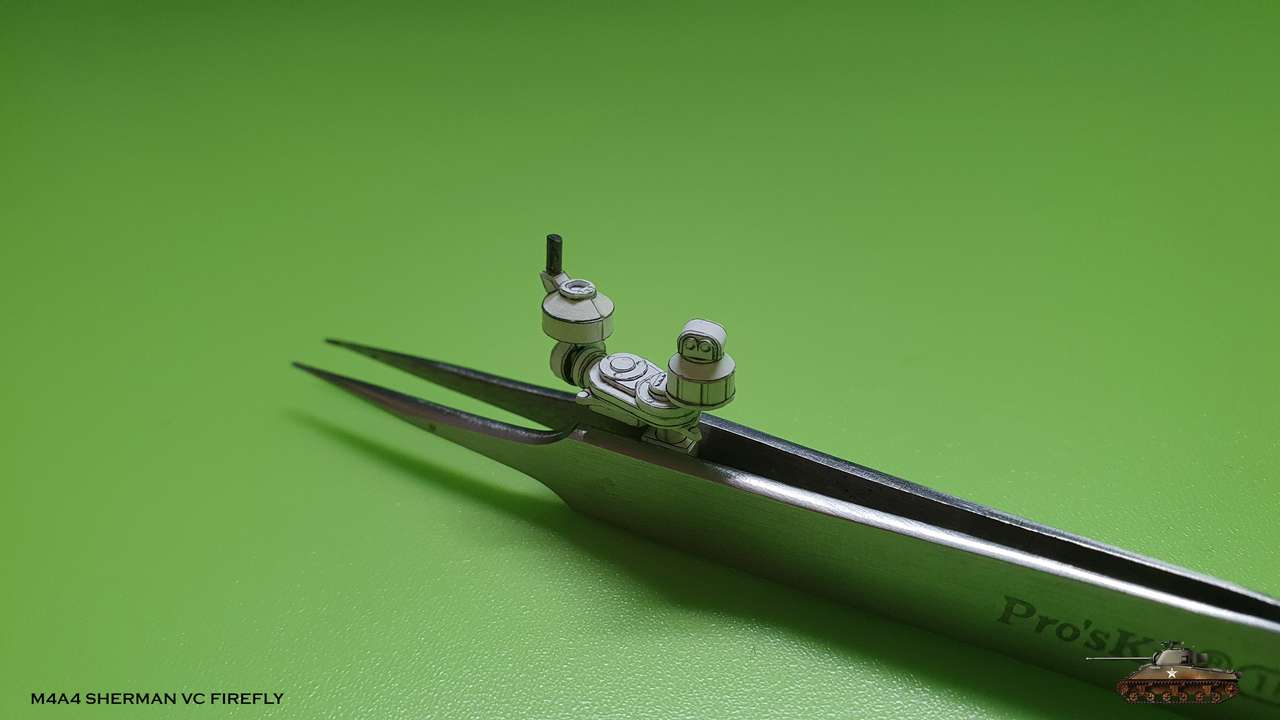 Next step was to connect two parts together by piping. But first i decided to to glue them in basket. Gear itself has marking on one of the beams to glue to, but manual controls glue marking is in turret itself. So i dry fitted basket into turret and marked placement of the controls. Then i glued it inside basket and attached previously prepared pipes. Also, there are two parts of protective skirt. Those have hole mesh, that very difficult to cut in paper. But friend from neighbour forum also assembled this model and got him laser cut ones. And i got the spares!  Skirt from book  Laser cut skirt 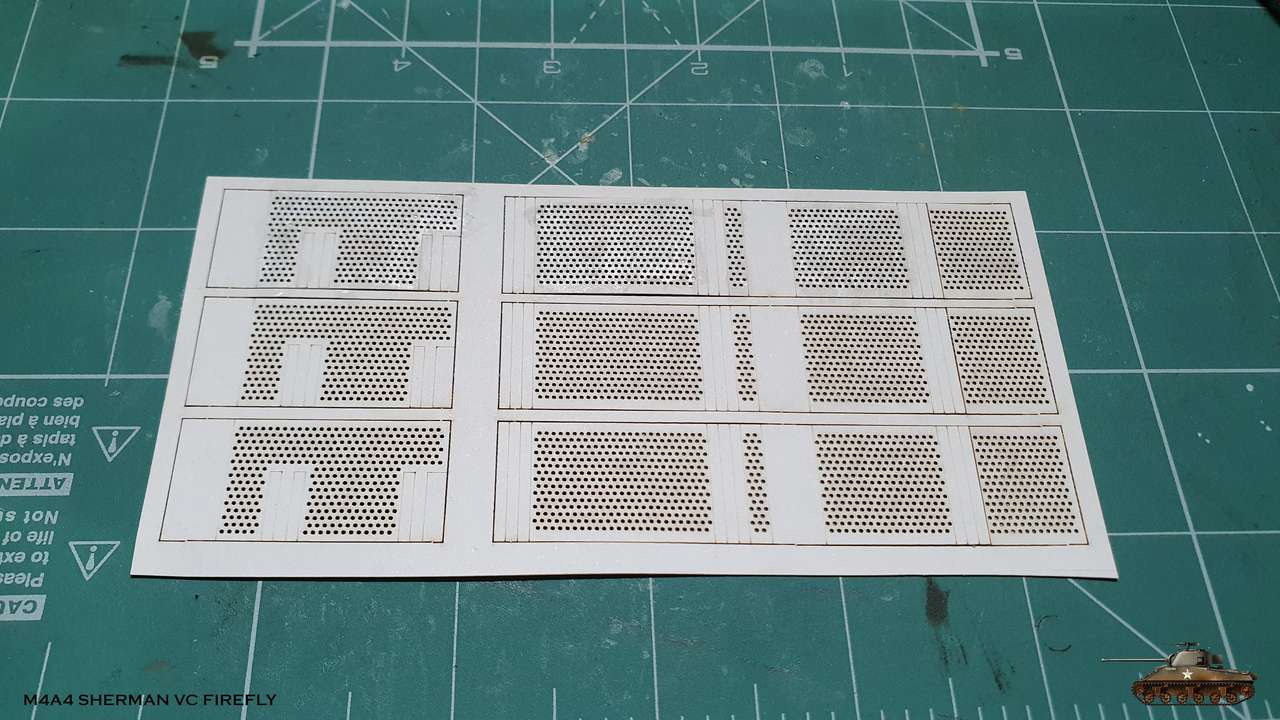 Took one sample and painted to look like original 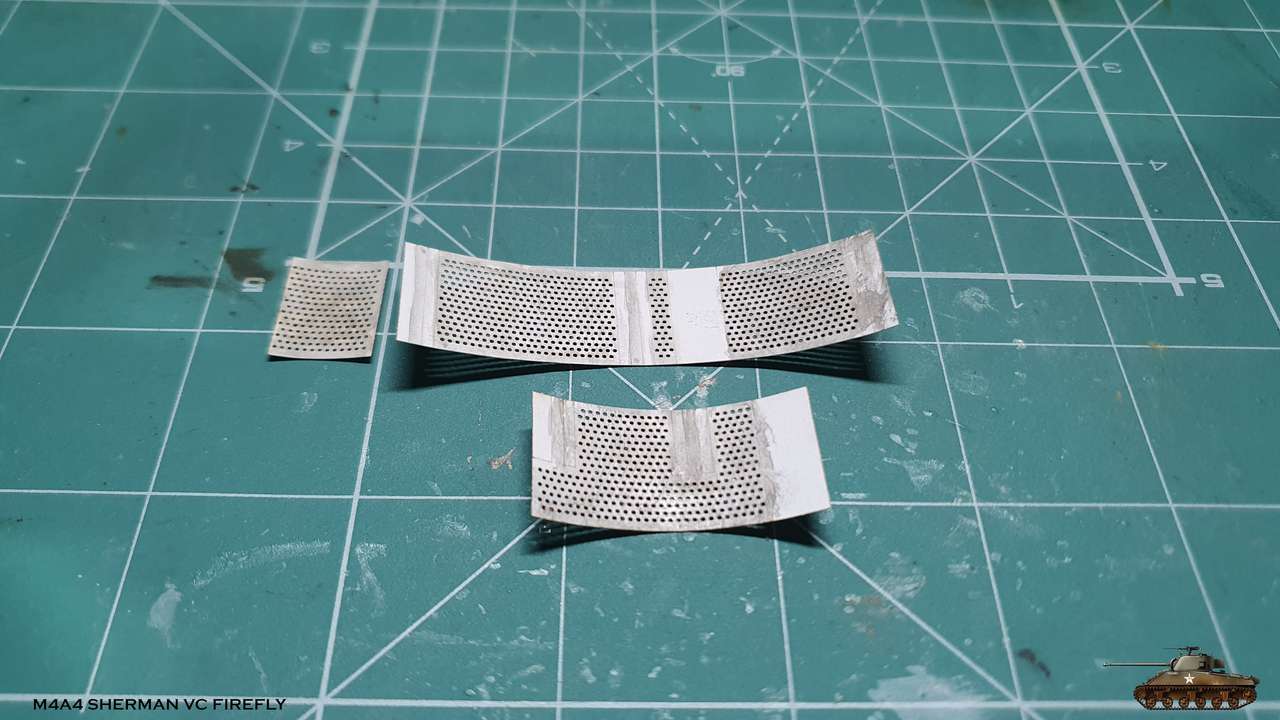 Everything assembled in basket 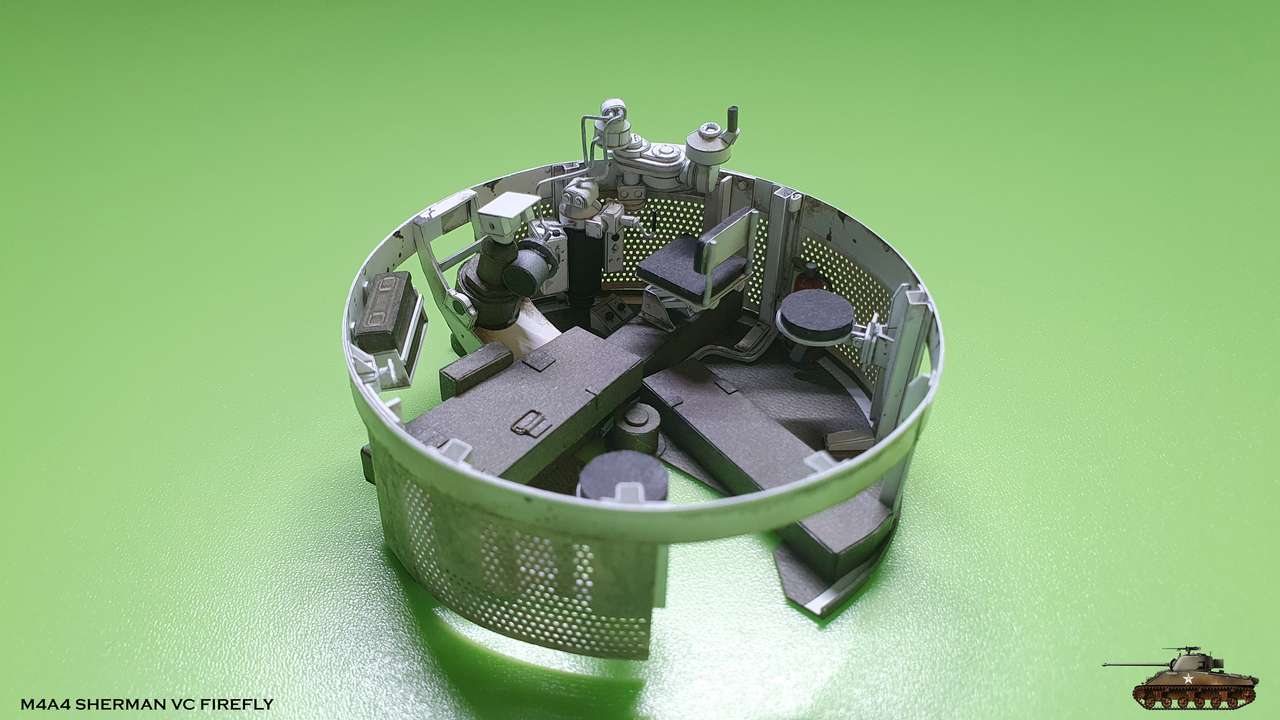 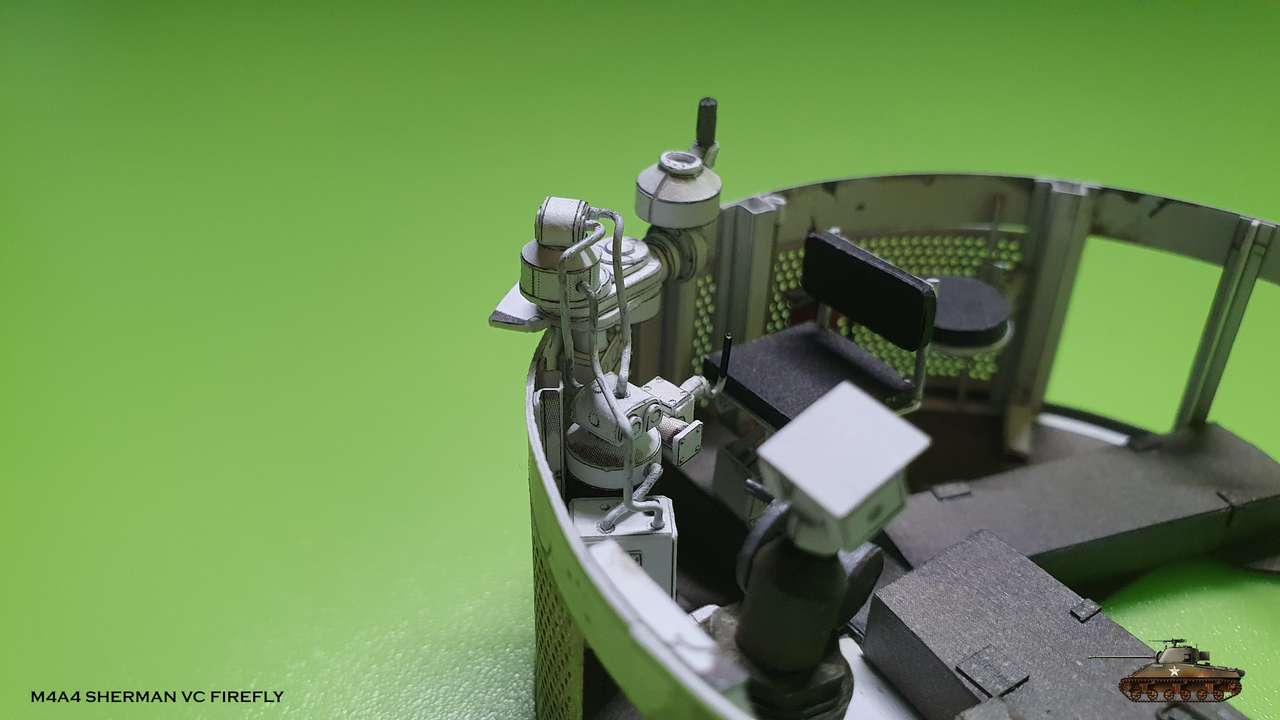 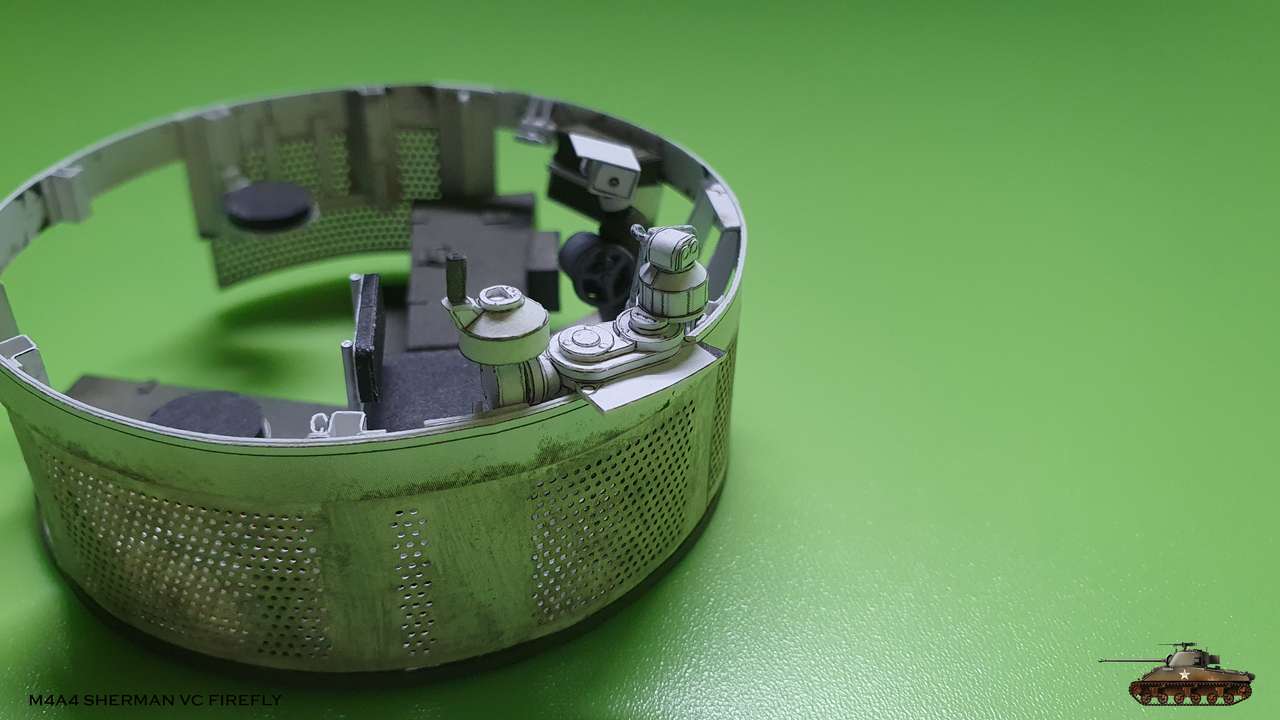 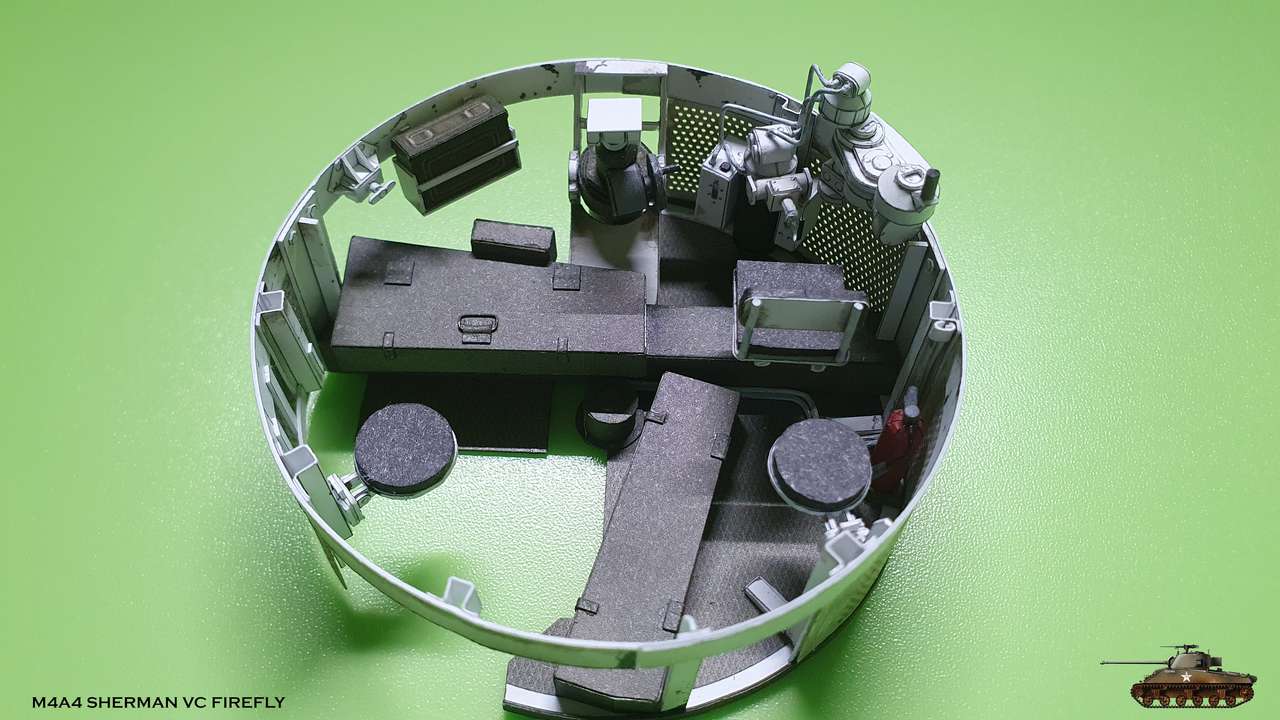 Basket finally glued to turret! 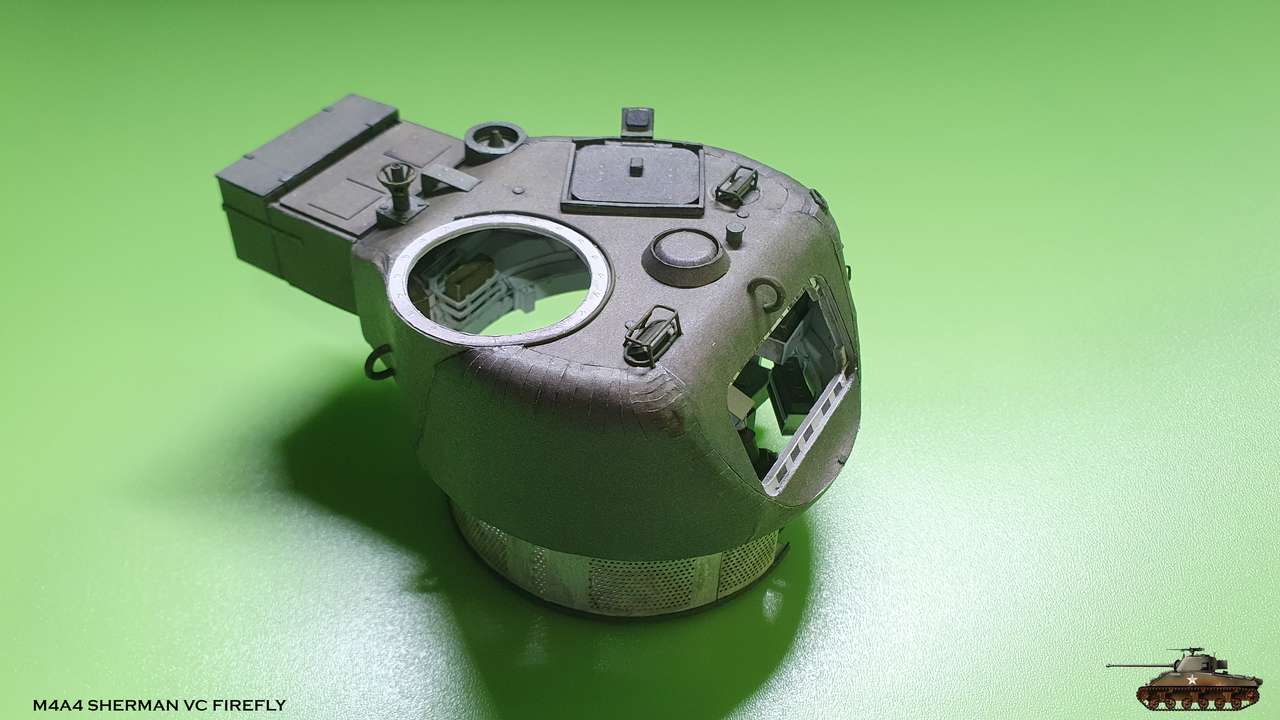 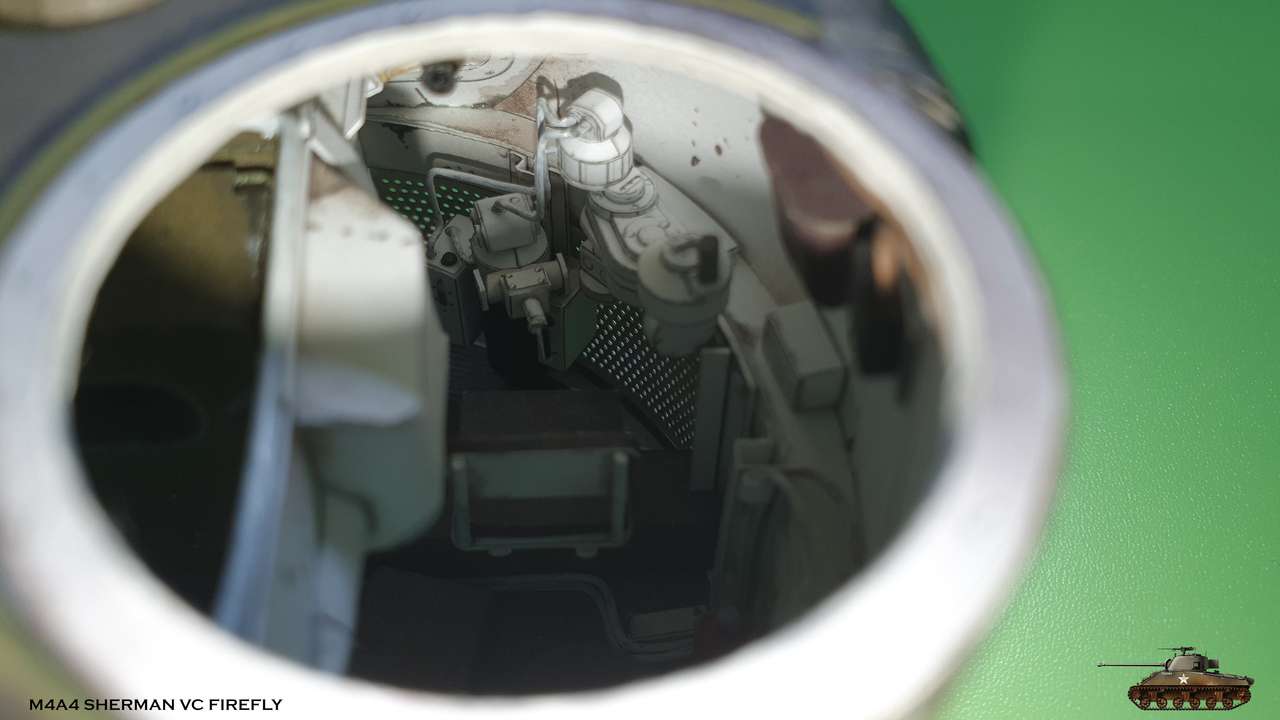 And look what attached next  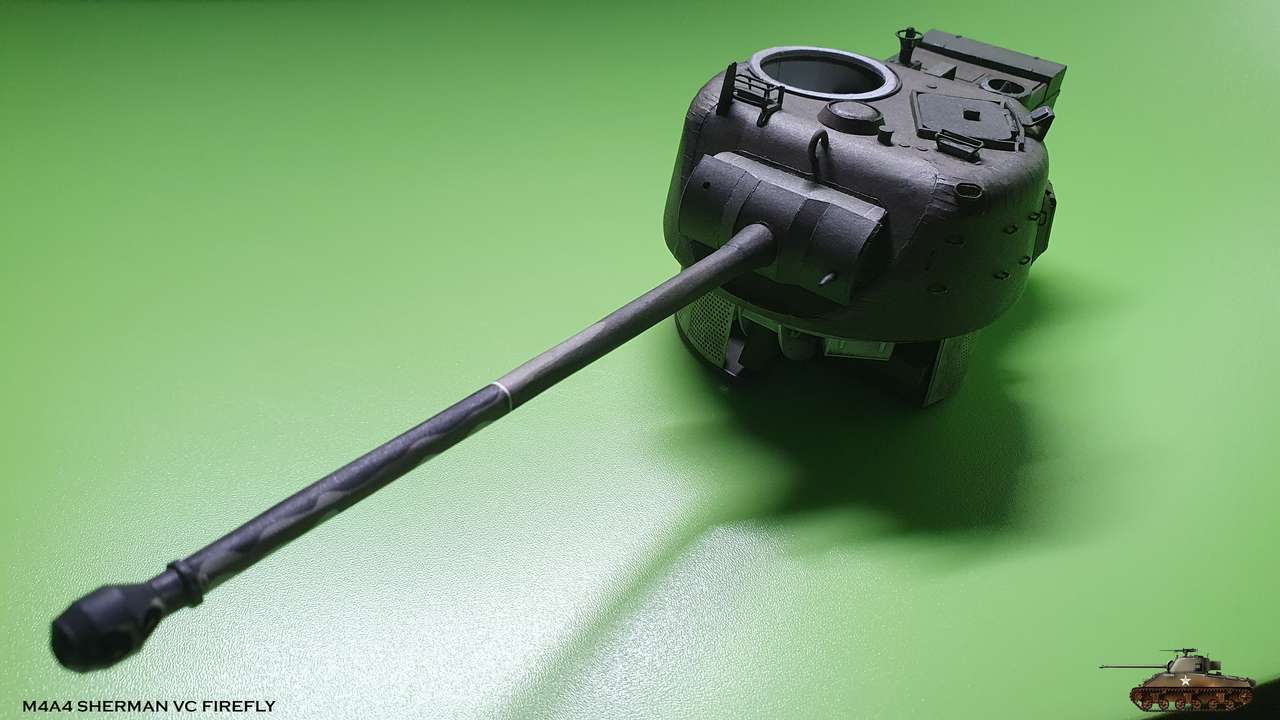 Gun inserted into opening like it should. It was easy to connect lifting cylinder with gun base, through the openings in floor. I think, on real tank, when gun unit was faulty, they just pulled whole unit out and inserted new one. Genius engineering!
__________________
Welcome to my gallery Last edited by Igor; 04-03-2022 at 02:44 PM.
|
|
#610
04-03-2022, 02:36 PM
|
||||
|
||||
|
Tour De Force.
|
 |
|
|


 Linear Mode

