


|
|
|
#11
 06-21-2021, 01:48 PM
|
||||
|
||||
|
Coming together nicely, looking "more Sherman" with every step.
 2 comments, one I am certain of and one I am less certain of. Am less certain of: (it has been a decade since I've modeled tanks in any format) My memory wants to tell me that the US Army changed its olive drab tank paint hue after WW2 and again later too. Have let go of all my tank reference books, otherwise I'd be able to find out easily. Am totally certain of: I'd consider characterizing the M36 as a variant of the Sherman to be somewhat inexact. Sure, the M36 (and M10) was built on a Sherman chassis, but above the drive sprocket it was a different vehicle with a different purpose and a different thickness (thinness) of armor. According to US armor doctrine of the period, M36 was officially known as M36 GMC, gun motor carriage. And was understood to be an anti-tank gun mounted on a tank chassis so it could easily go where the tanks were. For those interested in the US Tank Destroyer Forces this may be of interest, tankdestroyer.net Oh, and have a "Leavenworth Paper" from the 1980s about TD doctrine in WW2, https://www.armyupress.army.mil/Port...oks/gabel2.pdf Seek, Strike, and Destroy: U.S. Army Tank Destroyer Doctrine in World War II by Dr. Christopher R. Gabel Combat Studies Institute U.S. Army Command and General Staff College Fort Leavenworth, Kansas 66027-6900 September 1985
__________________
Screw the rivets, I'm building for atmosphere, not detail. later, F Scott W Last edited by southwestforests; 06-21-2021 at 02:01 PM. 
|
|
#12
06-22-2021, 06:37 AM
|
|||
|
|||
|
Part6: Hull build begins
Right.. finally I can post bigger pictures.
[url=https://flic.kr/p/2m6pS7b]  Now we move on to the hull buildings. At first, I focused on engine deck. This, less detailed engine deck just got build before that I decided to modify whole model. So I cut this part, and rebuild. [url=https://flic.kr/p/2m6sErs]  using 0.2mm paper, I build engine deck's frame. [url=https://flic.kr/p/2m6sEqW]  [url=https://flic.kr/p/2m6oQAq]  This method got a little risk, such as not aligned its top and twisted frame like those pictures. [url=https://flic.kr/p/2m6sEpD]  Thanks to the laser cut parts, I could build transmission cover's rivet fast. [url=https://flic.kr/p/2m6pS2S] 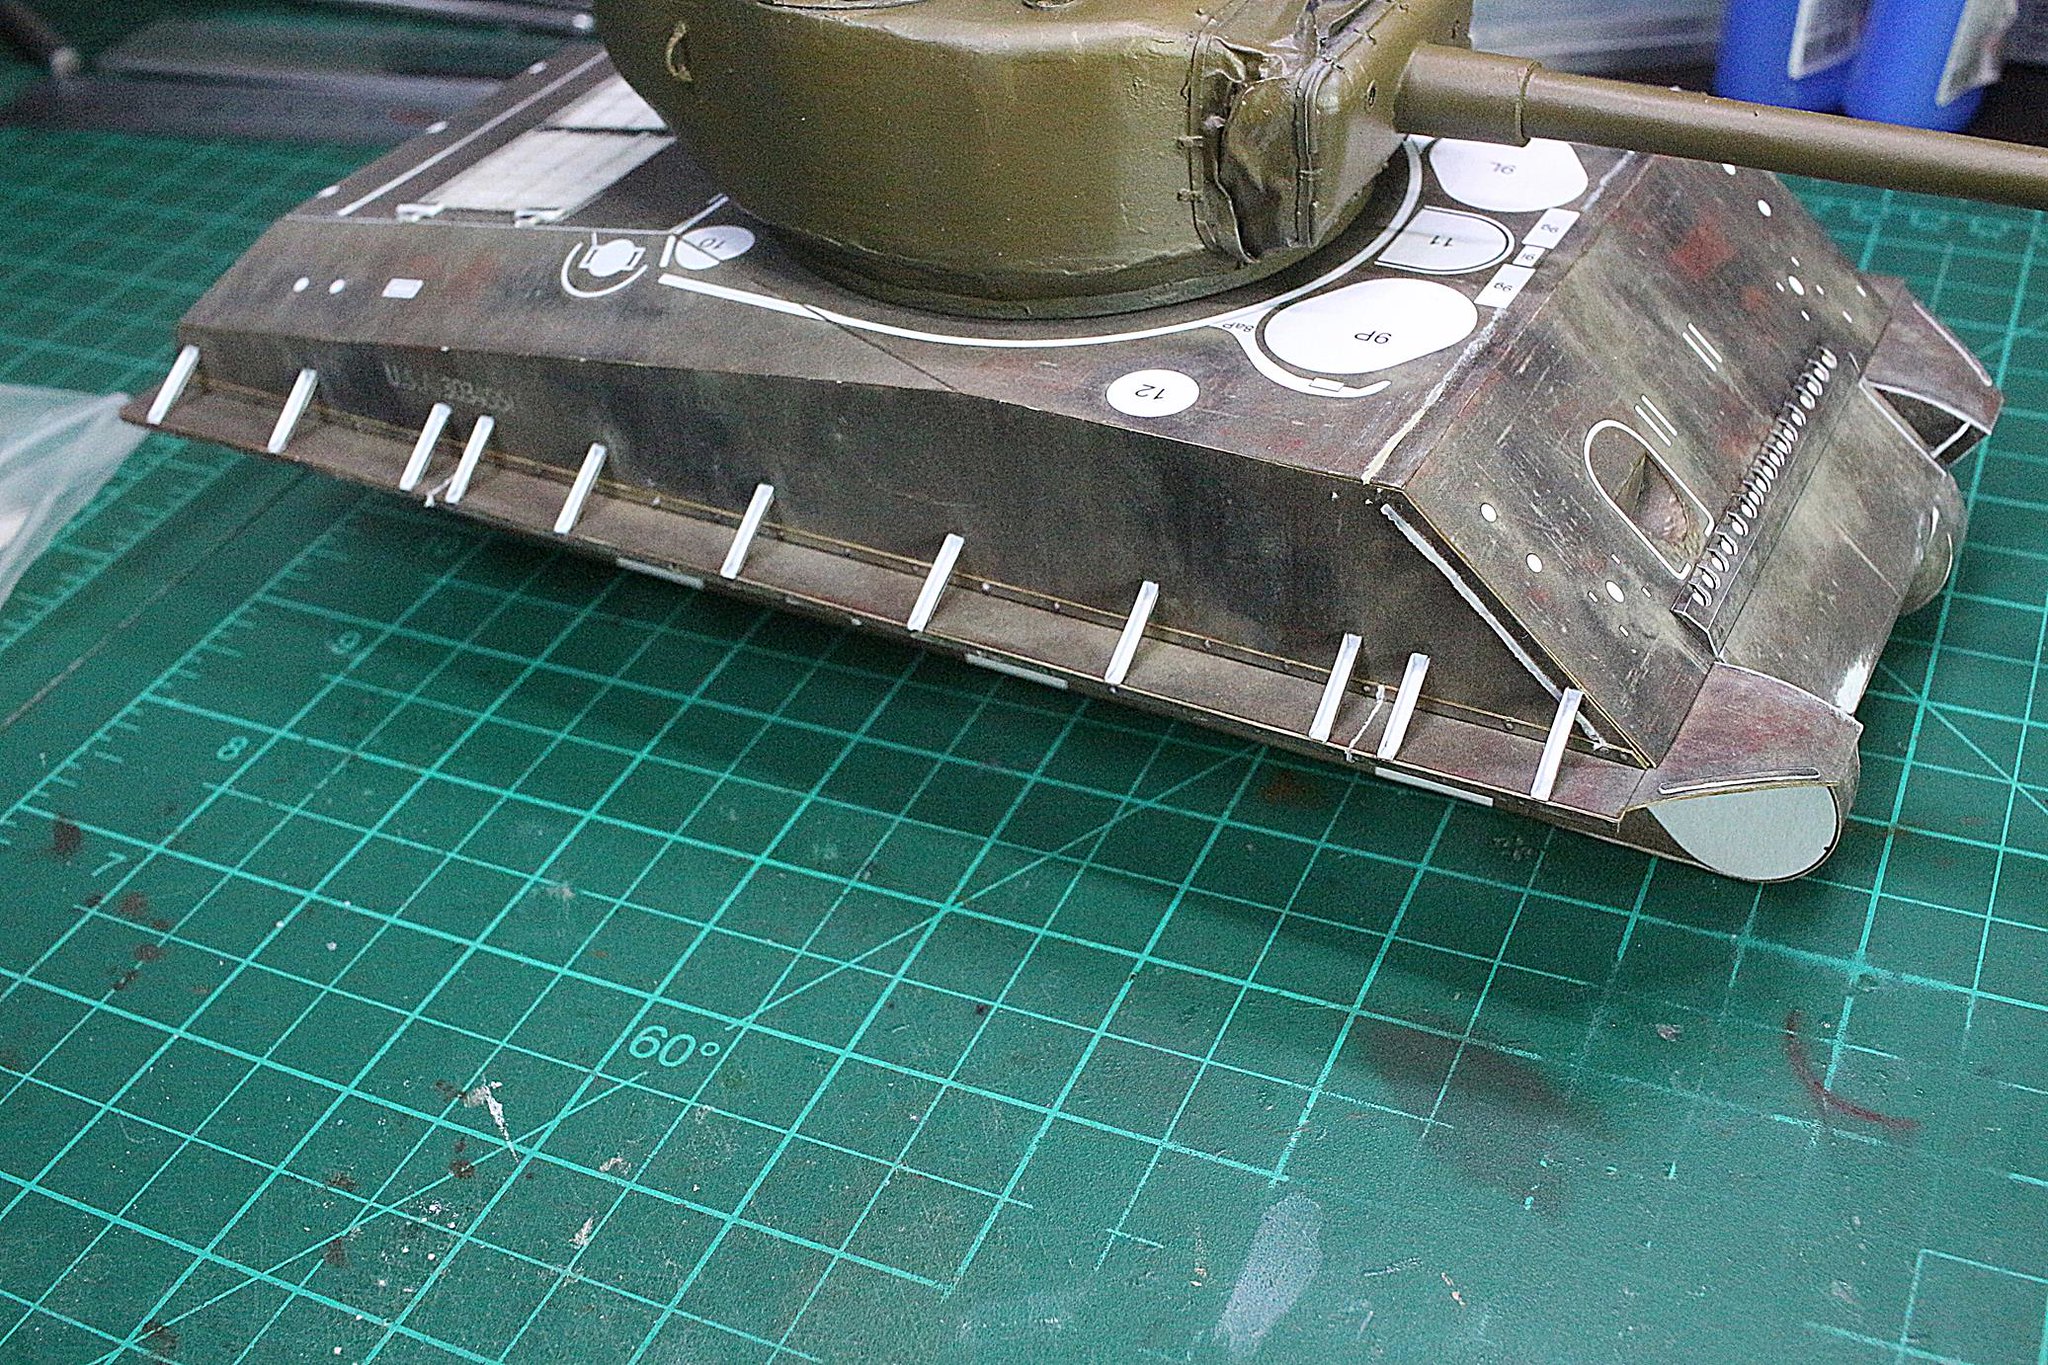 [url=https://flic.kr/p/2m6k7gc]  [url=https://flic.kr/p/2m6pS2b] 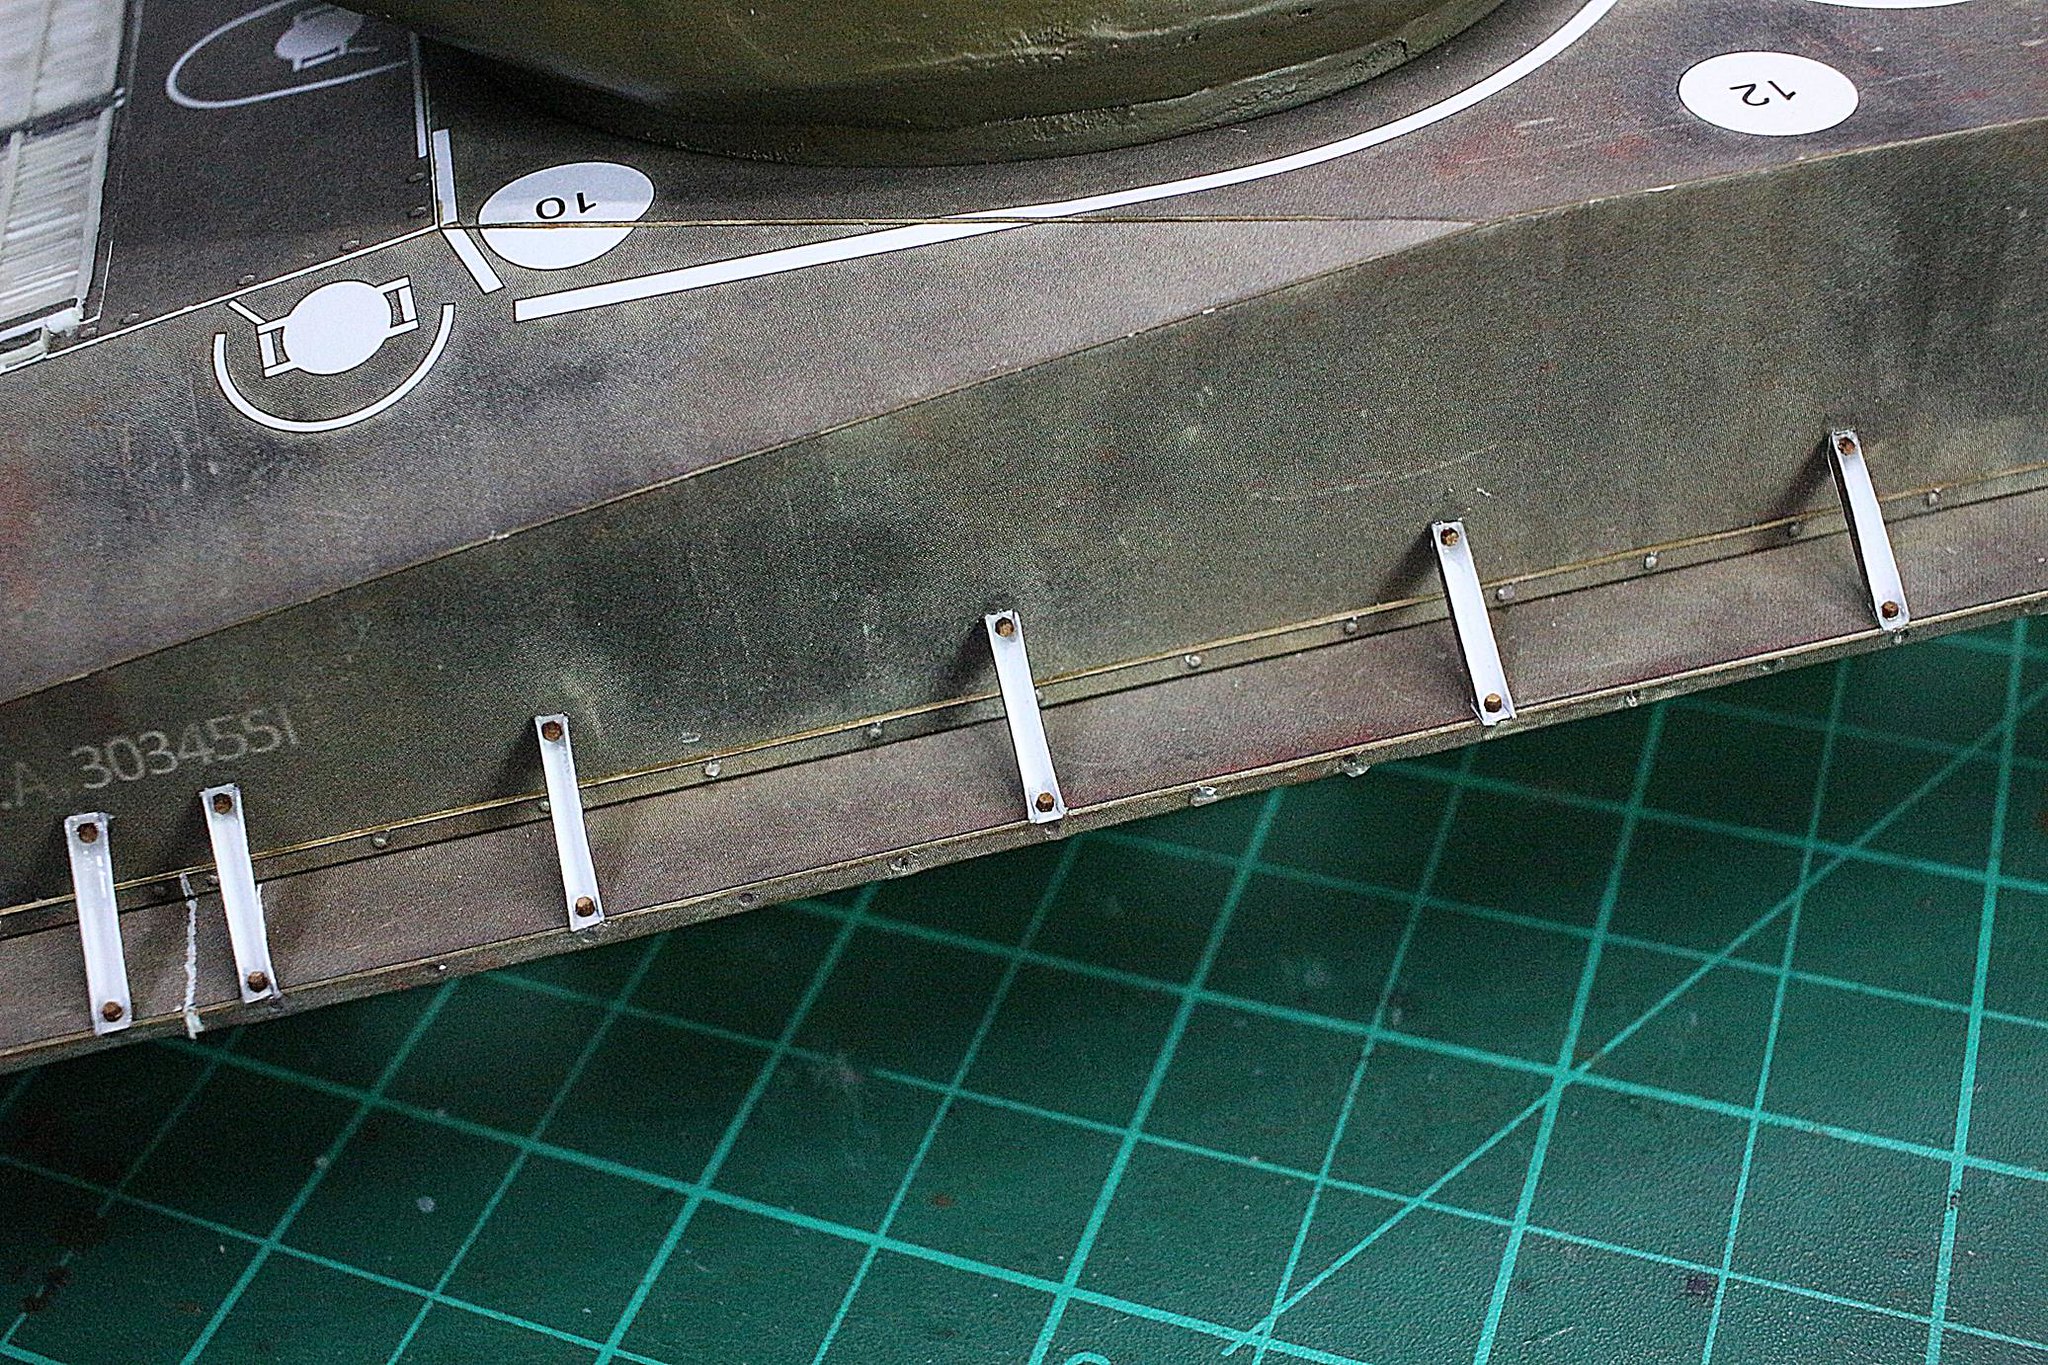 But in case of fender's rivet, I had to bring my after market laser cut. [url=https://flic.kr/p/2m6ubuh]  Hull hatch also got a bad detail. It just consisted with few vertical parts. But actual vehicle doesn't Yes. I had to modify again. [url=https://flic.kr/p/2m6oQtS]  I used 0.2mm paper again. Scale model's dimension was very helpful. [url=https://flic.kr/p/2m6sEhQ]  Hull's fixed periscope dimension also modified. [url=https://flic.kr/p/2m6k7aW]  [url=https://flic.kr/p/2m6sEhe]  [url=https://flic.kr/p/2m6oQqf]  Hull ventilator's missing frame added. Next time, I'll continue post with hull machine gun. Have a good day
Last edited by SinDiPaper; 06-22-2021 at 06:54 AM.
|
|
#13
06-22-2021, 06:50 AM
|
||||
|
||||
|
Outstanding work! Your additions to the turret have really raised this model to a whole new level of accuracy.
__________________
Regards, Don I don't always build models, but when I do... I prefer paper. Keep your scissors sharp, my friends.
|
|
#14
06-22-2021, 07:12 AM
|
|||
|
|||
|
Thanks for the nice information, southwestforests!
About M36, I believe it definitely different with sherman variations. Likewise M10 Wolverine(also M12) and M3 Lee, they just have a same chassis, but not positions. Thank you, rockpaperscissor! I am happy to hear that Those additions, was quite challenge to me, but I was really enjoyed it.
|
|
#15
06-23-2021, 06:33 AM
|
|||
|
|||
|
Part7: Hull Detailing
  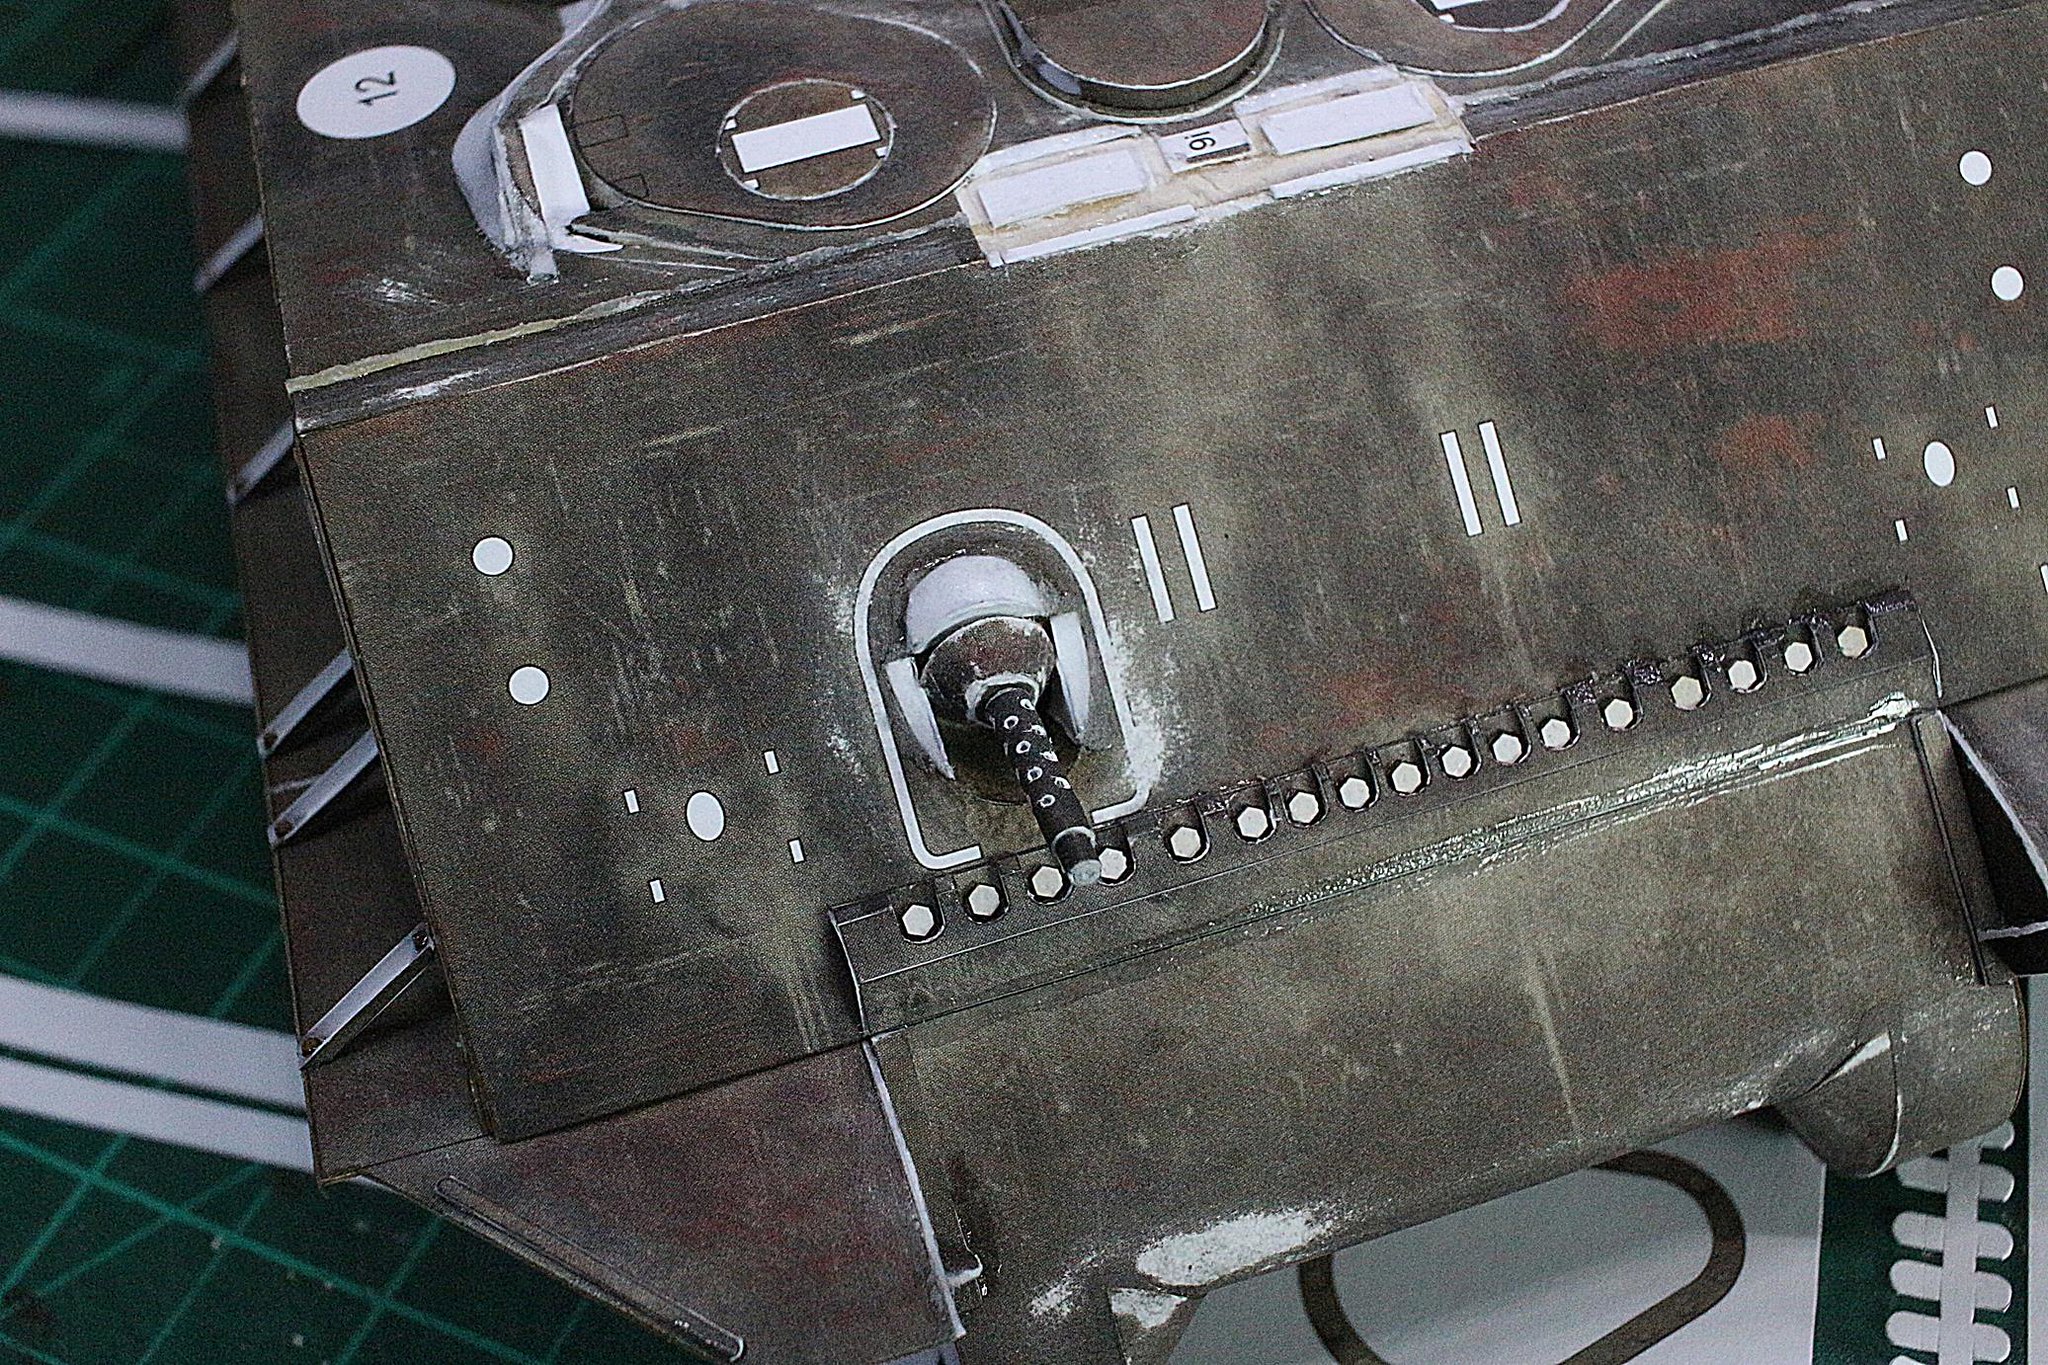 Now move on to the hull machine gun. First, I made hold on barrel. After mount it to hull, I realized that there is missing volume on machine gun mount. So I added It.  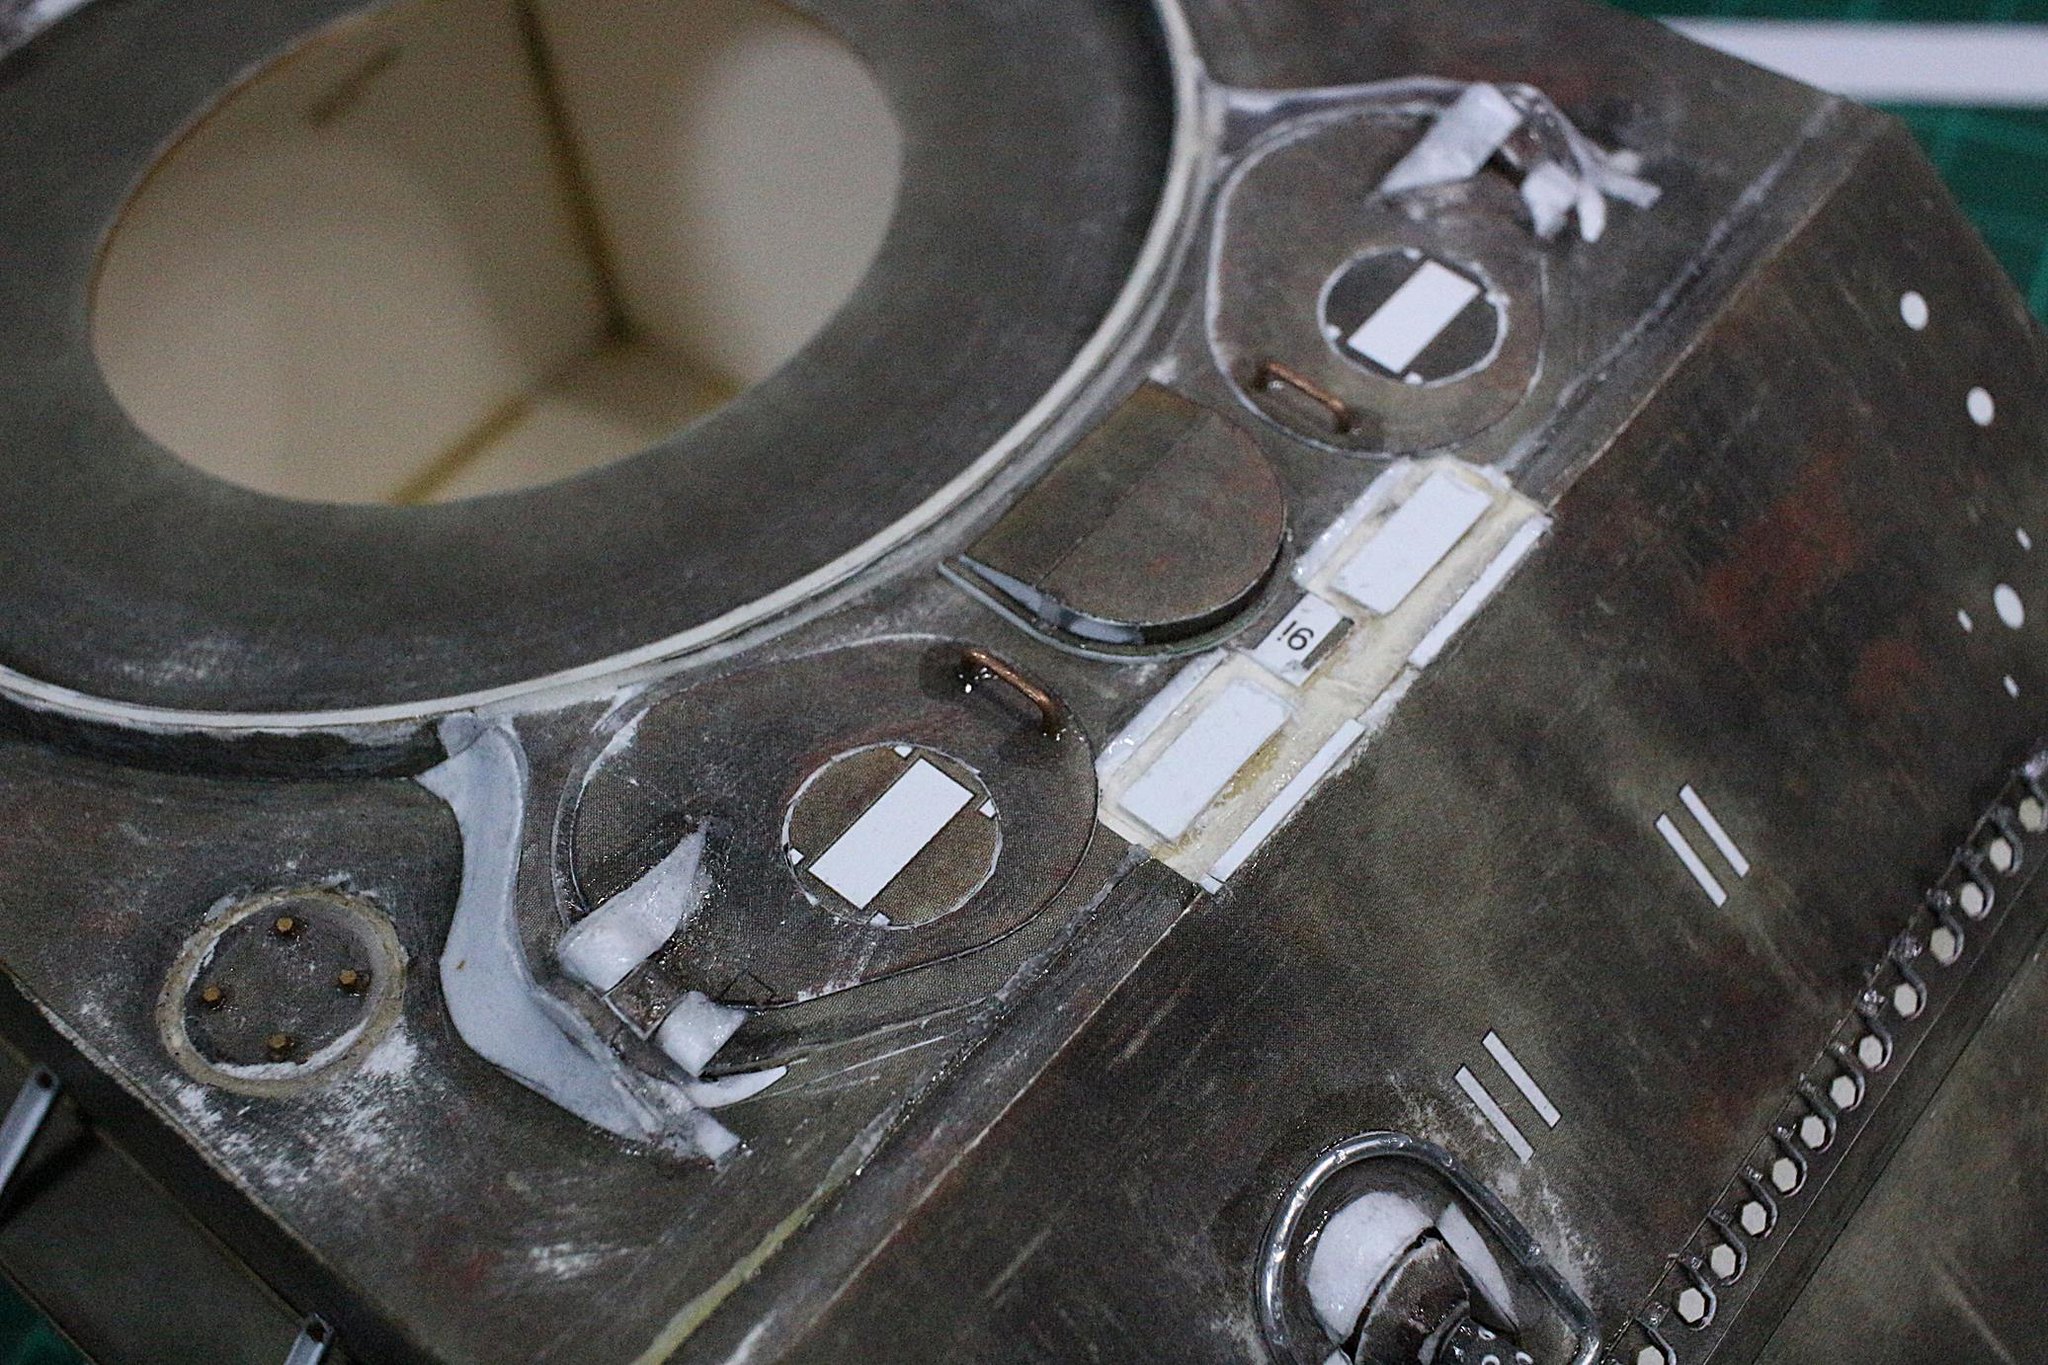 And added hull hatch's rest details.  Shape of those lids exactly wrong. So I applied putty later. 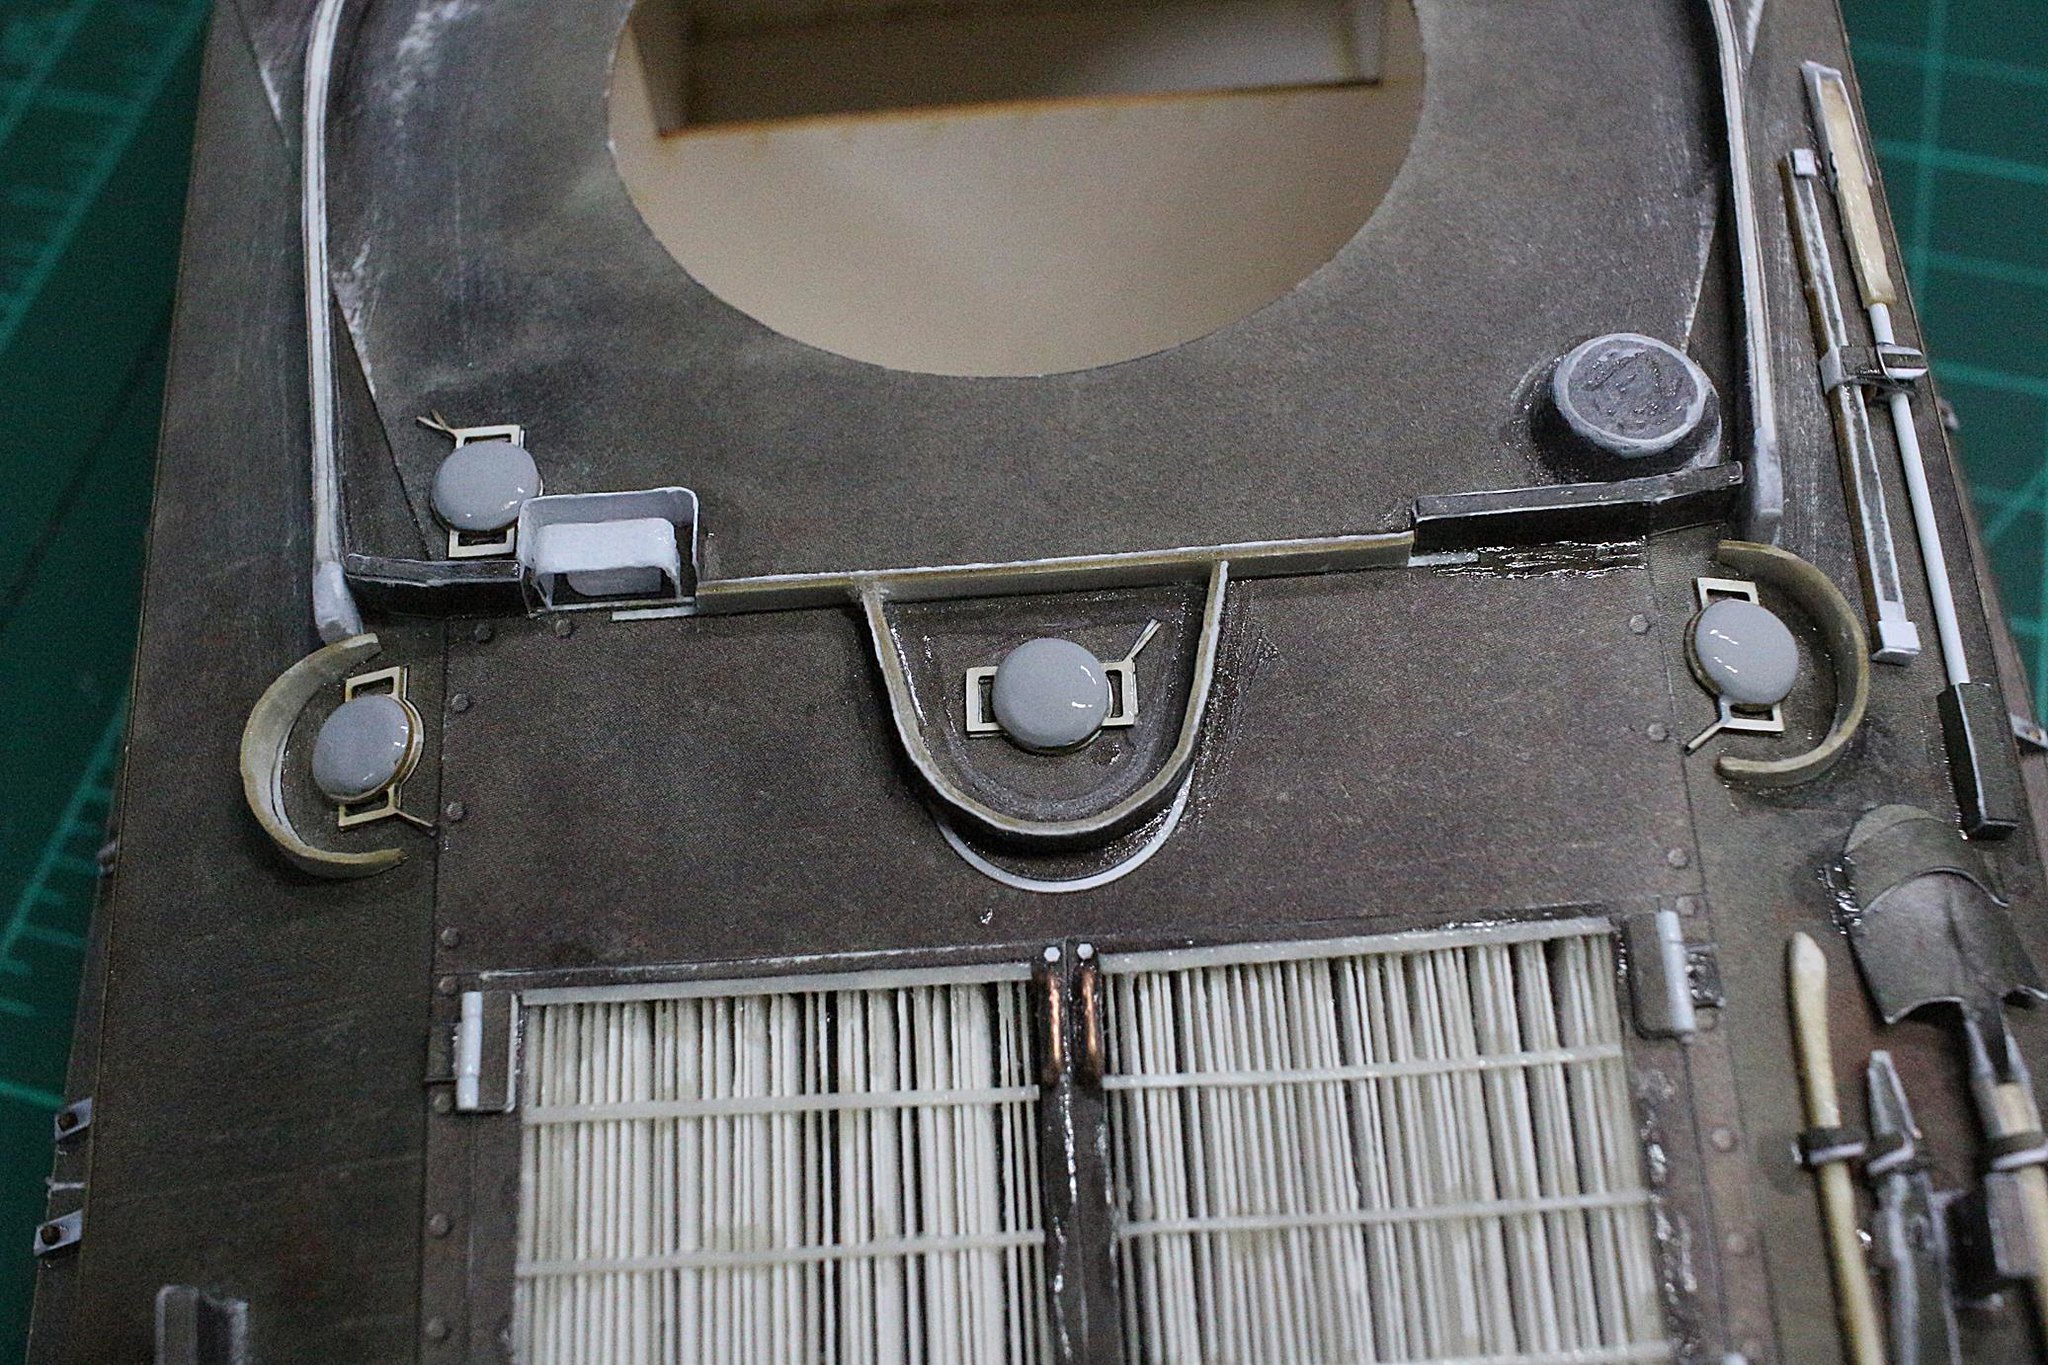 Like this.  Modified tools. I referred to scale model.  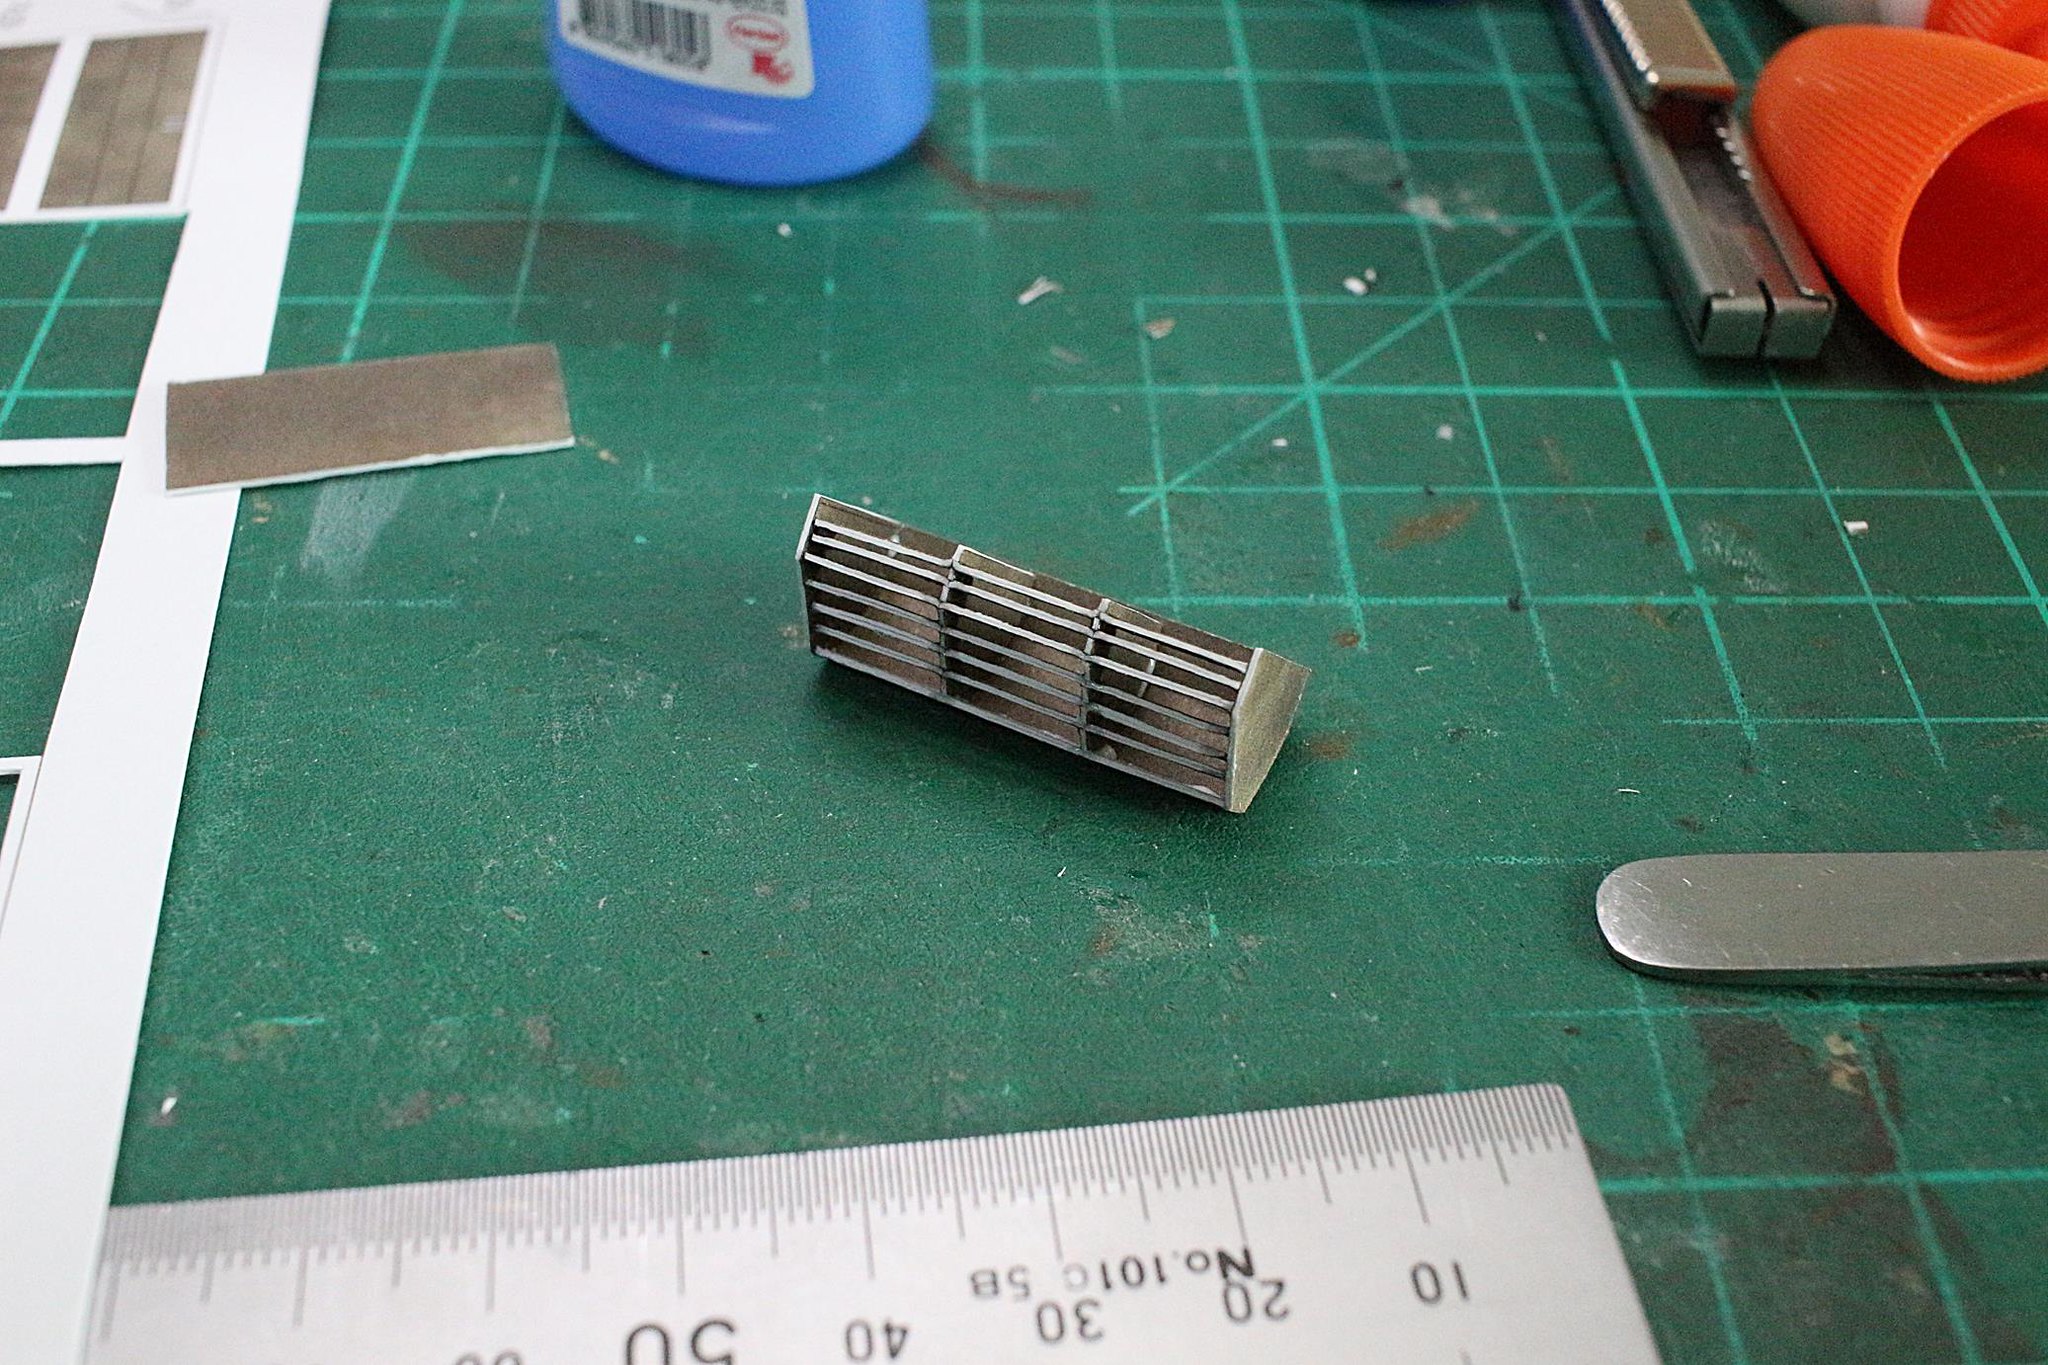  Thankfully, air filter's detail wasn't bad. I just added hinges only.   In case of storage rack, I need to modify its little details. Building gun cleaning rod was hardest work in this part.   Now storage rack building finished! Next time, I'll show you main gun travel lock building first. Have a good day
|
| Google Adsense |
|
#16
06-24-2021, 07:07 AM
|
|||
|
|||
|
Part8: Hull Front
  [/url] [/url]It is time to build Main gun travel lock. I followed scale model's detail again, which has two-piece lock. 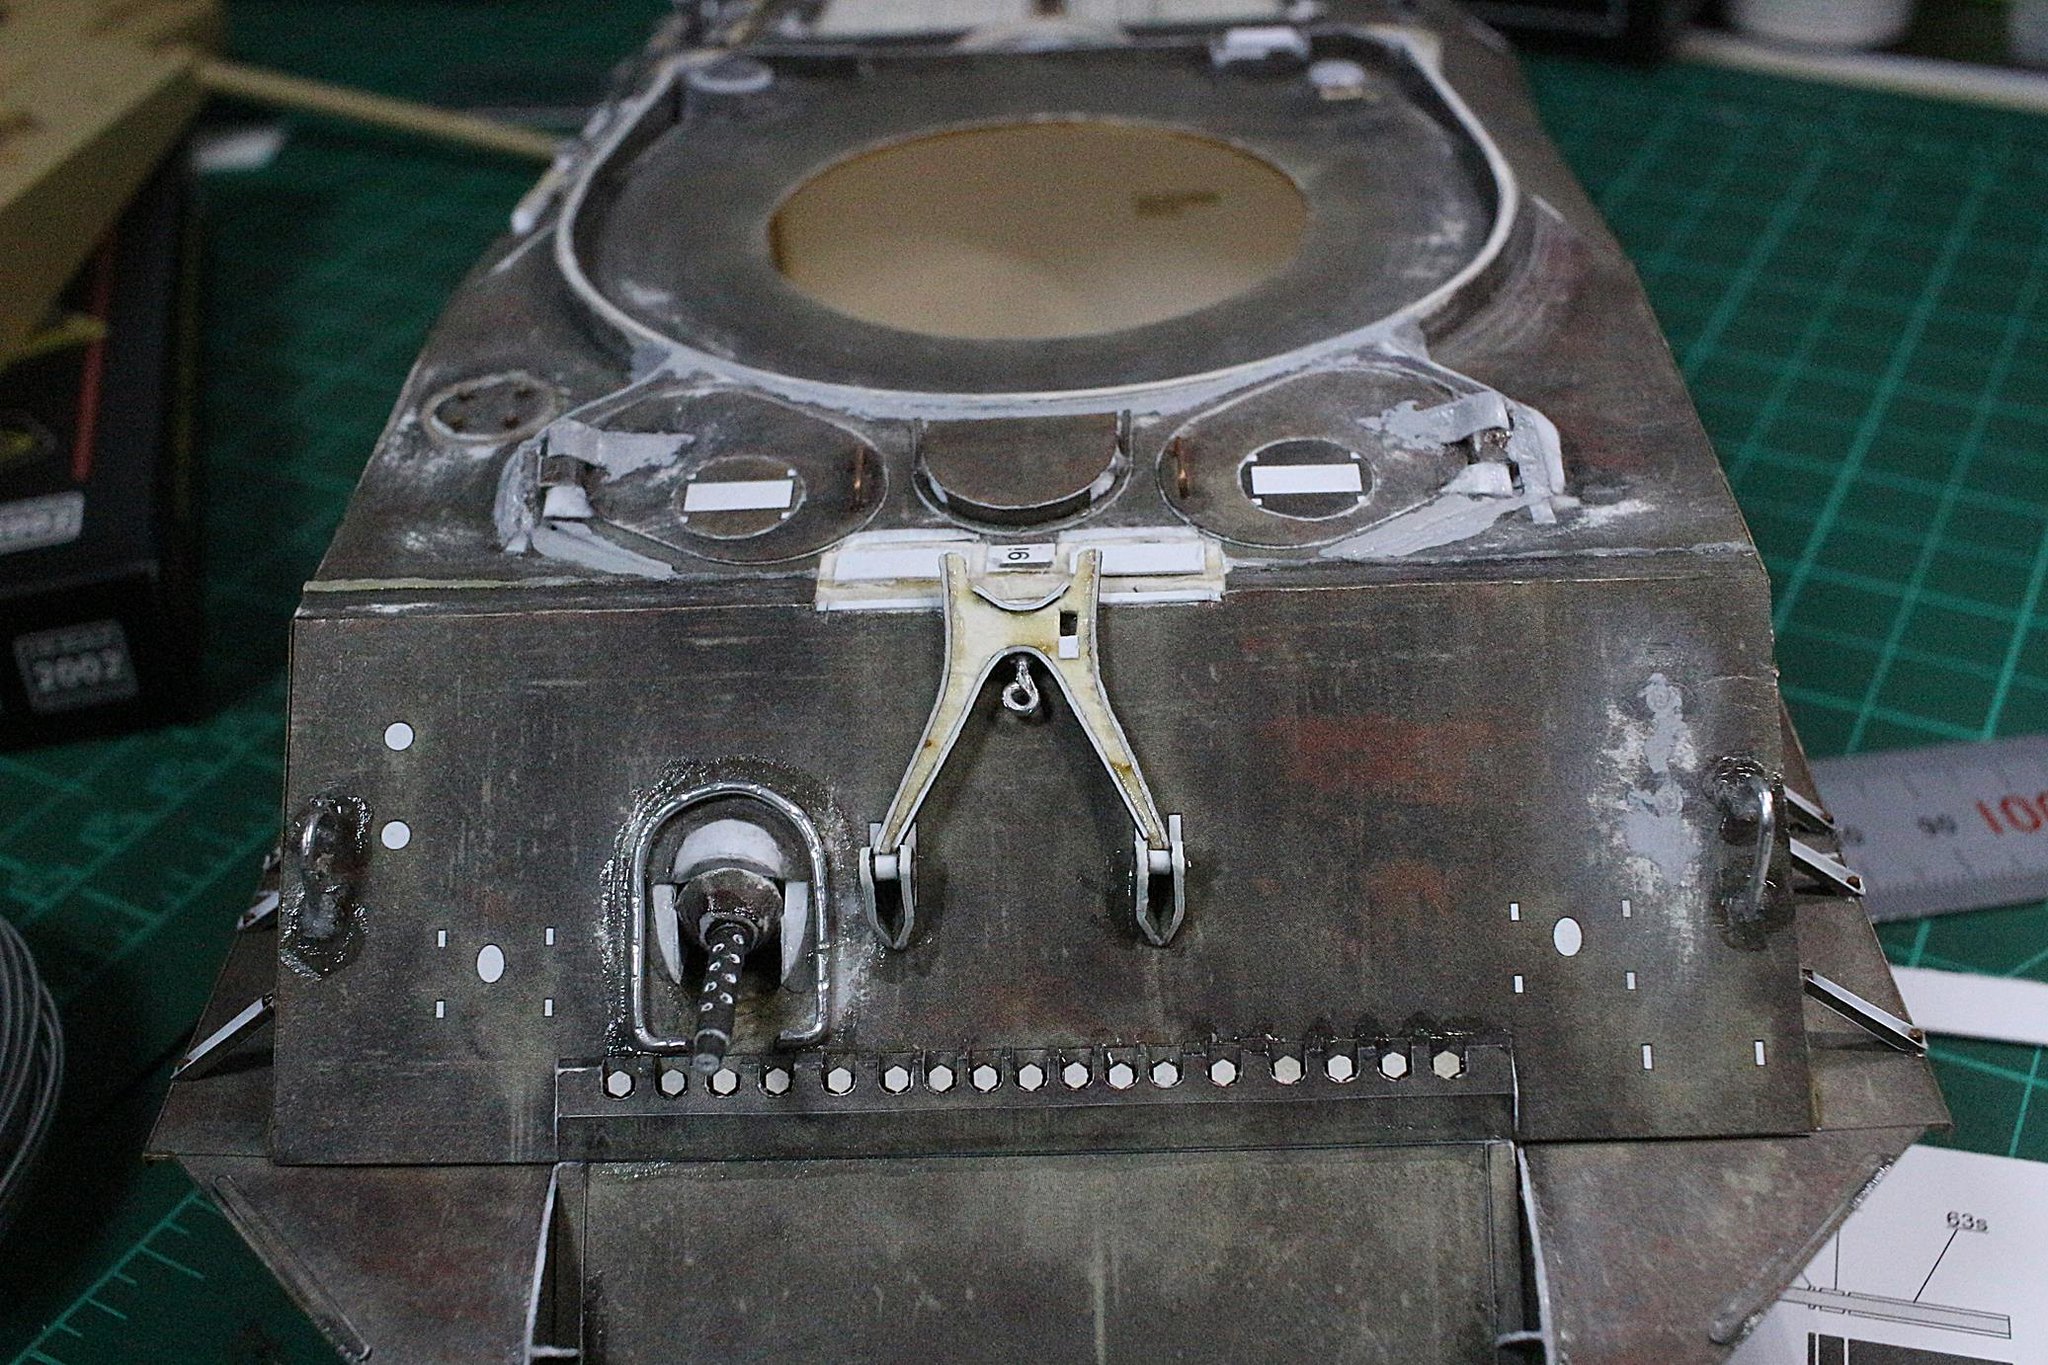 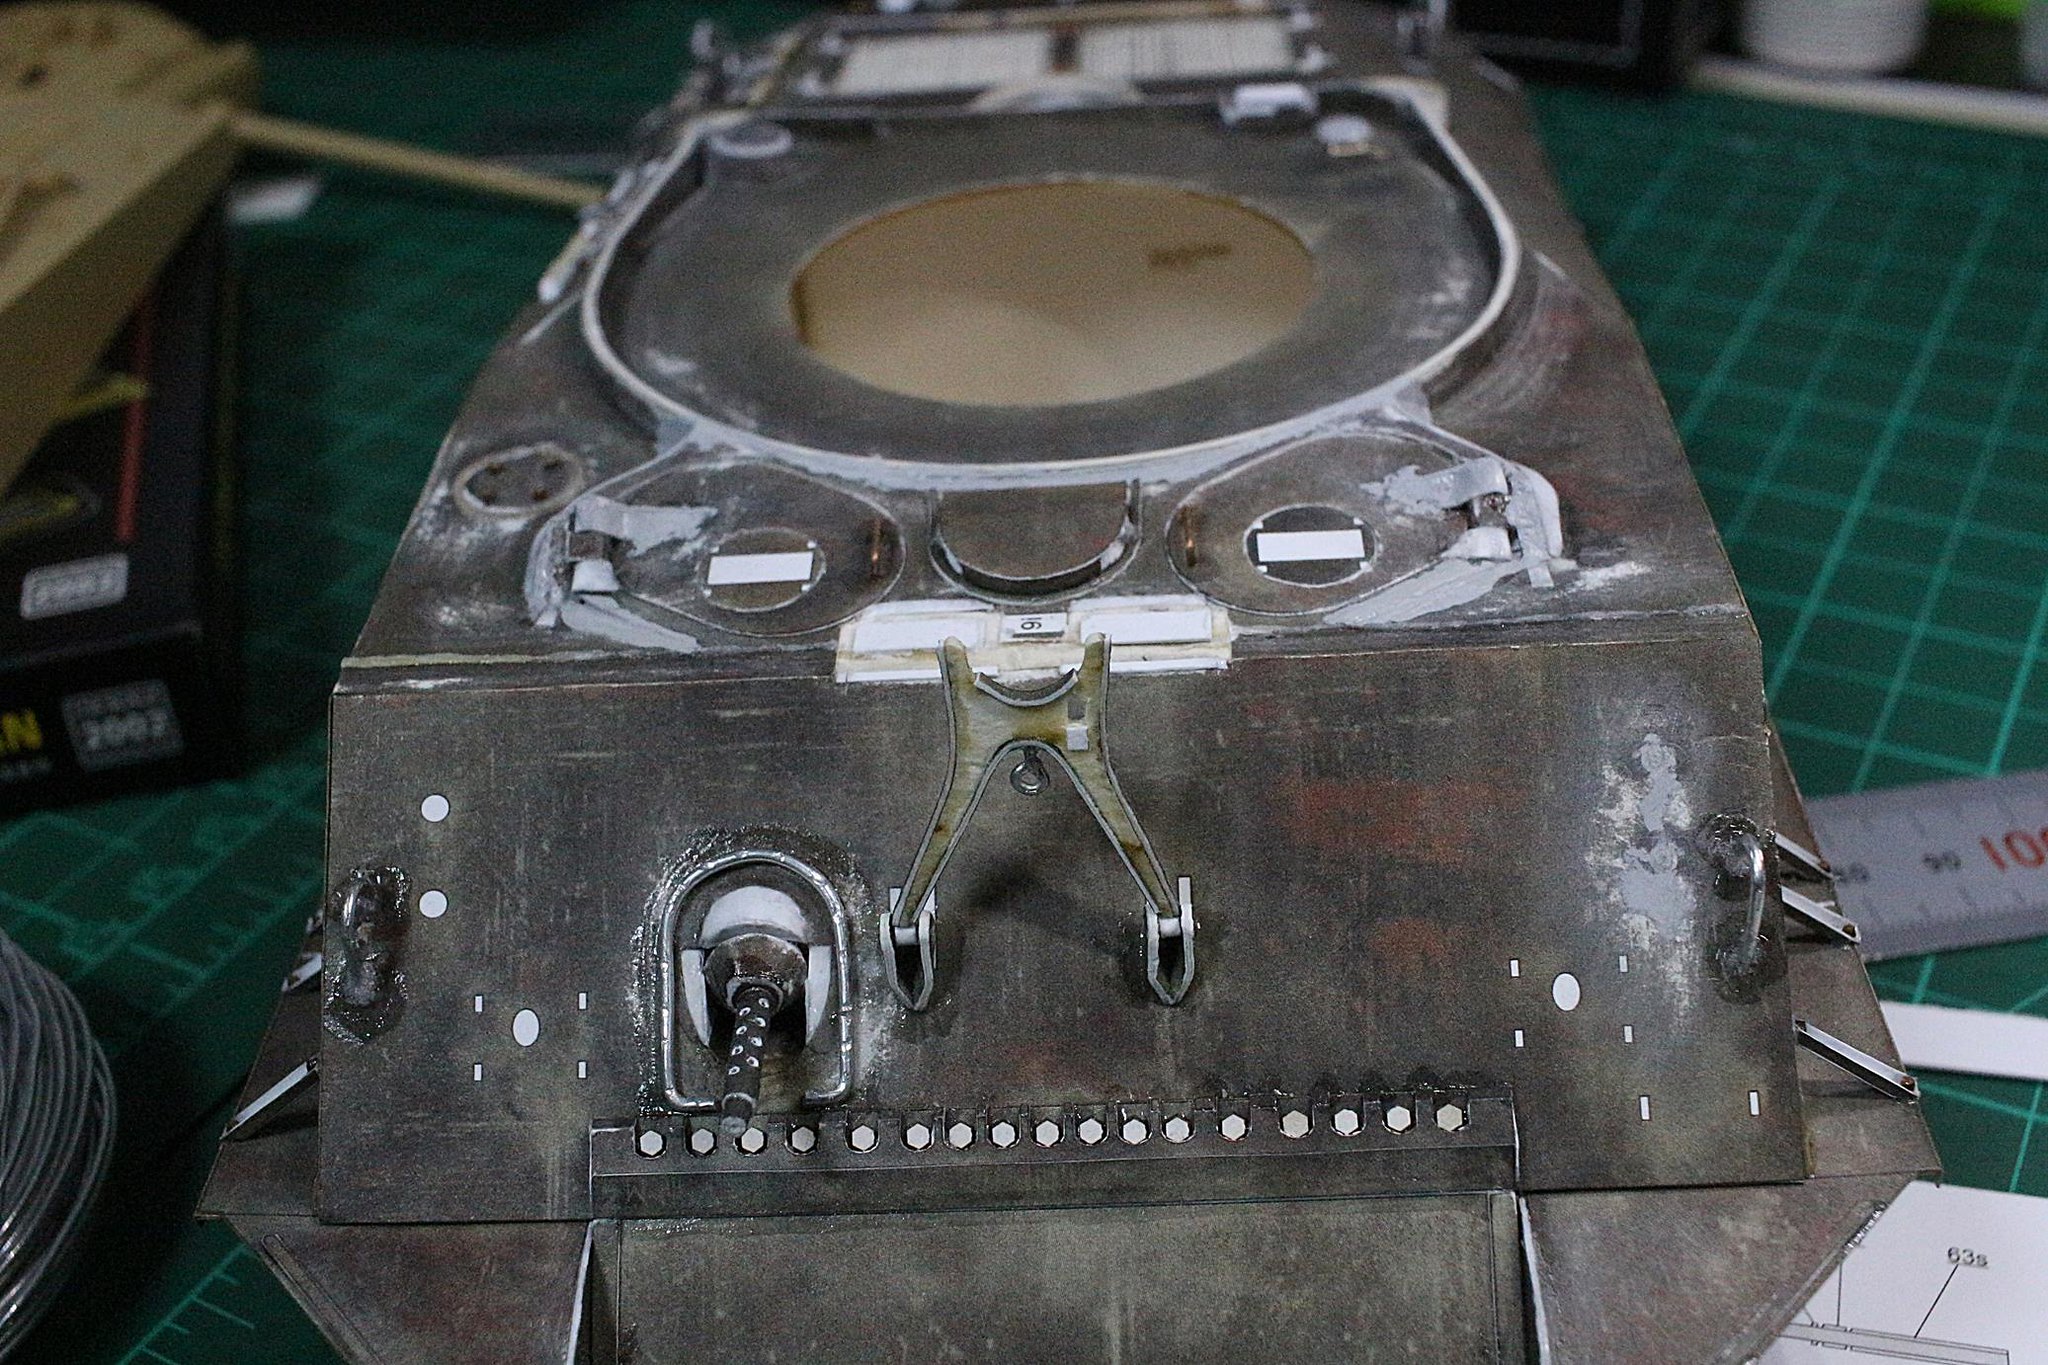 I made paper tube and pierce it with brass wire. So It is movable.  Both lock completed. I had to extend its base to look better. 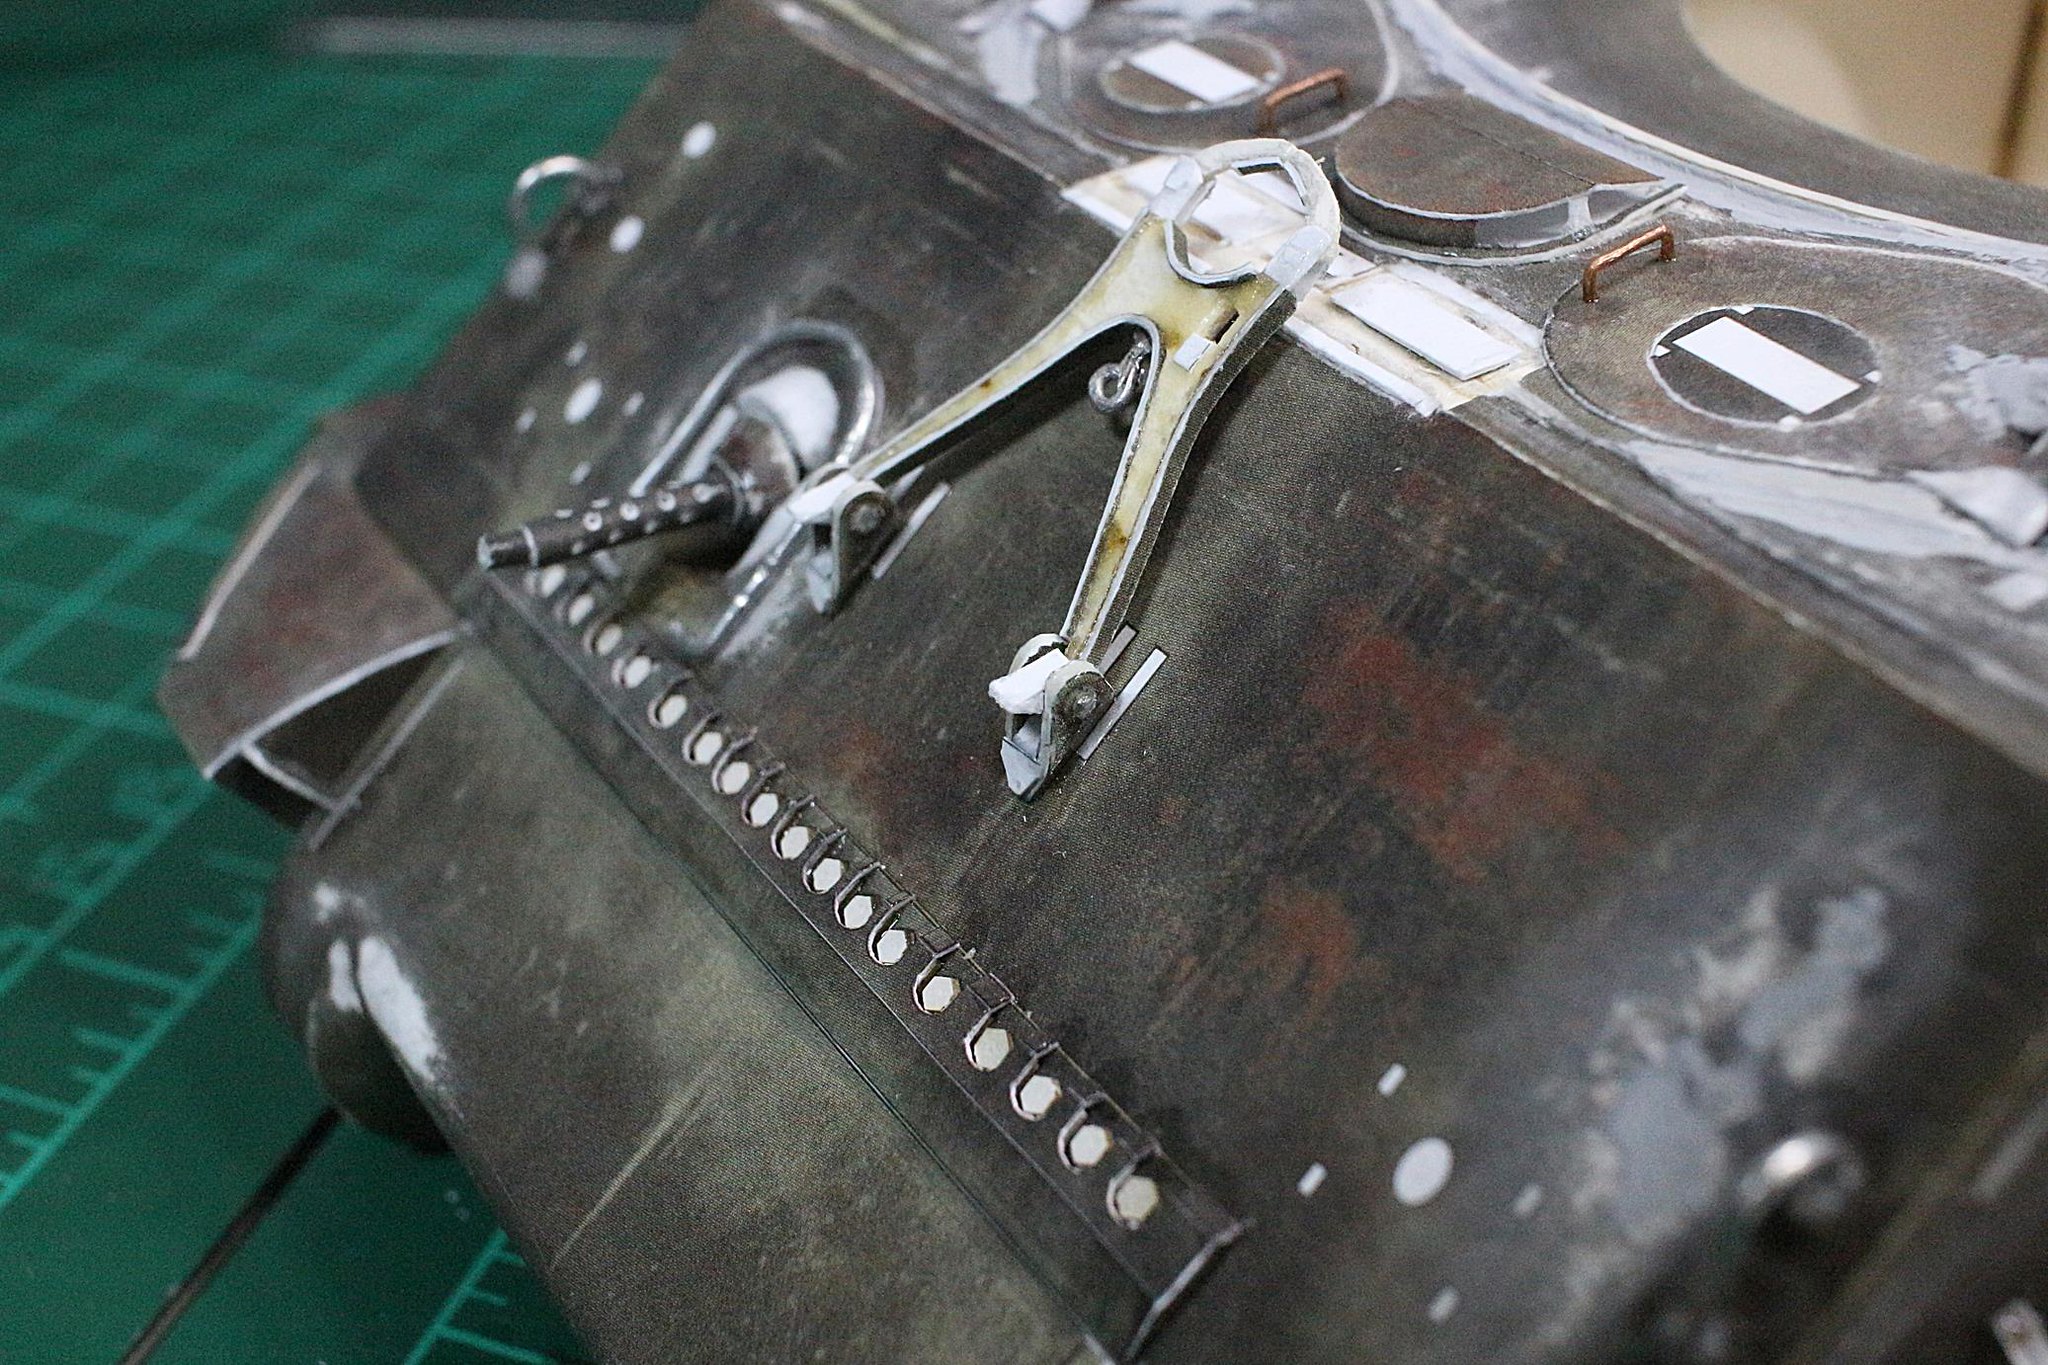 This stop structure actually works well. If this structure doesn't exist, lock tilted too much.  This structure doesn't exist in print, so I made it.  Main gun travel lock completed. But I realized that I build wrong type soon. Many of post war sherman have on-piece type travel lock.  So I fixed it later... You can see other works on front. Such as periscope guards, light with their guards(with plug).....  Head light building was also though. I don't like original print's head light. So I draw it from halinski M4A4 VC's reserved part on this model's color reserved first.  in case of its base, I draw it from wak's Sherman III on copy paper. How lucky that I have those models!  Thankfully, original print's horn wasn't bad. I just added megaphone shape.  Periscope cover doesn't exit. I draw it from halinski's one again.  Finally, I added each guard. Sure, I draw it from halinski's one.  I brought some toothpick and chain to build head light plug.  Done.  This towing lug wasn't bad. I just changed its thickness.  Oh, I almost forgot this wire. 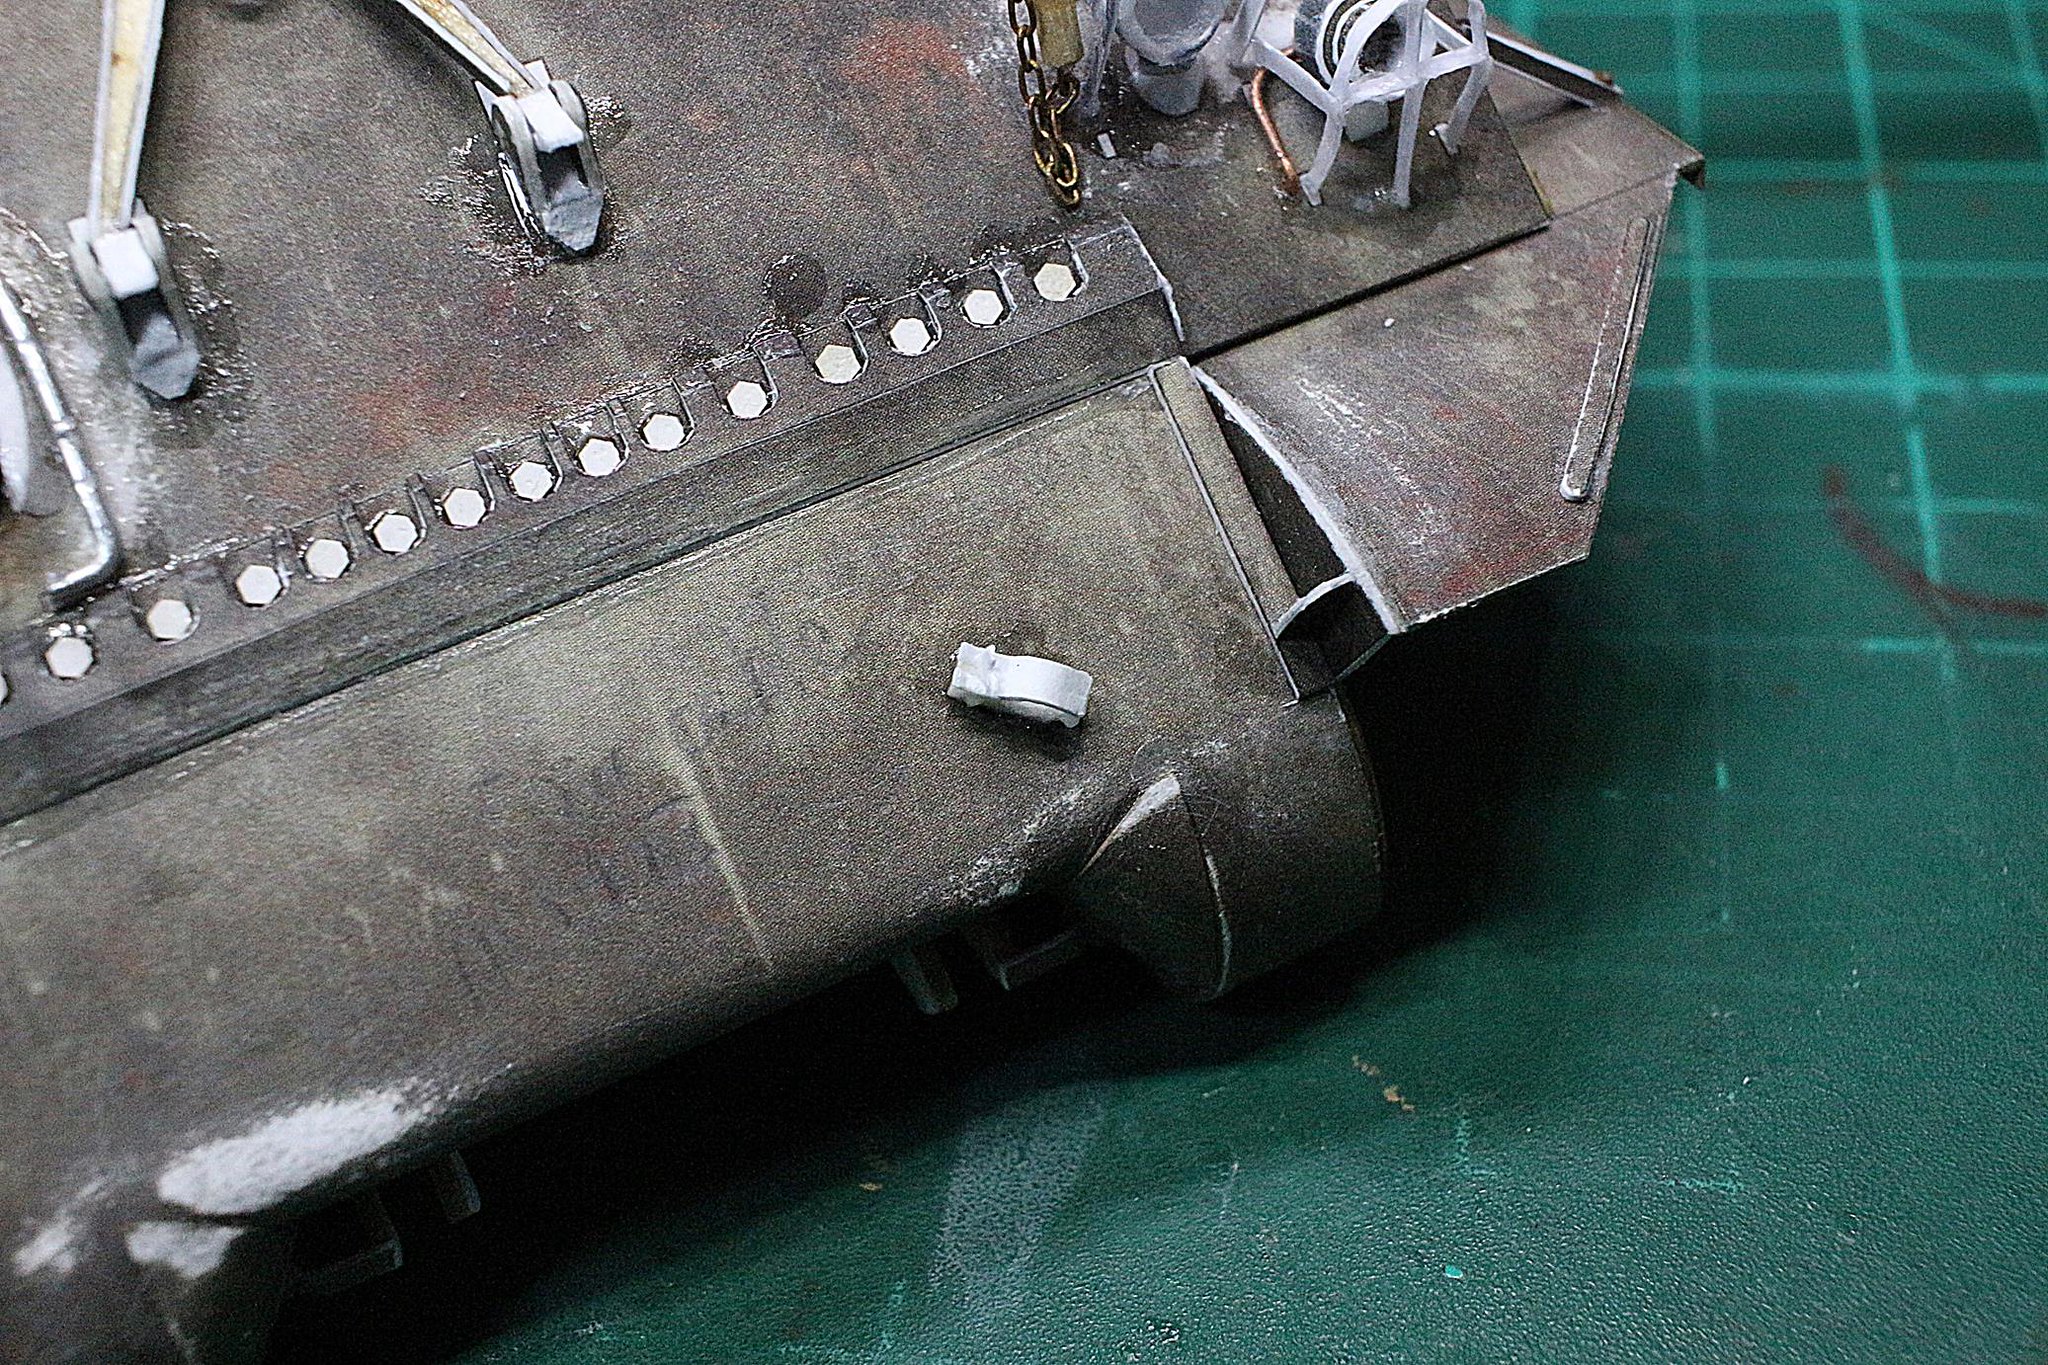 I referred scale model's dimension to build this towing cable mount. Alright, hull front is done. Next time, I'll show you back side(maybe upper hull) building. Have a good day
|
|
#18
06-25-2021, 07:06 AM
|
|||
|
|||
|
Part9: Upper hull
Thank you rifleman
I'm glad to hear that.  Post war Shermans usually have torsion hinges on engine deck for easy to open. So, using toothpick and 1.0mm of plastic rod, I made this structure. After that, I sprayed GSI's surfacer.    This is one of favorite part when I'm painting model. Because it looks like rendered 3D model :D  Well, this lid looks better than original model, but detail of its hinge still bad. Maybe I should draw it. 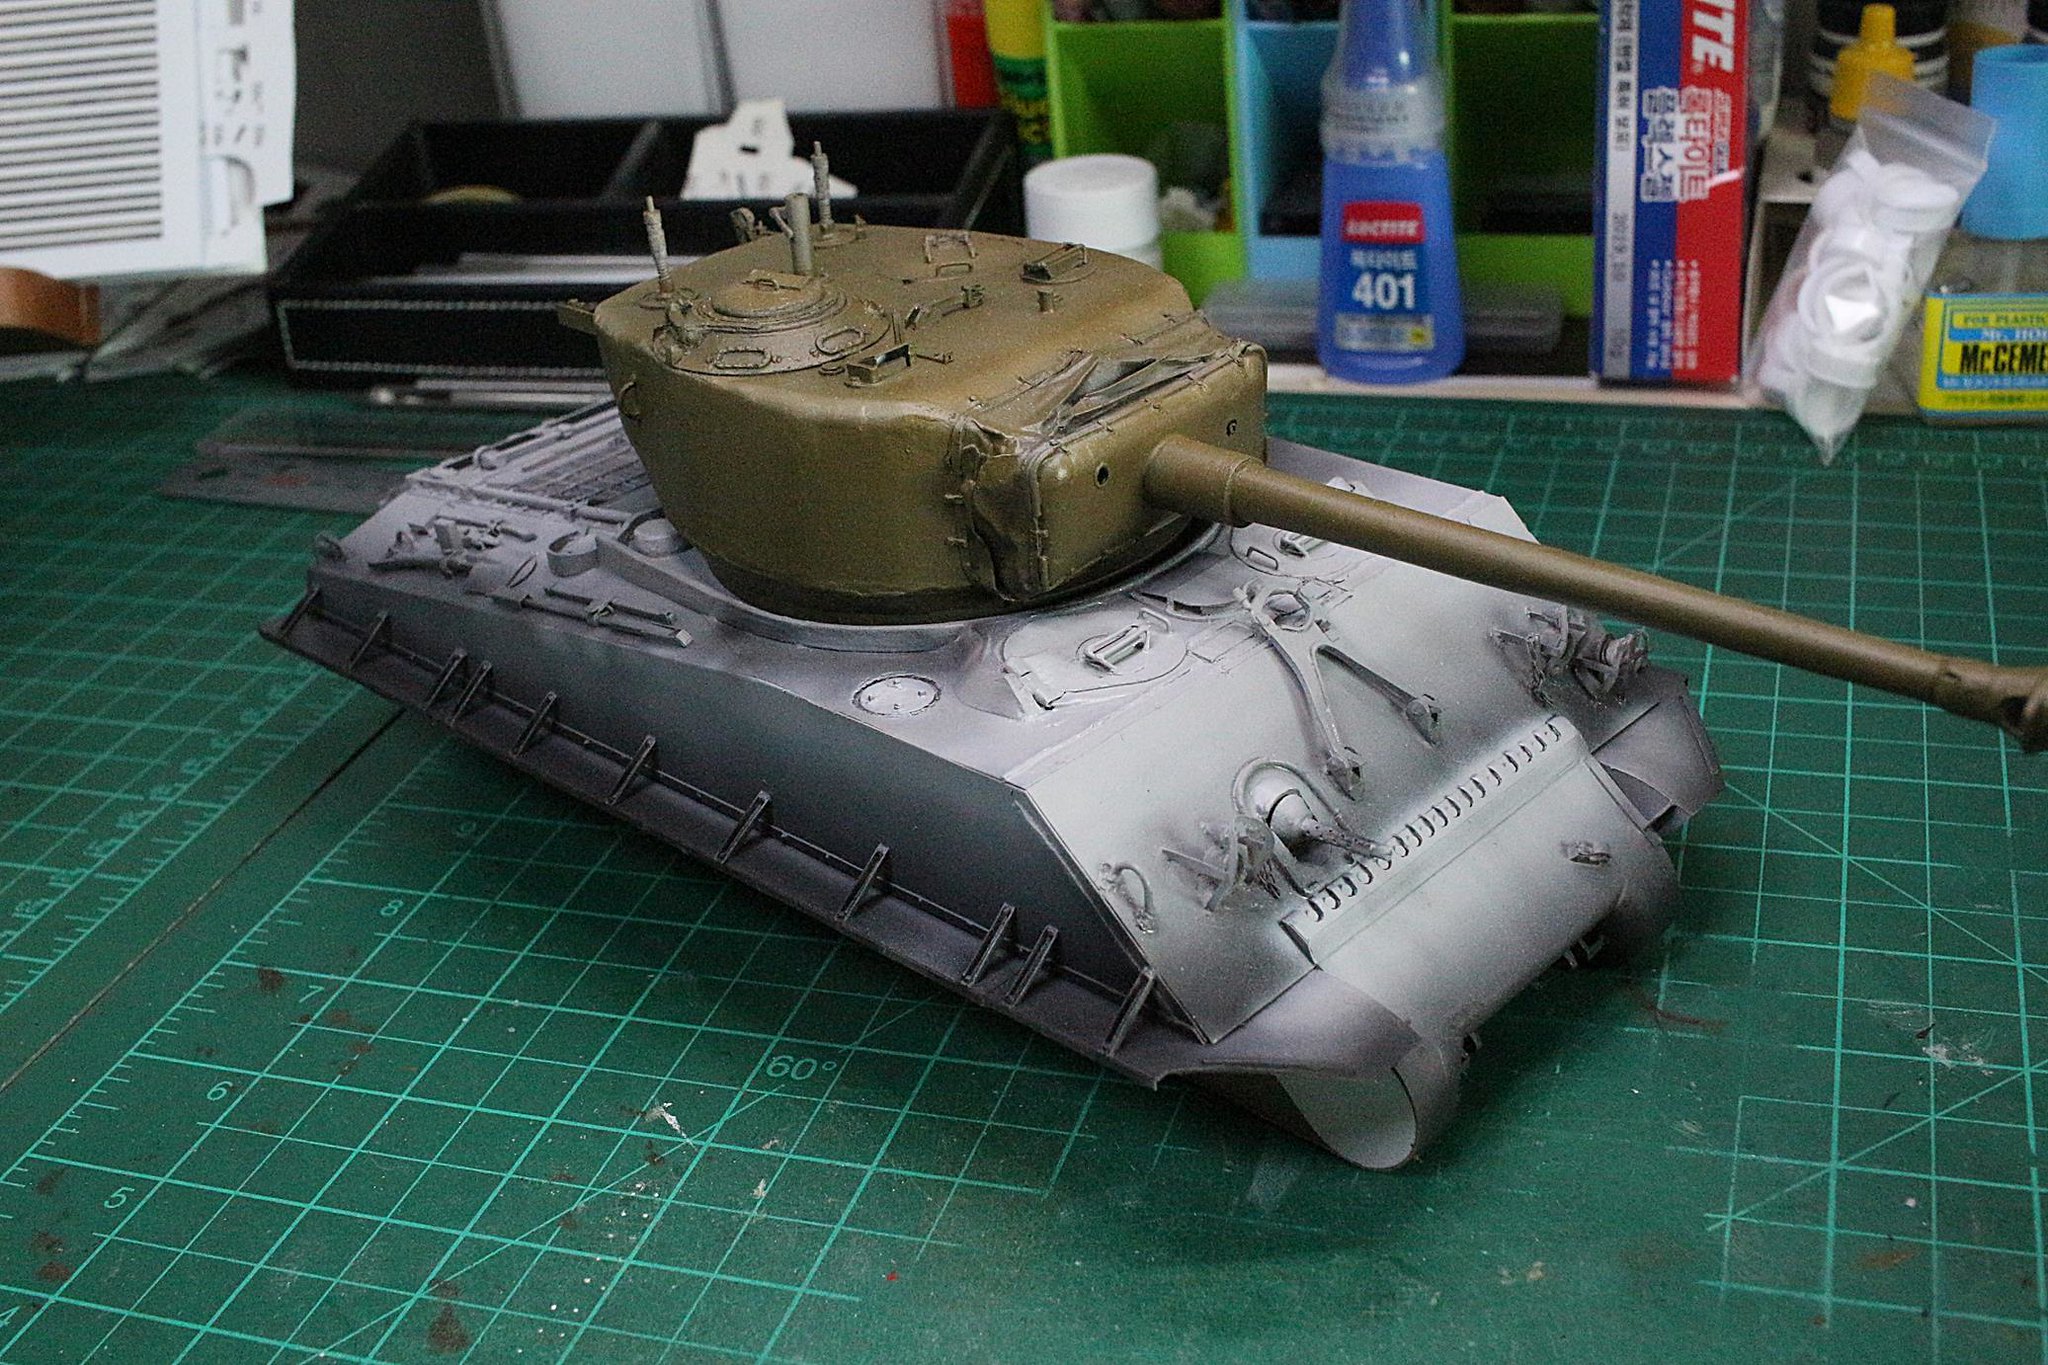  [ [Anyway, after I surfaced it, I sprayed it as greyish,   and I pre-weathered it just like the turret.   I used vallejo's flat red on its front. Well, I looks not bad to me. It is time to paint devil face!  At first, I masked frontal armor using paper that printed its face. (I use one of video game user's sherman skin)  And I want it painted black, so I did.   It's done. 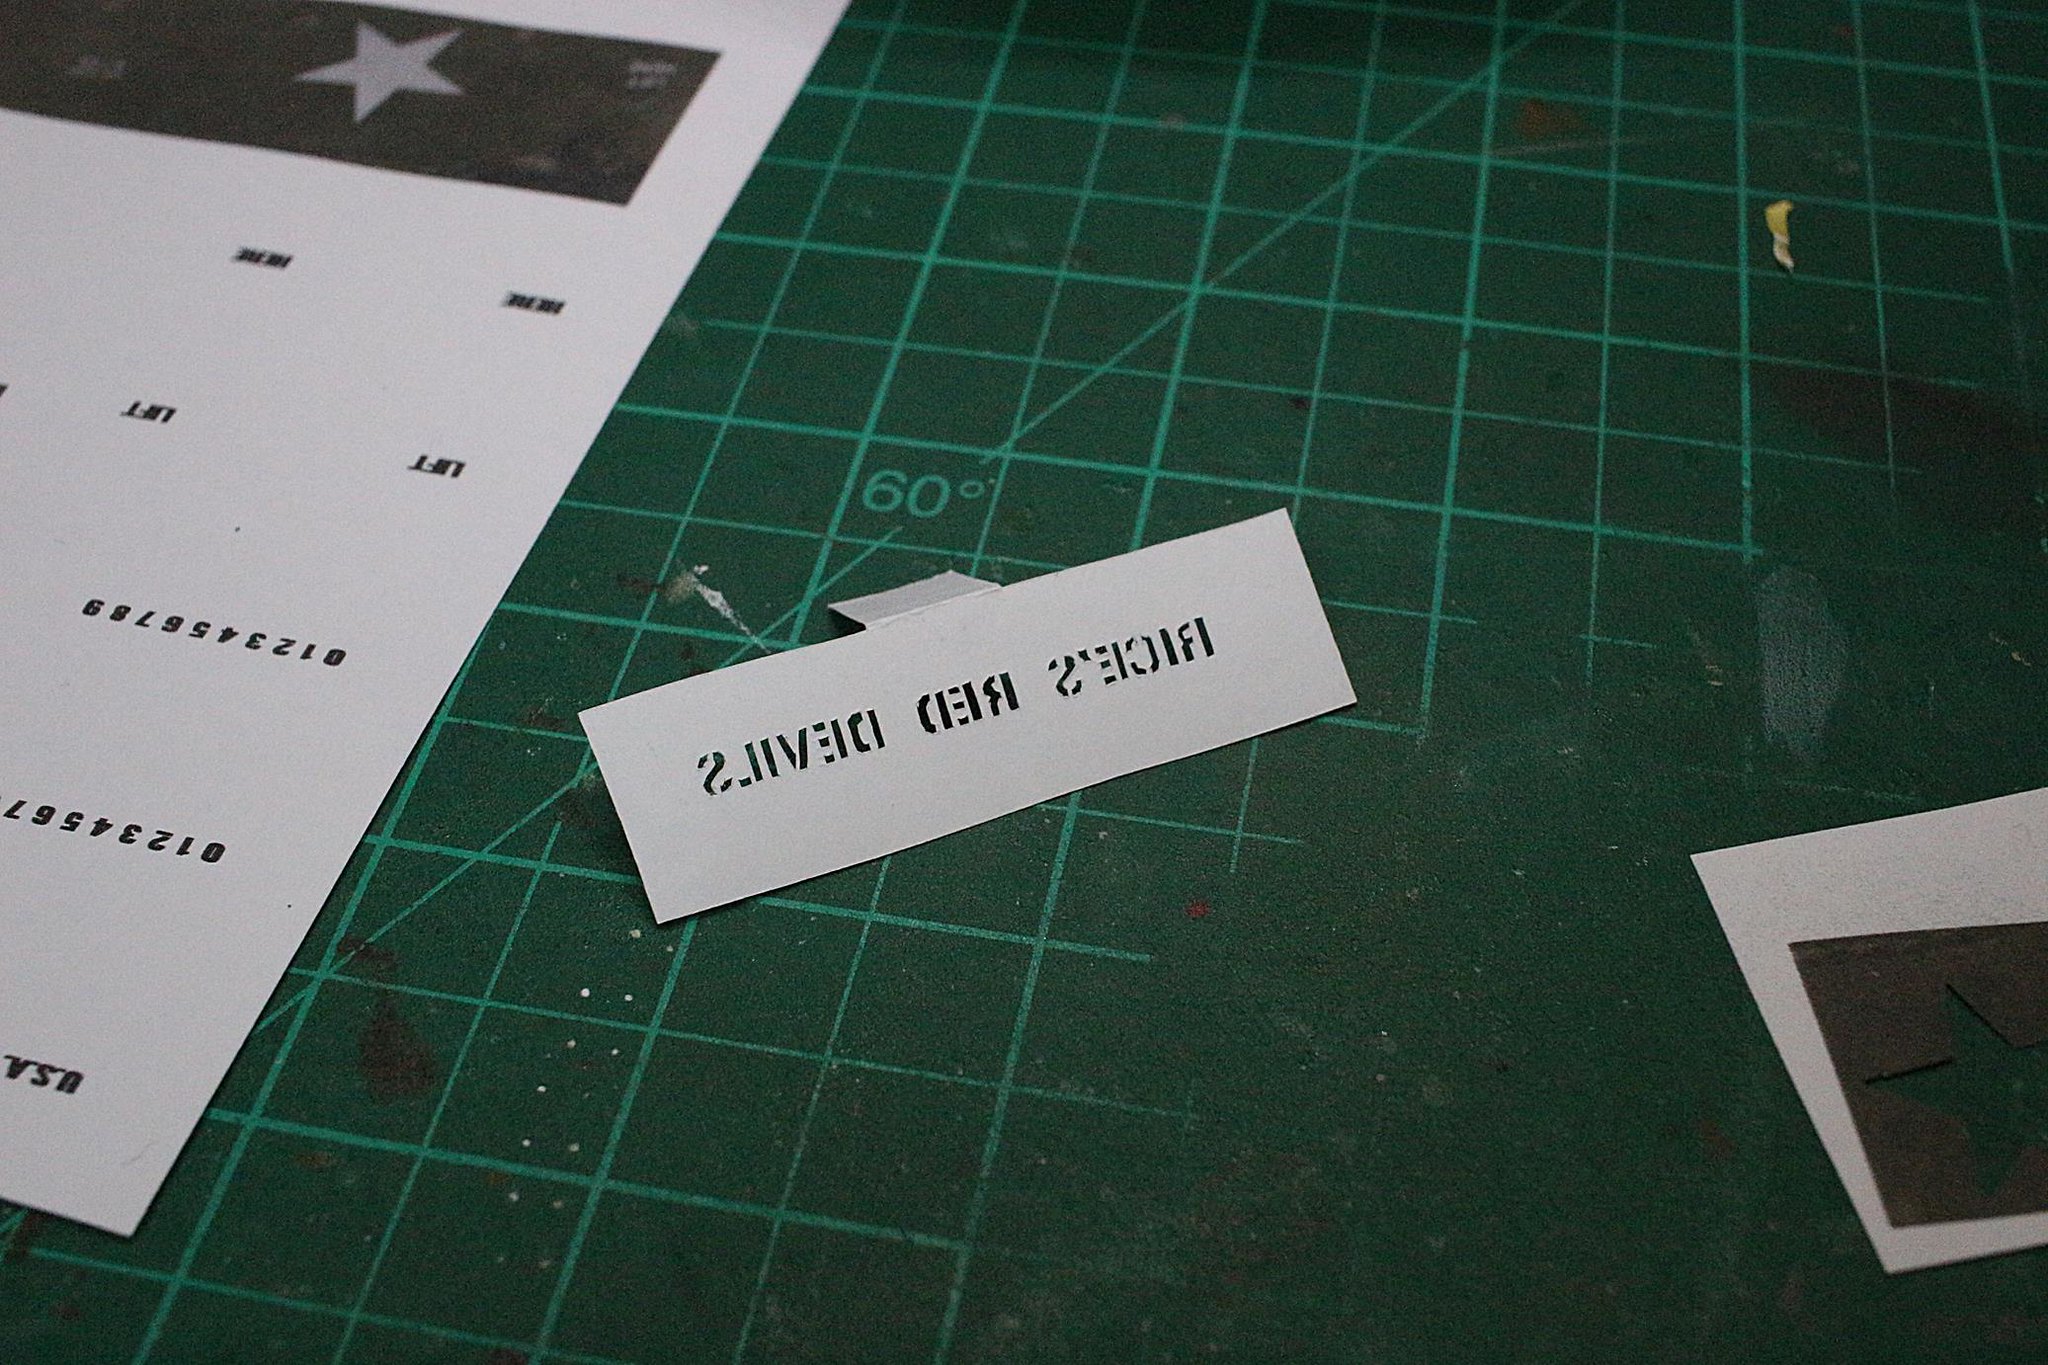 Next, I typed texts, printed and cut it.  This is it.  Painted periscope as transparent green. (I mixed blue and yellow) We almost there. Next time, I'll show you building suspensions. Have a good day
|
|
#20
06-26-2021, 06:33 AM
|
|||
|
|||
|
Part10: Wheels
Thank you so much, rifleman :D
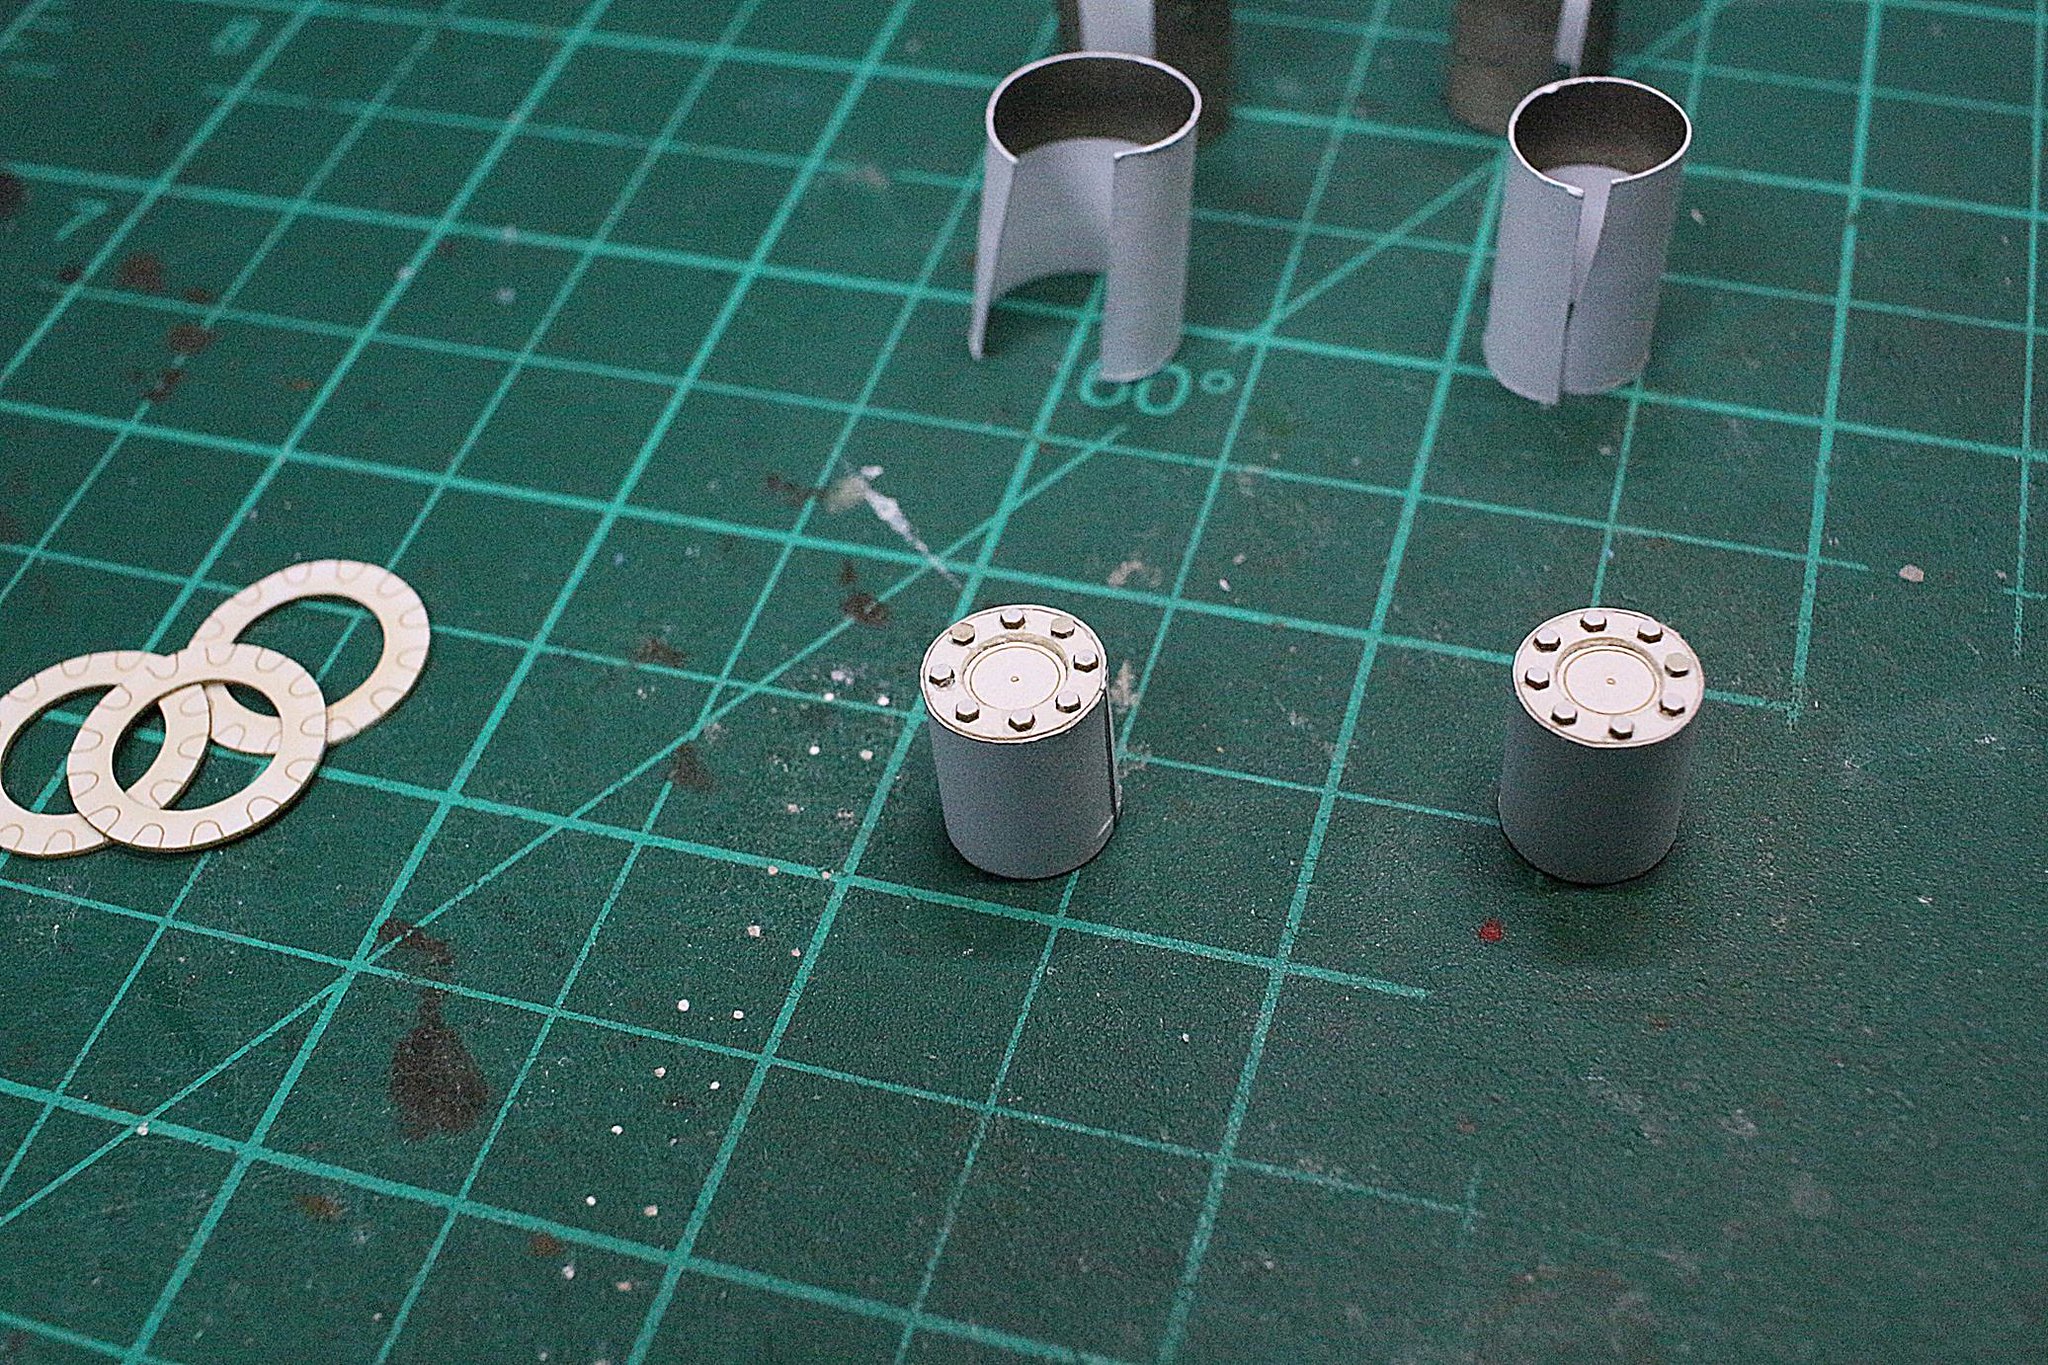   Now it is time to build wheels. At first, I build sprocket wheel.  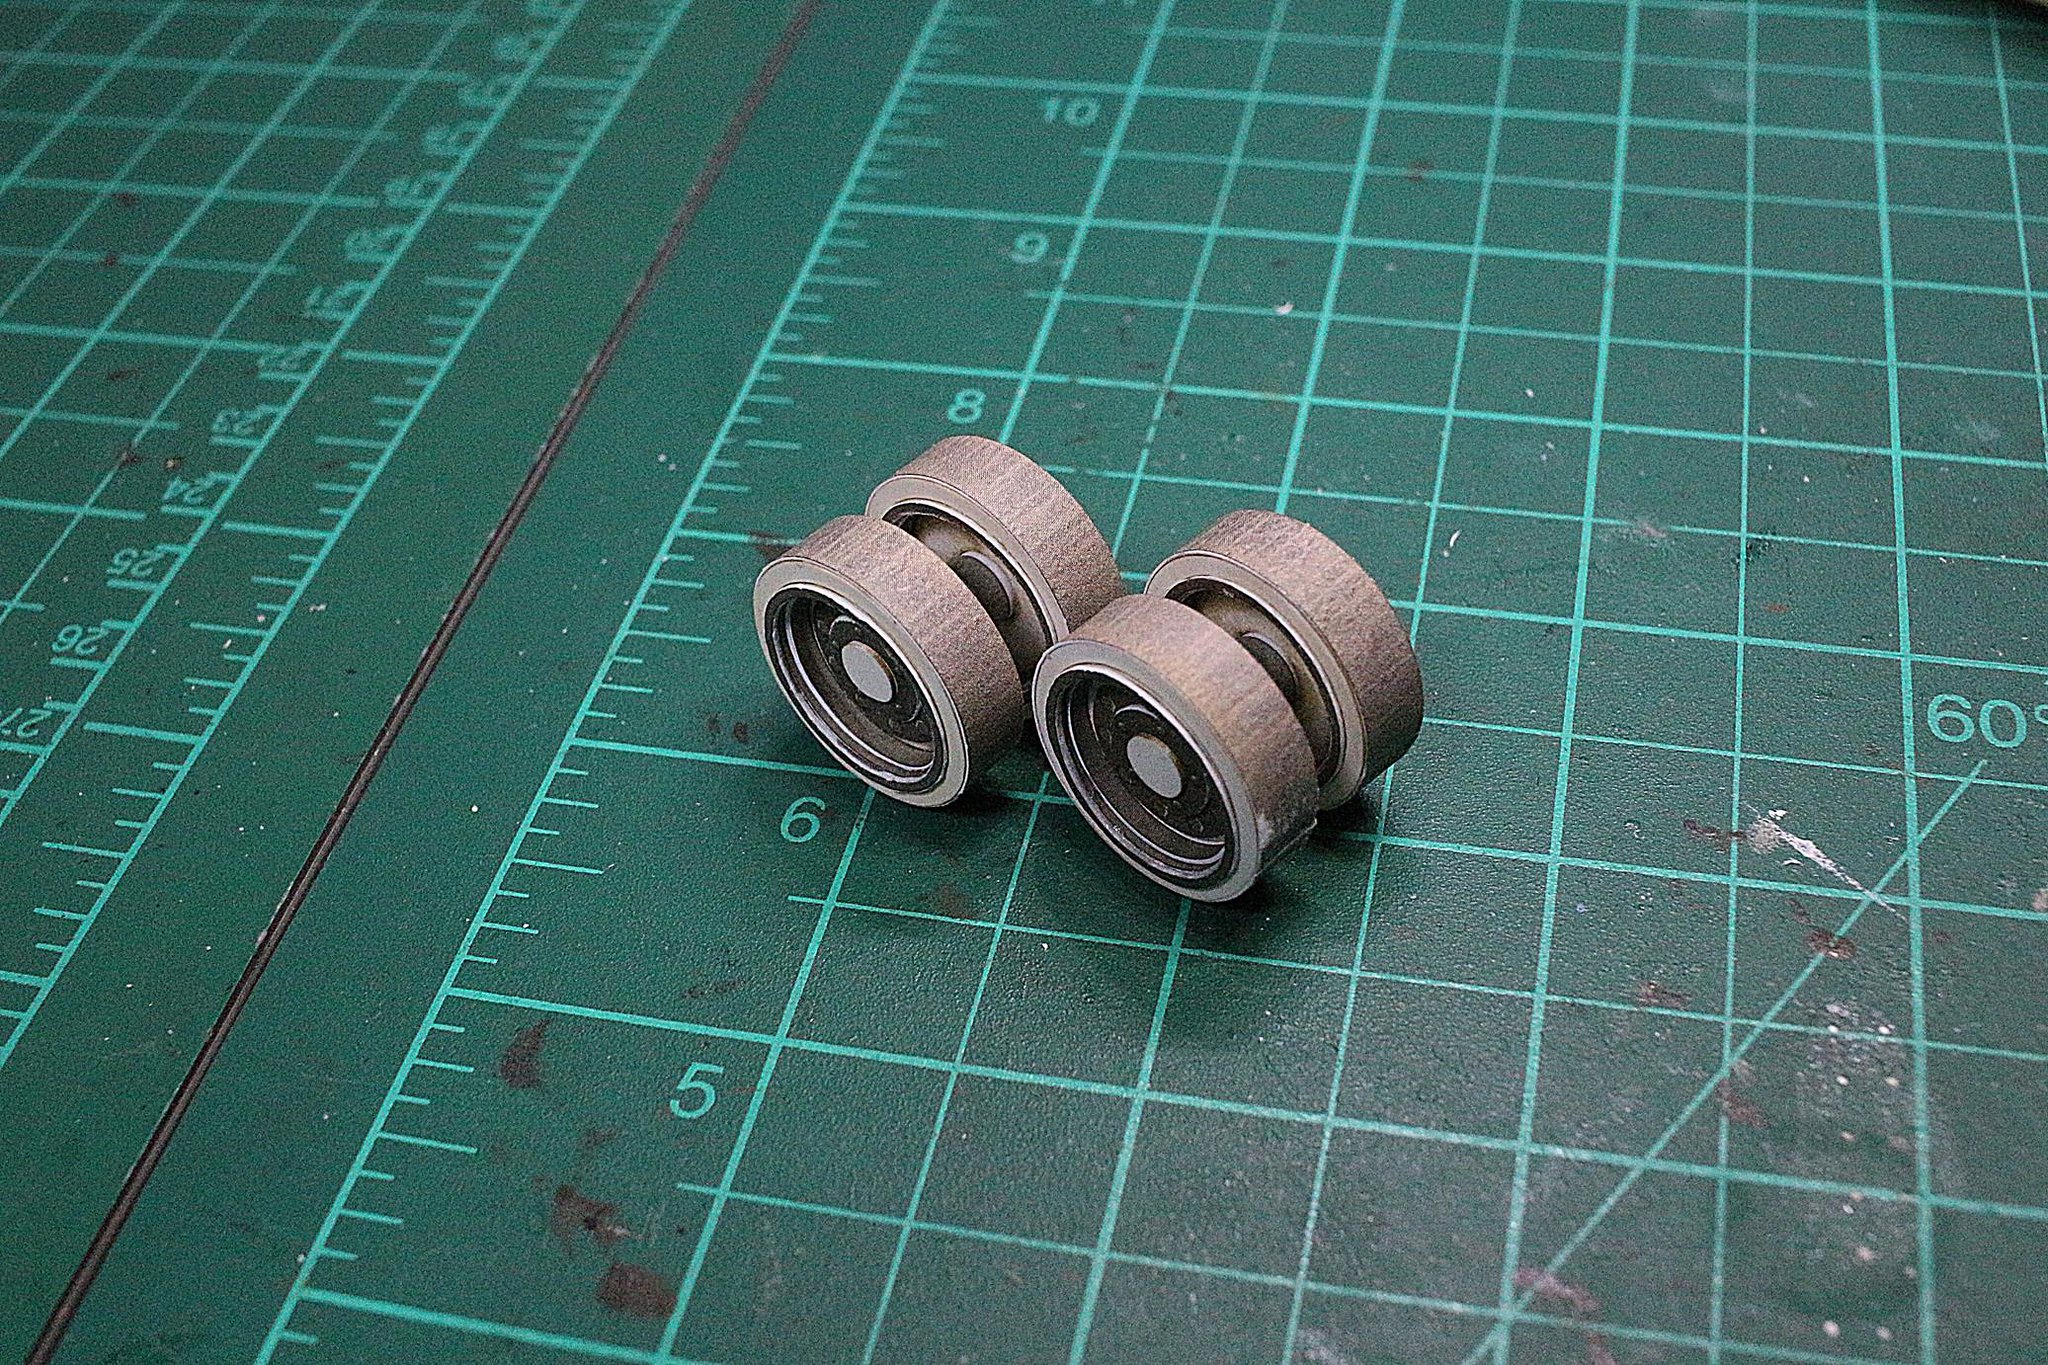 And this is idler wheel. Its rod was too long. So I had to make it shorter. 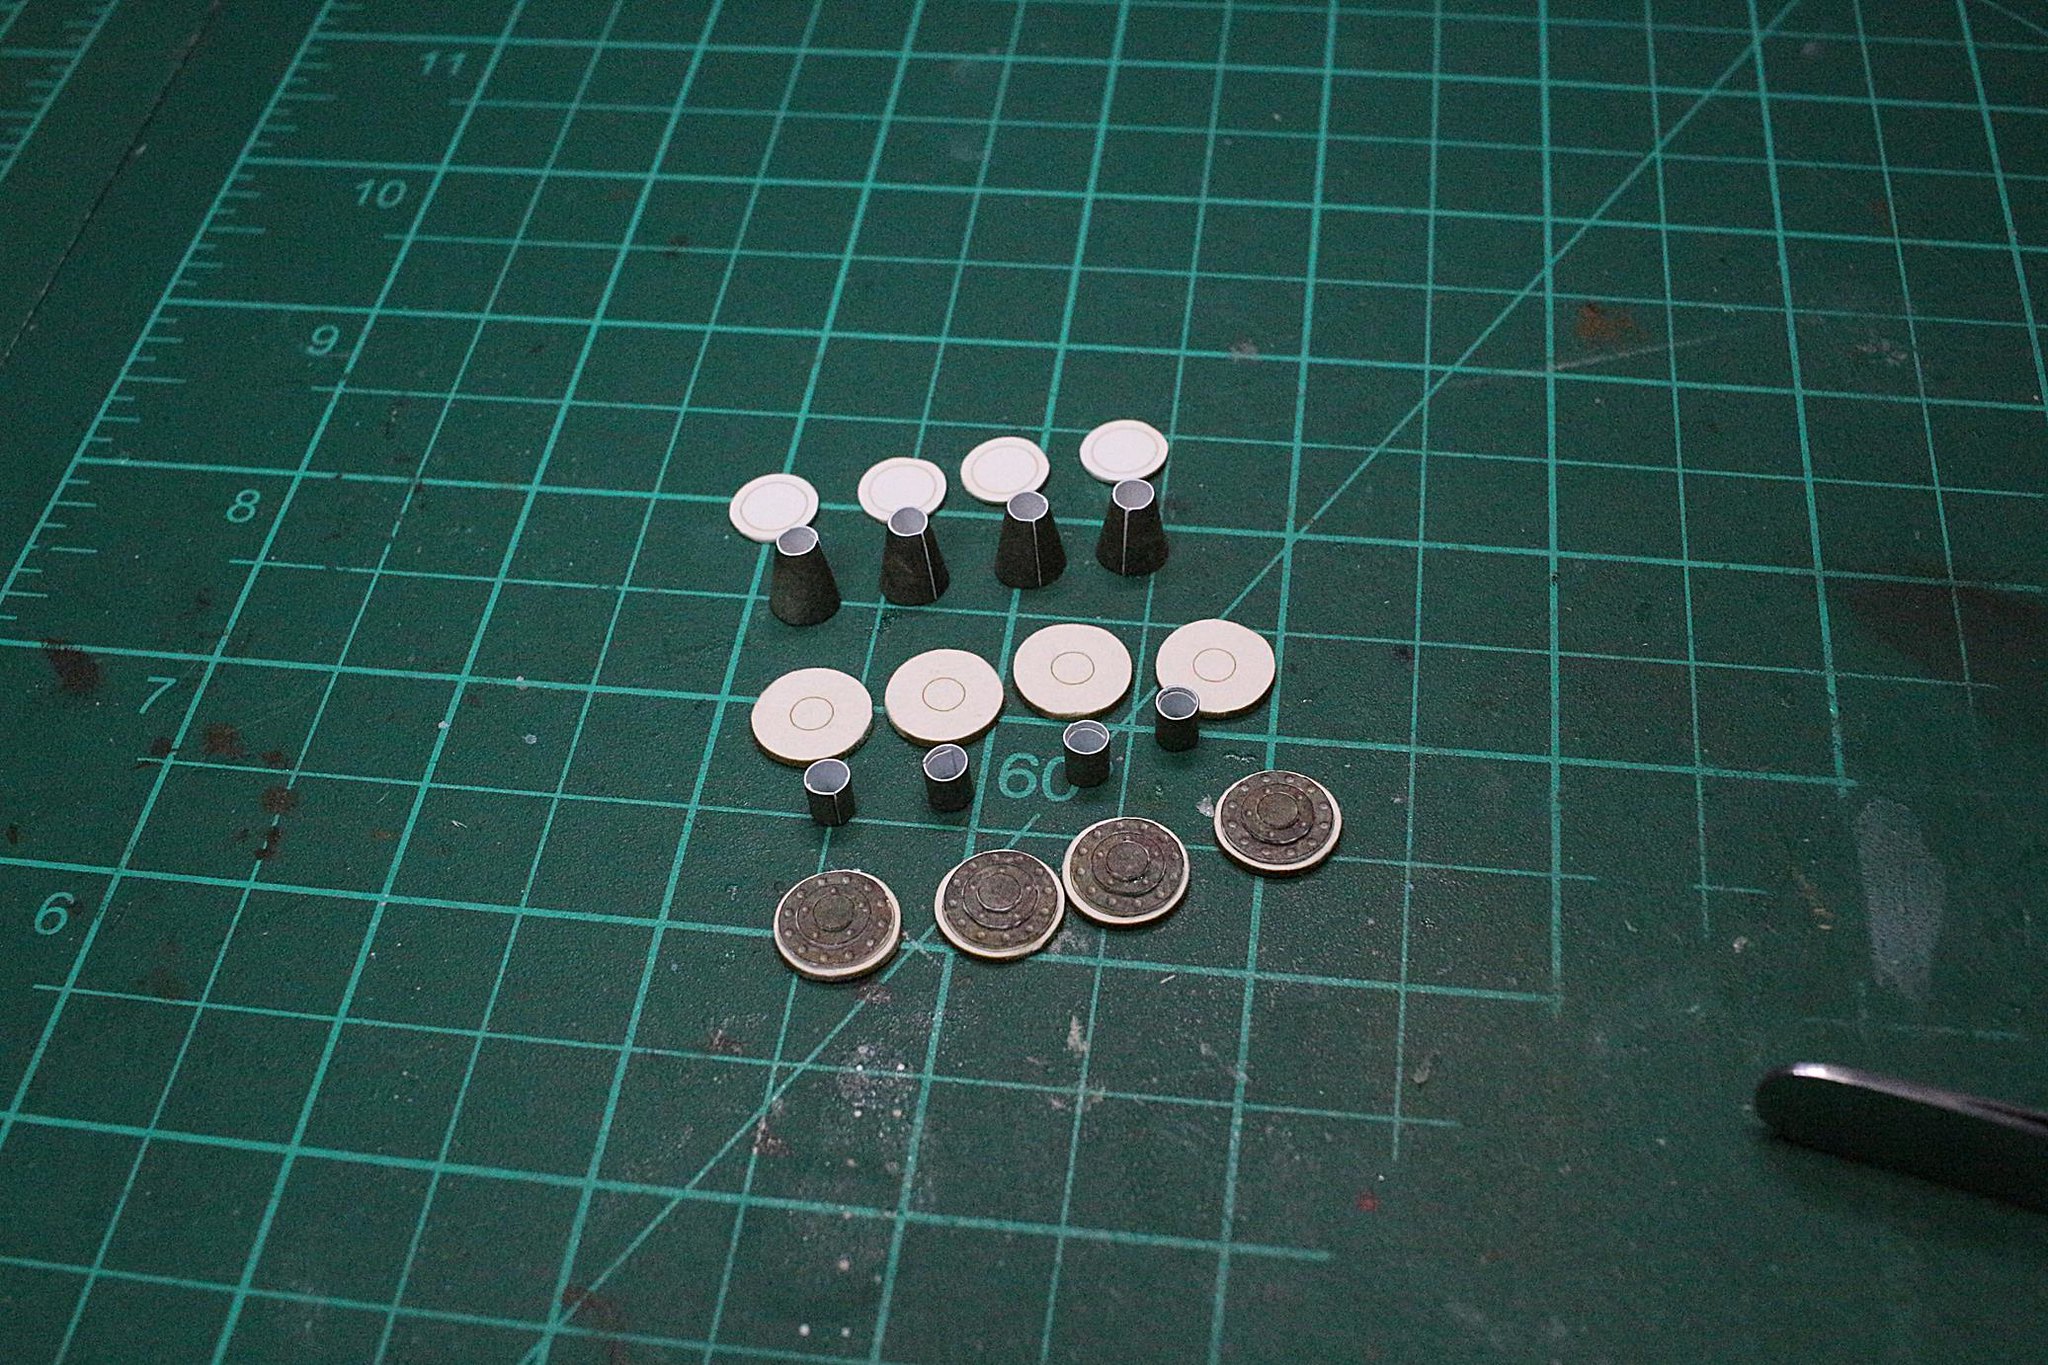  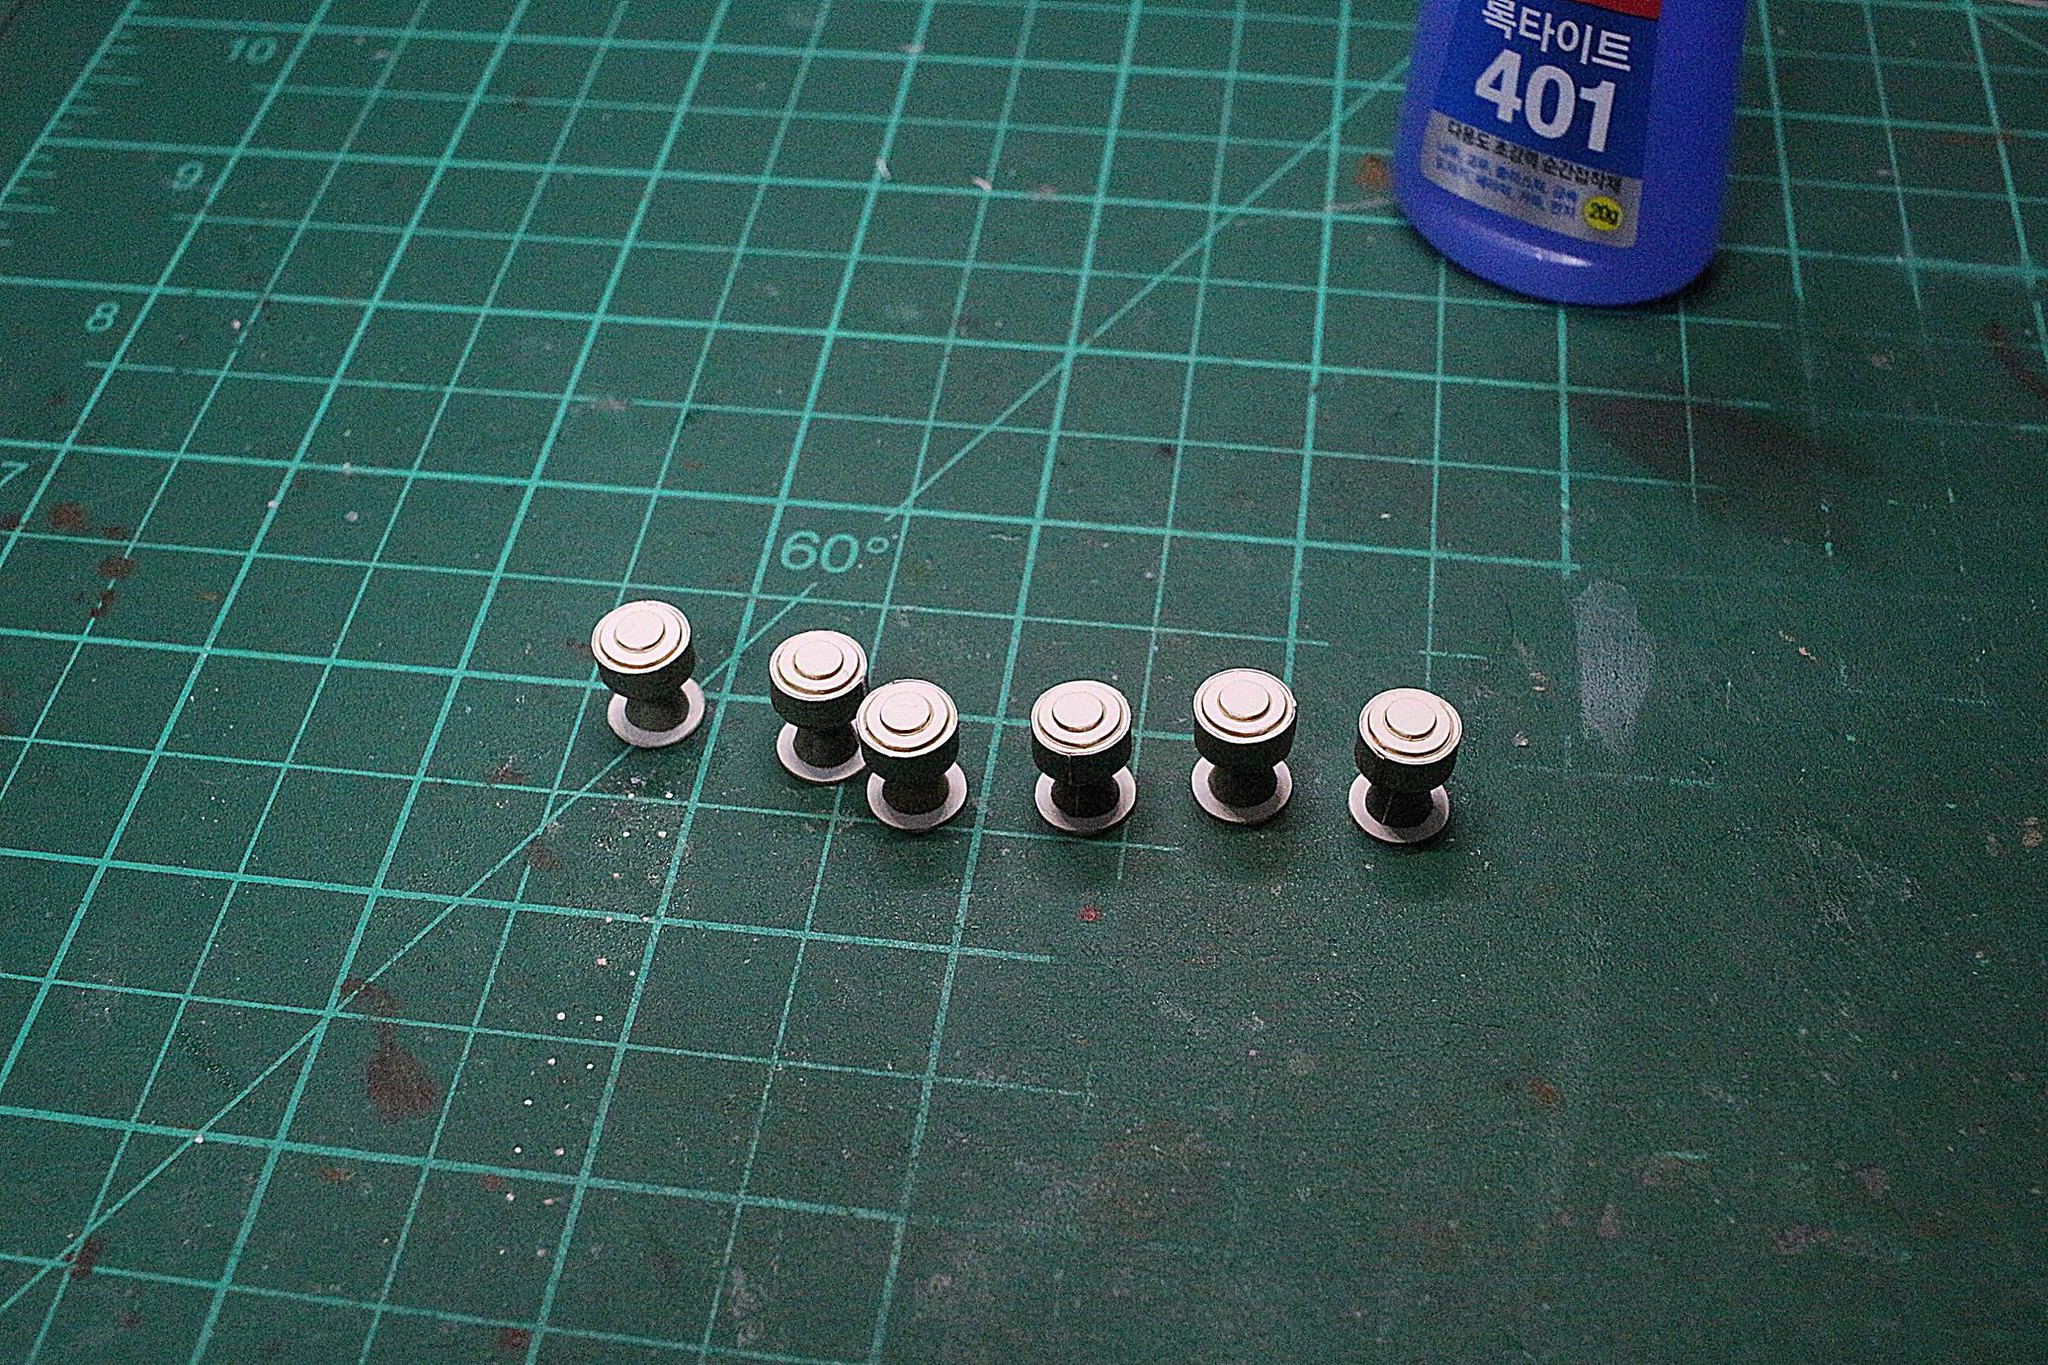 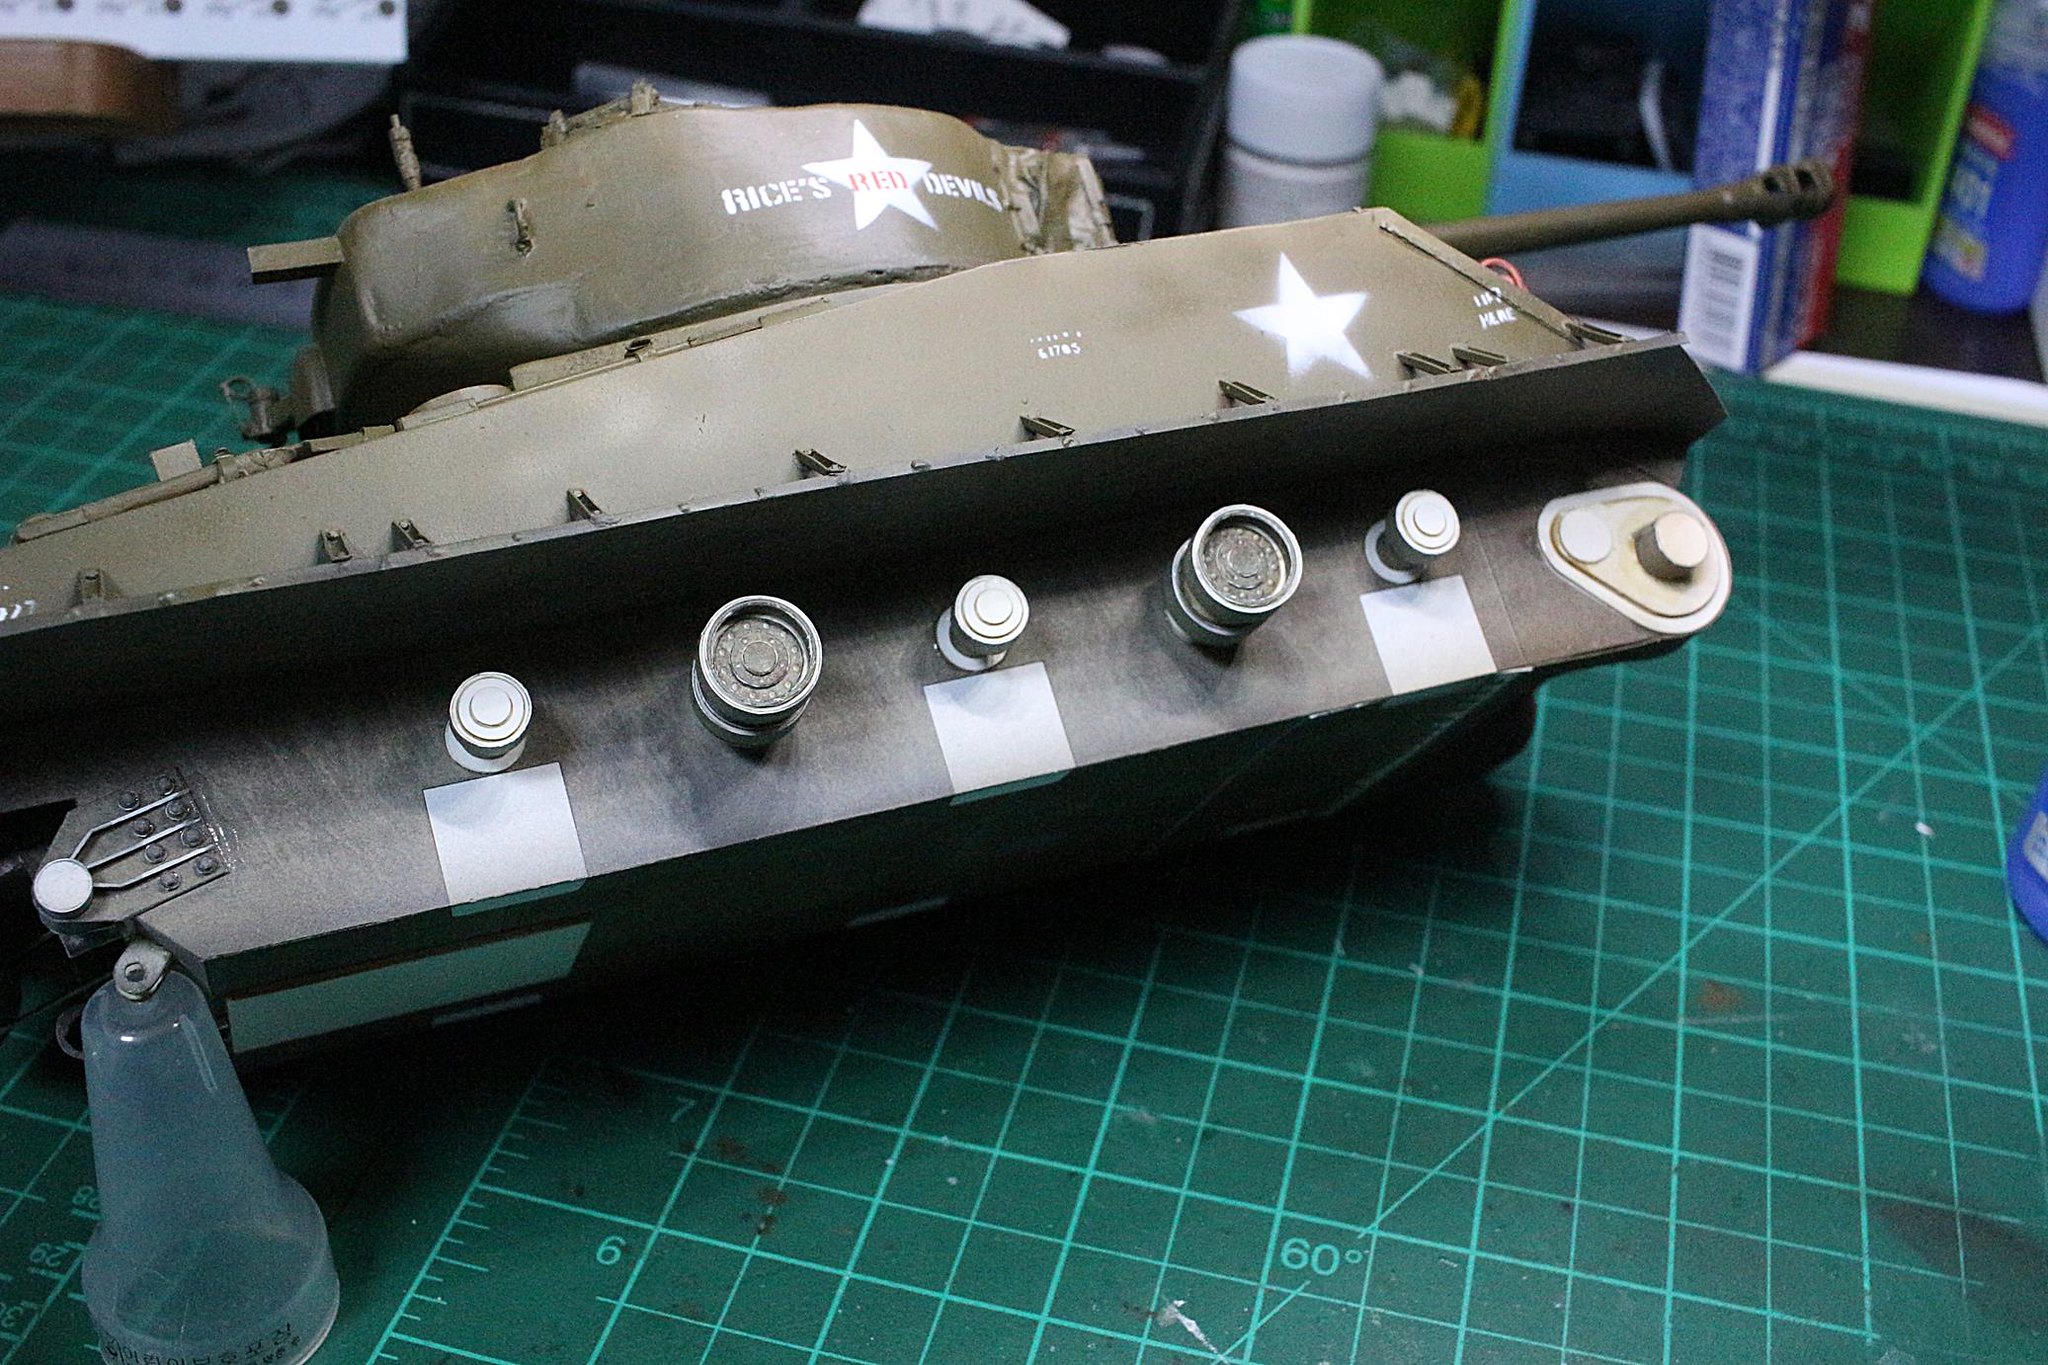 Then I build return rollers. I'll add rivets(or bolts), but I'm out of all rivet stock. So I'll ordered plastic rivets.  This is HVSS building.  Package arrived. Now I can add some rivets on this model.  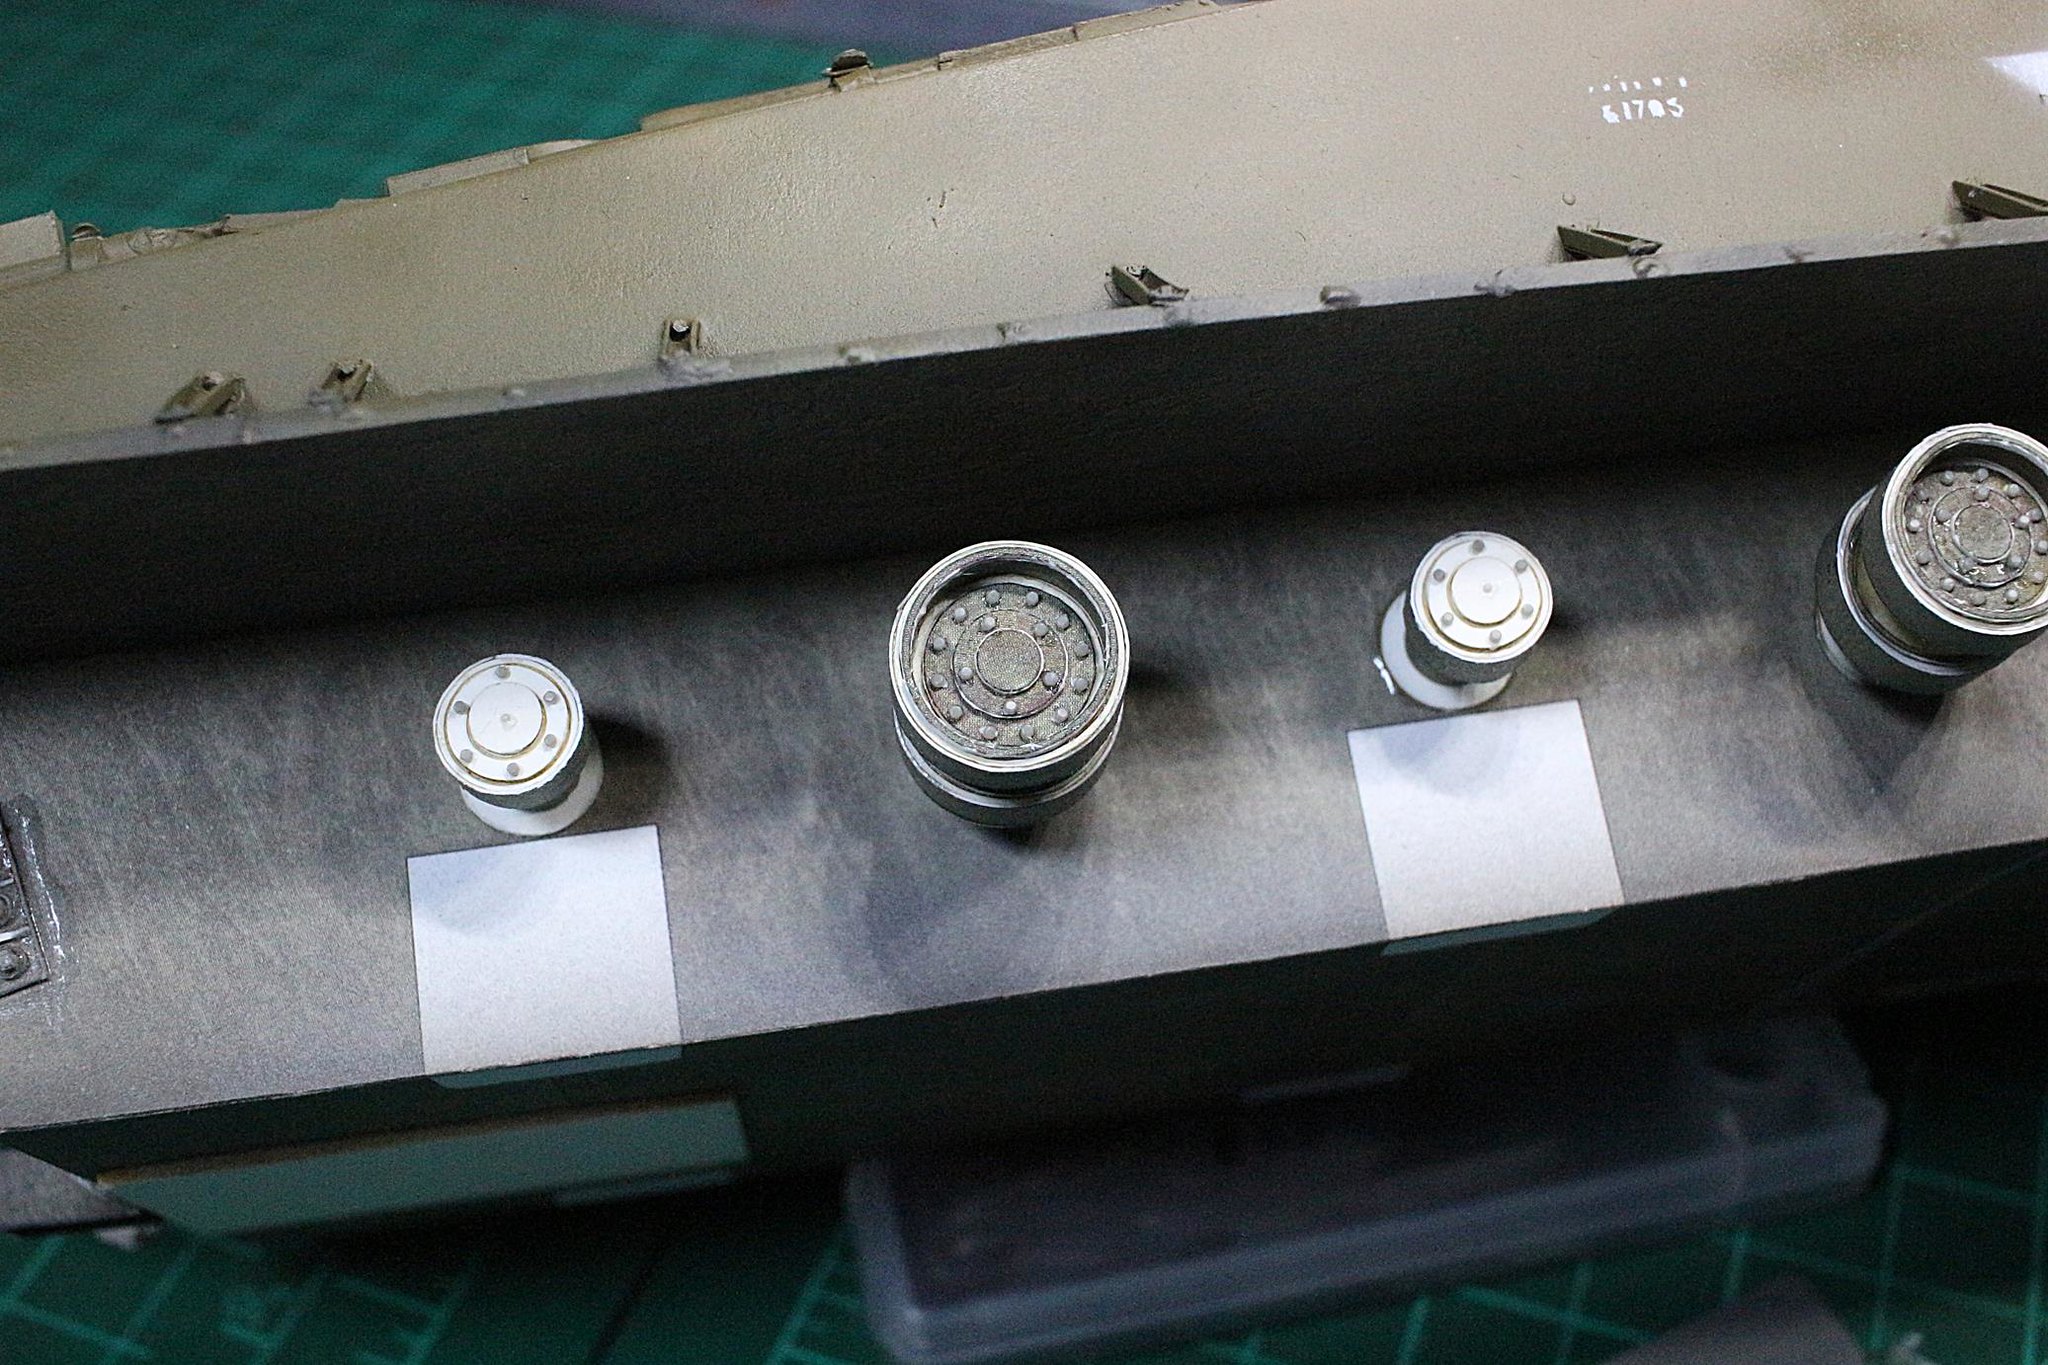 Well, not bad. I lost some of them. It is too small so easily fly away from tweezers.  Package includes paint for canvas, So I immediately masked turret.  It's done.   Now I continue HVSS building. I don't like spring's shape, but weathering will vanish it. So I skip it.   It's almost done. Alright. I reached maximum link. I'll show you rest of them later. Have a nice day
|
| Google Adsense |
 |
|
|


 Linear Mode

