


|
|
|
#61
 04-16-2023, 11:57 AM
|
||||
|
||||
|
Thanks Michael and rifelman.
Started to put outer skin. This step is crucial, and you must cut everything prices and dry fit every part. I did minimum adjustments to two parts only: 243 and 244. The fitment was satisfying and everything aligned well.  To connect all parts in a best way i did it in this order: Upper front skin (part 243)  Two small front bumper skins (part 245) 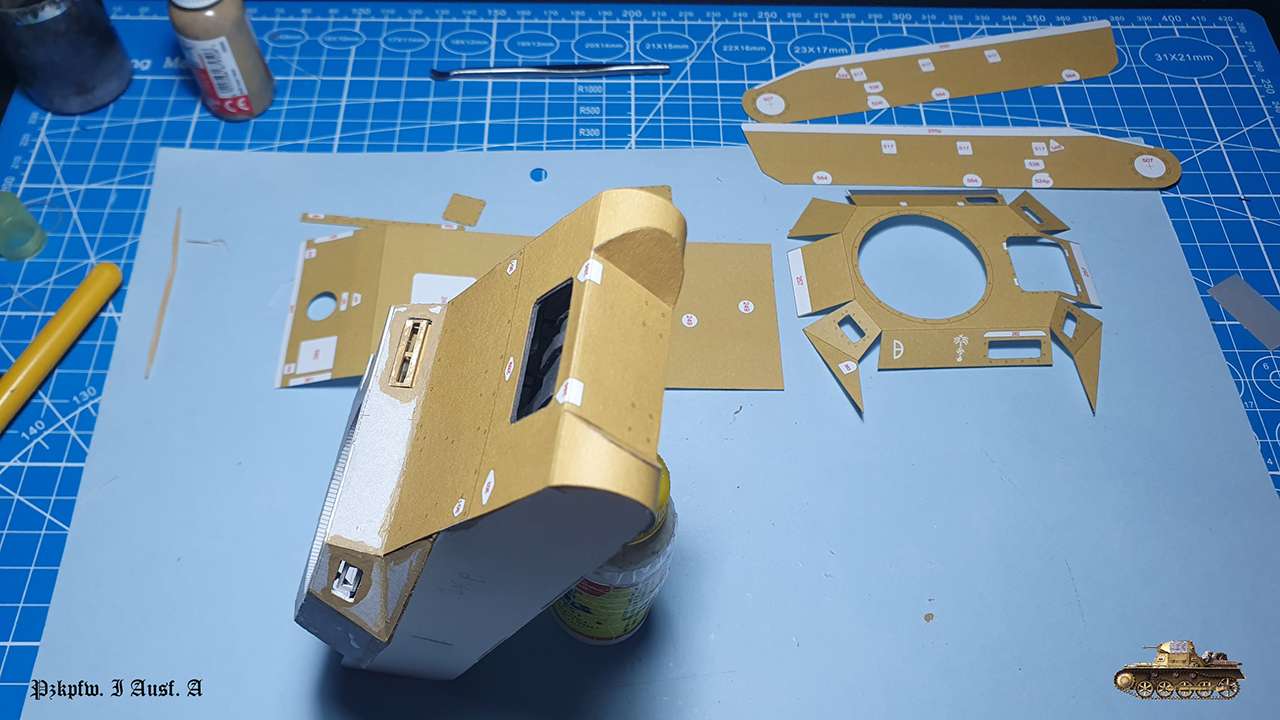 Bottom and side skins (parts 242, 244) 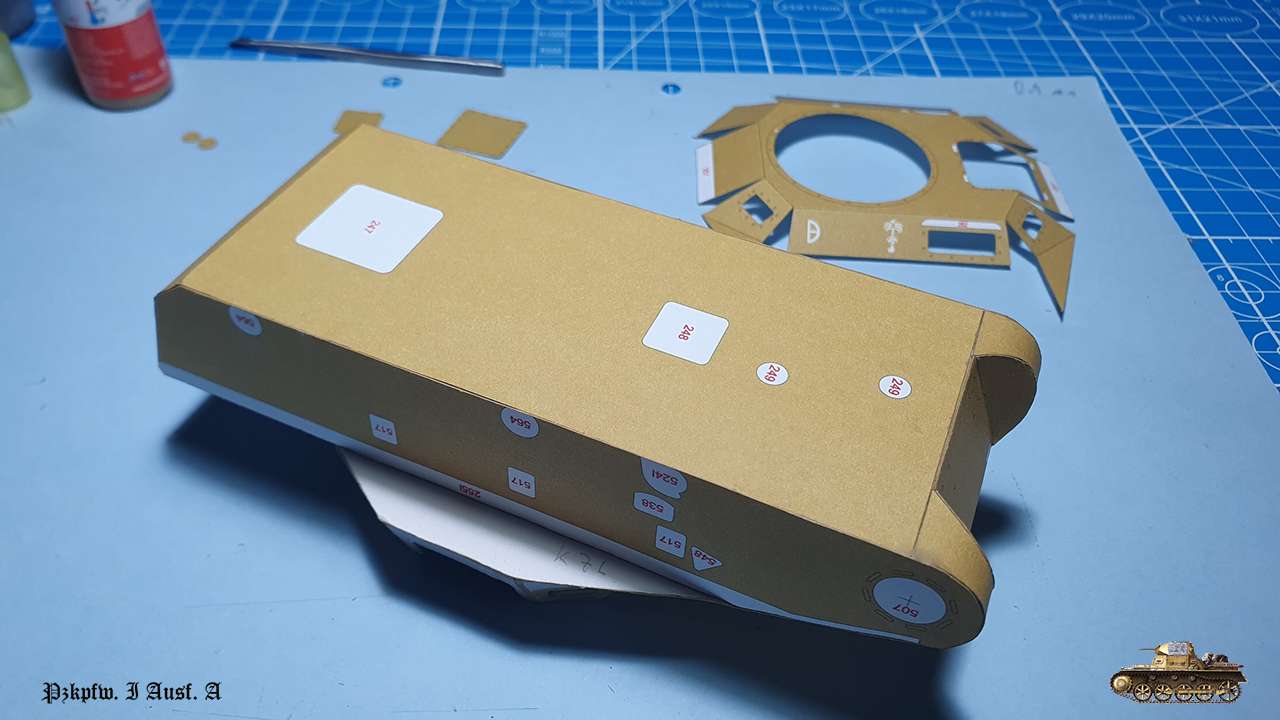 Upper main part. First glued middle and then each side (part 250)  And then all the small parts at the bottom and finished 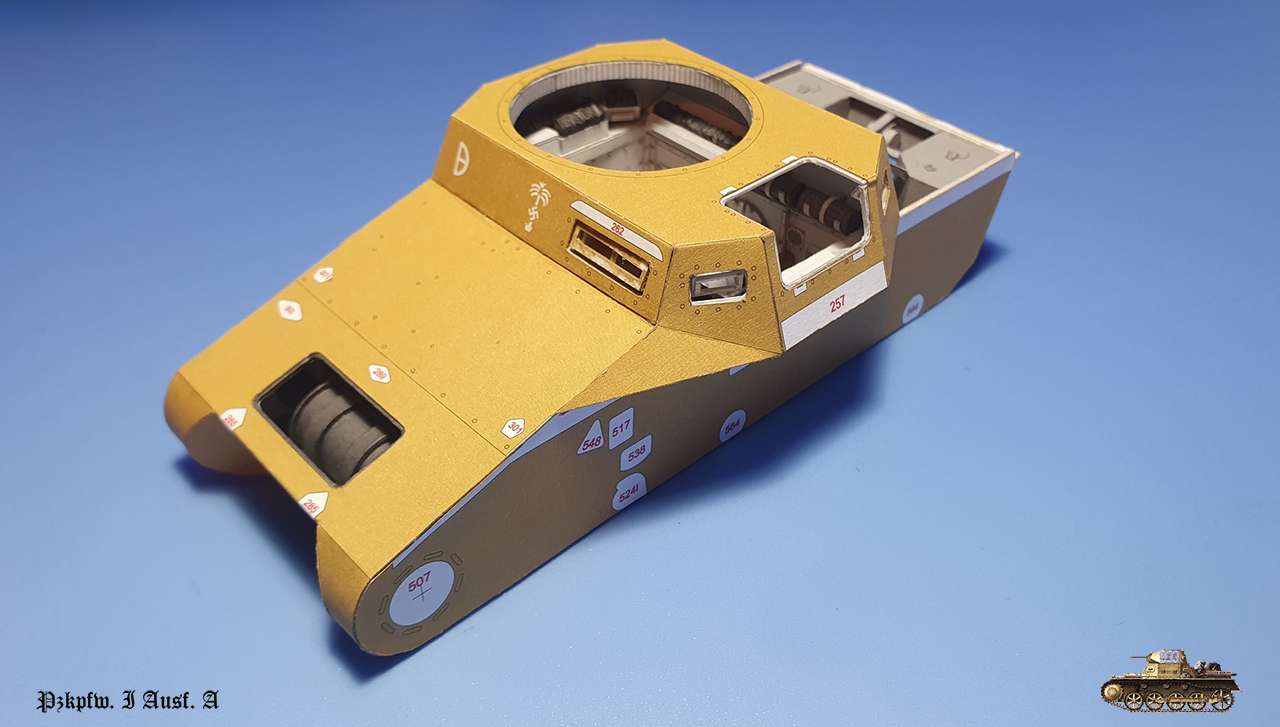 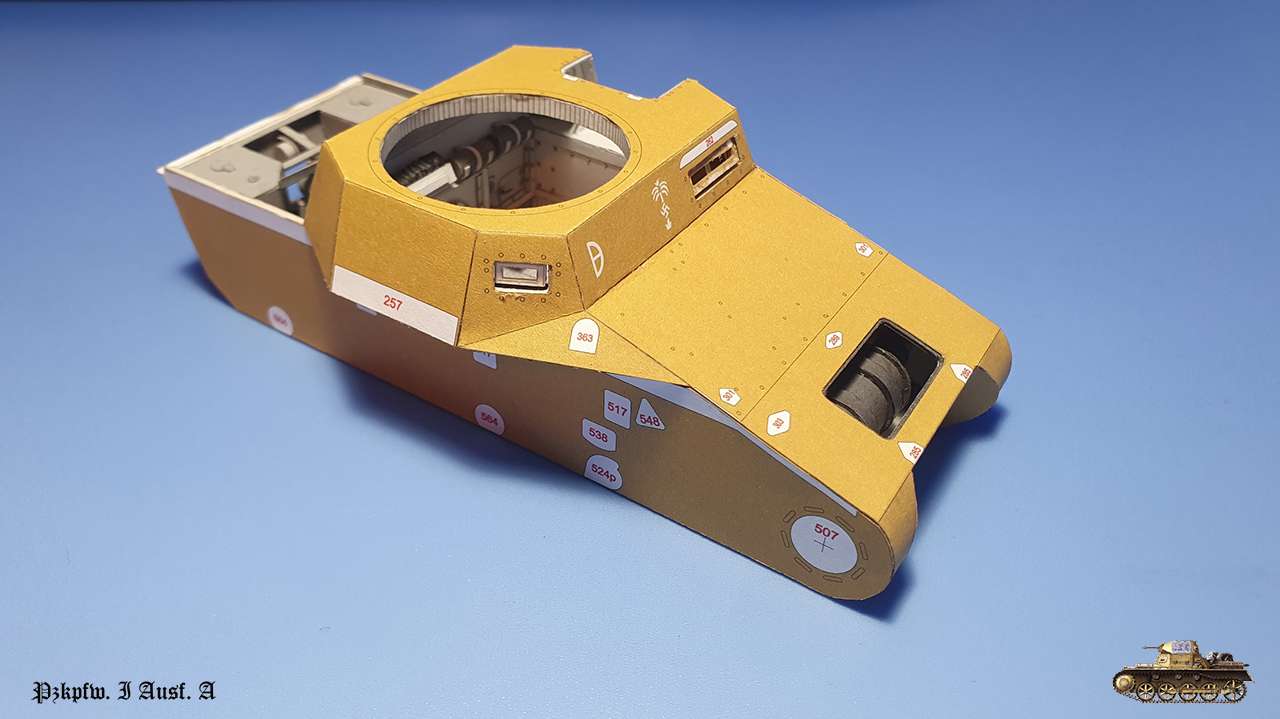  errors: none
__________________
Welcome to my gallery 
|
|
#63
04-22-2023, 01:39 PM
|
||||
|
||||
|
Thanks rifleman
Finished body with rear upper part. First of all assembled power structure, so i can point where will be endings of exhaust pipes.   Then inner exhaust pipes were bent from wire with isolation and glued inside.  Attached power structure and covered with skin.     Errors: There is a design flaw - no inner skin for rear upper part. It just white, in contrast to lower one. Fixed it by power structure sides, making skin form spare color for firewall side and painting grey on rear side
__________________
Welcome to my gallery Last edited by Igor; 04-22-2023 at 01:58 PM.
|
|
#64
04-22-2023, 01:43 PM
|
||||
|
||||
|
Nice internal details
Isaac
__________________
My gallery [http://www.papermodelers.com/gallery...v-r-6&cat=500] Recent builds  Meteor F1, Meteor F8, Mig-Ye8, NA Sabre, A-4E Skyhawk,Mig-15 red, Mig-17 repaint Meteor F1, Meteor F8, Mig-Ye8, NA Sabre, A-4E Skyhawk,Mig-15 red, Mig-17 repaint
|
|
#65
04-29-2023, 11:58 AM
|
||||
|
||||
|
Thanks Isaac!
Next step is the fenders. In this publishing there is a double-sided printing and this a huge plus in in design. I wish every publisher could do so.   For this time i marked bending lines from outside. This gave me accurate 90 degrees bend. Before gluing to place, I assembled front and rear fender ends    Errors: None
__________________
Welcome to my gallery
|
| Google Adsense |
|
#66
04-29-2023, 06:35 PM
|
||||
|
||||
|
I'm trying mentally to compare this tank to Vickers E or rather T-26 version and aside from obvious left hand/right hand drive they seem to be very much alike under the skin. Is it my faulty perception or that's the case?
Very nice model. I wish I had enough patience for tanks.
|
|
#67
04-30-2023, 11:32 AM
|
||||
|
||||
|
Quote:
Yep, there are some similarities in those three.
__________________
Welcome to my gallery
|
|
#68
04-30-2023, 02:02 PM
|
||||
|
||||
|
nice work on the skins Igor.
__________________
David........... Paper modelling gives you a happy high. currently building. c GAZ 51 ALG 17, wagon 111a. unex DH411 excavator and spitfire Mk 9
|
|
#69
05-18-2023, 11:30 AM
|
||||
|
||||
|
Thanks David
Worked hard on all hatch doors and visor covers Visor covers and front transmission cover  Side hatch doors and hinges 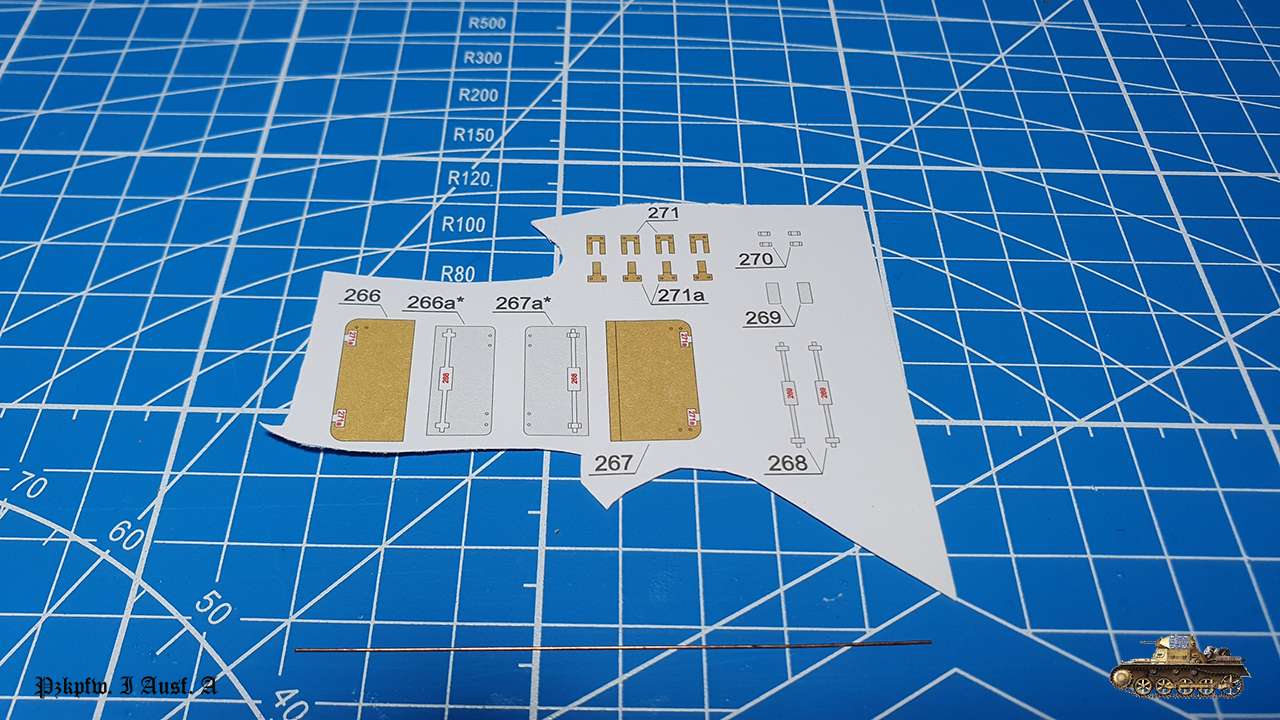 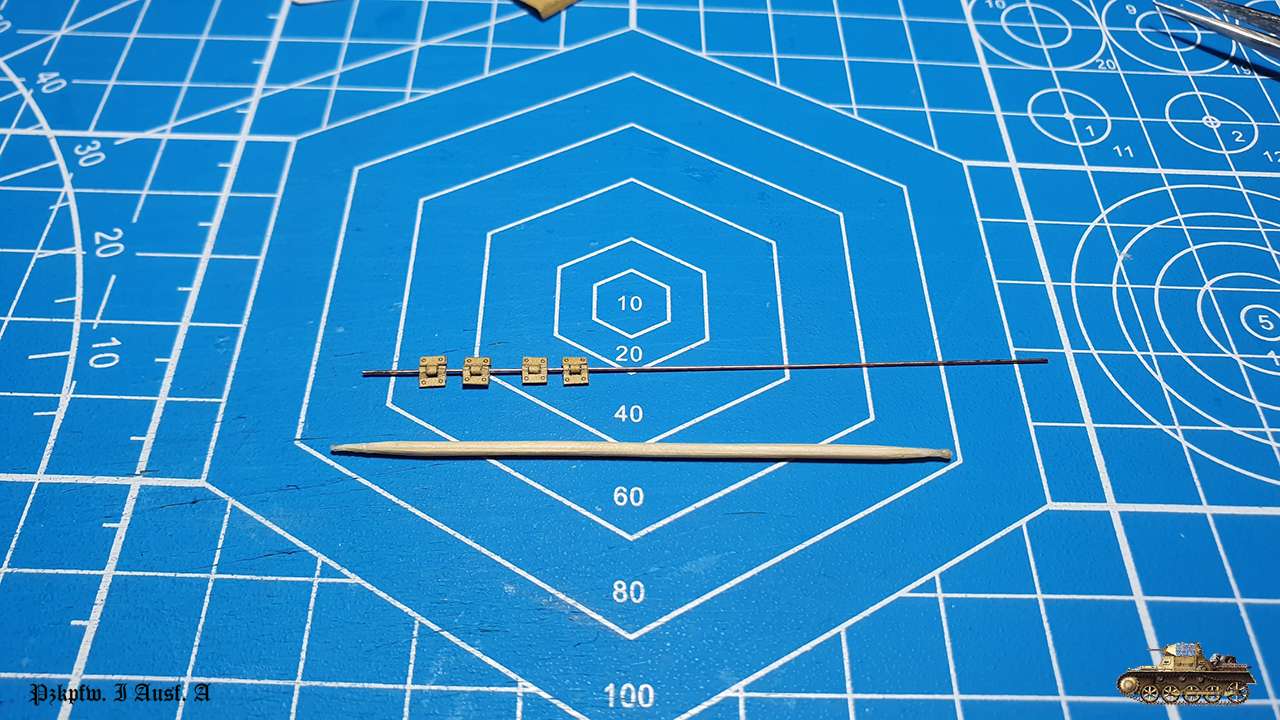 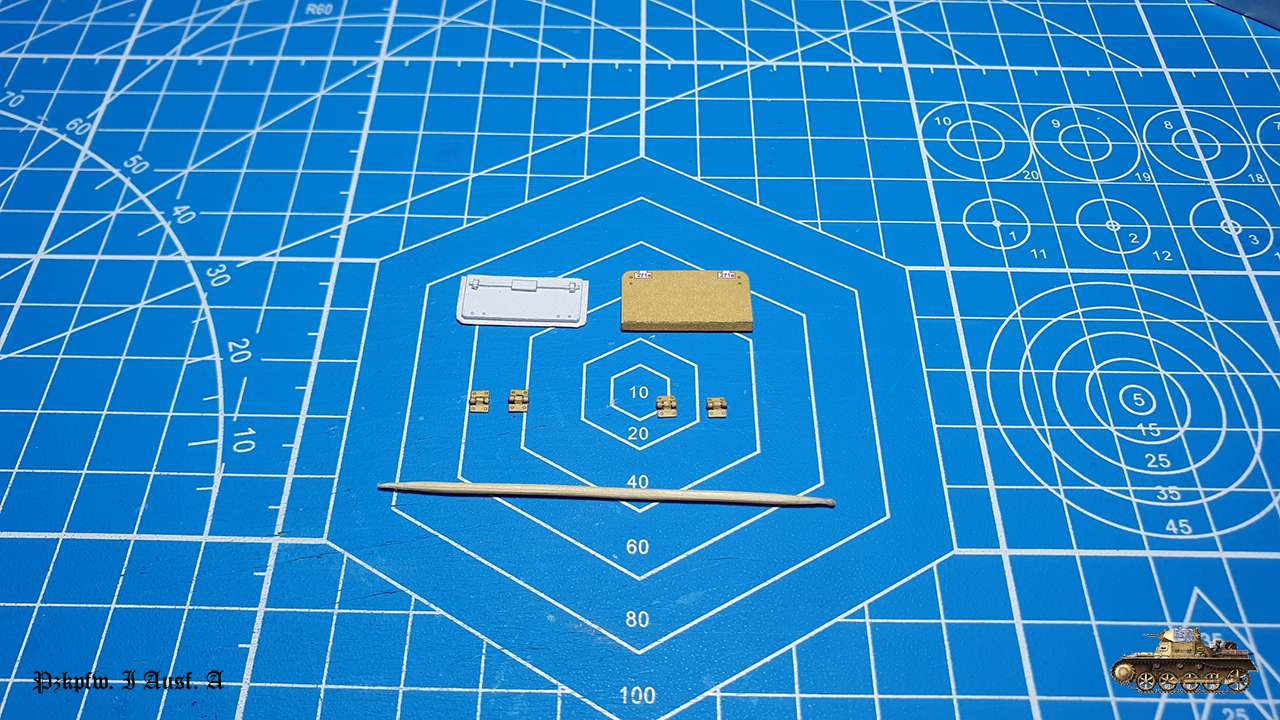 Rear engine hatch doors and hinges 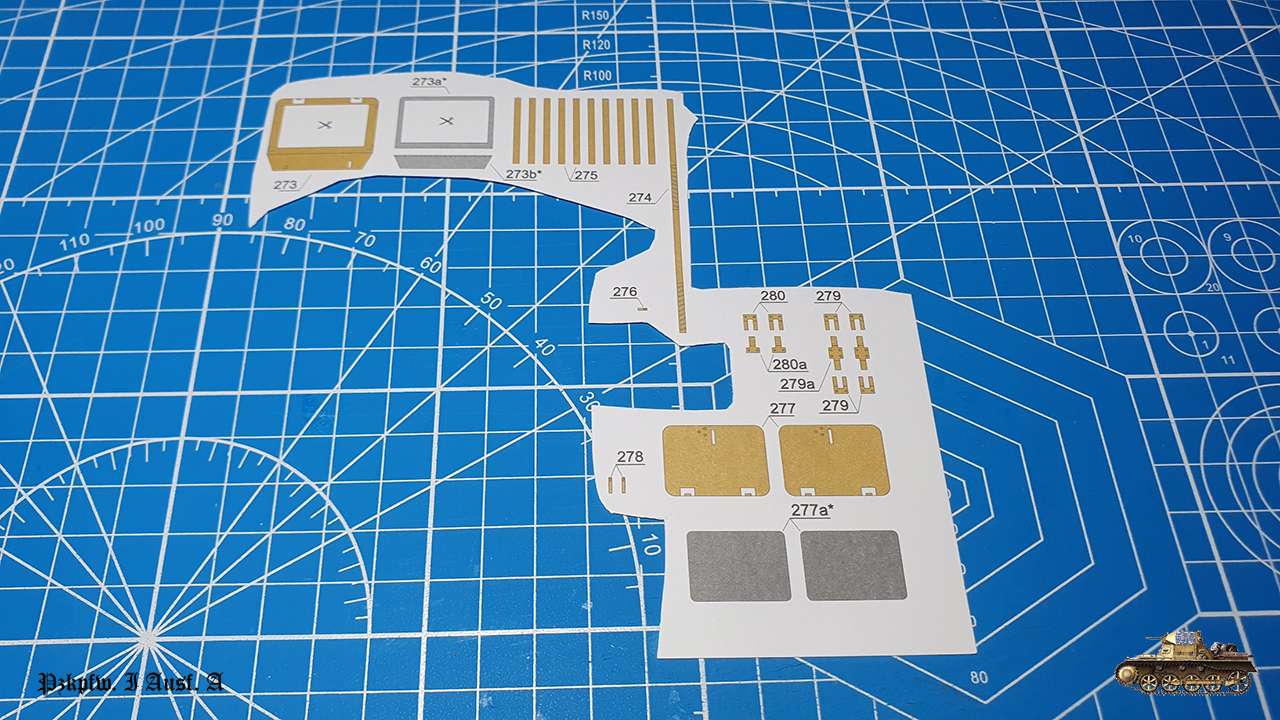 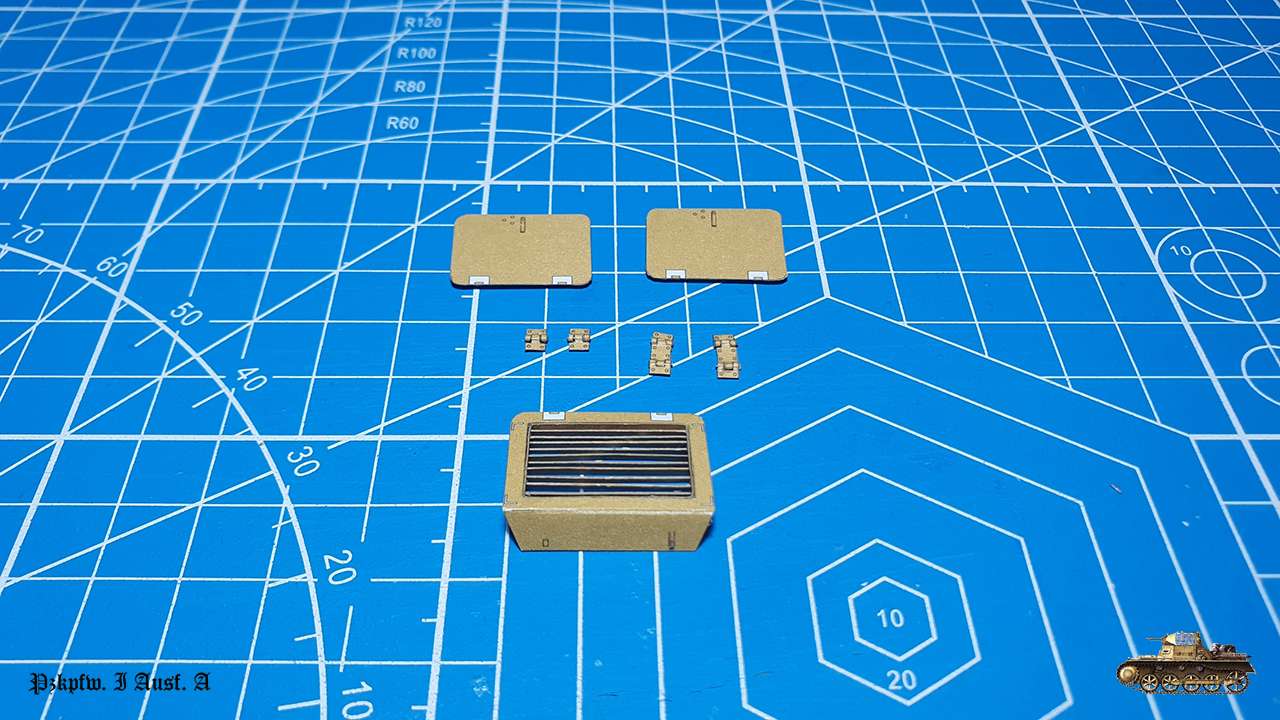 Fuel tank filler nozzle covers 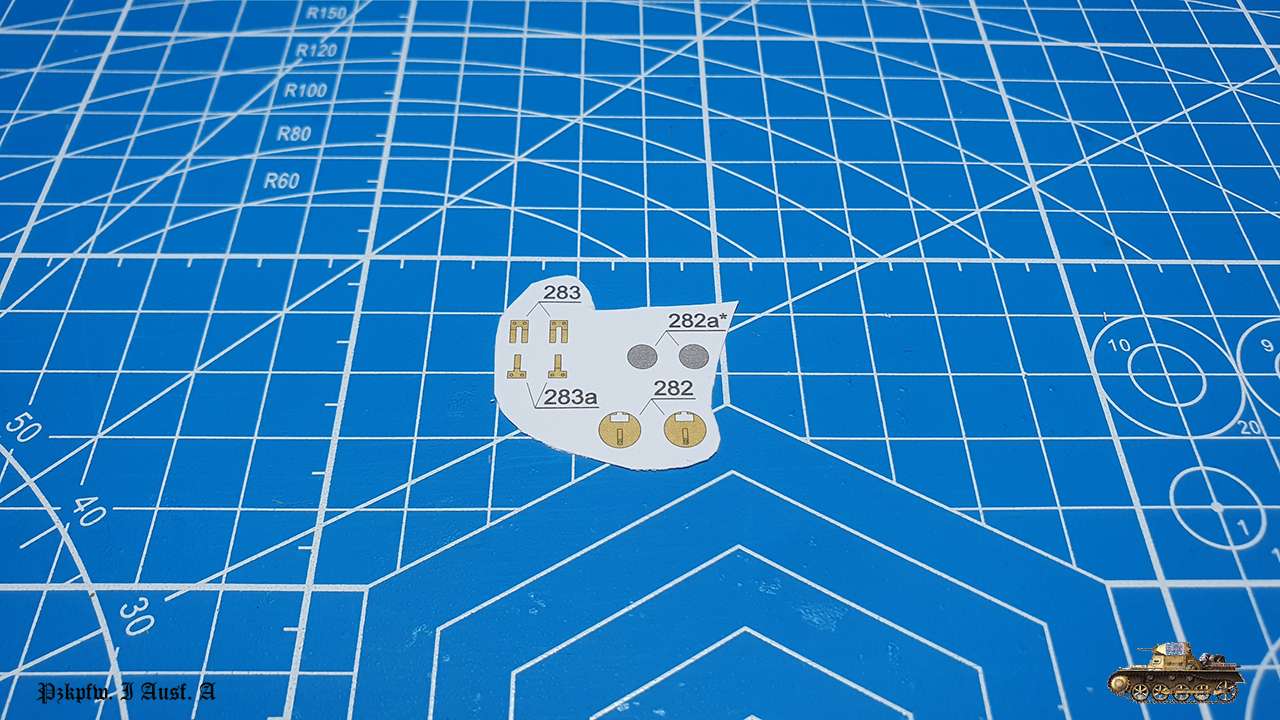 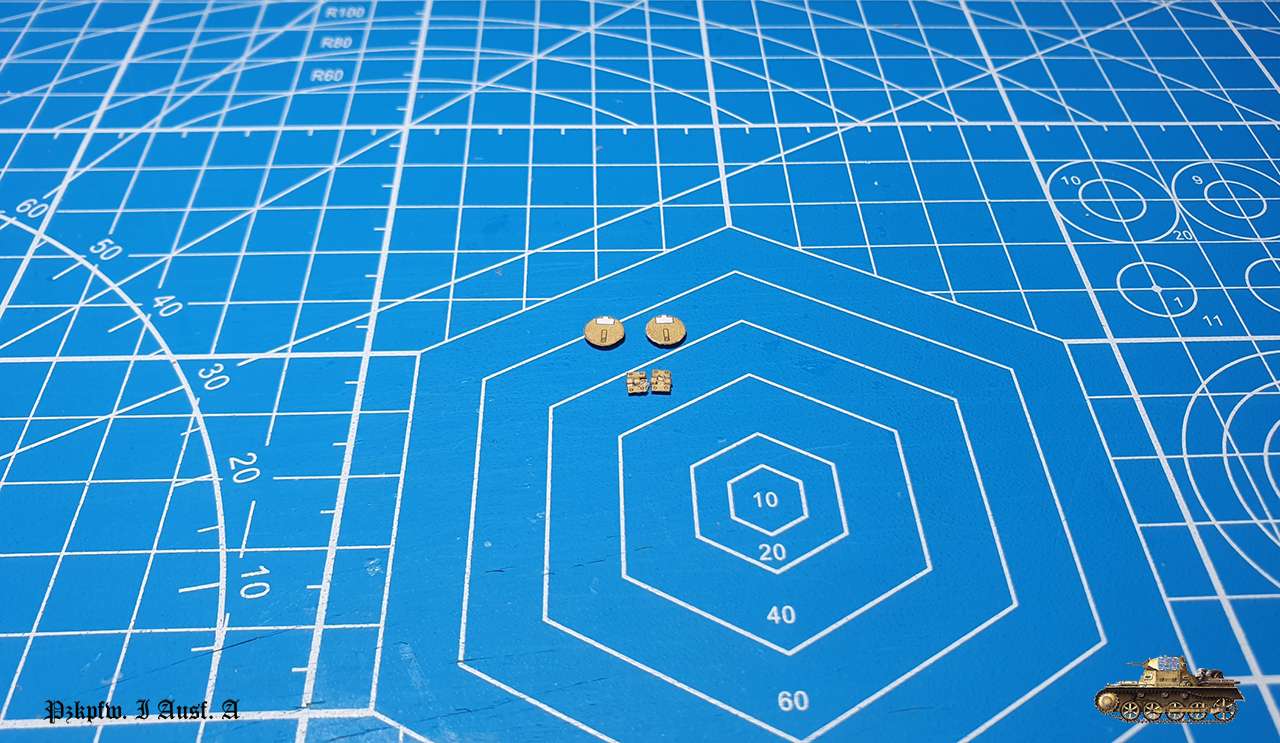 All doors on their places and can be opened As i suspected, there is no way to open visors. The mechanism design is wrong... So they'll just remain closed  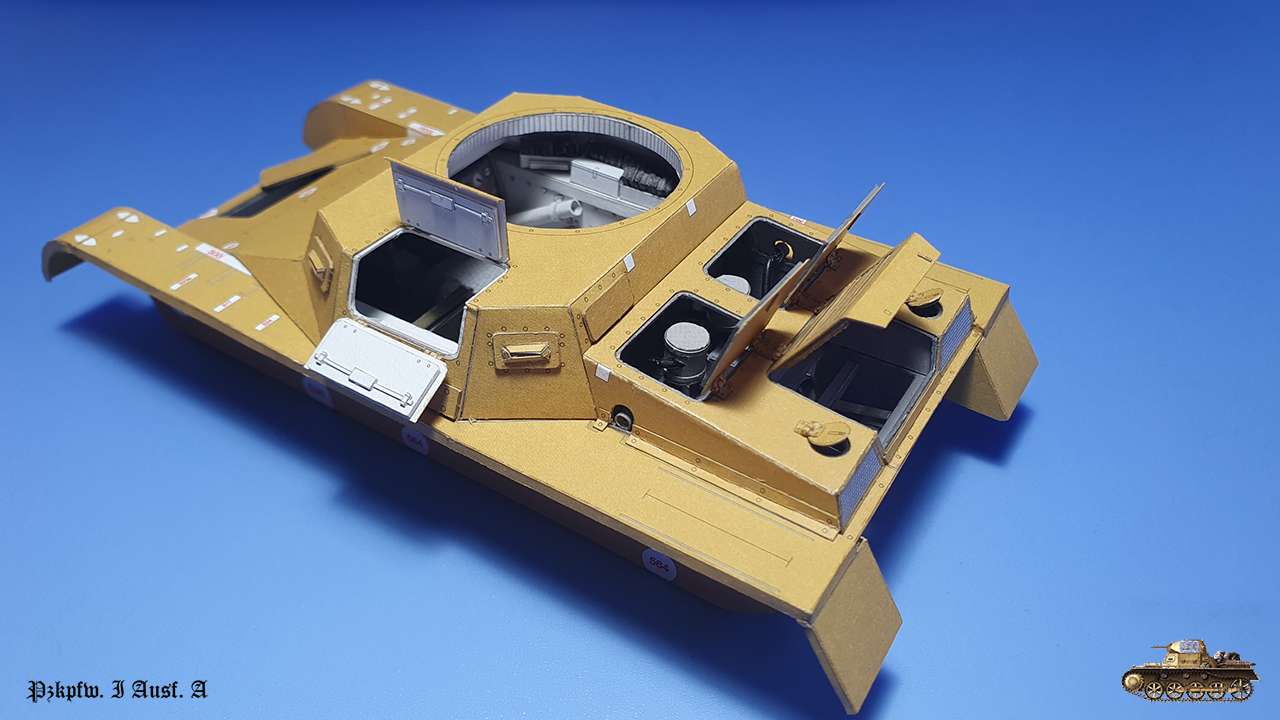 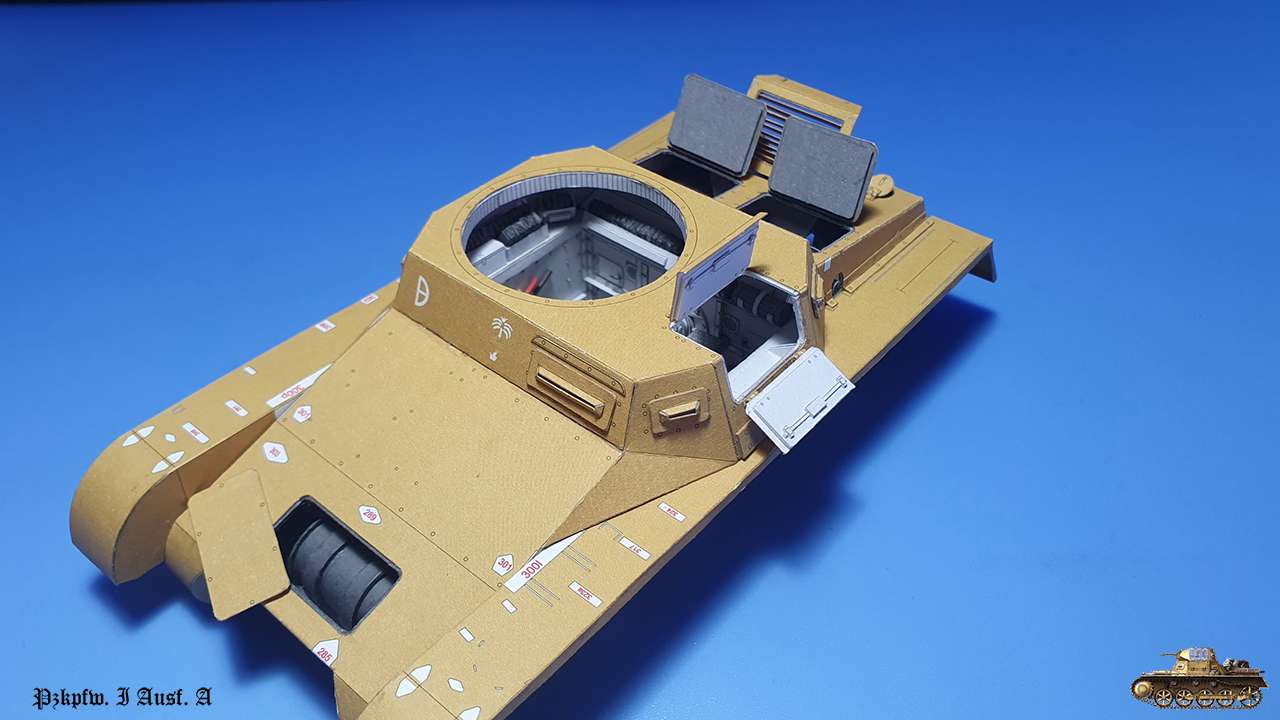 Errors: Visor cover mechanism designed wrong. Even with my addition of cardboard, visor base is not flash with the wall and stuck at the beginning of opening
__________________
Welcome to my gallery
|
|
#70
05-18-2023, 11:38 AM
|
||||
|
||||
|
Expertly done with those opening panels.
I noticed . . . even the fueling caps are shown open and closed. That must have required some extra effort.
|
| Google Adsense |
 |
|
|


 Linear Mode

