


|
|
|
#1
 08-15-2011, 02:14 PM
|
||||
|
||||
|
McDonnell F3H-2 Demon U.S. Navy squadron VF-41 / Pavel Kohno / 1:72
Next on the build list is the incredibly detailed McDonnell F3H-2 Demon in 1:72 scale as designed by the talented Pavel Kohno. I have chosen the U.S. Navy squadron VF-41 off the U.S.S. Independence due to a friend having served aboard her (though after the time of the Demon), from ecardmodels.com.
1/72 McDonnell F3H2 Demon USN VF-41 Paper Model - ECardmodels.com Shop - Downloadable models and Ecardmodels has just recently begun carrying Pavel Kohno's designs (originally sold through Kampfflieger's site), and will be carrying a whole lot more soon!  These are incredibly detailed kits, in a number of unique subjects. Check them out: ECardmodels.com Shop These are incredibly detailed kits, in a number of unique subjects. Check them out: ECardmodels.com ShopAn initial assessment of the kit, which is provided as a 1:72 kit (as opposed to me rescaling it myself), is that it is the most detailed 1:72 kit I've ever seen. In fact, it is detailed enough to be a 1:33 kit and was at the time of its initial release, offered in 1:72, 1:48, and 1:33: www.papermodelers.com/forum/design-threads/4305-mcdonnell-f3h2-demon-1-71-1-48-1-33-a.html The kit contains 4 pages of parts, and a nice set of diagrams showing all parts for placement. At 1:72 scale, there are some parts that will be difficult to build in card, so I printed the model twice, once on 65lb card, once on bond paper. This morning I have given the parts a couple coats of gloss clear spray to protect the model from fading and smudging during the build. Here we go with the most detailed model I've ever built... Here are the 4 pages, in duplicate, plus a few pages of the Stahlhart F/A-18 also in the build pile, with clearcoat drying. 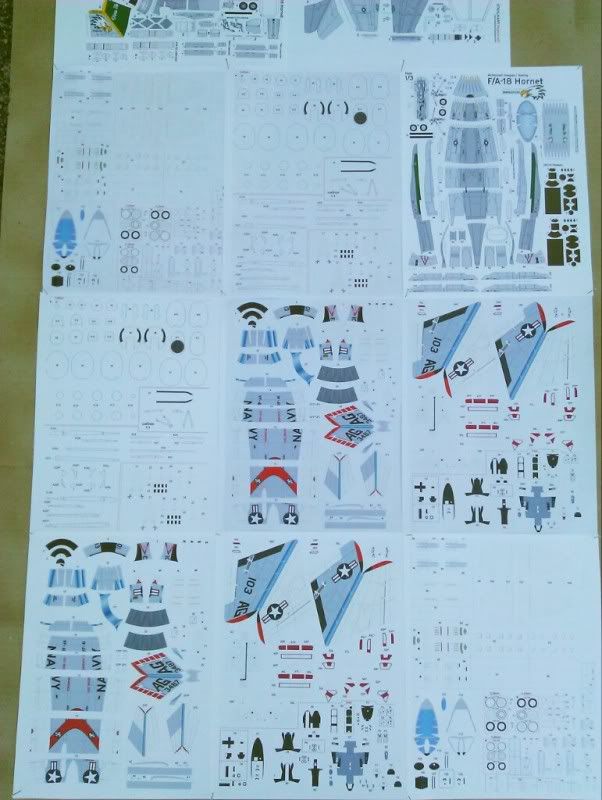
__________________
Put on hold build (someday I'll finish): F-35A Lightning II 1:72 Previous builds: cMags' Card Model Builds 
|
| Google Adsense |
|
#2
08-15-2011, 02:20 PM
|
||||
|
||||
|
Also, before I get started, I wanted to ask... While I was researching this model, I saw that a couple folks on the forum had purchased a copy from Roman's site, and was curious if there were any build threads. I saw reference to one on kartonbau.de but it was gone. I also saw reference to some fixes to the model, which I'm not sure if are included in this new offering from ecardmodels. Maybe mcboom can chime in?
Thanks!
__________________
Put on hold build (someday I'll finish): F-35A Lightning II 1:72 Previous builds: cMags' Card Model Builds
|
|
#3
08-15-2011, 07:25 PM
|
||||
|
||||
|
Ah, found it. Seems the old links are broken, and the site was redesigned, but the thread ID remained the same and I was able to build a new URL:
Gemeinsamer Baubericht: McDonnell F3-H2 "DEMON" in 1/33 - Bauberichte / Construction reports - Kartonbau.de - Alles rund ums Kartonmodell It's a little slow to load the pics, so I haven't gone through it all yet, but it does seem that some of the issues have been fixed, so hopefully this will be a trouble free build... ")
__________________
Put on hold build (someday I'll finish): F-35A Lightning II 1:72 Previous builds: cMags' Card Model Builds
|
|
#5
08-17-2011, 12:27 PM
|
||||
|
||||
|
Off to a slow start but a start none-the-less. Following from the build in on kartonmodel I started at the nose. For the first time, I attempted the segment-to-segment bulkhead connection technique where you build enclosed segments with bulkheads on either side, and then stack them to assemble the fuselage. Normally with models that call for this technique, I discard the second bulkhead, sit the remaining bulkhead slightly inset into the segment, and use glue strips. This time I experimented. It came out fine, though I'm not sure if I will carry the technique through the rest of the fuselage or revert to my standard technique.
Also a note for future builders in 1:72 scale: The formers sheet indicates to laminate to 0.25mm. The 67lb cardstock I printed the part on was already 0.18mm. Instead of laminating, I printed the formers sheet again on 110lb card, which came to just about 0.25mm. At the scale, some of the formers are really small, so you don't want to overdo the thickness.  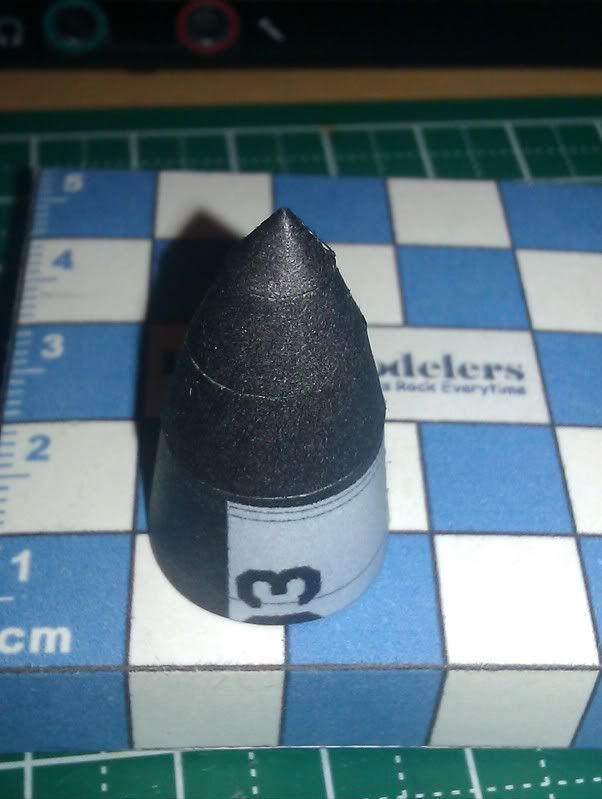
__________________
Put on hold build (someday I'll finish): F-35A Lightning II 1:72 Previous builds: cMags' Card Model Builds Last edited by cMags; 08-17-2011 at 12:51 PM. Reason: Note about formers for future reference.
|
| Google Adsense |
|
#6
08-17-2011, 12:31 PM
|
||||
|
||||
|
So I've read through the kartonmodel thread on this, and it does seem that while some errors have been fixed, others remain in the kit. I will be sure to make note of these as I come across them in the build for others who wish to build this kit. This thread can serve as a guide. I don't mind being the English-speaking guinea pig.

__________________
Put on hold build (someday I'll finish): F-35A Lightning II 1:72 Previous builds: cMags' Card Model Builds
|
|
#7
08-17-2011, 01:06 PM
|
||||
|
||||
|
Another note, which I should have included in the first post:
The kit is designed for A4 page printout, but did not take US Letter compatibility into mind. I could not print the kit as-is at 100% on my (pretty new) Epson NX 515 without some parts getting cut off. In the end I had to export the parts pages to a graphics program (Inkscape made a bit of a mess of the vector graphics so I had to export to raster b/c I don't have CorelDraw  ) and re-arrange parts into a smaller window. I wanted to note this because without graphics editing capability, the builder will need to use A4 or Legal sized paper to print this model at 1:72. That said, scaling the page to fit brings it to 92% which would be 1:78 scale, and most likely printing at 95% (1:76) would fit on Letter as well. Just a heads up. ) and re-arrange parts into a smaller window. I wanted to note this because without graphics editing capability, the builder will need to use A4 or Legal sized paper to print this model at 1:72. That said, scaling the page to fit brings it to 92% which would be 1:78 scale, and most likely printing at 95% (1:76) would fit on Letter as well. Just a heads up.
__________________
Put on hold build (someday I'll finish): F-35A Lightning II 1:72 Previous builds: cMags' Card Model Builds
|
|
#8
08-17-2011, 04:05 PM
|
||||
|
||||
|
lookin good and thanks for the printing heads up!
__________________
Want to buy some models from independent designers? http://www.ecardmodels.com and visit the shop!
|
|
#10
08-19-2011, 11:47 AM
|
||||
|
||||
|
Thanks Wyvern. Complex is right. The next section of the fuselage is one of the more complex - the engine air intakes and cockpit tub. Without instruction I'm just kind of piecing things together, following a little on the previous build thread and avoiding errors it seems to show.
First was to assemble the intake cowlings themselves. The parts are reversed in their labeling but are consistent (7L, 8L, and 9L are all right side pieces, etc.) The formers do a good job at guiding shape and placement. 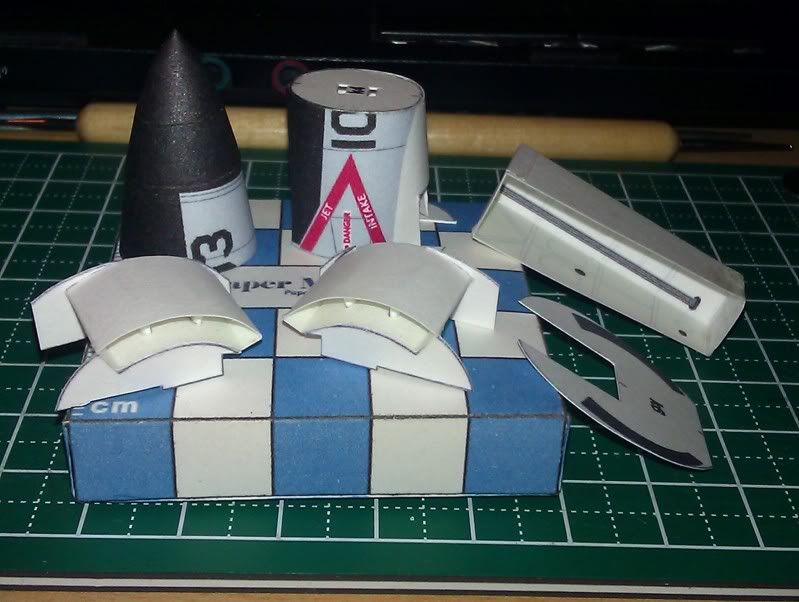 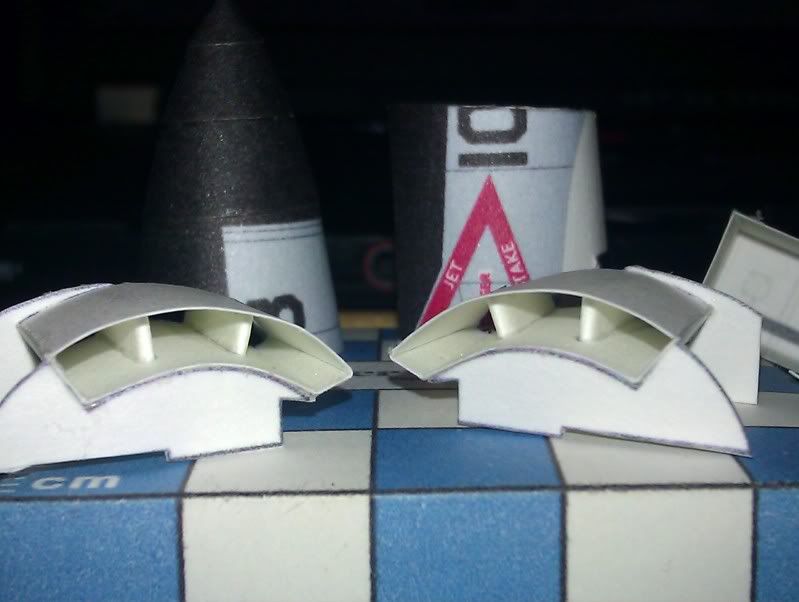 Using a trick shown on Kartonmodel, I sliced up one of the two formers with the intake graphic on the back to shape and locate the intakes against the next section back. Then I attached them along with the front gear bay to the assembly: 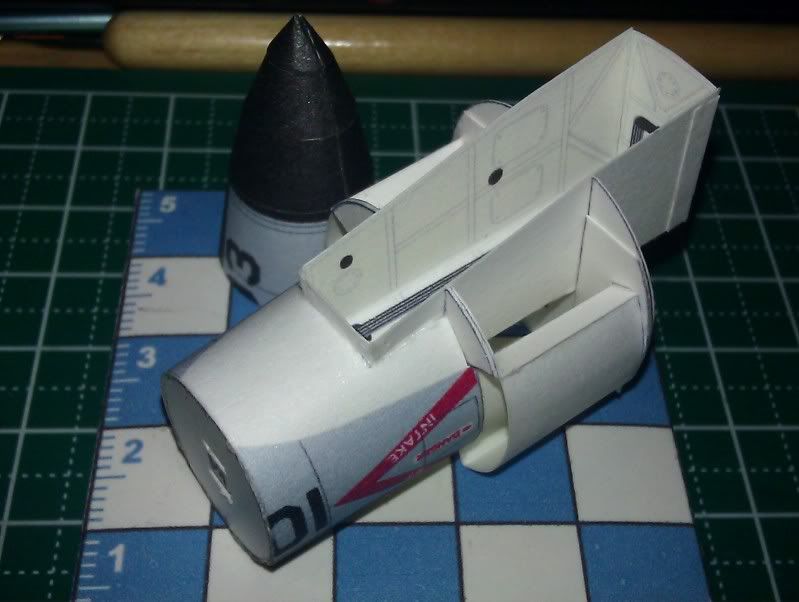 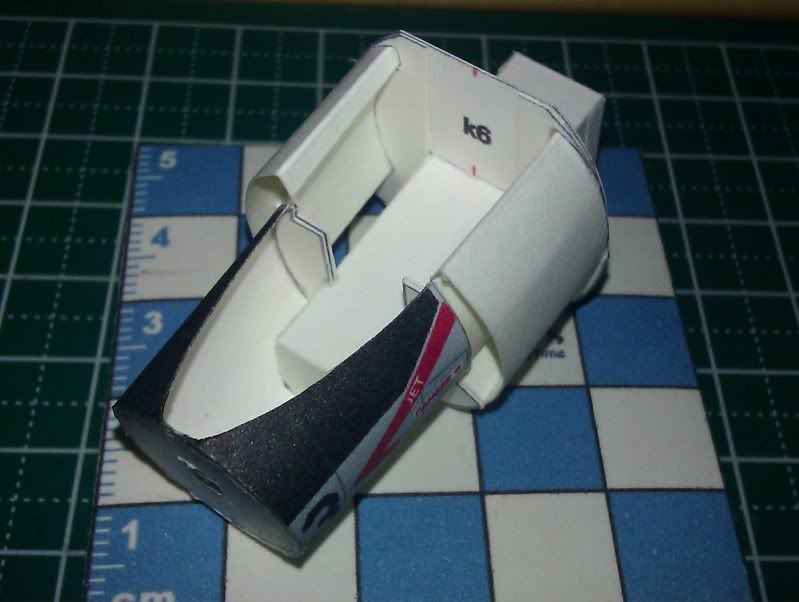 At this point I've left the nose off in case I make a mistake here so I dont need to rebuild it all. The next step will be to apply the outer skin for the intakes. Here are the first design errors I've come across so far. The skins contain a cutout for the machine gun ports, but the forward section is outlined in black as should the rear, and it isn't. This was noted on the earlier build but not fixed. I simply outlined it myself with watercolor pencil. 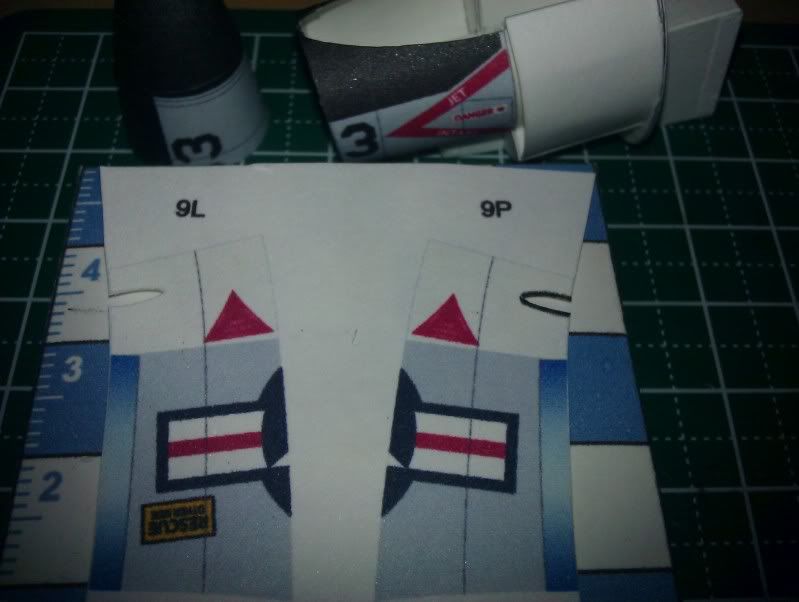 To make sure they get aligned correctly, I attached the next section back, so the graphics can line up properly: 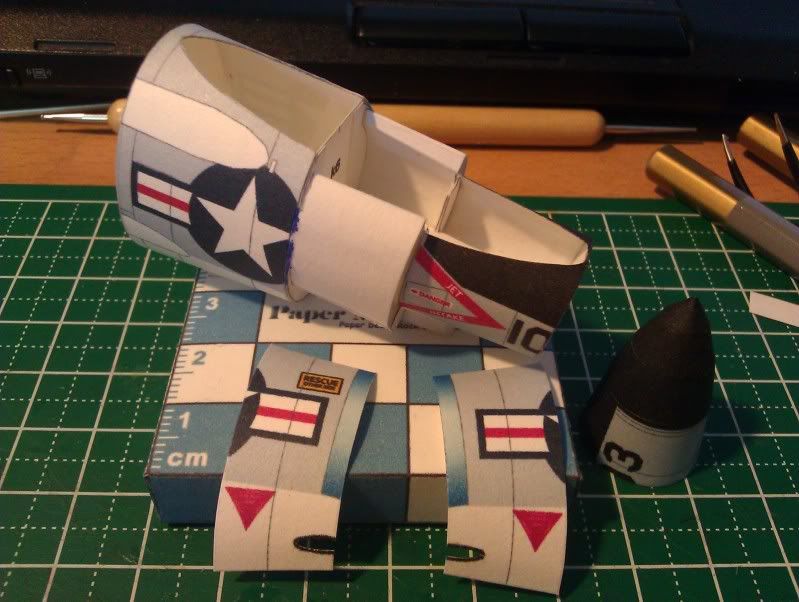 The second issue with the design is also with the MG ports - the ports are intended to be cut out, but the design contains nothing to insert behind them. In addition, one of the openings crosses a former which would be quite visible and prevents an inset tube from being placed. To address this, I created 4 inset MG tubes and cut away enough of the former to fit them. I think the effect works nicely. 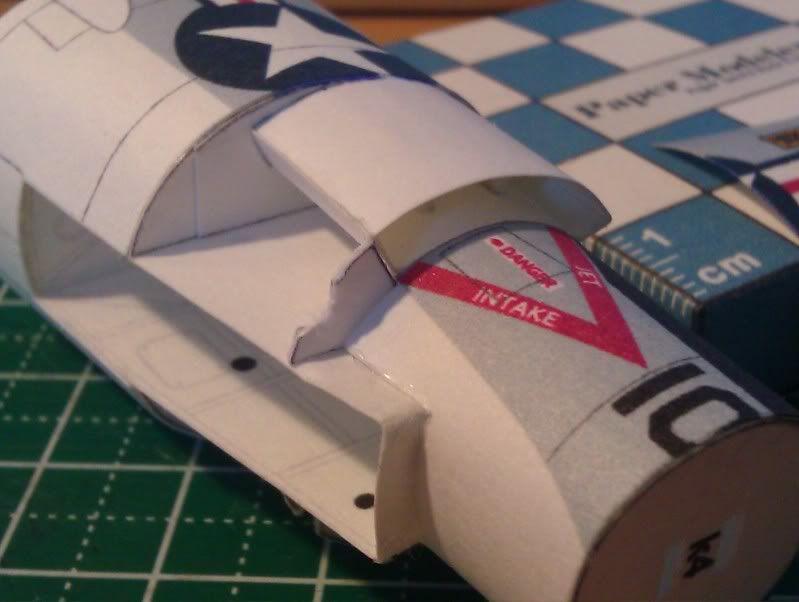 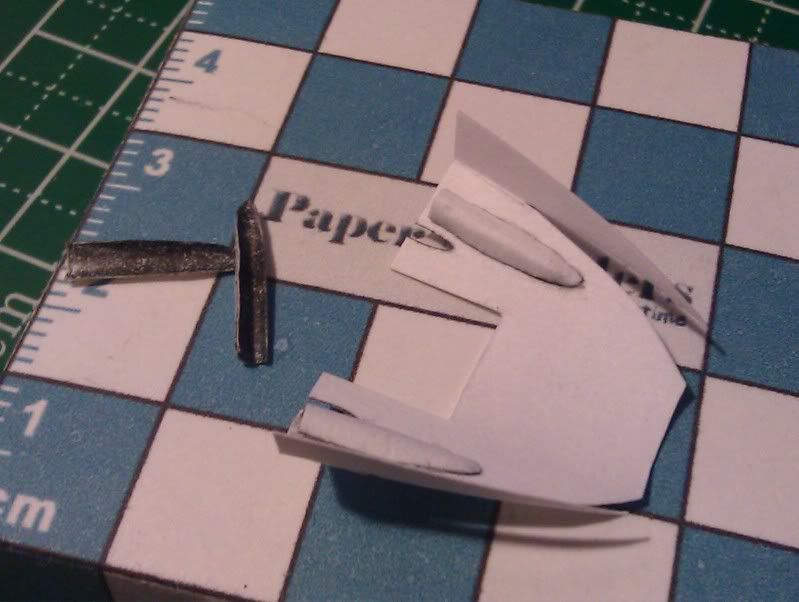 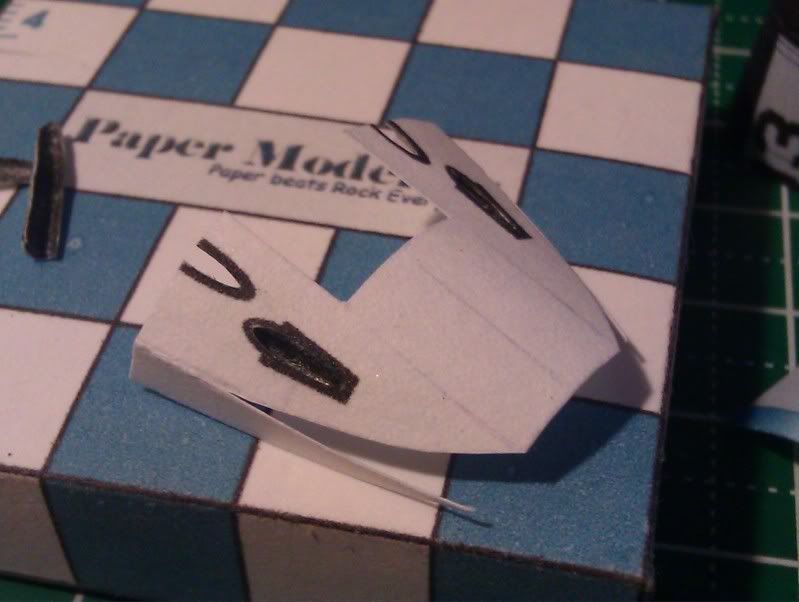 I still haven't applied the skins and second set of tubes but those will be next, and then I can either tackle some of the cockpit or continue on with the fuselage. Decisions, decisions...
__________________
Put on hold build (someday I'll finish): F-35A Lightning II 1:72 Previous builds: cMags' Card Model Builds
|
| Google Adsense |
 |
|
|


 Linear Mode

