


|
|
|
#11
 04-06-2010, 09:45 AM
|
||||
|
||||
|
yes Ray...thats exactly what I thought of too!
The printed kit includes double sided speed brakes (for upper and lower!) so I don't have to print out anything extra. I was thinking of slotting the mount points and installing the brake flap partially open, to help hide the gray coloured area underneath. I will have to consult some reference photos first.
__________________
SUPPORT ME PLEASE: PaperModelShop Or, my models at ecardmodels: Dave'sCardCreations 
|
|
#12
04-07-2010, 09:16 AM
|
||||
|
||||
|
okay, I might leave off the Speed Brakes.
If I'm building a static/parked aircraft, then why would the brakes be open? (unless for service?) back to the "cutting out gear Doors" issue... gave it a try last night and everything went quite smooth!! cut on the inside of the lines just to be sure, and only had to do minor trimming and glue down one small spot! I'm very happy...but I would recommend to anyone building the kit, do this step early, to avoid possible problems later! (Stahlhart?...change your instructs!) 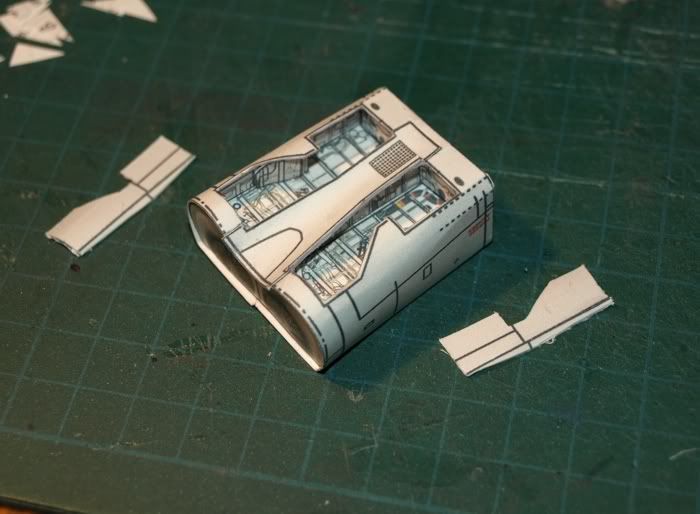 moving on to the the forward fuselage sections, I have realized one thing... my next Stahlhart aircraft (which will probably be a double scale Blue Angels F-18) will receive flush seams and joiner strips for the fuselage sections. I will be cutting off the tabs, which are probably designed more for beginner builders, although to be honest, the joiner strips are much easier to work with in my opinion. 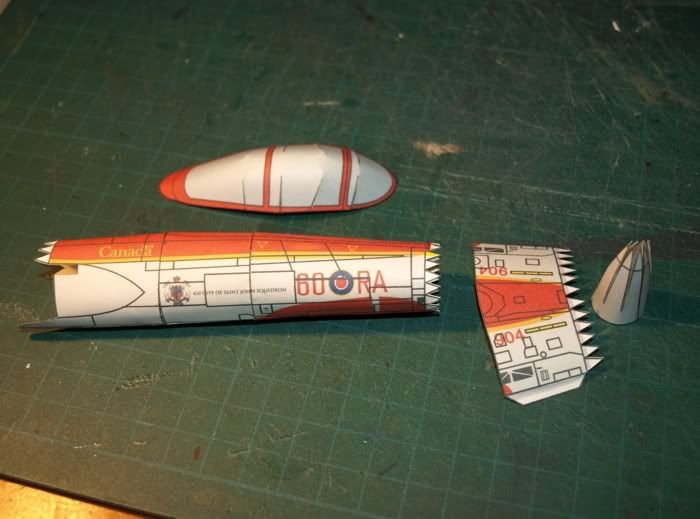 the forward fuselage has only one former piece (installed about where the "a" in "Canada" is) to give the fuselage its shape... for the forward sections you are instructed as to what "shape" to form the fuselage sections (building toward the nosecone). I'm not sure how the fuselage will hold this shape?...maybe its not a big concern in this area? I am contemplating adding another former, although I don't have any reference for shape and size. as you can see, I tried assembling the Canopy as well. I have trimmed out the lines, in the canopy folds, to improve the effect (but it still looks like a normal paper canopy). I haven't decided yet if I will bother with a plastic canopy...I may save that effort for the next build. I made a small mistake assembling the forward fuselage sections... like the rear fusleage, you need to install the front Landing Gear Bay assembly into the fuselage (and trim out the doors). I misread the instructions (which are a little confusing at this point) and assembled both ends of the fuselage section that houses the Landing Gear bay. This means that I had only one open end for access to fit the assembled bay into. (hopefully I am aligned as close as possible to the right position?!) I added a vertical tab to help me hold the assembly with tweezers and press it into place and it also acted as a stiffener for the whole Bay structure, to avoid any deformation while installing it. 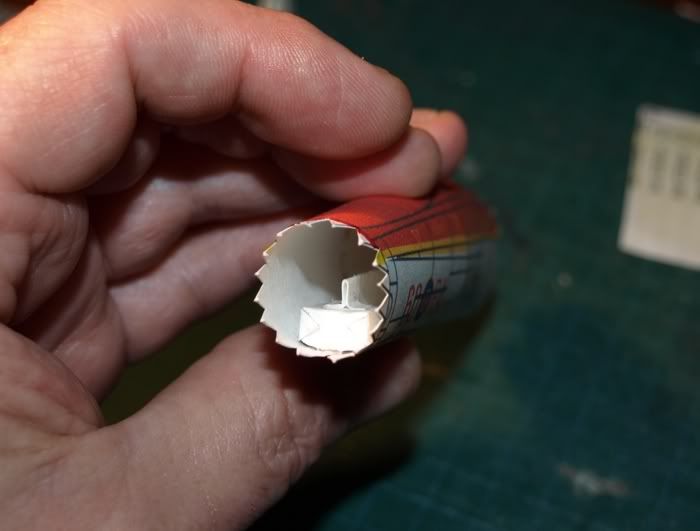
__________________
SUPPORT ME PLEASE: PaperModelShop Or, my models at ecardmodels: Dave'sCardCreations
|
|
#13
04-07-2010, 09:55 PM
|
||||
|
||||
|
a little more of the front fuselage...
I am really wishing I did the joiner strip thing, each section towards the front, gets worse! On larger fuselages and parts, the joining tabs work okay, but on smaller parts like this, the fit is not that great. The "petal" nose cone is fairly simple (large petals) and has a good overall shape. However the look is just not as nice as a sectioned cone. I would give up the better shape, for the smoother look. Canopy is still looking okay (for a printed paper canopy). I have added some small formers (not shown here) inside the canopy to help hold the narrowed shape to the canopy. Should make it a little easier to glue in place. 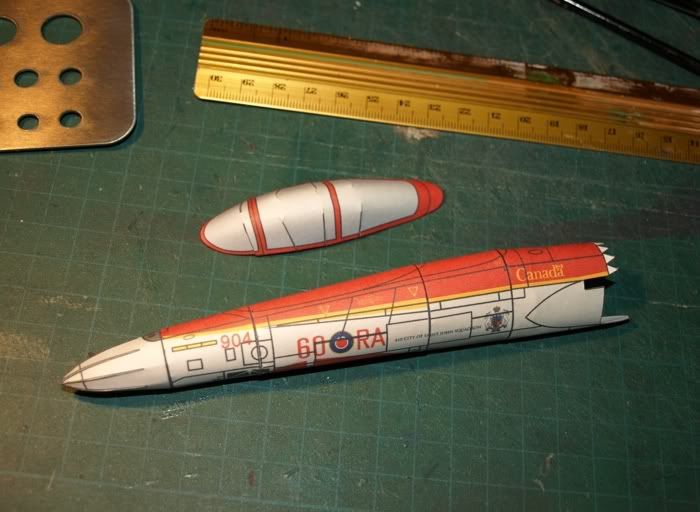 next...cut out the gear opening, in the front fuselage. wish me luck!
__________________
SUPPORT ME PLEASE: PaperModelShop Or, my models at ecardmodels: Dave'sCardCreations
|
|
#14
04-08-2010, 11:16 AM
|
||||
|
||||
|
Looks like an excellent fit so far considering the model is not even CAD'ed. I wonder how easy is it to add a transparent canopy with internal details from this kit? It occured to me that a reasonably fine detailed gear bay could be complemented by an equally detailed cockpit...
__________________
"The world is big" On hold: Fuyuzuki, Zao, Zara, Akizuki, Past works: XP55 Ascender, CA Ibuki, Seafang F32, IS-3, Spitfire V, J-20
|
|
#15
04-08-2010, 11:57 AM
|
||||
|
||||
|
^^ I was just thinking the same thing. Then I was realizing that I know nothing about vector graphics. :(
__________________
Put on hold build (someday I'll finish): F-35A Lightning II 1:72 Previous builds: cMags' Card Model Builds
|
| Google Adsense |
|
#16
04-08-2010, 06:58 PM
|
||||
|
||||
|
Tough work my friend!!!!!
__________________
Chaiwat Kosatanakom (Jack, the papermann) Aircraft Paper Designer & Modeler  "Flying 3 D Paper Airplane Model Inventor"
|
|
#17
04-09-2010, 01:11 PM
|
||||
|
||||
|
As with the main Gear, you have to trim out the doors on the fuselage for the forward gear...
I got real lucky, despite my rush to put fuselage pieces together before I had fitted the Gear box! I cut out the doors/panels and the box is lined up almost perfect. phew! 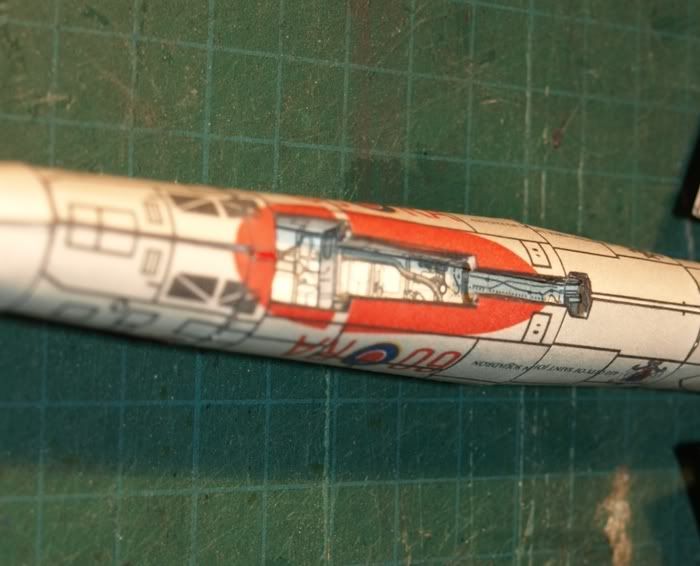 Basic wing assembly is pretty simple, the upper surface is slightly larger allowing you to glue the trailing edges and get the curve into the upper surface.. I don't like the seamed connection at the leading edge however, it leaves a pretty rough looking leading edge to the wing. Not sure why the wing isn't a one piece, fold over style?...its only the small wing tip protrusion that would have to be altered. 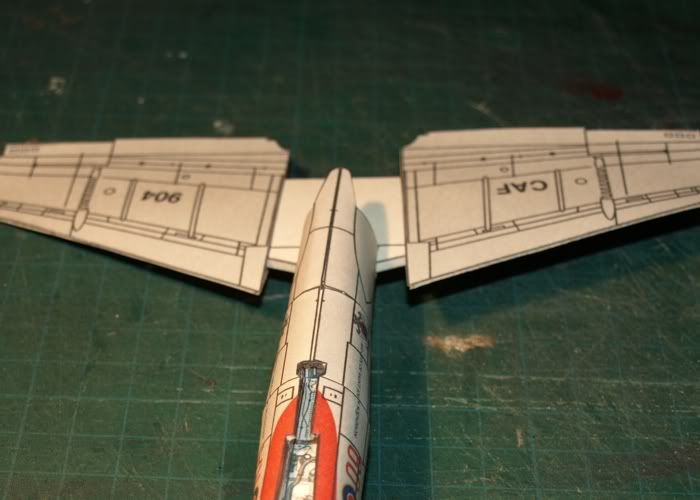 The inner support assembly is straightforward, and I think the trick is to attach the wings over the support making sure to line the wings up with the proper marks on the inner support. I applied glue only to the lower, flatter side of the wings. Both sides of the inner support have marks for reference.  The forward fuselage assembly slips tightly onto the inner Wing support and a little glue holds it in place. Once again, the instructions give you a couple of tips on proper placement and a side profile view that helps get the angles in place. I'm very happy with how these various assemblies went together. 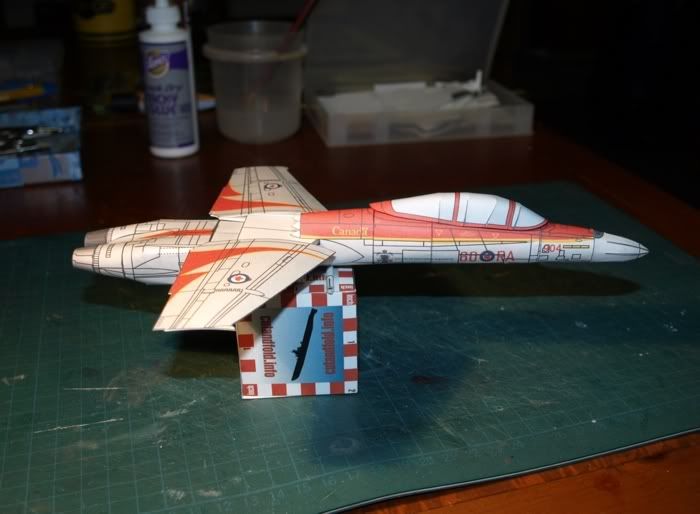 Canopy is not glued in place yet, but at least we can see the plane coming together nicely
__________________
SUPPORT ME PLEASE: PaperModelShop Or, my models at ecardmodels: Dave'sCardCreations
|
|
#18
04-09-2010, 01:27 PM
|
||||
|
||||
|
Quote:
__________________
Put on hold build (someday I'll finish): F-35A Lightning II 1:72 Previous builds: cMags' Card Model Builds
|
|
#20
04-09-2010, 02:00 PM
|
||||
|
||||
|
well I built paper-replikas Blue Angel F18, and although it looks pretty amazing in the photos on the site, it doesn't assemble quite that well.
I think most of the detail photos are CGI anyway. Once again, another model that lacks good instructions. Seems like many of these designers rely too heavily on: the builders sorting out the problems and build threads for details on how to assemble. It has a ton of potential, but it is a more advanced model I think, that has some very tricky areas to deal with. and I didn't build it with gear...I'm glad! Visually, if the paper-replika model was assembled correctly, it would outshine most other models though.
__________________
SUPPORT ME PLEASE: PaperModelShop Or, my models at ecardmodels: Dave'sCardCreations
|
| Google Adsense |
 |
|
|


 Linear Mode

