


|
|
|
#1
 05-02-2010, 07:05 AM
|
||||
|
||||
|
"Big Blue" - Stahlharts' Blue Angels F-18
As I stated in another thread, I am attempting to build a "big" Blue Angels F-18.
I had planned to scale up and try a second build of the Paper Replika F18 but when Stahlharts F18s appeared, I was swayed... Now before I start bitching and moaning, which I will do, let me clarify a couple of things... Every kit has its weaknesses and flaws. Every kit has its bad points and good ones. Not every kit is designed to be scaled up or scaled down properly. One man's "easy" build is another man's "difficult" build. Stahlharts designs are amazingly well thought out, I think and for "free" kits, they rival some of the best "pay" kits out there. Yes, they are far from perfect, but thats where the builder has to step in and take up the slack. Show me a kit that doesn't require some skill, some ingenuity, patience and understanding and a little extra effort to build it "just right". Anyway, enough of my annoying preaching.... The biggest issue I am experiencing with my over 200% upscale, is enlarged errors and fit issues. Small gaps become immense ones! Minor alignment issues become ess bends on mountain highways! The lack of internal structure, formers, etc is not helping the enlarged scale. Following the instructs, I start with the rear fuselage sections. No gear...I just want to keep it simple and make a hanging "in flight" version. 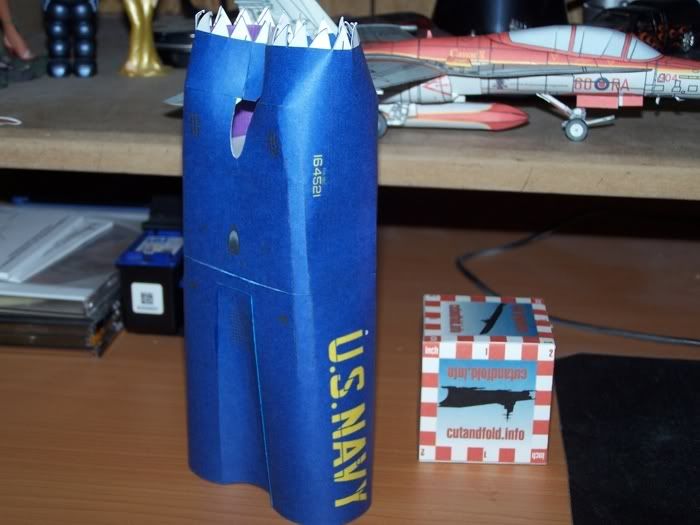 This part required three rebuilds as I figured out the scale up issues and distortion problems that would occur. Eventually I settled... and moved on. Theres only so much fighting I can do with this, I have to be satisfied at some point. The overall effect is good, just have to be careful in some areas to avoid buckling or denting open panel spots. 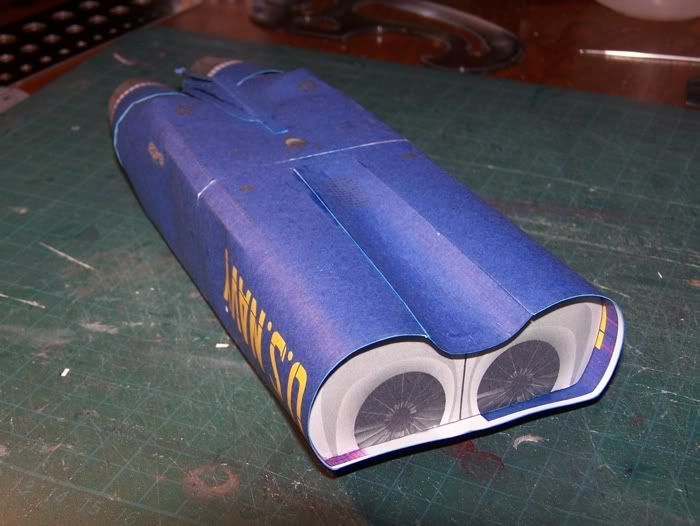 Keeping the exhaust parts aligned was the trickiest as was fitting the separator strip and catch hook assembly.. I finally allowed it to 'float" a little, to avoid any further distortions by trying to get it glued down everywhere. 
__________________
SUPPORT ME PLEASE: PaperModelShop Or, my models at ecardmodels: Dave'sCardCreations 
|
| Google Adsense |
|
#2
05-02-2010, 07:13 AM
|
||||
|
||||
|
Forward fuselage went together a lot easier.
Starting with the awful petal nosecone. Sorry, not a big fan of petal assemblies, although I have made them work on a number of items, in this case the scale up caused problems, but the smaller number of petals is also an issue. But this is my second attempt and the one I will stick with... 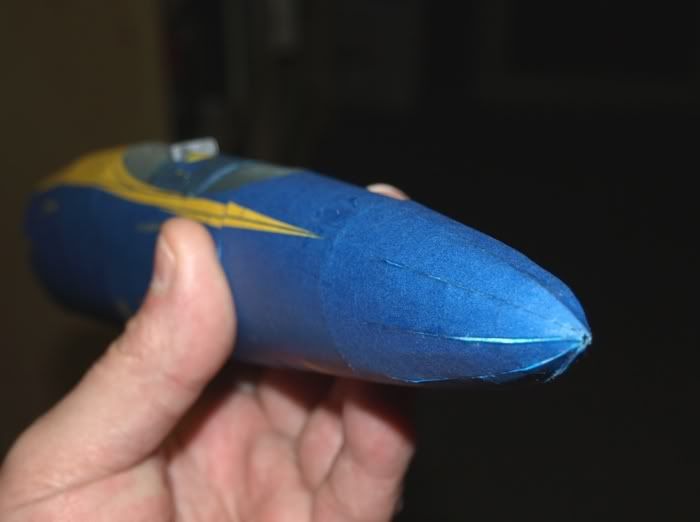 For the fuselage sections, I decided to cut off the tabs and tru joiner strips. Scale up issues kept me from a real tight straight build but the joiner strips made for a better assembly I think. 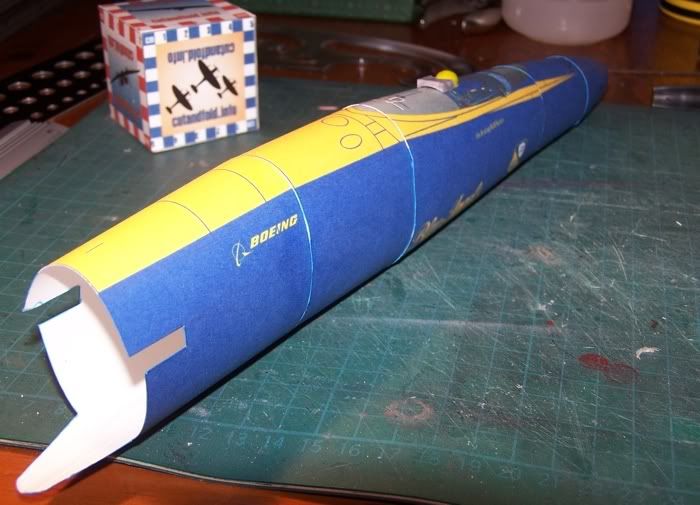 I decided to give the "clear canopy" a try. With all the recent chatter about forming plastic canopies, I thought a larger scale build might offer me some tolerance... hahahahahahahahaha okay, I'll stop laughing now. Things haven't gone well yet. I made a simple form from air dry clay, using the paper canopy. Let it dry, filled in the cracks and sanded it smooth. I used a heat gun to "soften" sheets of plastic (mounted in a wood frame) then pulled the sheets down over the sculpted form. Many attempts later... I have begun assembly on a small vacu-form box and I will give that a try! lol 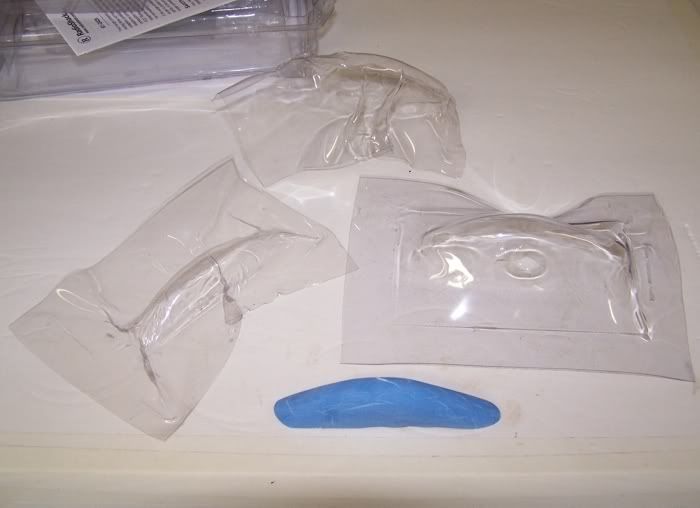
__________________
SUPPORT ME PLEASE: PaperModelShop Or, my models at ecardmodels: Dave'sCardCreations
|
|
#3
05-02-2010, 07:22 AM
|
||||
|
||||
|
I've seen a few builds with clear canopies, but no cockpit underneath.
I even saw one aircraft with a clear canopy showing build instructions still on the fuselage (cockpit area)! I know not everyone can build a cockpit and not every plane kit is ready to receive a cockpit. I personally did not want to get into an extensive design work trying to fit a cockpit into this "far from perfect' build. So, I did the next best thing...a pseudo cockpit. It was actually quite a bit of fun... I used an overhead screenshot of my Flight Simulator Blue Angels F18 combined with an overhead photo of a real F18 cockpit and "photoshopped" a simulated aerial view of the cockpit. Added a Blue angels pilot and the effect was there...but not quite finished. A small portion of the ejection seat headrest, and a "half helmet" give it a little more 3D effect! 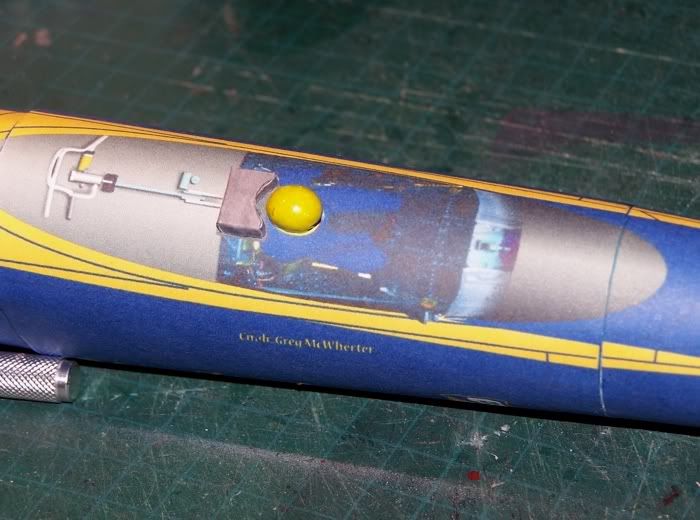 sorry, the camera* washed out the colour a bit...but you get the idea. *I am forced to switch back to my lower end camera for a while, until I get a replacement battery charger for my Olympus.
__________________
SUPPORT ME PLEASE: PaperModelShop Or, my models at ecardmodels: Dave'sCardCreations
|
|
#4
05-04-2010, 07:18 PM
|
||||
|
||||
|
Rock On!! very Nice
|
|
#5
05-07-2010, 08:32 AM
|
||||
|
||||
|
looks pretty good despite some of the fit issues. I like the cockpit idea.
|
| Google Adsense |
|
#6
05-18-2010, 08:07 AM
|
||||
|
||||
|
Finally got back to this (got a new printer!)...
printed out the Wing parts and support structure and assembled everything okay. Attached the Wing "assembly" to the fuselage and fitted the forward fuselage. Only thing I needed to add, was some small gluing/locator tabs for the area where the fuselage spine extends onto the Wing assembly. At this upscale, this part of the fuselage is flimsy and didn't want to hold its position.  This now brings me to the dreaded part of this project...the fitting of the LEX (Leading Edge Extensions)! Thats the forward wing extensions that run down each side of the fuselage. Although these are WAY better designed than a previous F18 kit I did, they are still a tricky fit. And once again, my large upscale exaggerates any and all fit issues. I will trim and fit, trim and fit, and try to take it slow. 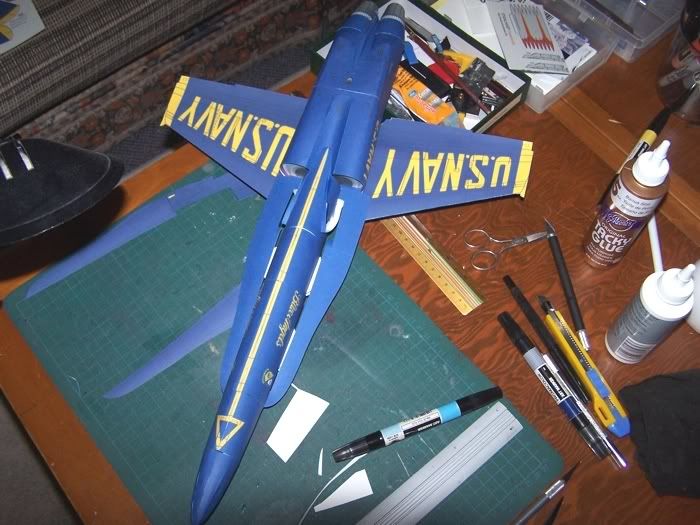 Overall length (tip to exhaust) is 22". It might not be the best build, but at this size it will look cool hanging from the ceiling!
__________________
SUPPORT ME PLEASE: PaperModelShop Or, my models at ecardmodels: Dave'sCardCreations
|
|
#7
05-18-2010, 06:03 PM
|
||||
|
||||
|
Quote:
Garland
|
|
#8
06-01-2010, 02:31 PM
|
||||
|
||||
|
In case anyone stillcares LOL), I am still tinkering away with this "big" F18
but its turning into an exercise of futility. Basically the upscale caused me a number of issues, exaggerating very minor problems into serious ones. Heres my latest problem: The wing aerofoil shape is a little excessive...the upscale made it even worse. At first I loved the way the wings retained a really visible aerofoil curve, but this proved to be a big issue when fitting the rear upper fuselage sections. Everything behind the canopy, back towards the tail and the LEX parts, require a flatter surface to be attached to. I tried and tried, but just couldn't get things to fit properly. Finally I notice that one wing had separated a little at the glue seam, so I figured if I could get the wing halves apart, I could reglue them flatter with less curve shape and then trim of the trailing edges. (No...there was no option of installing a new wing assembly without destroying much of the existing fuselage) ...half way through the wing separation, I tore part of a wing. Then I tore another part! I have since re-glued the wings and got some of the fuselage sitting better, but now I have damaged wings to repair. ...in other words, futility is setting in fast. another minor issue, is a slight colour difference in newly printed parts. a new printer. something I could normally live with, but on top of all the other issues...
__________________
SUPPORT ME PLEASE: PaperModelShop Or, my models at ecardmodels: Dave'sCardCreations
|
|
#9
06-01-2010, 02:34 PM
|
||||
|
||||
|
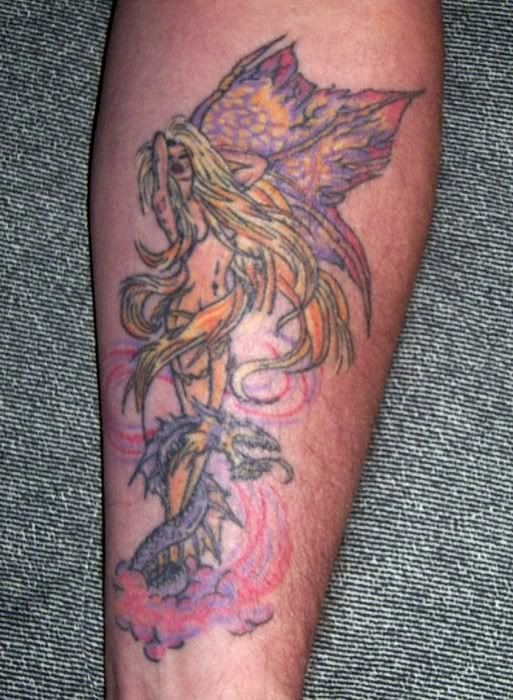
That's quite the tattoo Dave, what is it?
__________________
Put on hold build (someday I'll finish): F-35A Lightning II 1:72 Previous builds: cMags' Card Model Builds
|
|
#10
06-01-2010, 02:55 PM
|
||||
|
||||
|
Quote:
__________________
SUPPORT ME PLEASE: PaperModelShop Or, my models at ecardmodels: Dave'sCardCreations
|
| Google Adsense |
 |
|
|


 Linear Mode

