


|
|
|
#21
 05-27-2010, 09:01 PM
|
||||
|
||||
|
Well this is as far as I got today... the first row is on, working on parts for the second row. This is a fun engine to make and am glad the build time happened to occurr
 (seems some dust has acculmilated on my computer  ) )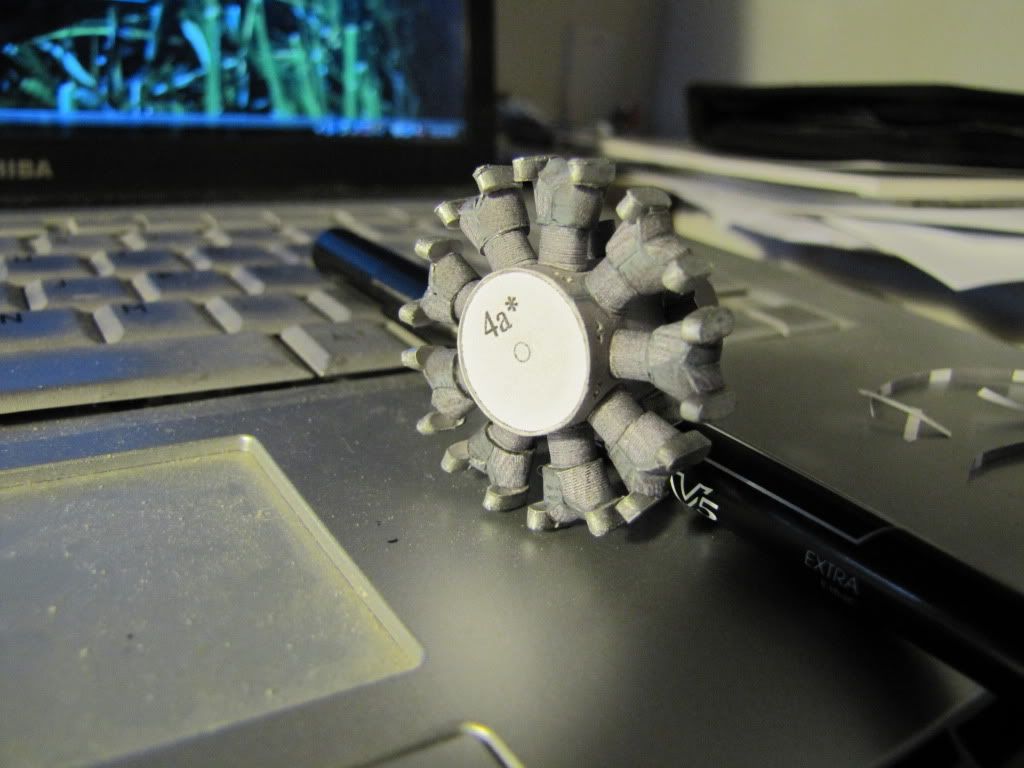
__________________
regards Glen 
|
|
#22
05-29-2010, 03:14 PM
|
||||
|
||||
|
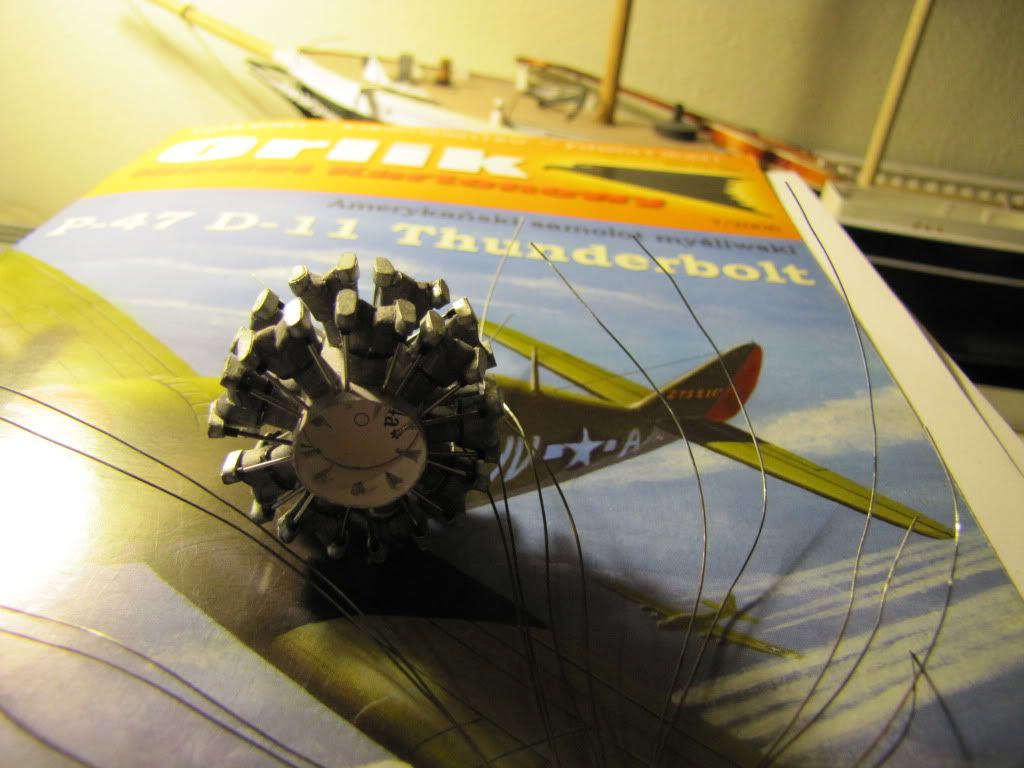
Rear row pretty much done, used paper clips with partially removed plastic covers for pushrod tubes, look ok but not as nice as pins will use those for front up next making another set of valve covers
http://i232.photobucket.com/albums/e...v/IMG_0017.jpg http://i232.photobucket.com/albums/e...v/IMG_0018.jpg
__________________
regards Glen
|
|
#23
05-31-2010, 12:03 PM
|
||||
|
||||
|
Here's my attempt to make a wiring harness, it seems like it may be too prominant and overwhelm the view of the cylinders..the wire is steel, used brass black to darken the wire, the main disc is card frisbee shaped by gluing the outer rim to a central disc and sanding the edge to look more circular/ tube-like. drilled holes around the rim to insert the wires which were epoxied in from the back, very strong.Slipped plastic tubes over each pair of wires...this is the result

__________________
regards Glen
|
|
#24
05-31-2010, 01:44 PM
|
||||
|
||||
|
Glen,
Really wild job! Slightly reminiscent of another build I've seen around here somewhere  How do you find working with the steel wire? I have really fine stainless that I was thinking of trying out for rigging but if you say it's a pain I won't try it just yet. Ron
__________________
http://burnedofferings.com/shop
|
|
#25
05-31-2010, 02:26 PM
|
||||
|
||||
|
Ron I don't think this wire is stainless, is magnetic though, suspect some alloy, doesn't say but is 28 guage craft wire that has been in my drawer for years and find it's way into a variety of projects useful stuff. I used stainless for my rc sailboat and it is a pain..
__________________
regards Glen
|
| Google Adsense |
|
#27
05-31-2010, 09:48 PM
|
||||
|
||||
|
....Looks awesome Glen.
|
|
#28
05-31-2010, 11:05 PM
|
||||
|
||||
|
This is looking really great. Orlik desing is excellent and you're doing a fantastic job with it. Airplane engines are a soft spot of mine and I enjoy watching you build one - P&W Double Wasp in particular. When ever an electrical appliance in my house breaks down I demolish it into atoms and save all parts worth using in modeling. My wire collection is big - every guage in every possible color and alloy. :-)
Looking forward seeing how detailed you're work this one.
|
|
#29
06-01-2010, 10:44 PM
|
||||
|
||||
|
Thanks Ron, Kevin and Tapcho (has springtime come to Finland?) Was able to put on the plug wires, it actually was a quick job just worked around the engine. Now to make some of the parts for the gear housing cover, I tried to put some rivets on, my first attempts were pretty poor, but I'm starting to get the hang of it.
__________________
regards Glen Last edited by birder; 06-01-2010 at 11:01 PM.
|
|
#30
06-02-2010, 02:55 AM
|
||||
|
||||
|
Spring is almost over, heading stronly towards sumer - we've had temperatures +24C already! Engine is looking really cool. I've been looking photos of the real thing and it's offering a multitude of detailing options if one wishes to go that far - for instance the bolts and rivets on the gear housing - I guess that's what you refered to. :-) Also the sems to be a 'handle' shaped structure between valve housings on each cylinder. I don't know what it actually is but seems producable in this scale. Good work so far - I'd just wish there was an P&W engine paper model - I could do that.
|
| Google Adsense |
 |
|
|


 Linear Mode

