


|
|
|
#1
 06-25-2010, 07:07 AM
|
||||
|
||||
|
P-47 N Thunderbolt "Chautauqua" [AirDave Re-Design]
Time for another Airdave Build Thread...lets recap:
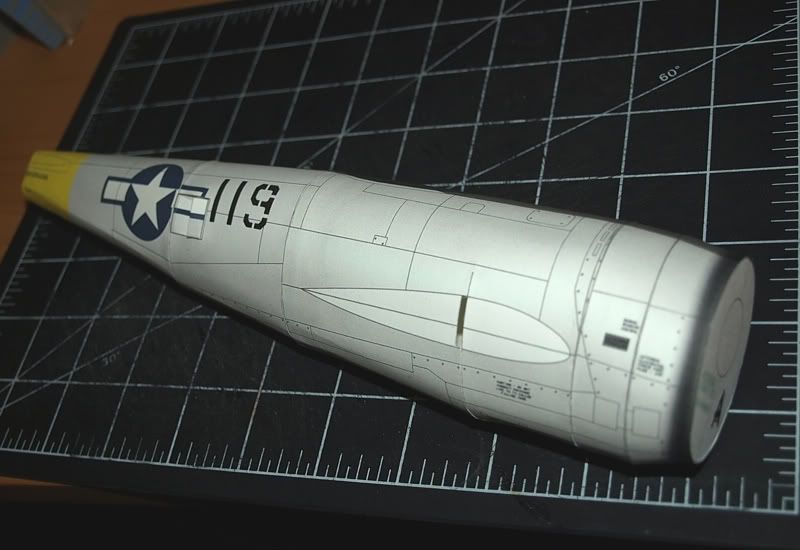
Dave's build method is best termed as "impatient". Dave's builds are generally rushed. Dave is obsessive compulsive and his threads are detail oriented. Dave doesn't like hijacking (unless he's the one responsible). Dave can be quite anal at times...with a side order of Jack Daniels. Dave loves your opinions and ideas...as long as they concur with his. If you haven't already seen one my long winded build threads... I apologize in advance for what I could probably show you in three photos. .................................................. ...................................... This is the P-47 N "Chautauqua" as flown by Lt. Victor Schmidt It is one of three P-47 models I have created (P-47 D, M & N), based on Marek's older P-47 kit (available at ecardmodels.com) I have made extensive modifications to the kit to create the three new models, and of course, complete repaints. This "test" build serves the purpose of ironing out many of the last modifications and necessary tweaks to the kit before releasing the model at ecardmodels.com Its already shown me that even with my quick and sloppy build technique, the parts are going together with considerably better precision and less effort...so far so good! This is definately not an overly complicated kit, with some simplified structure and assembly methods (my kind of kit!), but I still think it would be a challenge for a beginner. I'll show you my current build as it is progressing, including some of the necessary design adjustments. As usual, I don't print the entire kit, opting for just the pages as I need them. Heres the main fuselage parts, which is where I am starting. 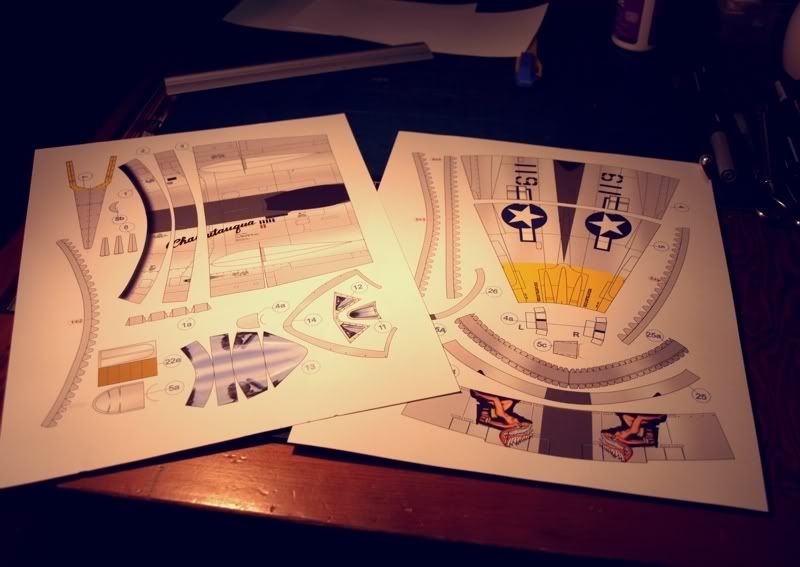
__________________
SUPPORT ME PLEASE: PaperModelShop Or, my models at ecardmodels: Dave'sCardCreations Last edited by airdave; 06-25-2010 at 07:31 AM. 
|
| Google Adsense |
|
#2
06-25-2010, 07:19 AM
|
||||
|
||||
|
So, my method for building is start with the fuselage.
I am assembling the fuselage parts into each sectional "ring". I have designed and added a set of joiner strips into the kit. (Belly seam joiners are not included, they are easily cut to taste, in my opinion) 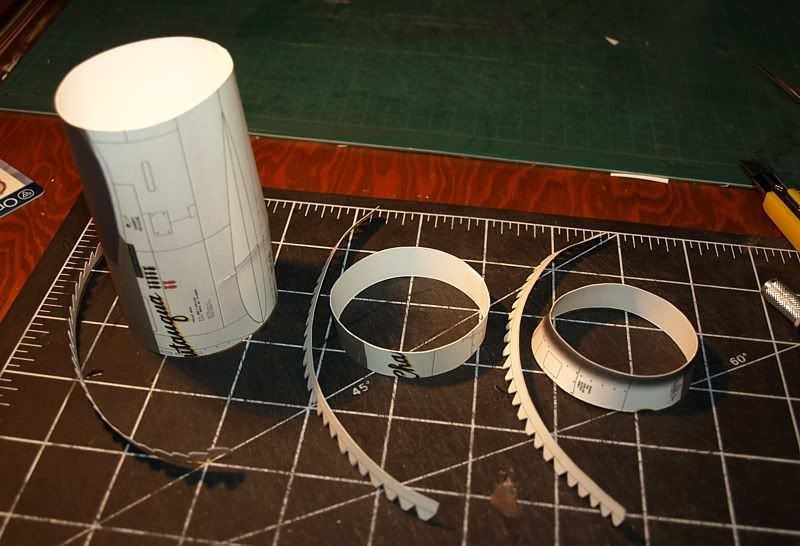 You can also see, in the Wing section of the fuselage, the small slit and rejoin necessary to create the angle underside of the fuselage. The side Intercooler vent openings needed a complete redesign, and using many reference photos I created two options. The fuselage section has a printed 3D effect of partially open Vent doors. Or if you want a real 3D effect, you can fit the added outer door part. (you make three small straight cuts, push the existing door inwards and mount the 3D outer door from the inside of the fuselage section) 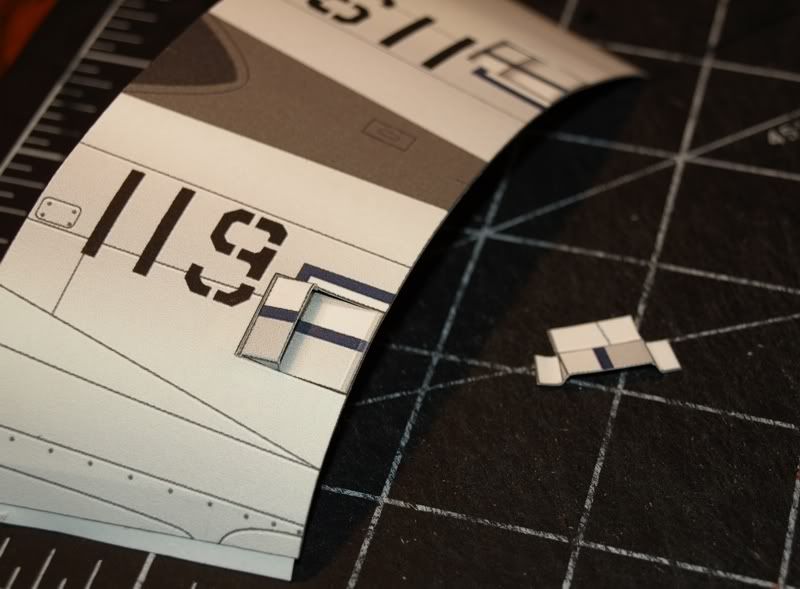 I altered the Fuselage Former arrangement for this kit, preferring the single former, joiner strip connection method. If the builder still wants to attempt a "butt" joint technique, they need only print a second set of formers. Some slight resizing of formers has been done to the kit...but since everyone handles former cutting and fitting slightly different, its impossible to make them work perfectly for everyone. I have tried to guaranty the formers are correct to slightly oversize, to allow for proper reshaping if necessary. In this case, the fuselage has gone together quite well, with each former sitting roughly at the center of each ring connection. 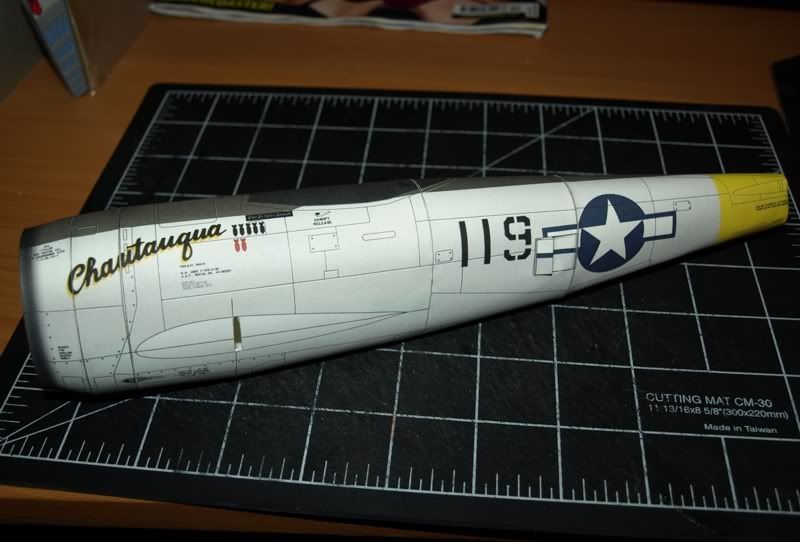
__________________
SUPPORT ME PLEASE: PaperModelShop Or, my models at ecardmodels: Dave'sCardCreations
|
|
#3
06-25-2010, 07:48 AM
|
||||
|
||||
 The second former (B) has not been used...because of the section sizes, the front really doesn't need three formers. I have left it in the kit as an "optional" part. And here is the assembled Engine Cowling and how it fits to the fuselage. I extended the forward section of fuselage to allow for a better positioned fit and it uses a butt joint connection. This is one of two areas that require a "butt joint". The other being the tail end of the fuselage. One former is set deep into the cowling assembly, to allow for cutting of the vent flaps (if desired), and the fuselage former is flush with the front edge. 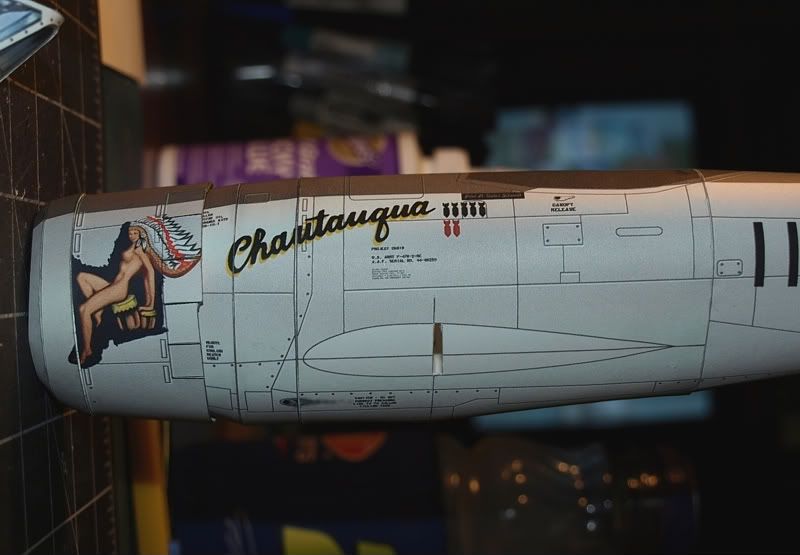 You can see a small misalignment on the cowling artwork, which I have corrected in the kit. You can also see the wing support notches...although these will have to be recut to suit the spar thickness. While I was waiting for some glue to dry (yes I do that once in a while!) I assembled the included paper canopy. Most know, that "bubble" canopies are not the best rendered in paper. This kit does its best to simulate. However the canopy comes in 5 pieces, with framework separate from "glass" allowing you to attach the frame parts to a vacu-formed canopy or use the "glass" part as a stencil for a clear acetate canopy. 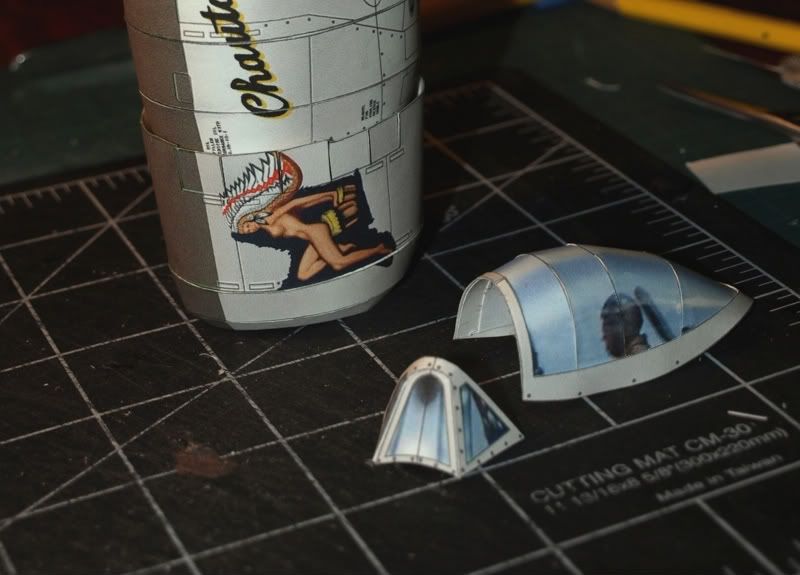
__________________
SUPPORT ME PLEASE: PaperModelShop Or, my models at ecardmodels: Dave'sCardCreations
|
|
#4
06-25-2010, 07:59 AM
|
||||
|
||||
|
Engine Cowling assembly required a number of modifications.
I made some small adjustments to the sizes of the ring sections. I attempted this cowling twice so far... both times with great success. Its only three parts to the curved front edge, but takes a little patience to get it all in place. The inner tabbed ring makes it a lot easier. This second (painted) attempt, I accidentally crushed one side. I did my best to reform the damage (you can still see a little deflection) but I was too lazy to print and assemble another one! 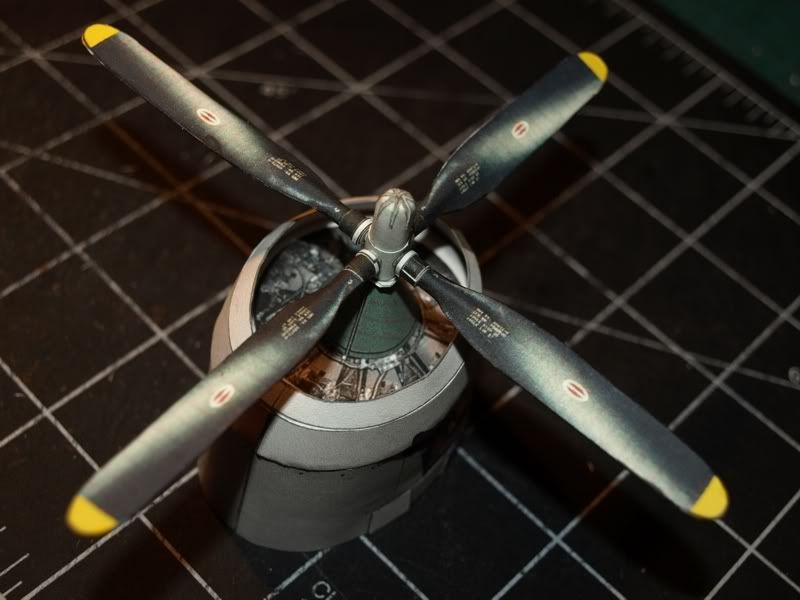 I was very unhappy with the original prop and hub assembly. I did a complete scratch redesign and this is the new prop assembly. The Prop Blade "Boots" are not in the picture...I needed to resize them, and I haven't gotten around to fitting them yet. You will also notice the hub base for each prop blade is black and is actually gray in the kit. And of course you can see the redesigned Motor "plate". I used an actual P-47 engine photo. 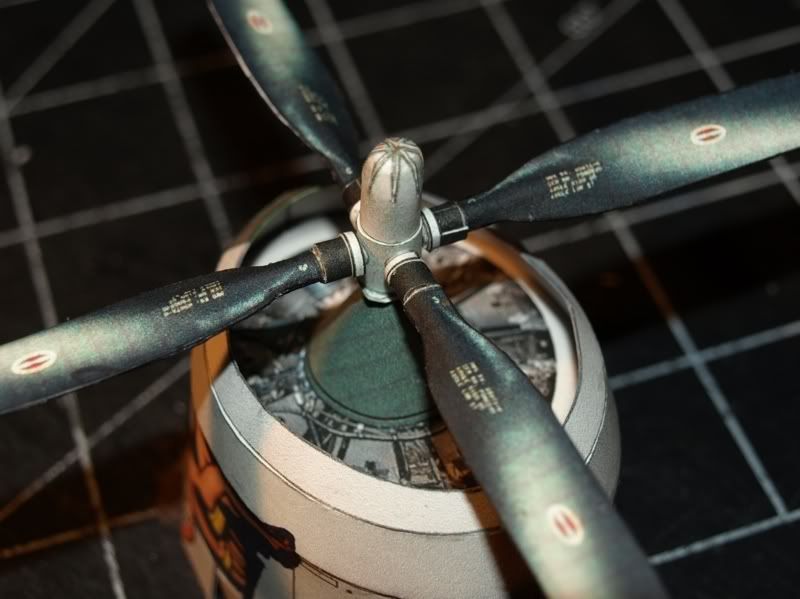
__________________
SUPPORT ME PLEASE: PaperModelShop Or, my models at ecardmodels: Dave'sCardCreations
|
|
#5
06-25-2010, 08:08 AM
|
||||
|
||||
|
So, now I am getting ready to fit the Main and Tail Wings.
I've got both spars in place...required trimming out the hole in the fuselage to fit the thickness of the material used for the spars. Main Wings use only one inboard former for the wing shape. I am in the process of designing a second, outboard former. Not sure if its necessary, I might try one wing assembly first. And then I'll decide whether to include a second wing former in the kit. 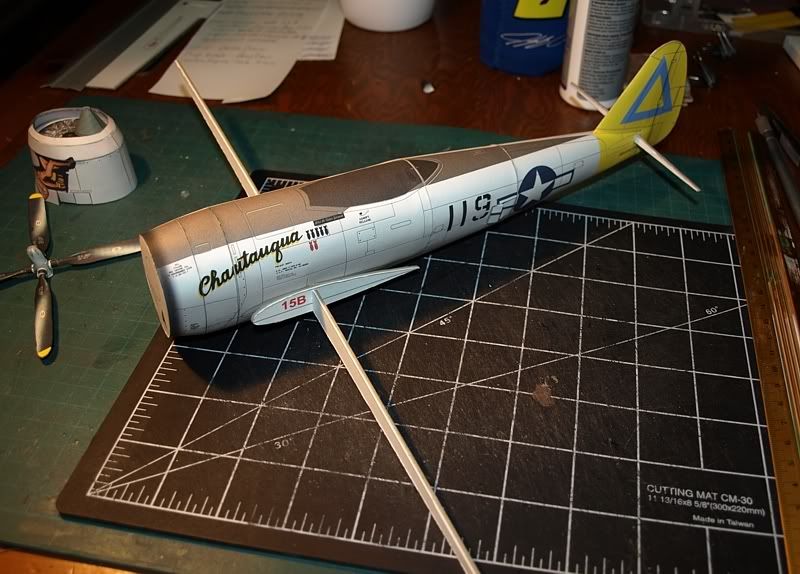 I have a whole new set of newly designed Wing Fairings...for the main wings, Tail wings and vertical Stabilizer. You can see the new vertical Stab. fairing in this next photo. The fairing is nothing more than an extension of the Spine extender. I designed two new spines for the M and N models Thunderbolts (both different) The D model doesn't use a spine extender, so I will add a simple tail fairing for that kit. 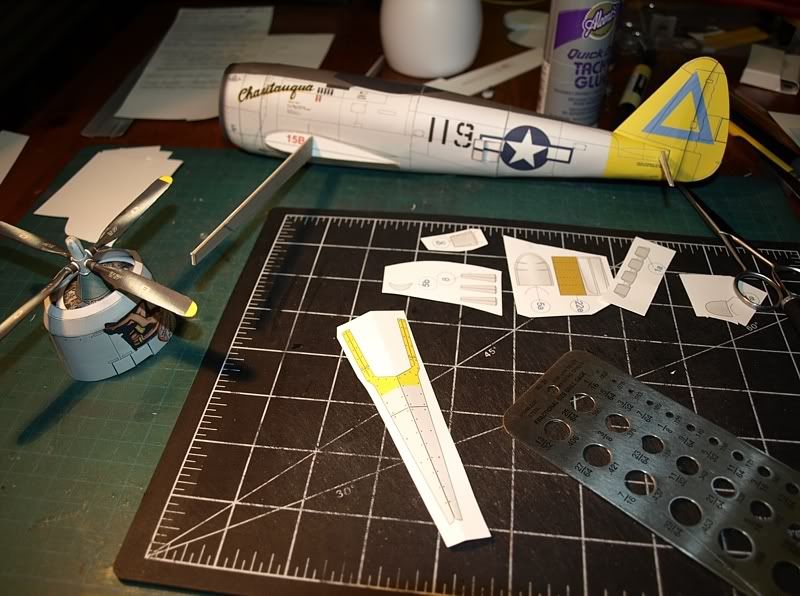 I'm also adding some small joiner tabs for the Spine extender and horizontal tail parts. Just simple bend and glue tabs to help with positioning. (These will be added to the model kit) 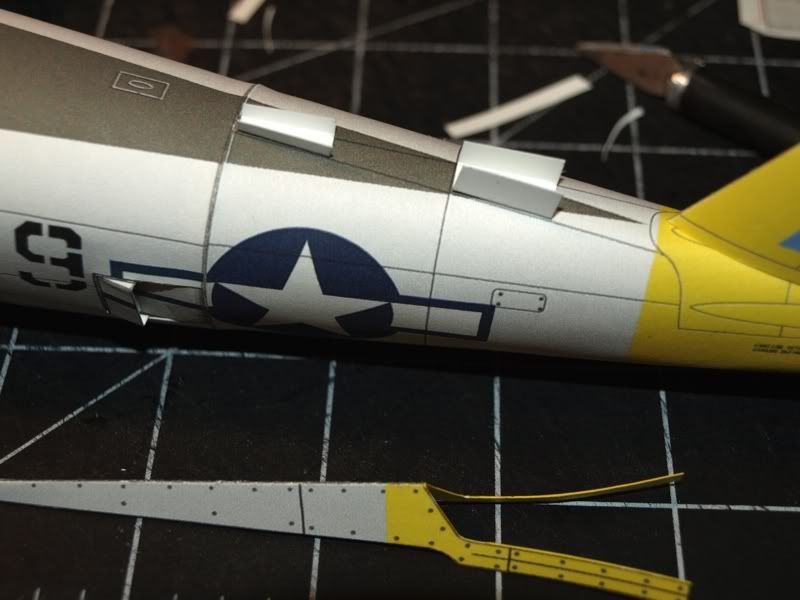
__________________
SUPPORT ME PLEASE: PaperModelShop Or, my models at ecardmodels: Dave'sCardCreations
|
| Google Adsense |
|
#6
06-25-2010, 08:34 AM
|
||||
|
||||
|
Sidetrack for a moment....
on the subject of cockpits. It was my intention to design a cockpit for this model...which I am still hoping to do. Along the lines of what I did for my Mustang kits, I will most likely design a "Cockpit Kit" to fit all the P-47 variations. For now, you will notice in the photos, that I have coloured the cockpit area black. For those of you who like to add the clear canopies, its a shame to reveal a white area or similar. So I decided to go one better and add a simulated cockpit to the basic kit. Using a combination of photo and digital art, I have created a top view P-47 cockpit that will show through a clear fixed canopy. Not everyone wants the extra effort of building a cockpit anyway, but for those who use a clear canopy, it will help improve the effect. 
__________________
SUPPORT ME PLEASE: PaperModelShop Or, my models at ecardmodels: Dave'sCardCreations
|
|
#7
06-25-2010, 08:39 AM
|
||||
|
||||
|
Thats a pretty cool idea on the cockpit
 Build is coming along great - I wish my rushed stuff looked like that. Build is coming along great - I wish my rushed stuff looked like that.Chris
__________________
Want to buy some models from independent designers? http://www.ecardmodels.com and visit the shop!
|
|
#8
06-25-2010, 08:40 AM
|
||||
|
||||
|
Very nice indeed, Dave! Looks clean to me and the artwork looks great.
|
|
#9
06-25-2010, 08:41 AM
|
||||
|
||||
|
okay, back to fitting the Tail wings:
cut, score, fold and glue each wing. and then just slide over the wing spar. The vert. Tail is assembled with one internal former. It is positioned flush with the front edge of the tail to butt up to the fuselage.  I have added some shading effects to the movable aileron/rudder parts but I think I will strengthen the shadows to give a more defined effect. I also added two small locator tabs (like the Spine tabs) to help position the horiz. wings. Fit is pretty good up against the fuselage/tail, keeping in mind that fairings will hide the joins. 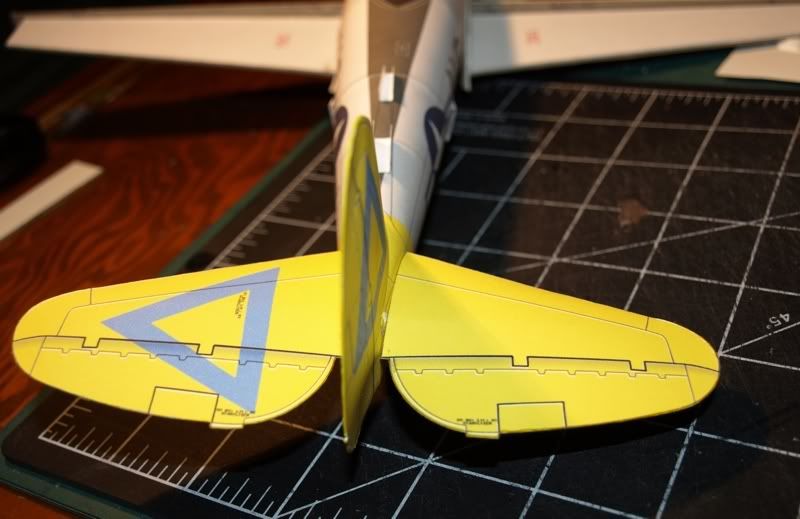 Heres a shot of test fitting the spine extender and fairing part. This photo was just to help me make a small adjustment to the fairing, which sits a little too low at the moment. I'll make the adjustments and print a new part and come back to this later. 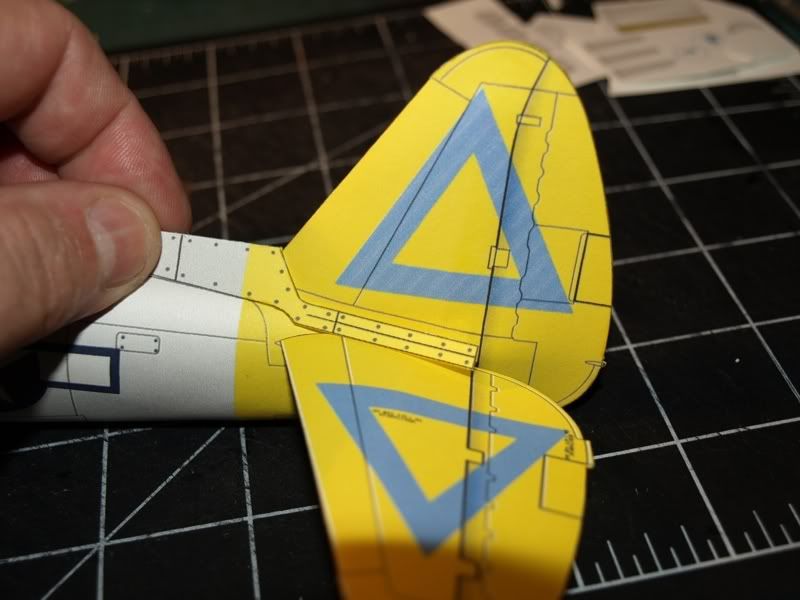
__________________
SUPPORT ME PLEASE: PaperModelShop Or, my models at ecardmodels: Dave'sCardCreations
|
|
#10
06-25-2010, 08:50 AM
|
||||
|
||||
|
Landing Gear...another area that needed some redesign work.
I have stayed with the basic main support for the gear. Its a simplified design (compared to the real thing) but the assembly is also very simple and easy. Theres lots of room to add extras (for those skilled scratchbuilders). The Gear doors however needed some major work.... first the doors need to be cut into three parts and slightly overlapped during construction. The inner doors needed some colouring rework and I came up with the idea of adding some thickness to the doors. I used a number of reference photos and have tried to simulate some of the raised inner panels. The new Door parts are an inner and outer skin with extra panel pieces that can doubled or tripled for even more 3D effect. 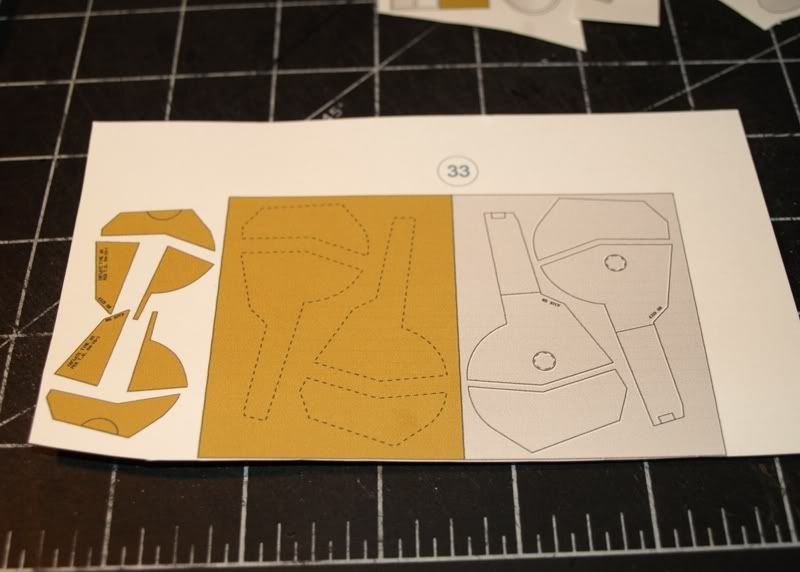 I have also added aded a few stencil lettering details to add realism. Heres the assembled door parts: 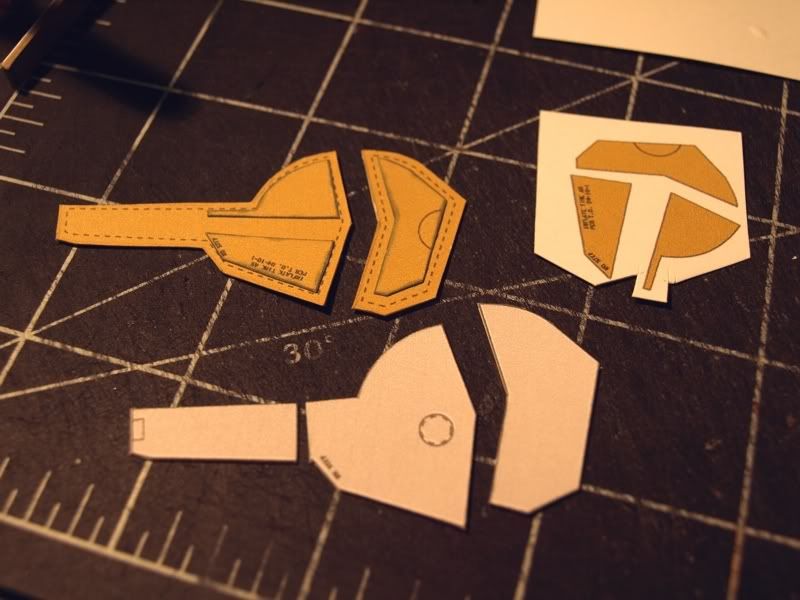 Then just mount to the main gear support, making sure to overlap the door sections to simulate the way the real thing folds. For the wheels, I have included an inner and outer part, to be laminated to thicker inside layers. I have included 8 discs that can be used as laminates, or use thicker card. (I used two pieces of matte board to create a thicker wheel) 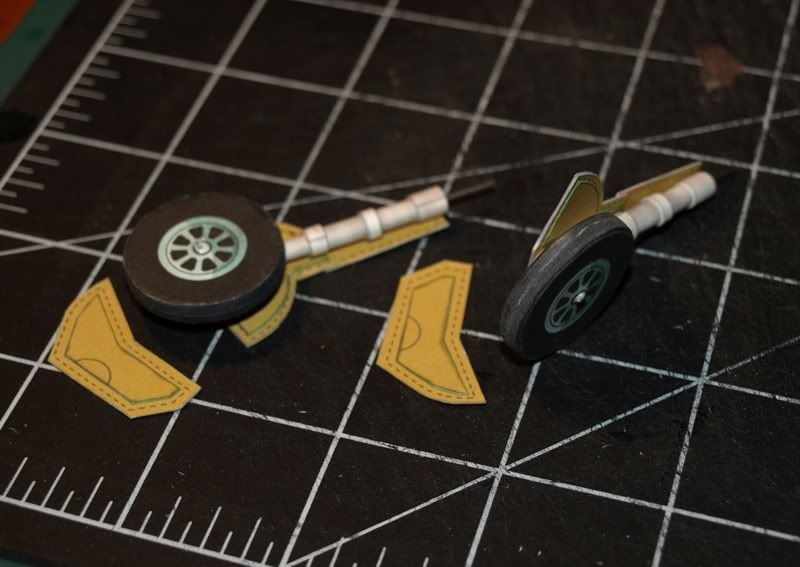
__________________
SUPPORT ME PLEASE: PaperModelShop Or, my models at ecardmodels: Dave'sCardCreations
|
| Google Adsense |
 |
|
|

![P-47 N Thunderbolt "Chautauqua" [AirDave Re-Design]](https://www.papermodelers.com/forum/iconimages/aviation/p-47-n-thunderbolt-chautauqua-airdave-re-design_ltr.gif)

 Linear Mode

