


|
|
|
#1
 12-26-2011, 07:49 PM
|
||||
|
||||
|
USS ALEXANDRIA Beta Build
Well, here goes. Corey suggests I put up a sequence as I build, and in some ways that's a good idea: while I'm just returned to this hobby after a long hiatus and may be reinventing the wheel in every pic I post, there may be something in here that someone might pick up on. Sounds right to me.
I laid down the "Eggcrate" on the base outline, one layer of 110# stock with the keel laminated up of two. This first shot shows that frame with sides fit & glued. You see this work posed on my ohhh-sooo-precise granite "surface plate," which I'll constantly work on or glue-up to in order to keep things as flat to a datum as I can keep; in this instance, so that my waterline model will sit flat against its "waterline" display base without any gaps, but also so that I can more-or-less trust that I'm not incurring any error in my build that will carry up to the next level in the stackup. You will have errors in your work, but if you know about them you can use that knowledge when you make the next element, and so on. It's what engineers call "significant numbers," the tolerances-as-related to the next assembly. We oughta do more like that. 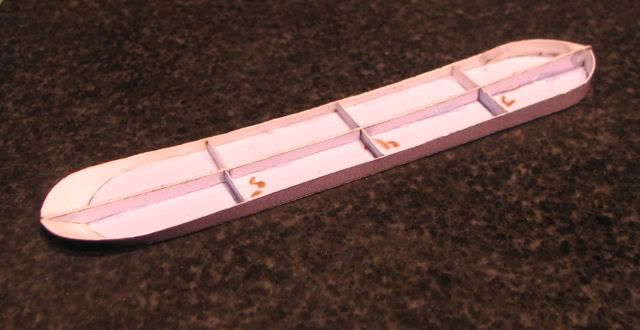 Now, this is a teeny model! What you see here is barely four inches long. But, the keel and crossbars frame up a subtle sheer, and accurate cutting from the start paid off. What I didn't do was to chop out the little interlocks for the eggcrate--I just butted one side in and tacked, then clipped the side and di the same on the other. It's sloppy where it won't count, but at the end it'll get trimmed down to provide a no-gap base for the deck (you see a little mismatch in the keel/bow, for instance). Beta-testing comment: all the geometry up to this point falls together nicely, including the unfolded sides fitting up well within my cutting tolerances. The decks are made up of two pieces laminated together. An easy way to make things line up is, push "index" pinholes into both outlines at some handy spot--I lined up on the apparent cris-cross interstices of the deck outlines, but that's a comparatively big space as it turned out-- 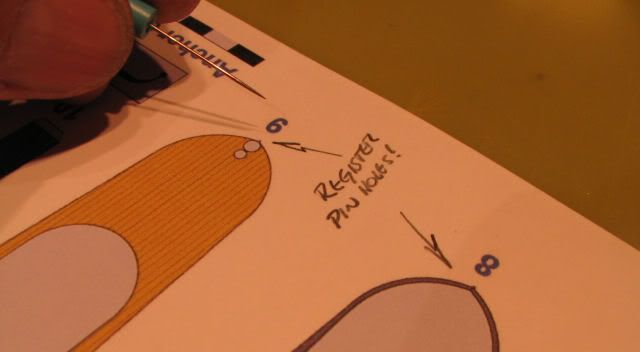 --And glue back-to-back, then cut out the outline and it should match up-- 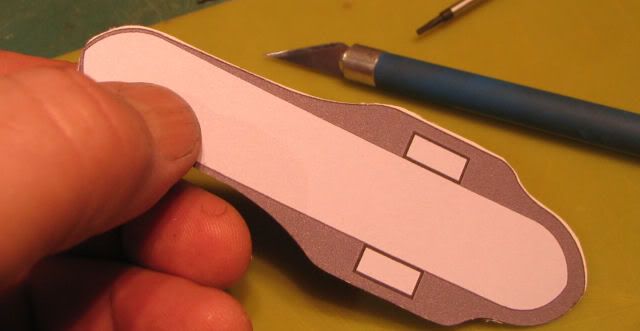 --um...better than that. What's wrong? the outlines as it prints out (no, as my second try proved), or my pinholes? (Sorta-yes.) Well, this is the great thing about downloadable models, if you goof up you can print out another! Soooo, back to pinning & gluing & cutting, but with just the slightest bias towards the mismatch I saw in my first try-- 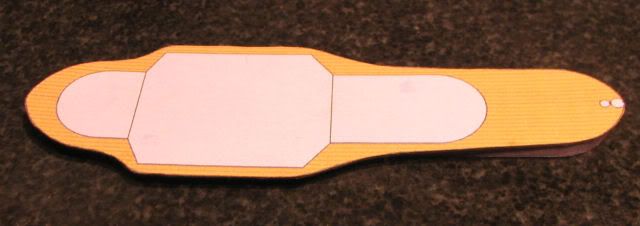 --And it's better the second. A little burnish along the cut edge with the barrel of the knife, a touch of light brown Sharpie on the outline, shape and glue down. I tried to get an edge-on shot to show the marvelous-subtle sheer that Corey has engineered into this model, but the workpiece is too small for my camera to autofocus on at this point. There'll be pics later. Next up, the cabin and hurricane deck. I am mulling over "kitbashing" the cabin sides to follow the deck sheer up to the next leve, or not--the difference amounts to just slightly more than the thickness of my #11 blade. Stay tuned. 'Duster 
|
| Google Adsense |
|
#2
12-26-2011, 09:14 PM
|
||||
|
||||
|
Wow, a great start and a great step by step. I like the pin hole idea.
CT
__________________
My models are available here http://ecardmodels.com/index.php?manufacturers_id=62
|
|
#3
12-27-2011, 10:33 AM
|
||||
|
||||
|
Up on the boiler deck now, beginning the jigsaw puzzle after the assembly diagrams ran out (don't tell me! don't tell me!).
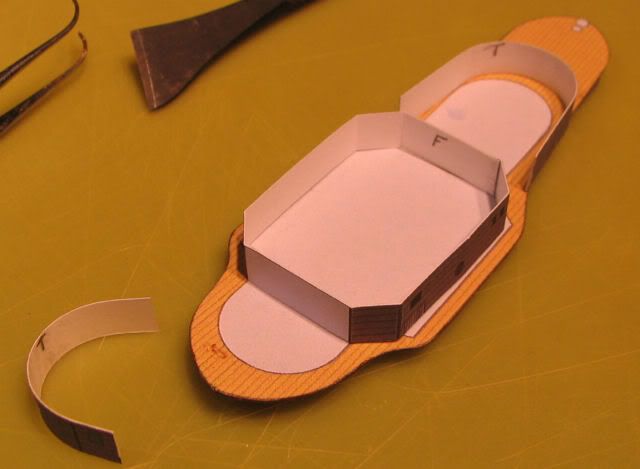 Here's the central structure around the paddleboxes, built as a unit on which I'll hang the fore & aft cabin elements. I omitted the closing tabs on those, since it would create a double-fold condition that would show up huge in this teeny model. The center section is pretty flimsy at this point-- 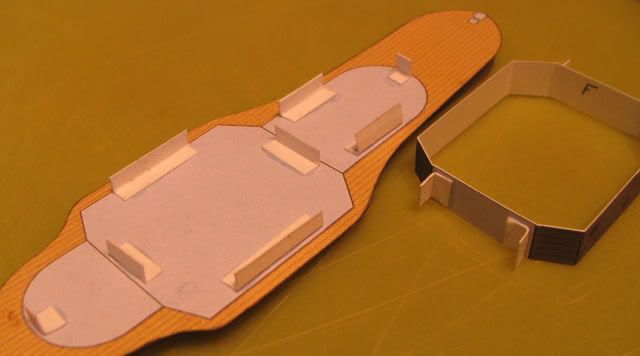 --so I laid in an array of tabs to register the cabin sides at glue-up. This makes folding & final fitting much easier as well, since the workpiece is held kinda in place while you look at what needs tweaking. Also notice, the tabs are set back just a hair from the join line-plus-card thickness, to allow you to "float" them up to fit at gluing. In the "loose" position, the tabs provide just enough support to allow you to move, shift, pull for those critical few seconds you need to get things perfect. 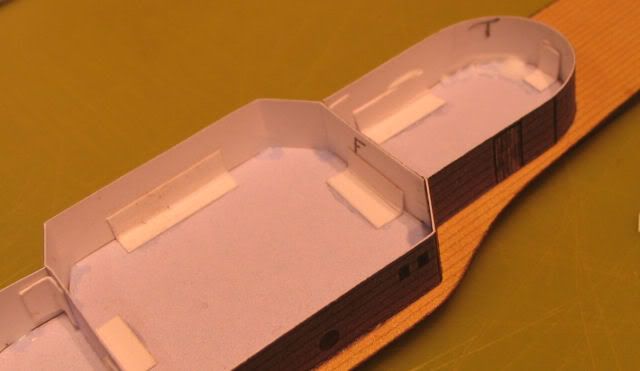 And once it's all in place, some fillets along the unsupported edges just to make sure. It's been nearly a decade since my last card model (DN's wonderful OSLABYA) and in my fuzzy memory I think I recall using Tacky for most of that. Here, I grabbed what was handy: Pacer 560, a canopy cement for model airplanes. A little thinner in consistency but it dries clear. 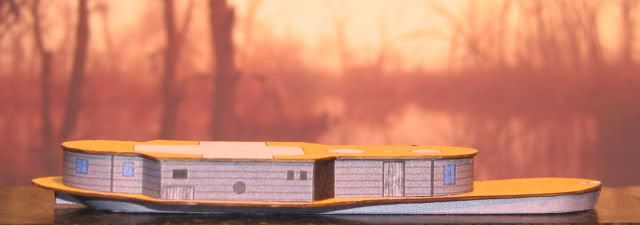 Doin' good so far, how's bayou? (sorry, couldn't resist.) This close-up shows a lucky minimum of hairiness along the deck cuts. Any worse and I'd burnish with a wax pencil. I still might once it comes down to the finish. But all the joints up to now look pretty close, the exception being the gap in the skeg/rudder at the stern; it'll be better when I mount the model on its "water." More later. Sorely tempted to do up some handrails. I could make some standard 1/250 jig, I s'pose... Last edited by Hudsonduster; 12-27-2011 at 10:47 AM.
|
|
#4
12-27-2011, 10:59 AM
|
||||
|
||||
|
Wow, moving right along. Not bad after a ten year break. I love the back drop for that last photo!
Hand rails are clearly shown in the drawings of the original boat. On a larger model, like the Price, I will be adding printed railing options (like in my Champion model) for those who lack the ability to do the thread thing! Like me. On this little guy I figured printed railings would be over powering. If you can do wire or thread go for it! Corey
__________________
My models are available here http://ecardmodels.com/index.php?manufacturers_id=62
|
|
#5
12-27-2011, 12:07 PM
|
||||
|
||||
|
I am really looking forward to seeing the pilot house now that we have a visual on the overall size of the vessell. As was said early, here, paint a target on me.
Great looking work. Joe
|
| Google Adsense |
|
#6
12-27-2011, 01:52 PM
|
||||
|
||||
|
Starting to see mussy spots and hurry-marks, a sure sign that I'm finished for the day, but nothing I can't wax down and touch up tomorrow.
 There're two elements on the top deck (nothing this small can bear the name "Texas") that I read as skylights/vents. Rather than build the boxy structure that Corey lays out, I just used the hatch portion and stood it proud of the deck with a layer of Bristol. You see the light gray outline still on the deck under this piece, which I think gives enough illusion of glazing. But-- Quote:
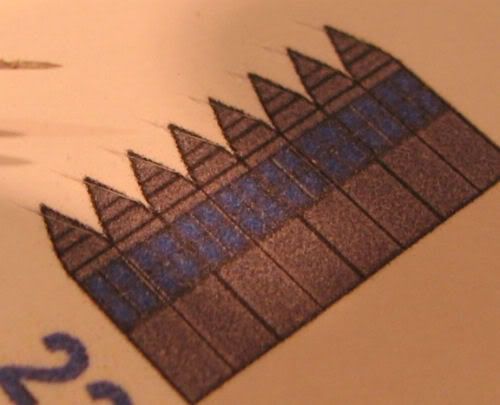 I sorta intuited that the pointy-points in the layout of this piece would build up more conical than the representative painting, so I started my first pie slices midway up the wedges and cut 'em across as shown. I did all of this on one side of the wedge, out of laziness and a clear assessment of my lack of skill at getting both sides symmetrical anyway. 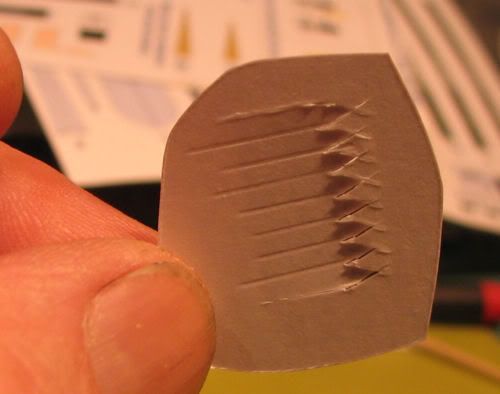 After that first cut, the next was to cut down inside the end of the joint to allow for some relief in folding, then came scoring the backside for the octagonal bend... 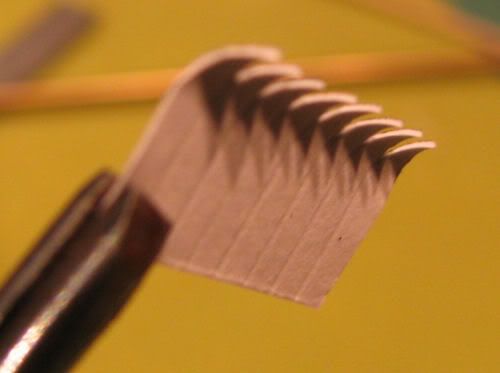 ...followed by pre-curling the top panels to form the cupola... 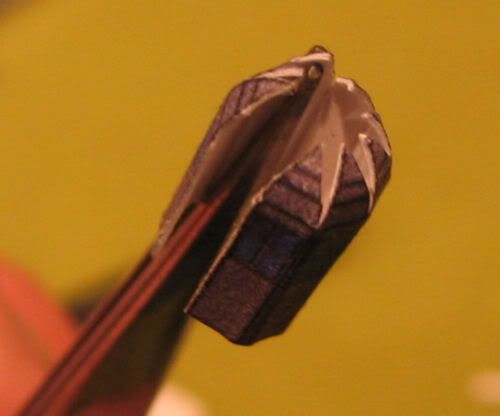 ...and fold & work progressively down to close to the final shape. See, this is where I benefit from the experience I got making up all those Card Sowbugs in Biology class. 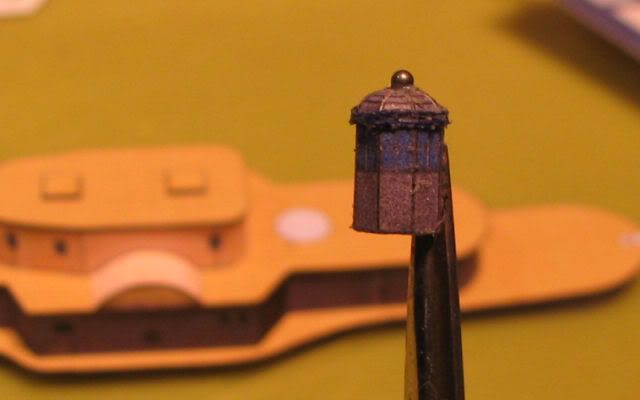 Done for now. After joining the barrel with a lap patch, I worked the cupola sections more-or-less into shape over a rounded dowel and then rubbed the inside with a gluey Q-Tip, & held the outside 'til set. A ball knocked out of a slotcar bearing crowns the cupola, and a bit of thread runs 'round the sill as beading; after letting the thing set and cure overnight, I'll wax the thread down to make it a little more uniform, but it's still wicked small and most of this only shows under magnification. Now can I go for a walk? 'D
|
|
#7
12-27-2011, 02:11 PM
|
||||
|
||||
|
Yes Sir, you earned it! Wow that's awesome. I am adding that cupola proses to the instructions, including the ball and thread, and the shaping. Good stuff.
Here is another page of instructions though you seem to be figuring everything out. Great build! CT
__________________
My models are available here http://ecardmodels.com/index.php?manufacturers_id=62
|
|
#8
12-27-2011, 03:20 PM
|
||||
|
||||
|
It was raining.
Ah, a good idea to do the double-glazings! too late, and I've got insane enough already. I will make individual buckets in the paddlewheels, though. What we really need is a few little guys about .26" high to cut out & place around in poses like in the painting, where they all look like they've been sitting on something too narrow for too long. Yup, some crew figures'd really do it for me. Just don't ask me to figure out how to laminate 'em front-to-back. Might try to finish off the boiler and stack today, & then mull over the details at leisure tonight. 'D
|
|
#9
12-27-2011, 03:31 PM
|
||||
|
||||
|
Here is the next instruction page, complete with the suggestion of improving the cupola and the cut down skylight boxes.
CT
__________________
My models are available here http://ecardmodels.com/index.php?manufacturers_id=62
|
|
#10
12-27-2011, 04:32 PM
|
||||
|
||||
|
Gee, I wish I'd known all that when I built it.
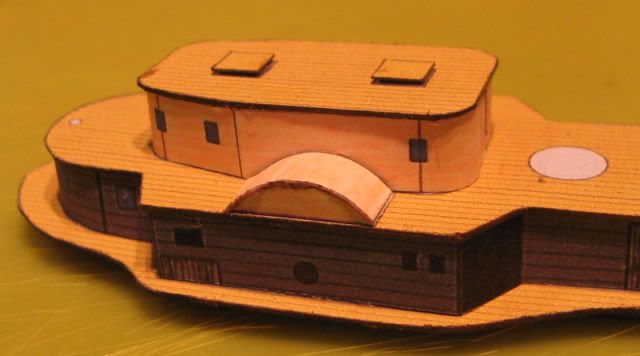
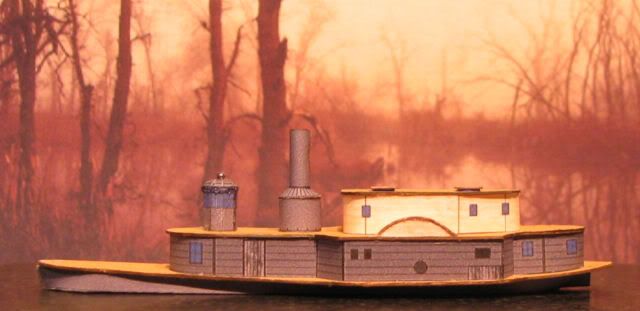 Damn all, don't that look nice? Yah, I like the backdrop too. And I particularly like the beautiful sheer Corey has drawn into the piece: establishing the curve of the boiler deck, he tapers the walls of the three-piece great cabin but subtly-less, so that you get the hint of that sheer carrying up to the hurricane deck and on. Best application of "Less Is More" I've seen in some time, and this heavyhanded tyro stands humbled by its elegance. This is the end of the "Test" portion of the build, all the geometry fell together like someone knew what he was doing. As small as, as fussy as, there were no surprises nor glitches up to here; just straightforward, methodical, contemplative dumb fun like a hobby should be. Now comes all the REAL dumb fun. The guns. The rigging. The fiddly bits. Tomorrow. 'D
|
| Google Adsense |
 |
|
|


 Linear Mode

