


|
|
|
#81
 11-13-2011, 10:56 AM
|
||||
|
||||
|
Quote:
And I could very easily include a a flat disc wheel using graphics to simulate spokes. But when you consider the Chassis Parts, Suspension, Engine, etc etc is there any pont in simplifying the wheels? If you really don't want to assemble those wheels, you ain't gonna like the rest of the model! This is not me saying I won't design some simpler wheels for the kit, but after thinking about this for a while, I realized I am not going to add every complicated part in"simpler" form. If that was the case, I would have made the decision in the beginning to make the entire model in a simpler form. So, if we are just talking about the Wheels, then I will include an alternate version... but is that going to satisfy the Builders that want the alternate parts? Or will the rest of the kit still scare them away? ............. on a related note... I was in a "Dollar" store yesterday, and looking through the Craft Aisle I came across some small bags of Wodden Dowels. About 50 in a bag...each dowel about 6" long (150mm) And they had three sizes...the smallest being about 1/8"(...actually 3.8mm) 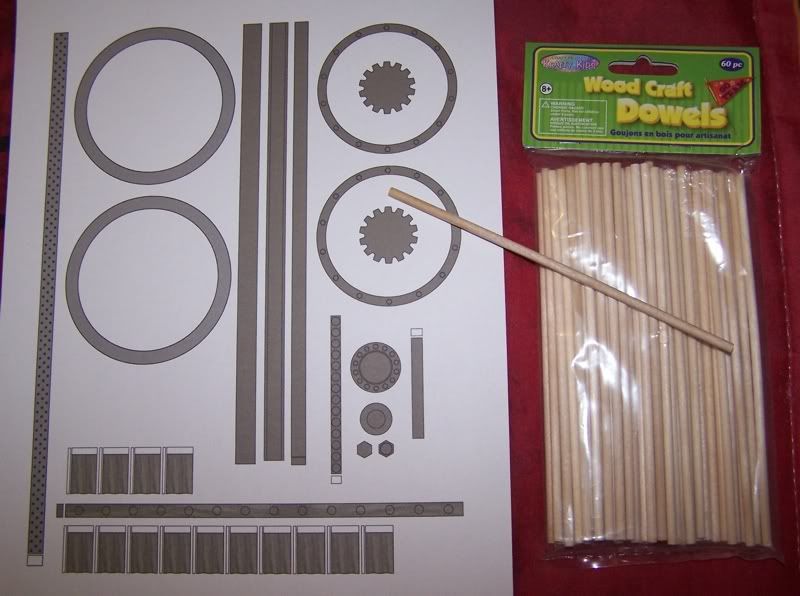 These will quickly sand smooth and reduce down to 3.4mm which is the spoke size I need for these Wheels! So, I am going to give them a try...either wrap them with a printed paper wrap or just colour them green, since the Wheels are wood anyway. I think the wrap idea (suggested earlier by Miles) is the best way to go. The kit will have the paper spokes that you can roll...but using a dowel or inner spoke would be a common sense approach too.
__________________
SUPPORT ME PLEASE: PaperModelShop Or, my models at ecardmodels: Dave'sCardCreations 
|
|
#82
11-13-2011, 12:11 PM
|
|||
|
|||
|
Yankee ingenuity at it's best! I have to wonder, though, if round tootjpicks might wok, either as the spokes themselves or a reenforcment for rolled paper ones.
|
|
#83
11-13-2011, 12:36 PM
|
|||
|
|||
|
Guess that would depend on the size of the wheel, though!
|
|
#84
11-13-2011, 03:00 PM
|
||||
|
||||
|
Quote:
The entire Wheel is about 60mm diameter and about 71mm with the Tire ............................ LATEST BUILD UPDATE finally got the Rear Springs together...actually found a better way to assemble the Leaves...using CA glue. I am generally a white glue (Aileenes) user but I occasionally use CA glue. one of the problems I kept having with the Spring assembly is keeping the Spring square and all the Leaves parallel and not angled (leaning). I found it a lot easier to fit all the Leaves into the Jig...hold them together keeping them nicely square and parallel in the jig and then just run some CA glue along one side. The glue grabs fast while I am holding the leaves in proper place and then I can flip it over and glue the other side! Anyway, heres the Rear Springs and Rear Cross Spring together... all the brackets assembled and everything installed on the frame. 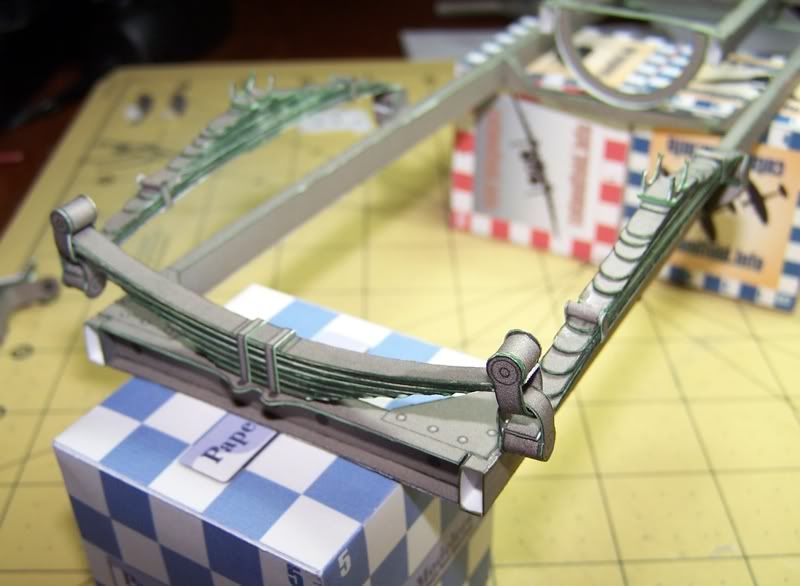 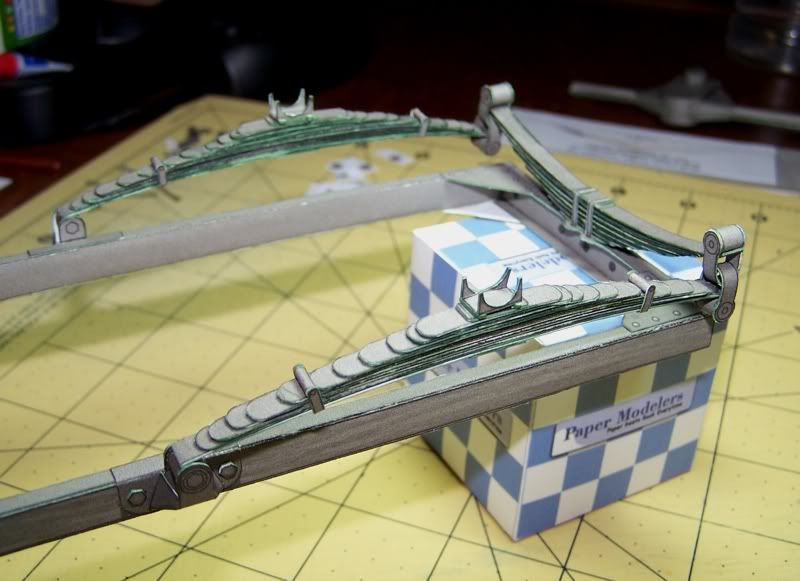 The coupling brackets (between the Springs are slightly oversize in scale) on purpose. It just made it a little easier to get everything together and connected. And I don't think its radically overscale so that it doesn't look okay. Rear End (Differential) is not glued into place, but fits in place properly. *Note...I forgot to install the Springs straps on the Rear Cross Spring before I assembled the rear springs to the Chassis! I also forgot the U-Bolts (to the Rear Axle) but they are easy to attach after the fact. 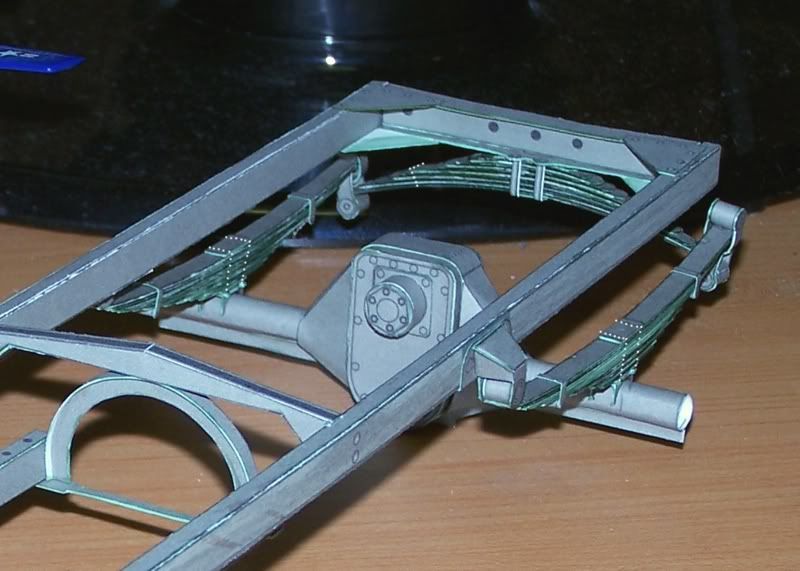 and finally, I made some small adjustments and installed a new Front I-Beam Axle... ...heres the full Chassis ready for a Motor and some Wheels! 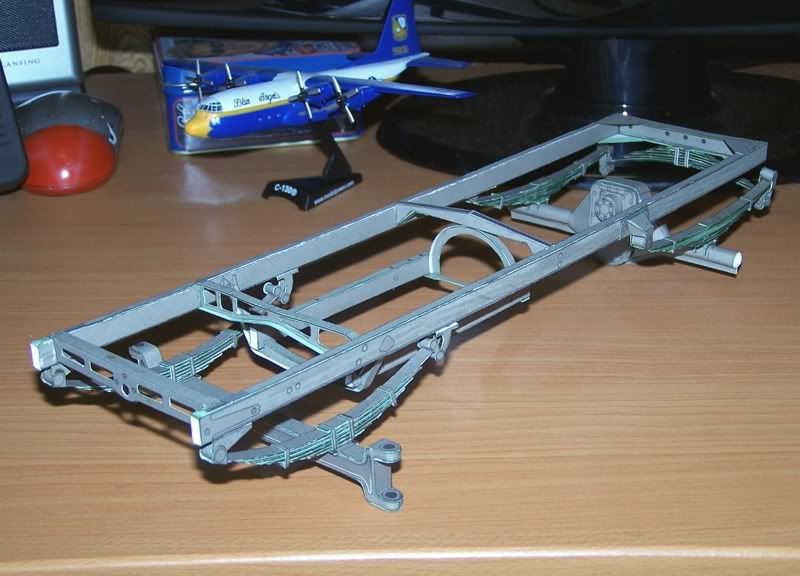
__________________
SUPPORT ME PLEASE: PaperModelShop Or, my models at ecardmodels: Dave'sCardCreations
|
|
#85
11-13-2011, 04:35 PM
|
||||
|
||||
|
If you would like to see the basic Autocar Truck in action...
Tim at Landships posted this short video (just click the pic to open) 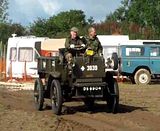
__________________
SUPPORT ME PLEASE: PaperModelShop Or, my models at ecardmodels: Dave'sCardCreations
|
| Google Adsense |
|
#86
11-13-2011, 05:02 PM
|
|||
|
|||
|
Nice video, shame it was not a little longer. I really like
these old vehicles and your recreation of this autocar is looking great so far. Can't wait to see what you do with the body. Rick
|
|
#88
11-13-2011, 06:14 PM
|
||||
|
||||
|
Got curious and went digging. Check out this link: 1915 Autocar XXIF | Flickr - Photo Sharing!
May not be the same but sure lots of detail items would be same.
|
|
#89
11-13-2011, 06:28 PM
|
||||
|
||||
|
|
|
#90
11-13-2011, 07:35 PM
|
||||
|
||||
|
right...thanks CharlieC
Whulsey...I am building the Canadian Armored Car (shown below) which used the 1914 to 1917 Autocar 2 ton Truck Chassis. Autocar stopped making Cars just before WW1 and became solely a "Truck" manufacturer...I believe they still produce Trucks today. The Truck didn't vary much from 1914 to 1920 (unless you really know what to look for) The 2 ton version Chassis is what is underneath the Autocar Armoroed Car. Tim's Dumptruck shown in the Video (which was the more common version of the 2 ton Truck) is almost exactly the same Chassis and motor as what I need for reference. 
__________________
SUPPORT ME PLEASE: PaperModelShop Or, my models at ecardmodels: Dave'sCardCreations
|
| Google Adsense |
 |
|
|


 Linear Mode

