


|
|
|
#141
 07-19-2013, 06:12 AM
|
||||
|
||||
|
Quote:
lol sure!! its just the pattern for the side wall part, reduced about 1mm to compensate for the layers of the tread strip. I'll include it and a diagram (in the kit). The builder can glue it to heavier card and cut it out. (I glued it to some thick card, maybe 1mm thick, and then I cut it out, and glued it to another layer of the same card. Cut it out again, and glued it to a third layer. Then glued the whole thing to a base card.)
__________________
SUPPORT ME PLEASE: PaperModelShop Or, my models at ecardmodels: Dave'sCardCreations 
|
|
#142
07-19-2013, 09:44 PM
|
||||
|
||||
|
I must admit, I got a bit excited tonight!
To finally see the Centurion in this state... 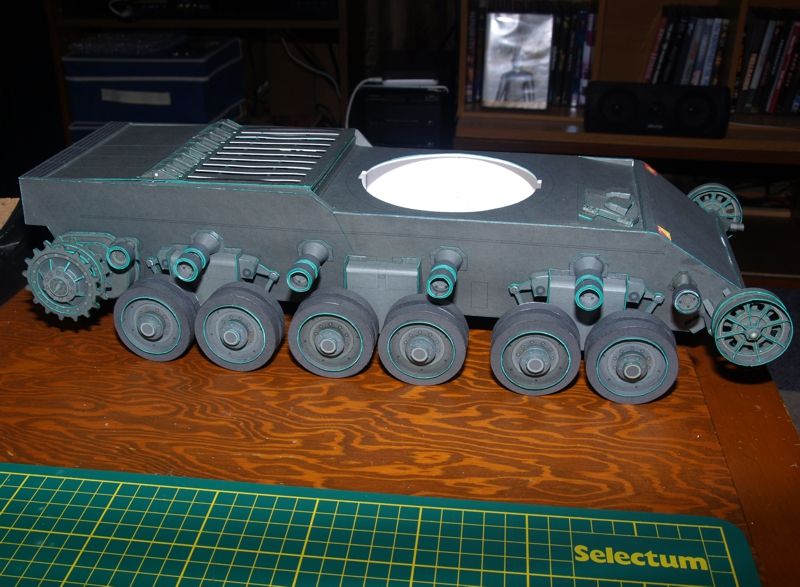 Some of the Road Wheels are not permanently glued yet. I'll finish that up this weekend. And, I am now anxious to sort out some Tracks! (but, I have a B-24 Liberator kit to finish first) 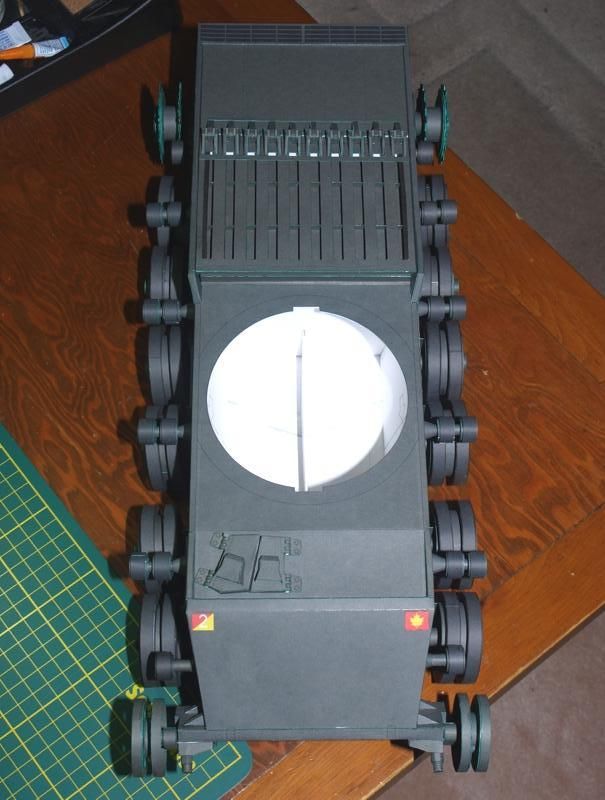
__________________
SUPPORT ME PLEASE: PaperModelShop Or, my models at ecardmodels: Dave'sCardCreations
|
|
#144
07-20-2013, 02:43 AM
|
||||
|
||||
|
AIRDAVE,
Just thought I'd add my two cents, I really liked the video, I thought it was much more dynamic than the standard photos, a nice change. Thanks
|
|
#146
07-20-2013, 07:16 AM
|
||||
|
||||
|
Hopefully this weekend I can get all the Wheels properly glued into place,
and build and install the bracketry for the "side skirts"...which fit between the Road Wheels. And then I will do a quick video update! The last one was fun, and I appreciate the positive response. Not that I crave attention or anything. LOL I'll have to find a spot with better lighting....
__________________
SUPPORT ME PLEASE: PaperModelShop Or, my models at ecardmodels: Dave'sCardCreations
|
|
#147
07-29-2013, 07:15 AM
|
||||
|
||||
|
Centurion latest update...
still working away on the Tank. I finished all the Wheels and Track drive components. And I think I have the Tracks sorted out! I will be creating and posting a new Video update real soon! Got a nifty new HD Camcorder. So watch for that. A while back, when I first started talking about a Track and Link design, I got some great input from members...including two Track Link design ideas from two members in particular (Thorsten and Michal). Before I say any more, I'd like to say thanks guys!...you gave me some usable ideas. Michal and Thorst had similar ideas, using a rolled part, creating a hinged Track Link. They even provided me with 3D mockups of their designs. 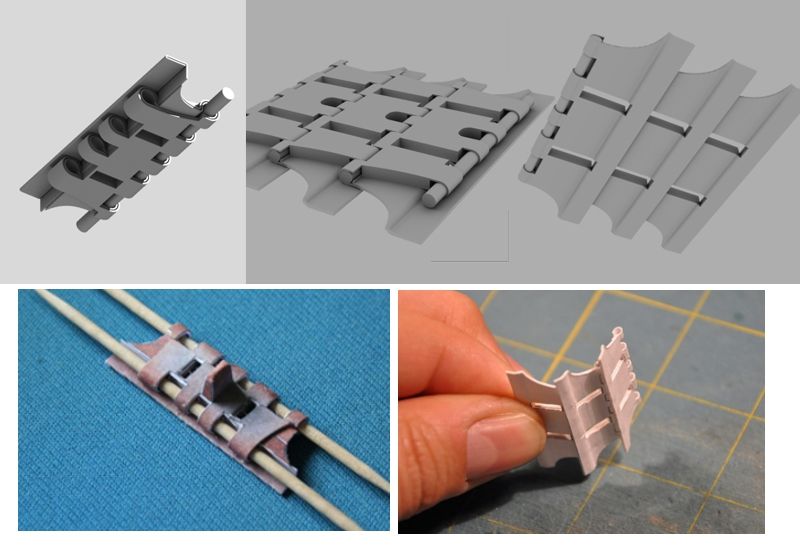 I can't believe how good these designs look! But unfortunately I still have some small issues with different aspects of the designs, like; - too many small parts to cut out - too many holes to cut out - very small and narrow areas that might not survive cutting and handling and, the idea of using a wire hinge pin. Plus...the Tread is still too small and will still require more parts added on. I liked my idea of all paper strip Track, with a folding seam hinge, etc But I just couldn't get the weight and thickness I wanted, without adding multiple layered parts...too many layers. So, I kept going back to Michal's and Thorst's designs and eventually gave in to the small part size...but I simplified the overall design to reduce the holes and the narrow areas. I also reduced the number of connecting links (3+2) instead of (4+5). The entire Link is only 4 parts (one of those parts just a simple layer addition). But it uses the rolled and layer technique for the hinge parts. 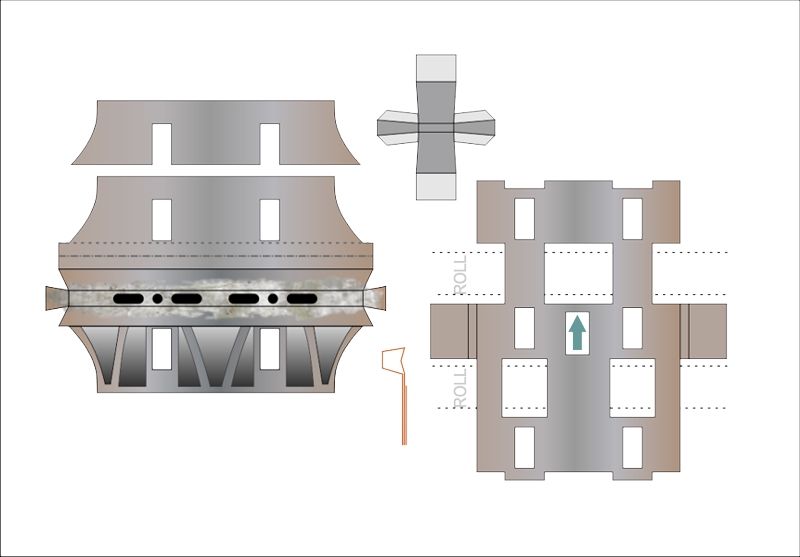 The Track Links still require a "pin" (which is the part I don't like) and I have used 1.5mm Florist Wire. Its a green coated wire used by Florists to support Flower arrangements. Its pretty common in Craft stores and Florists. Its the thinnest thing I could find that was easy to cut and available to most. Wooden dowels would require at least 2.5mm, making the part to big. I'm still looking for a way to cut the wire lengths smoother and cleaner and not sure about how to "lock" the pins in place. 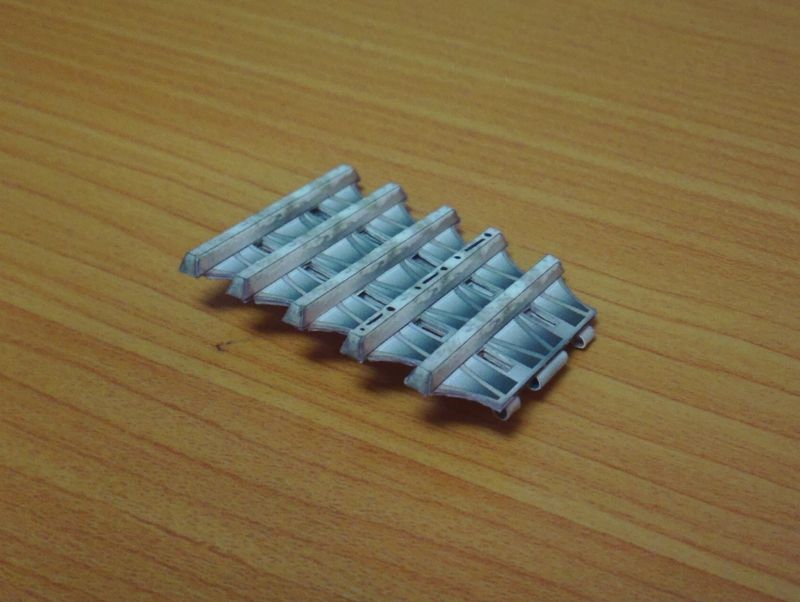   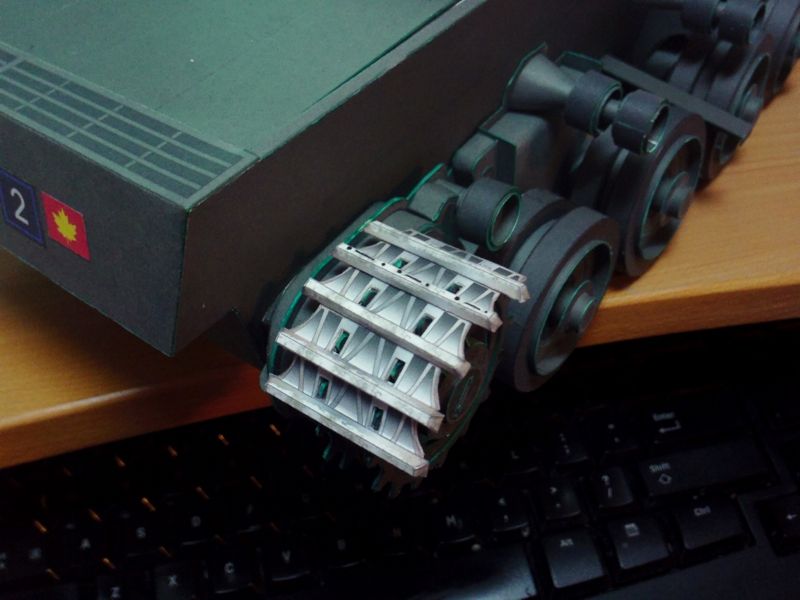 Based on the dimensions of the Track Links, I am estimating somewhere close to 100 Links for each Track. So...about 200 Links, each with 4 parts and a hinge pin...should take about six months to assemble. No problem. Shoot me now.
__________________
SUPPORT ME PLEASE: PaperModelShop Or, my models at ecardmodels: Dave'sCardCreations
|
|
#148
07-29-2013, 07:39 AM
|
||||
|
||||
|
Dave,
The plastic modelers use a very small drop of CA on the pin to get it to stay. The same can be done with the paper link. However, care must be taken to prevent to much glue from discoloring the paper. Also, I would glue the pin on the inside of the link (the side next to the chassis) to help hide any mis-steps with the glue.
__________________
Ray Respect the Paper, RESPECT IT! GET OFF MY LAWN!
|
|
#149
07-29-2013, 07:46 AM
|
|||
|
|||
|
Dave, that really looks great! I'm glad that we could help you a tiny bit!
Just a small thought: How much additional time would it take to build the track with the full number of connecting links instead of the reduced number? As a fictonary builder, if it doesn't double the time needed but only add - let's say - 10% of the total time, I'd go for the more detailed and accurate version. But that would depend on each one's preferences. If you decide against that, I'd vote to do the non-represented connecting links as graphic though. But all in all, it's looking VERY good, congratulations! Thorsten BTW, the photo folders I sent you from Bovington should contain a top-on view of a track link (IMG_0659.JPG), If you like, feel free to use it as texture for your model.
|
|
#150
07-29-2013, 08:11 AM
|
||||
|
||||
|
Quote:
On final assembly, just push the pins out with a pre-cut length of galvanised florists wire. There is usually enough friction in the joint not to need glue. Tim
|
| Google Adsense |
 |
|
|


 Linear Mode

