


|
|
|
#11
 02-03-2015, 07:49 AM
|
||||
|
||||
|
Well, last night I tried to fit the Tail Box into the end of the fuselage.
I must have had my eyes closed when I designed it because not only is it too narrow for the hole in the fuselage!... its also a square sided box ...and the fuselage is a tube! Rounded!! lol Shouldn't take much to fix and try a new part. I just hope its not a sign of how the day is going to go. Yesterday I ran out gas in the snowblower ...just as I had finished clearing all the snow. After about 2 hours of throwing snow, I had literally said to myself "okay, that'll do" and the engine sputtered as the tank emptied. So, that was a good thing. Good luck usually precedes bad, doesn't it?
__________________
SUPPORT ME PLEASE: PaperModelShop Or, my models at ecardmodels: Dave'sCardCreations 
|
|
#12
02-03-2015, 08:01 AM
|
||||
|
||||
|
Quote:
Mike, I like that leather punch idea. Thanks, Gary
__________________
"Fast is fine, but accuracy is everything" - Wyatt Earp Design Group Alpha https://ecardmodels.com/vendors/design-group-alpha
|
|
#13
02-03-2015, 08:12 AM
|
||||
|
||||
|
I have one of those handheld leather punch thingies,
with a rotating wheel, that has various hole punch sizes... but its awkward to handle around small paper parts. And a part this small would not survive the manhandling and so many holes punches. When the punch goes through the paper, its a fight to get it to release. And you end up doing damage to the part. Small, individual punches might work better, but these holes are very small. I think too small even for hand held punches. The largest holes are 2.5mm (1/8"). Smallest used a needle. But considering it took me no more than about 4 minutes to cut all the holes, it really wasn't worth the effort of getting out a punch set and... sorry to be so disagreeable. lol I really would like a hole punch set...for other projects.
__________________
SUPPORT ME PLEASE: PaperModelShop Or, my models at ecardmodels: Dave'sCardCreations
|
|
#14
02-03-2015, 08:27 AM
|
||||
|
||||
|
When I used to be involved at the Heritage Days Festival at Warsaw, Missouri, there was a leather worker that had a number of punches that looked like nail punches and a metal plate with various sized holes to match the diameter of the punches. I wonder if something like that would work better, or if it is even available. Sandwich the cardstock between two of the plates, with the holes lined up, and one tap should do it, without tearing the paper
__________________
A fine is a tax when you do wrong. A tax is a fine when you do well.
|
|
#15
02-03-2015, 08:57 AM
|
||||
|
||||
|
I would say if you had to do a lot of these, or a lot of repetitive projects like this
then it might be worth the cost and effort to acquire some fancy tools. The idea of very fine punches, and hole plates, sounds like a workable thing. Once you sandwich the paper between plates like that, its going to work a lot better. But honestly, it all seems like a lost of cost and preparation for a fairly simple task. I have $2 magnifying glasses ("Readers") of various strengths. I have a $3 Hobby Knife...with #11 blades. And with a little practice, its quite easy to cut out small holes. My trick is to use the knife tip like a punch ...and I make repeated stabs at the paper. Push the knife straight in and pulling back out to make a slice in the paper. Following the part lines, rotating the paper/part as I go, making repeated slightly overlapping incisions until I have gone around the whole part. You cannot draw the knife, trying to curve around the part. It just doesn't work when the curve is this tight. You will probably break the tip off your blade, if you don't make a mess of the part.
__________________
SUPPORT ME PLEASE: PaperModelShop Or, my models at ecardmodels: Dave'sCardCreations
|
| Google Adsense |
|
#16
02-03-2015, 09:45 AM
|
||||
|
||||
|
Dave,
I use the same method (and try really hard not to draw blood at the same time), I was looking for a simpler low cost way to cut out the holes. Gary
__________________
"Fast is fine, but accuracy is everything" - Wyatt Earp Design Group Alpha https://ecardmodels.com/vendors/design-group-alpha
|
|
#17
02-03-2015, 02:56 PM
|
||||
|
||||
|
update...putting the pieces of the fuselage together.
tweak here...tweak there...everything getting sorted out nicely. I got a little rushed and didn't do a great job of attaching the mid-fuselage sections. I was focuing more on making sure things lined up and taking measurements here and there and I ended up wrinkling a few spots...so I had a bit of a fight when gluing it all together. new Tail Wheel box seems to fit, as does the gear itself. so, I'm happy with that. 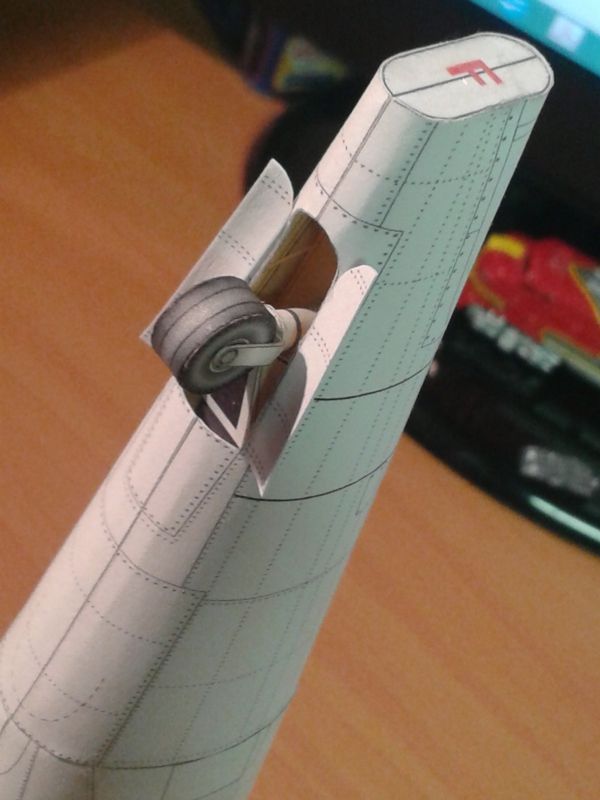 ... Cockpit fits too...its a little fiddly getting it into place, but it works. Had to resize the additional former that supports the cockpit tub, but wasn't a problem. 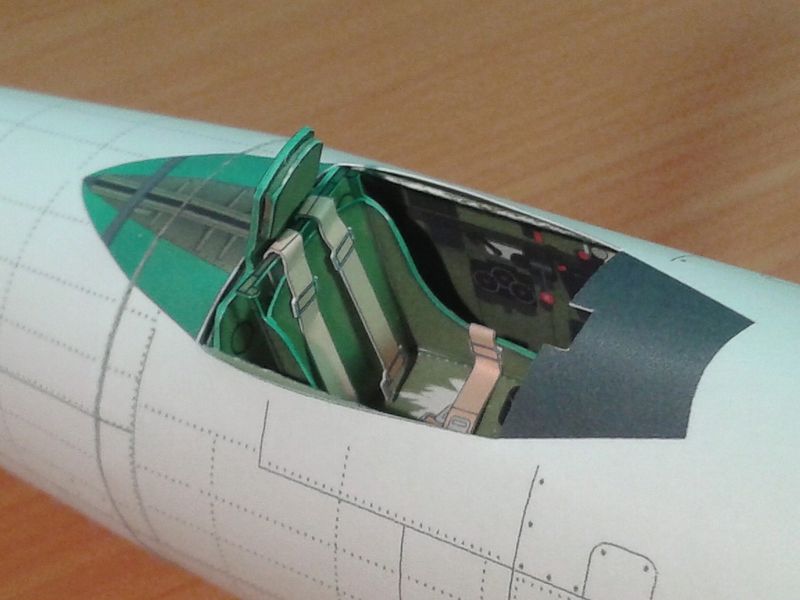 Once the cockpit is secure, you can feed in any remaining cockpit components. In my case, I had already installed the seat and joystick, so I just needed to fit the instrument panel. I think it needs to be left until last, because you want the least possible in your way when fitting the tub, and the instrument panel needs to fit up close to the cowl. Its easier to place it at the end and get a good fit. You also have to fit the gun sight, but I think that can be installed at any time from this point. 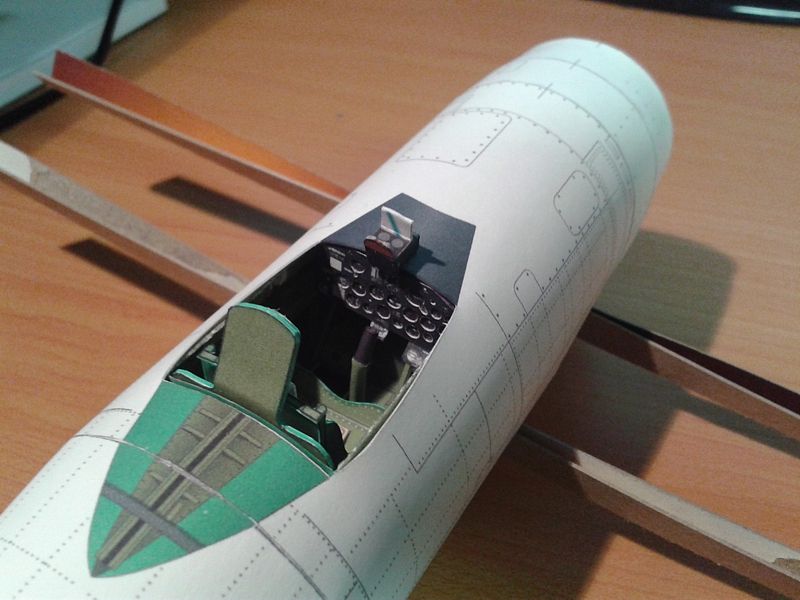 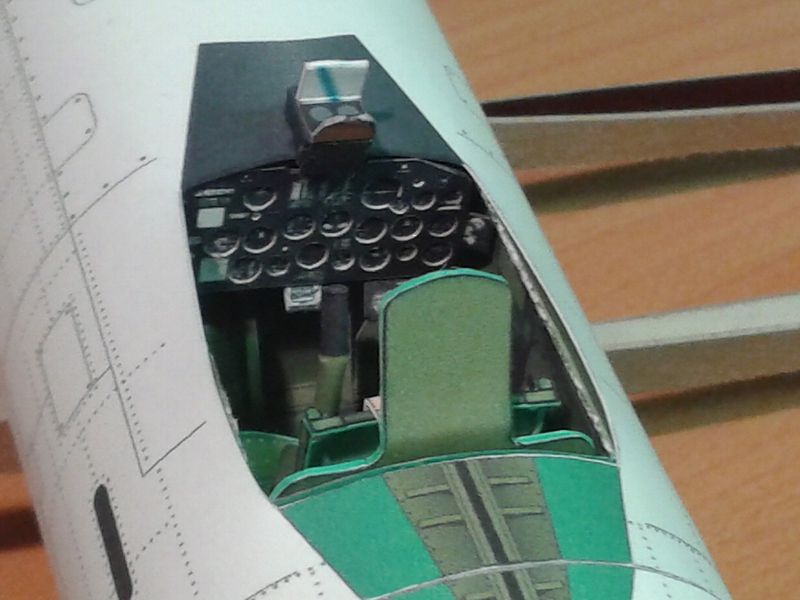
__________________
SUPPORT ME PLEASE: PaperModelShop Or, my models at ecardmodels: Dave'sCardCreations
|
|
#19
02-03-2015, 03:35 PM
|
|||
|
|||
|
Nice work dave!
|
|
#20
02-03-2015, 03:58 PM
|
||||
|
||||
|
Awesome!
nice work Dave. mike
__________________
Cardstock Property Tables and Terms Flying Cardstock Models http://www.papermodelers.com/forum/m...uers-projects/
|
| Google Adsense |
 |
|
|


 Linear Mode

