


|
|
|
#1
 03-20-2019, 09:56 AM
|
||||
|
||||
|
1/16 Scale Ford "Quad" Field Artillery Tractor Design and Build
I decided to start a new thread since this project took a couple of turns.
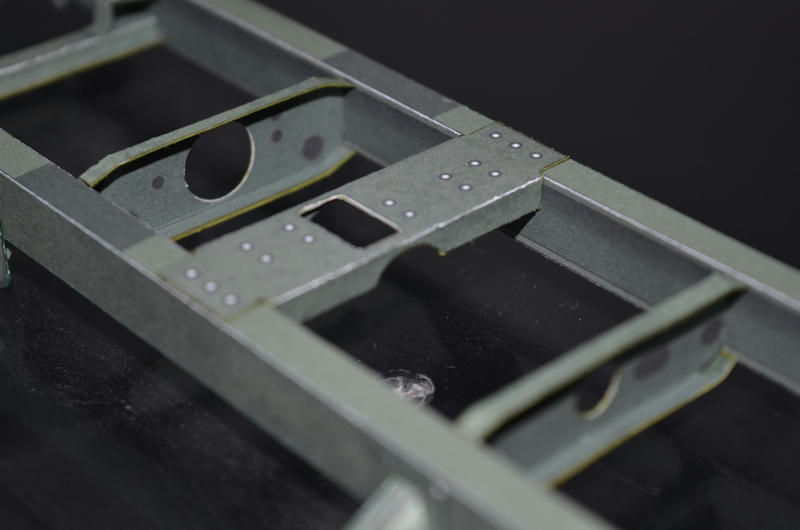
At first I was going to design and build in a slightly smaller scale (1/24) to reduce the detail and time spent on the project. It turned to be no less complicated...and in fact, made some parts more difficult to design and build. I also decided to keep my large scale Vehicle scale theme going with another 1/16 scale project. This keeps it in scale with my Saladin Armoured Car and Centurion Tank. I wanted to create a "build walkthrough" type thread...which is what this will be... but since I am also designing on the fly, there will be some trial and error moments. If you use this thread as a "build tutorial" make sure you read ahead to verify any part of the construction. ... Starting with the Frame, I stylized the Frame Rails, making them a box construction. The real Frame rails are C Girders. I also removed the forward narrowing and S-bend of the frame to make it a bit easier to build. The Rails are separated into two sections, once again to make assembly easier and to combat the twist and deformation during assembly. This method has proved to be much quicker and more reliable for assembly. So, first I assemble the straight box tube Rails, the forward angled section of the rails, and the boxed Joiner sections. (Ignore the markings on these frame rails...this is not the final design.) 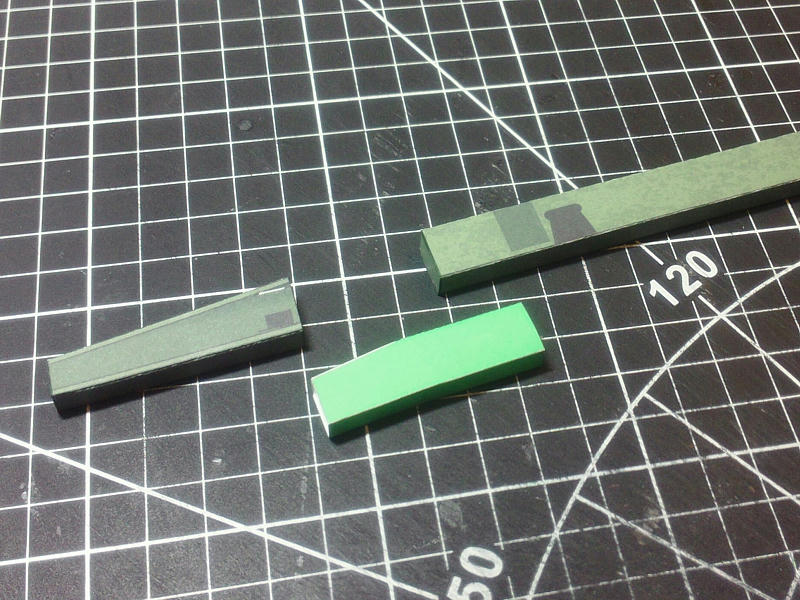 ... Its a very tight fit, but thats what I want! 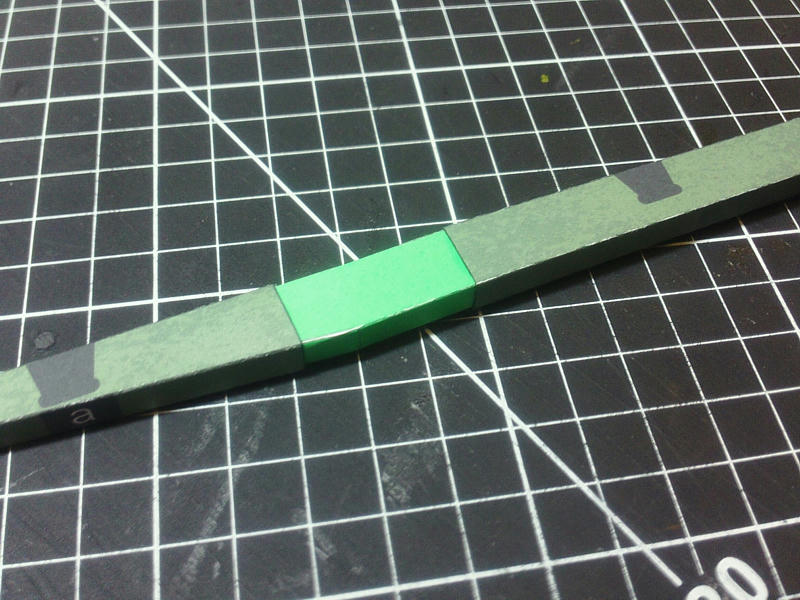 ... The seam is a small trade off to keeping the Rail almost perfectly straight and true. 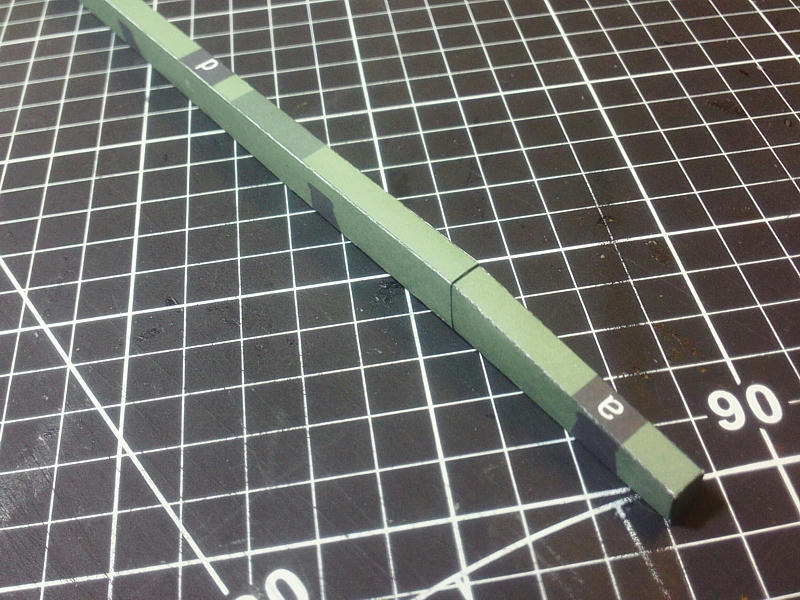 ... Now, to assemble all the "cross Members"...every one is different! Each have a front and rear layer, and need to be carefully scored and folded in to shape while gluing. There are a few holes to be cut, but the smaller holes are black and are (hopefully) not needed for construction. Its up to you if you wish to cut them out, I didnt. Here are all the parts, pre frame rail assembly. 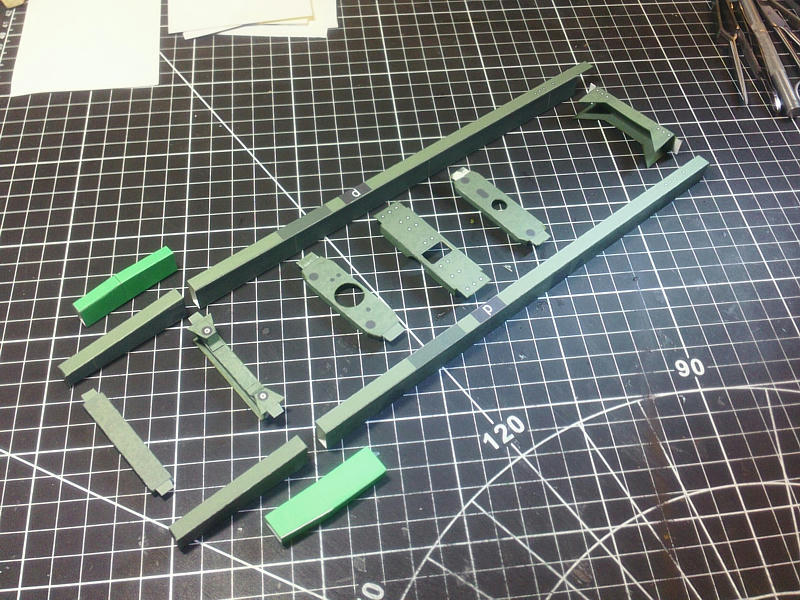 ... Some of the cross members install using small tabs and slots, and don't even need to be glued. You have to remember to cut the slots on the Frame Rails before assembly. You could also cut off the tabs and glue everything in place...but i didn't bother gluing any of those tabs. Both end cross members and center cross member are definitely glued and lock everything together. The cross members also help square up the frame rails. I'll show some close up photos of all the cross members in the next post...along with details on all the Frame attachments, but this is the completed Frame... with all the correct placement of attachments. 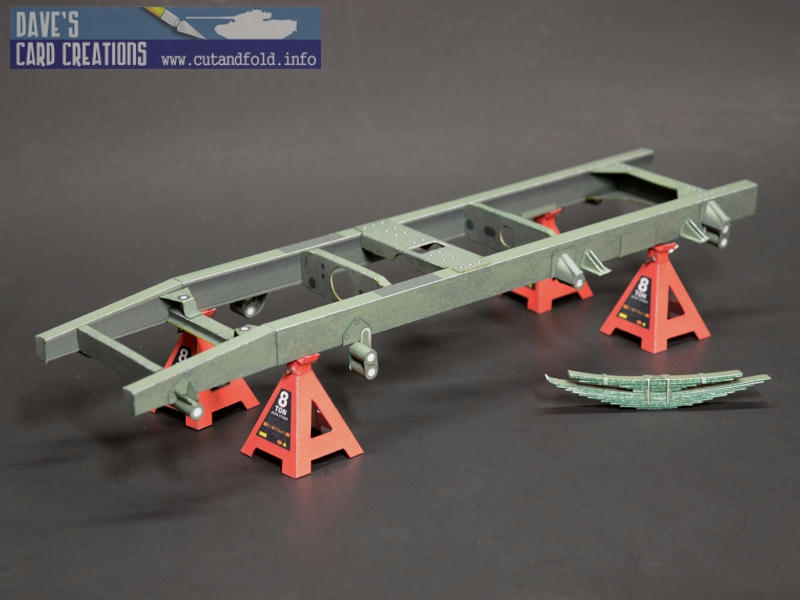
__________________
SUPPORT ME PLEASE: PaperModelShop Or, my models at ecardmodels: Dave'sCardCreations 
|
| Google Adsense |
|
#2
03-20-2019, 10:12 AM
|
||||
|
||||
|
So here are a few photos of all the cross Members and how they appear in the final Frame assembly:
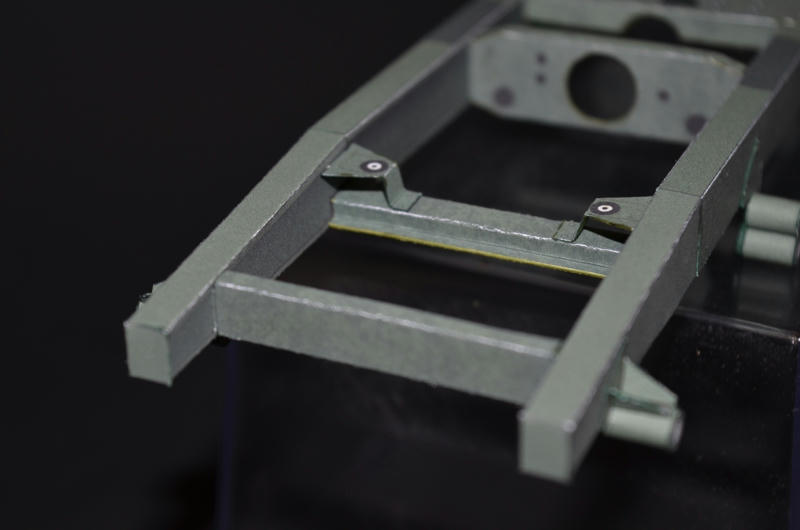  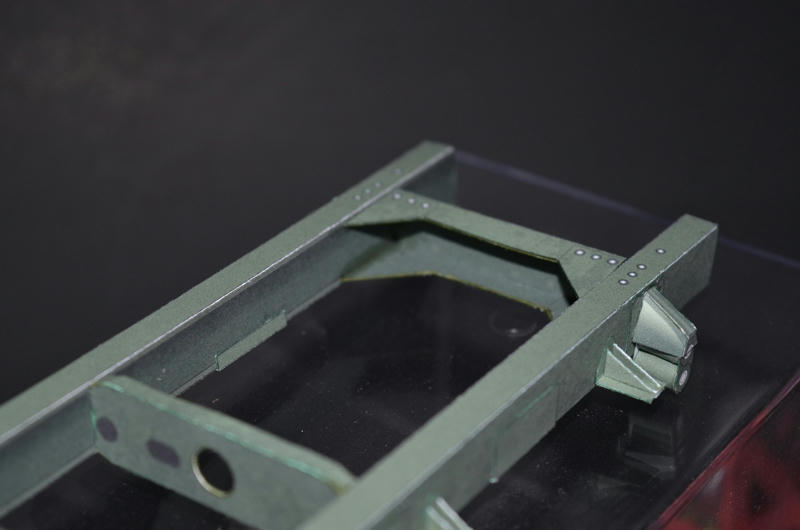  And, a few pics of the outside attachments. Mainly all the bracketry to support the Leaf Springs, including the bump stops for the rear springs. Most bracketry are mounted on base plates which are first glued to the Frame rails. 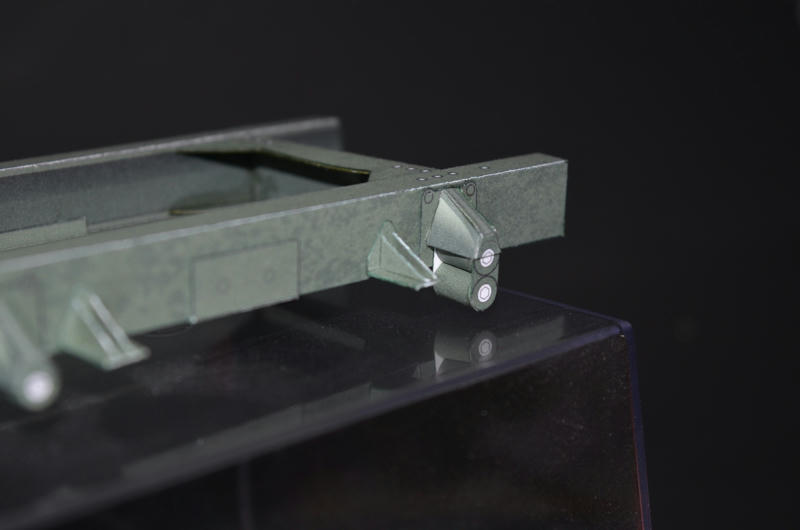 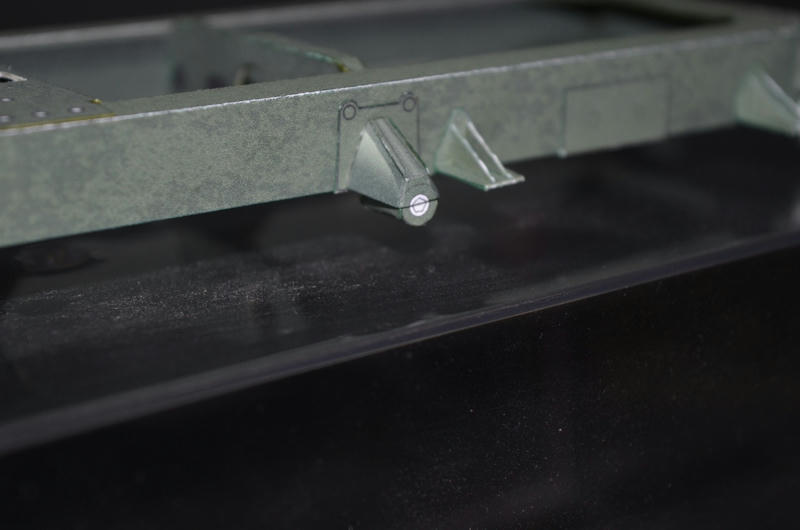  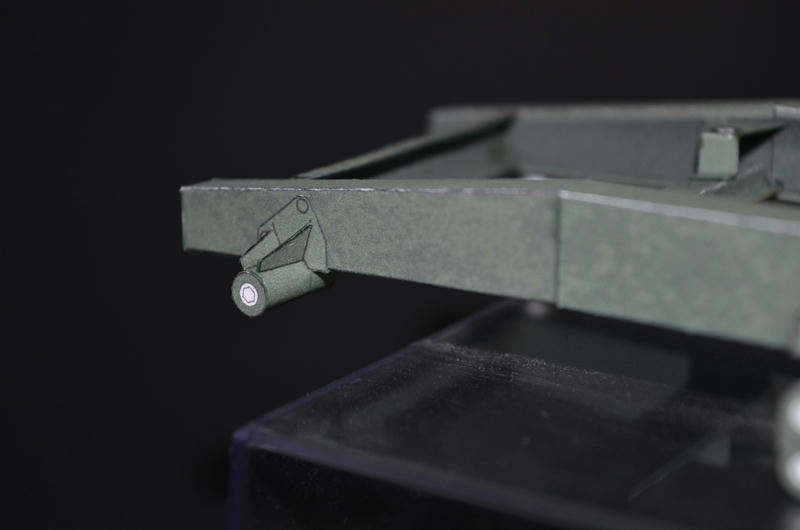
__________________
SUPPORT ME PLEASE: PaperModelShop Or, my models at ecardmodels: Dave'sCardCreations
|
|
#3
03-20-2019, 10:12 AM
|
||||
|
||||
|
I've started assembling the leaf springs...I did an earlier test build which proved the design.
The small details need to be tweaked, as does the paint colour and edge colouring. 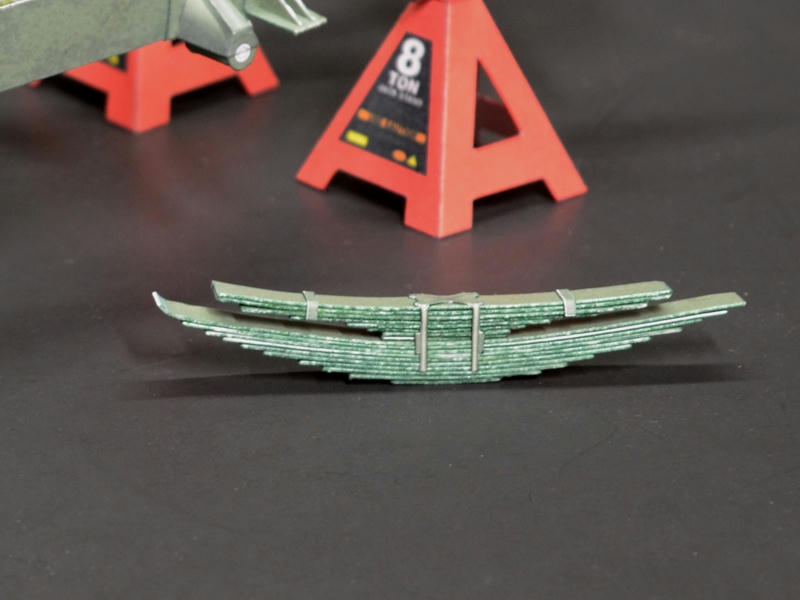 With all the updates in place, I've started printing and cutting parts for the final Leaf springs... Each "leaf" is a folded construction, and all will be stacked and glued at the center. Then I will manually curve the entire Spring to a predetermined height. I think there will be plenty of room for play, but it will be important to match the shape of right and left springs precisely. I'll probably include a template for the spring shape and curve. You can also see in this photo, the rear Differential/Axle assembly. I think thats a go too! 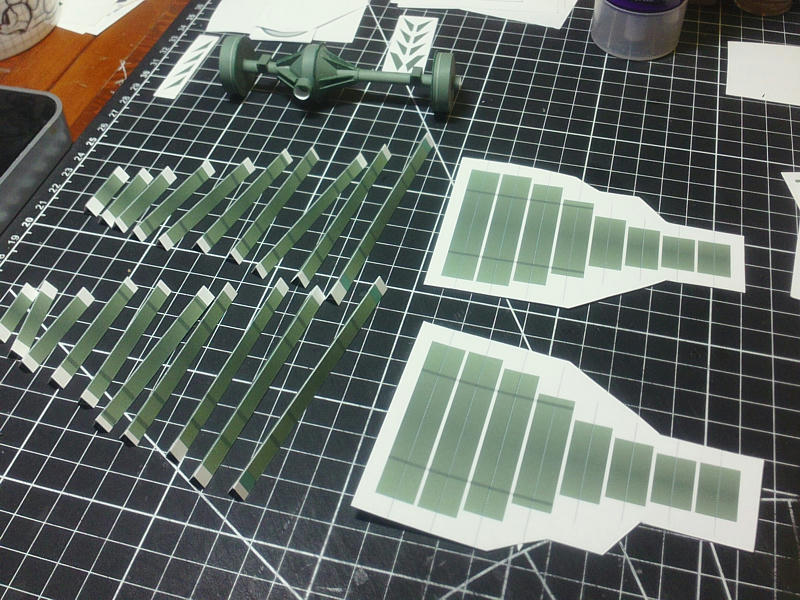
__________________
SUPPORT ME PLEASE: PaperModelShop Or, my models at ecardmodels: Dave'sCardCreations
|
|
#4
03-20-2019, 10:42 AM
|
|||
|
|||
|
Amazing work , at first glance it's looking like metal.
Well done!
|
|
#7
03-20-2019, 02:05 PM
|
||||
|
||||
|
I like it when a man who "talks the talk" shows he can "walk the walk".
I'm impressed Dave, beautiful work. So looking forward to seeing the finished model. However, I feel certain that when it is done you will not be fully satisfied until you create the gun and limber, despite what you say now. That is the trouble with being a perfectionist eh. Cheers, Clive.
__________________
"This planet is now property of the Sontaran Empire. Surrender your women and intellectuals."
|
|
#8
03-20-2019, 03:25 PM
|
||||
|
||||
|
thanks guys.
hehe I didn't say "never"...I said "no plans". It'll all hinge on how well this stage goes!
__________________
SUPPORT ME PLEASE: PaperModelShop Or, my models at ecardmodels: Dave'sCardCreations
|
|
#9
03-20-2019, 03:26 PM
|
||||
|
||||
|
Will be following with great interest. A build thread is good, but a design / build thread is an i sight into the thought processes of designing a model.
__________________
"It's all in the reflexes."
|
|
#10
03-21-2019, 06:08 AM
|
||||
|
||||
|
Wow, this is really impressive. I like the mottled texturing on the frame rails. Are you intending to run brake, fuel lines, etc?
__________________
Regards, Don I don't always build models, but when I do... I prefer paper. Keep your scissors sharp, my friends.
|
| Google Adsense |
 |
|
|


 Linear Mode

