


|
|
|
#11
 05-09-2021, 09:10 AM
|
||||
|
||||
|
The video said they have a small heater in them to keep liquids from freezing. They have a little hole right in the center, so I'm thinking liquid sprays form there (I'm picturing the "Constellation Urine" scene from "Apollo 13").
Dunno why there is a third one on the hatch. Maybe the Astronauts got their own personal dump, so 3 astronauts equals 3 dumps, and the hatch was the easiest place to put the third one? If it was me designing, I'd do a separate flat glue on piece that the builder can emboss into a roundish shape. 
|
|
#12
05-09-2021, 09:48 AM
|
||||
|
||||
|
Two side dump nozzles were main Urine and waste Water dumps.
Fecal matter was maintained in bags onboard for the duration. Quote:

__________________
SUPPORT ME PLEASE: PaperModelShop Or, my models at ecardmodels: Dave'sCardCreations
|
|
#13
05-09-2021, 12:37 PM
|
||||
|
||||
|
Quote:
Even at 1/12 scale, its still very small. A dome with multiple parts would be very tricky to build. I agree with Murph, an additional 2D disc...if I'm not satisifed with Ken's method.
__________________
SUPPORT ME PLEASE: PaperModelShop Or, my models at ecardmodels: Dave'sCardCreations
|
|
#14
05-10-2021, 07:46 AM
|
||||
|
||||
|
So I did a quick test build yesterday of the outer skin parts.
Please keep in mind two things: 1. the lower rings are not included. (There are two narrow rings that separate the capsule upper exterior from the heatshield) 2. I printed parts at 45%, allowing me to fit the entire capsule skin as one part on one sheet (letter size cardstock). (Normally, the exterior skins are 4 panels (one per printed sheet) that must be connected.  I'm fairly happy with the overall look and colouring (unless my eyes deceive me?). Trying to recreate metallic that can be viewed from any angle is almost impossible in paper. Its not perfect and I fudged a few technical details, but I had to make allowances for scale and part layering. I'm also trying to work within the pattern of Ken's model. Anyway, I went ahead and printed some of the surface details and attached those. Because of the very small scale, it was hard to bend and buildup the narrow angled edges of the window frames and rear sensor frame. For the hatch frame I opted to glue it flat and not attempt the edge framing. On the full size model, it will be easier. Note, I have not completed the recolouring of the surface detail parts. 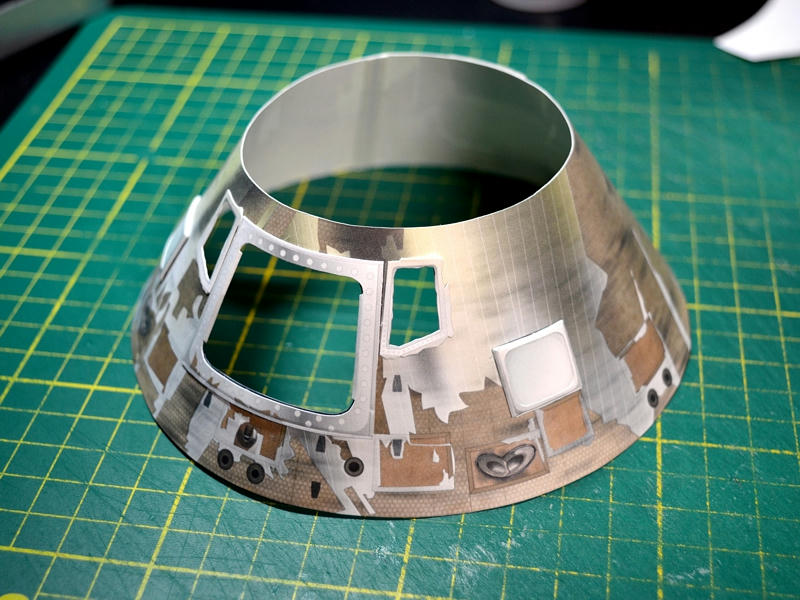 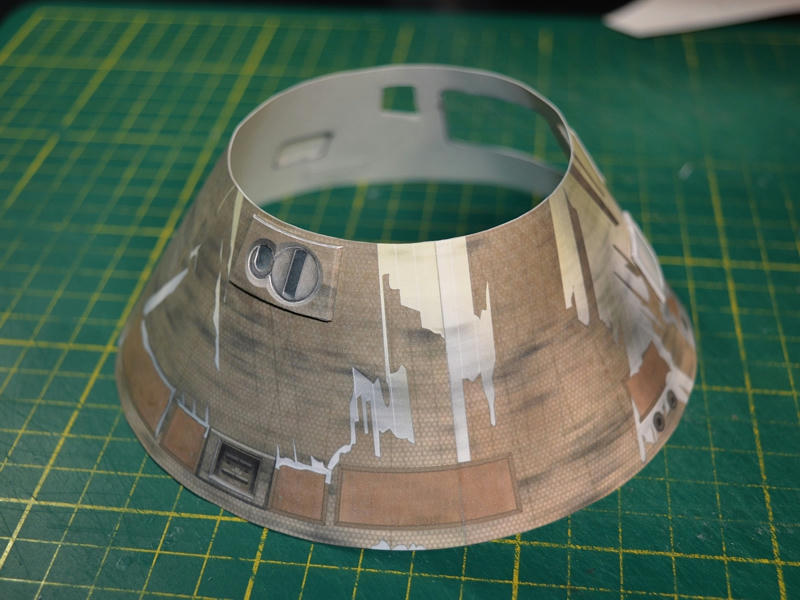 While I made sure to work within Ken's template so as not to affect the internal structures and assemblies, I have made quite a few exterior detail changes to Ken's design (for various reasons). For example, the Thrusters... Kens recessed 3D assembly looks good, but I didn't think it looked like the real thing (on Columbia). Maybe they look different on another Apollo CM? I haven't compared them all...but Apollo 11 definitely looks like this: 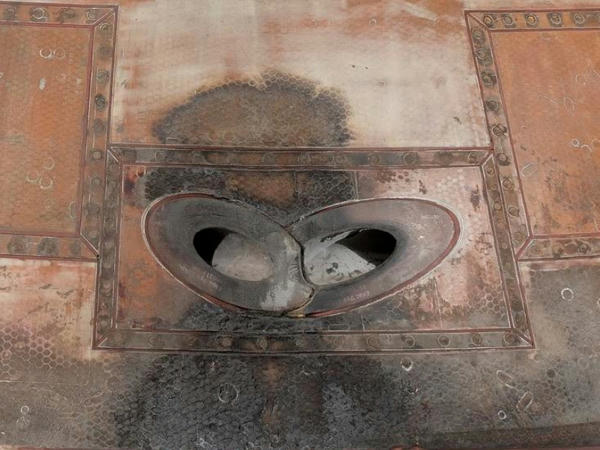 So I came up with a different assembly method since the Thrusters are flush with the capsule surface, only separated by the cutout in the panel. I have created two simple layered parts, that are mounted from underneath. The hard part is cutting out the opening in the skin...made more difficult in this small scale test build! Once again, the full size model will be simpler and cleaner. 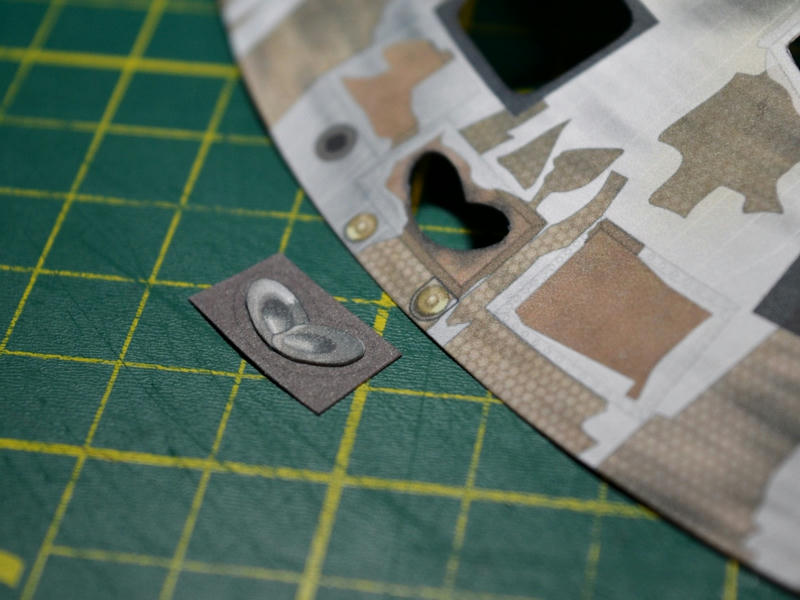 So, thats where it is so far. I have to go back and make a few tweaks, but I think the exterior skins are ready to be prepped for parts. Speaking of the heatshield...it was the first thing I repainted of Ken's model, and the fellow who originally requested this repaint has test built it for me. Not sure what paper or cardstock he used (I'll have to verify) but he said built it full size, and thats about 12" across! And, as you can see, the edge rings are not there (since I have not created them yet) but they will basically transition the colour and texture to the exterior finish. Smithsonian provides high resolution photos of the entire heat shield...I used those for a photographic repaint. 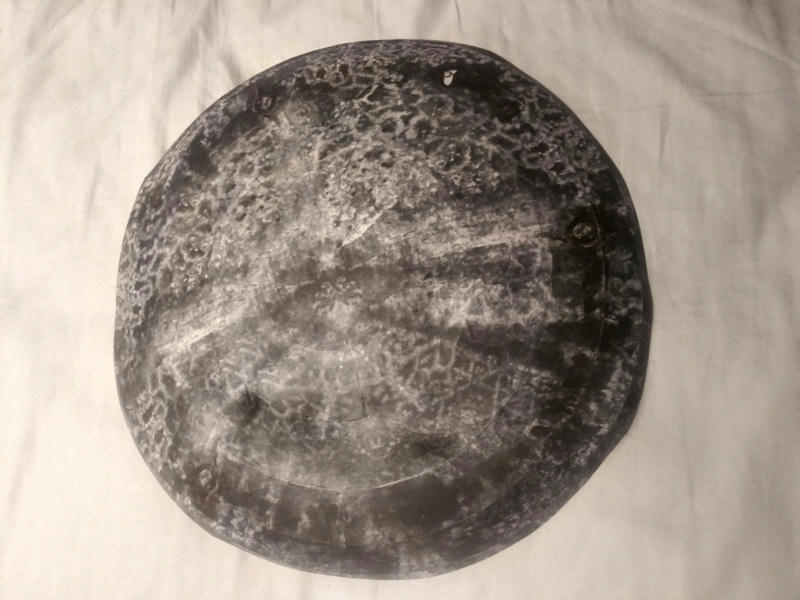
__________________
SUPPORT ME PLEASE: PaperModelShop Or, my models at ecardmodels: Dave'sCardCreations
|
|
#15
05-10-2021, 09:17 AM
|
||||
|
||||
|
Quote:
I would probably make three 2D circles. The wider one having the markings, and all white one on top of that and a copper one to top it off. That would give a little roundness, too. I am saying that, but I don't know the diameter of the part. If it is 'very small', that might not be feasible I definitely think you are on the right track with your repaint. It looks 'authentic', even though it might not be 100.000% correct EDIT -- on the dumps, is it large enough to do with a truncated cone, capped with the copper part?
__________________
A fine is a tax when you do wrong. A tax is a fine when you do well.
|
| Google Adsense |
|
#16
05-10-2021, 09:53 AM
|
||||
|
||||
|
I'm going to show the nozzles coated in foil with just a bit of discoloured plastic showing.
The nozzle "domes" are about 7.5mm diameter. Not microscopic, but pretty small if you're trying to build a paper "dome". The nozzles are a full dome as you can see by the real uncoated part, so they require full dome construction to look accurate. But as we all know, good domes in paper require lots of parts and have lots of seams. And at this size, are very difficult to assemble cleanly. So, I recreated Ken's original part, which is more of a truncated cone with disc top. I also added a flat 2D option. I think those are your best options, however the conical part looks more like a pimple, rather than a dome. 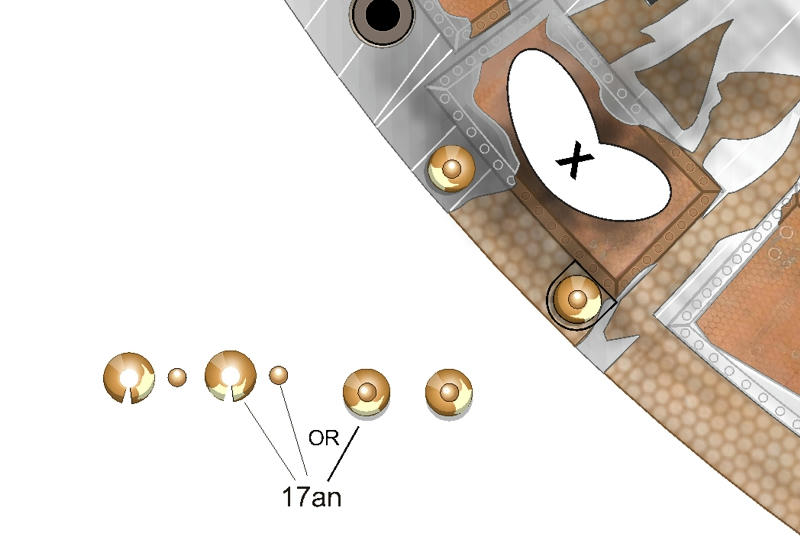
__________________
SUPPORT ME PLEASE: PaperModelShop Or, my models at ecardmodels: Dave'sCardCreations
|
|
#17
05-11-2021, 08:35 AM
|
||||
|
||||
|
Looking good.... Very good work thus far Dave!
|
|
#18
05-11-2021, 09:05 AM
|
||||
|
||||
|
...
and here is the first attempt at a conical waste nozzle (on the main hatch).  On the subject of the Hatch...I decided to redesign the assembly. My first issue was with the porthole design. Once again, I have not analyzed the different Apollo capsules or their Hatches, so I don't know what Hatch Ken used in his original design. But since I am trying to recreate Apollo 11 Columbia, I redesigned the outer parts to have the squared off surround (around the porthole). I also decided that the real thing is a lot flatter...while the outer frame and porthole surround are angled and raised, the full amount is quite minimal. Minimal enough that I could use flat layered card parts with artwork to simulate the raised bevels. This made for simpler construction, especially with the squared off porthole surround. I made everything mate up to Ken's interior (hatch) parts...I only needed to shorten the porthole tube to accomodate the new layers. I also added some artwork/colouring to the edge strips around the hatch to better simulate the stepped levels. Another view before final assembly. 
__________________
SUPPORT ME PLEASE: PaperModelShop Or, my models at ecardmodels: Dave'sCardCreations
|
|
#19
05-11-2021, 09:49 AM
|
||||
|
||||
|
I never thought Ken's work on The Capsule could be improved and yet here it is. Amazing work, Dave. It is looking really good!
|
|
#20
05-11-2021, 10:22 AM
|
||||
|
||||
|
Not improved...just different?
The Capsule Part Deux
__________________
SUPPORT ME PLEASE: PaperModelShop Or, my models at ecardmodels: Dave'sCardCreations
|
| Google Adsense |
 |
| Thread Tools | |
| Display Modes | |
|
|


 Linear Mode

