


|
|
|
#11
 04-30-2009, 01:29 PM
|
||||
|
||||
|
"Thats paper talk for you do it first so I can learn from your mistakes!"
Roger that, Blue Leader. (That's oldtimer talk for "You have interpreted my message correctly.") Don 
|
|
#12
04-30-2009, 01:34 PM
|
||||
|
||||
|
Quote:
I see how it is. You use me as Guinea Pig! :p
|
|
#13
04-30-2009, 02:15 PM
|
||||
|
||||
|
Quote:
Greg
|
|
#14
05-01-2009, 07:07 AM
|
||||
|
||||
|
Maybe I can bribe for hints and advise here! This is interesting model. It is not that it is overly complicated, I just must learn to make it.
I made two sections of the airplane but 1) the seam on the bottom it comes apart when the pice is curved more sharply and 2) segments they do not fit together 3) the paper wrap for the color of the airplane does not match the size of the template you glue inside. I will revise this... 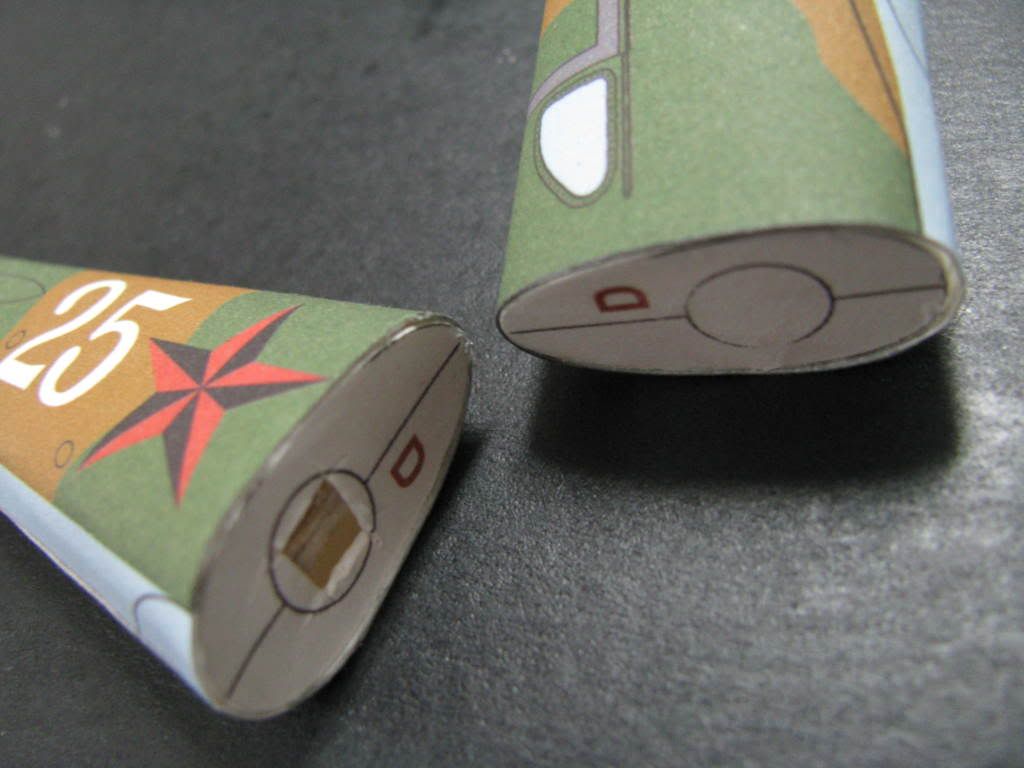 If you notice, I make a hole in the end of the template and glue wood inside. THis makes for a handle I can grab with tweezers to move the template around. Now I think I will glue both matching template part together first, then slip body wrapper half way over them from each end. Rather than make two pipes of the body and try to glue those. In the above picture I had try to trim the back piece to fit better and it became ruined. But this is a test of how I will build this.
|
|
#15
05-01-2009, 07:39 AM
|
||||
|
||||
|
You may want to try a strip of regular weight paper to use as a backing for the seam at the bottom.
Greg
|
| Google Adsense |
|
#16
05-01-2009, 08:30 AM
|
|||
|
|||
|
You can also wrap paper around the formers to make them fit snugly.
__________________
Fred Bultman
|
|
#17
05-01-2009, 08:51 AM
|
||||
|
||||
|
Thank you. You can not see but I make paper tab along the joint inside. I had thought of wrapping former but it is not too small all around, just in some area if that makes sense?
|
|
#18
05-01-2009, 10:47 AM
|
||||
|
||||
|
Lala, I had the same problem with the PZL -- the fit of the skins is loose, so there is a tendency for the skin to buckle somewhere if you wrap it tightly to the former. What I do in my case is choose to have the skins bulge consistently on one side of the formers; I choose the top side for this, since I want the glued seams along the bottom to have a surface to grip. I also create a joiner strip from scrap paper to use inside the fuselage seam. Lastly, I glue the formers ever so slightly less than flush with the skins, to help eliminate the problem of the butt-joined sections not meeting flush. Hope that helps some.
Regards,
__________________
Chris Coyle Greenville, SC "When you have to shoot, shoot! Don't talk."
|
|
#19
05-01-2009, 12:09 PM
|
||||
|
||||
|
That all does help becuase you note everything I have seen. That is why now I think I will make the templates extra thick and slide the skins over them only half way so the next segment can attach.
|
|
#20
05-01-2009, 12:35 PM
|
||||
|
||||
|
I am going to try that same technique on my next Shoki model, as well, Lala. But instead of making the formers/templates extra thick, I will print out an extra copy on bond (thin) paper and use it to make joining strips between the fuselage sections -- making use of the techniques suggested by you and by Chris Coyle. I think that one thickness of joining strip all the way around the former will make up for the difference between the fuselage skin diameter and the former diameter.
There is one advantage to the Shoki in that the low wing covers up any gaps or mismatches along the fuselage seam, since the bottom of the fueslage fits down into the wing center section structure. Don
|
| Google Adsense |
 |
|
|


 Linear Mode

