


|
|
|
#1
 04-29-2009, 09:37 AM
|
||||
|
||||
|
Marek Marathon Lala's LaGG
I have the LaGG-3 from Marek to make. It is not too many pages with one page parts, one page diagrams and artwork and one page template and history text.
A suggestion for any company (I think of this with Fiddler's Green) is all the extra artwork and things in color use more ink to print if you do not want. Normally with 3 pages, I would print each at the same time together, but I do not need large color picture using half the page space. So I print the diagram page in black and white for economy. I have also to "Fit to Page" for standard paper. I use 65# card but will make template part thicker. But now my printer ink is empty and I have refill to do. 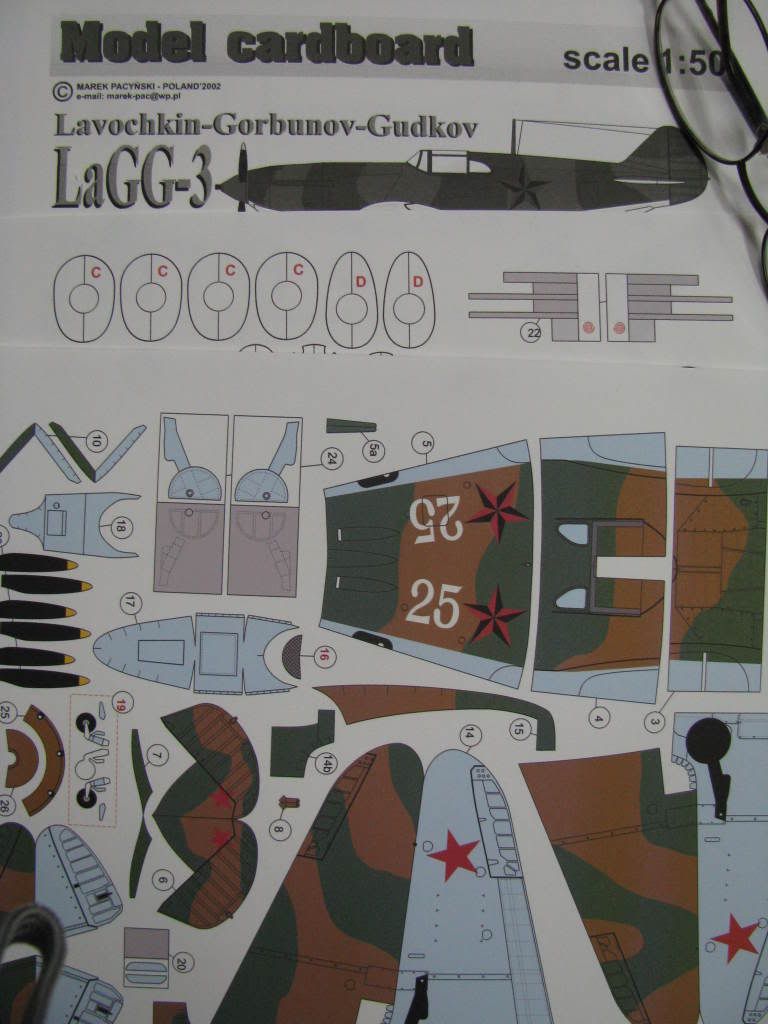

|
| Google Adsense |
|
#3
04-29-2009, 11:22 AM
|
||||
|
||||
|
It can t be worse than Fiddlers Green when it come to fit! At least the lines are nice and constant. I have some of the template parts mounted to Bristol Board tablet paper and cut out so far.
|
|
#4
04-29-2009, 01:09 PM
|
||||
|
||||
|
I'm glad you are building this model, Lala. I bought the LaGG models from Dewayne Barrett a couple of years ago and have looked forward to building them some day, but the day has not yet come!
I will be interested in your experience with the model and hope to learn from your experience. The Marek models do not come with instructions and there are occasionally some minor errors (misidentified parts), but in my limited experience, the parts fit well and they provide not-too-difficult and generally accurate models of many interesting airplanes. I think with your skill and experience of making necessary modifications, you will not have any great difficulty with this one. I will be glad to know if you come up with a way to make the propellor turn. My usual technique is to insert a piece of 1/16" outside diameter aluminum tubing for a bushing (a hollow cylinder that a propellor shaft can turn inside of) and use a 1/32 wire for the propellor shaft. The Japanese captured some of these LaGG airplanes and repainted them in Japanese markings. I keep hoping Marek will issue a repaint in those markings, much like the "captured airplanes" series done by Marek and Kampflieger. Don
|
|
#5
04-30-2009, 07:06 AM
|
||||
|
||||
|
I have cut some parts now. The template parts were spray-glue to Bristol Board. The thickness seem right to me and the parts that must slip together fit perfect. The two "D" parts here, if they look rough they are not really. I make the two at the same time and then sand the edge of both so the contour is as close as the same as possible since one must glue to the next when the pipes of the body are fixed together.
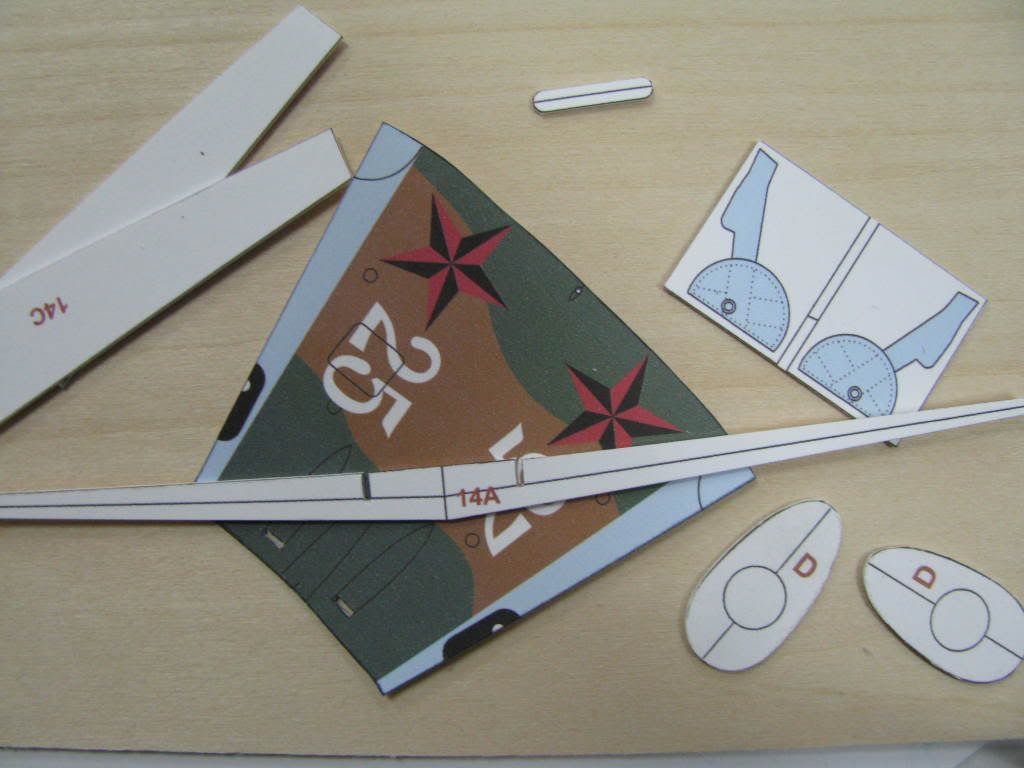 I make the wing template part. It would be nice to have some part in the middle it is floppy. 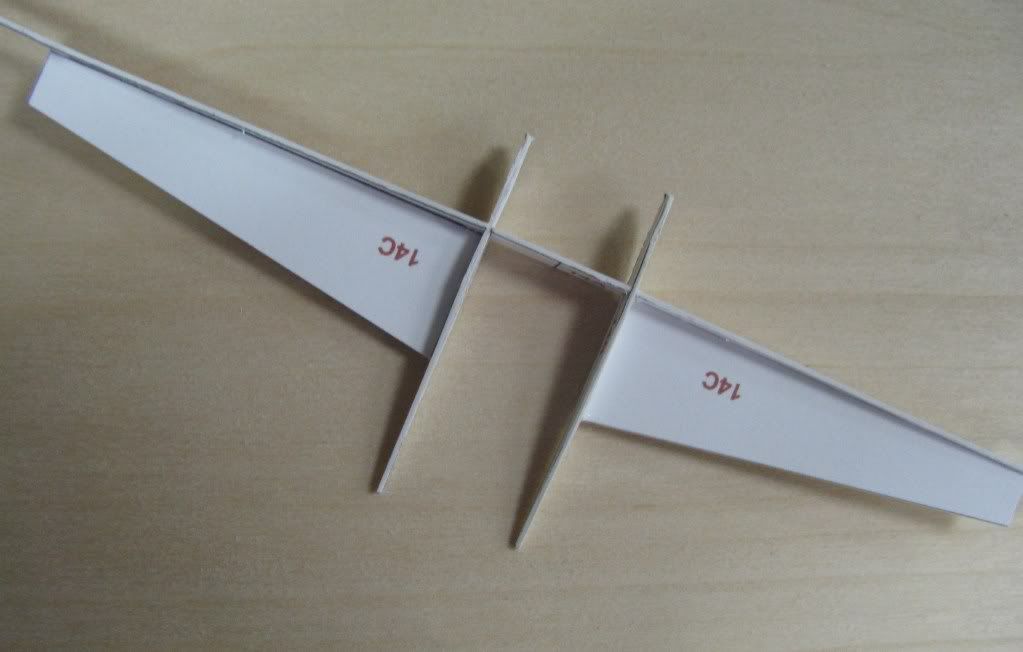 I have practiced with two wraps for the body and need to print another yet. I get the idea of how to make this kind of construction though. It is a very nice model so far but one mistake is color of propeller with yellow bands which are not used on Russia plane propellers at all. Last edited by Keds_Girl_Lala; 04-30-2009 at 07:09 AM.
|
| Google Adsense |
|
#6
04-30-2009, 08:36 AM
|
||||
|
||||
|
Thank you for describing your building process so thoroughly, Lala. I think your approach to sanding the formers together is essential in order to get smooth joins between the fuselage sections with this type of construction.
You do very nice clean work. Don
|
|
#7
04-30-2009, 09:16 AM
|
||||
|
||||
|
Thank you. I have experimented with some of the wrapping parts for the body and wing and things will fit well but I need to devise some ways of fixing the parts and a sequence. For example, part of the front of the wing is curved and a seperate part. But it just stick there with no supports or tabs. So I learn I need to make some shelf from card to attach the part to.
It would be nice to see Lagg in colors from Continuation War.
|
|
#8
04-30-2009, 11:23 AM
|
||||
|
||||
|
I think I have printed this model now 5 time for parts! Mostly the same part. I have made two sections but 1) the seam it comes apart on the bottom and 2) the back and front section do not line up. I had fear this. But I have idea now to make the template part thicker and glue both matching part together.
I can see now also some things to consider for modification. You have to cut gully (probably not the right word) in the nose for the gun placement, but the curved gully will hit the middle of two template parts as it is recess into the airplane body and not smooth on the outside.
|
|
#9
04-30-2009, 11:31 AM
|
||||
|
||||
|
Lala -- You are learning alot from this build and your experience will be very valuable for others of us who want to build this airplane. Please continue to provide photos of your innovations and modifications.
Don
|
|
#10
04-30-2009, 01:11 PM
|
||||
|
||||
|
Don, you sweet talker...
Lala,
Thats paper talk for you do it first so I can learn from your mistakes! I know. I'm doing the same over on Don's thread!:D We're all in this together, one drop of glue at a time. The DC
|
| Google Adsense |
 |
|
|


 Linear Mode

