


|
|
|
#12
 10-14-2009, 07:54 AM
|
||||
|
||||
|
You make good progress also. I found when I had make the hull for the model it fit well. I wish I had it still. I put much effort in to it and it is my most favorite ship.

|
|
#13
10-15-2009, 03:45 PM
|
||||
|
||||
|
I bought a matt, red, spray paint (well, not as matt as I'd like, but will do)
  I cut out elements of plating, marked what's necessary on the back, pressed some marks at front and sprayed them with the red paint   I glued 1cm wide ribbons of 80g paper to the ribs, and coloured them with red permanent marker.   And then I started to glue the bottom - and my lack of skill became apparent - last time I glued the bottom of a big ship was over 15 years ago - and I have much to learn to be happy with my results. Ribbons didn't worked out as I wished - I'll have to think of sth better. At the moment I have "steps" in places; between first and second belt there are big rifts - between second and third they're smaller but still there they are. :(  But the shape is beautiful  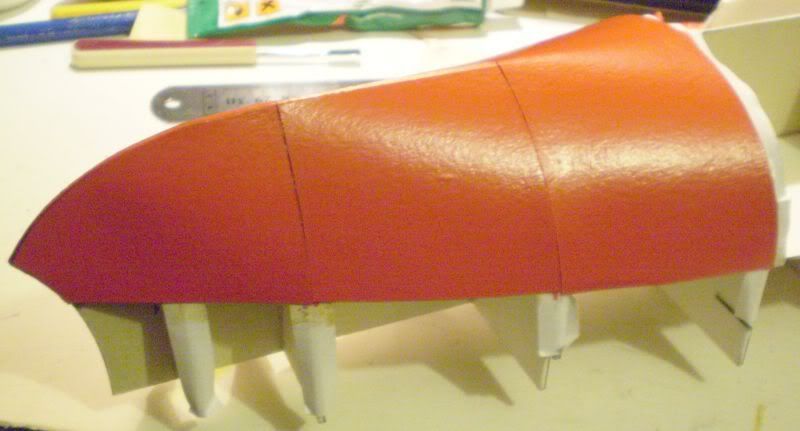
|
|
#14
10-15-2009, 04:48 PM
|
||||
|
||||
|
The framework looks massive and the bright colors look nice, much different than the old faded kit. I have an old MM sailing vessel and I have looked at it and it does look like it could result in a nice model. On the MM Hellcat brightening the colors with acrylic paint made a surprising difference although does take time and patience to stay "in the lines"
__________________
regards Glen
|
|
#16
10-15-2009, 06:51 PM
|
||||
|
||||
|
I find the painting of the sheets before attaching to frame interesting. Most seem to apply to frame and then paint. I like this way you did better, you can fix before attached. Your planking w/indent of planks w/as you describe: dull knife, wonderful, will give this a try as well. I think what you have done so far is just great. I have a large collection of MM ships, that I had put away for just collecting. Now after watching you, taking them out and wondering which one to give a try using your techniques. Keep it coming.:DRick
|
|
#18
10-16-2009, 09:39 AM
|
||||
|
||||
|
And some info about painting the elements of bottom plating - On a big sheet of card I glued 2 long ribbons of doublesided tape and 2 short in the middle for the long stabilisers. Then I attached the parts to tape and set the big sheet vertical to have it easy to paint from the spraying can. I sprayed 2 layers, each time laying the sheet down when finished, to prevent the paint from flowing and creating thicker smudges.
I didn't have my camera in work where I sprayed the parts, so today I've took it to work and made those pictures.    The big red spot under the parts is where I were test spraying, and finishing spraying by turning the can upside down and spraying until paint from the valve was gone.
|
|
#19
10-17-2009, 10:19 AM
|
||||
|
||||
|
To get smooth lines of connections of the underwater segments I've teared off the ribbons of thin paper and now I am gluing 0,5cm strips of 2mm card (I happen to have a lot of this type of card in long, 4cm wide strips)
 I use cyanoacrylic glue - first catch it in spots, then fill in the spaces. First strip after the already glued on bottom I attached with the Magic glue - to avoid smearing the bottom.    So far at the moment: 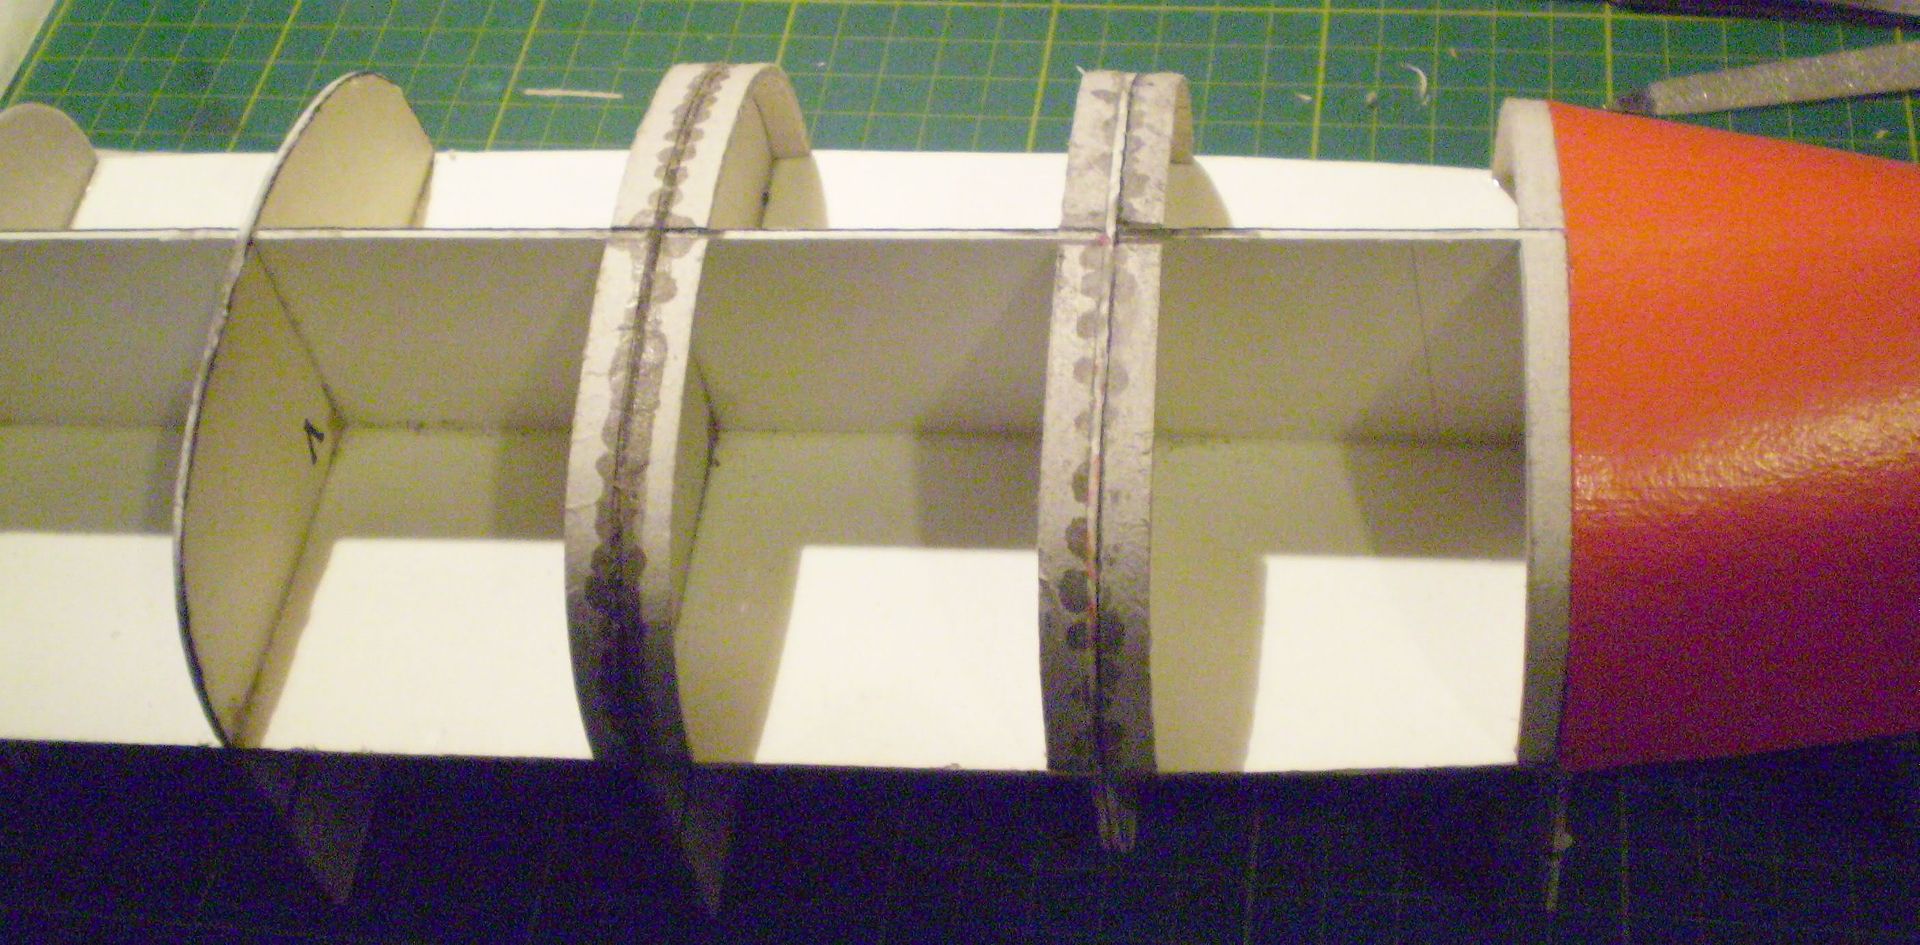
|
 |
|
|


 Linear Mode

