


|
|
|
#11
 03-22-2010, 06:58 AM
|
||||
|
||||
|
more...
putting the wings together, both prints have the same problem: got a nice curve in the upper leading edge of the wing half, lined up the edges and wing tips for gluing 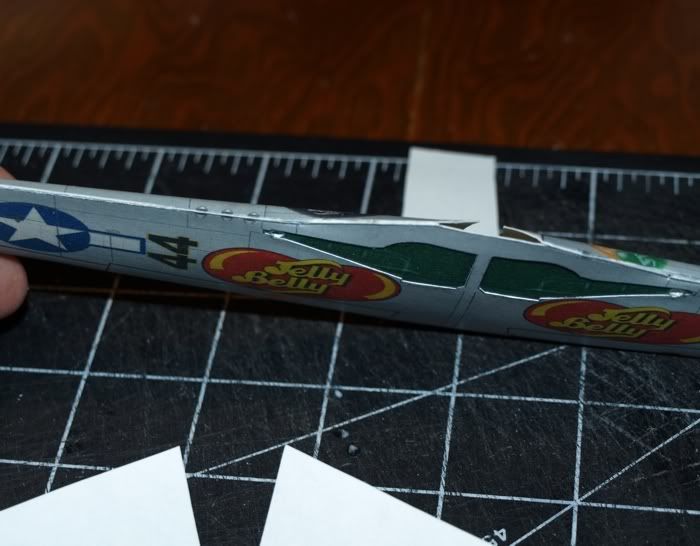 everything looks good until you get to the inboard angle change (on the leading edge of the wing) upper and lower parts don't match. I lined them up as close as possible, trimmed off a little excess and molded them into shape with fingers and glue! 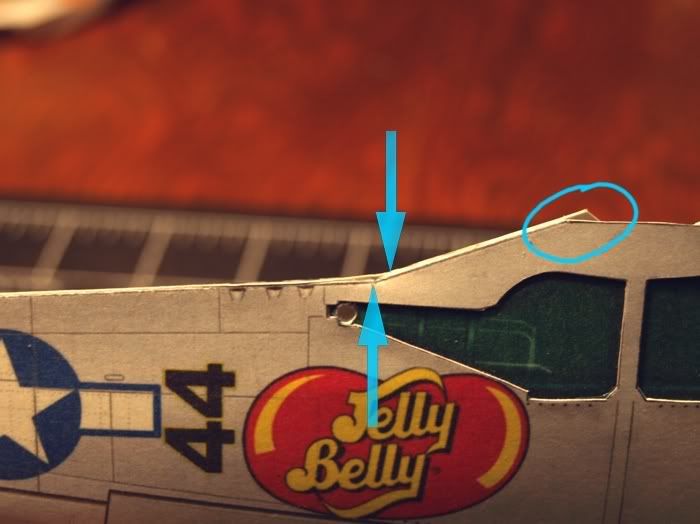 Horiz. Tail fits together a lot better, but I added some thickness to give it more shape. Just a few strips of cardstock, before sandwiching the tail together. 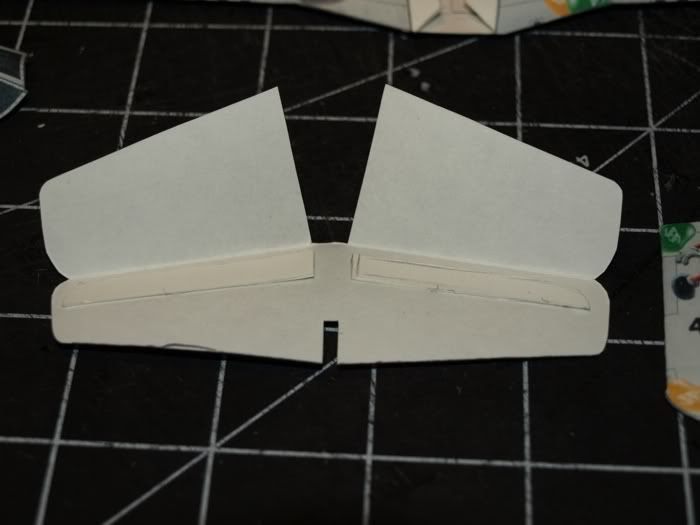 and a similar thing for the vert. tail...although this time I extended the added padding to be the "connector" to the fuselage. This part just slips into the tail end of the fuselage and is glued solid. 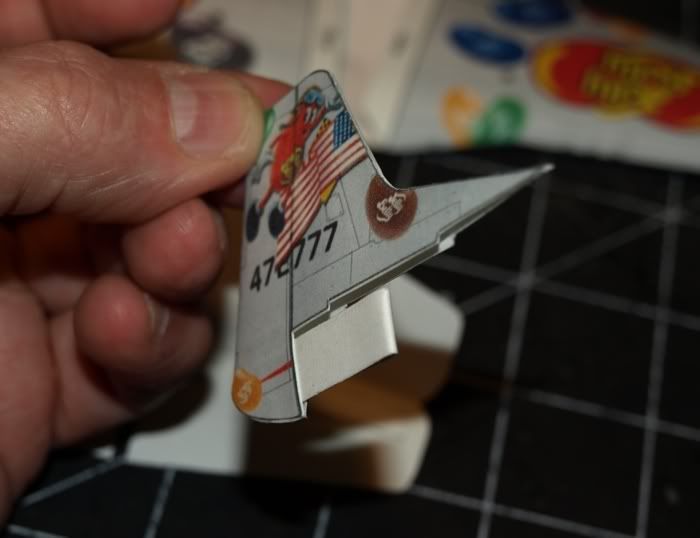 all ready to try the second wing fit! 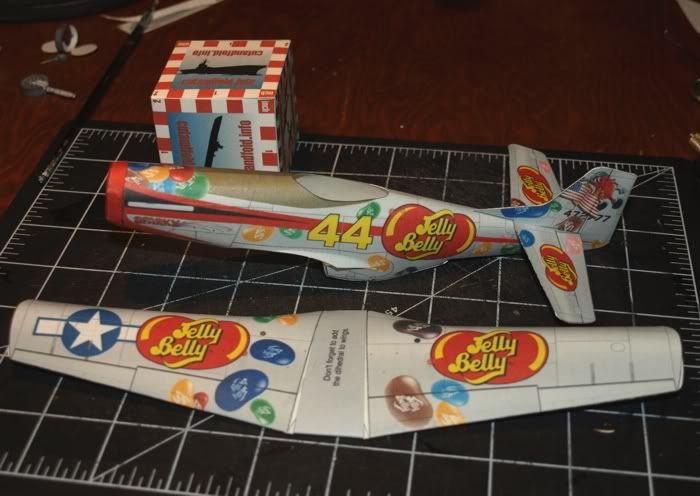
__________________
SUPPORT ME PLEASE: PaperModelShop Or, my models at ecardmodels: Dave'sCardCreations 
|
|
#12
03-22-2010, 07:08 AM
|
||||
|
||||
|
First wing fit went fairly smooth...its a little tricky squeezing the wing into place.
You have to be careful not to make a complete mess of the lower "tabs" on the fuselage. Anyway, this was my first effort with the wing fairings, which looked very odd to me. These don't look like the Mustang fairings I have seen and used before (on marek's kits) and don't even look like any other fairings I have seen. 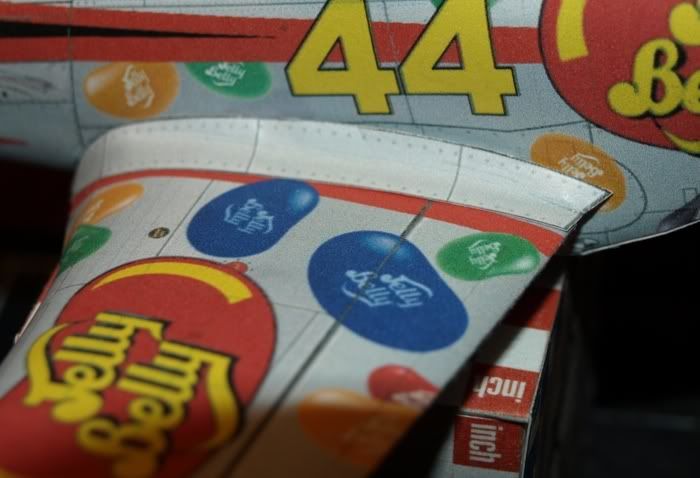 I could not make these things match the shape of the wing... I tried to put a curve into the fairing, and I could get the rear to line up with the wing (sort of) but the front would not wrap around properly. Another issue was the Jelly Belly graphics were hidden by the fairing. This is about the best I could get...  For the second build, I have already designed some fairings, borrowing from the Marek kits and copying the printed fairing shape that is already on the FG Mustang fuselage. I have already tried a test fit, and although not perfect, I like the look much better than the FG versions. 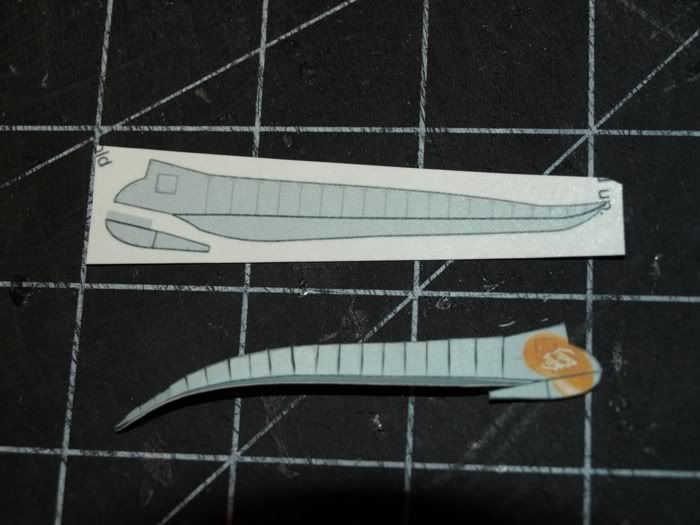 oh....and I finished off the wings, by dealing with the wing tips. There doesn't seem to be a way to close up the wing tips without folding or distorting the parts so I added a small slit to the upper surface and overlapped the the ends creating a curve. (you could also do a vee cut and butt glue the area) then I just pushed the lower surface up to meet the newly curved upper, and trimmed around the edge with scissors. 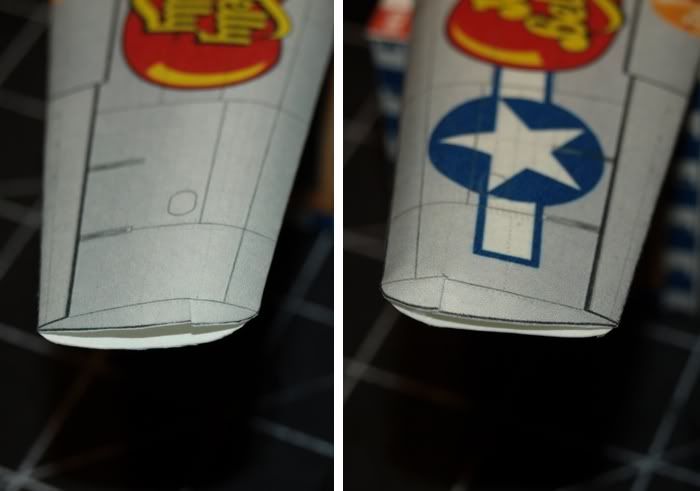
__________________
SUPPORT ME PLEASE: PaperModelShop Or, my models at ecardmodels: Dave'sCardCreations
|
|
#13
03-22-2010, 07:16 AM
|
||||
|
||||
|
and I started assembling the gear parts.
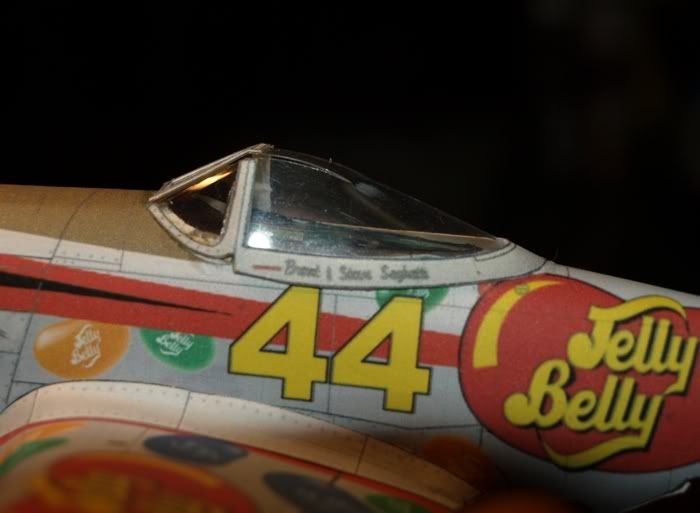
yes, the gear support legs do seem a little too tall (thanks willygoat) so, I trimmed off one complete rib section from each support. you can also see in the earlier photos, that I predrilled the wing holes for the gear. 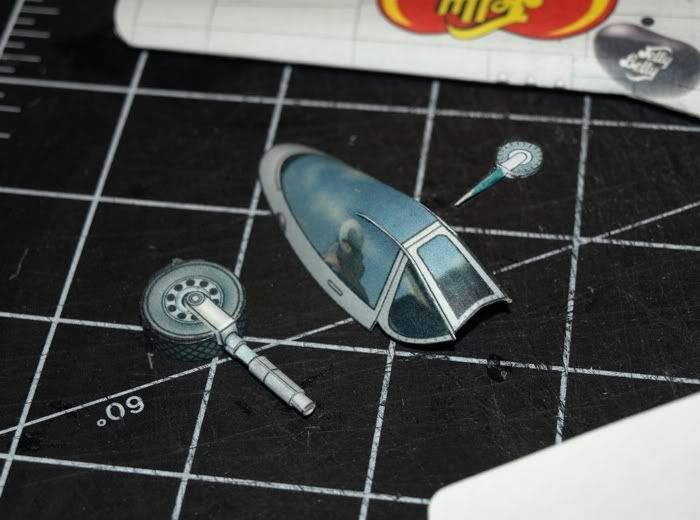 The tail gear, I glued to a small section of wood toothpick to insert into the fuselage. (I didn't see any parts for that gear, other than the wheel itself) For the canopy, I did a quick photo repaint (I used photos of Jelly Belly, so its accurate!) For the other plane, I am going to try my first clear canopy!
__________________
SUPPORT ME PLEASE: PaperModelShop Or, my models at ecardmodels: Dave'sCardCreations
|
|
#14
03-22-2010, 09:10 AM
|
||||
|
||||
|
Looking great Dave!!!! Can't wait to see these babies wrapped up. They look sooo col with the Jelly Belly theme. Or, as my son would say, "That plane has jumping beans on it!" :D
|
|
#15
03-23-2010, 09:21 AM
|
||||
|
||||
|
Okay, so heres the gear in place.
the extra layers of card inside the wing really made a difference! a blob of glue in the hole, and its a much sturdier attachment. 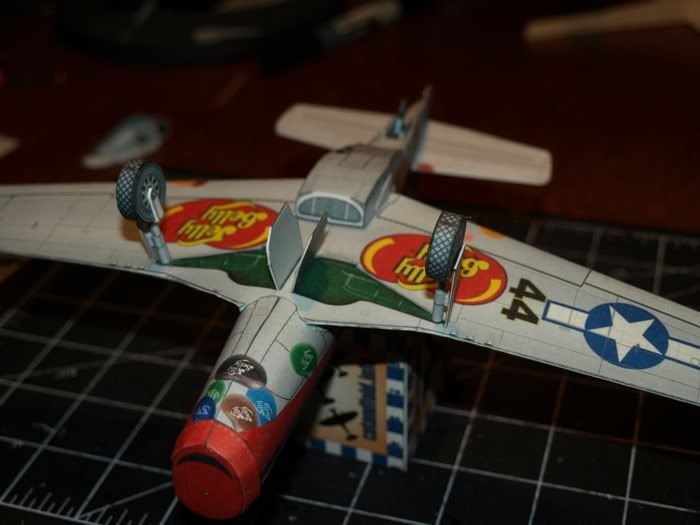 My new wing fairings worked better...although I still need to fine tune the trailing end, make it a bit wider to cover the gap.. When you fit the wing assembly to the fuselage, you can adjust the width of the fuselage (since there are no internal formers) and I think I squeezed it a bit too narrow. The unfinished area of the wing is visible and would normally be covered by the wing fairing. 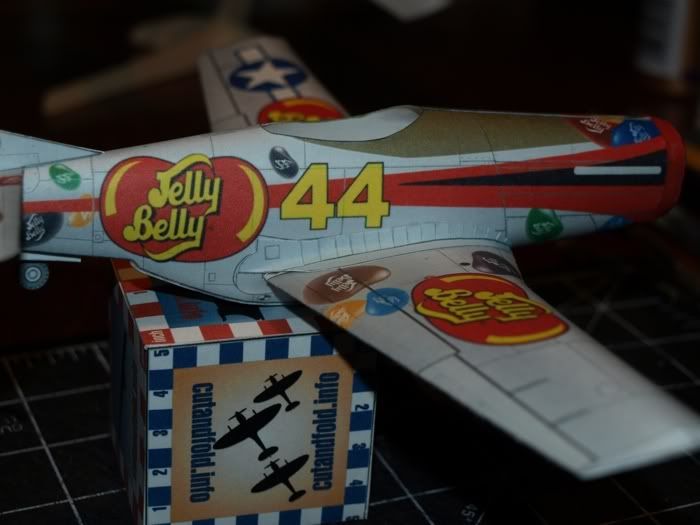 and heres another angle, which also shows the Canopy in place: 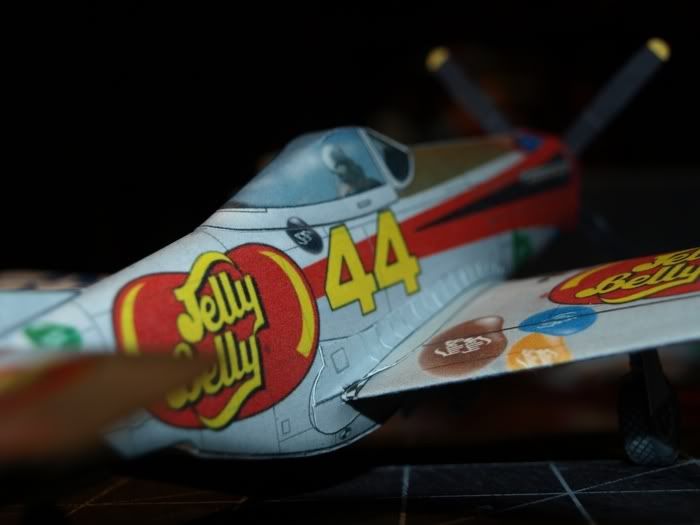 another shot showing the landing gear, and the exhaust has been fitted 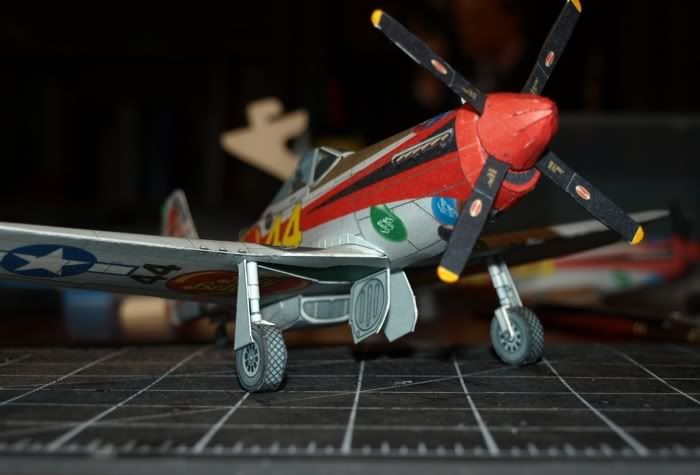 and the Tail Wheel...sorry, its in the shadows... 
__________________
SUPPORT ME PLEASE: PaperModelShop Or, my models at ecardmodels: Dave'sCardCreations
|
| Google Adsense |
|
#16
03-23-2010, 09:28 AM
|
||||
|
||||
|
Heres my attempt at a clear canopy...
 a pretty simple one really...just cut out the paper canopy and traced it onto some acetate. One piece, folded exactly the same as the paper one, with no glue. 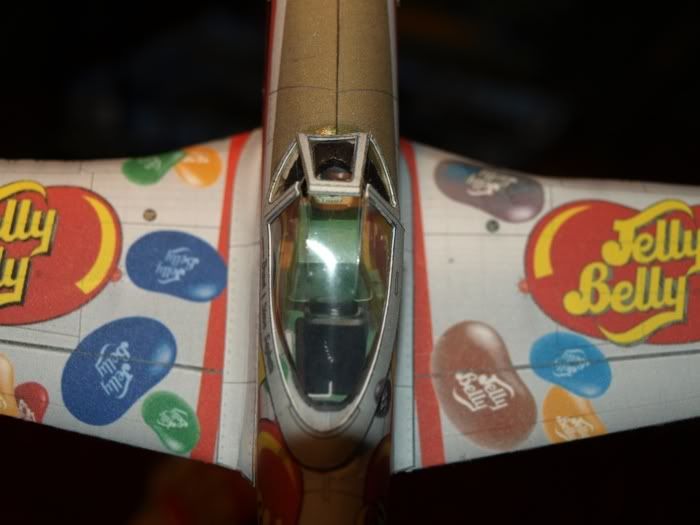 I just cut out the paper canopy frame and glued it to the surface of the acetate and glued the front seams. The complete canopy was formed into the correct shape with my fingers and then glued to the fuselage and held in place until dry. 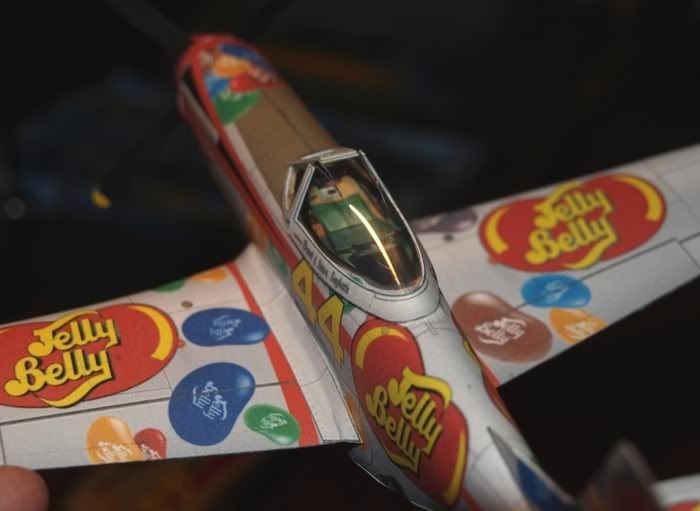 Obviously, I had no cockpit for this plane, so I simulated one with a photo print of an actual cockpit (glued up through the bottom of the fuselage).
__________________
SUPPORT ME PLEASE: PaperModelShop Or, my models at ecardmodels: Dave'sCardCreations
|
|
#18
03-23-2010, 09:29 AM
|
||||
|
||||
|
AND THERE SHE IS!
Sparky!! 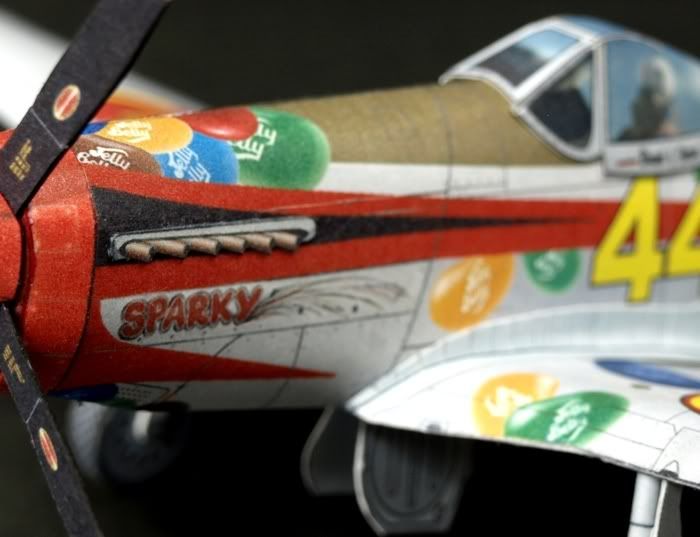 Consider this my entry in the FG Contest!!! 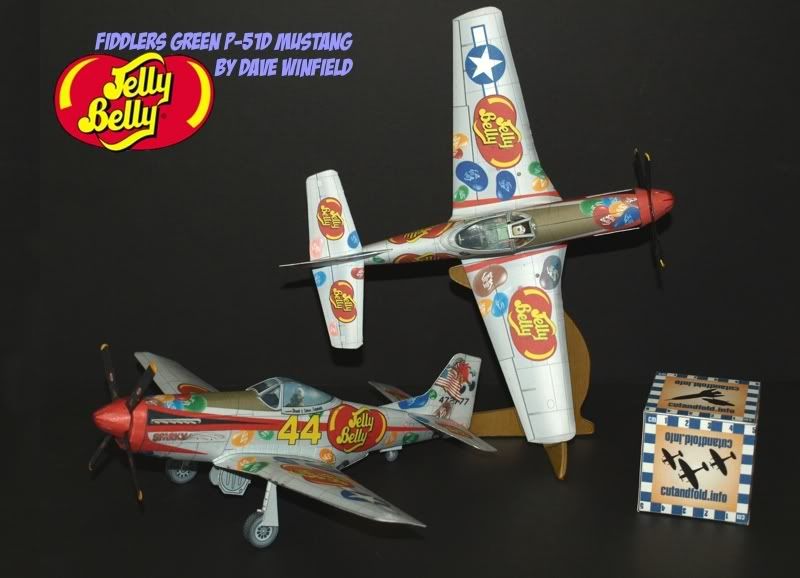
__________________
SUPPORT ME PLEASE: PaperModelShop Or, my models at ecardmodels: Dave'sCardCreations
|
|
#19
03-23-2010, 09:45 AM
|
||||
|
||||
|
Quote:
it still needs more tweaking to be shared in that way. my goal, beyond the repaint, was: 1. to try to build one model as close to FG original and 2. another with some of the mods I thought it needed ...thats why I ended up with two versions, although I kinda mixed up the "mods". lol I think my adjustment to the nose cone (prop attachments) is also a good tweak to the model ...having the props sit behind the nosecone just doesn't look very good to me.
__________________
SUPPORT ME PLEASE: PaperModelShop Or, my models at ecardmodels: Dave'sCardCreations
|
|
#20
03-23-2010, 09:45 AM
|
||||
|
||||
|
Awesome. Those look great Dave! A worthy entry indeed.

__________________
Put on hold build (someday I'll finish): F-35A Lightning II 1:72 Previous builds: cMags' Card Model Builds
|
| Google Adsense |
 |
|
|


 Linear Mode

