


|
|
|
#1
 06-24-2009, 07:19 PM
|
|||
|
|||
|
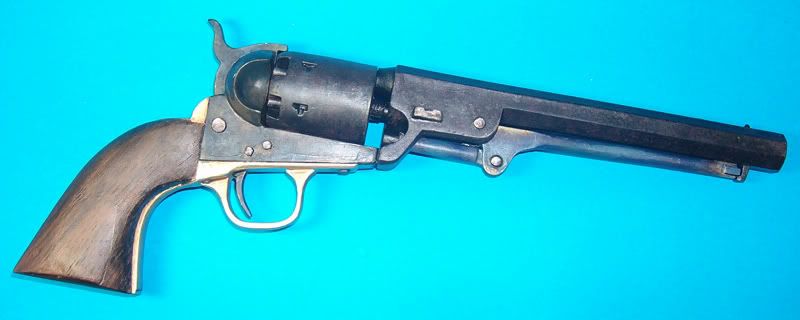
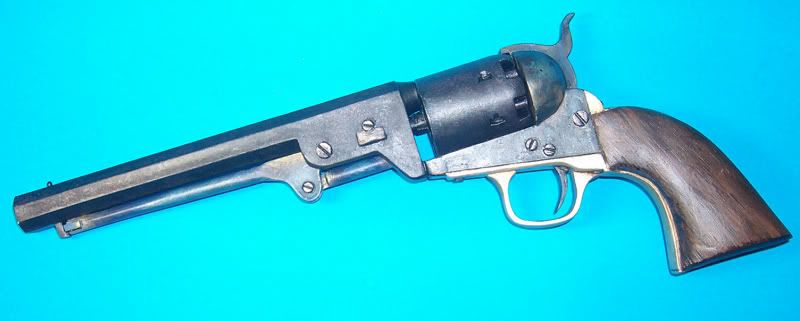
Nothing's 1851 Colt Navy
This post is a repeat and or summary of a previous post I made on "another" forum, I hope you enjoy.
Just finished this one, and what a beauty it is. 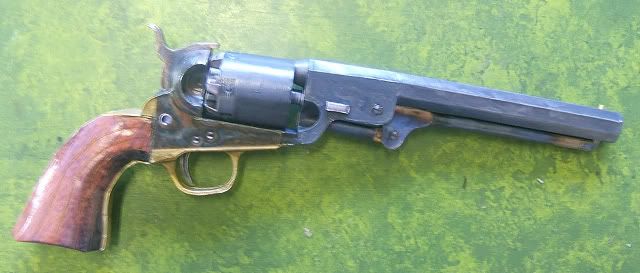 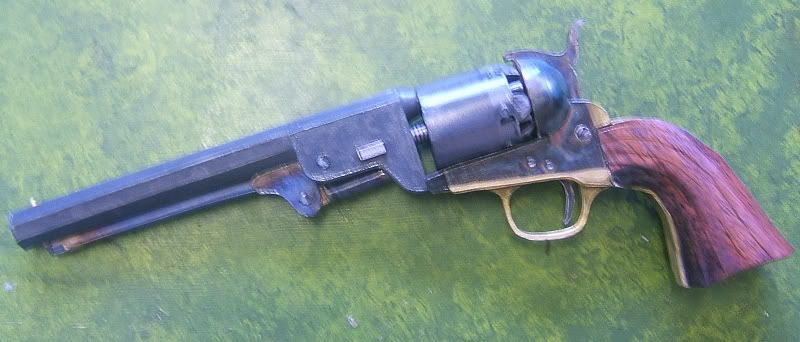 Great subject, awesome colouring and textures, clear instructions. There are a few fiddly bits, but all went pretty well, and only rates about a three out of ten on the blueometer (where 1 is a pleasant cornflower blue, for words like "golly" and "oh, Pooh", and ten is deep, royal blue for those special occasions when you have to make words up). I've added a lot of internal reinforcement to this model, particularly after a near disaster with the hand grips. I think these would have been better with a separatlely modelled frame with the 'wood' parts added after completing the 'Brass' frame. now that I think of it, this would also allow the modeller to carve up some wood grips out of bass wood if they should so please. Also, It would have been nice to have the whole barrel/ breech bit as a single piece to avoid the seam line where the barrel joins the rest of the weapon. I'm off to order the derringer..... ******** Okay, I've started Again. Not that I'm totally unhappy with the first one, I just think I can do better. First thing that occured to me during the build of the last one, was that it's fairly flimsy, and could do with some reinforcement, which is what I hope to show in the next few posts. Step 1: The Pistol Grips. The pistol grips as supplied fold up from a single piece of card in a particularly clever and nifty manner, but leave you with a structure that won't tollerate a lot of handling. This is problematic when you are as ham-fisted as I am, and like to grip onto one part of a model none too delicatly whilst working on another. I have lots of Squishy models, and I want to avoid that this time round. So. A frame is needed. Problem: I'm not sure of the exact shape it's supposed to be. My first effort is adequate (I aspire to adequacy..), but bulges in a few places it shouldn't, and has a pronounced bend to the left, so I can't use that to measure from. Solution: a quick email to Nothing (the designer) who promptly and wonderfuly supplies a profile plan. From there it is fairly easy to plan out a box section, that will take the place of the central Brass part of the grip. I cut the pieces in 1mm card, and assembled them with white glue, with some CA on the inside to stiffen things up. 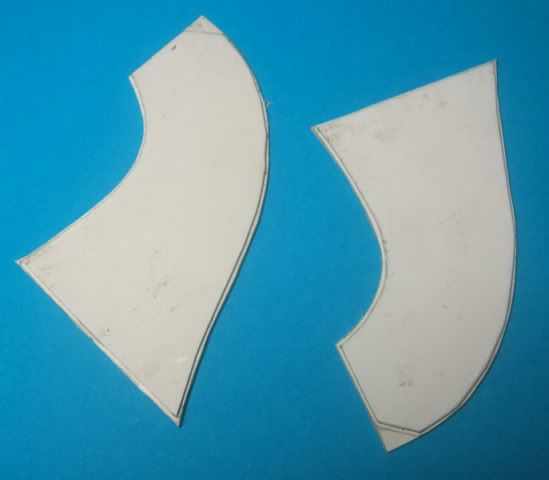 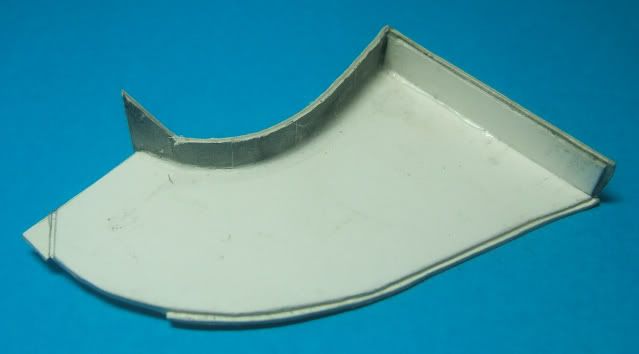  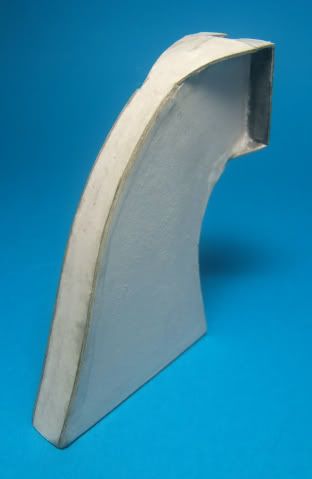

|
| Google Adsense |
|
#2
06-24-2009, 07:25 PM
|
|||
|
|||
|
Continuing on, the bulk of the frame was soaked in CA and sanded 'till Smooth.
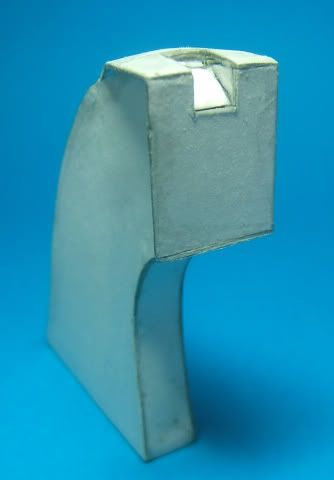  HHmmmmm. Smmmoooothhhh. The hand Grips themselves are carved from Balsa. Okay, okay. it's not paper. Meh. sue me. I did the paper ones before, and they're good, but the unavoidable lines in the handle are the only real givaway that the model's not made of wood and steel. 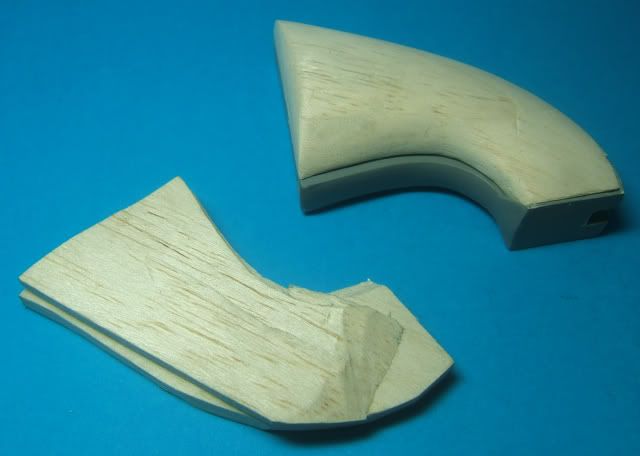 One should note, that all the extra work I'm doing is not nessesary to complete this wonderful model, I just want something a little sturdier. here's a pic of the first grip I made: 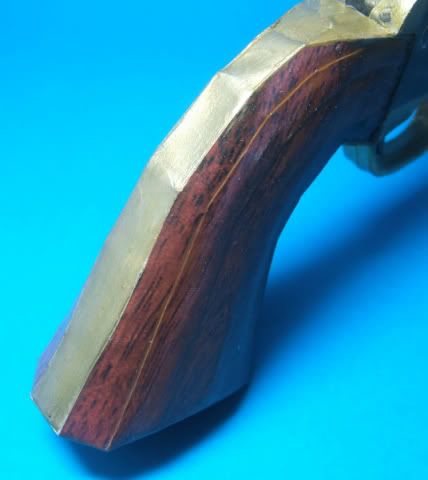 ****** Next bit: The frame. Okay, This is probably a tad overengineered, but I went ahead anyway. lessons learned from my first build helped figure all this out. 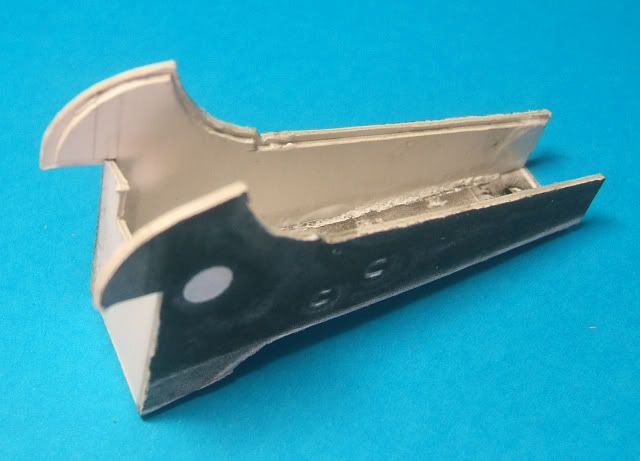 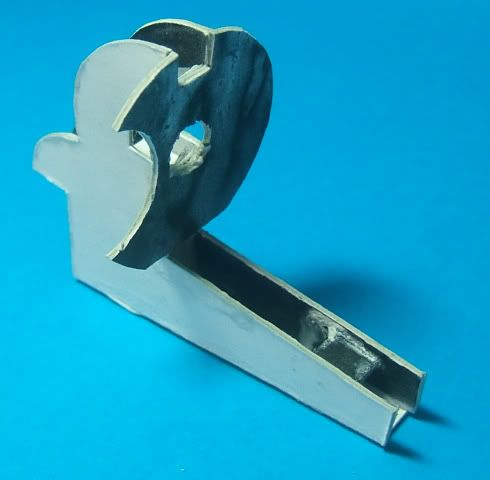 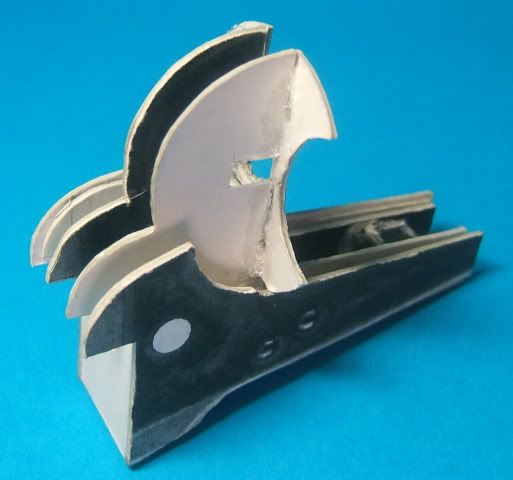 ...all was going well until I realised I had the round face bit on backwards. it's all good now though.
|
|
#3
06-24-2009, 07:26 PM
|
||||
|
||||
|
You need a license for that before ya shoot your toe off!
Great work!
__________________
Sit quietly, doing nothing, spring comes, and the grass grows by itself. ") http://www.usswhiteriver.com/
|
|
#4
06-24-2009, 07:31 PM
|
|||
|
|||
|
Whoops! got a bit exited, forgot to take some photos. so sorry if it jumps ahead abit...
 I've decided at this point to secure the frame to the grip, to give me something to hold onto while I work on the rest of it. (here's where it jumps ahead...)  as you can see, I've added the "bulgey bits" (a technical term), and after much sanding/ supergluing/ spraying, rinse and repeat, I have a nice shape, Which I hope the kit parts will fit over.. They don't. Oh well, paint it is. I just hope I can come close to matching nothing's awesome colouring. I might as well spray the brass, as it's simple, quick and I have a spray bomb around here somewhere. 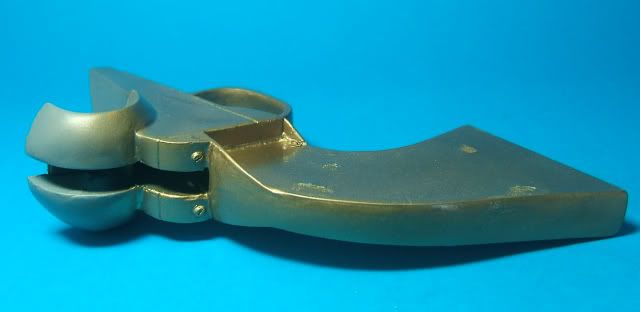 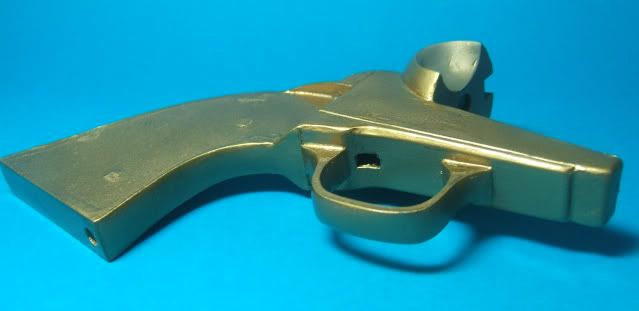 hmm. I'll have to leave that to dry. ***** okay, first attemp at matching the look of the original with paint... 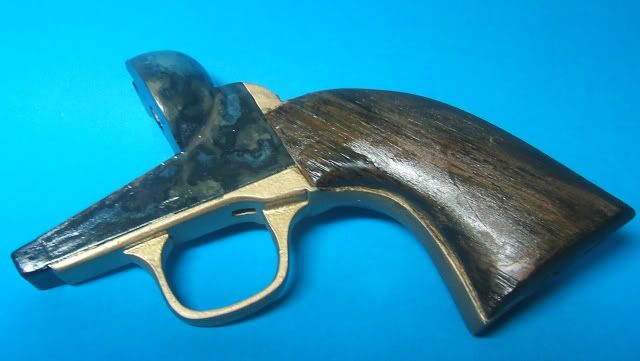 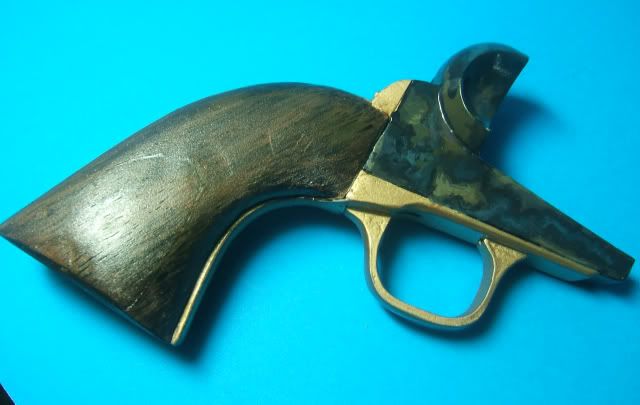 ...I'm fairly happy. a bit more fiddling, perhaps. ****** Next bit: Part 6, the central cylinder retainer thingy. IMPORTANT NOTE: The finished model relies on this part for most of its finished strength and alignment. It's strongly reccomended that it be attached a firmly as possible and wrapped around some form of strong tubing. I've used plastic tube, and recessed it into the face about 5mm, and used alot of superglue. Also be very careful to make sure that it is straight and true before it dries. The Screw heads were added from wee circles of card with their centres chopped out, and painted with acrylics. They're a bit oversized (my fault) and I suspect that the "real' ones are countersunk, but I like the added chunkyness. 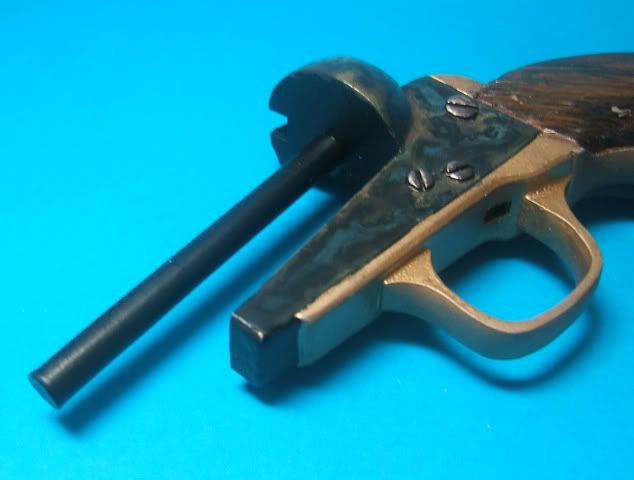
|
|
#5
06-24-2009, 07:36 PM
|
|||
|
|||
|
Hammer Time!
(the following section does not require purple parachute pants, but I think they help...) the hammer parts were tripple laminated and then stuck together: 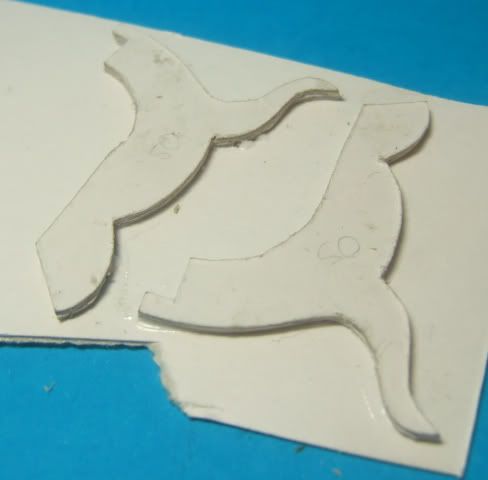 the whole assembly was generously covered in superglue (I use the cheapest superglue/CA I can find at bargain stores...), and sanded then undercoated, then sanded some more, superglued, sanded, undercoated, sanded a bit more, etc etc. 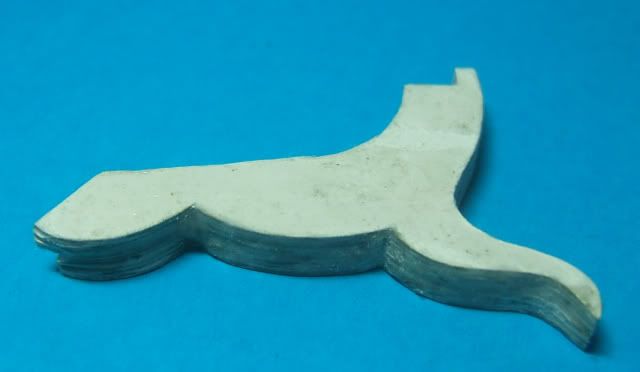 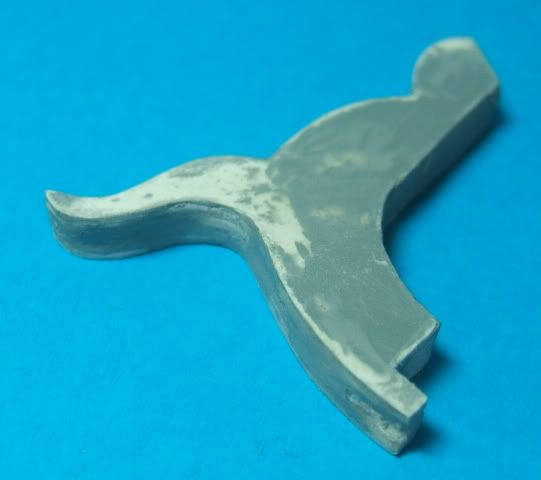 When nice and smooth, it was painted black: 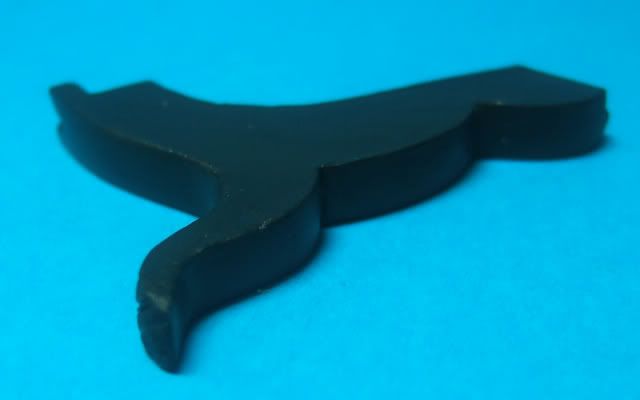 And painted to match (as best I could) the printed textures. 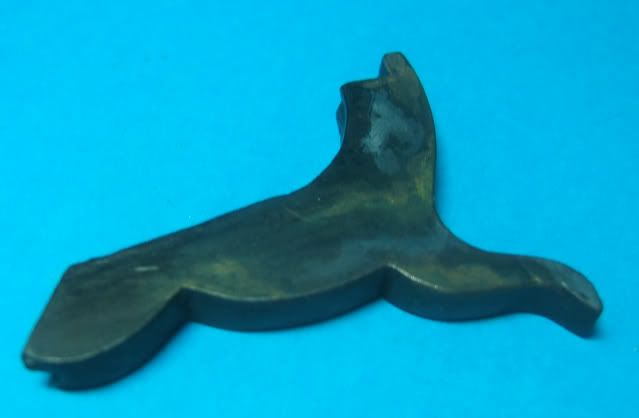 ....and attached. 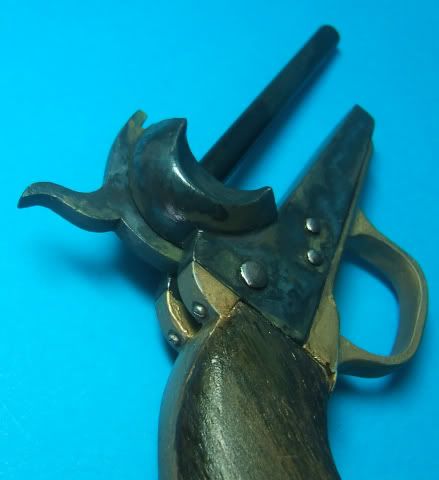 many of you will have noticed that I've changed the shape of the part, and I'm not using the alignment pins. I decided early on not to use the moving parts option, this also means no pins. Be Careful, however, as the pin that holds hammer in position also aligns the rear frame parts so everything lines up, something I found to my detriment during the first build, When I ended up with a huge gap at the rear of the frame assembly.
|
| Google Adsense |
|
#6
06-24-2009, 07:39 PM
|
|||
|
|||
|
Wow! Fantastic Job.
Nothing's models are great. BTW, there is nothing wrong with substituting wood for paper. I can't believe how realistic this looks. I think you could easily rob a bank with this guy! Ken
|
|
#7
06-24-2009, 07:47 PM
|
|||
|
|||
|
Part Something: the cylinder.
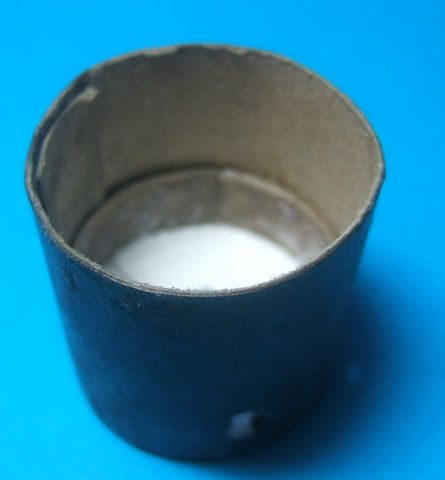 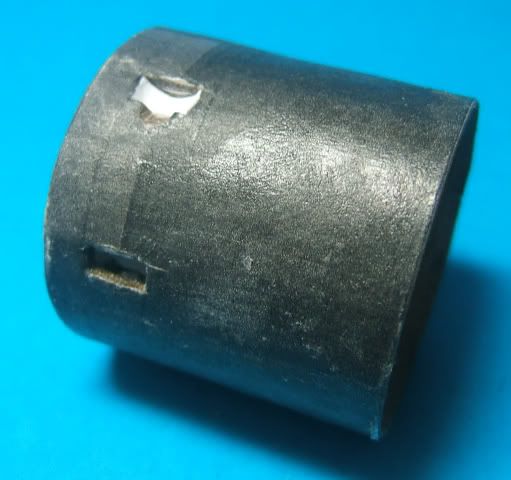 As usual, reinforce everything. This time, I need it to be quite thick at the back because I'm going to add the pawl/catch/hole thingys to the sides of the cylinder, which are on the printed version, but are only 2D. Now the front bit and chambers. I imagine the Chambers on the Real weapon must be smaller towards the rear to allow for the depth of the aformentioned pawl/catch/hole thingys, but the simple solution for me was to just shorten them. 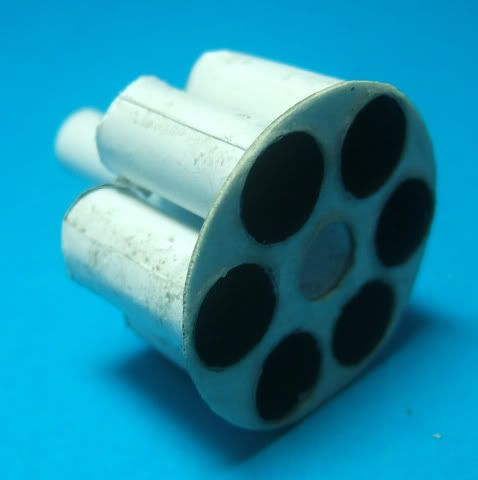 The front bit is probably one of the most delicate pieces in the whole thing, Superglue to the rescue! Soaking the whole thing in a good layer of superglue turns the front bit into something more akin to plastic, and is about as durable. This also allows for a bit of gentle reaming of the holes to ease fit. 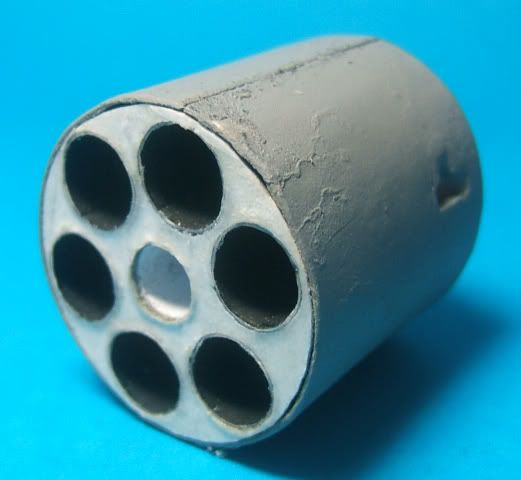 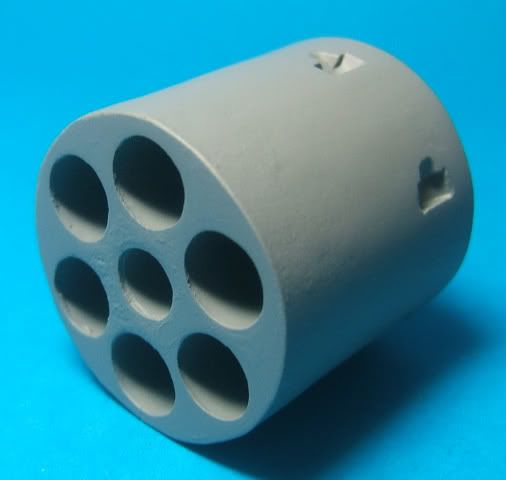 And now the part of the Cylinder that I like to call the 'Udder', for reasons which will become obvious shortly. 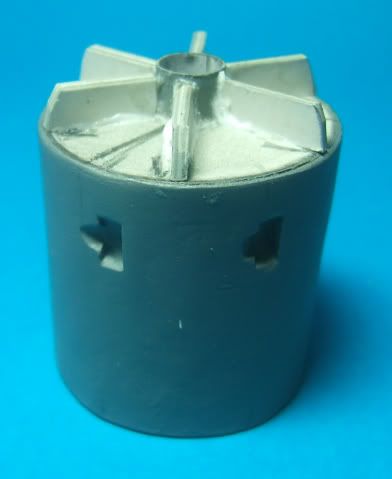 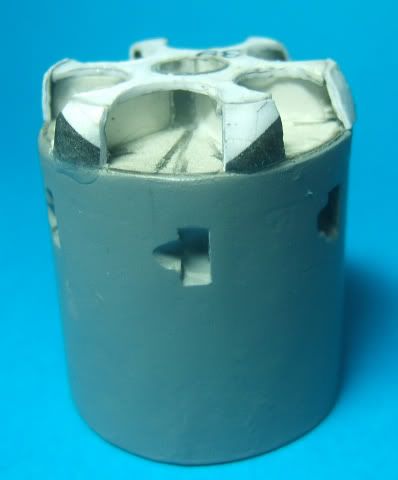 This made up of a Star shaped bit and a bunch of fold-up 'cups', and I must admit to having made a bit of a dog's breakfast out of it on the previous version. so rather than fold it up, I thought I'd build it up instead. 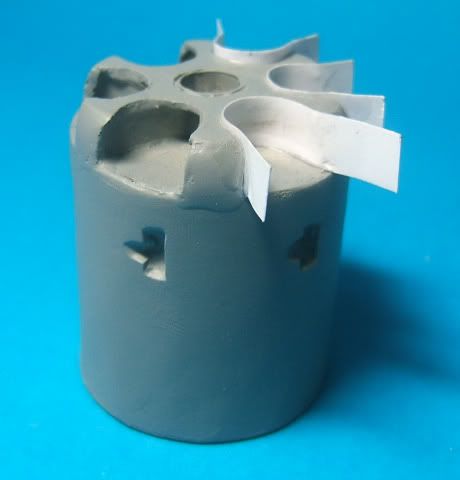 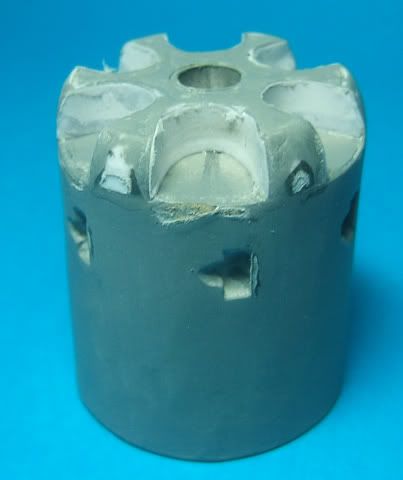 and finally I added the (block your ears kidywinks, I'm going to say Nipples) nipples from rolled paper. Now I have to admit to a potentialy nasty mistake I made earlier, in attaching the frame face a tad to low, Which caused the cylinder NOT TO FIT!!! Never mind. thankfully there was an easy, if ugly fix which is not going to be noticable on the finished model 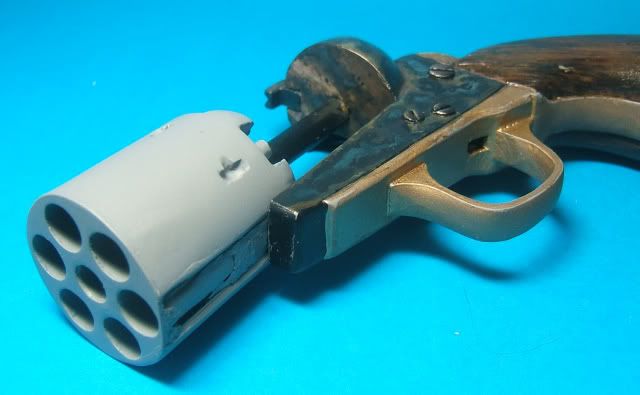 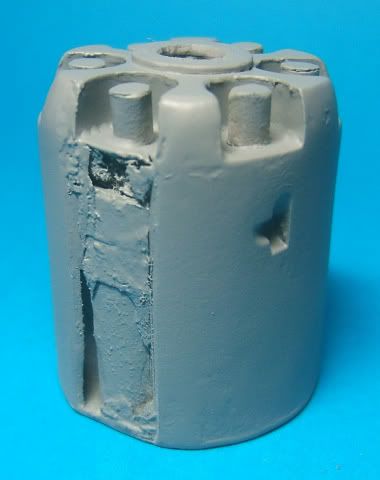 ....*hangs head in shame*....... * 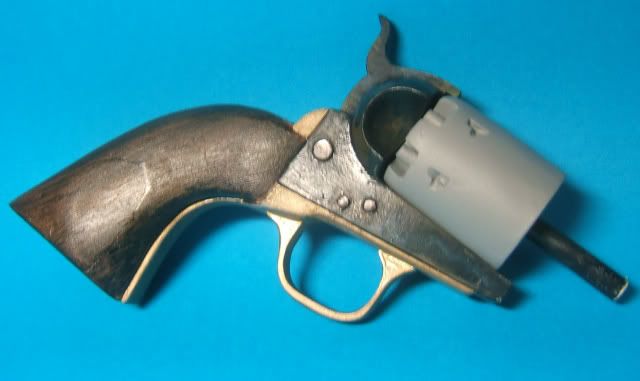
|
|
#8
06-24-2009, 07:53 PM
|
|||
|
|||
|
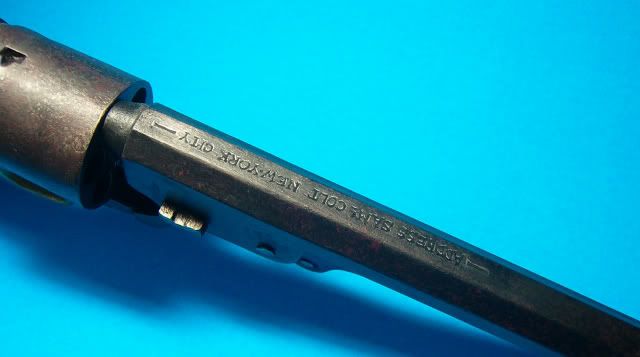
And done:
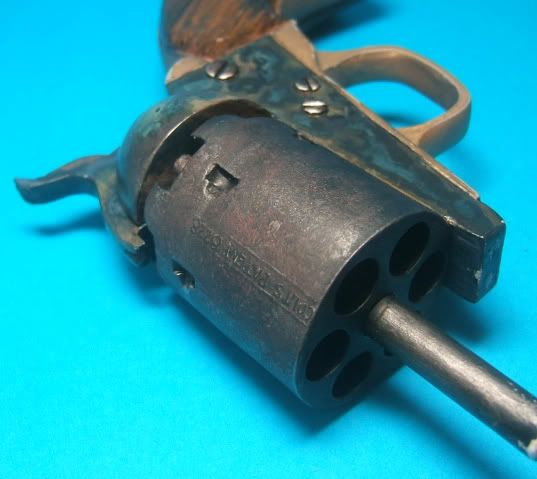  somewhat of a painting challenge, but it worked in the end. there are six or seven different colours used on the cylinder alone, Starting with a stipple of Red brown (in three differing shades), a little dark red/purple, Further stippling with a couple of shades of dark steel (mixed from silver and black) , Drybrushing with some more (lighter) steel, just on the edges and places where the cylinder would be worn, The lettering picked out in silver and black, and finally some selected washes with a thin blue/black to tie it all together. Well, I wanted an old used iron, and I think it worked. Happy as waffle in Whipped butter, I am ! ******** onto the barrel: as usual, reinforce like mad.  I had to change the design of the barrel to make it as God intended, without a seam in the middle. All of the reinforcement you see here is 2mm, and beveled so it will fold up into it's propper octagonal shape.   All folded up (before supergluing) this is now quite a strong structure. of course the 8" piece of 3/8" brass tubing up the middle of it isn't hurting, either. Last edited by mousemuffins; 06-24-2009 at 08:03 PM.
|
|
#9
06-24-2009, 07:56 PM
|
|||
|
|||
|
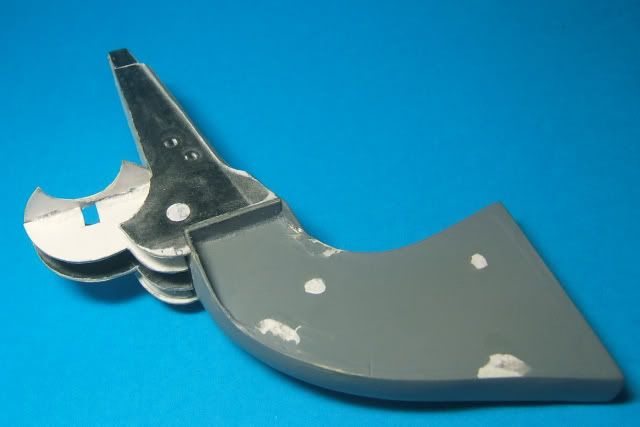
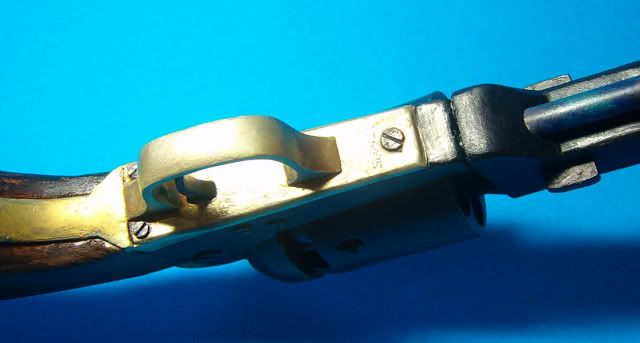
It has to be said the side port/ramming socket is one of the more complex bits of this kit, both times I had to trim the parts a bit after they were glued in place.
After the usual treatment, I've fixed the barrel to the reciever, useing an extra plug from rolled paper in the barrel to cylinder and also two pegs at the bottom, from a couple of pieces of small diameter brass tubing for extra strength. I could have used tightly rolled and glued paper for this, or even a couple of small wood dowells, but the brass was handy, and wouldn't be visible on the finished model. 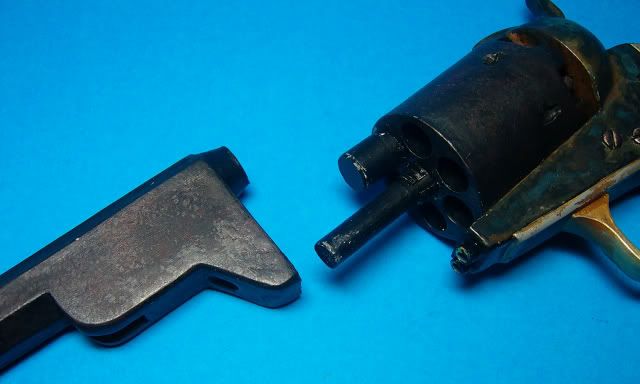 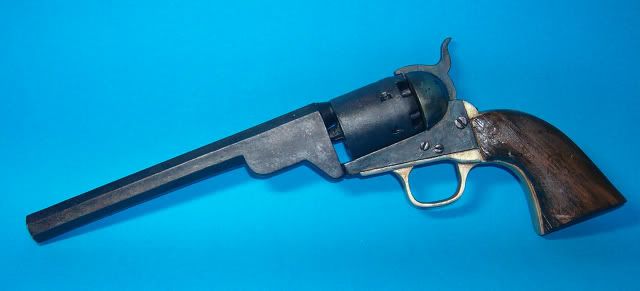 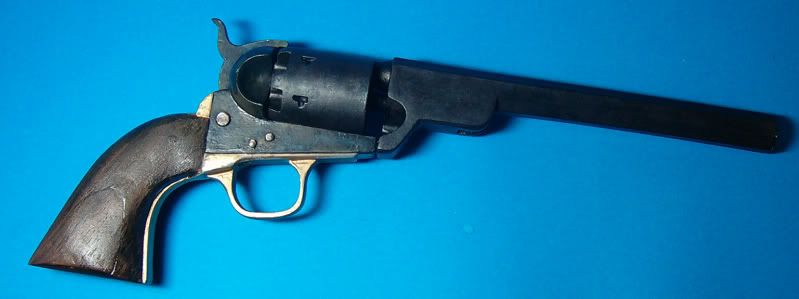 needless to say, after all of this reinforcing, I have a very strong model indeed. You will probably notice that the paintwork around the grip has taken a bit of a beating during all of the extra handing of the build, but will be fixed at the end. Without nothing's designs, I would never have attempted this. I've tried in the past to make copys of real guns, but just don't have the resourses available to me measure or even research the weapons properly. Nothing's designs take all the pain away. Overall I've only added a handful of "improvements" , these all being quite minor. I've added a V groove to the top front of the hammer, scribed some lines to show the separation between the brass of the grip/trigger guard and the frame, added the little notch thingys in the cylinder, an extra screw above the barrel wedge, altered the shape of said barrel wedge, and made all the screws 3D. The finish Line Approaches: The under barrel ramming do-hicky. 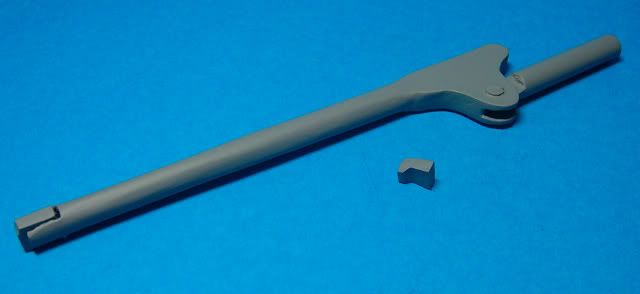 The main part has been filled and sanded until it looks like one part, and a screw added with 1mm card. Last edited by mousemuffins; 06-24-2009 at 08:08 PM.
|
|
#10
06-24-2009, 07:58 PM
|
|||
|
|||
|
Fanfare!! All done...
     A huge thanks to Nothing for the design work. I'd like a Luger Please. ...* runs off to start laminating Samaritan*...........
|
| Google Adsense |
 |
|
|


 Linear Mode

