


|
|
|
#1
 06-25-2009, 06:59 PM
|
|||
|
|||
|
Nothing's M1A1 Thompson SMG
well, here it is. my own tommygun. Nothing has done a brilliant job once again, and this one even includes some formers to help keep it all in place.
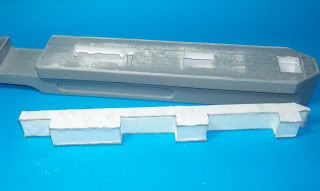
Shouldn't be too difficult a build for an average level of experience, and the instructions are clear enough for even a complete noob to muddle through. The colouring is quite attractive, but I'll be painting mine, so all the pretty woodgrain is a bit wasted on me. Still, it's there, and it will make a great model straight from the printer, so to speak. ...straight from the printer..... Nope. Ain't going to happen. Now. Where's that 1mm card..... ******** Okay, card in hand, lets get started. Now I'm going to treat this as a bit of tutorioral on how I reinforce a model, and subsequently sand and smooth until I have a part that looks like a 1 piece molding or casting. So pay ettention. Firstly, this process results in a VERY strong model, but it's not suited to all models. It's absolutly not appropriate for your gplinski krokian flopwopper biplane with all the beautiful printed textures. It is suited to models with a simpler format, models that will need to take alot of handling, or large shapes which need a smooth continual line. You WILL have to paint it. I guess you could use the technique to create really strong framework for a more conventional approach, but You'll have to be super careful not to change the dimensions with all the shaping and sanding that will take place. Now, where was I? Ah. the Thompson. I'm going to build the receiver first, as this is central to the whole model. I began by laminating all the formers (parts F2) to 1mm card. This part confused me a bit at first, until I realised there are supposed to be tabs marked around the part, which arn't. F2 should be the same shape as part 7 (without the semi-circular cut-out). Now, as I'm going to paint this model, and virtually all parts will be laminated, I'm not going to waste ink or decent card on unessesarily pretty pieces, so all printing is done using the print text option, black ink only, on normal 80 GSM copy paper. 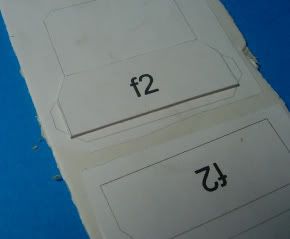 I then laminated the main receiver parts, cutting up and adding the magazine housing to the front so I could have a more continual part without the seam. I'll be modifying the ejection port later, so I'm not cutting it out at this point. 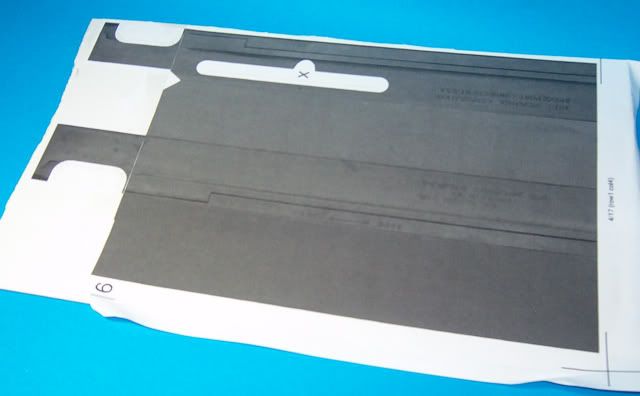 I'm going to have to do the top centre part again, as I havn't left enough space for the extension out the front. I'm going to start with the bottom piece, and work my way upwards. because all parts will be (at least) 1mm thick, I need to decide which edges will seat over other edges, and make allowances for the thickness of the card. In this case I've cut the pice full length, but two mm norrower than normal, as the will fit between the sides later. I cut a second piece 1mm smaller all round and glued it to the first. This creates a ledge for subsequent parts to adhere to, and a stronger bond. 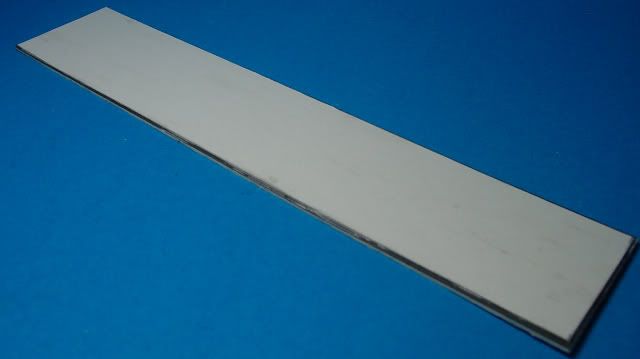 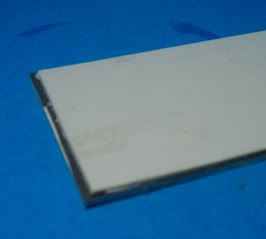 Back to the formers. It could just be my sloppy cutting, but I think there has been some allowance made for the thickness of card you are going to use included in the formers, about 1/2 mm. Regardless, I managed to cut my first lot too small, and had to do over. The end pieces have been cut 1mm smaller all round, with a second part cut 1mm smaller again laminted to the centre of that. The Central formers are cut 2mm smaller all round. rather than use the supplied short formers for behind the cocking slot, I've trimmed the side of three formers so the will still support the top. 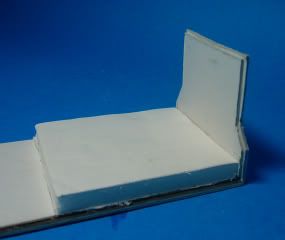 I've glued a bit of scrap 5mm foamcore betwen the formers, just to help steady them while drying, but they're not really needed. 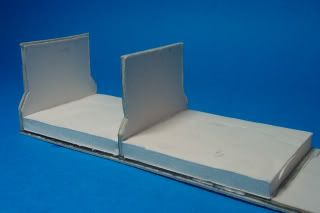 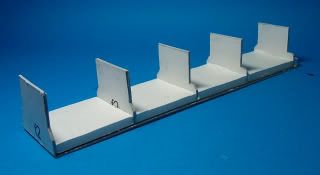 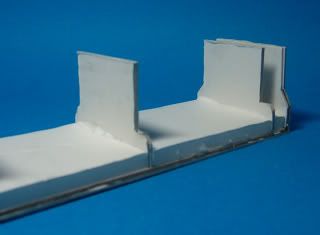 ******** onward and upward.. The side pieces were cut up into two to facilitate the bend. This area was a bit finicky and extra time was taken to make sure eveything fit. 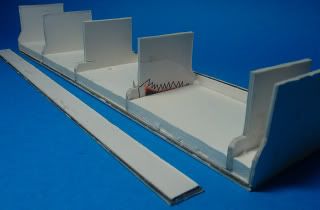 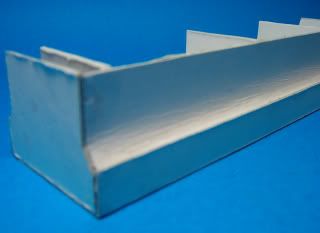 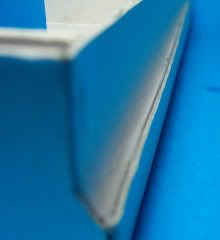 I guess idealy I should have made the top part of the sides with something a bit thinner, as I got wrinkles in my card where the bend is, but I can fix that later. 
|
| Google Adsense |
|
#2
06-25-2009, 07:08 PM
|
|||
|
|||
|
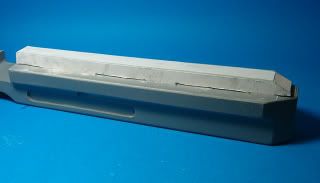
Again, all parts are 2mm laminations with a smaller lamination inside the first.
I glued a strip of card in where I had trimmed the formers to act as a backing for the cocking slot. 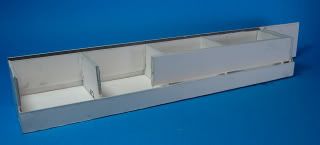 and glued the other side in position.  Note that the sides SHOULD be slightly higher than the front and rear formers. 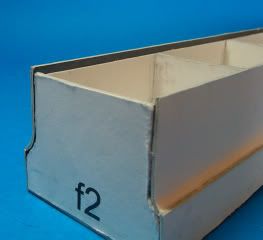 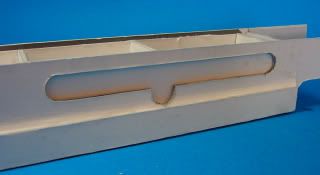 Before I glued the top in position I packed the lower rear with card, as I was going to trim a bit off the outside here later on. 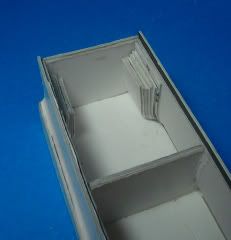 Finally, the top was glued firmly in position. 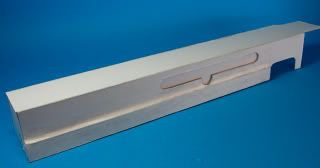 I've made a few changes to the shape of things here, to line up more closely with the references I have. The curve at the back of the magazine port was removed, and the one at the front made sharper, and the area in front was made slightly shorter in height than the rest of the receiver. 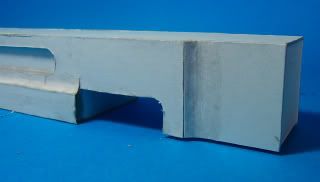 The ejection slot was moved forward and enlarged. I hand fitted the interior parts trimming a bit at a time until they fit. 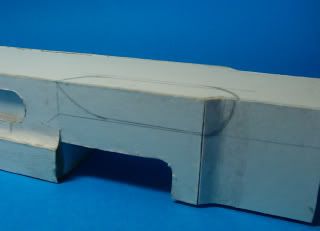 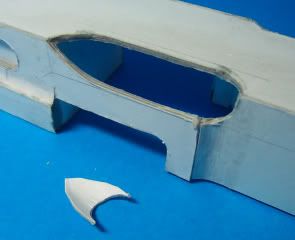 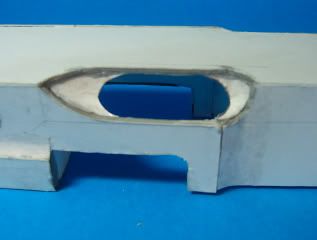 ...and the resulting mess was tidied up with wood filler. 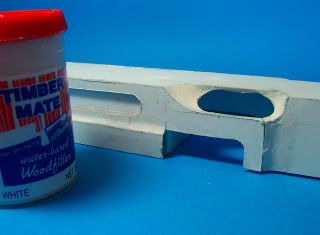 lesson for the Day: wood filler = good. I've altered the back end, which shows the reason for the packing earlier on, as i've trimmed the side phlang bits at an angle to meet the back plates, as per my references. The side phlanges were also increased in depth by 2mm each side, by adding extra covering . having done all that, I still got the angles slightly wrong, but I'll just have to live with it for now. 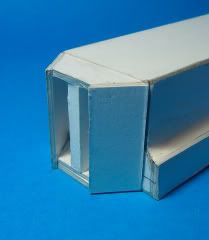 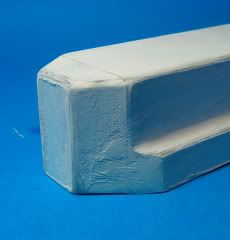 the second shot also shows the use of wood-putty again to help smooth things out. With the aid of a hair drier, this stuff dries in two minutes and is ready to sand. At this point all exposed edges of card are soaked in superglue (CA) . I use the cheapest stuff I can buy, and use lots of it. Basically the method here is to Sand the area, but card tends to get all furry when you do that, and the superglue seals it. As long as you're sanding, and you start to kick up a but of fuzz, superglue the area again and repeat until smooth. In between sanding and supergluing, I spray with an automotive primer, which also helps seal the card and provide a visible indicator. When applying superglue, try to wipe away any drips before they set, as they are difficult to remove later. I usually apply the glue, wait a couple of seconds for it to soak in, and wipe the area quickly with a tissue. the whole receiver was given a thourough going over with sand paper, deliberatly rounding off the top edges quite a lot, as has the real weapon. Now I'm going to give some thought to the barrel, and how to attach it. The front part of the bolt on a thompson is round, so I made up a long spiggot of rolled paper and inserted it through the front and well into the model, leaving plenty sticking out the front to anchor the barrel to. 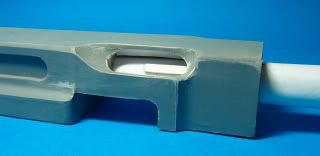 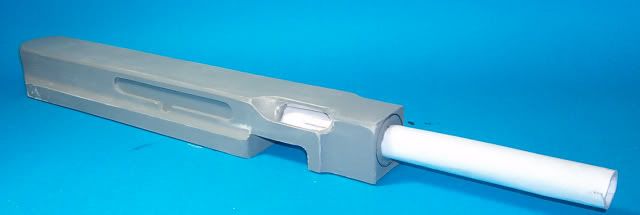 golly. it's starting to look like a gun....
|
|
#3
06-25-2009, 07:14 PM
|
|||
|
|||
|
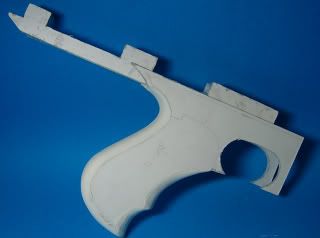
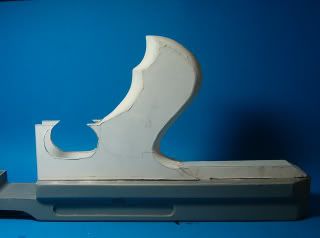
more on the barrel :
I've changed the shape of the barrel a bit, going for two parrallel sections with a cone shaped piece in the middle. first I made up a length of paper tube to fit tightly inside the first, and long enough for the full 10" barrel length. I made doubly sure the barrel was straight and true, 'cos there's nowt worse than a droopy barrel. 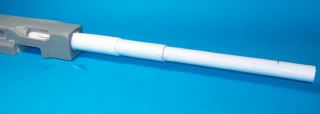 Then I wound 2 1/2" of paper around the breach end until I reached the desired thickness. 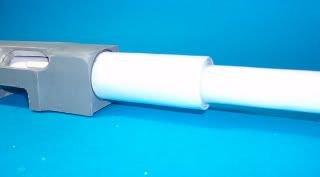 and made up a cone shape with Saitki, a nifty free program available from Gremir models which will design basic 3D shapes. I made up three, each 1/2mm smaller than the other, so they'ed nest inside eachother, and slipped it over the barrel. 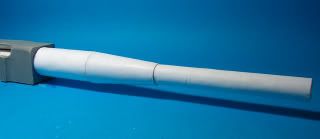 more on the barrel a bit later. the grip: My previous models have all had carved balsa grips, primarily because i wasn't confident I could build a grip with so many compound curves convincingly without a ridiculous amount off effort. This time, however, the grip is mostly flat, so i'm going to have a go at making it in card. my first thought was to laminate the whole thing. but the grip is 28mm wide, and even with 1mm card, that would mean cutting 28 grips!!! so, plainly out of the question.... PREPARE FOR LUDICROUS LAMINATION!!!!!! ..I made up a template from the printed parts, combining a few pieces to avoid unessesary joins later on. the two outside sections were made up to 3mm thick each. Only 22 to go...  the grip area itself was then cut.... 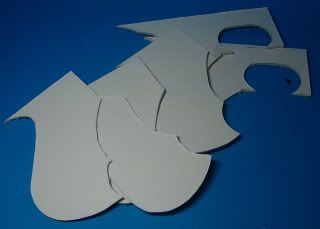 and laminated, and cut again... 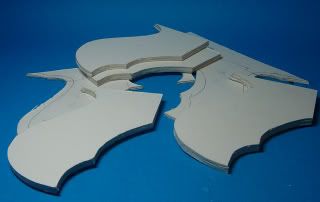 and finally glued up: 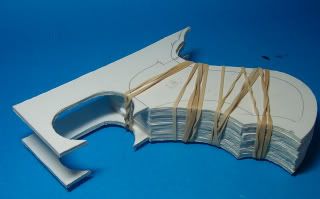 Carving the laminated card is actually kinda fun and theraputic, and I managed to keep all of my fingers. 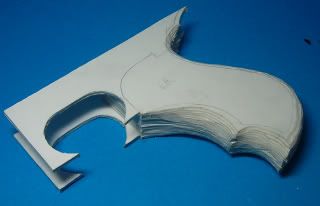 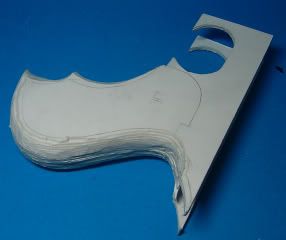 it was then sanded vigorously, finished with wood-filler. 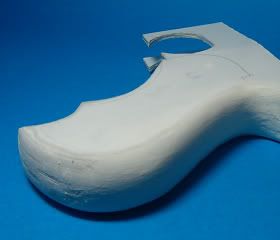
|
|
#4
06-25-2009, 07:19 PM
|
|||
|
|||
|
I've had to give some thought to how I'm going to mount the pistol grip to the receiver, in order to give maximum strength. here's my solution;
 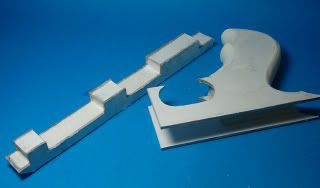    I think that should be adequate. Now to clean these parts up and make 'em all pretty like. I'm going to start skipping ahead a bit now, as I think I've pretty well explained most of the techniques I'm using for this build. Please ask questions if you feel you need to know more. I reinforced and assembled the forestock, and encountered no real problems, except of my own making. The only change made here was to deepen the finger grooves and round them out with some wood putty (Hey, it's celulose based, just like paper...) I'm going to add the attachment screw and maybe the sling swivel at a later time. Fixing the forestock in position really starts to make it look like a thompson. 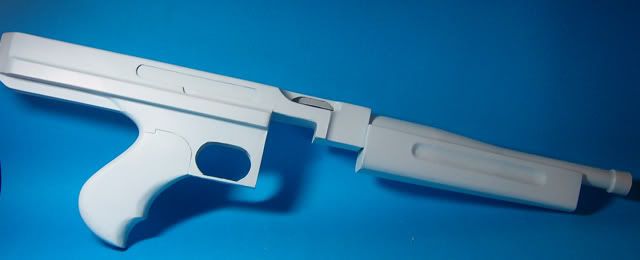 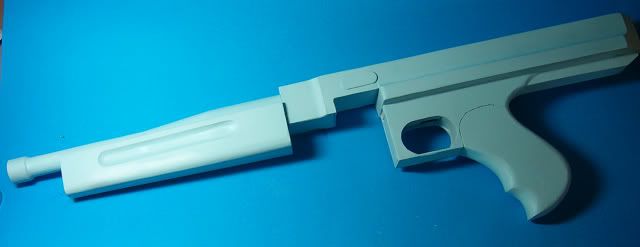 God I'm pleased with this. Nothing, your awesomeness is magnificent.
|
|
#5
06-25-2009, 07:25 PM
|
|||
|
|||
|
onto the bit I had dreaded, The Stock.
I've decided to go with card for this, instead of my usual balsa, as i don't have sufficient wood for the job, and I wanted to see how it would turn out, anyway. Now, I'm not sure if it was my sloppy building and coverting to 1mm card and joining strips, but I ended up with something that looked sort of like a thompson stock, but a bit odd.  I wasn't happy with the shape, so embarked on an epic journey of measuring, copious quantities of extra card, monumental effort and embarrassing amounts of wood filler, to finally end up with something that looked sort of like a thompson stock, but a bit odd. 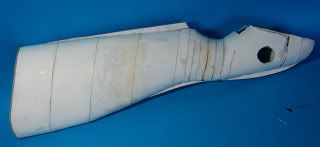 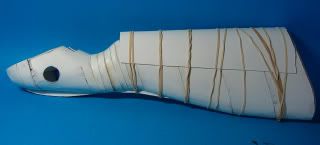 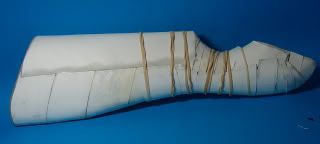  Ah well, The magazine has proved a pleasant diversion, being a nice simple shape. Which I still managed to make a little wonky. 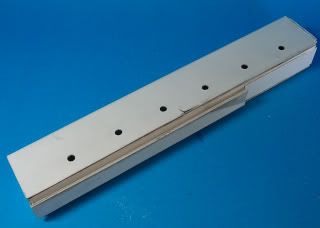 A few extra coments on the stock. after researching around there does appear to be a bit of variation in stock shape, but I've had enough mucking about and sanding, so it will stay as it is. ******* She's nearly finished, just a few more details, like the front sight, and she'll be ready for paint. 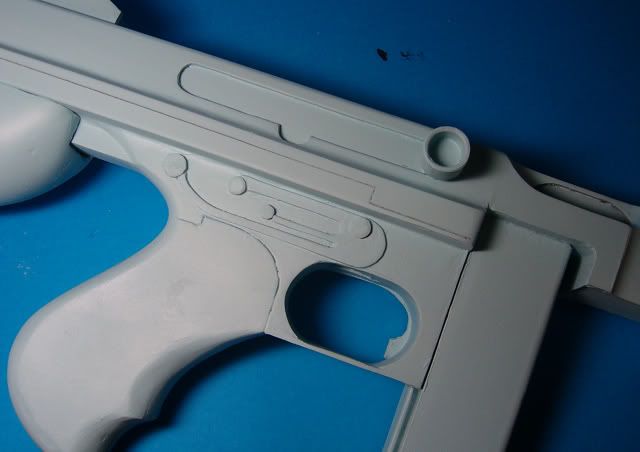 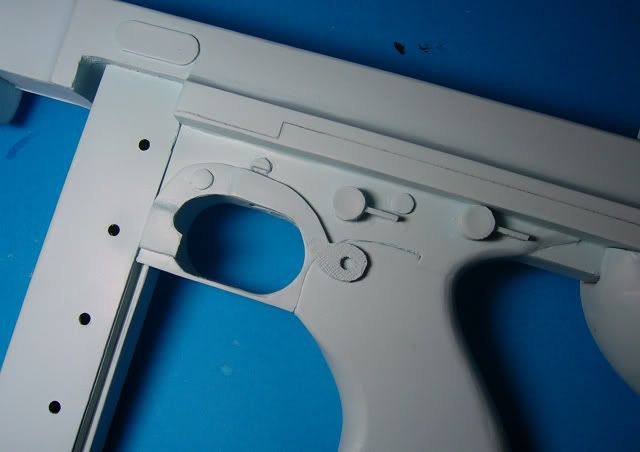 as you can see, I've gone for a 30round clip, an easy modification of the included 20, just add two holes to the length. 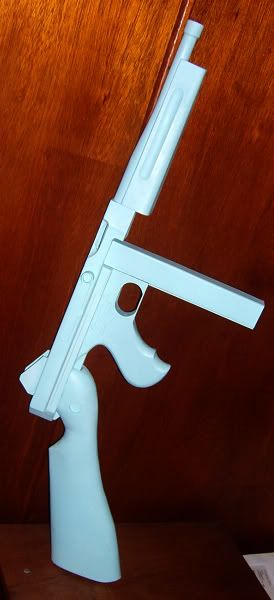
|
| Google Adsense |
|
#6
06-25-2009, 07:26 PM
|
|||
|
|||
|
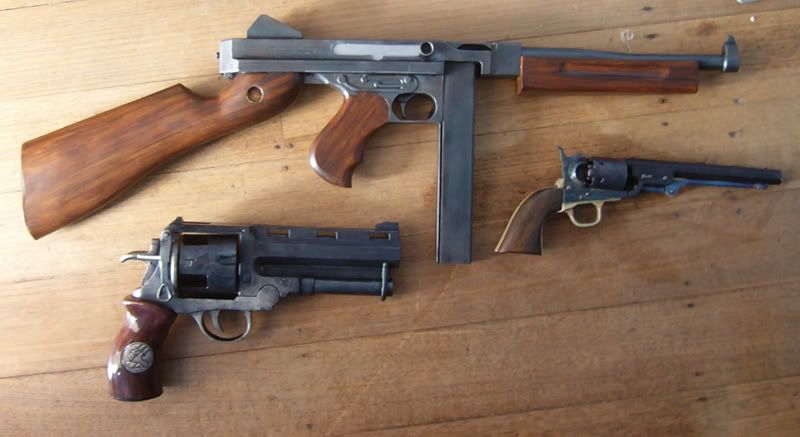
and here's a nice Family portrait. I'll try to come up with a few more detail shots of the finished model in the next week or so.
|
|
#9
06-25-2009, 09:33 PM
|
||||
|
||||
|
Would you elaborate on your technique for achieving the wood finish. I was particularly impressed with that.
__________________
Maj Charles Davenport, USAF (Ret)
|
|
#10
06-25-2009, 10:45 PM
|
|||
|
|||
|
Sure thing, I'll have the Samaritan build up in a day or so, which shows the wood technique fairly well.
|
| Google Adsense |
 |
| Thread Tools | |
| Display Modes | |
|
|


 Linear Mode

