


|
|
|
#571
 05-22-2011, 11:46 AM
|
||||
|
||||
|
Back to work.
Been a while since I updated my ISS build. Since I last posted I've added the 2 russian modules, these were built over the last few days. Zarya can out better than I thought, I finished most of it, then it got crushed. I've managed to get it looking good. Thats why I like paper, repairable, if this was plastic it would have gone i the bin.
Thanks for updating the list of modules Alfonso. Photos. 
|
|
#572
05-22-2011, 04:05 PM
|
||||
|
||||
|
Great job Paul!
I'm so excited to see other people's work. As per usual, my Russian docking modules got the heavy modification treatment. I dislike any internal structure which can be crushed, or which may deform during assembly, and I prefer that the docking rings themselves are rock solid, and so alter the ends of the parts also. I then ensure, using my vernier calipers, that the docking rings are 100% straight and true, so that items docked to them will remain correctly aligned. Will post pics soon. The more I look at my original Fortezza-designed Zarya and Zvezda, the more I think I should rebuild them now.
__________________
How many escape pods are there? NONE, SIR! You counted them? TWICE, SIR!
|
|
#573
05-27-2011, 06:10 PM
|
||||
|
||||
|
Work In Progress
No Pun intended.
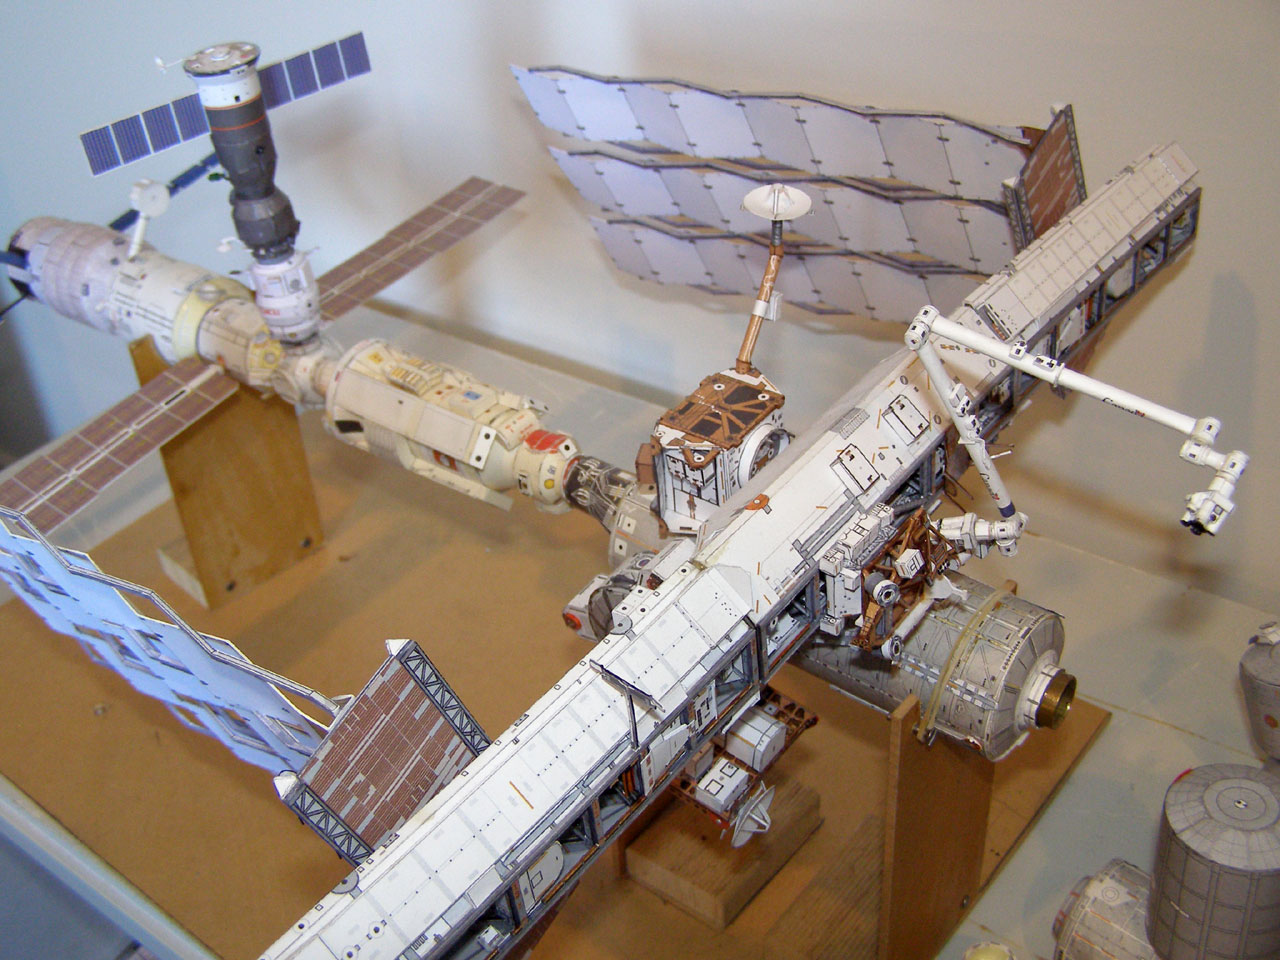 P1 test fit, with radiators completed. Poisk, Progress and ATV Magnet-docked in place. Russian section test fit. US Lab brass anchor ready for node fitting. (bottom right) 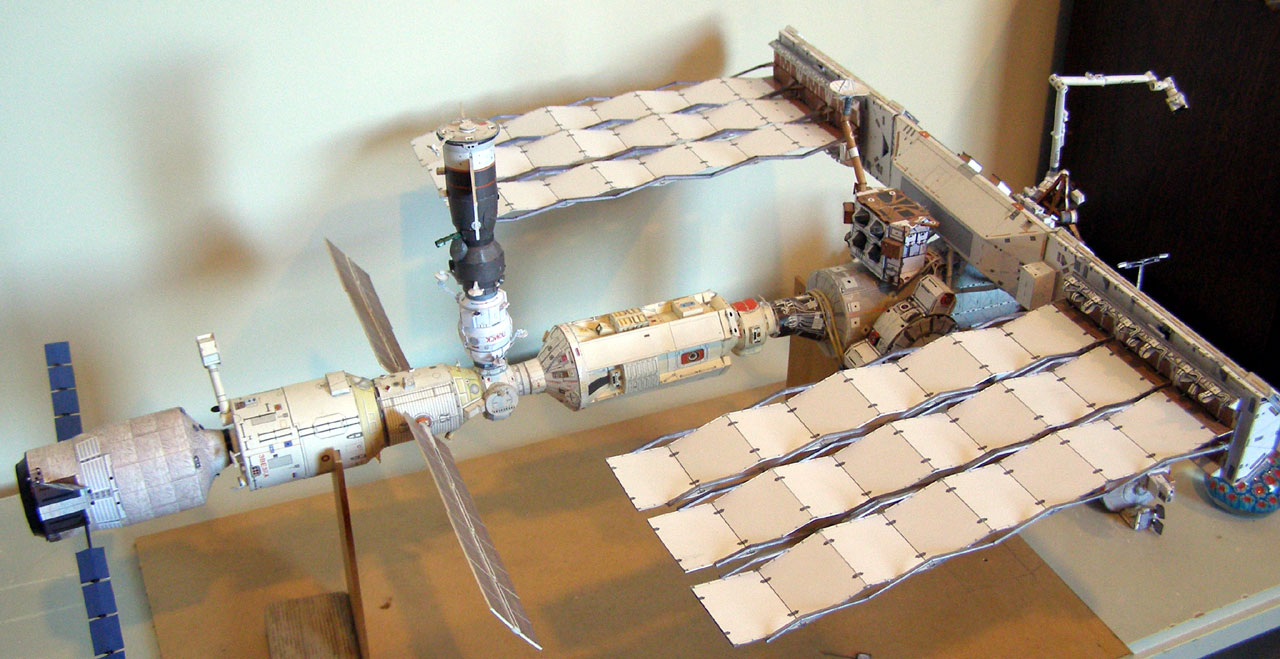 Reverse angle with radiators horizontally aligned. 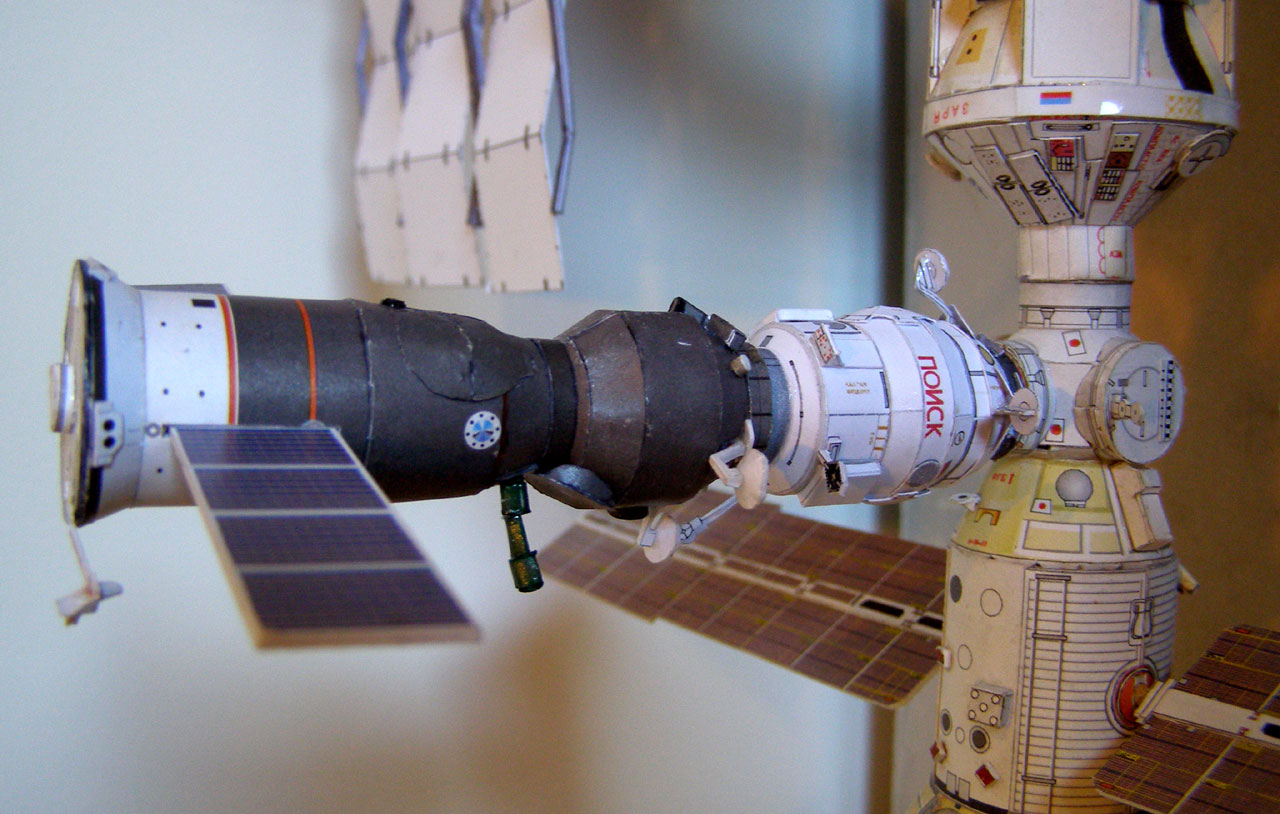 Poisk detail. Yes, I messed up the alignment of the rings. I can dock the ATV to Poisk, but it looks a bit weird.  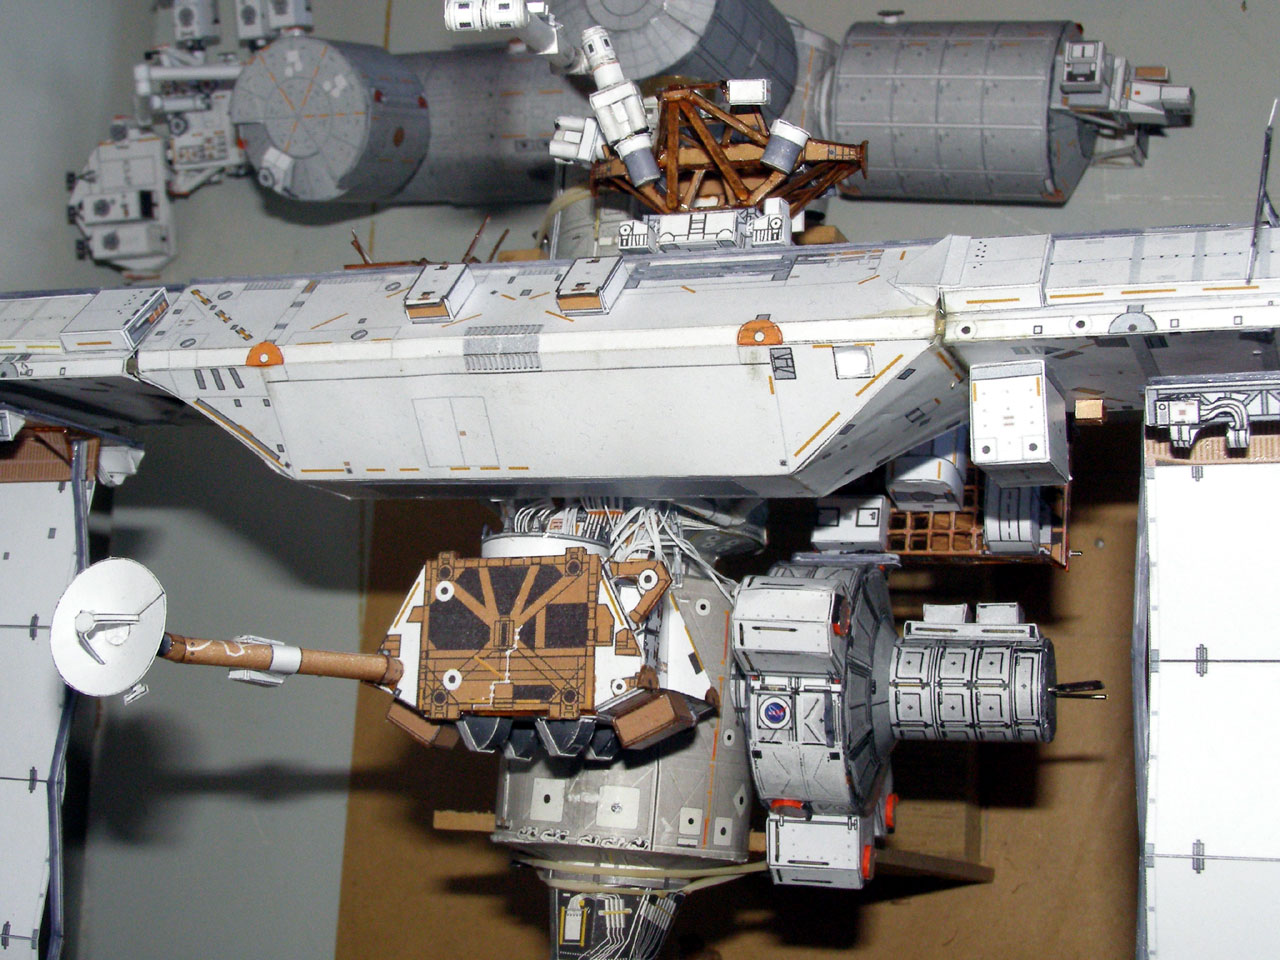 P1 test fit fairly loose as shown by exposed match stick at the port end of S0. Radiators stand up well in horizontal mode, with about 2-3 degrees of droop. Not a viable long term display option though, even with my crazy 8 layer Z-ladders. More soon.
__________________
How many escape pods are there? NONE, SIR! You counted them? TWICE, SIR!
|
|
#574
05-28-2011, 01:01 AM
|
|||
|
|||
|
Way to go Paul & Mobius, really sweet work
Mobius, how did you keep the radiators straight?
|
|
#575
05-28-2011, 06:13 AM
|
||||
|
||||
|
Thanks for your kind words.
Firstly, I printed the radiator support struts on to 300 gram paper. Then I glued that to another layer of 300 gram. And again. And yet once more, to make 4 layers of 300 grams, glued solidly. This is not easy to do, as the paper wants to warp like crazy when you use a lot of glue. So each layer gets glued individually, and then is wrapped in 3 layers of kitchen wipes and then stacked under about 5 kilos of hardbound books. (For reference, each strut is 1.64mm thick when completed, according to my vernier calipers.) After about 1 hour, I remove the kitchen wrap and replace it, as it gets moist. After 1 day, I check to see if the sheets have dried properly. If they have not, I check the next day. I repeat that process until all four layers are glued, dried and totally, 100% flat. Then I begin the very slow and painful process of cutting them out. This last set of rad struts - six of them -I broke about 12 blades doing it. That's because each cut takes at least 4 fairly firm pulls on the exacto knife. Sometimes 5. Or even 6. When cutting out the spars, I angle the blade very slightly outwards so that the back side of each strut is slightly thicker (and the strut correspondingly stronger) than the front. And I also cheat a bit: I do NOT cut on Alfonso's lines. I cut about half a millimetre away from the line, and this makes my struts pretty strong, for paper. When I have exposed one side of a strut I use a grey felt-tip pen to grey out the edge of the strut. When it's freed from the block, I do the other side. Then, I score each radiator panel and bend it appropriately. I take care to ensure I only cut alternate lines to keep the double-layered radiators themselves as strong as possible. Then I create a Radiator Jig, by cutting out the interior of a strut,glued to some foam-cored cardboard. I extend the cuts so that a nemt radiator will fit exactly inside it, as below: 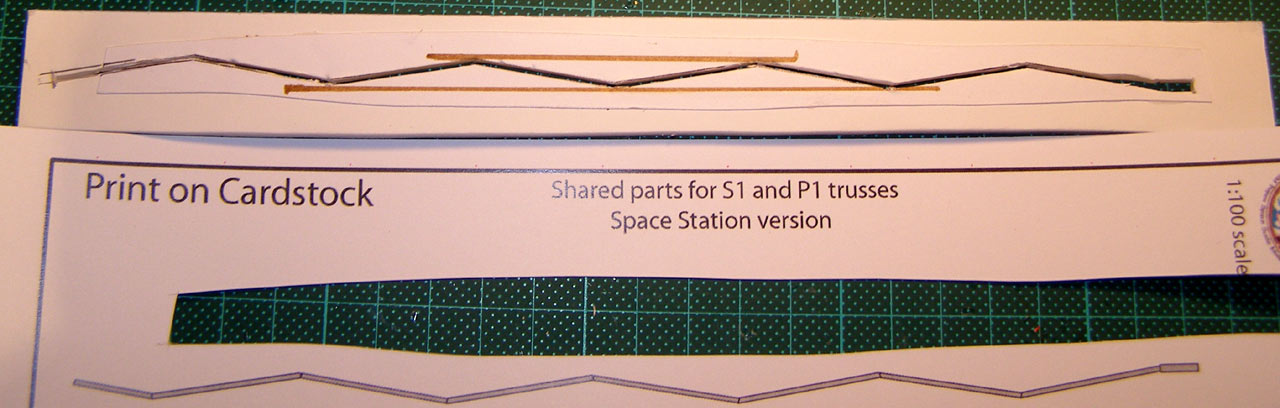 Here you can see the piece I cut out to create the Radiator Jig. Then I slide a pre-bent radiator into the jig, as below: 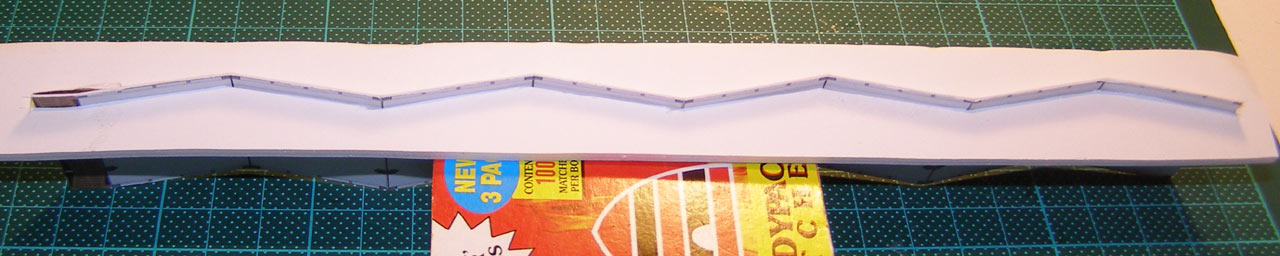 Then I take a strut and gently adjust the shape until it sits on top of the bent radiator and balances there. I gingerly remove it, apply a small amount of glue to spots on the radiator, and strut and wait 1 minute for it to start going off. Then I very carefully apply the strut, and with some very gently pressure, push down to secure it. Then I leave it to set. Once set, I carefully examine the gluing job, and with a very sharp toothpick apply more glue to each side of each joint between the two pieces. I then let that dry, too.  Once that side is dry, I remove it from the jig. I check to make sure the radiator folds are completely even and straight. Some gently twisting is usually required. Then I repeat the process for the other side of the rad. Please note that I do not attempt to glue the base of the strut to the triangular anchor point at this time. When all three rads are complete, I bend the triangular tabs over and place the rad flat on a surface, and push a block of wood up against it, so that the base of the radiator will be square.Then I glue the struts to the base. Once dry, I add about a metric ton of glue to the base of the radiator to ensure it's strong. See below: 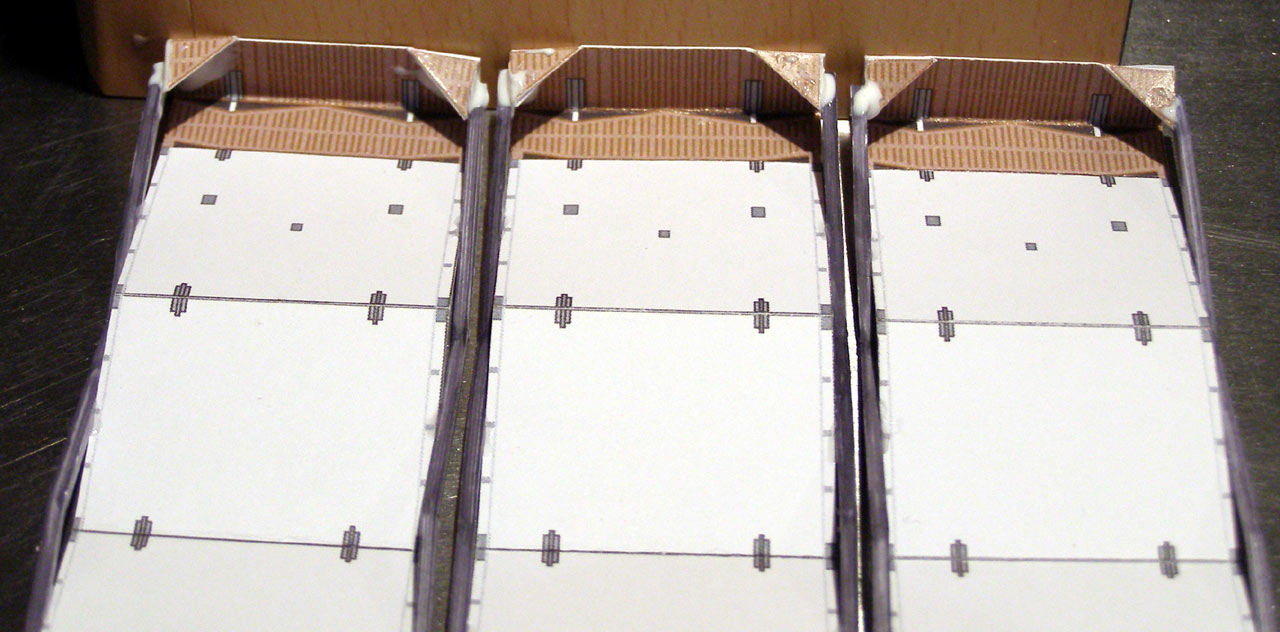 Once all three rads are thusly glued, I attach them to the carefully prepared (and heavily reinforced) radiator base plate, as seen below: 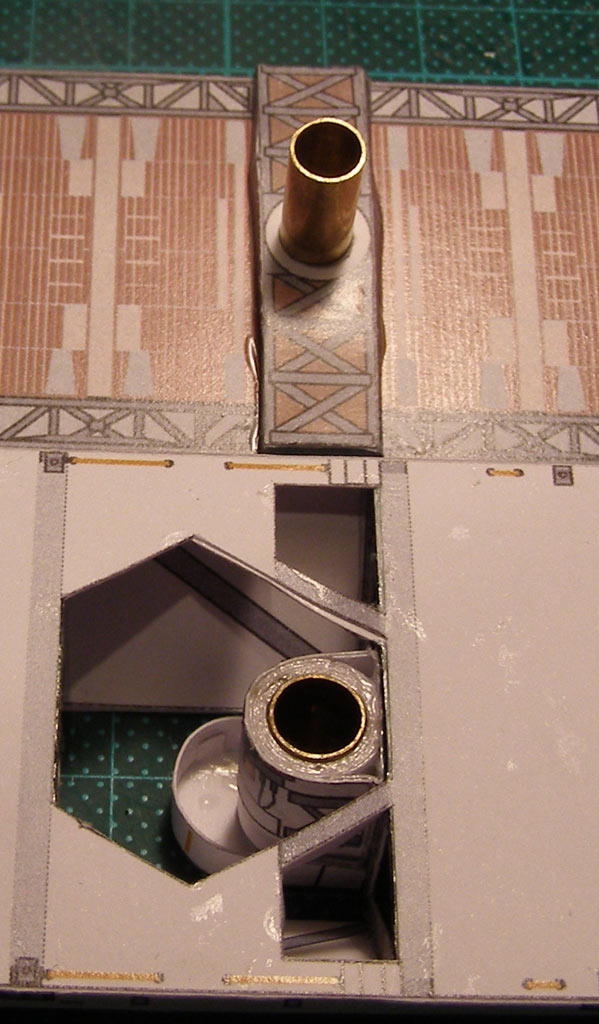 I have previously ensured the brass tubes I use to secure the radiators are completely square. And this is the end result: 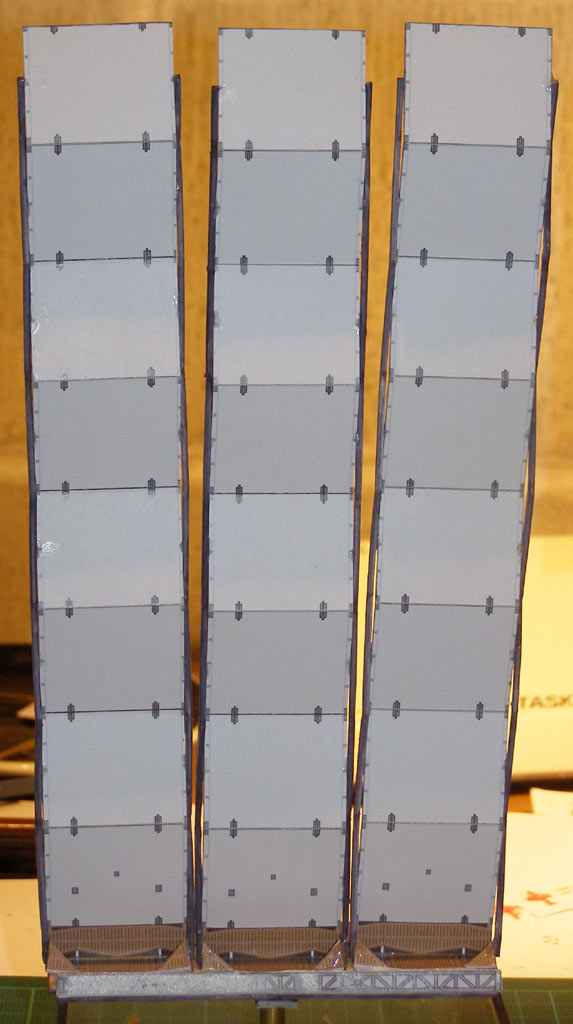 And THAT is how to make non-deflecting radiator panels. I'll do another of these for the solar panels, when I have worked out how the hell they can possibly be properly self-supported!
__________________
How many escape pods are there? NONE, SIR! You counted them? TWICE, SIR!
|
|
#576
05-28-2011, 06:51 AM
|
||||
|
||||
|
Nice work on the rads Mobius. I've always had trouble cutting out the 144 scale radiator 'zig-zags'. Thats why I used 1mm brass rod, the panel's are really strong. I'm not really bothered about having my rad panels rotate, I'll be glueing them in position, so they should stay straight and not have any droop.
As for the solar panels, Alfonso's design is fairly strong at 144 scale, the square truss keeps the panels tight. Again I'll be glueing them in position, not rotating. As this project is getting close to finishing, I've been thinking about what to do about displaying it/her/him (never sure what to call the iss). I've got an old fish tank that I've tried the iss in, but the glass is a bit heavy. So I think I'll get hold of some acrylic and make a case myself, black background, earth coloured floor. I had thought about sealing the case, so no dust would get in, but as items could be added and future different visiting craft will need to be included inside the case, I'll go for a lid that can be removed. Long term future project.
|
|
#577
05-28-2011, 09:33 AM
|
||||
|
||||
|
Awesome work, Mobius! A great build you got there. And thanks for the explaining pictures. Beautiful job. This is really good reference stuff.
|
|
#578
05-28-2011, 05:08 PM
|
||||
|
||||
|
Thanks gents!
I too have been thinking about a way to display the ISS once complete. Hanging it from the ceiling is an obvious choice, but one which will result in dust collection and also nasty fly spots. I think one of the best ways is to suspend it from the ceiling, *and* create a five-sided perspex case for it, which screws to the ceiling to keep out dust and flies, and to prevent it from being damaged by any wind gusts. However, I am currently designing my next new home, and there will be a special place created to display it. This will be achieved by having a recessed section of ceiling, taller than the station itself, and with the top and sides painted black. I will insert fibre-optic lines through the gib panels prior to installation, to simulate stars and light them with a small halogen lamp. I'll also install four small up-lights into the sides of the recess to provide for additional light. Then, I'll fit a perspex panel to the base of the recess to keep out dust and flies. That's my long term plan anyway - which is still about 3 years away. In the meantime, I'll get that perspex case made - and they are, surprisingly, not that expensive if you just get them to cut and bend the parts, and do the gluing yourself. I think the last case I had made (for a Tornado fighter during the first Gulf War) cost around $40 - so that means a case for the ISS is probably not going to cost more than $150 or so. Here's a detailed pic of POISK for your entertainment. 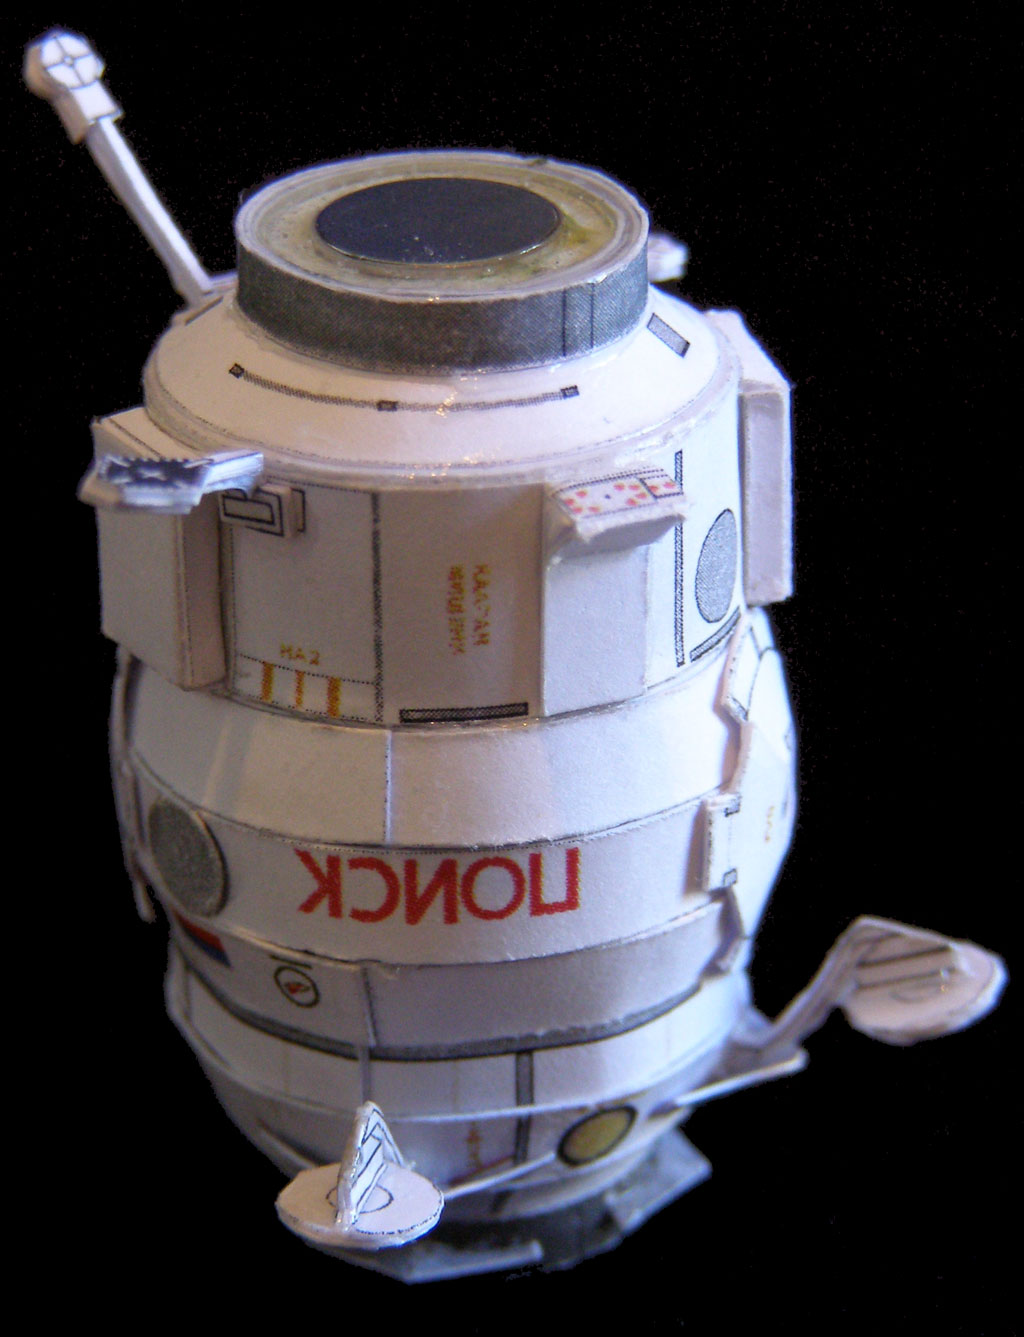
__________________
How many escape pods are there? NONE, SIR! You counted them? TWICE, SIR!
|
|
#579
05-28-2011, 05:14 PM
|
||||
|
||||
|
the rings look ok...ive built it too, but no pics and i'm too lazy 2 update...XD i'm not really gonna add anything more to mine, cuz i just need to buy more ink then i'm starting over. for TONS of reasons
__________________
Mohammed Aly Current Projects LUT, Pad 39A
|
|
#580
05-29-2011, 03:40 AM
|
||||
|
||||
|
Hi Mobius, your ISS look´s great. I wish I can buildt the complete station by myself someday. The thirst of my childs move from home in 13 years or so, and i can use the room for a big ISS model and lots of other buildts.
|
 |
|
|


 Linear Mode

