


|
|
|
#622
 06-16-2011, 03:12 PM
|
||||
|
||||
|
Quote:
I couldn't figure any easier way, if I wanted a thick, strong part. You think that looks bad? Look at the "Death By One Thousand Cuts" pic from when I was cutting out the walls for S0, P1 and S1! 
__________________
How many escape pods are there? NONE, SIR! You counted them? TWICE, SIR! 
|
|
#623
06-17-2011, 03:09 PM
|
||||
|
||||
|
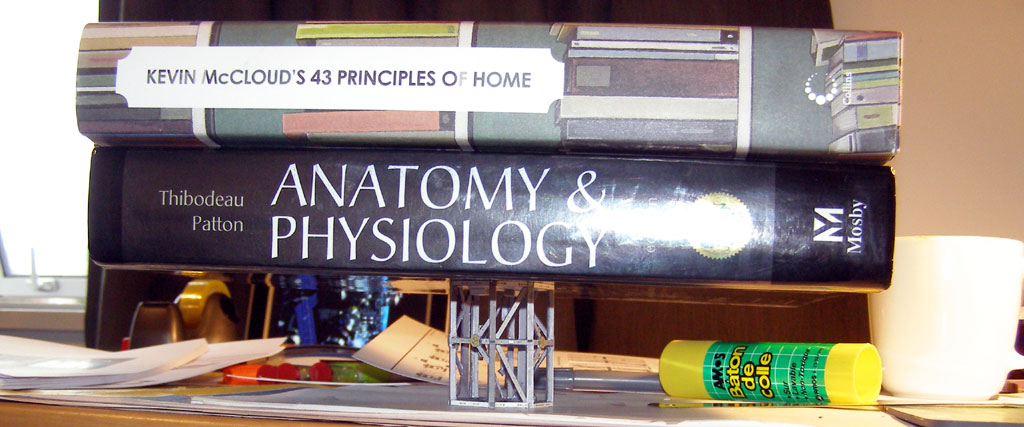
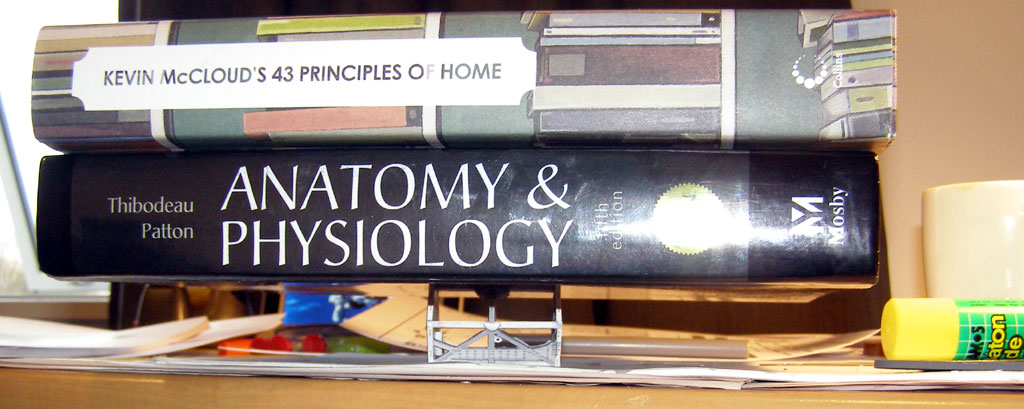
More S3/P3 truss WIP shots
Has anyone else had problems trying to sort out their Left from Right, Port From Starboard, and the correct parts from the correct parts? Phew.
My work on the "box" for P3 (S3?) turned out to be wrong. I had the beams around the wrong way, and so the middle wall was in the wrong position when I finally figured out that it wasn't P3 or S3 I was building. :P Fortunately, the very strong beams and walls allowed me to cut the glue holding the middle wall in, remove it, trim off excess glue and re-mount it in the correct position to be P3 (18 - 20 on the rail). This is one of the real advantages of building stuff way way stronger than it needs to be - sometimes repairs can be made! Once that drama was identified and repaired, I could begin to customise the "wrap around" parts into my beam-work on the truss. Below you can see the front rail glued on already. This one is only three layers deep - I had to discard my first rail, because it was far too thick and would have been proud of the rails on S1/P1. So I made it again, with just three layers. ("How remarkably retrained of you Chris", I can hear you say.) With the front rail glued, I can cut out the first section of the beams, as shown, and then shave down the edges so that it fits into the space between the beams themselves. (All the images are 1280 pixels wide for detailed viewing) 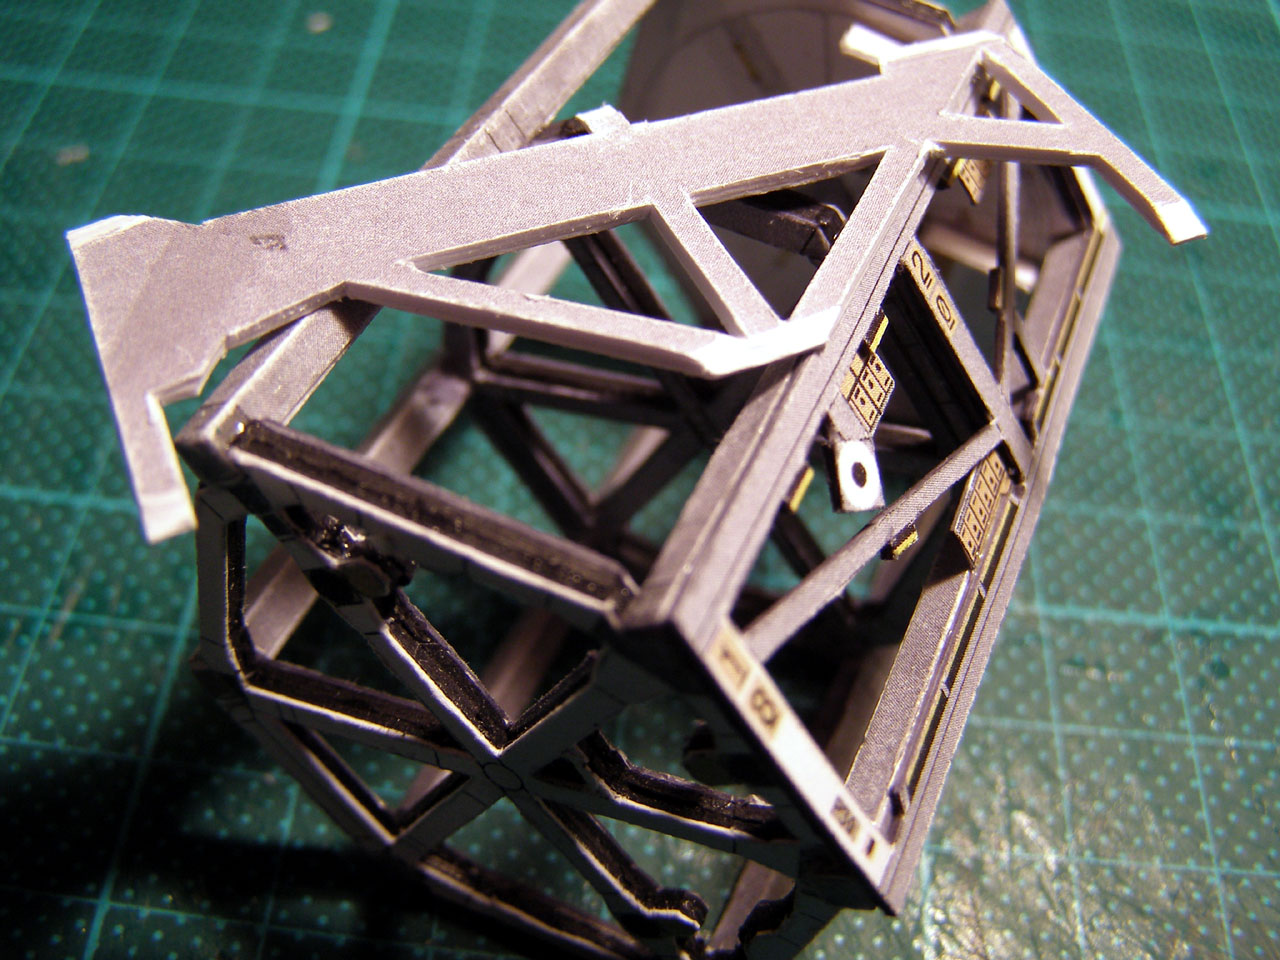 Fortunately, my version is slightly smaller due to the smaller diameter of the entire truss structure, so I have a little bit of lee-way to cut down the parts to fit nicely. Here's that same section glued into place above 18-20 on the rail. The effect I am looking for is starting to be evident: This is a structure made from beams, rather than a box wrapped in a blanket. 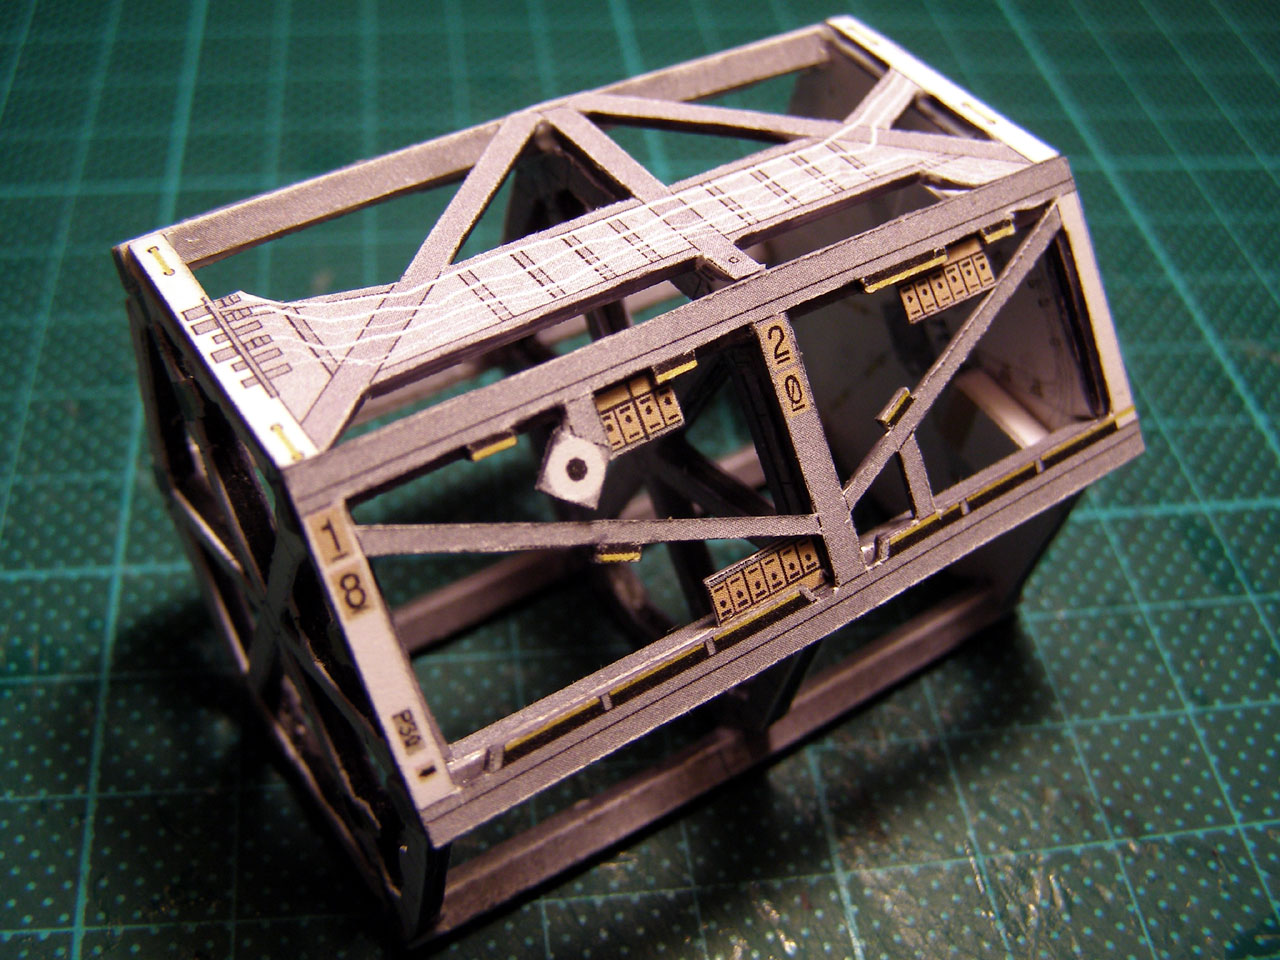 In the next pic you can clearly see how my centre wall is not aligned against the marks on the beams. D'OH! I couldn't chuck out 8-10 hours of work because I'm lazy. It'll be barely noticeable on the model once mounted. Also showing here is the back side of P3, where the available space is not sufficient to mount my heavy beams in place and maintain a nice structure bounded by the beams alone. 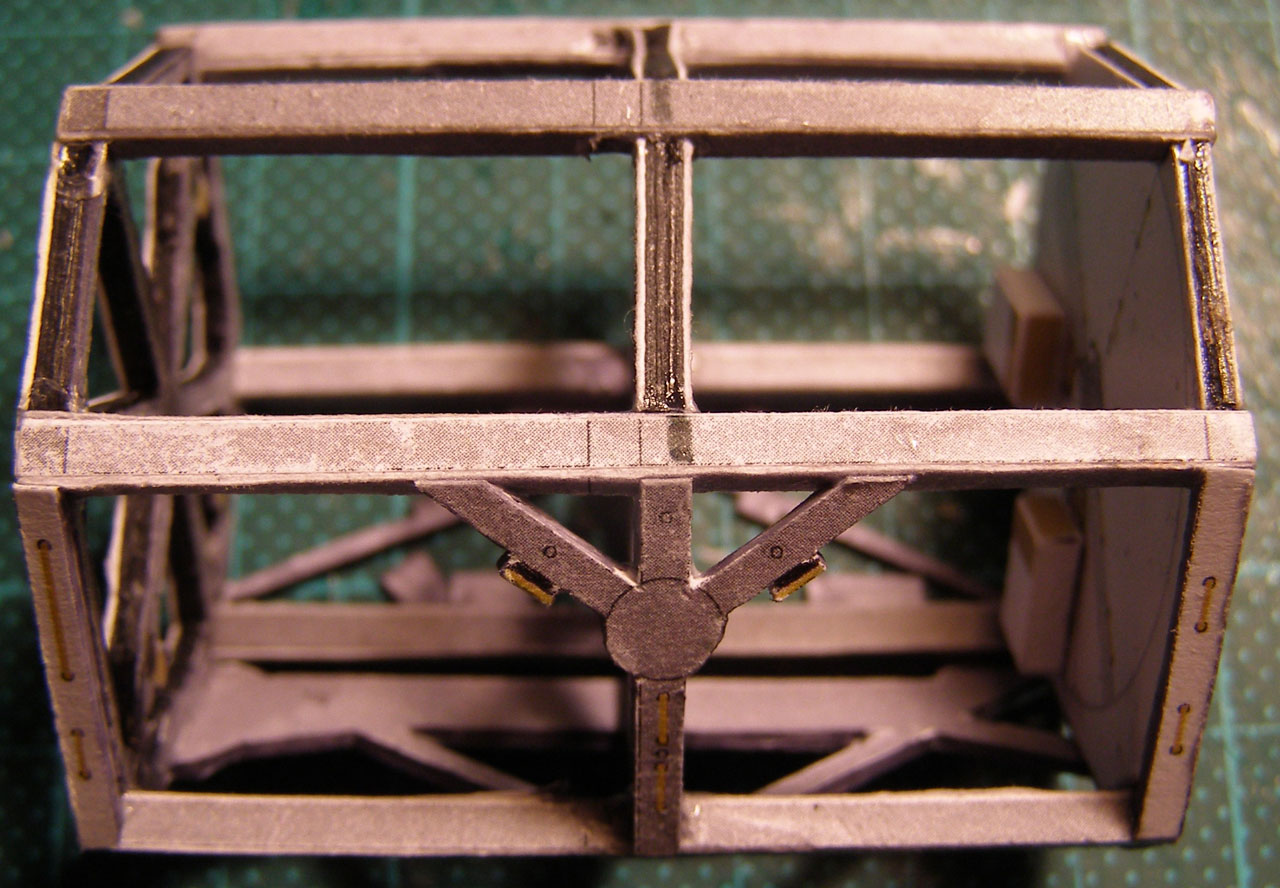 So, I cut out some the hand rails from a single printed sheet, and then cut out the diagonal cross-beams from the reinforced parts and fit them directly between the beams as shown below. 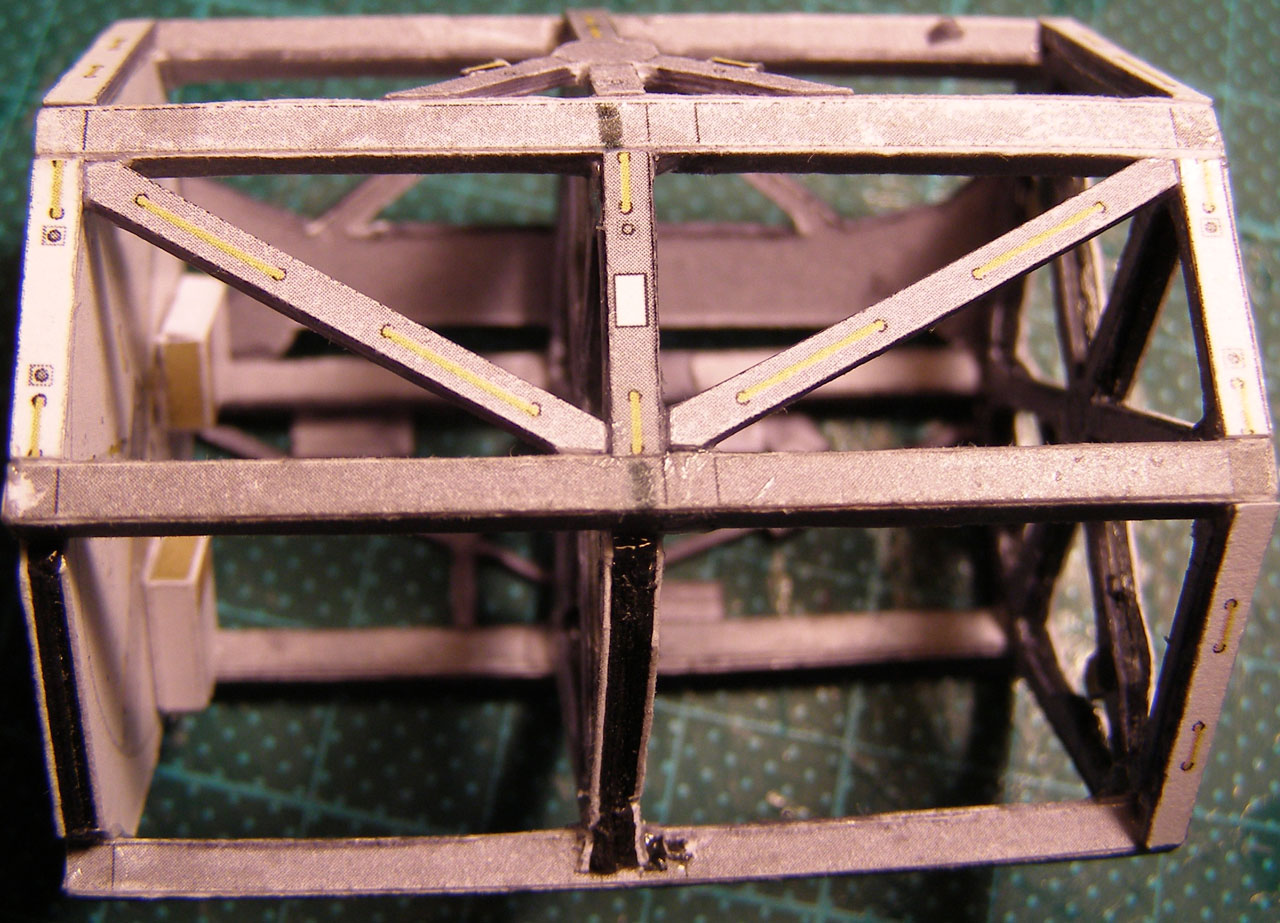 I am starting to feel happy about the way this part is working out. I am a little disappointed that all my handling and work has damaged the grey surface of the beams somewhat, and I will try to reduce that on S3 when I build that. In the meantime, I am working on my non-deflecting SARJ joint. I have the correct size ball bearing races to replace the SARJ completely and last night I turned up some small hardwood "plugs" which will glue onto P3/S3 and then the bearing will glue to the plug, while the outer part of the truss will glue to the outer part of the bearing, thus providing perfect rotation for the solar arrays with no deflection. (Or if it does deflect, I will have to kill myself :P ) Before the SARJ is fitted though, I have to flatten the face it will glue to on P3. During construction, the surface of the SARJ joint somehow got away from true, so I will use a slow-setting epoxy to fill the low side and bring it back to true again. I hope you enjoyed the update, and I'll post some pics of the completed P3 part tomorrow. I have not yet added all the hand holds to it, as most of them get cut off in my "beaming" process. I will cut them from a single printed sheet, and glue them on individually. Cheers, all!
__________________
How many escape pods are there? NONE, SIR! You counted them? TWICE, SIR!
|
|
#626
06-17-2011, 04:22 PM
|
||||
|
||||
|
Cheers gents. Looks can be deceiving Paul, but it *should* be strong enough to support my solar arrays. The beamwork modifications have added substantially to the rigidity of the part. I was a little concerned initially that it would not be, but all the extra glue, brass and thick parts seem to be stabilising it nicely.
Yes - fully sealed bearing races seemed like the obvious answer to the SARJ. Each race only cost about $8, so it's a bargain, too! If you recall, I built a prototype of the SARJ provided early on by Alfonso and added a long part to simulate the arrays plus the weight I thought it would have to carry by adding some coins at the end of the cantilever. I was pretty aggressive with the weight, I must say, but I wanted to be very conservative: much too strong better than not-quite-strong-enough. (Kibo: AARGH!) Sadly, after a couple of days it started to sag a bit, and I was not confident I could build it any stronger from paper or card using any other technique. (Alfonso's design in paper is about as good as you could hope for I think.) So, it was pretty easy to come up with the idea for ball bearings; there's a bearing store over the road from work, so I wandered in with the External Diameter, and walked out two minutes later with two set the right size. I'll detail my work on that part of the model so that anyone else who is worried about a paper SARJ joint can follow along with my modifications.
__________________
How many escape pods are there? NONE, SIR! You counted them? TWICE, SIR!
|
|
#627
06-17-2011, 09:33 PM
|
||||
|
||||
|
Got me thinking Paul.
Quote:
__________________
How many escape pods are there? NONE, SIR! You counted them? TWICE, SIR!
|
|
#628
06-18-2011, 07:50 AM
|
|||
|
|||
|
Wow thats strong.........
|
 |
|
|


 Linear Mode

