


|
|
|
#1021
 04-22-2016, 01:53 AM
|
||||
|
||||
|
Thanks Peter for watching, stay tuned!
 
__________________
Greetings from Germany Manfred Under construction: Launch Pad 39A with Challenger STS-6 (1:144) 
|
|
#1022
04-22-2016, 03:03 PM
|
||||
|
||||
|
Hello everybody,
today the other three flange tubes should get their handles, which I have bent this time under a steel rule with suitable thickness (1.3 mm) that yielded uniform grip widths what mattered to me.  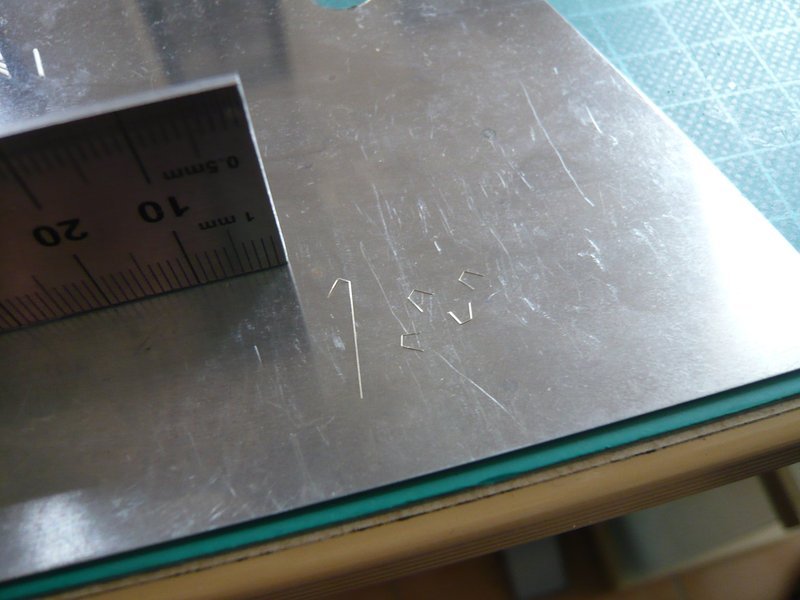 The insertion of the handles was not less stressful than the first time,  but now this tinkering is finally managed and I feel relieved. but now this tinkering is finally managed and I feel relieved.  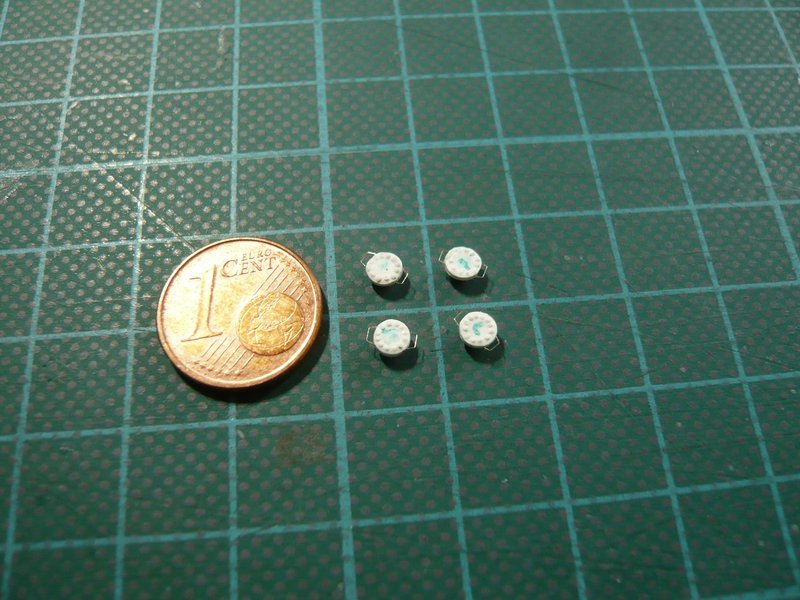 And here's the trying on of the flanges on the front, but still not glued and therefore lying.  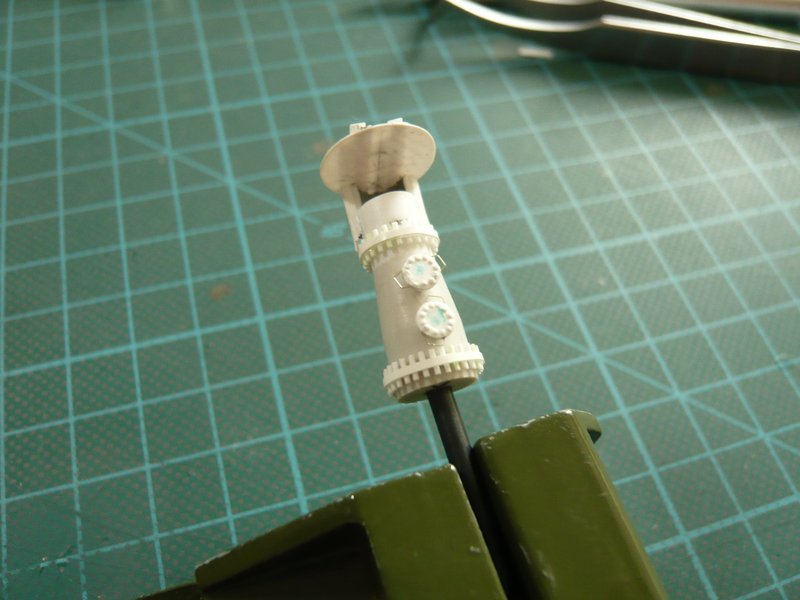 Tomorrow I will then glue the flanges on both sides, and then there is finally seeing a few still images.
__________________
Greetings from Germany Manfred Under construction: Launch Pad 39A with Challenger STS-6 (1:144)
|
|
#1023
04-23-2016, 04:40 PM
|
||||
|
||||
|
Hello everybody,
let's go to the A-1 final.  After I had filled the spaces between the screw with wood glue, the flanges were finally glued, first on the front,  and they glue now really tightly, as one can see here,  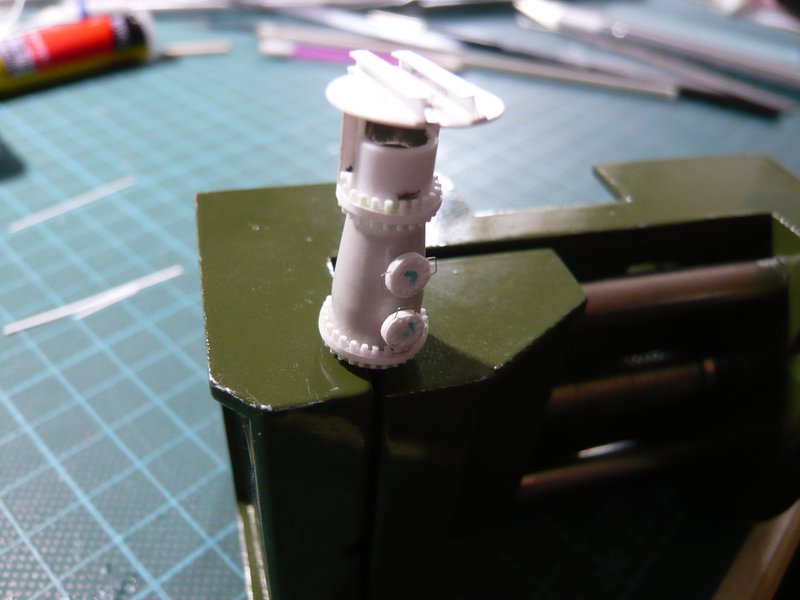 and then on the back. 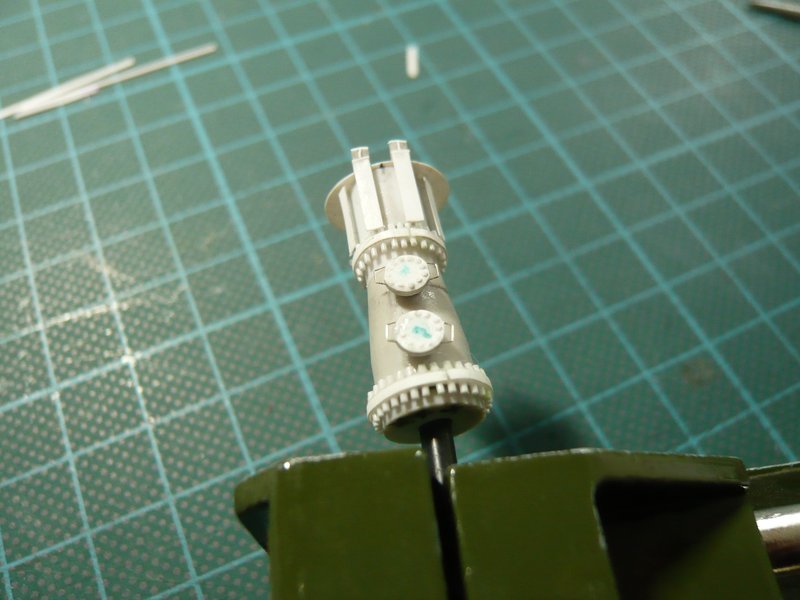 And here the A-1 is standing now in all its glory, and if you do not know, you can hardly believe that it consists of more than 100 parts. 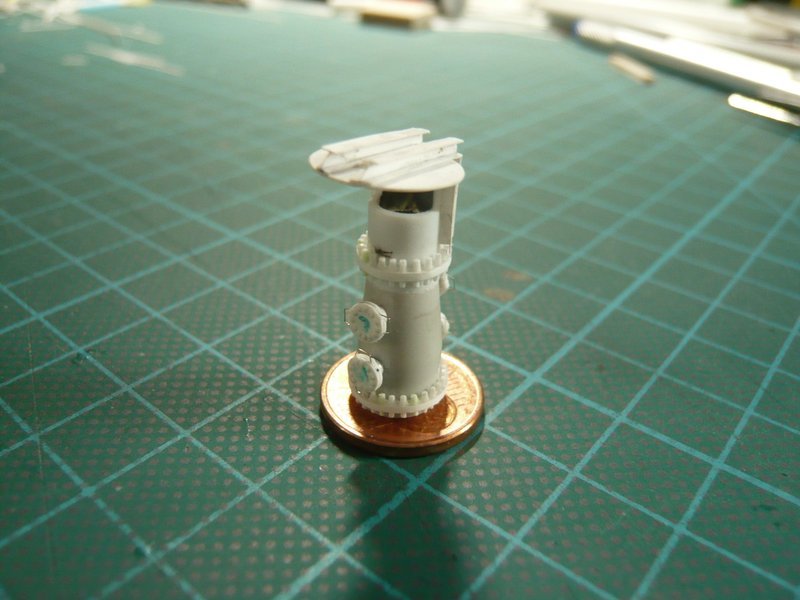 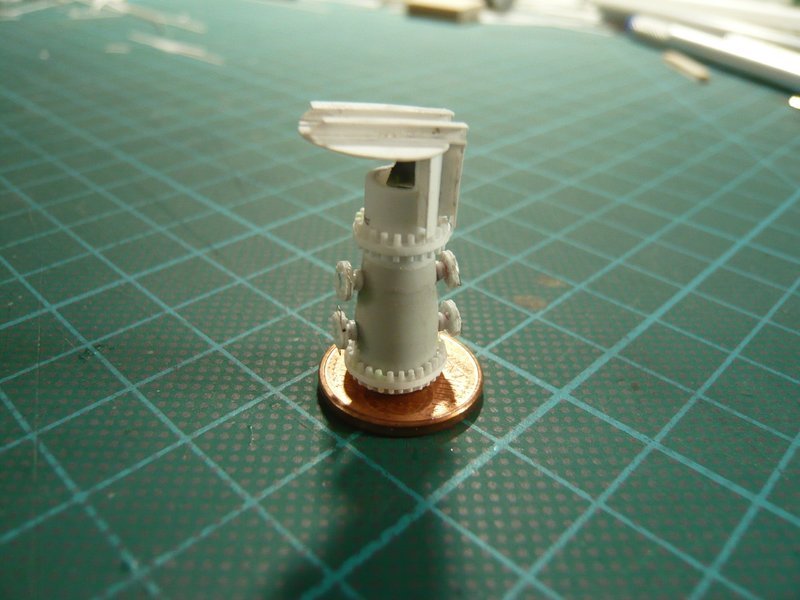 And one thing I have not previously noticed. While the two upper flanges of the MLP-2 are at the same height, the lower flange on the back is sitting slightly lower than that on the front side.  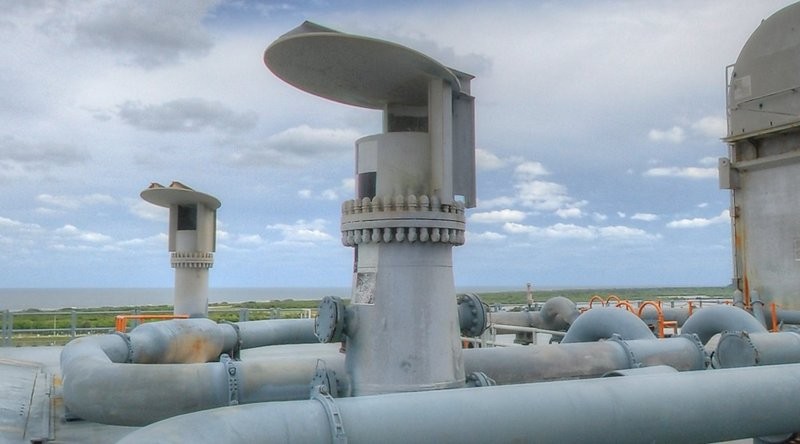 Source: NASA And so now there are already a bird-couple, on the left side the A-1 and right the B-1, which has nearly 40 parts. 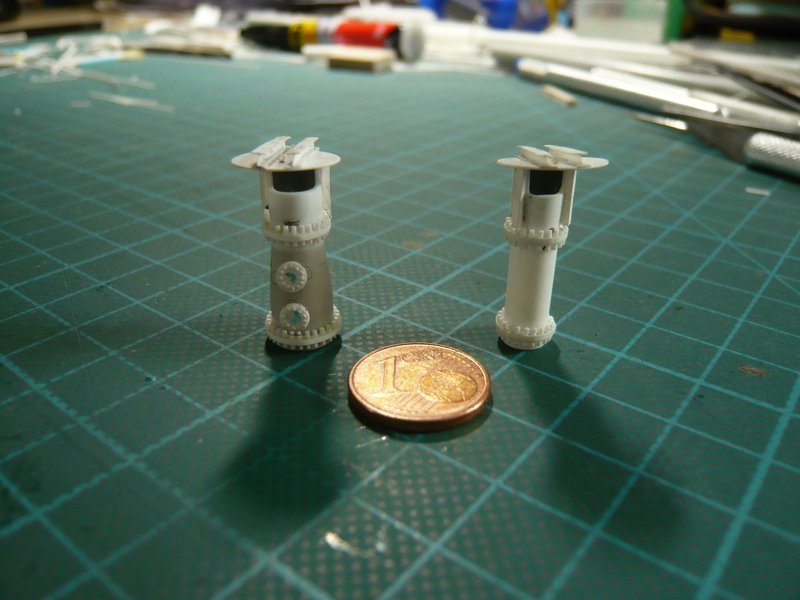 Then already a nice weekend.
__________________
Greetings from Germany Manfred Under construction: Launch Pad 39A with Challenger STS-6 (1:144)
|
|
#1025
04-25-2016, 04:13 PM
|
||||
|
||||
|
Thanks buddy.
 Hello everybody, and it goes on with the Rainbird A-2, which stands at the rear end of the Blast deck. However, in contrast to the front central Rainbird A-1 he has no Revision flanges, oh how that's nice ...  but instead at the back this tube here, which is standing at MLP-2 outside the quadratic indentation, but instead at the back this tube here, which is standing at MLP-2 outside the quadratic indentation, Source: NASA-Google Street View and what is laterally angled in the lower part, as you can see in the picture below.  Source: NASA And these are again the necessary parts are already prepared, except for the profiles at the top and this tube. This is the lower tube (Ø 7.9 mm) with the conical midsection and the upper tube (Ø 6.3 mm), the finished cover, and the two screws belts, the lower one is quasi only a half belt, because this flange is mounted directly on the floor just like the other two Birds (B-3 and B-4) within the Blast deck.  Otherwise, this is again the same mounting procedure, but this time I first glued the cover because this can be handled more easily without the screws belts. 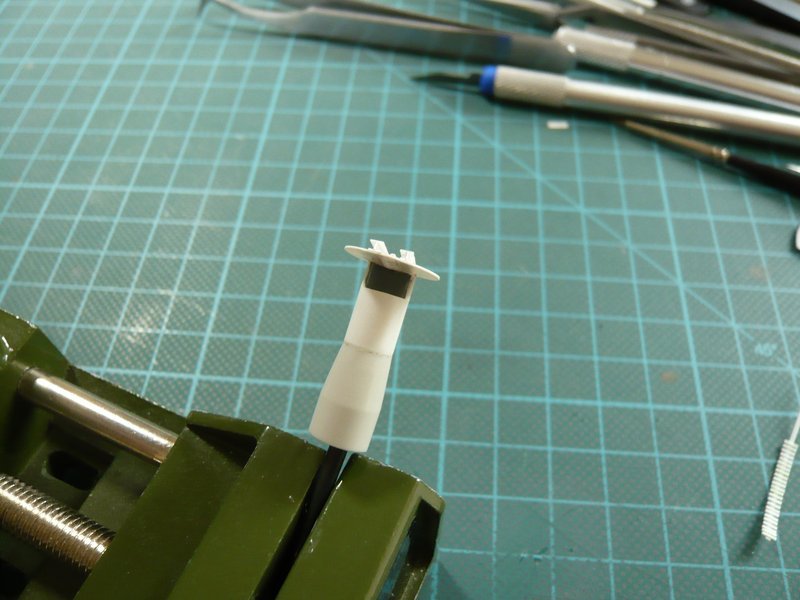 And then the upper belt was glued gradually, as usual. 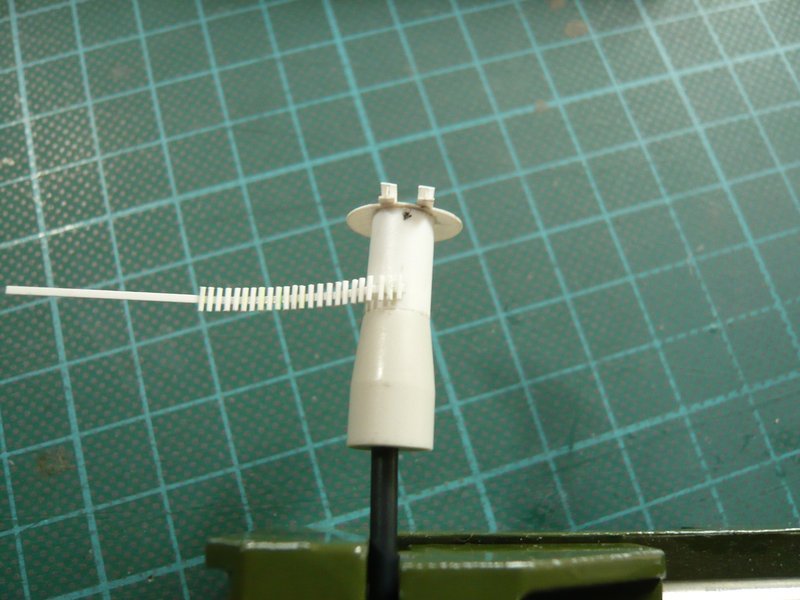 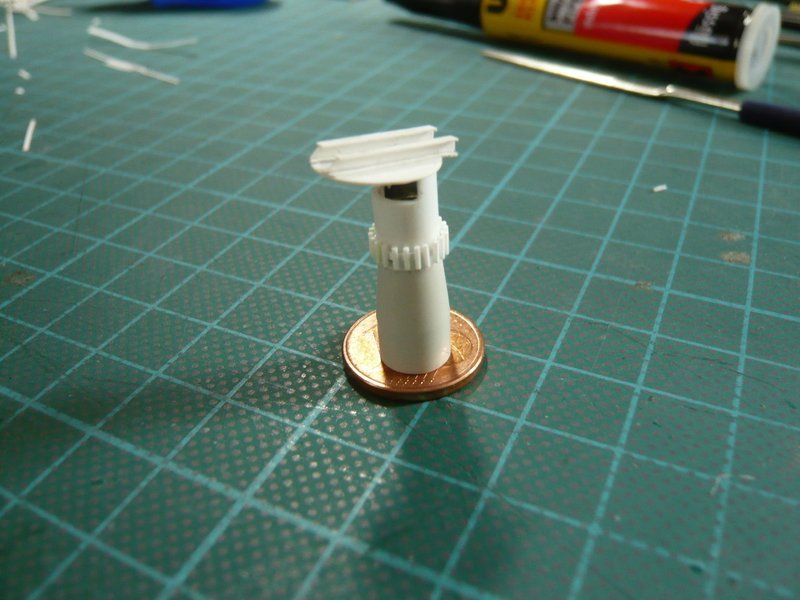 The lower flange with the screws sits in the recess flush at the pipe end, as one can see in this picture. 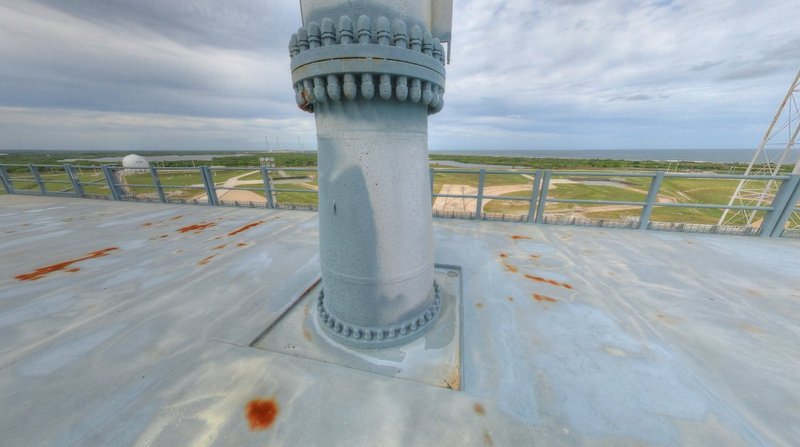 Source: NASA And just the same the lower screws belt was glued. 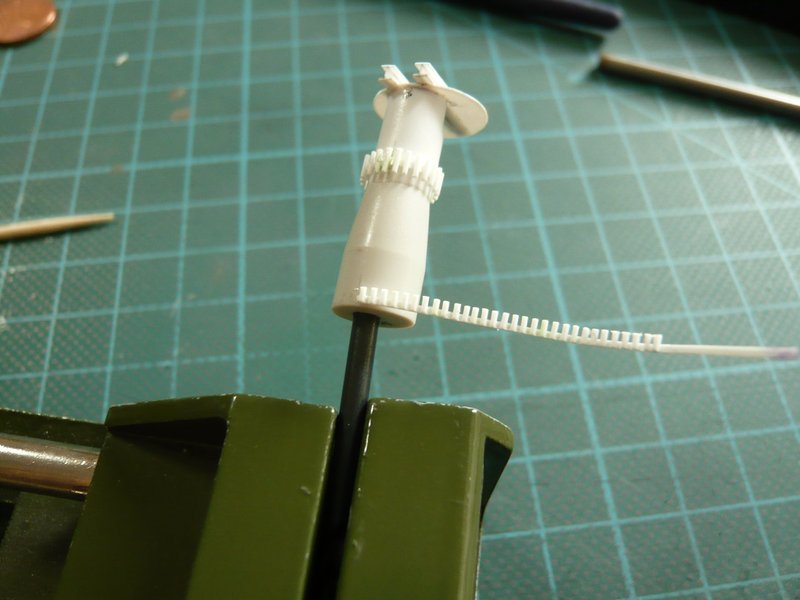 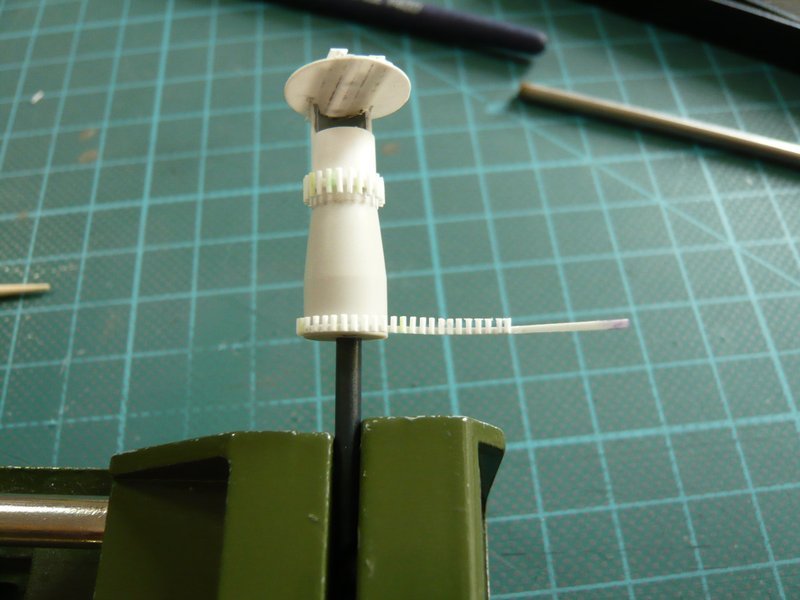 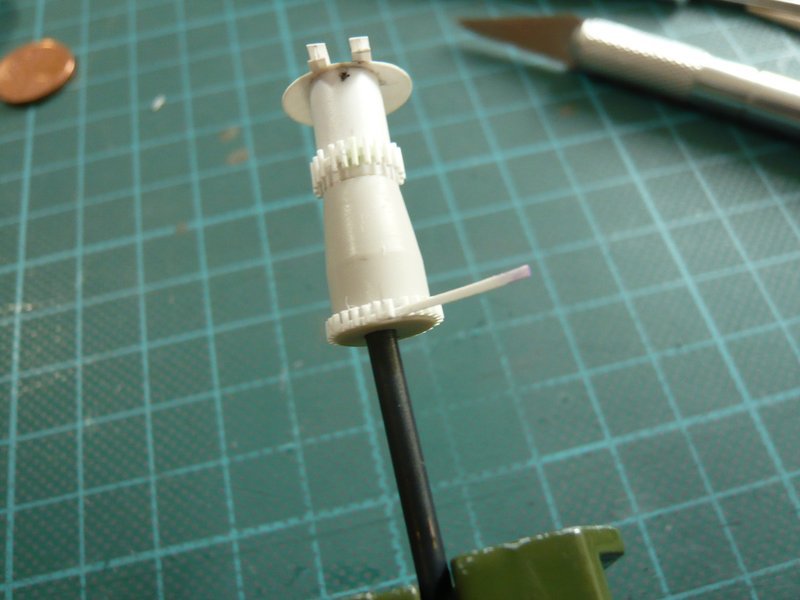 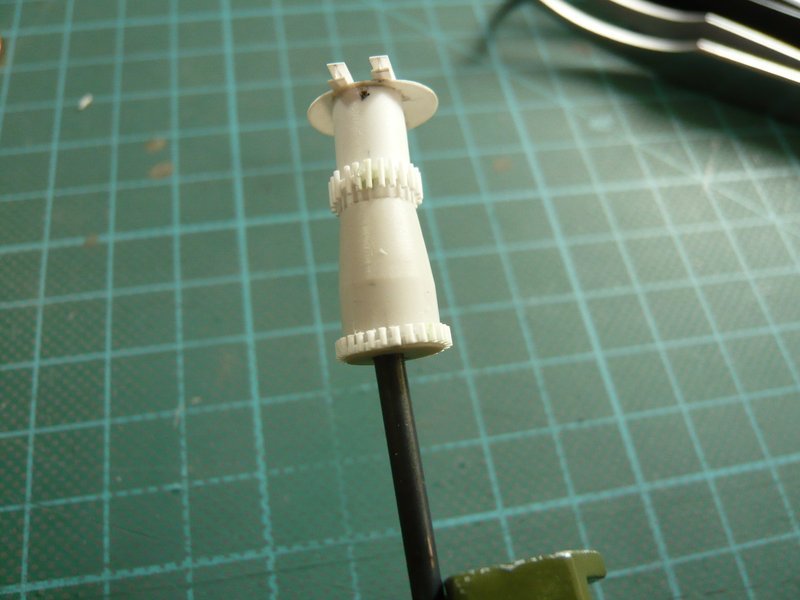 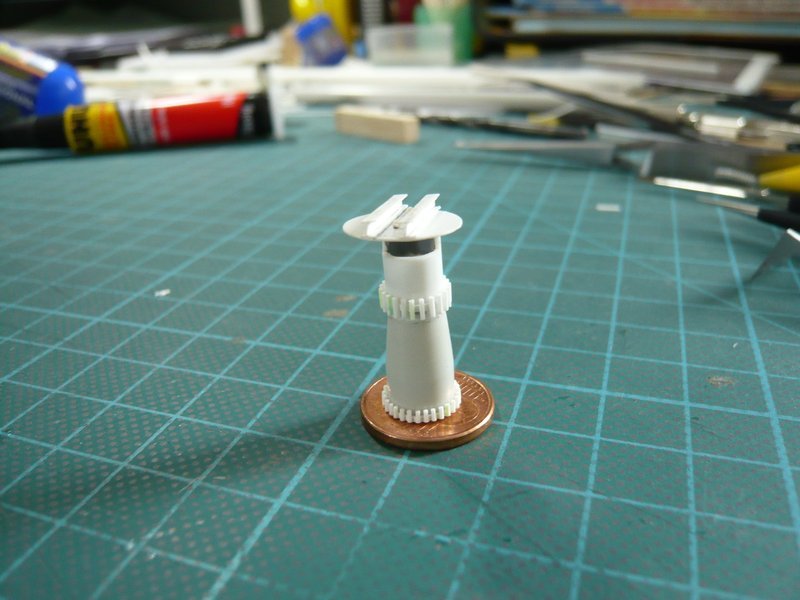 Now missing only the cover strips, which were now glued, first the upper strip (0.1 mm x 0.8 mm), 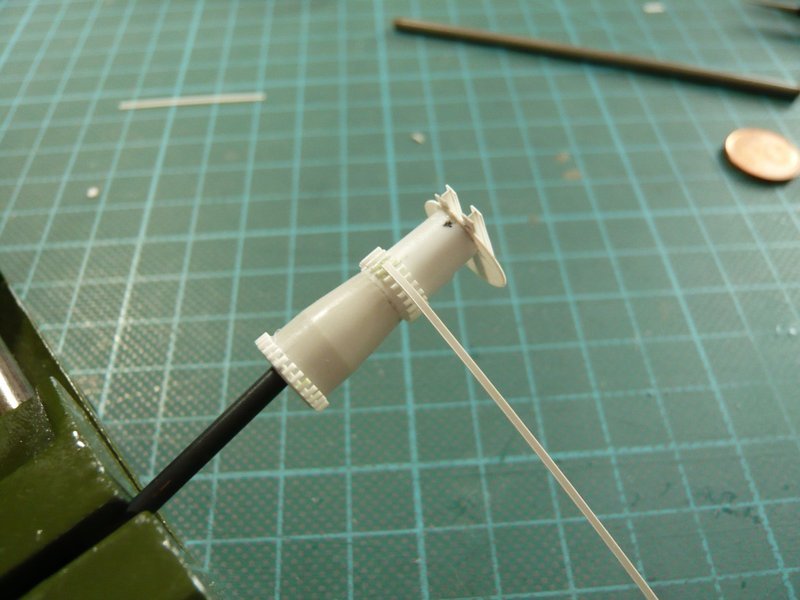 and then the lower one (0,1 mm x 0,4 mm). 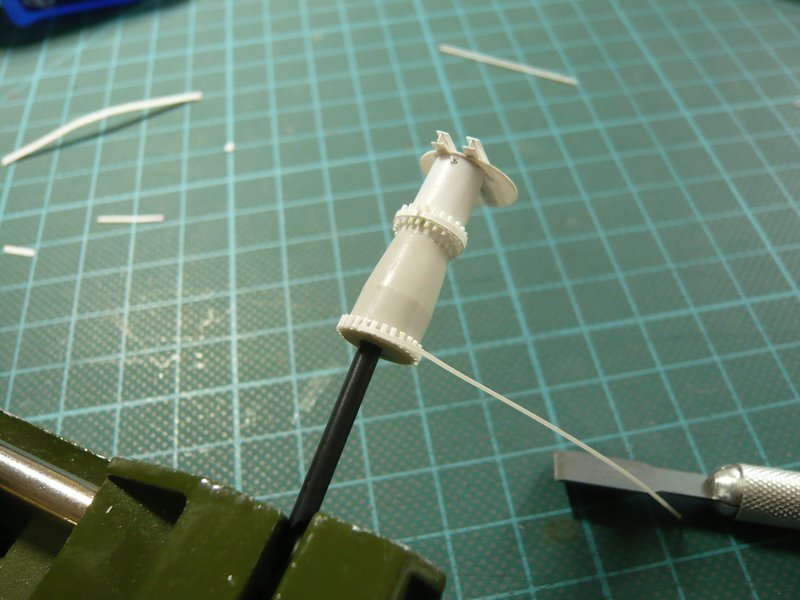 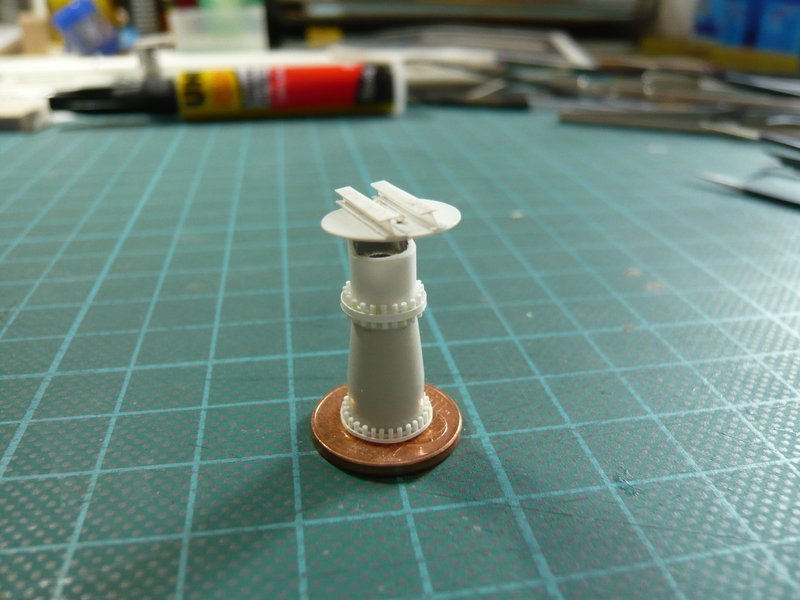 That should it be for today, the profiles follow tomorrow.
__________________
Greetings from Germany Manfred Under construction: Launch Pad 39A with Challenger STS-6 (1:144) Last edited by spacerunner; 09-19-2016 at 04:02 PM.
|
|
#1026
04-26-2016, 03:49 PM
|
||||
|
||||
|
Hi there,
then let's come to the A-2 finale with the profiles and the mysterious pipe. Here, the two angled profiles with the recesses. 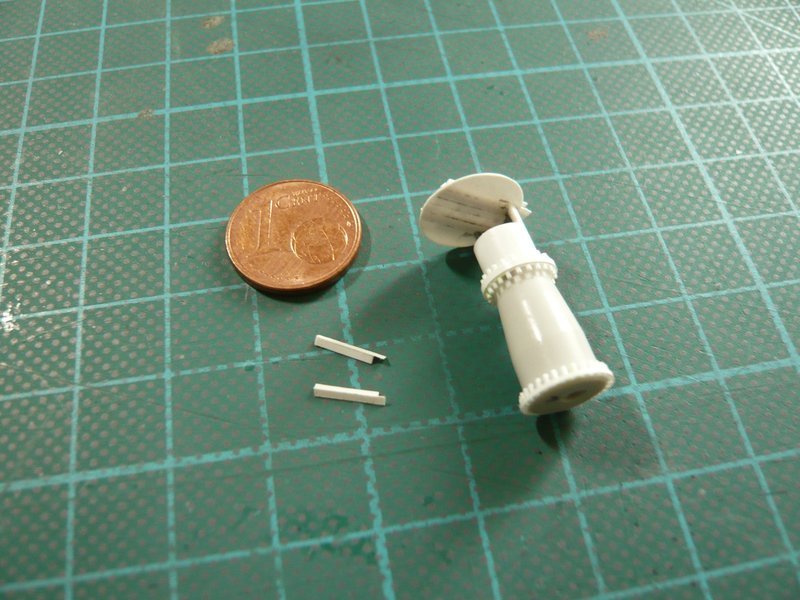 The difficulty in the bonding is really only the exact vertical orientation beside the opening. Therefore I glue always the upper end of the angle with a droplet Revell Glue under the cover and then the alignment may still be corrected a bit. Then I fasten this position with tape, 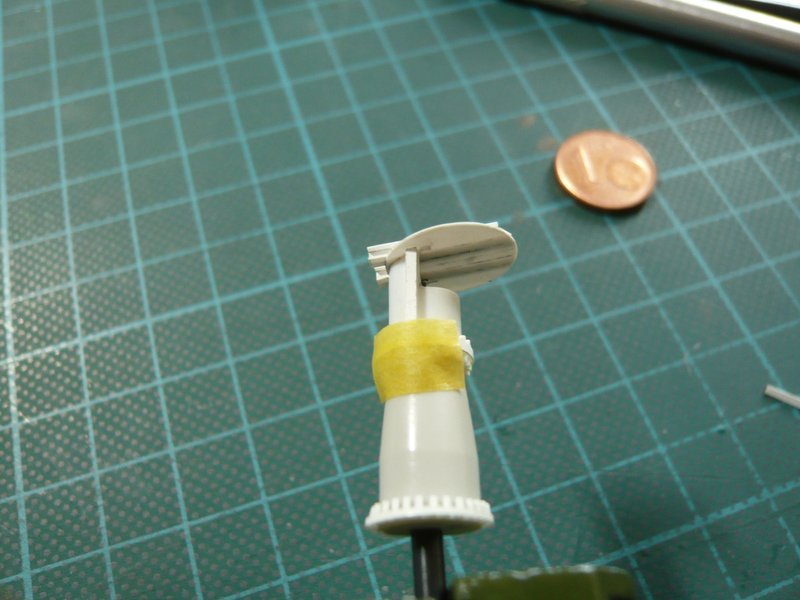 and then I glue the profile on both sides with MEK. 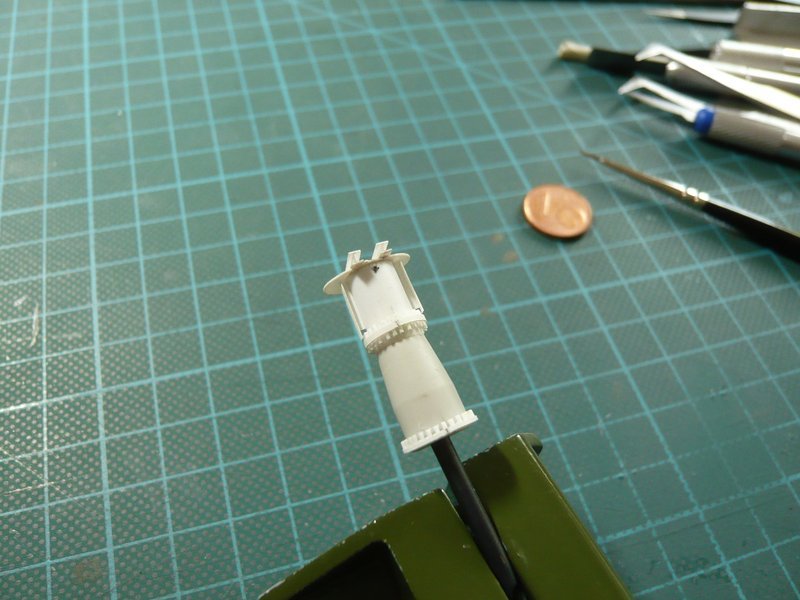 And then again follow the two rear T-beams, initially the two webs, 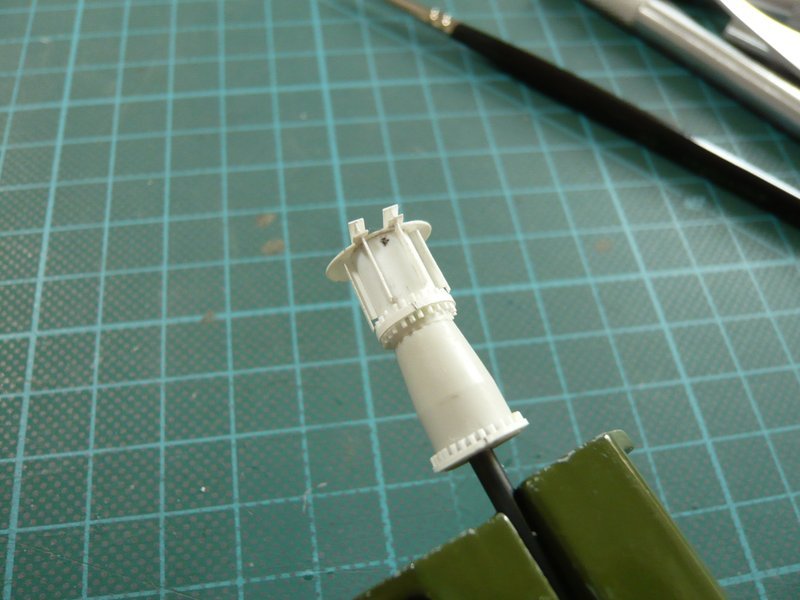 and then the two flanges. 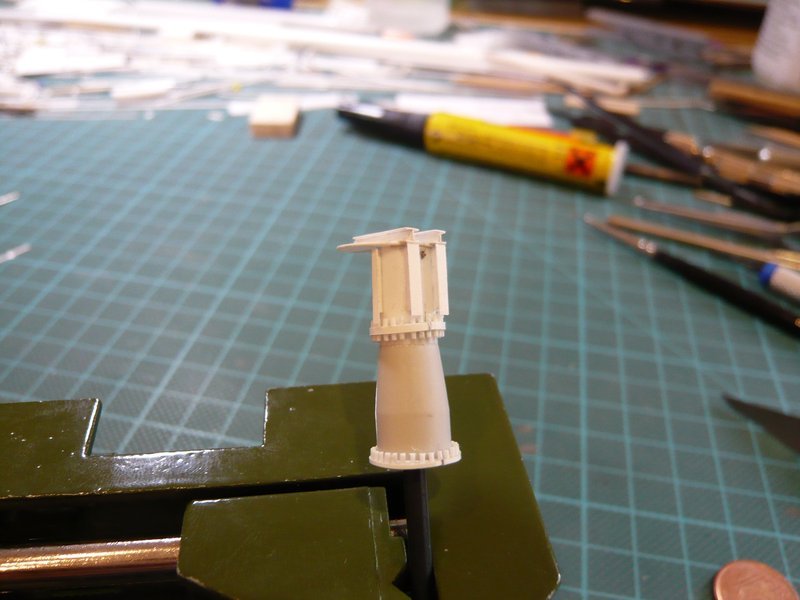 Now, the supernatants of the H-profile yet straightened. 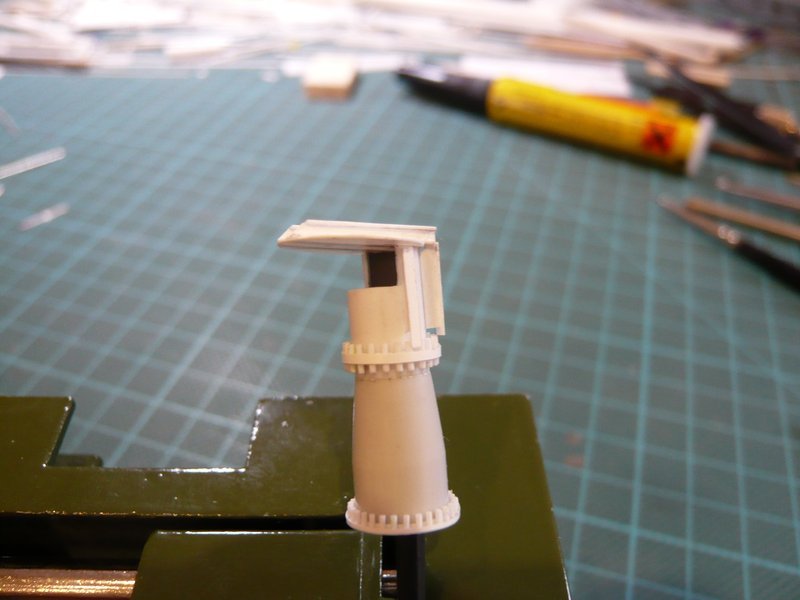 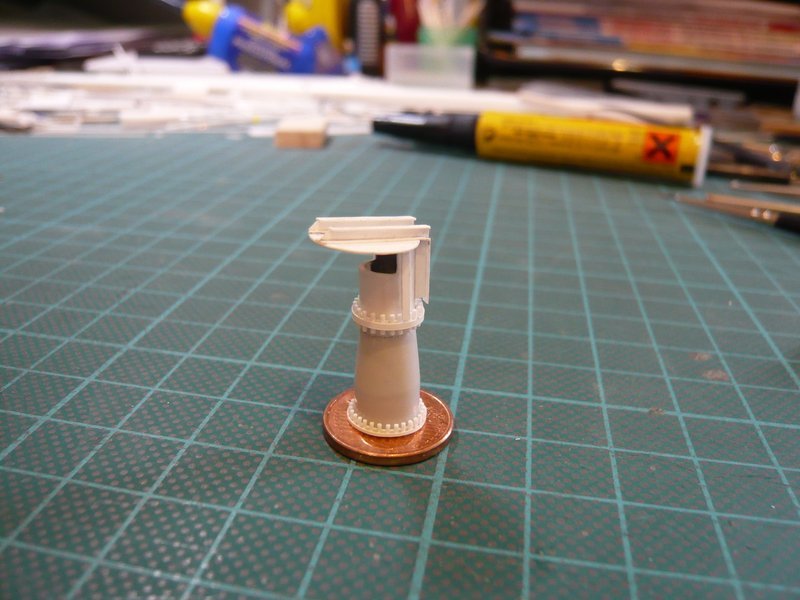 Now is missing only the rear tube.  This should be in my estimation about a 5'' pipe, what would correspond about 0.8 mm (1:160). So forth with the drill and the corresponding rod, 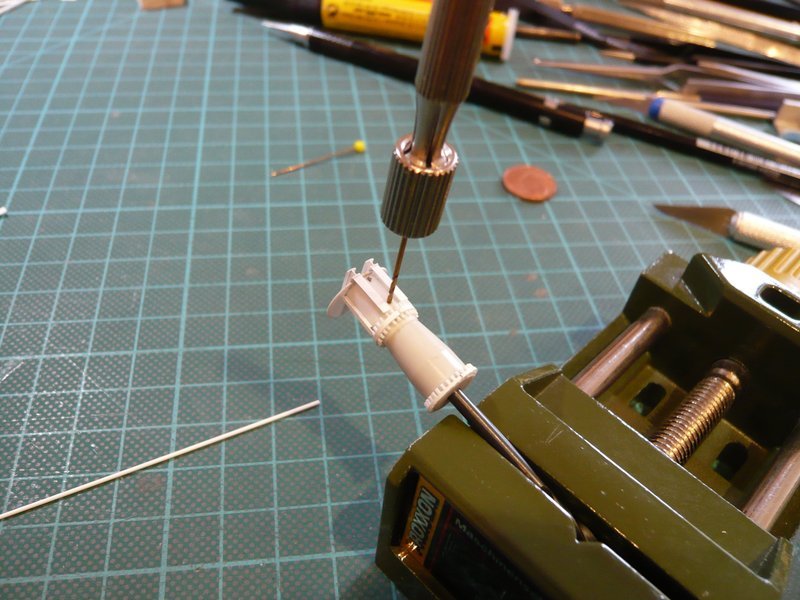 which has to be bent repeatedly. 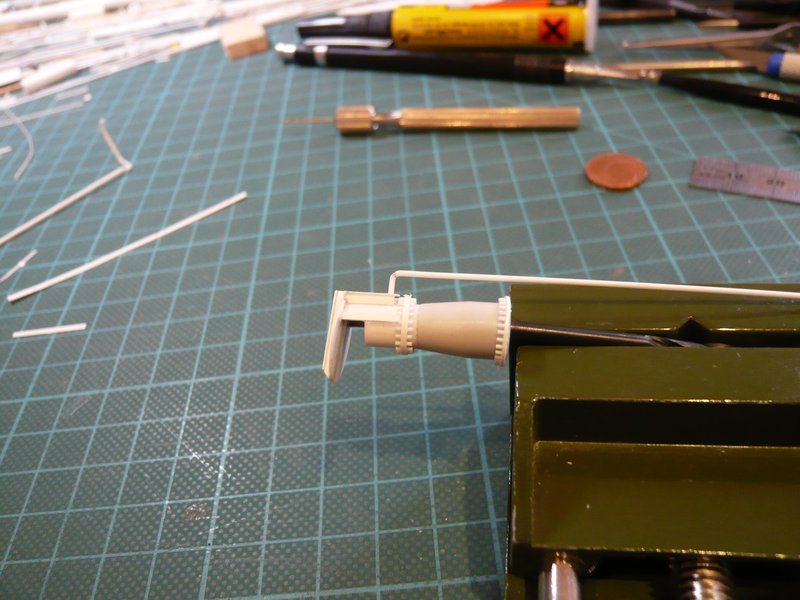 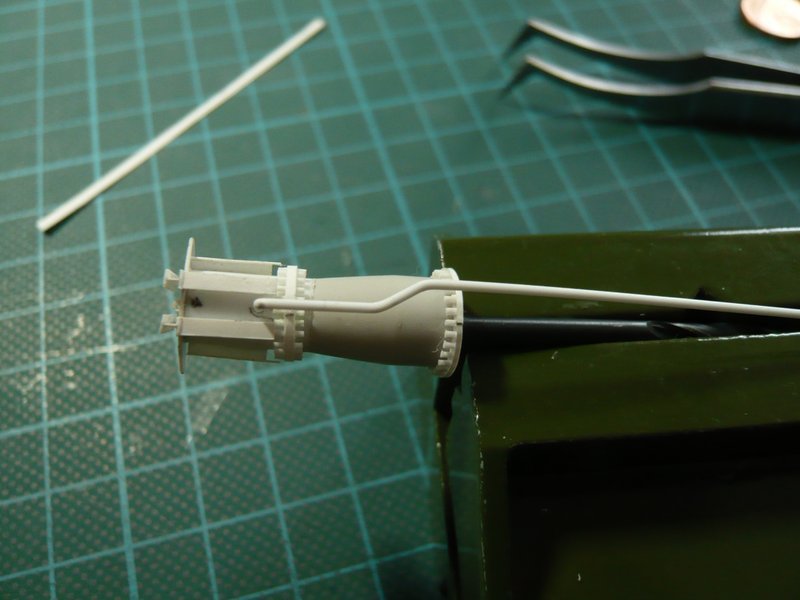 That's it for now with the A-2. 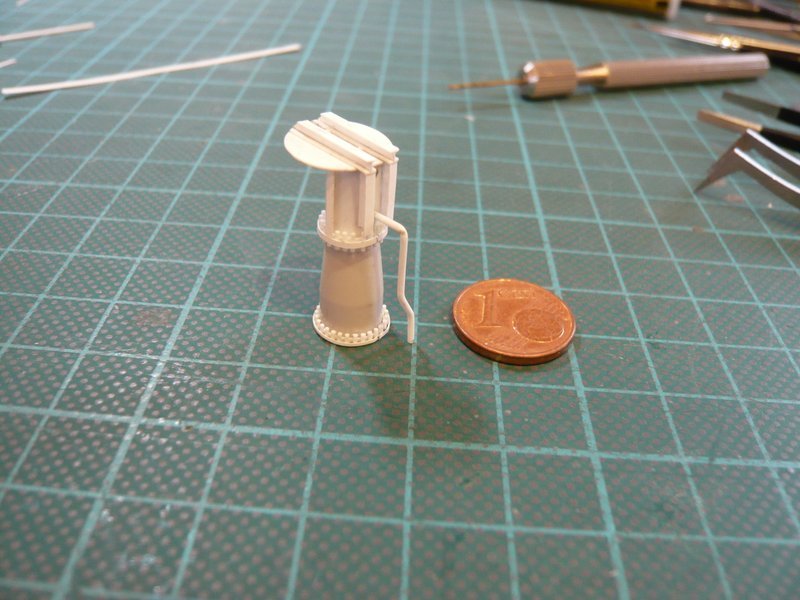  And so would we have nevertheless already a dashing threesome.  And therefore now still missing the Birds B-2, B-3 und B-4.
__________________
Greetings from Germany Manfred Under construction: Launch Pad 39A with Challenger STS-6 (1:144)
|
|
#1027
05-02-2016, 11:34 AM
|
||||
|
||||
|
Hello everybody,
Meanwhile it was going on further with the last three slender Rainbirds. These are (except for the upper profiles) the necessary parts for it, from right to left for the birds B-2, and the two birds B-3 and B-4, which are standing on the Blast Deck. 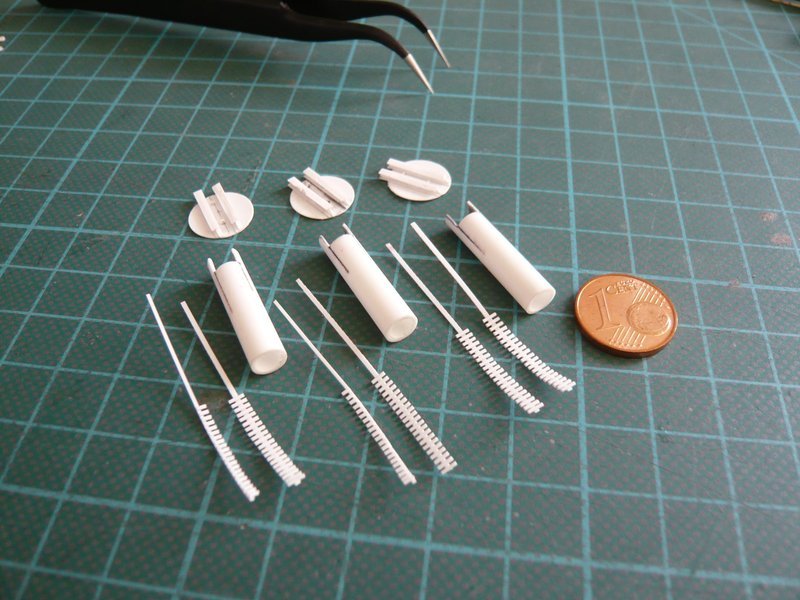 After I had glued the covers, it went on with the cartridge belts. First was the bird B-2, in the picture on the left, to the right is the ready built B-1. 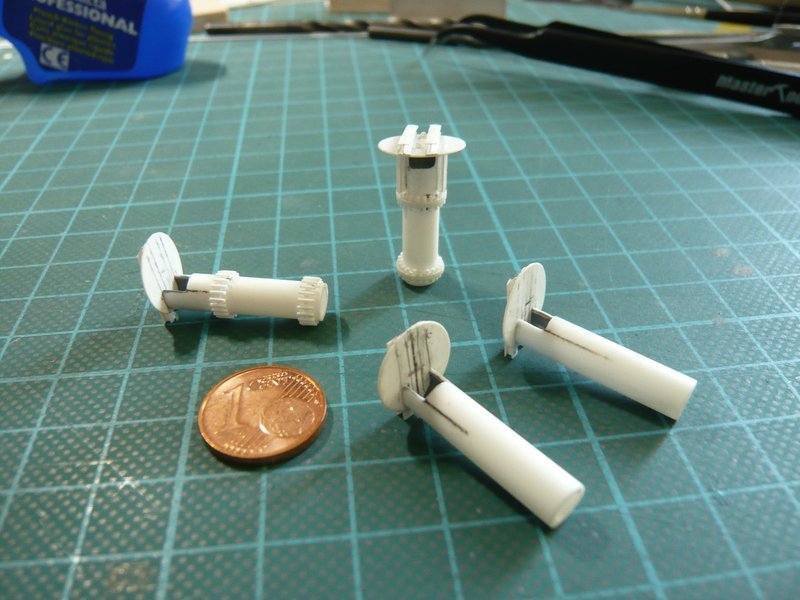 And this is a great moment because now only the last belt is missing, which is to be glued on top of the B-4.  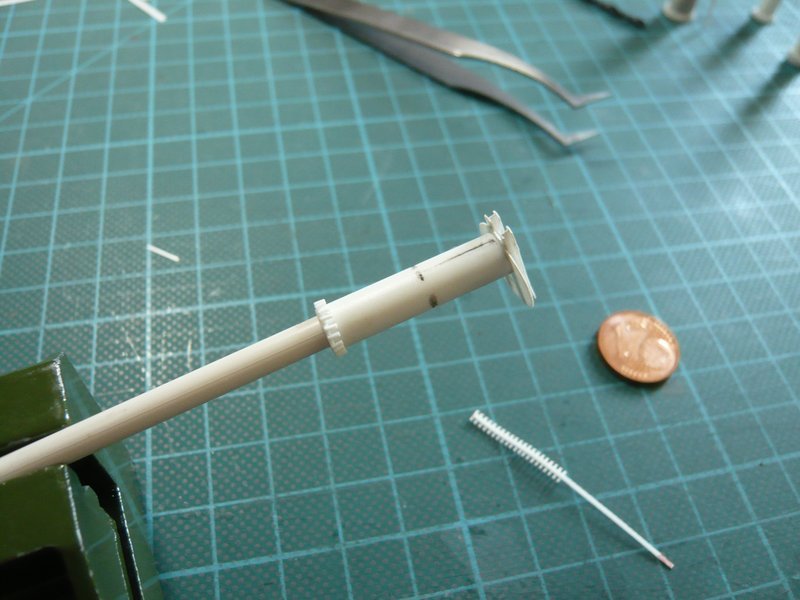 And that would be it, now missing still five cover strips and the upper profiles.  And so this tricky subproject of the Rainbirds is now coming to an end, it's indeed high time.
__________________
Greetings from Germany Manfred Under construction: Launch Pad 39A with Challenger STS-6 (1:144) Last edited by spacerunner; 09-19-2016 at 03:56 PM.
|
|
#1028
05-02-2016, 12:09 PM
|
|||
|
|||
|
I do believe you have successfully passed a milestone (one of many!) on this massive project Manfred. Hearty Congratulations are the order of the day!
__________________
This is a great hobby for the retiree - interesting, time-consuming, rewarding - and about as inexpensive a hobby as you can find. Shamelessly stolen from a post by rockpaperscissor 
|
|
#1029
05-02-2016, 04:30 PM
|
||||
|
||||
|
Thanks Elliott for your hearty congratulations.
 With the results I am even more than satisfied, especially as the filigree Birds already unpainted look really  , although the effort for a total of more than 300 parts was immense. , although the effort for a total of more than 300 parts was immense. 
__________________
Greetings from Germany Manfred Under construction: Launch Pad 39A with Challenger STS-6 (1:144)
|
|
#1030
05-03-2016, 11:51 PM
|
||||
|
||||
|
Quote:
Keep on doing great work Manfred!!!
__________________
Finished projects: RMS Mauretania 1/250; SS Canberra 1/250; Toyota Hilux Overdrive; Current projects: SS Michelangelo 1/250
|
 |
| Thread Tools | |
| Display Modes | |
|
|


 Linear Mode

