


|
|
|
#141
 09-12-2013, 01:57 PM
|
||||
|
||||
|
Thanks guys for your kind words, our comments give me encouragement to keep pushing on.
 I fully agree with you Michael, I also like the silver look.  So, and here is now the silver painted Transfer line of the Side 4. 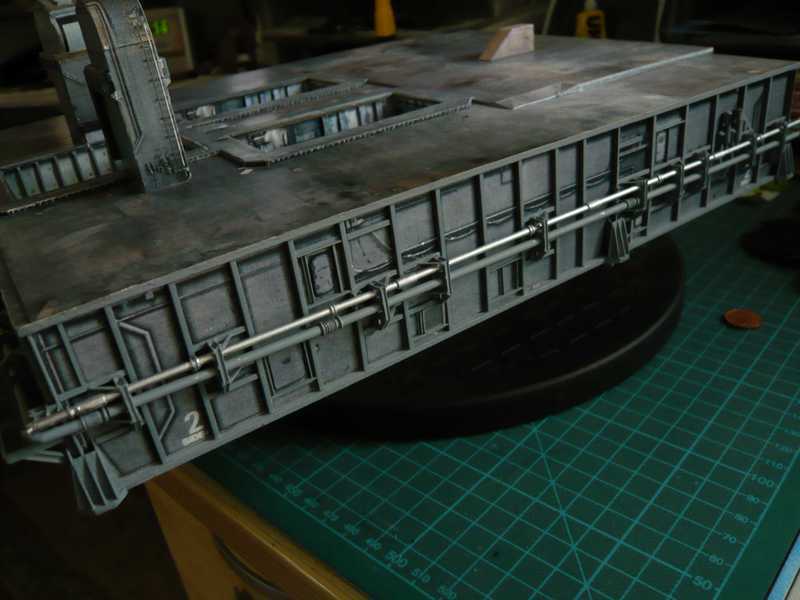 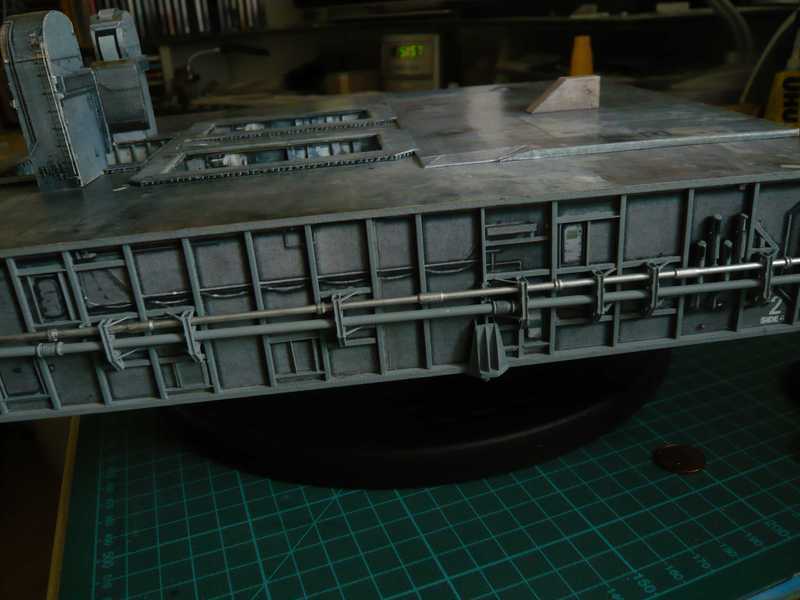 And now I think I'll paint the Vent lines probably also still silver, then it gives a more actual overall picture.  
__________________
Greetings from Germany Manfred Under construction: Launch Pad 39A with Challenger STS-6 (1:144) Last edited by spacerunner; 10-13-2016 at 10:54 AM. 
|
|
#142
09-13-2013, 12:37 AM
|
||||
|
||||
|
Hi folks,
In addition to the pipes to painting continued with the second, thinner pipe from the LOX-Valve skid to the LOX tunnel. I had bent it of 1.0 mm round profile and placed several bellows, which are wrapped in coils of 0.3 mm lead wire. 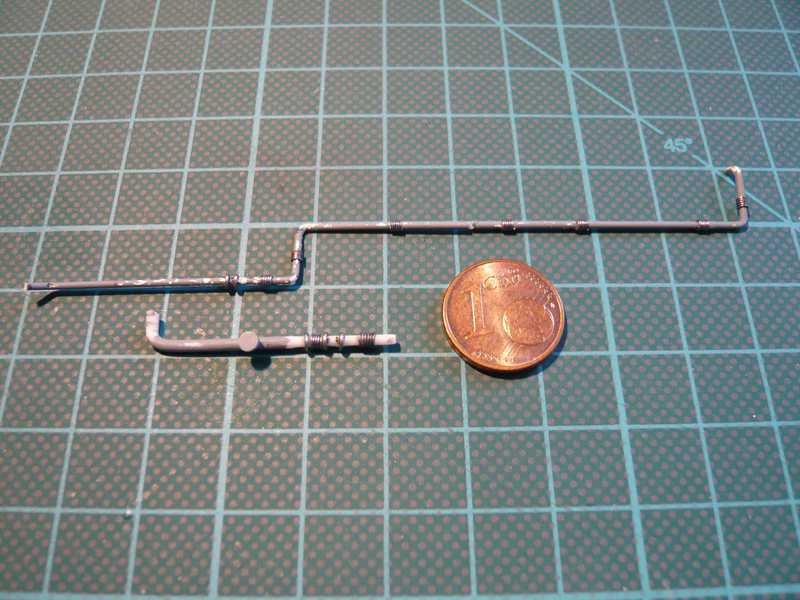 The longer right part of the pipe runs directly in front of the MLP wall and then top enters the LOX tunnel. The left part runs obliquely forward on the valve skid and then meets the branch of the vent line, located here underneath. Because the upper pipe must be threaded under the transfer line elbow pipe, which leads in the LOX filter, I have separated the line in the middle at the local pipe guide, otherwise pipe laying would become too complicated, especially since on the left-hand side after the double elbow pipe anyway a few small details to install.  Again to clarify that what's now is about: The branch of the vent line shown above is the middle piece of line running from 1 to 2. And on this line this nice small armature sits, that could be possibly a type of flow meter or controller, that I tried to scratch-build.  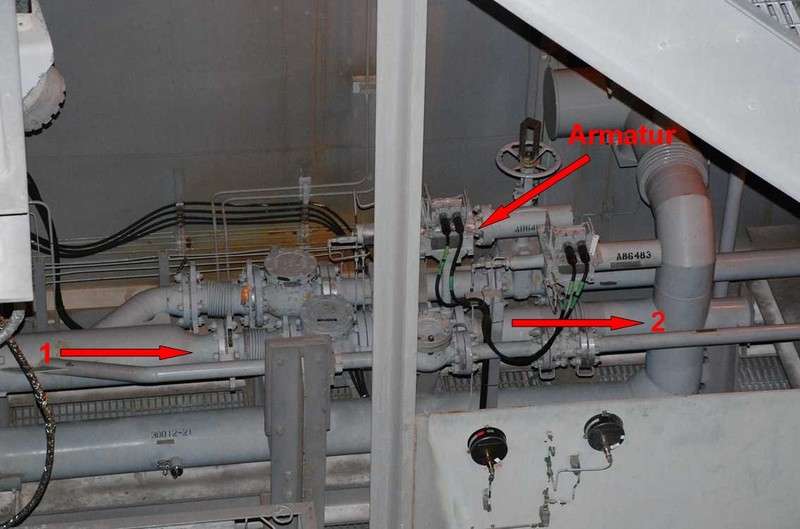 Source: J. Patterson (NASASpaceFlight ) But see better the next photos, without much words: 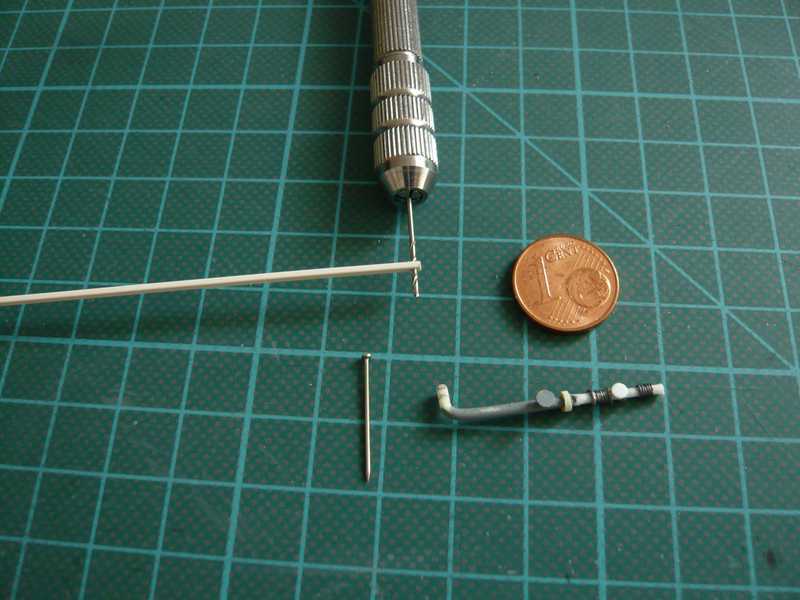 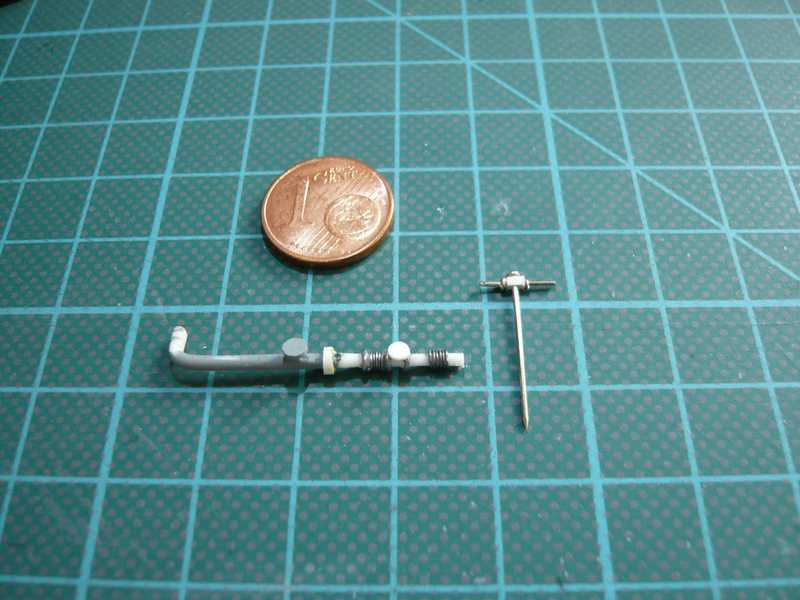 And so the part looks now with me after the assembly, almost adventurous, or?   And here finally silver painted: 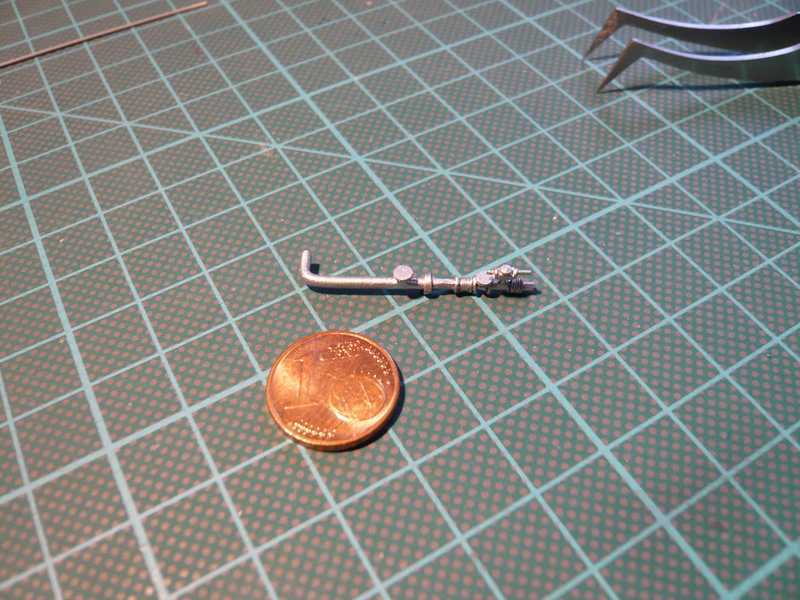 So, and as a conclusion for today here is the right section of the initially shown thinner pipe, which leads to the LOX tunnel, after painting and assembly: 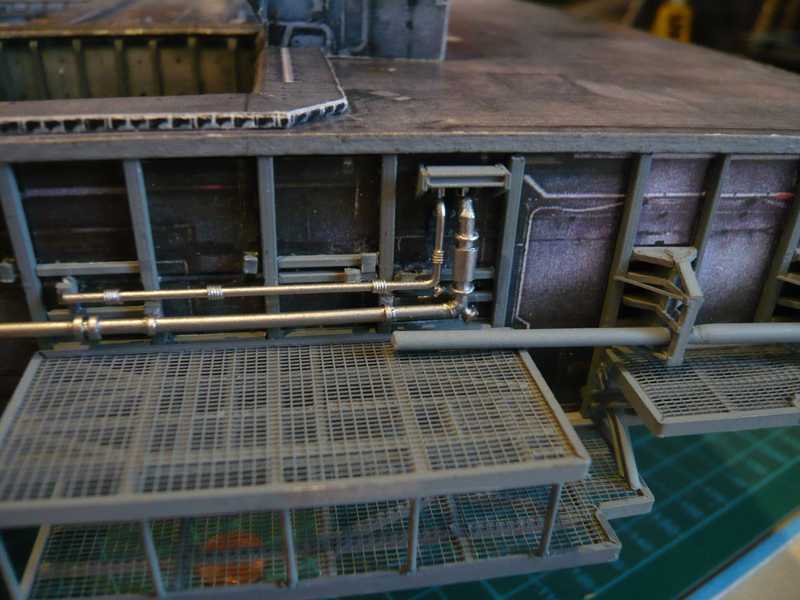 So, that was something out of the often strained rubric: Many a mickle makes a muckle ... I hope you understand the German byword. 
__________________
Greetings from Germany Manfred Under construction: Launch Pad 39A with Challenger STS-6 (1:144) Last edited by spacerunner; 10-13-2016 at 10:56 AM.
|
|
#143
09-13-2013, 01:44 AM
|
||||
|
||||
|
Quote:
Yes, understand.... 
Last edited by spacerunner; 10-13-2016 at 10:58 AM.
|
|
#144
09-13-2013, 03:54 AM
|
||||
|
||||
|
That you understand it was clear to me!
__________________
Greetings from Germany Manfred Under construction: Launch Pad 39A with Challenger STS-6 (1:144) Last edited by spacerunner; 10-13-2016 at 10:58 AM.
|
|
#145
09-14-2013, 03:38 AM
|
||||
|
||||
|
Initially, here is a supplement of the silver painting of the pipes with some images of the three sides of the MLP.
Now I have painted the originally white Transfer lines with Revell-silver. The Vent lines I wanted to vary something color and mixed to therefore a few drops of Revell-grey and Revell-iron into Revell-silver. The shade of color differs only marginally from the pure silver, what I have now so left. Here is the Side 1, in which the upper vent line has received now the junction just before the blind flange, which then flows into the transfer line: 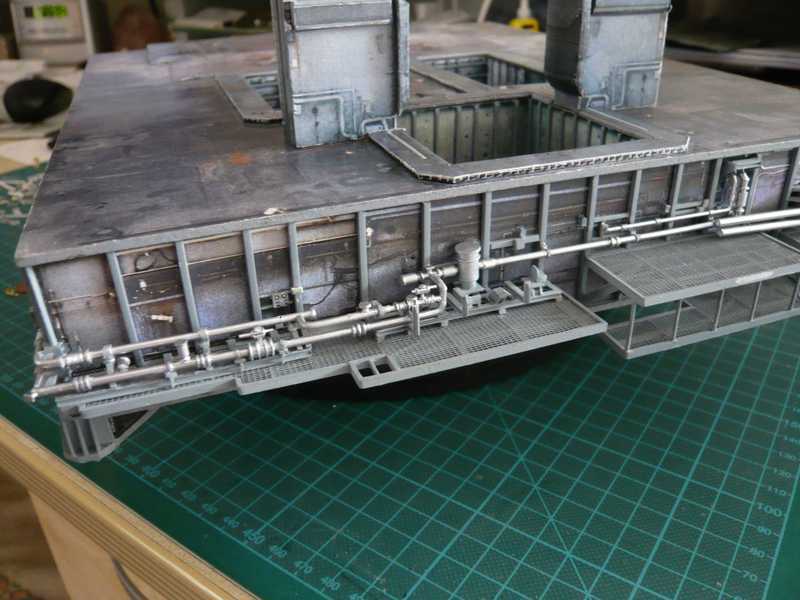 And here is Side 2, 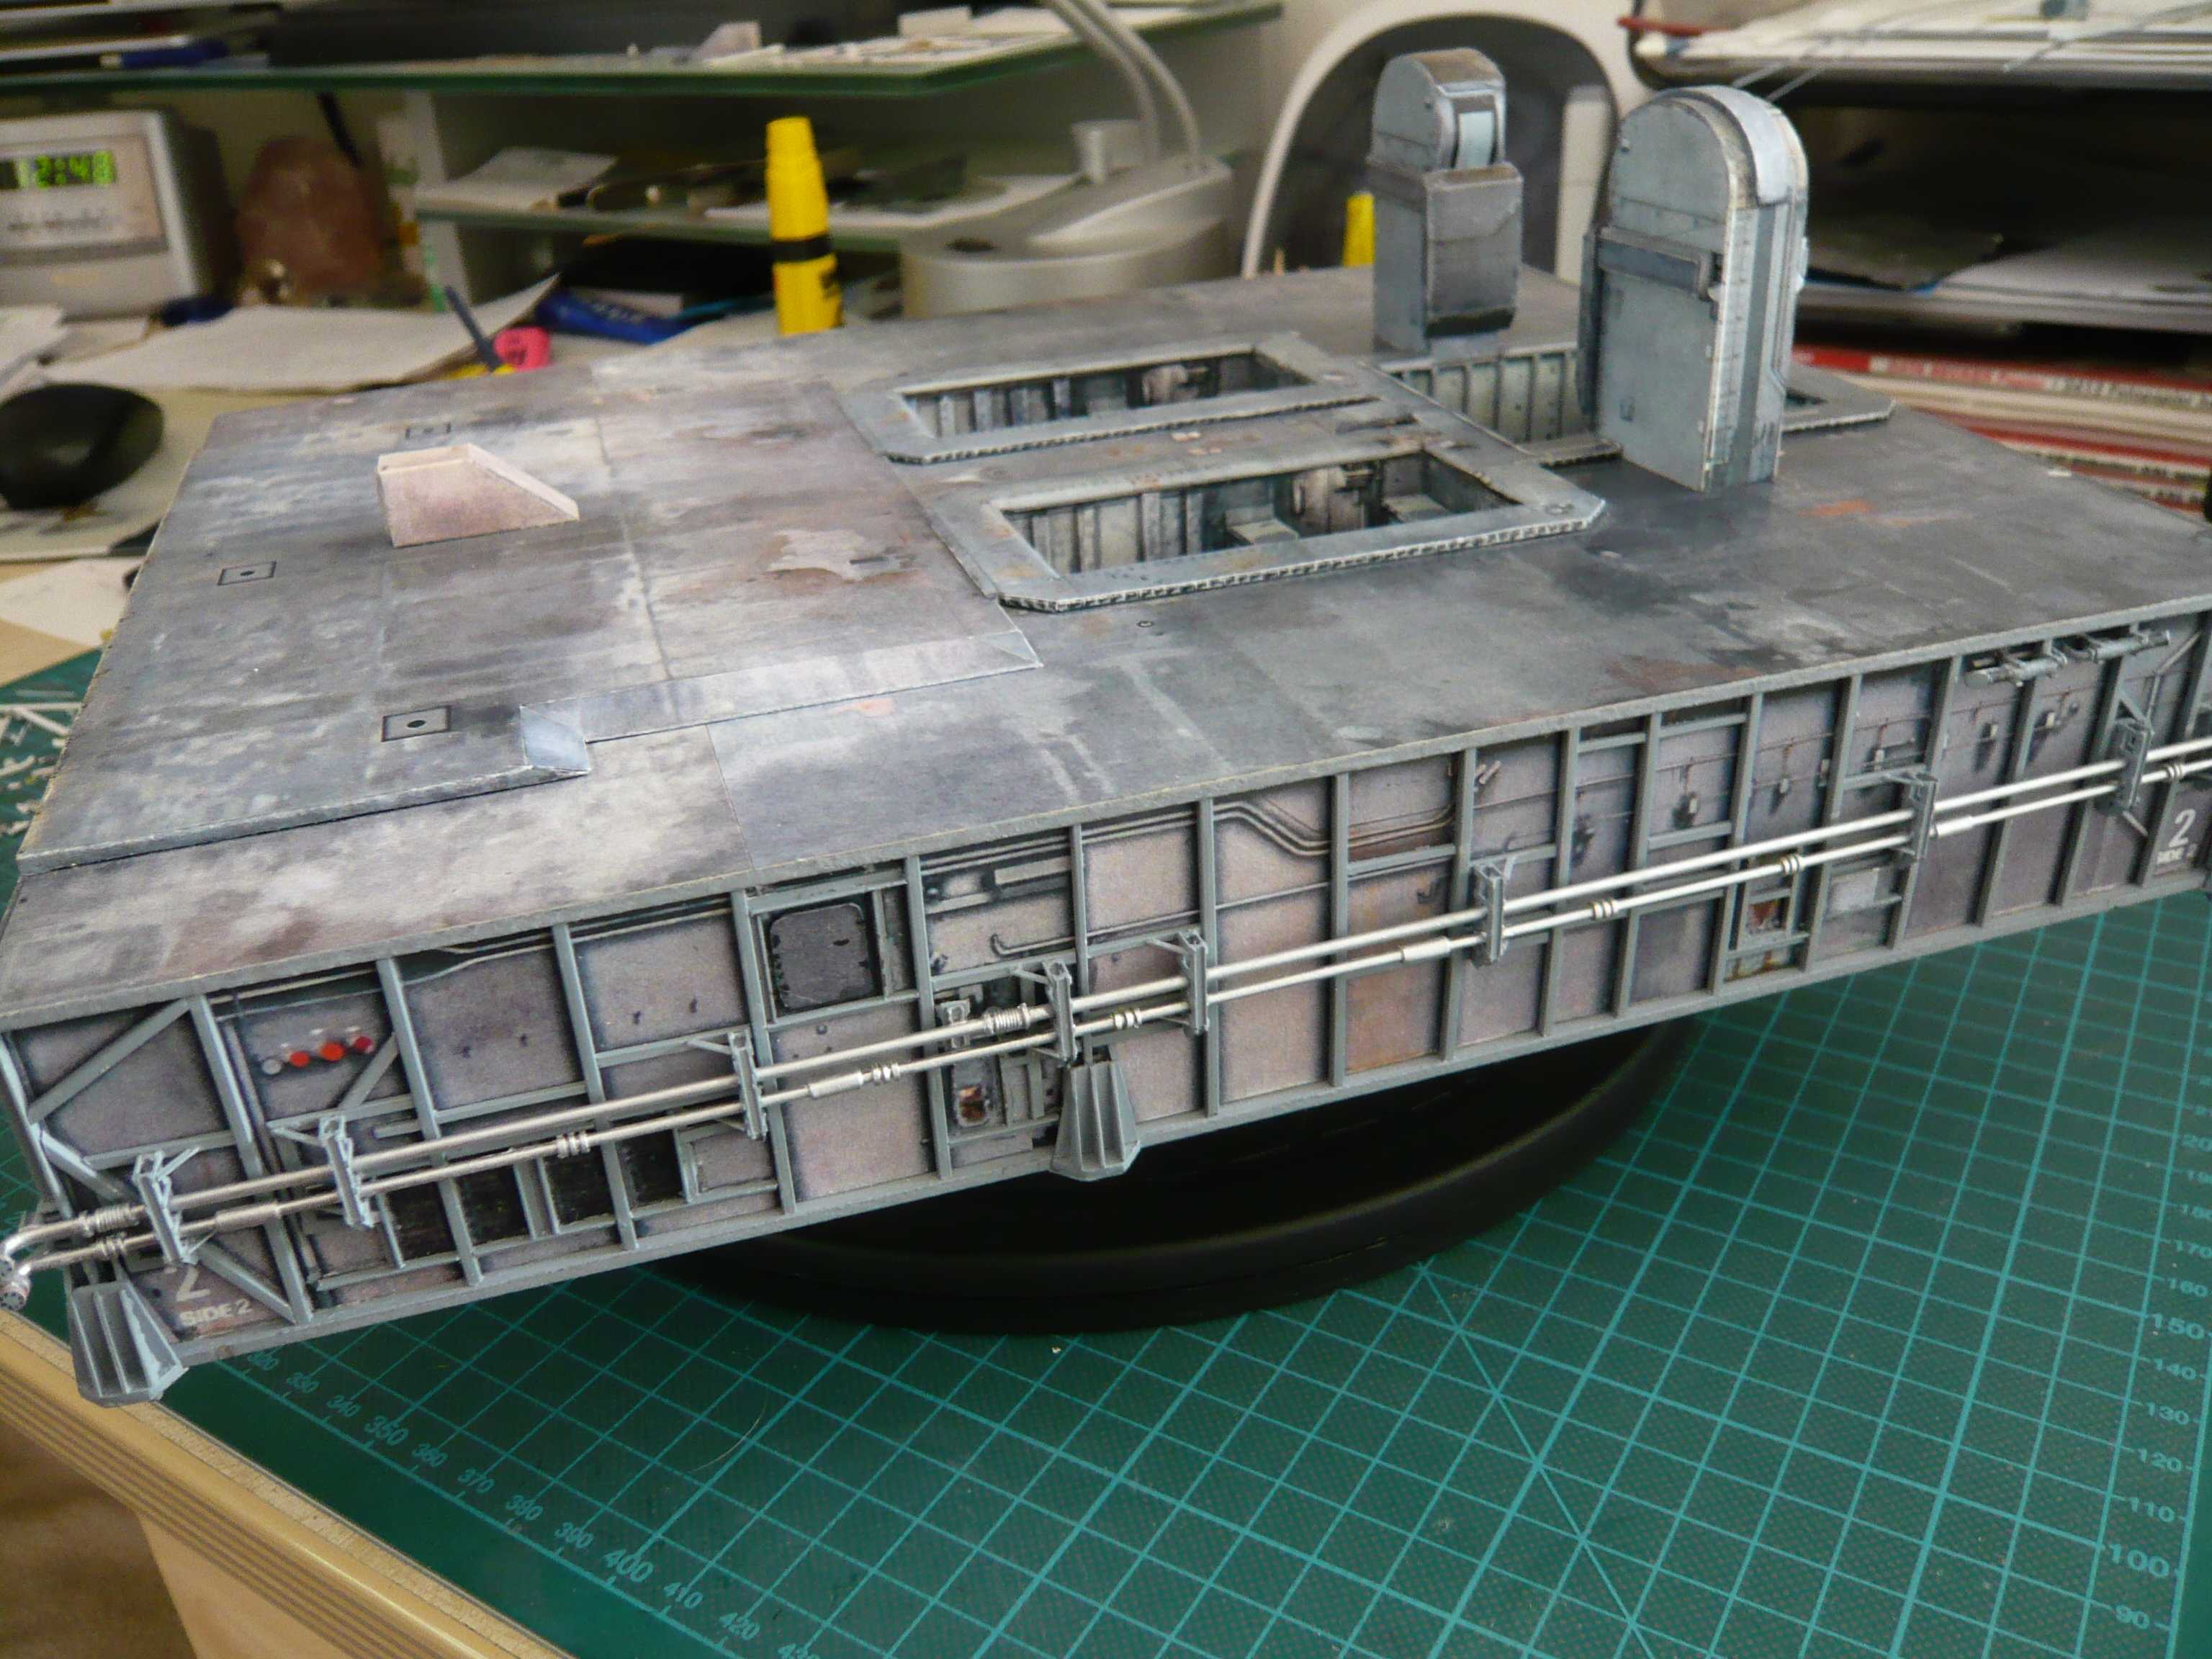 and here Side 4: 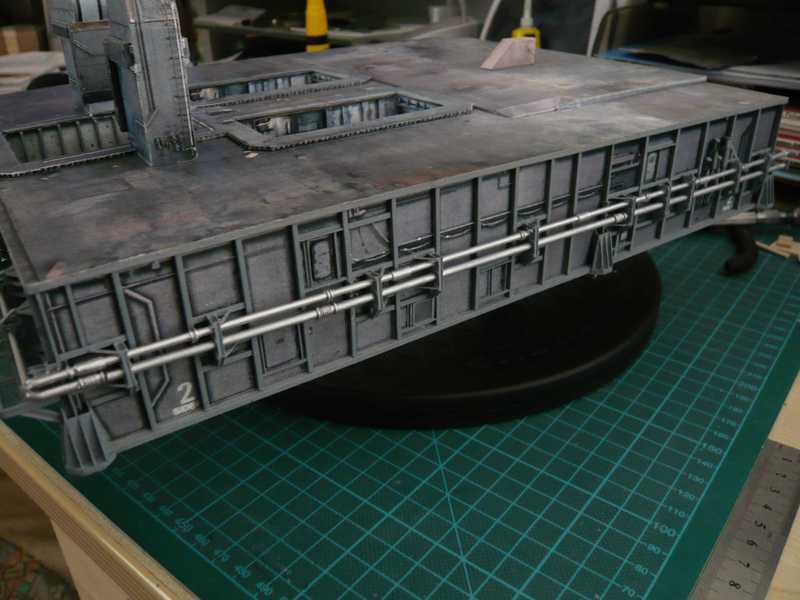 So far, so good, but what part of it else to the fuel pipes, to fuel the stack correctly, and above all safely? Clearly, of course, Valves and Sensors, and some of which I at least wanted to indicate. Granted, for a long time I was considering whether I myself should dare approach also on these details, and even longer about repercussions, how I could scratch-build it. Here is the following, already known image of the Side 1, on which I have marked some of these details: 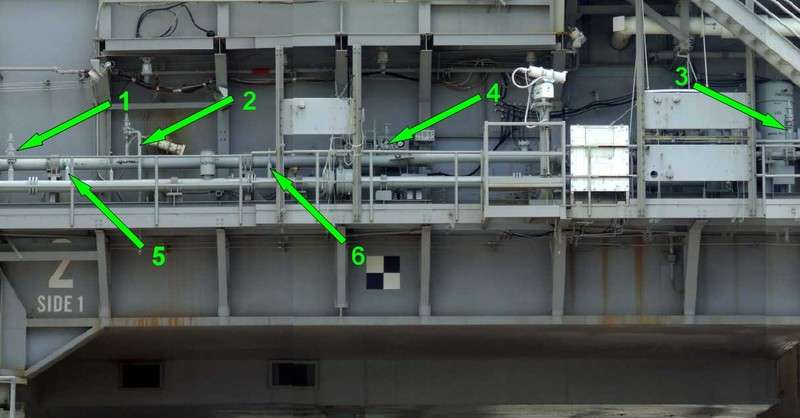 Source: NASA There are for example four Relief valves, of which three (green arrows 1, 2, 3) are visible. The fourth, sits left next to the transition to the LOX-filter. Valve No. 4 is a Control valve with a small hand wheel. No. 5 and 6 are Temperature and Pressure sensors, which occur even in some other places of the valve skids. Looking for appropriate solutions for the construction of these fittings I have found something in the store for ship modeling, there are namely small rail supports made of brass, which I can use very well for these valves, as can be seen in the next picture. 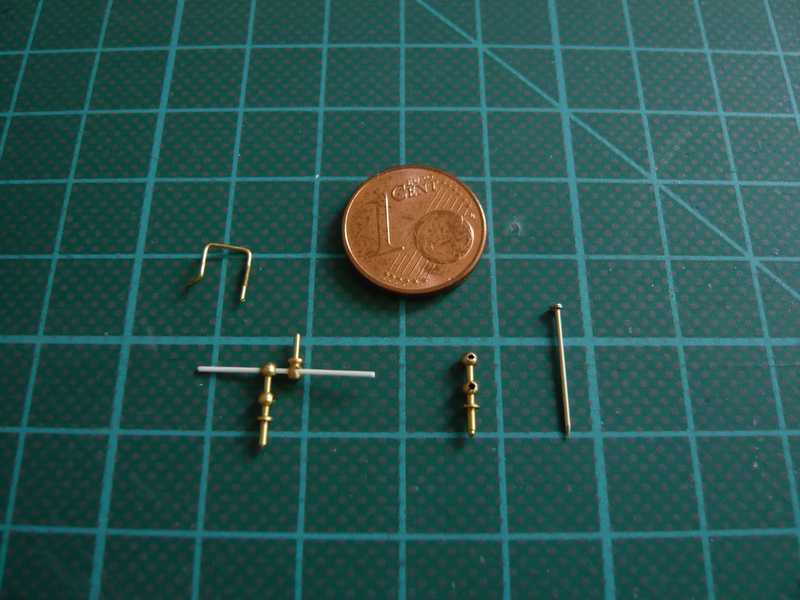 And finished valve No. 2 looks like this, 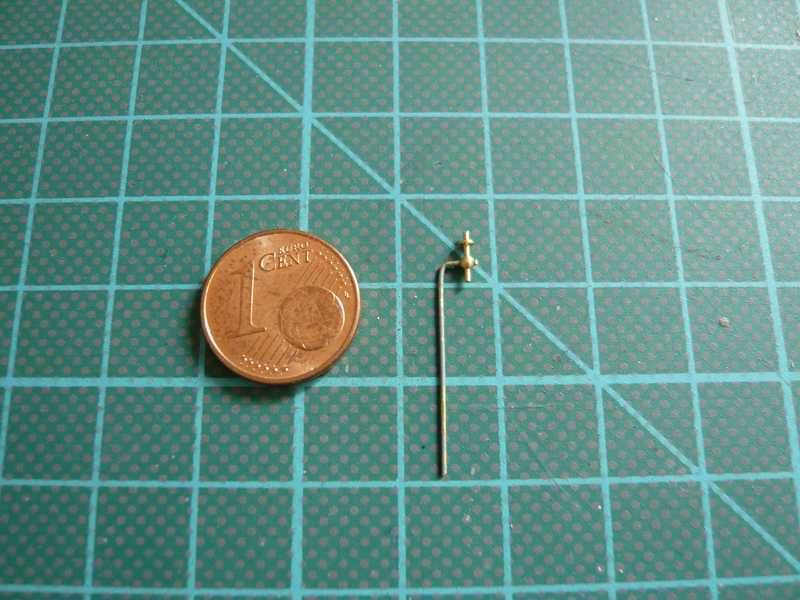 and here to the fitting on the left equipment pallet at the MLP: 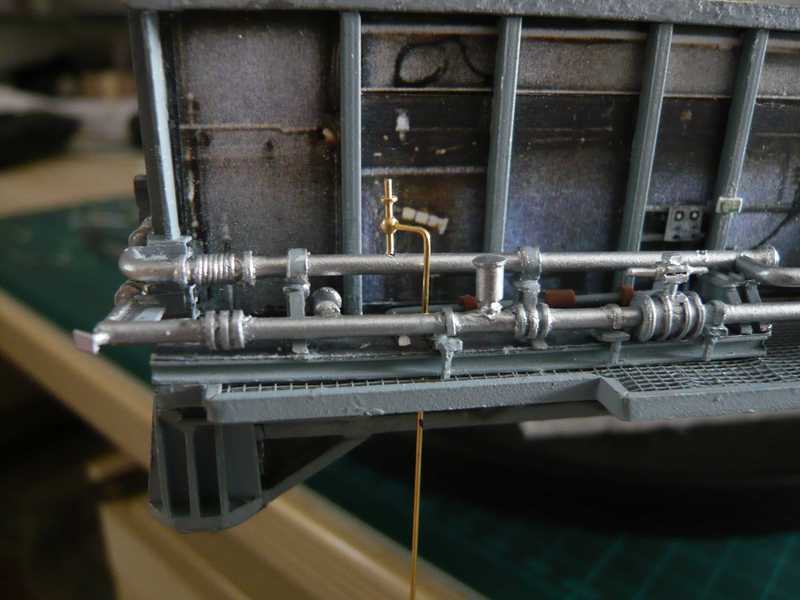 On the next image, the beginning of the valve No. 1 is right to see, 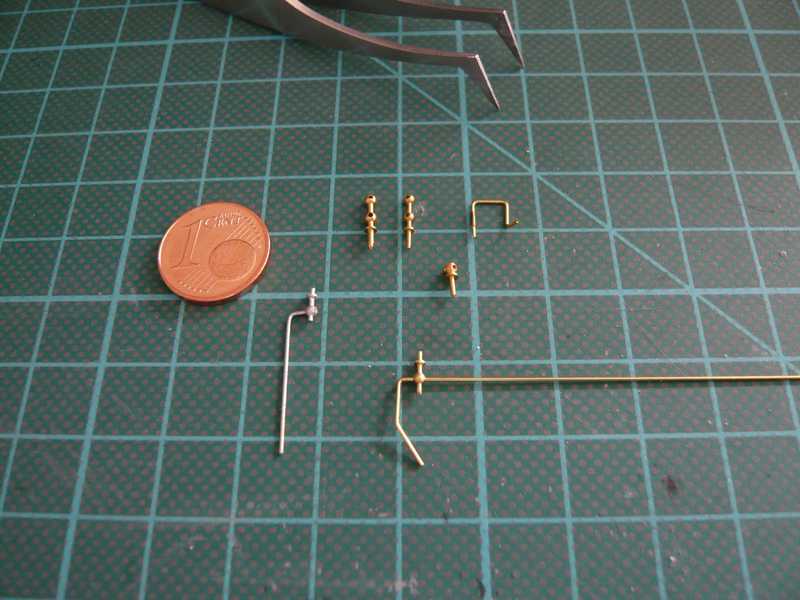 and so it went on ...  To the left that should become the control valve with the small hand wheel No. 4, and here is the result: 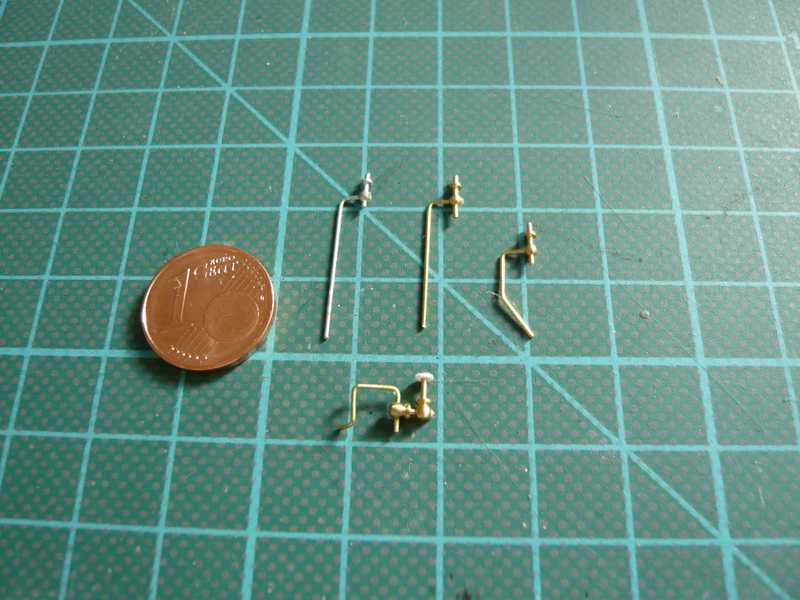 So enough for today, bye for now! 
__________________
Greetings from Germany Manfred Under construction: Launch Pad 39A with Challenger STS-6 (1:144) Last edited by spacerunner; 10-13-2016 at 10:59 AM.
|
| Google Adsense |
|
#146
09-14-2013, 08:02 AM
|
||||
|
||||
|
SPACERUNNER,
What needs to be said again? Great!
__________________
OMG, I have finally discovered what's wrong with my brain: On the left side, there is nothing right, and on the right side, there is nothing left.
|
|
#147
09-15-2013, 01:22 AM
|
||||
|
||||
|
Hi all together,
I was just again looking the last orders in the paint shop, and the guys did in fact busily, and now the next pipes and armatures are also done. 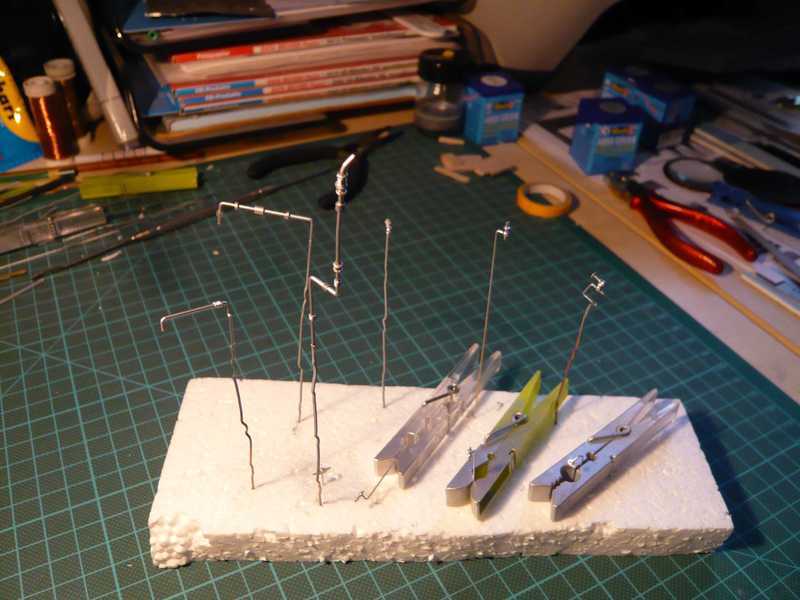 Unfortunately I must paint everything individually and outside of MLP that, and thats always something awkward and also quite stressful, but unfortunately no change can be. But now I can finally also building everything, therefore let's see action.  Since it is now but quickly cluttered with every other line on the LOX valve skid, I have here two images for a better overview, to better track the line run and assembly order, if someone wants to recreate it. I had installed the right half of the thinner pipe running above the LOX-Fill/Drain Line, coming already from the LOX tunnel. Now comes the continuation of this line, which runs via the LOX valve skid across. This is the green marked line, running at the LOX filter past, 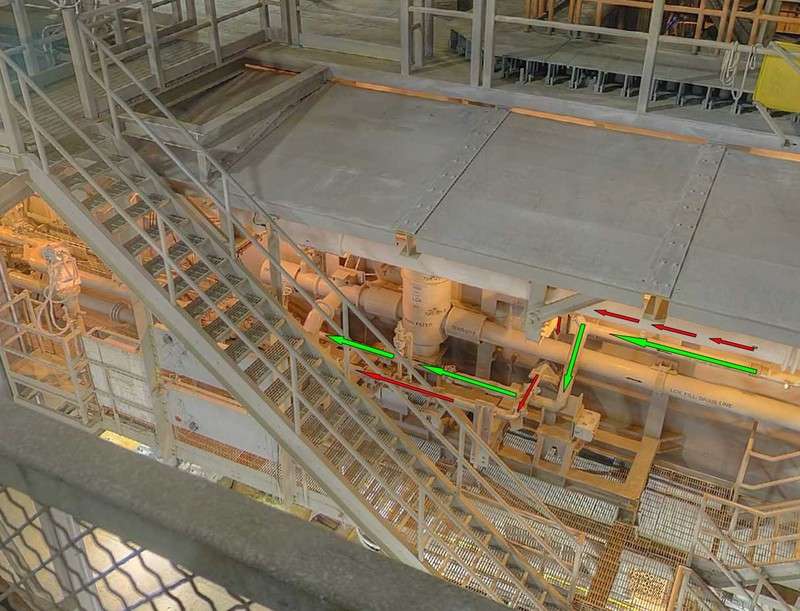 Source: NASA and finally diagonally enters in the branch of the Vent line.  Source: J. Patterson (NASASpaceFlight) The difficulty this work is on the one hand, to ensure the fit of each section or to dominate the customize. Here on the original photos all look still pretty handy, but it is in the 1:160-reality unfortunately no longer. And on the other hand the place on the skid becomes closer with every other part and work this is always trickier. And with the thinner pipes are inevitably the fittings, valves and expansion joints etc., always filigree ... In addition to this "green" thinner pipe, there is yet a further, even thinner, red marked pipe on which I ever point to, because that will be still attached. The blue arrows indicate additional fittings/valves. But first, here is a picture of the extension of the "green" pipe. 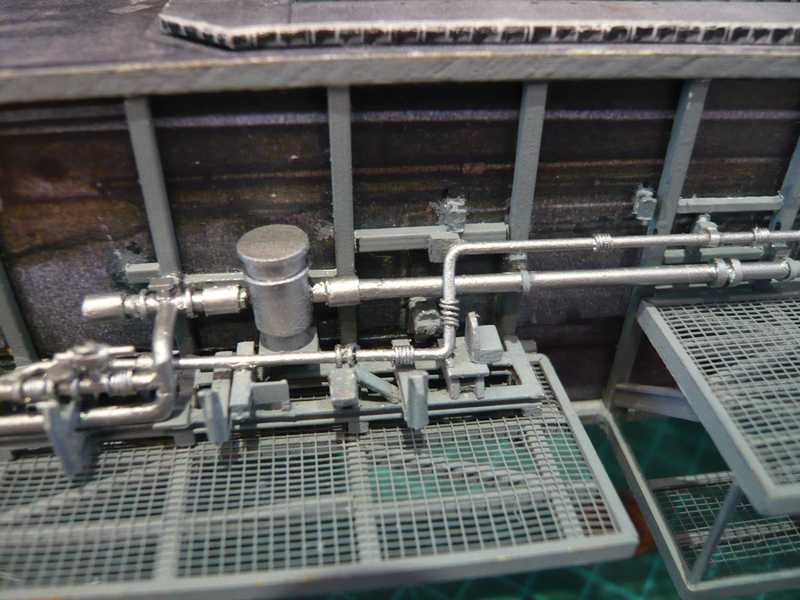 In front of the lower part of this extension, now a by-pass line was assembled, which is difficult to see in the first photo since it is unfortunately obscured by the "red" pipe. But in the HiRes resolution of the panorama pic (click) can be seen at exact look, provided, you know it. : 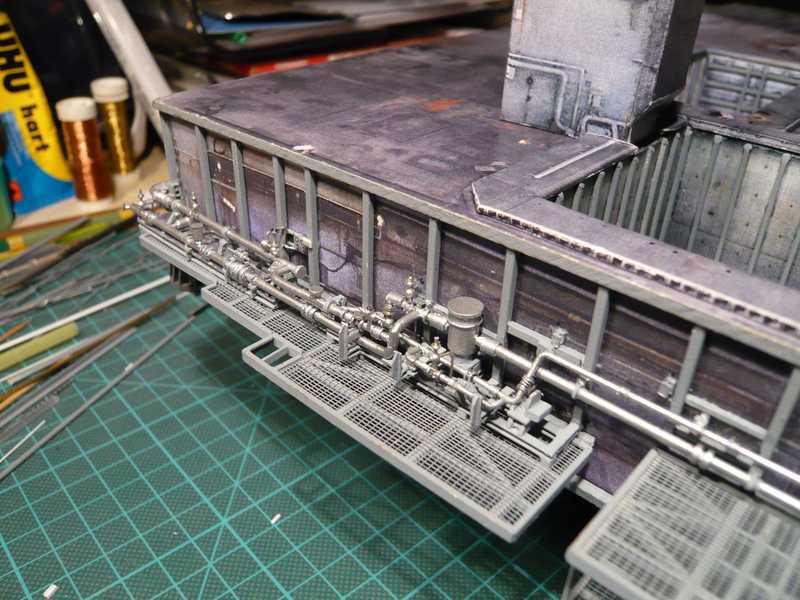  As shown on the pictures, here now even some of the small relief valves and control valves are mounted. A more by-pass line is there on the Transfer line of the left equipment pallet, which I had prepared some time ago, but for place reasons still not could install. 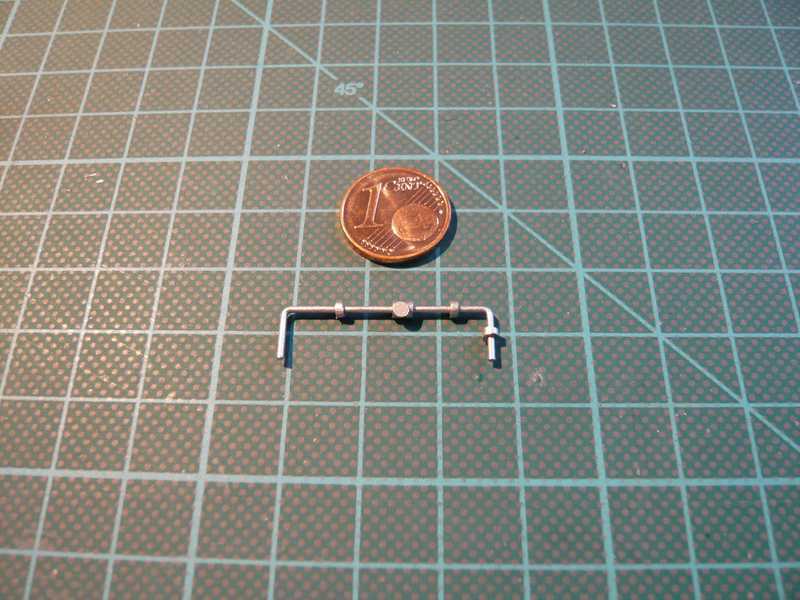 This by-pass line could now, under the vent line through, connected with the transfer line, what turned out as extremely difficult, because there almost is no more space for fiddling. 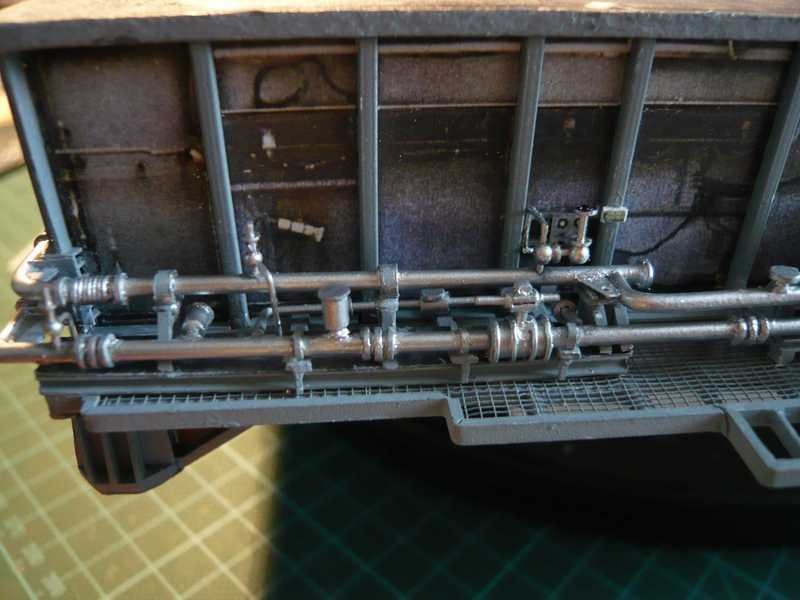 And here are some more pictures which show that the place on the LOX-valve skid is now running out. 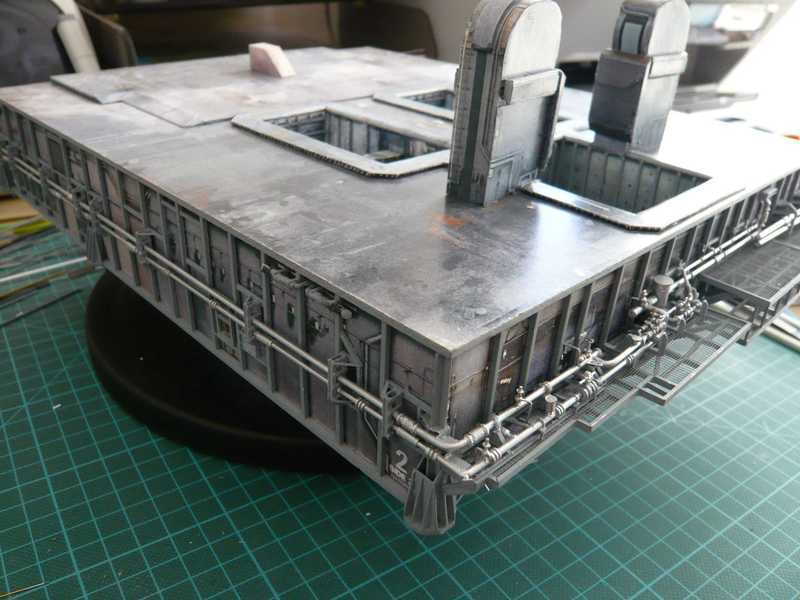 However, on the Access platform AP 3 is still plenty of place for the LH2-Valve skid. 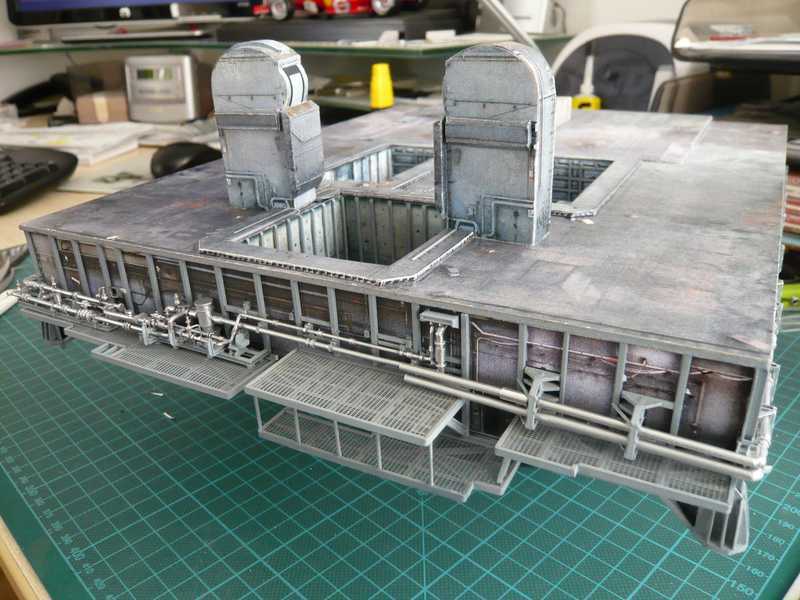 Tomorrow, then still the thin "red" line will be installed from the LOX tunnel to the LOX-valve skid, and even this line has a few valves ... and then I can complain to the LH2-valve skid. 
__________________
Greetings from Germany Manfred Under construction: Launch Pad 39A with Challenger STS-6 (1:144) Last edited by spacerunner; 10-13-2016 at 11:18 AM.
|
|
#148
09-15-2013, 10:02 AM
|
||||
|
||||
|
MANFRED,
Looking again at your build skills, I have forgotten how good this really is my friend. The build clinic continues!
__________________
OMG, I have finally discovered what's wrong with my brain: On the left side, there is nothing right, and on the right side, there is nothing left.
|
|
#149
09-16-2013, 03:43 AM
|
||||
|
||||
|
Thanks Rich for your nice comments.
 Here is the next update: Finally, now is the thinnest and thus last of three pipes (0.5 mm brass-wire) on the line, and this pipe is not silver shiny, but grey. Since the pipe next to the LOX-Filter runs under the thick LOX-fill/drain line through, I had to subdivide it again into two parts. 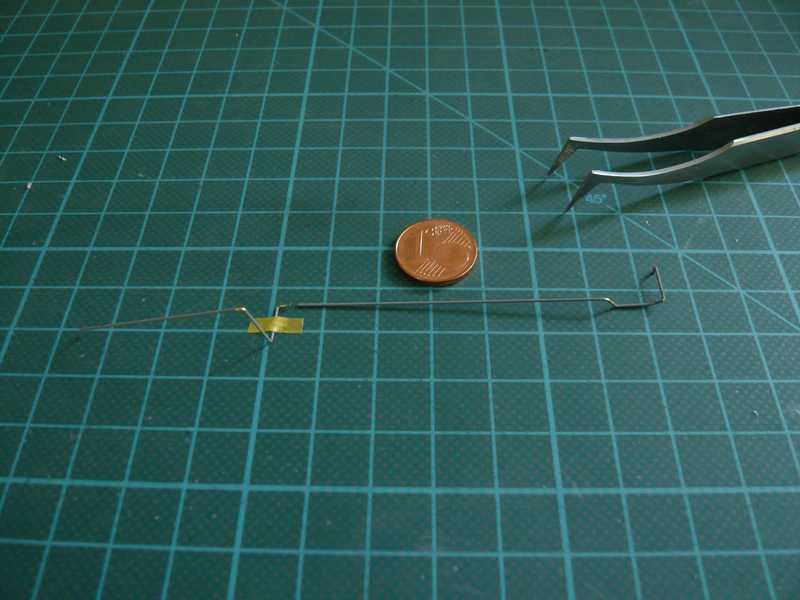 Here I tried the tiny temperature and pressure sensors that are made of 0.3 mm steel wire, in a 0.7 mm brass tube. 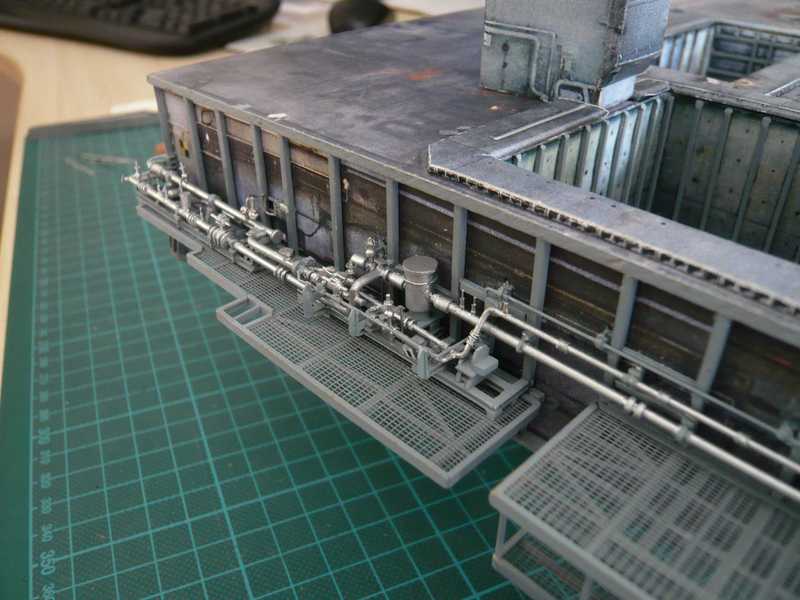 Then the two parts of the line were installed one at a time, their junction is on the first pipe guide before the elbow pipe down. 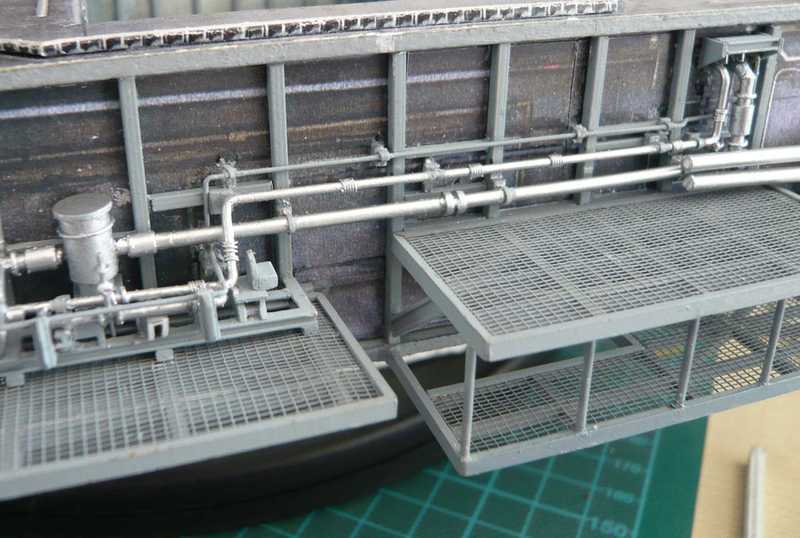 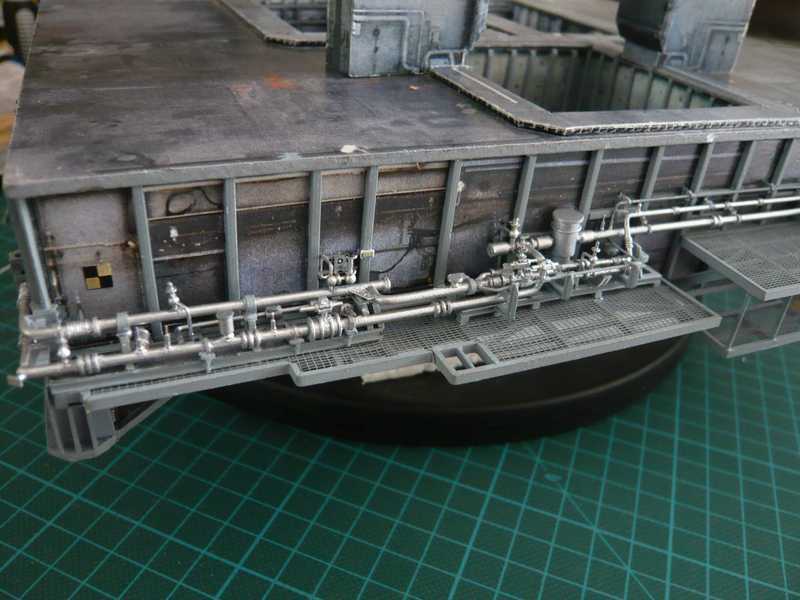 And also this line has two valves, located here in the front between the two pipe supports. 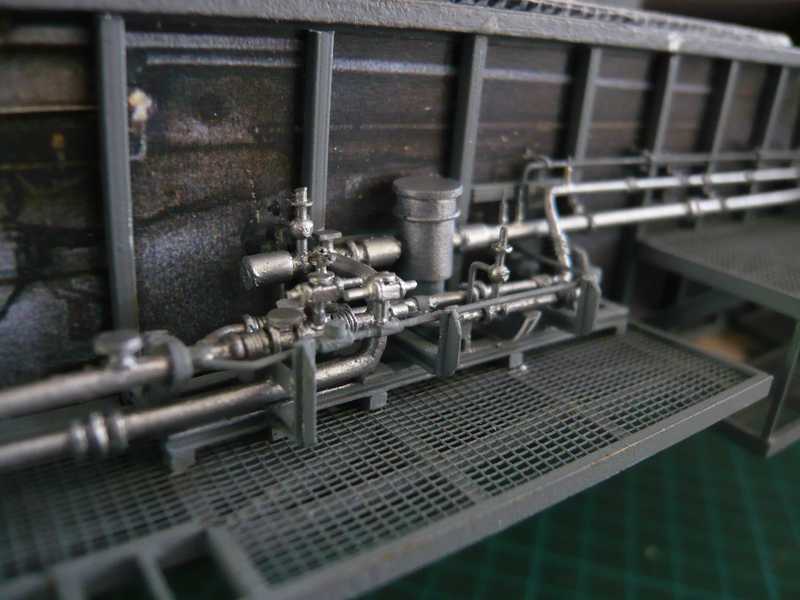 On the next two pics, the sensors are quite clearly visible right next to the LOX-Filter. 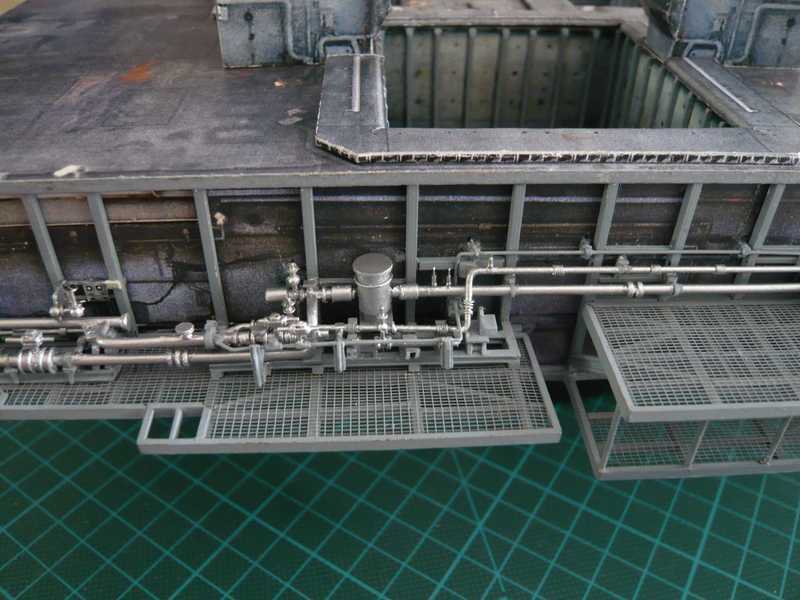 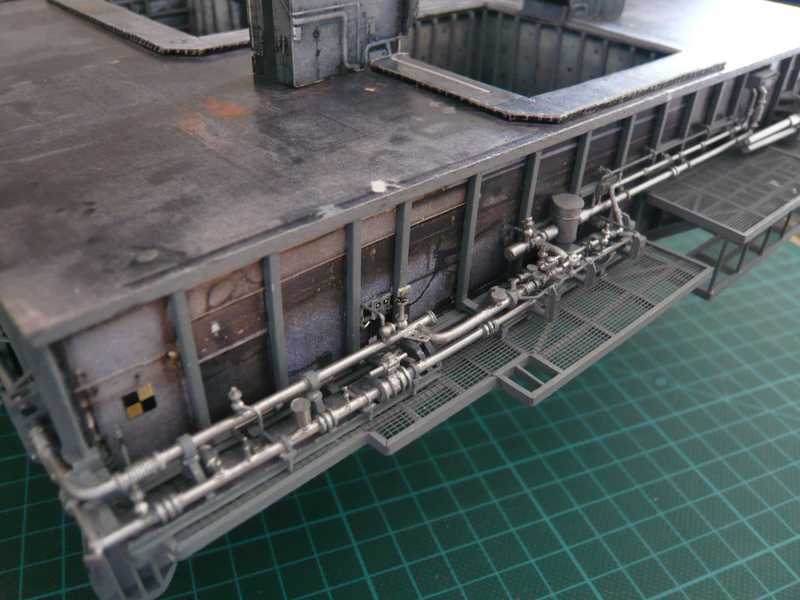 Thank God, thus the LOX-Valve skid is finally complete now, and therefore I will approve today evening once a beer (or two ...) me.  And next time I'll go to the LH2-Valve skid on the right Access platform, what will become at least as equally stressful or a little bit more ...
__________________
Greetings from Germany Manfred Under construction: Launch Pad 39A with Challenger STS-6 (1:144) Last edited by spacerunner; 10-13-2016 at 11:26 AM.
|
|
#150
09-16-2013, 05:12 AM
|
|||
|
|||
|
This is one of the most informative threads I have ever seen; I'll save it to my HDD when the build is complete so that it doesn't get lost.
|
| Google Adsense |
 |
|
|


 Linear Mode

