


|
|
|
#2601
 03-15-2022, 12:18 PM
|
|||
|
|||
|
Perfect!


|
|
#2602
03-16-2022, 06:38 PM
|
||||
|
||||
 Marcell. Marcell.  Many a little makes a mickle.  
__________________
Greetings from Germany Manfred Under construction: Launch Pad 39A with Challenger STS-6 (1:144)
|
|
#2603
03-18-2022, 10:49 AM
|
||||
|
||||
|
Hello everybody,
after the Fire extinguishers are attached now, I actually wanted to scratch the two Rear-view mirrors as final details. But prior I've planned to do one more detail that I actually wanted to do without, but which hasn't gotten out of my head since then ...  And that concerns to the two side walls of the transporter, which are huge steel profiles and resemble double T-beams in shape, as one can see on many images, as well as here on these STS-6 photos.   Source: retrospaceimages.com (STS-6) 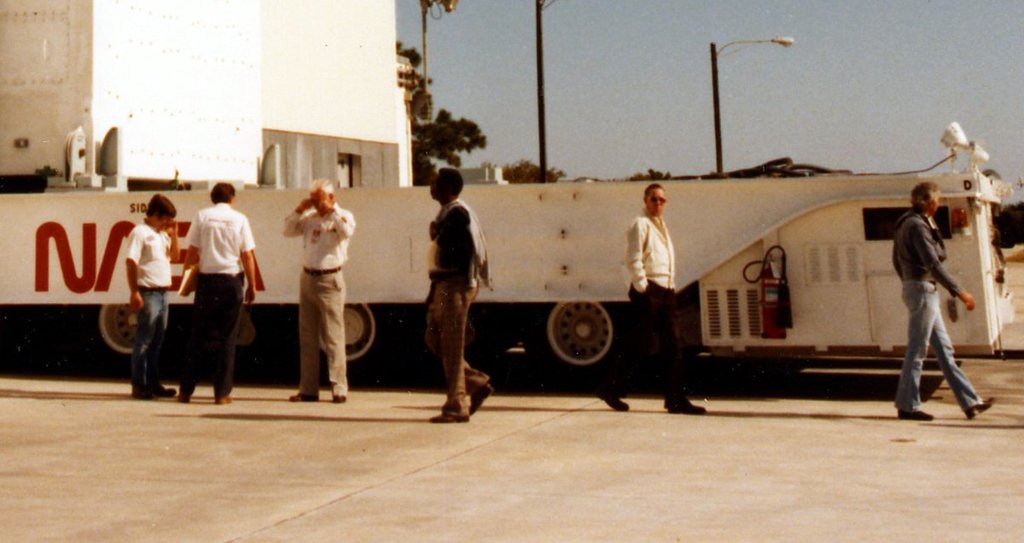 Source: retrospaceimages.com (STS-6) But this thing just hasn't let rest me the more details of the transporter I've scratched.  However, I was undecided for a long time, because with this action I would risk disimproving the actually well-made transporter in the end. However, I was undecided for a long time, because with this action I would risk disimproving the actually well-made transporter in the end.  But then, in the end, my ambition and penchant for perfection won out, which is why I decided to do this in front of the rear-view mirrors, which would otherwise have gotten in the way. Since I had wisely already indicated the upper webs by the slight overhang of the ceiling panel, I've thought about using Evergreen Strips (0,25 mm x 2,5 mm) for the lower webs could,  which after precise gluing approx. 0,5 mm should protrude outwards. which after precise gluing approx. 0,5 mm should protrude outwards.  However, the strips onto the lower edges of the side walls would have to be glued carefully and with the greatest care, since they are only 2 mm wide and directly border on the outer twin wheel sets. However, I first had to order the strips online and also think about which glue I could use to glue them to the Balsa wood. After the profiles arrived yesterday, I first tried a few gluings on the first two KAMAG side walls. I've used a somewhat older UHU all-purpose adhesive, a Pattex instant adhesive, and a newly purchased UHU all-purpose adhesive Super, also a CA that is supposed to be correctable for a short time, which I finally decided to use. 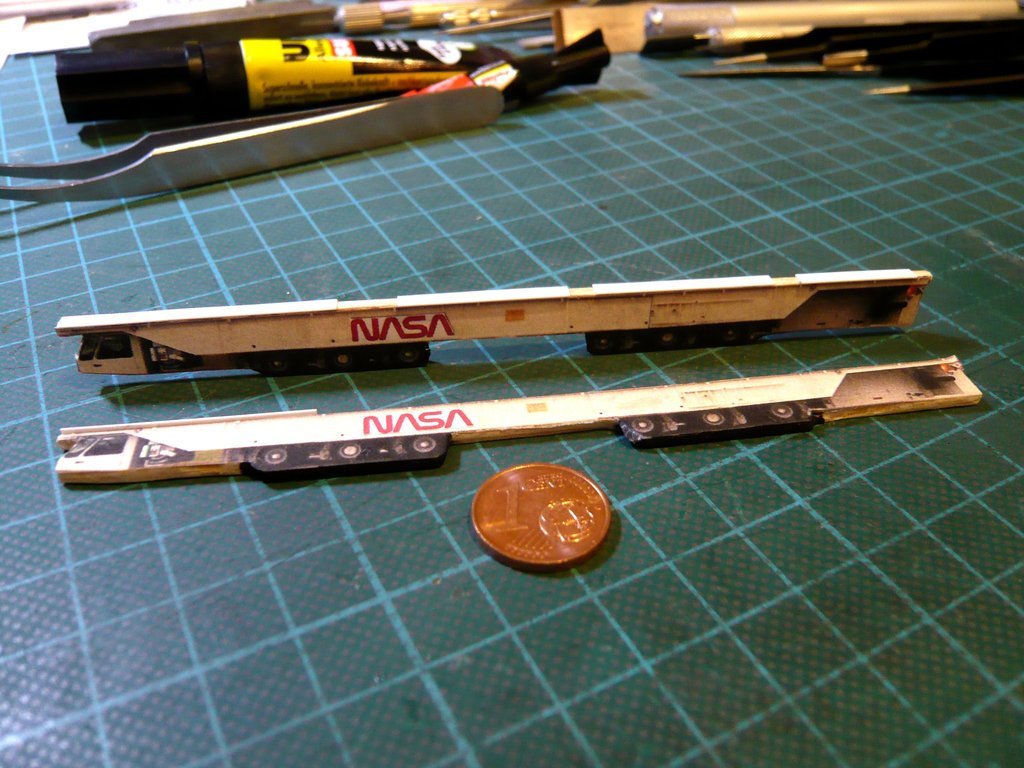 The angled areas of the walls on the front and back of the transporter were problematic because of the small Panel boxes and Fire extinguishers already glued there, at which I had to go past, so I glued those parts separately, which was quite a stressful affair. In order to adapt and glue the strips, the transporter had to be firmly fixed again by using magnets. Then the long central strip was carefully dabbed with Seku and immediately placed onto the lower edge up to the rear stop, slightly corrected and then pressed on, 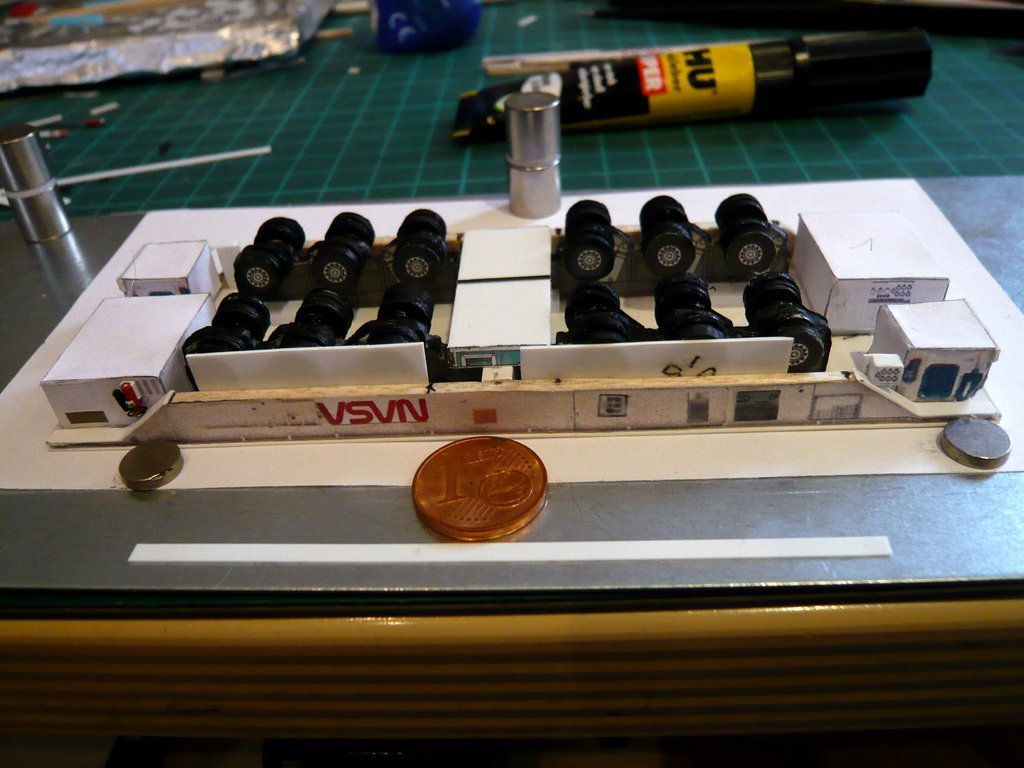 which worked quite well, as you can see here, after which a load has fallen from my heart.  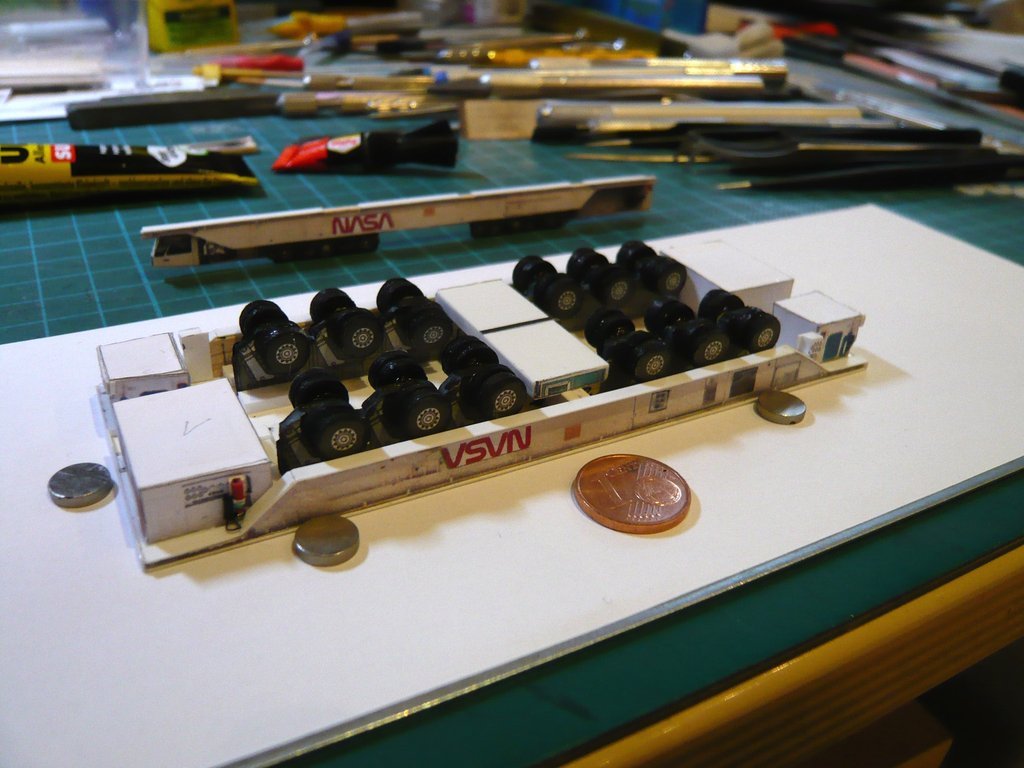 And so the whole thing looks much better, which I'm finally satisfied with, 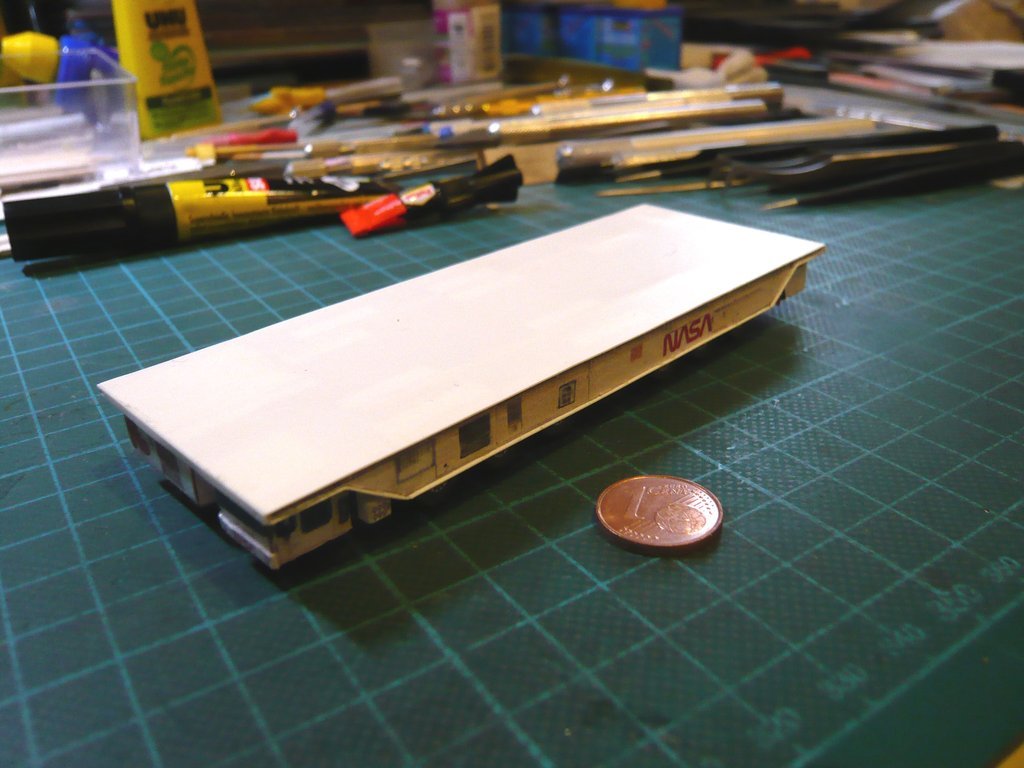 so that the other underside could then be planked in the same way. 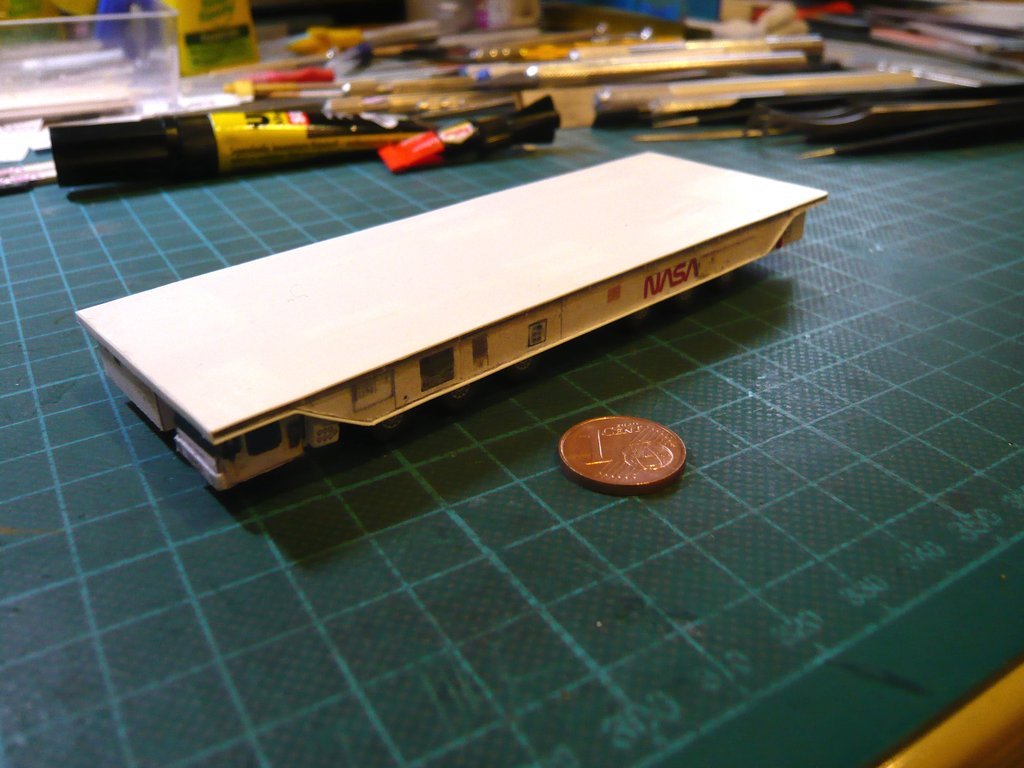 And what made me wonder about the photos from the beginning, the transporter is actually very flat and only about a man's height, as one can see here.   And as the grand finale, I can now try to scratch and mount the two Rear-view mirrors and I'm curious to see if I'll be able to do that.
__________________
Greetings from Germany Manfred Under construction: Launch Pad 39A with Challenger STS-6 (1:144)
|
|
#2604
03-22-2022, 11:29 AM
|
||||
|
||||
|
Hello everybody,
and so now to the last step and the two Rear-view mirrors of the transporter, which I wanted to try scratching at least once.  How they were attached to the transporter, I could see from the few usable photos from that time, albeit a bit blurred. 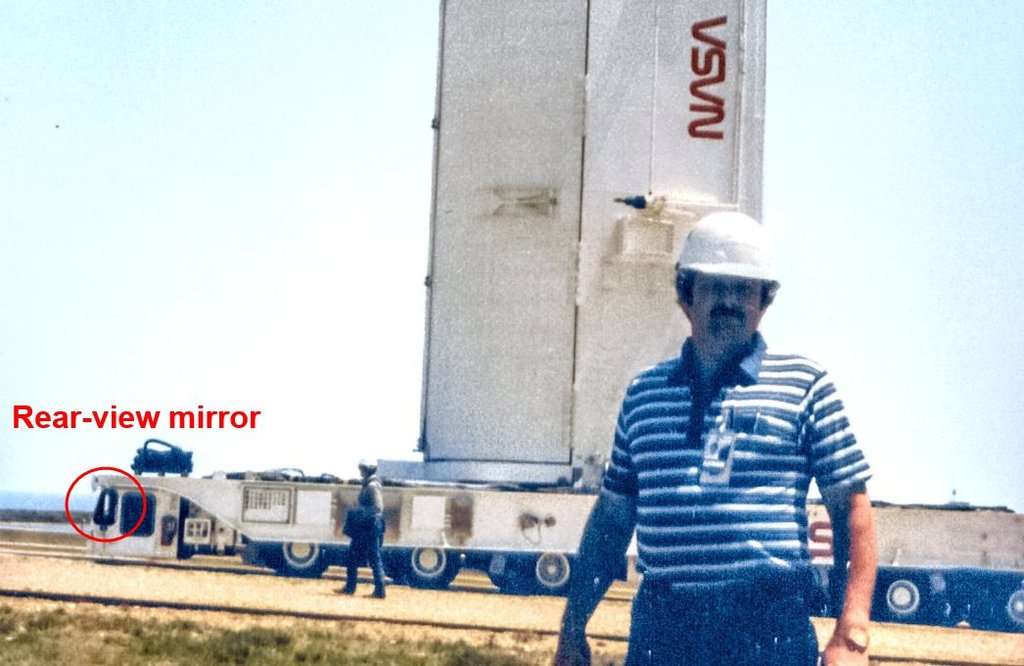 Source: 16streets.com/MacLaren More important for scratching was of course the shape of the mirror and the holder, which I've learned by watching from this photo, what will not have looked much different at the time.  Source: NASA (STS-135) And off we go, whereby the mirror itself still looks relatively simple at first, on the other hand the filigree holder (Ø 0,1 mm) has instilled quite a bit of respect in me.  That's why I've begun that the first thing I did and picked out my thinnest German silver wire (Ø 0,1 mm). Since the two holders should be the same size if possible, you cannot bend such filigree mini parts with tweezers simply by hand. Therefore, a suitable jig was needed again, like this stop from the Mitre Cutter, in order to be able to bend at least the first scaled length of 1,9 mm reproducibly. And experience has shown that one should definitely use a longer length of wire than needed and then cut off the rest, what makes handling much easier. 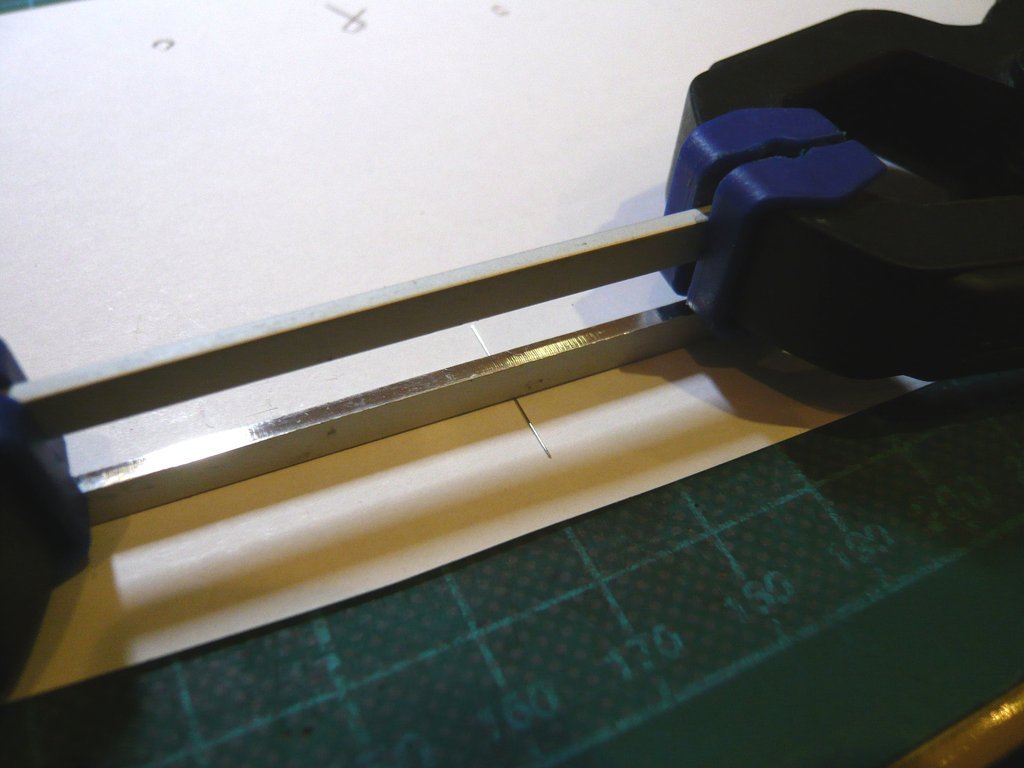 The further bends were then much more trickier due to the short lengths, because one still have to hold these tiny things somehow while bending, so that they don't fly away, which, however, could not be completely avoided, followed by creeping and looking for on the floor ...   After a few tries I managed to get a passable pair. Next to it is the rectangular profile (0,25 mm x 0,7 mm) for the supports rods, which should be approx. 5 mm long.  As a mirror I wanted to use the parts from the Astrovan Kit first,  to glue Bare-Metal-Foil (Chrome) on their front as a mirror surface, which was a delicate matter. because you have to carefully pull off an excess length and only then cut it to 4 mm and then glue it on. 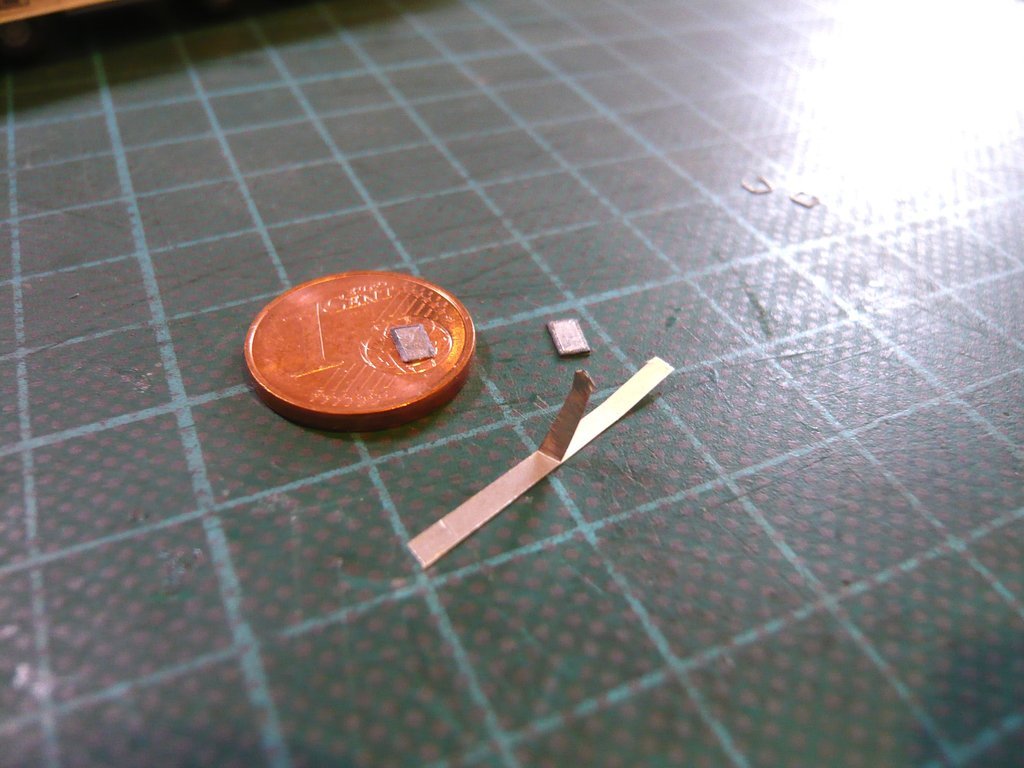 Since the holders cannot be glued directly to the backs, a tiny recording had to be scratched first, by means of which the mirrors, although not for my model,  but in reality let swing in. And these minis I've punched with Ø 0,6 mm from styrene (0,25 mm) by using the Punch&Die Set. but in reality let swing in. And these minis I've punched with Ø 0,6 mm from styrene (0,25 mm) by using the Punch&Die Set.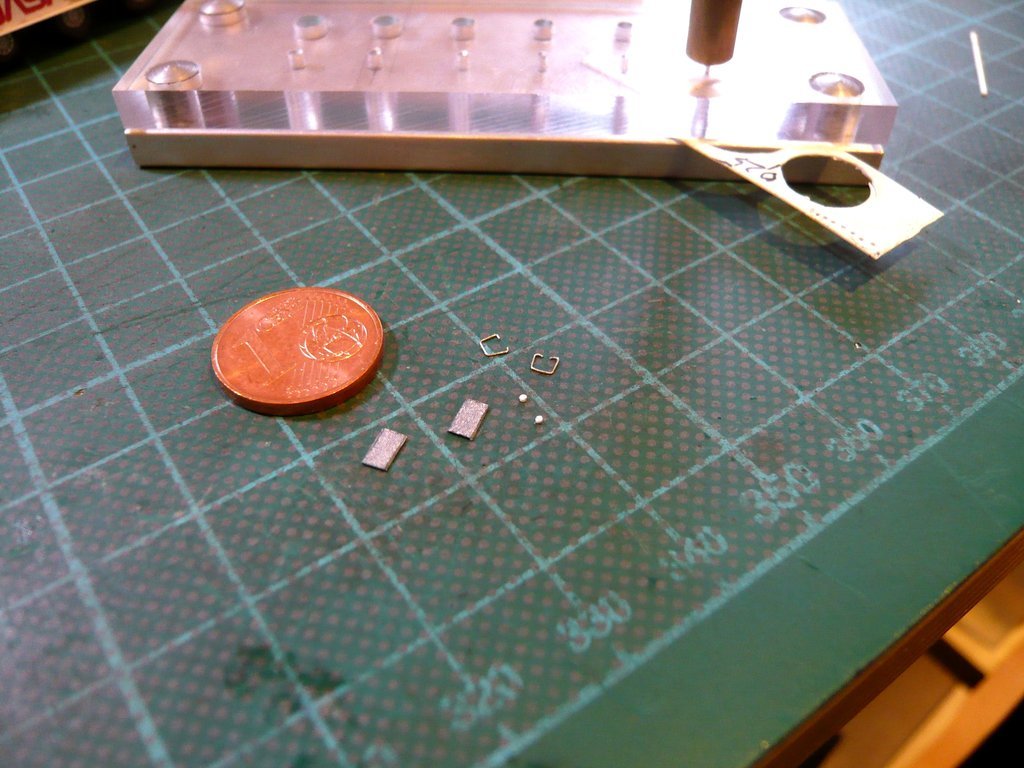
__________________
Greetings from Germany Manfred Under construction: Launch Pad 39A with Challenger STS-6 (1:144)
|
|
#2605
03-22-2022, 11:33 AM
|
||||
|
||||
|
Of course, to glue these mini discs in the middle on the back, the mirrors had to be fixed again, then a dot UHU-CA was dabbed into the middle with the acupuncture needle and then to carefully pick up the midget with the cutter tip and put it down with a steady hand.
  And then the holders were glued on in the same way. So far so good. 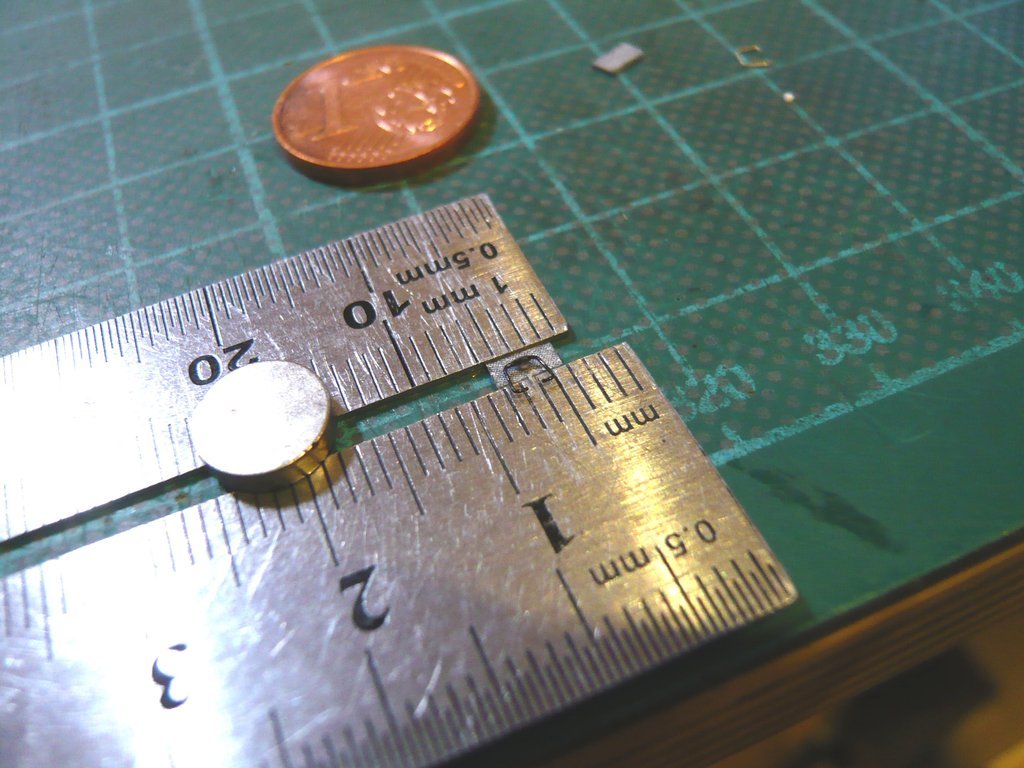 Now the mirrors only had to be glued onto the 5 mm long support rods, 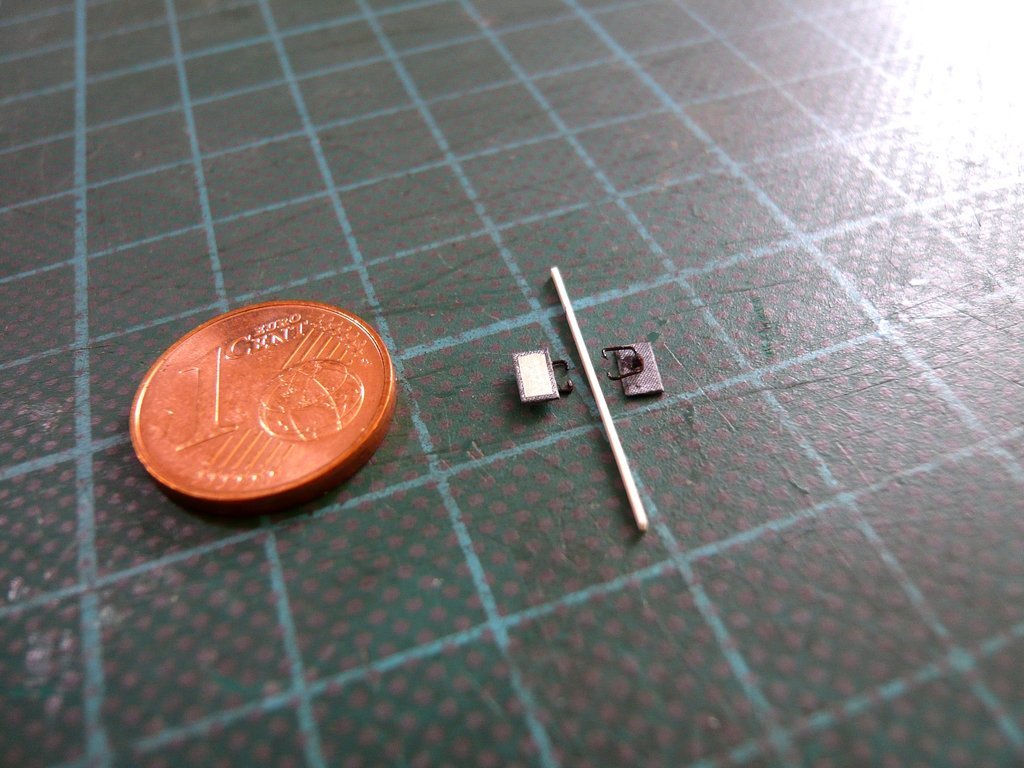 which had to be fixed again so that nothing could slip when the mirrors were glued on. 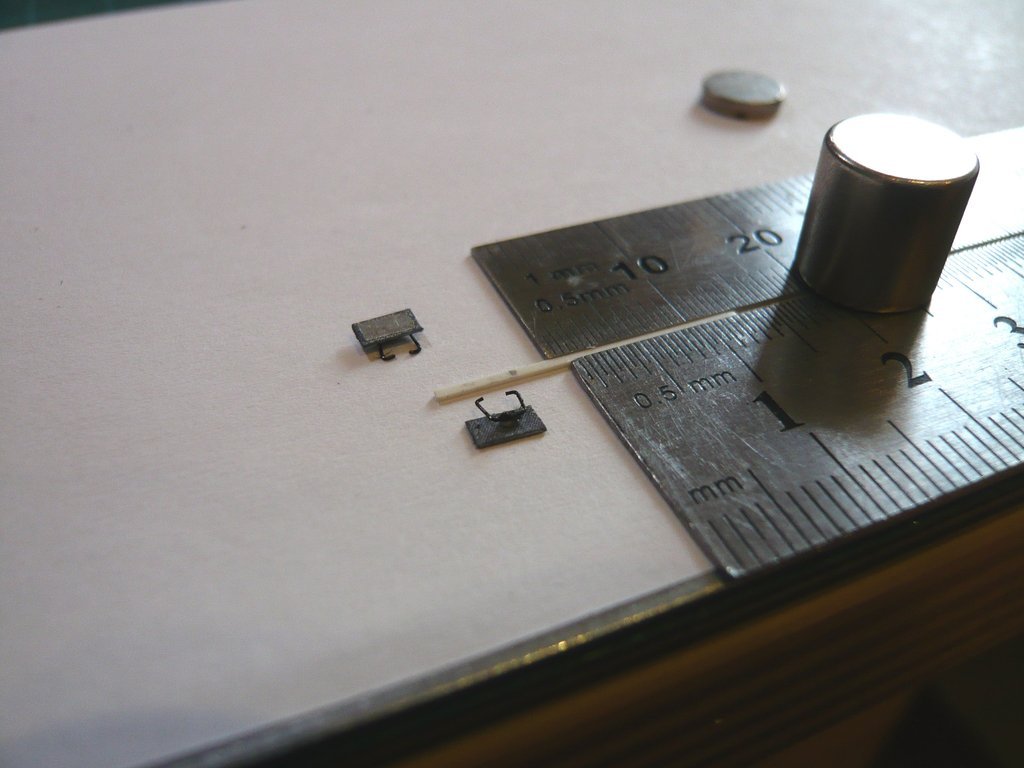 Then the base points for the gluing were marked, CA dots were dabbed onto them again, after which the mirror was set down with the tweezers and a steady hand while holding the breath - between two heartbeats ...  And as one can see, the first mirror stands bolt upright!  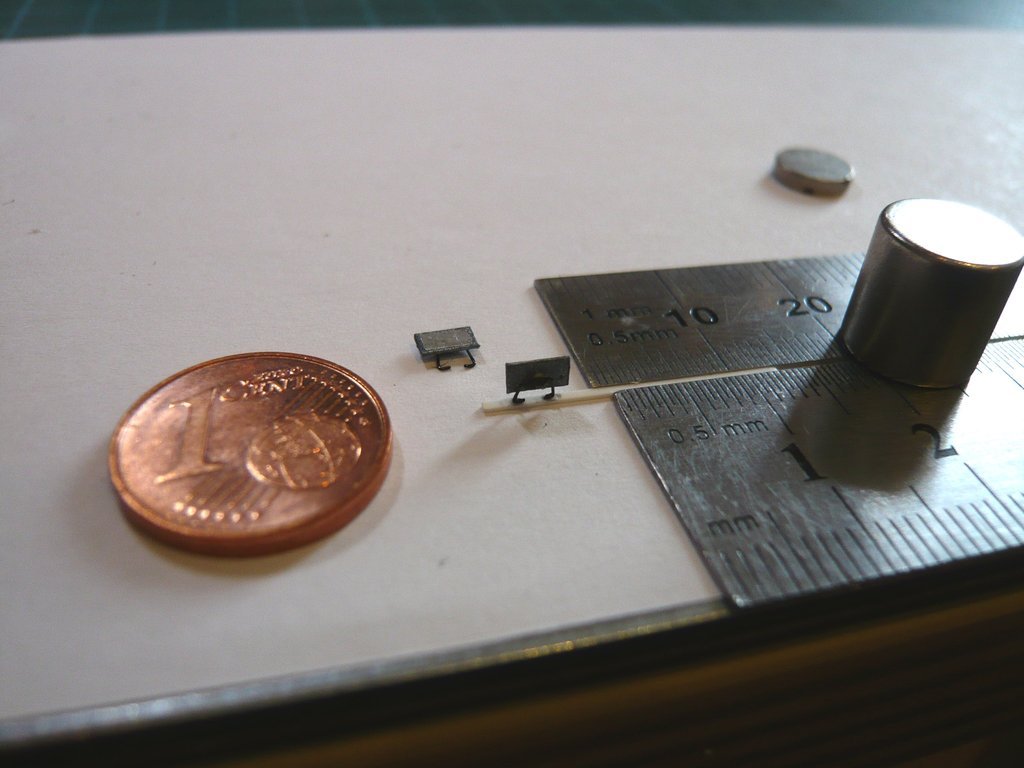 Now the support rod only had to be cut to the final length, of course again with the a stable fixation. 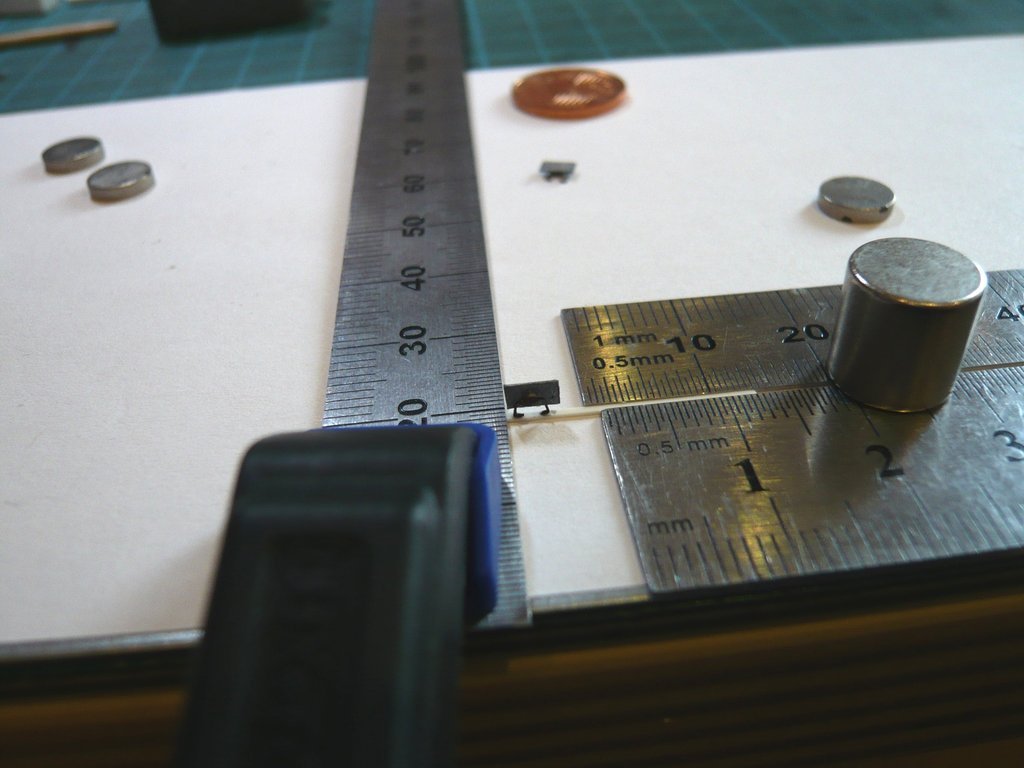 And now there's the thing! 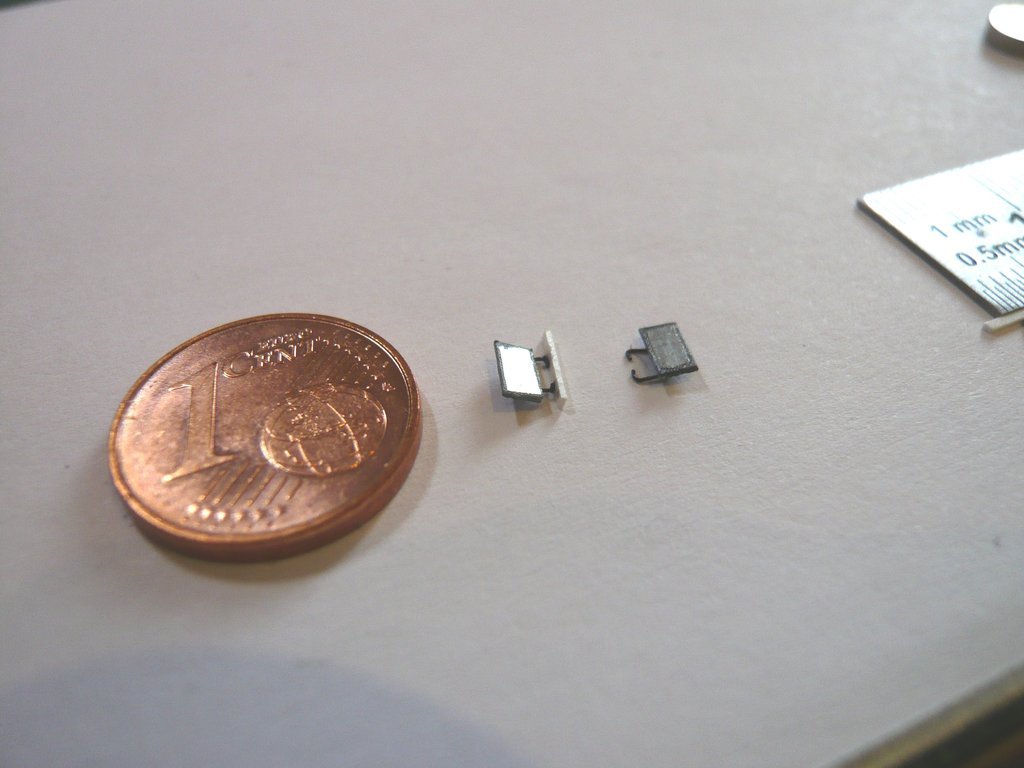 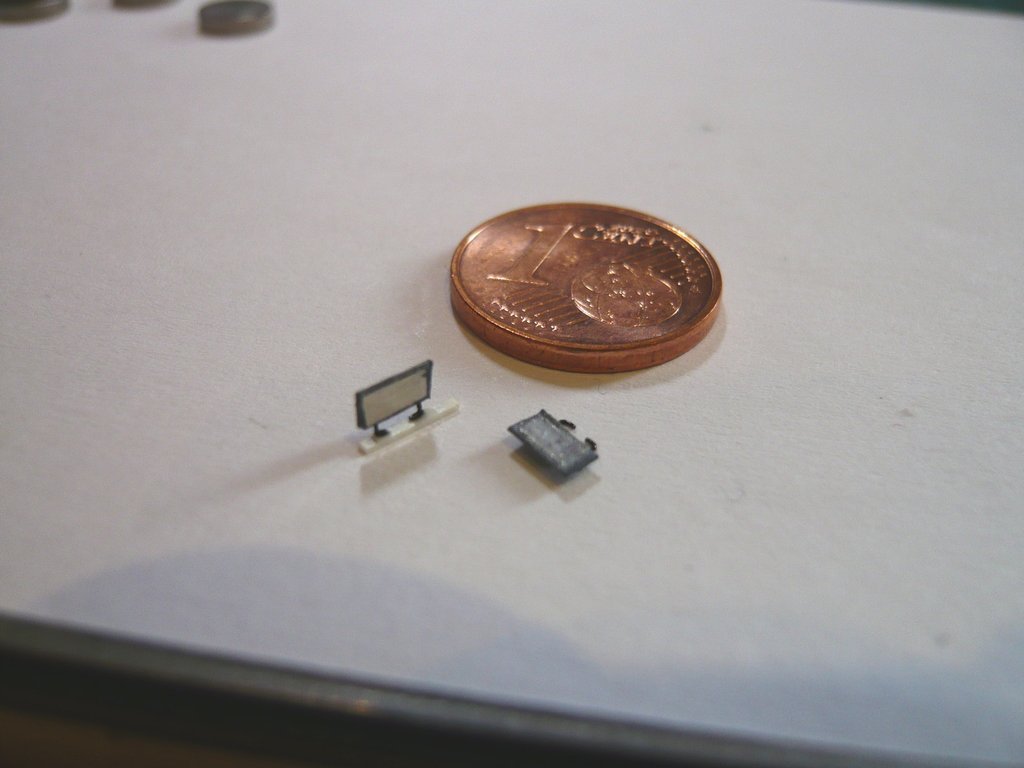 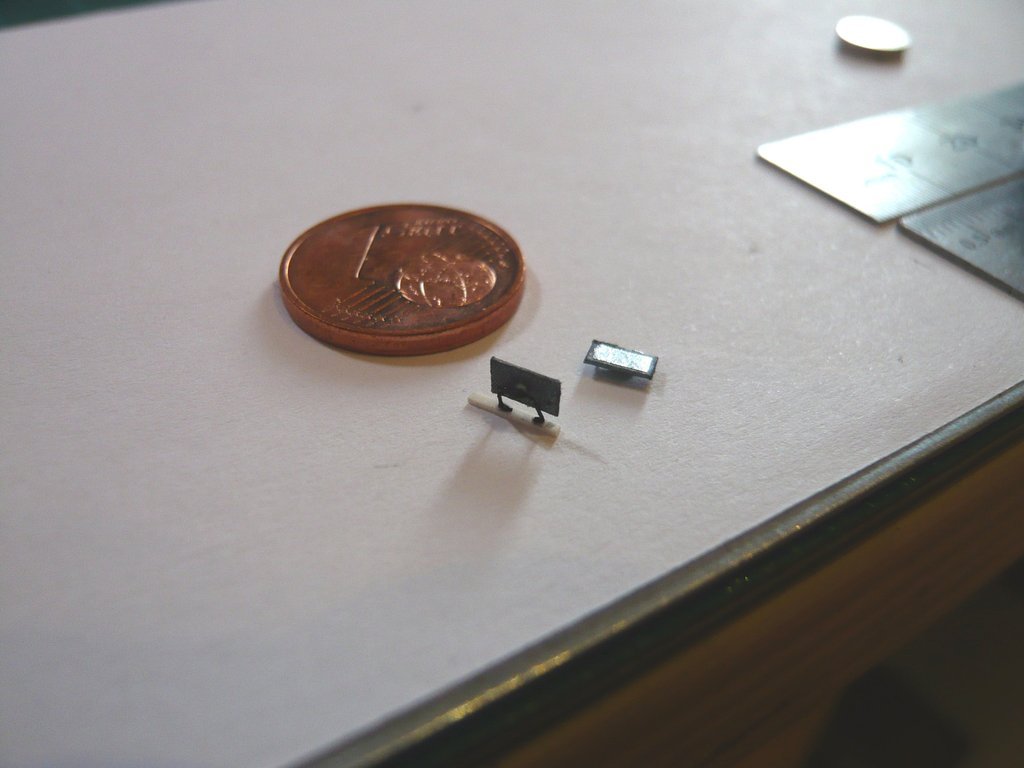 Then the adhesive point was marked under the side wall next to the driver's cabin and the support rod with the mirror was glued, which is half the battle.  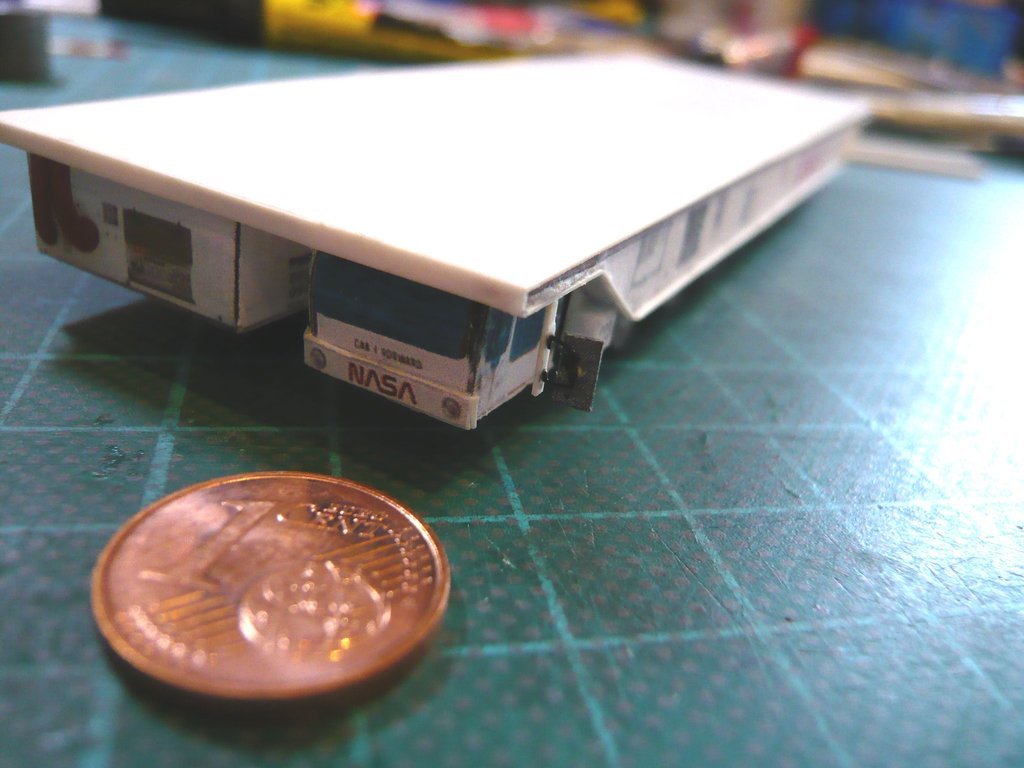 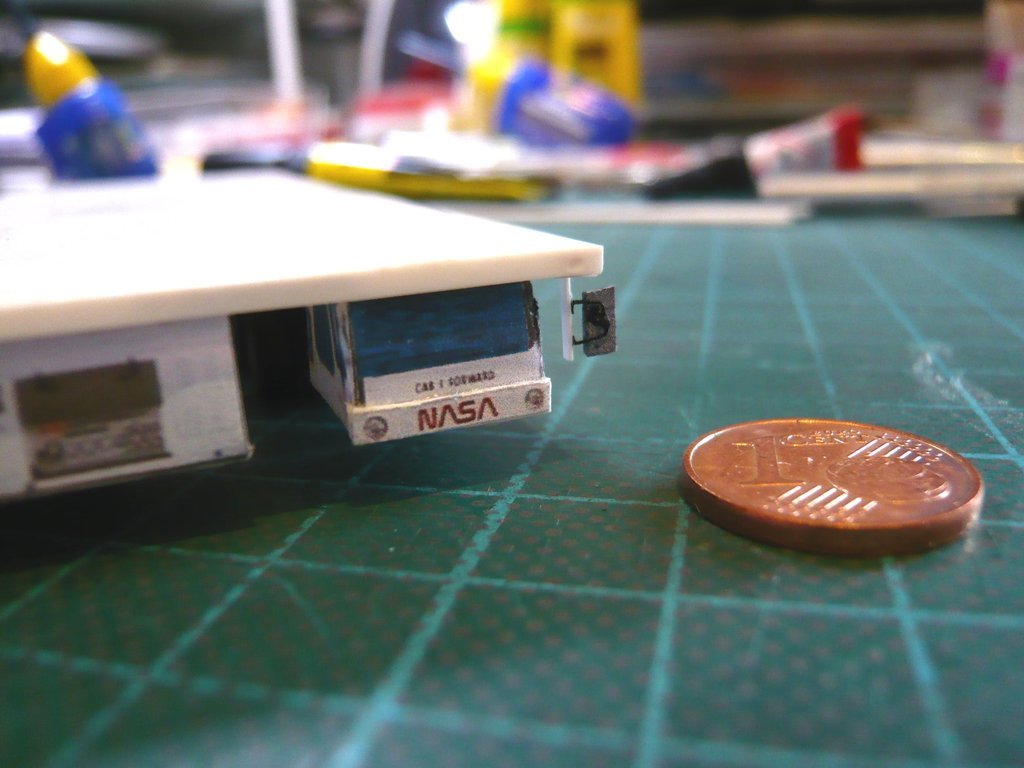 That's the end of the first action, the other half will follow later.
__________________
Greetings from Germany Manfred Under construction: Launch Pad 39A with Challenger STS-6 (1:144)
|
|
#2606
03-22-2022, 05:34 PM
|
||||
|
||||
|
Hello everybody,
and after the images of the Rear-view mirror on the Front side here now for mounting the mirror on the Rear side of the transporter, here the mirror and the prepared support rod. 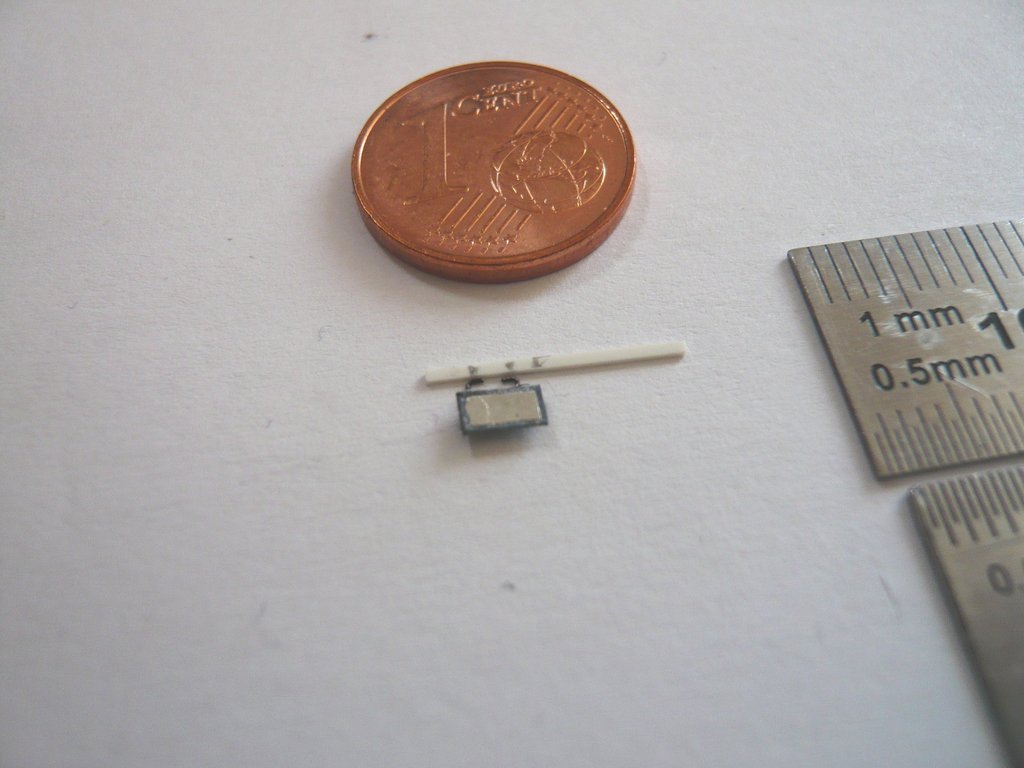 To glue on the mirror, it must be placed ready to hand for the tweezers, 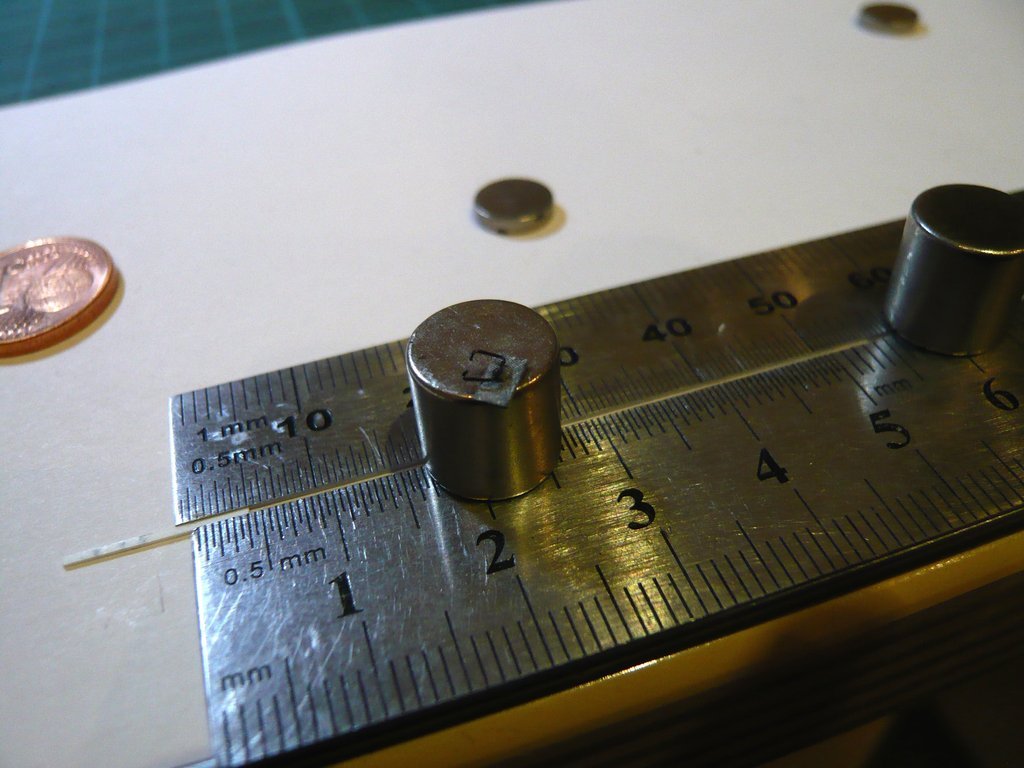 so that one can sit it onto the support rod immediately after dabbing the CA. 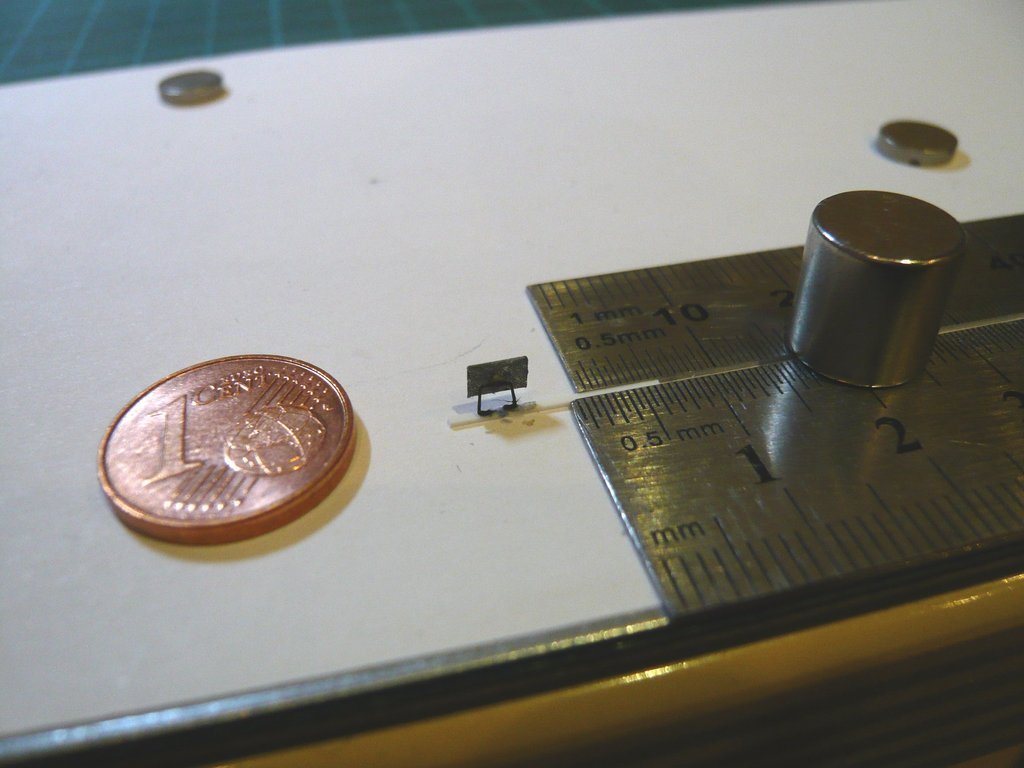 With it the driver's cab at the rear side now also has its rear-view mirror, and the transporter can be maneuvered safely in both directions. 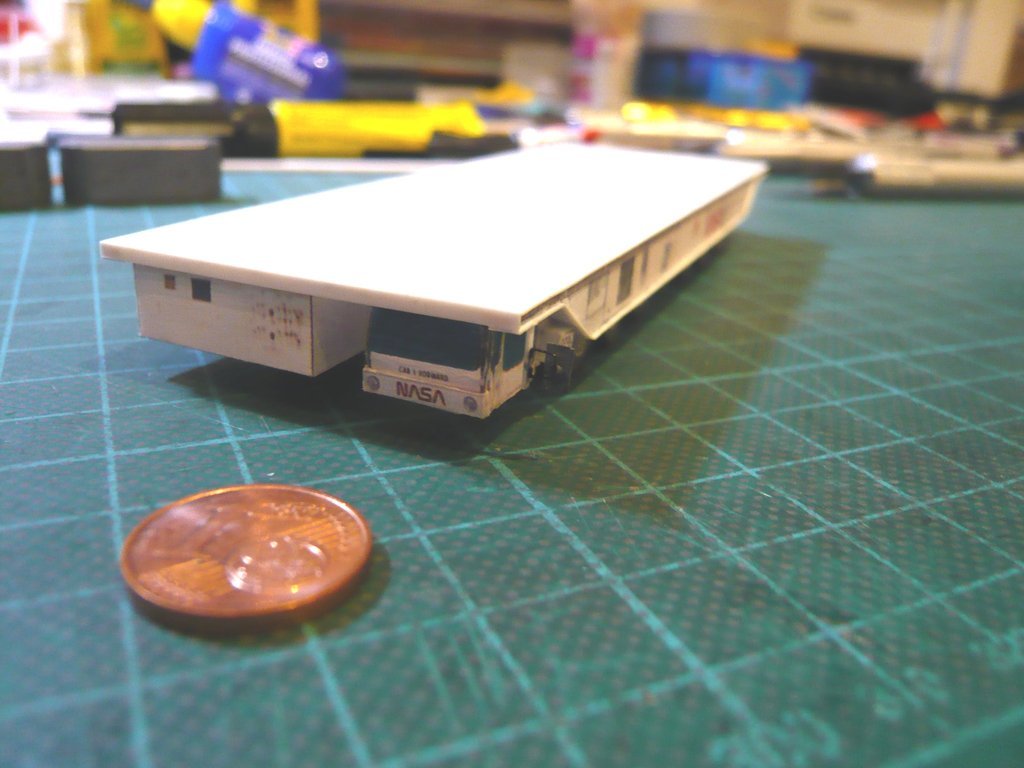 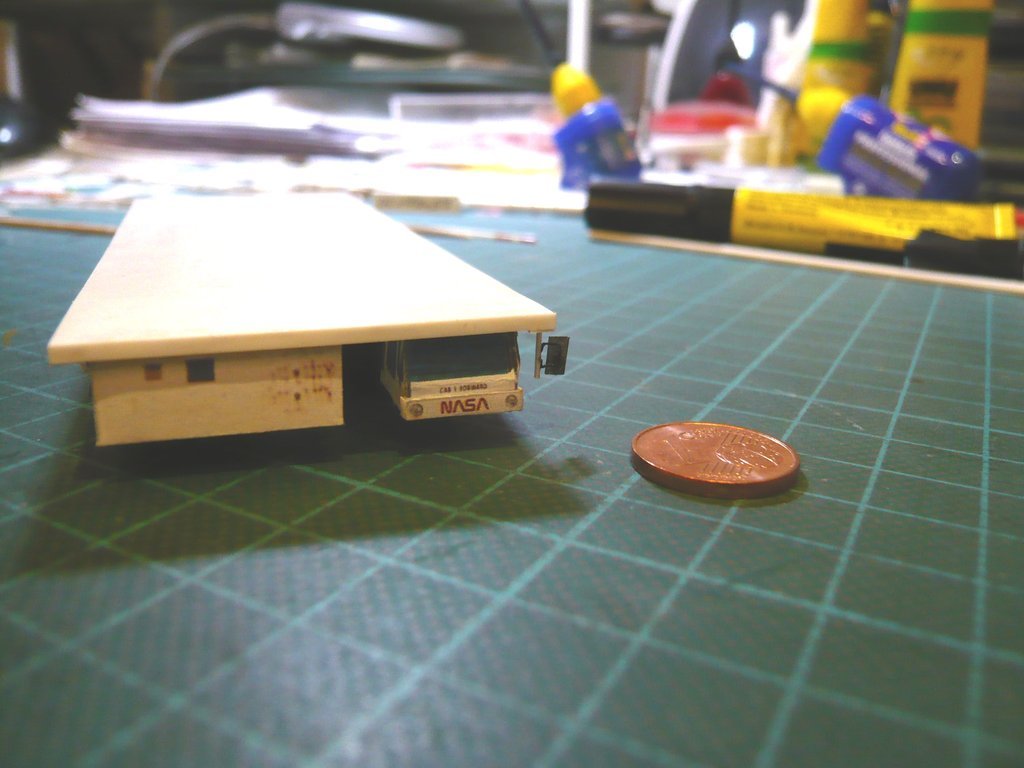 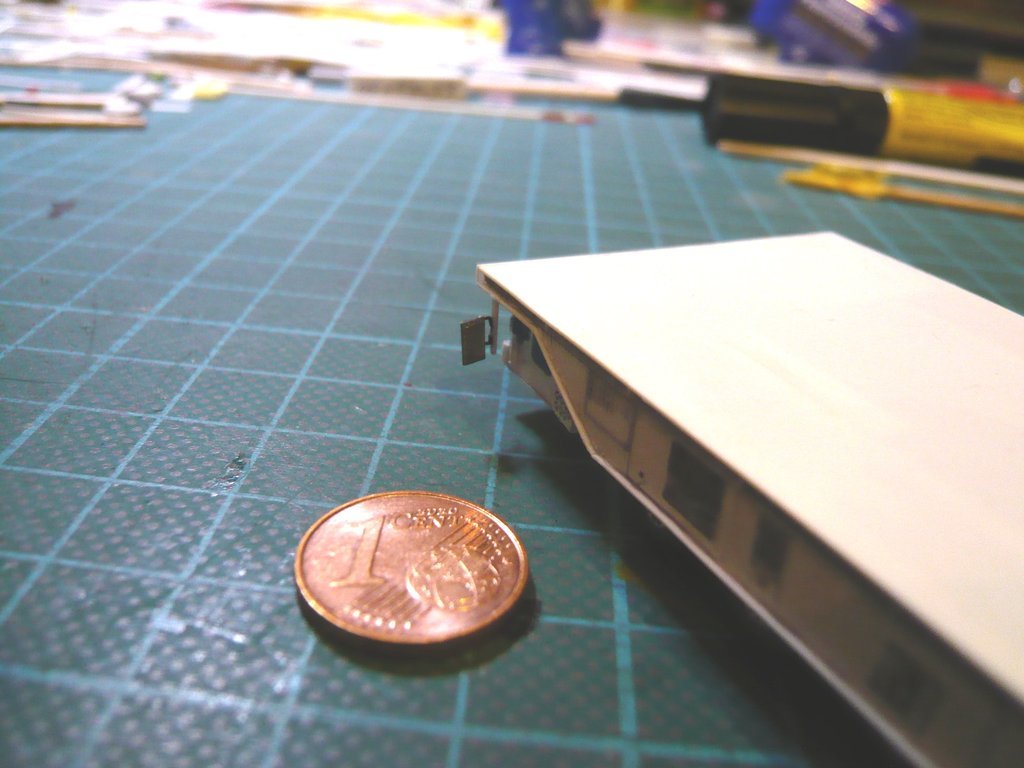 From now on at the latest as the top priority applies: Handle with care! And with that, have a nice evening everyone.
__________________
Greetings from Germany Manfred Under construction: Launch Pad 39A with Challenger STS-6 (1:144) Last edited by spacerunner; 03-22-2022 at 06:58 PM.
|
|
#2607
03-23-2022, 01:37 PM
|
|||
|
|||
|
Extraordinarily cool!
It has side mirrors, bumpers, wheels, and a loading area that would make any moving company envious. With one of those transporters you would never have to pack up things - just take your entire house with you!
|
|
#2608
03-23-2022, 06:10 PM
|
||||
|
||||
|
Marcell for your nice compliment. However, when planning the route, you should make sure that there are no bridges on the route. Then you could also take your houseboat with you ...  Source: kamag.com Joking aside! But since we were just talking about safety in the Launch pad traffic, without large Rear-view mirrors it just doesn't work. But of course one thing is still missing, well, who has an idea? Okay, guys, I don't want to keep you in suspense for long. Since the transporter sometimes transports millions expensive Satellites in the Payload canister, an appropriate safety distance and free travel must of course be guaranteed. And this is usually warned by corresponding Rotating beacons on the transporter, which should not be missing at my transporter too, but which should then be the irrevocable final detail.  And in these STS-6 images one can see the beacon on the back side. 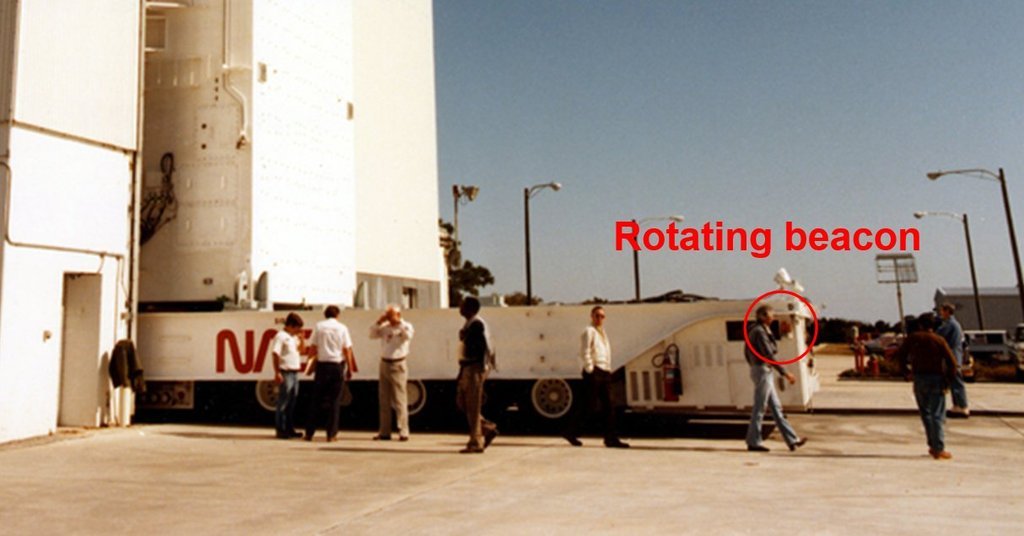 Source: retrospaceimages.com (STS-6) 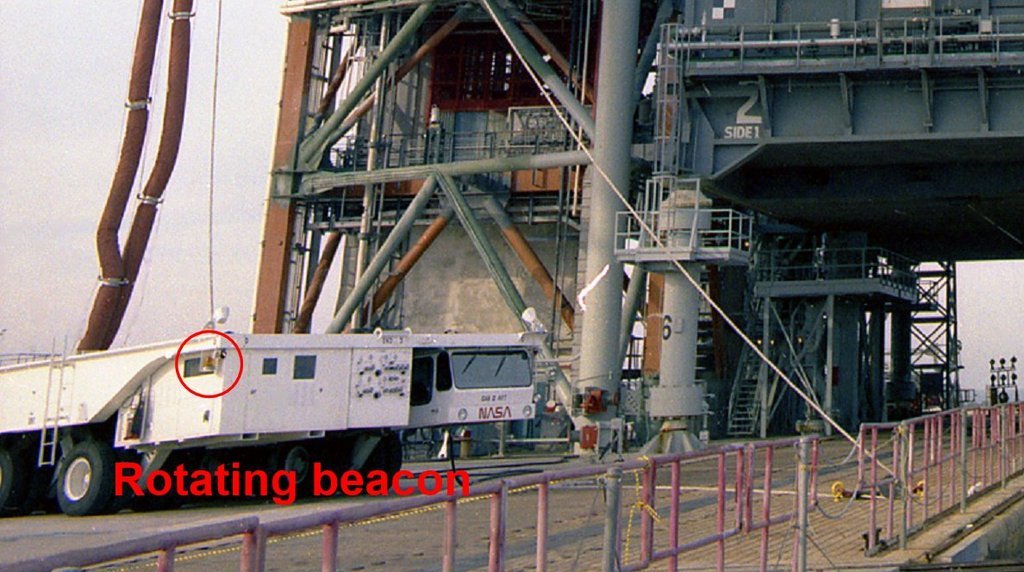 Source: retrospaceimages.com (STS-6) So then I want to measure and scale this thing to see if that's still doable. But I think so, because the diameter should be in the range of a Fire extinguisher (approx. 1,5 mm), so I could have a chance.
__________________
Greetings from Germany Manfred Under construction: Launch Pad 39A with Challenger STS-6 (1:144) Last edited by spacerunner; 03-23-2022 at 06:21 PM.
|
|
#2609
03-25-2022, 06:26 PM
|
||||
|
||||
|
Hello everybody,
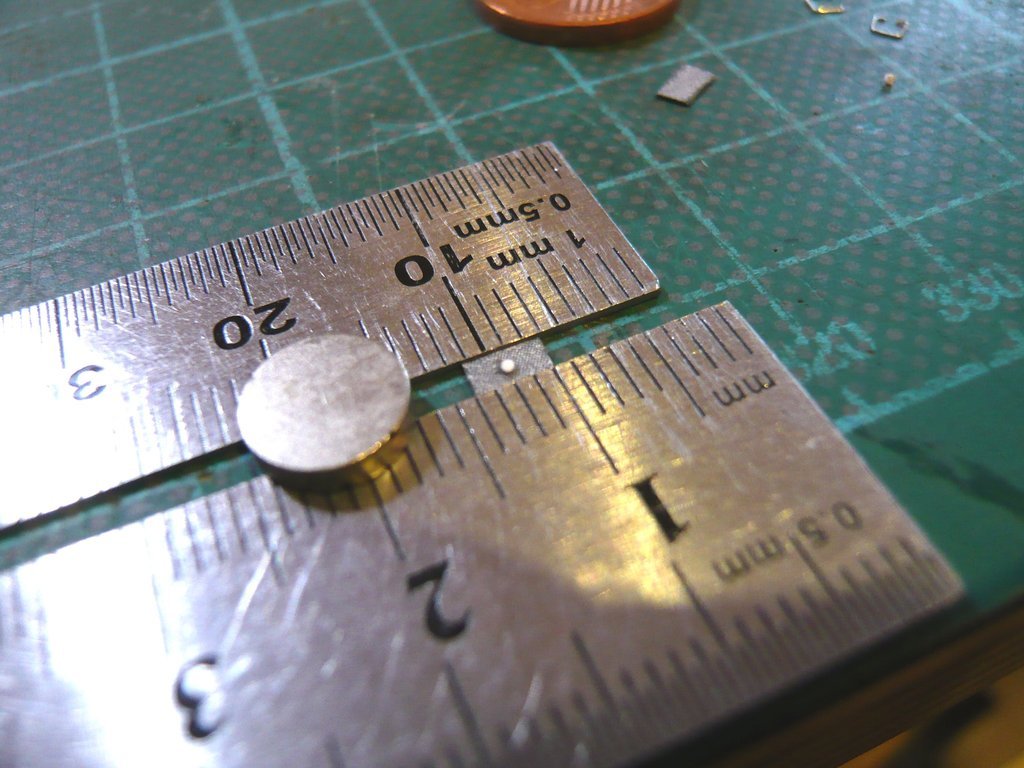
let's go with the Rotating beacon. After it was clear where the beacons are on the transporter, I looked for a few more detailed photos that show how they are set up and attached, which can be seen in the following two photos. Their structure is relatively simple, and the shape corresponds to the rotating beacons also known in this country, whose orange Bell sits on a Holder,  Source: nasatech.net which in turn sits on a simple Mounting bracket attached to the wall. As a result, it would actually only be three parts.  Source: mediaarchive.ksc.nasa.gov I started with the Bell (Ø 1,2 mm), for which I used an Evergreen rod. For its coloring I used Illuminant dip paint, which I bought some time ago for coloring of white LEDs. 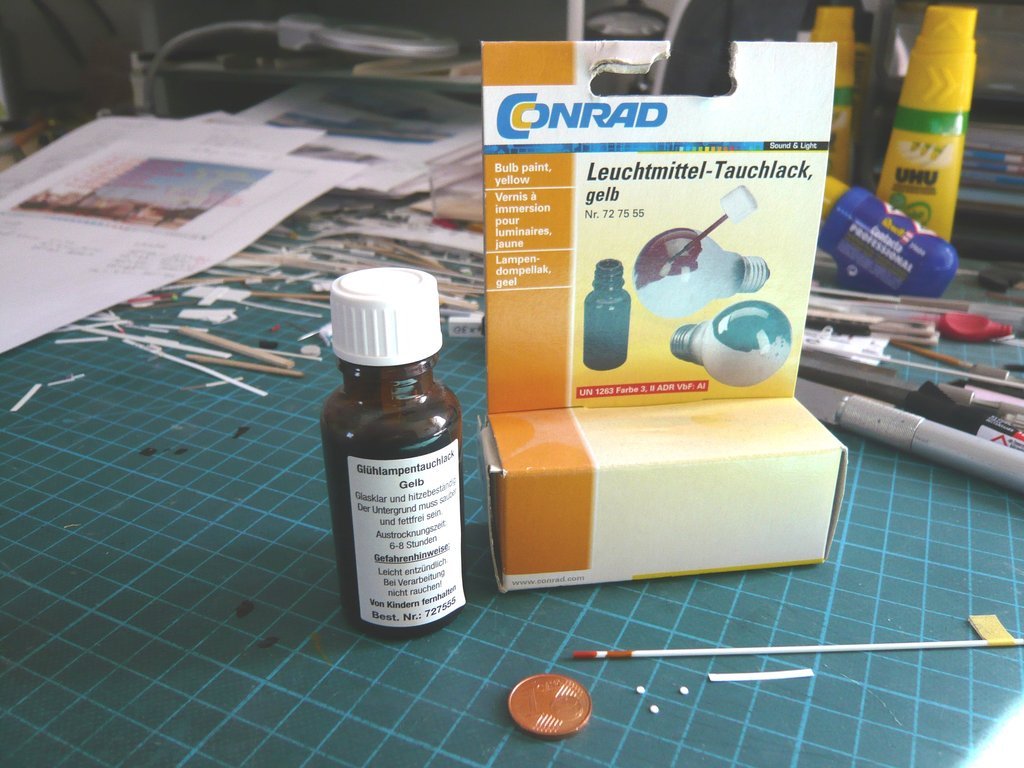 As the color test shows, the hue Orange (left) corresponds more to a Red, whereas the hue Yellow next to it corresponds to the Orange of the beacon on the photos, which I then also used. Next to it are the small Holders (Ø 1,4 mm), which I punched again, as well as a strip for the Mounting bracket (0,1 mm x 2,5 mm ). 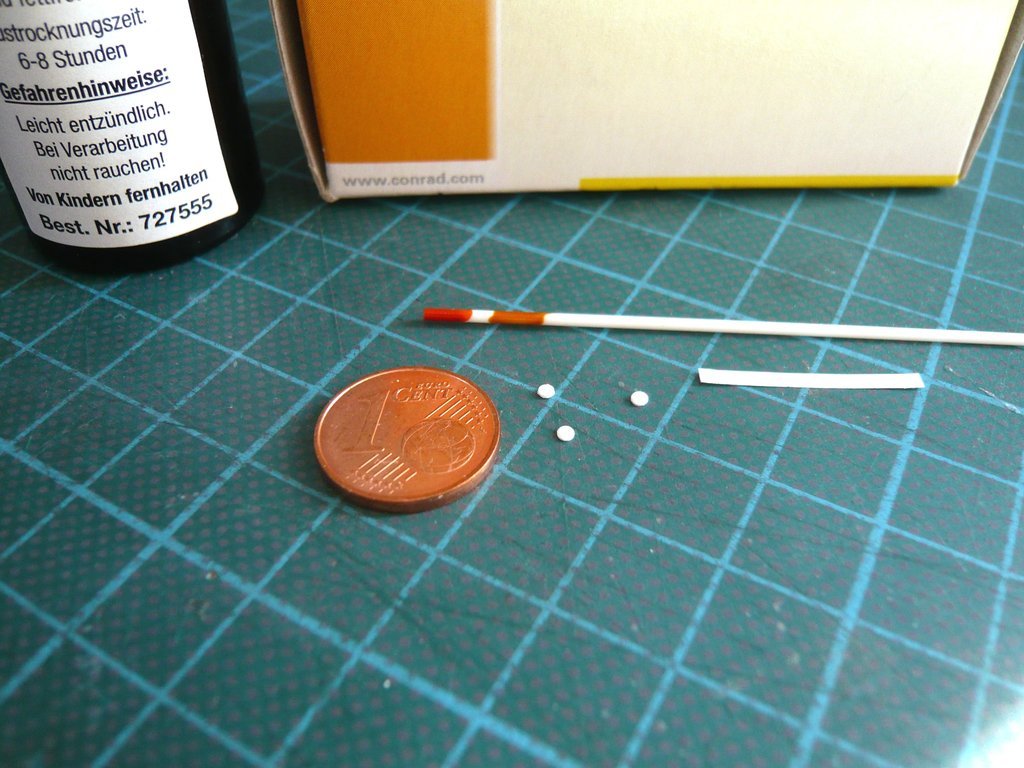 Then I carefully separated the Bell (L = 1,5 mm) with the razor blade, 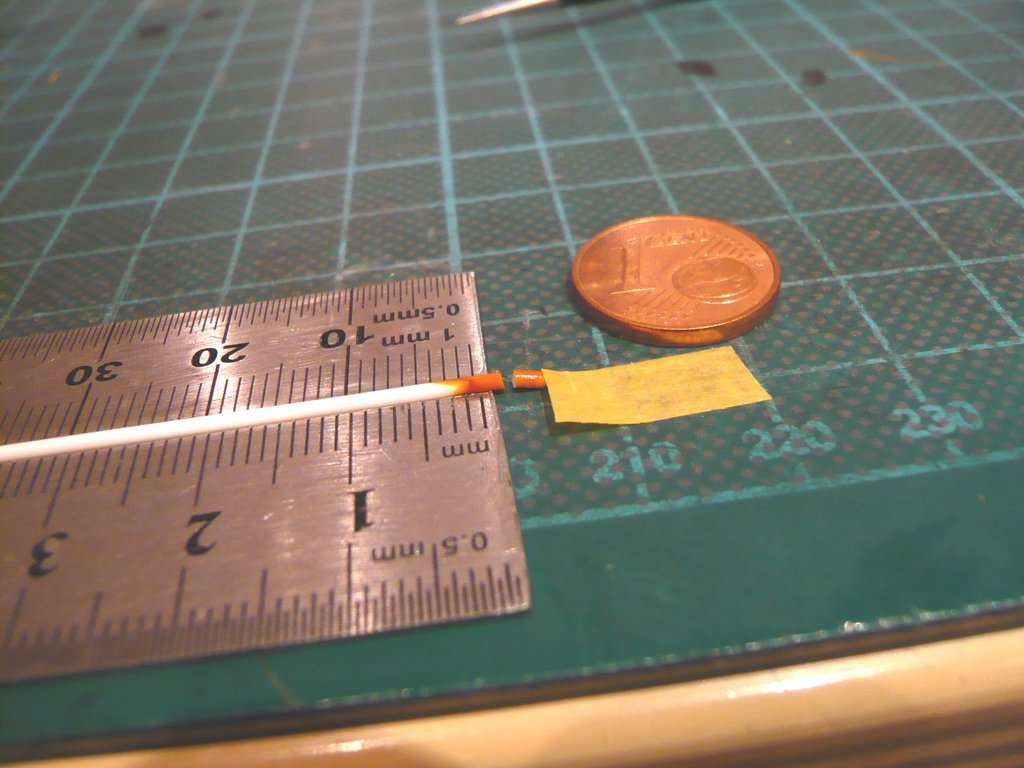 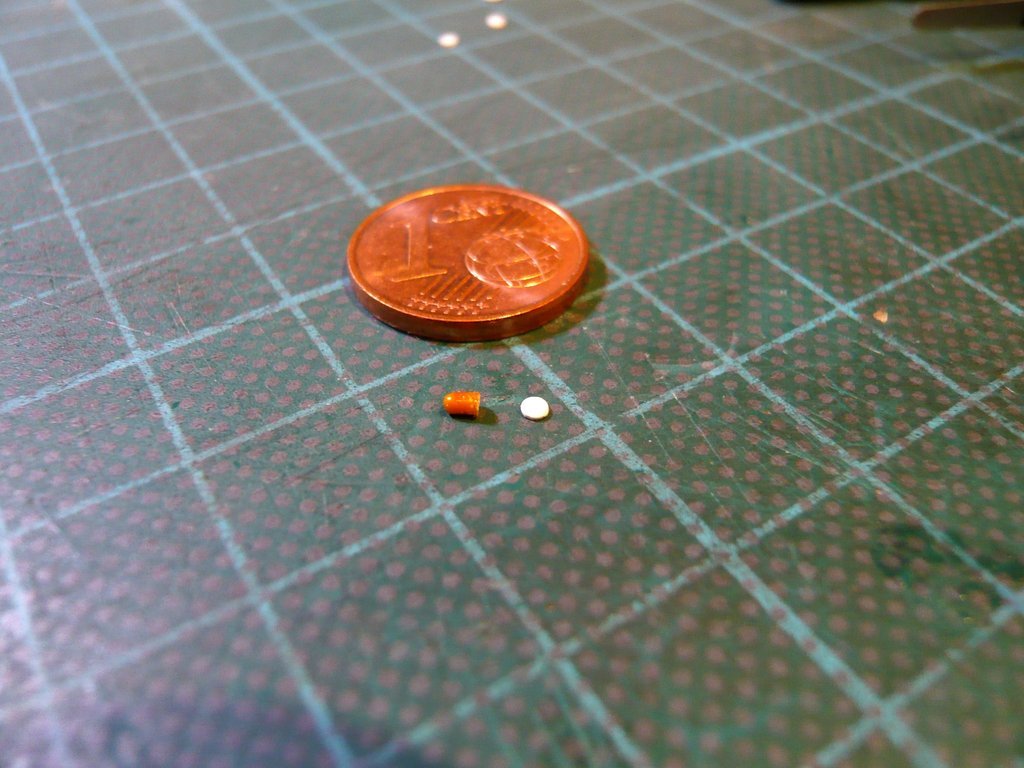 and glued onto the holder. 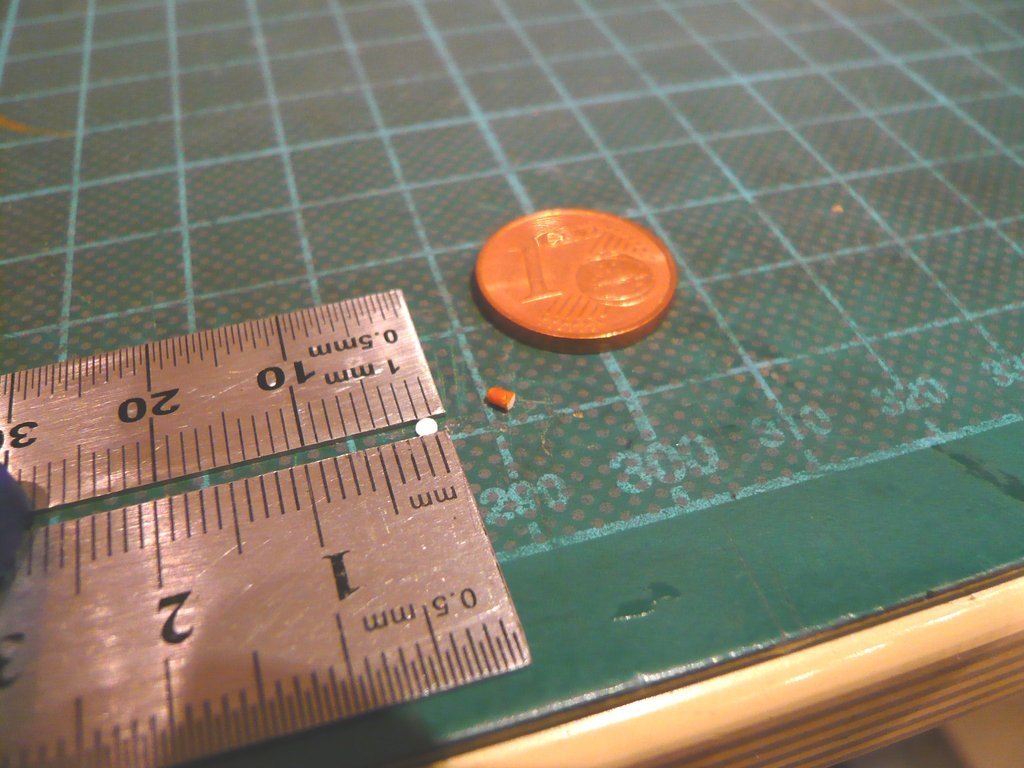 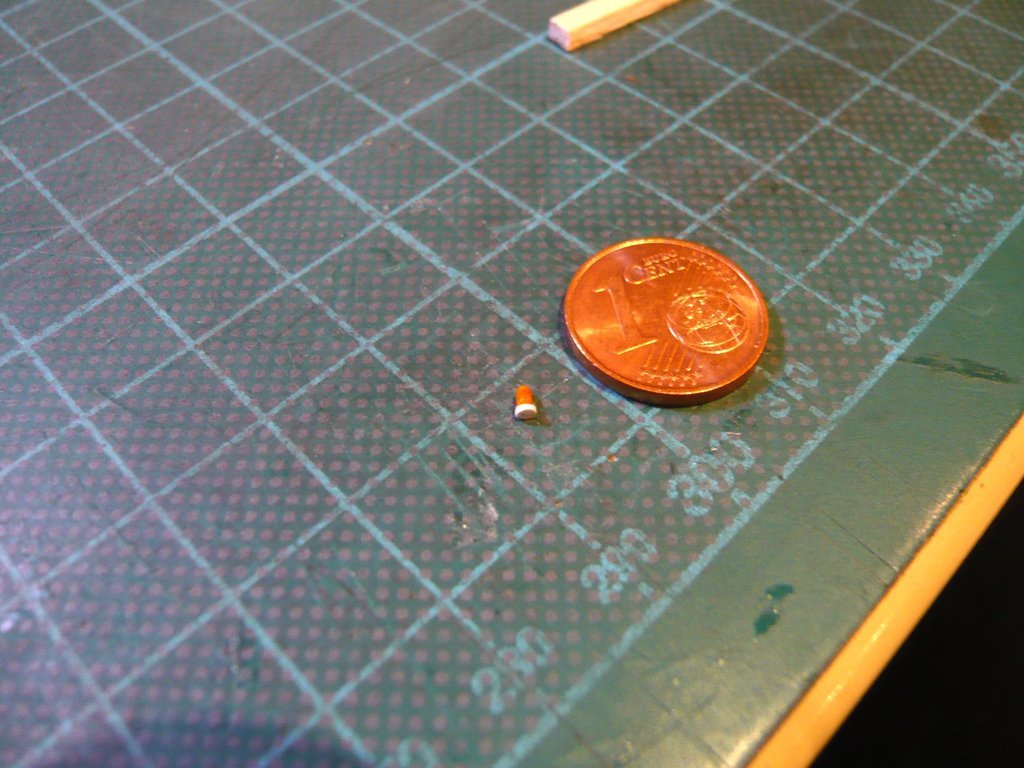 To glue the Holder to the angle strip, I used the UV glue again. 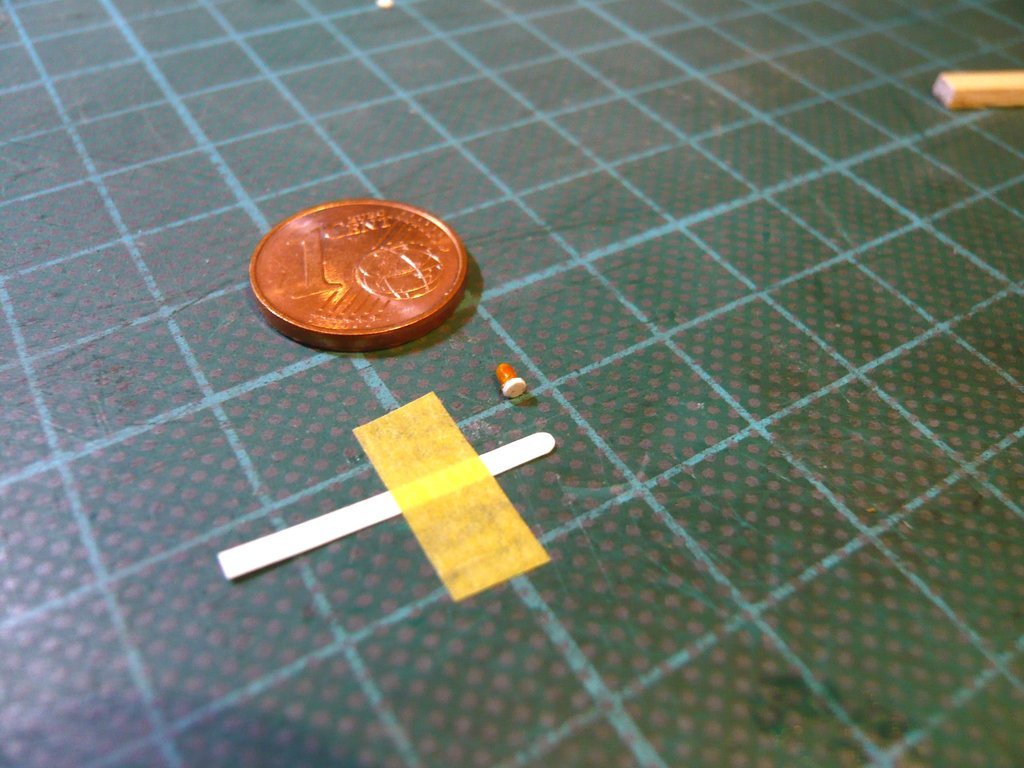 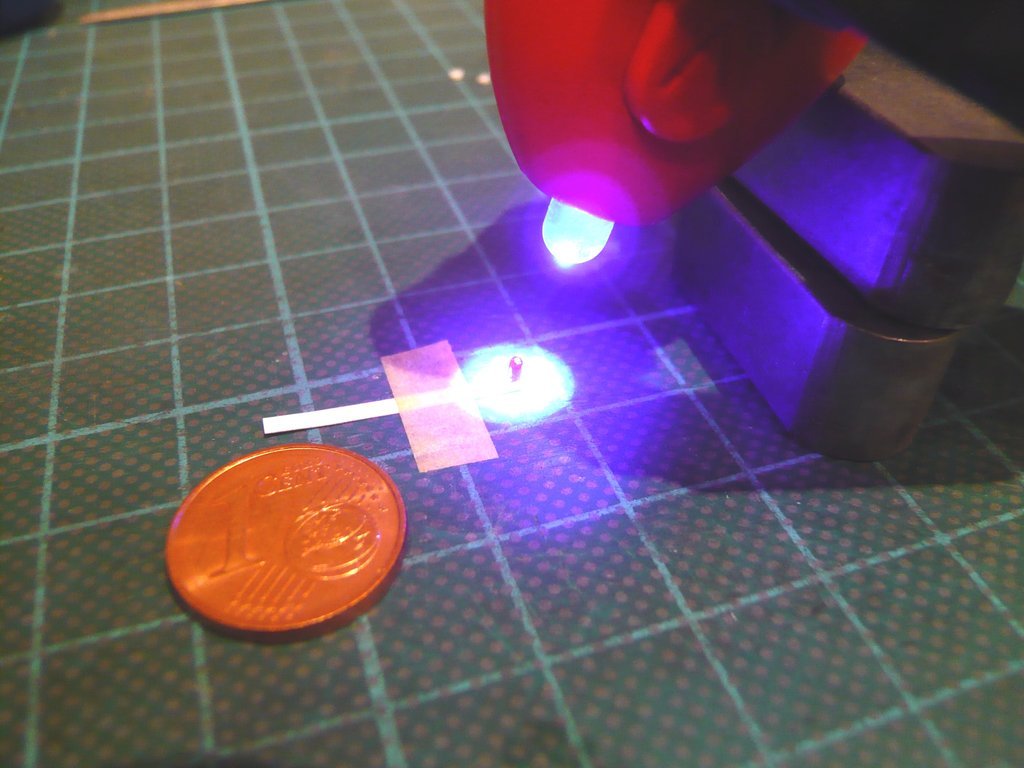 Since the wafer-thin Styrene strip cannot be bent at right angles but breaks, I've cut it off, 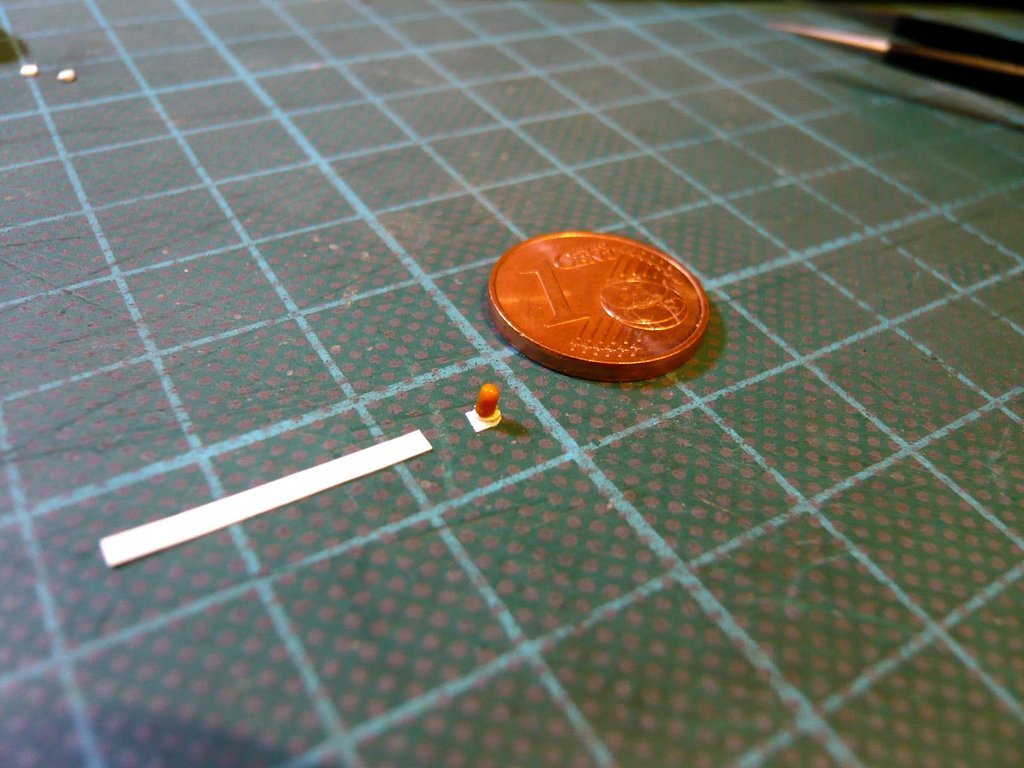 and glued the part with the beacon to the strip, also under UV light, 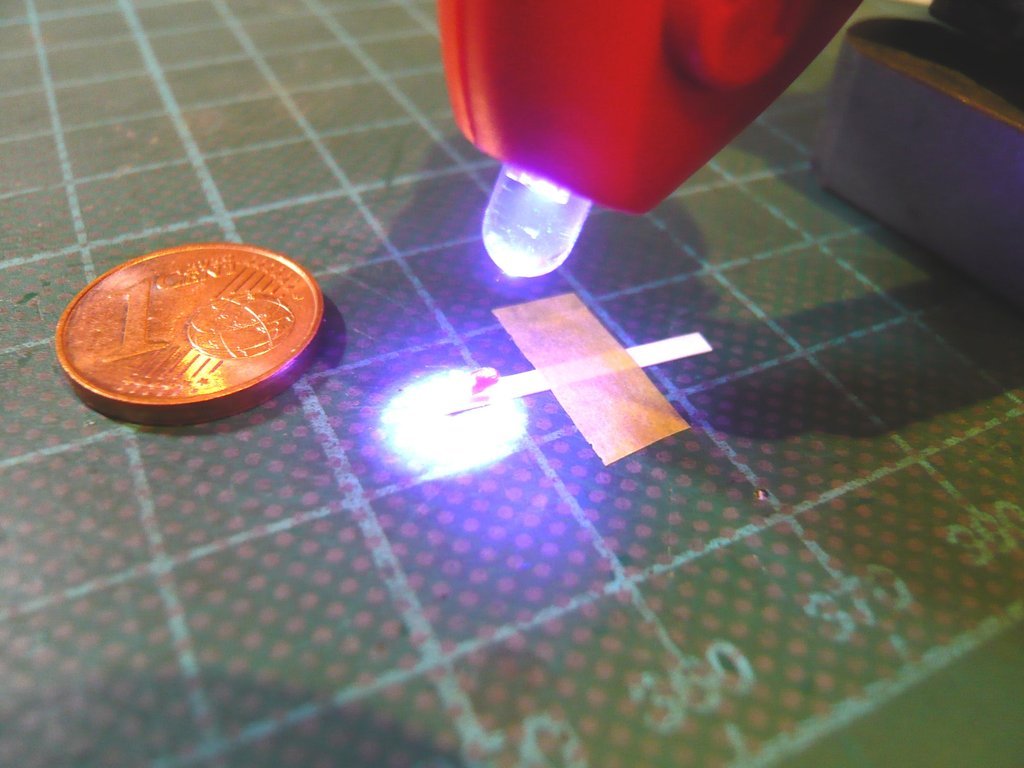 eventually resulting in the Angle Bracket. Since the bracket is not attached directly to the wall, a small spacer (0,4 mm x 0,75 mm) was glued underneath, 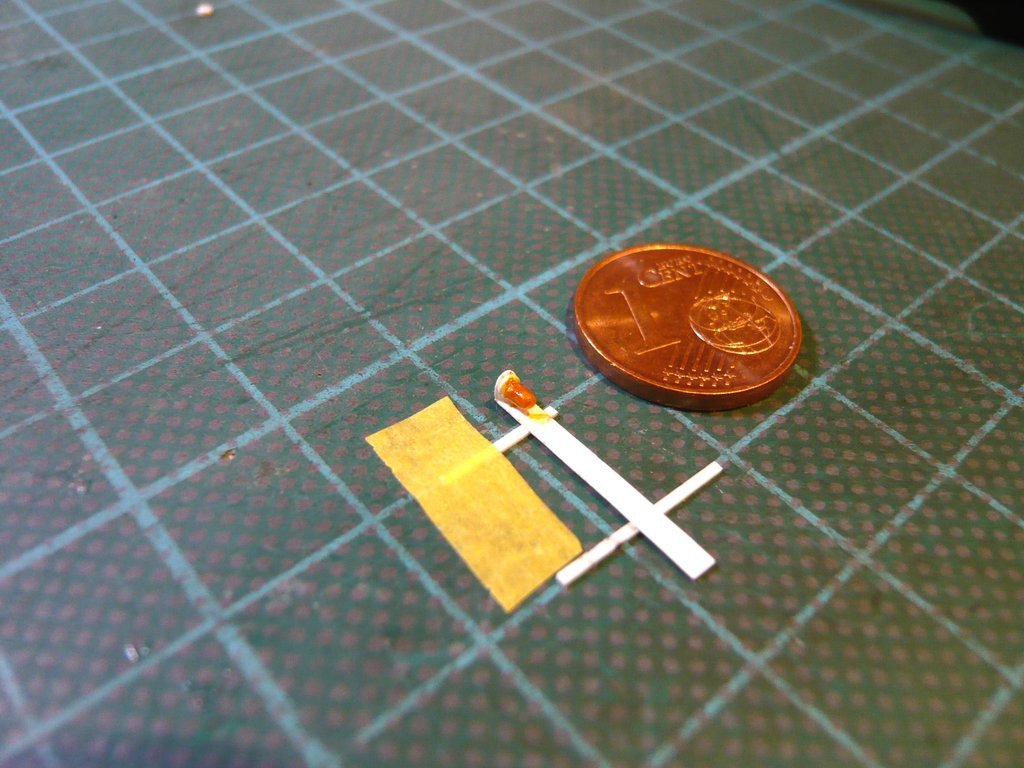 and the lateral overhangs separated, with which the Rotating beacon was completed. 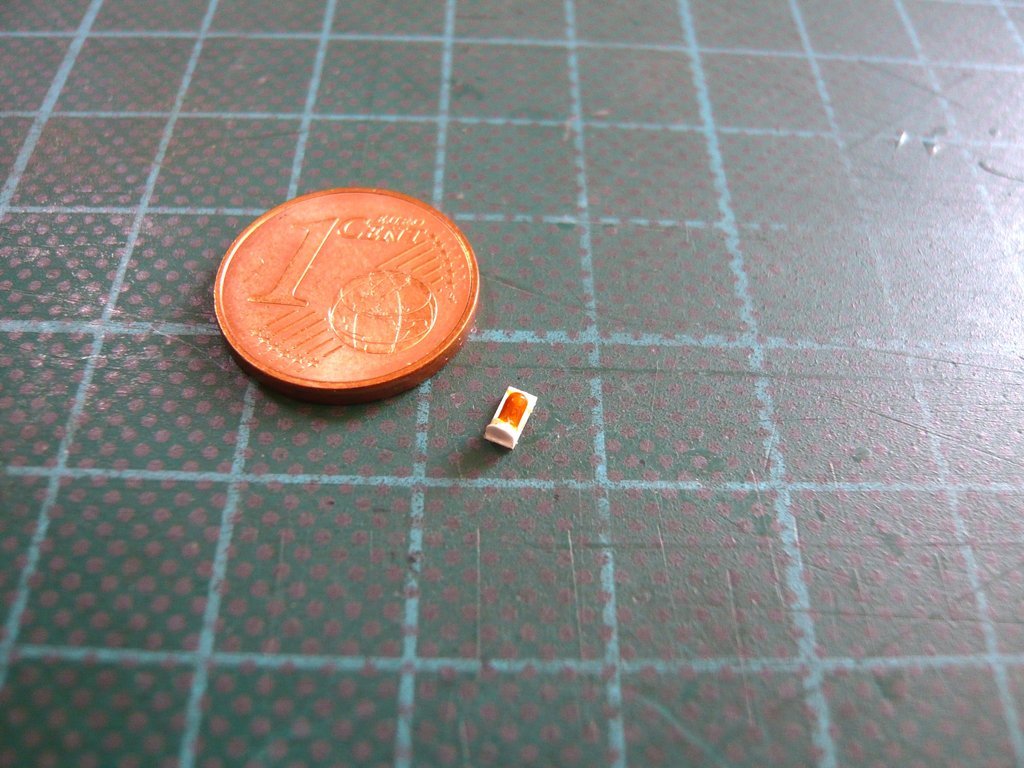
__________________
Greetings from Germany Manfred Under construction: Launch Pad 39A with Challenger STS-6 (1:144)
|
|
#2610
03-25-2022, 06:27 PM
|
||||
|
||||
|
To glue the beacon on, the transporter had to be placed on its side. In order not to break off the Rear-view mirror improvidently
the transporter had to be supported accordingly and at the same time fixed in a stable manner. 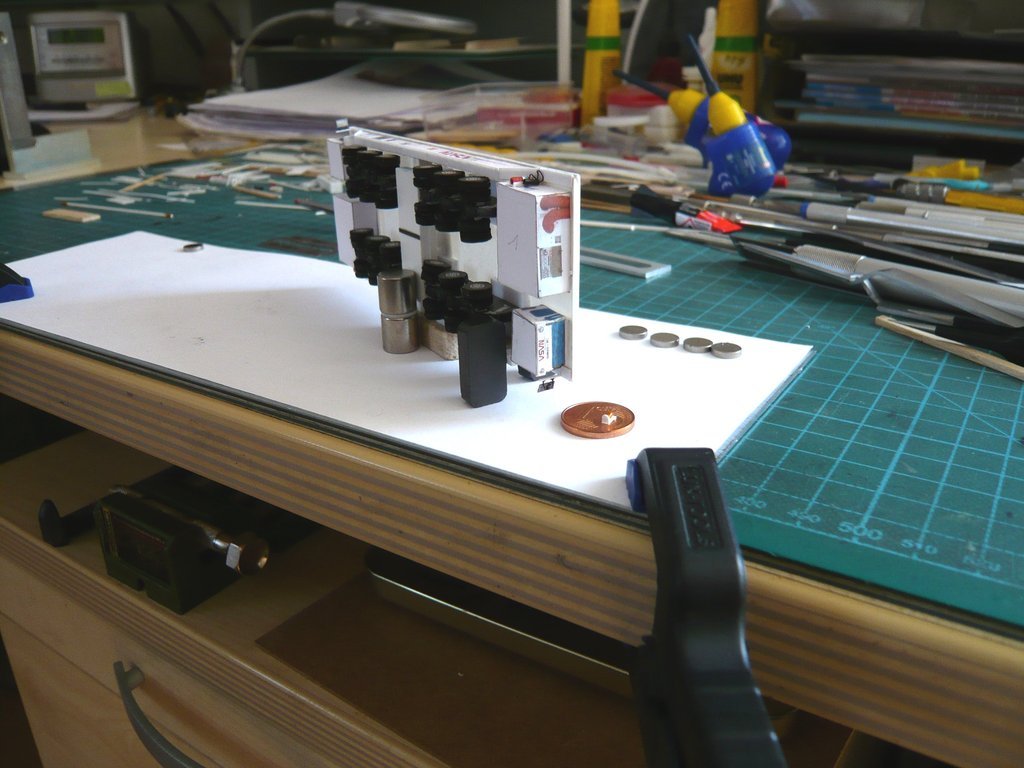 This was followed by a test fitting of the beacon on the side wall, which fitted so far well. 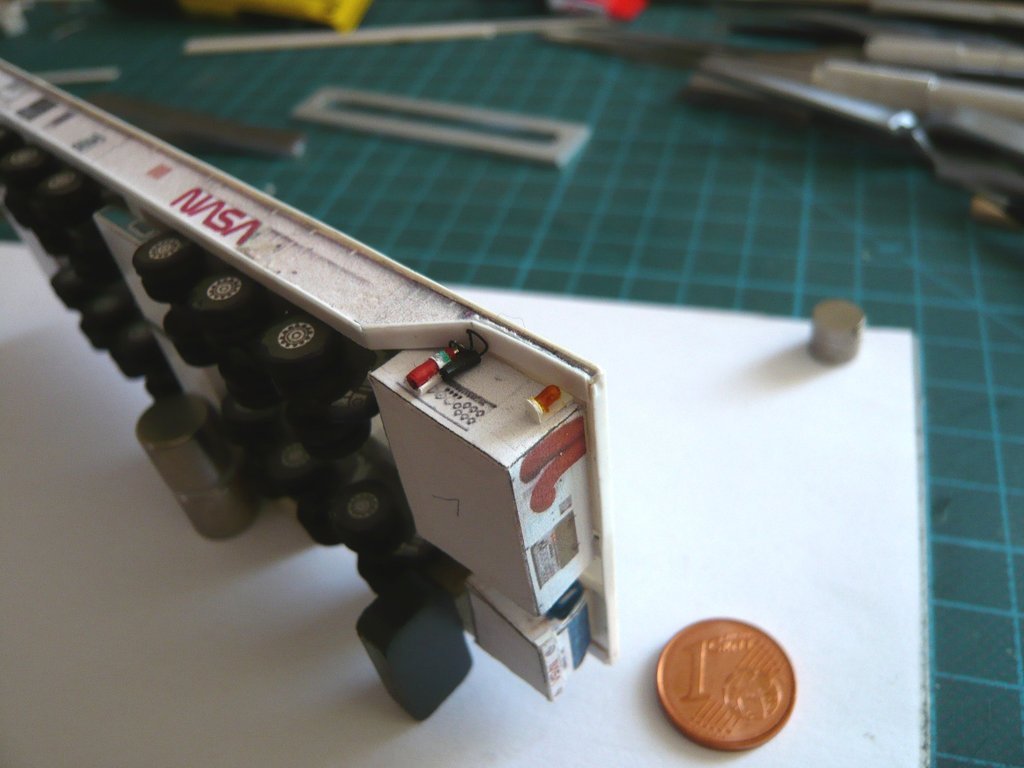 Now a spacer was also placed on the underside, whereupon the bracket on the upper spacer was glued to the wall. 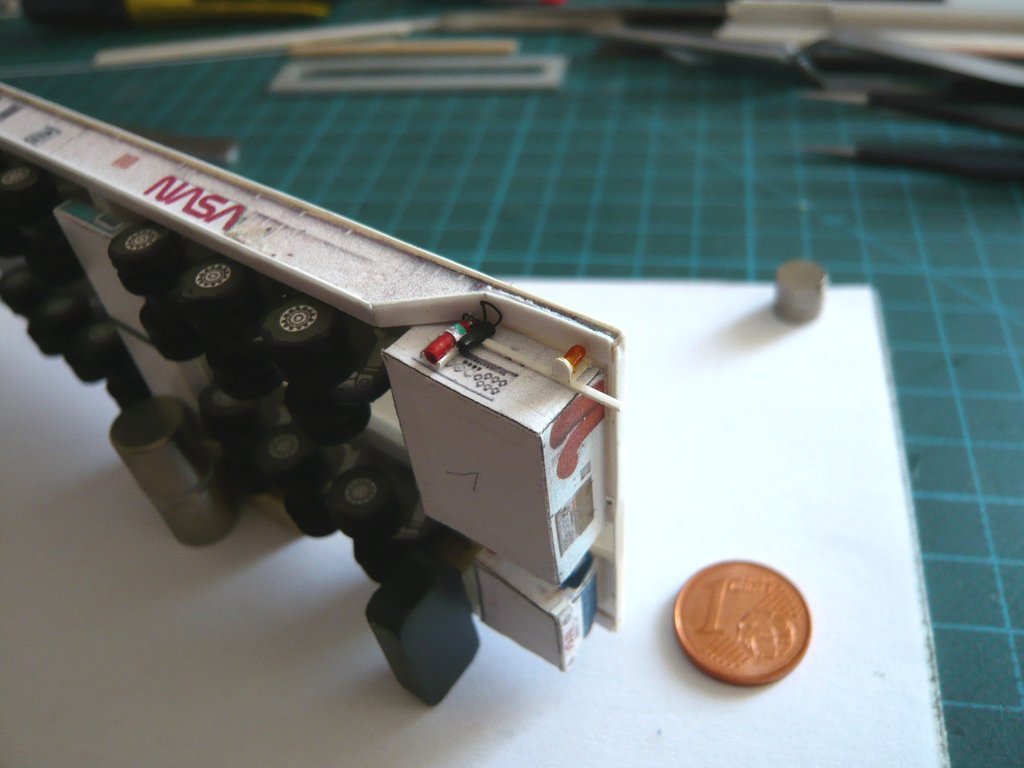 After that, the transporter could finally be put back on its wheels, 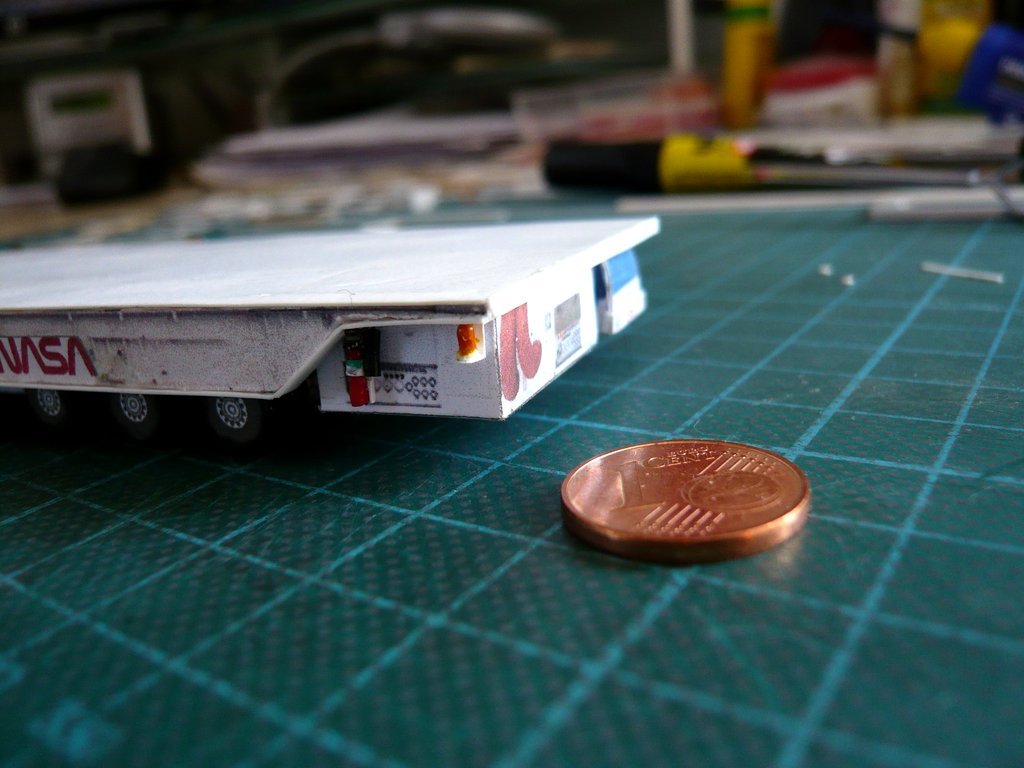 with which the first Rotating beacon is now in place. All in all, quite a lot of effort for this small detail, but it was worth it and rounds off the overall picture. Now all that's missing is the beacon on the other side, which I'll still be able to do too.
__________________
Greetings from Germany Manfred Under construction: Launch Pad 39A with Challenger STS-6 (1:144)
|
 |
|
|


 Linear Mode

