


|
|
|
#2661
 07-02-2022, 01:36 AM
|
||||
|
||||
|
Thanks Marcell for looking in on me again.
 Yep, this is definitely true and absolutely helpful.  Better one has, than one would have. Better one has, than one would have.  
__________________
Greetings from Germany Manfred Under construction: Launch Pad 39A with Challenger STS-6 (1:144) 
|
|
#2662
07-03-2022, 01:53 PM
|
||||
|
||||
|
Hello again,
when drawing the tiny heights of the individual parts on the transportation plate, it's getting straight down to the nitty-gritty, as feared.  When measuring the details on the photos, everything still looks quite manageable and large, although I have already seen that the dimensions after converting to 1:160 sometimes shrink into the tenths of a millimeter.  But at it I still haven't even thought about drawing these mini parts yet ...  For example, a photo now looks like this after multiple corrections of the conversions if I previously have determined certain dimensions using incorrect reference dimensions (lengths/heights).   Source: NASA (STS-122) In the last post I had already started drawing the heights on the floor plate (0,25 mm). But as soon as I drew in the holders for the hold-down clevis, which are only 0,8 mm high, I realized what I've let myself in.  In order to be able to see differences in the heights at all, I drew the front view of the plate at the highest magnification in MS Word (500%), and to keep things clear, I tried to color-code the different sub-areas accordingly to their dimensions, which is probably hardly recognizable here in the picture, but is probably not that interesting for you either.  The most difficult place was the opening between the two holders, in which the hold-down clevis later has to fit, whereby only a gap of 0,8 mm (light blue) for the two fork plates is available.   And between these two plates there must still also be enough space for the small Tie-down Lug plate, which can be seen here again, initially in the original, with an impressive size of at least approx. 0,5 m,  Source: NASA (STS-114) as well as here with approx. 3,5 mm in scale 1:160. 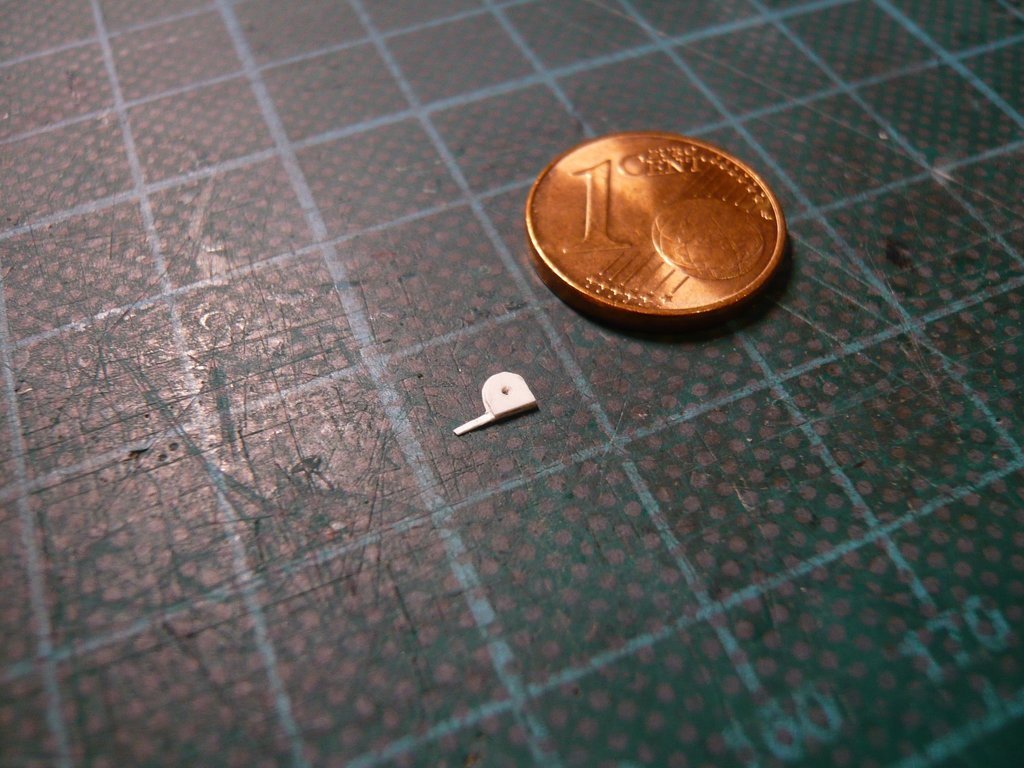 While the thickness of my prototype is approx. 0,5 mm, the finished plate has to be even narrower with 0,4 mm. And since it consists of three discs, only my thinnest Evergreen Styrene Sheet (0,13 mm) can be used,  unless I save myself this effort and leave it with one thicker part, since one can hardly see the plate in the Hold-down Clevis anyway later. unless I save myself this effort and leave it with one thicker part, since one can hardly see the plate in the Hold-down Clevis anyway later.  To the left of the brackets one can see the two Stop holders. For the sake of clarity, I have not drawn the PLC Support Plate behind the Clevis brackets. And here is an impression of the height profile of the parts in front of the transportation plate behind. 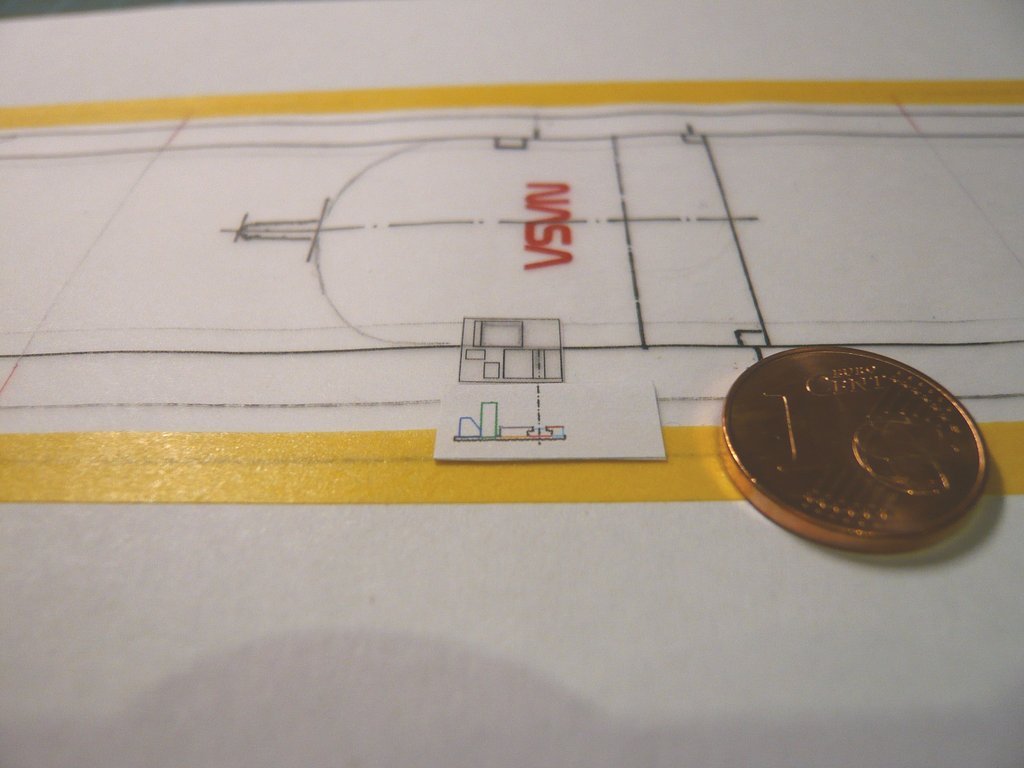 Since in the first image one can hardly see the interesting details of the entire bracket because of all the dimensions and conversions, here is another image without this irritating nick-nack.  Source: NASA (STS-122) With that I might just at least make a first attempt and start building this transportation plate.
__________________
Greetings from Germany Manfred Under construction: Launch Pad 39A with Challenger STS-6 (1:144)
|
|
#2663
07-09-2022, 03:54 PM
|
||||
|
||||
|
Hello everybody,
before I start building the larger Transportation plate, I first drew the smaller plate, which is a bit simpler in construction, but is only about half the size. Easier therefore, because the two brackets of the Hold-down Clevis have the same width, as can be seen in this image.  Source: NASA (STS-126) However, the widths (1,8 mm) determined in this picture are not correct  and are too big because I used the Height of the Transporter side panel (7,5 mm) as a reference measure, what I described in a previous post. and are too big because I used the Height of the Transporter side panel (7,5 mm) as a reference measure, what I described in a previous post.To avoid this error, I'm using since then the Sidewall height (7,5 mm) solely for determining heights, while all lengths/widths are based on the Center-to-center spacing of the Tie-down Lug Plates (15,5 mm) from the NASA drawing, as one can see in the following image.  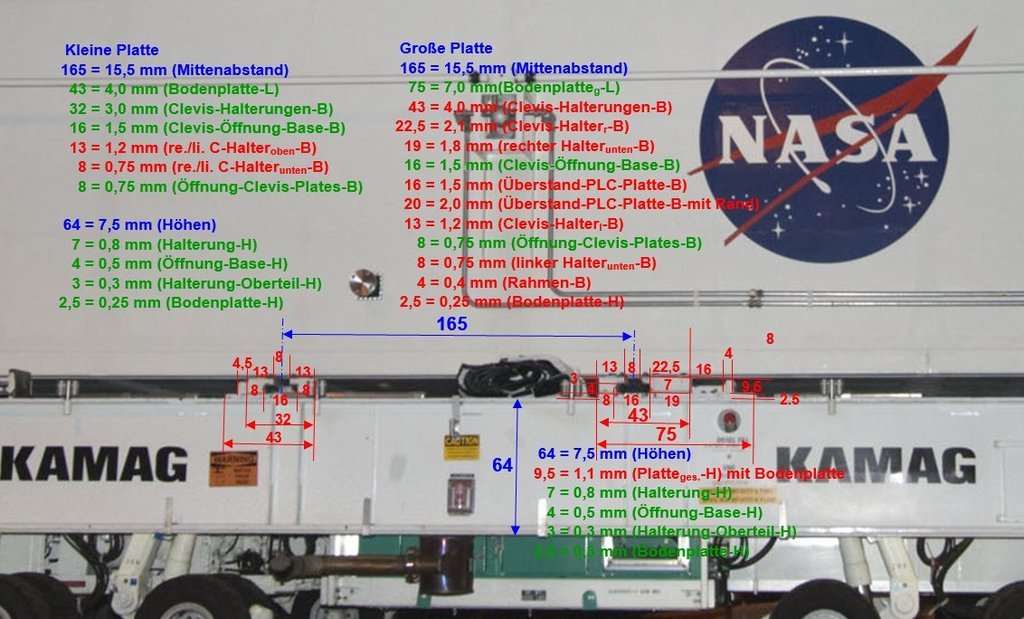 Source: NASA (STS-135) And the resulting width (1,2 mm) for both Clevis holders I used for drawing the ground plan of the small plate. But for that I also needed the dimensions perpendicular to it, i.e. the depths. Determining them was much more difficult because you sometimes have to resort to oblique perspectives and/or previously determined "secured" dimensions as a reference. The following photos should serve as an example for this, without my wanting to go into more detail about the somewhat more complicated measuring and conversions, for which a certain amount of practice in perspective vision and trained spatial imagination is required, in order to correctly recognize and understand the structure and shape as well as hidden corners and edges of the parts.   Source: NASA (STS-124)  Source: NASA  Source: NASA Enough of the preface, finally I was able to draw the smaller transportation plate, which is only half as big, but still can be clearly represented in MS Word (500%).  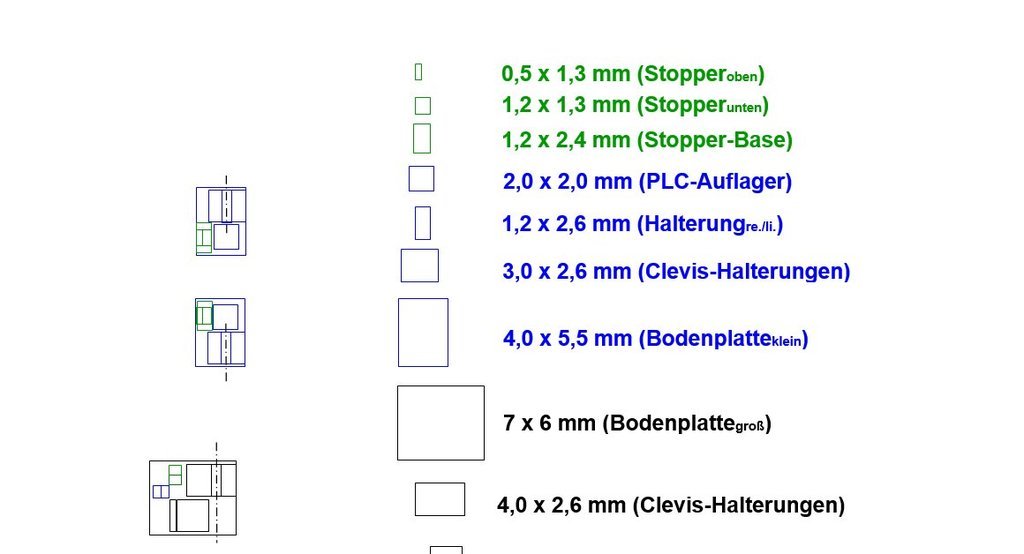 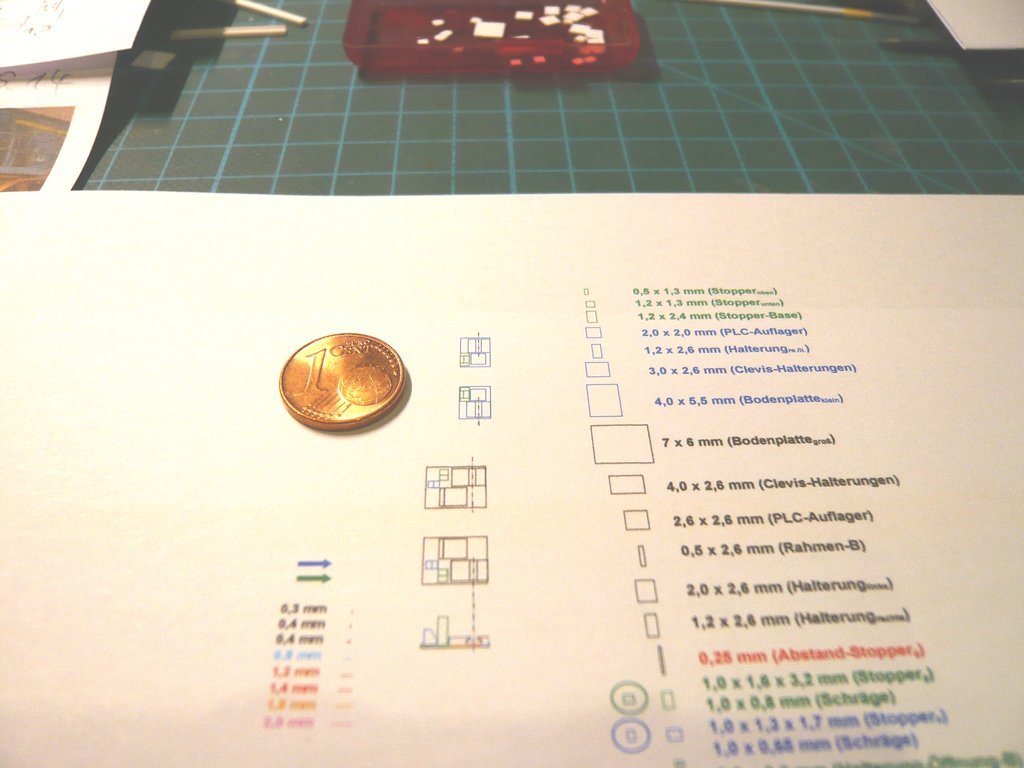 And this is what the plates look like on the transporter.  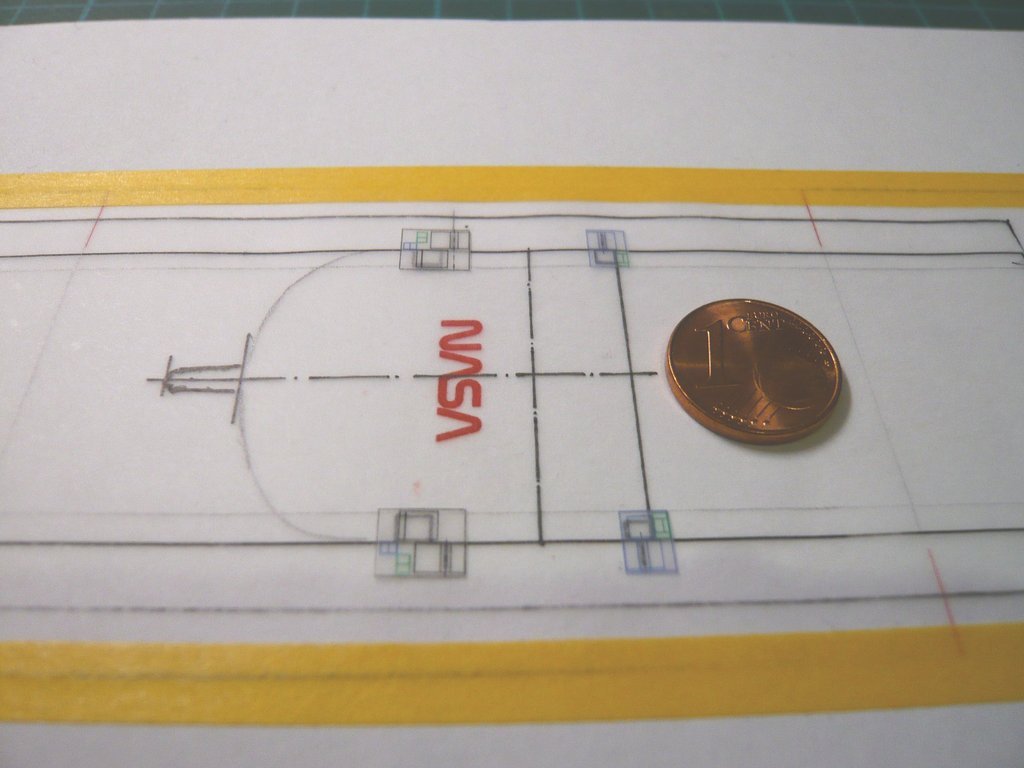 But already from a greater distance one can hardly still see any details, 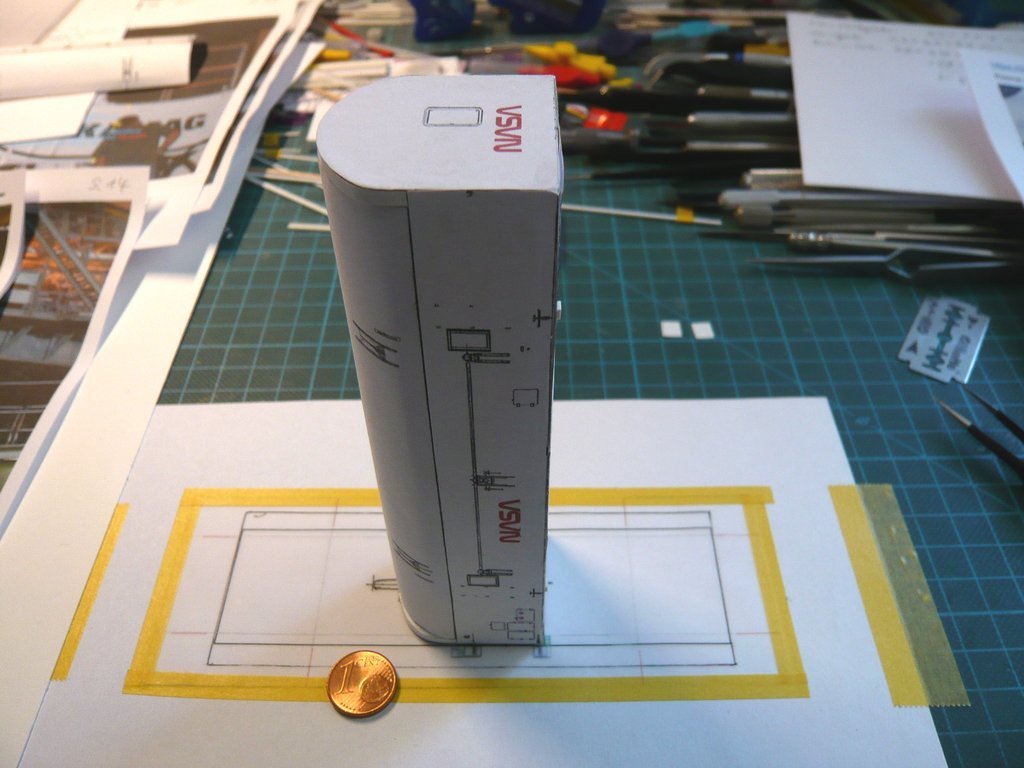 which is why I have to put on my headset glasses.  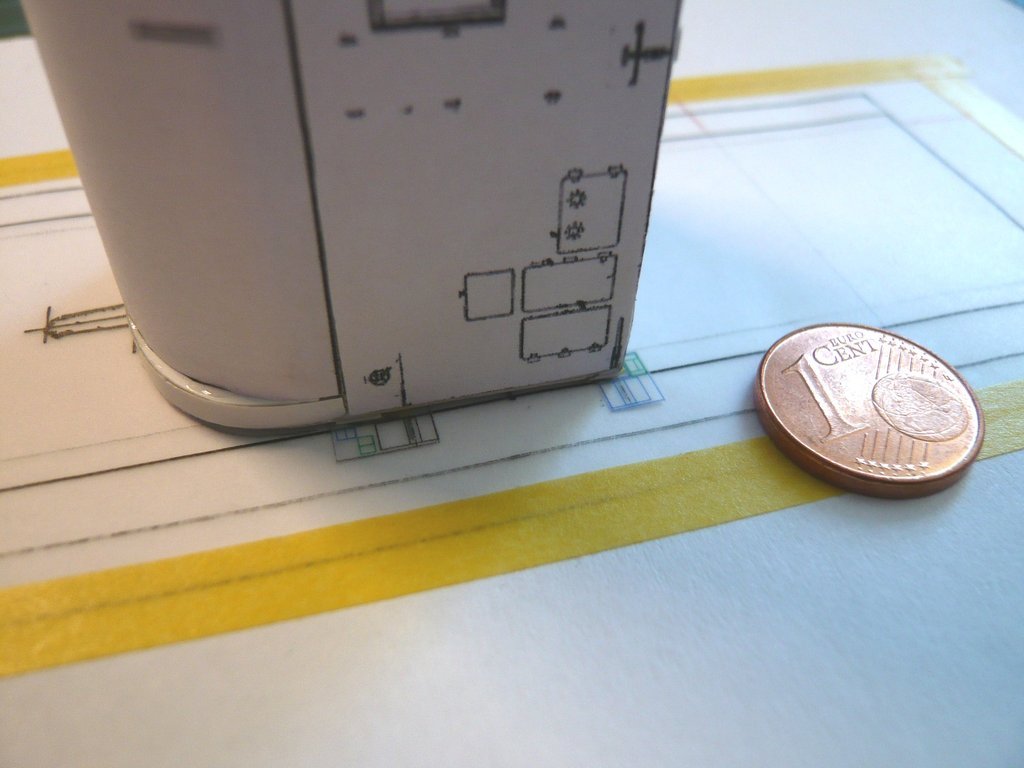
__________________
Greetings from Germany Manfred Under construction: Launch Pad 39A with Challenger STS-6 (1:144) Last edited by spacerunner; 07-09-2022 at 05:04 PM.
|
|
#2664
07-09-2022, 03:55 PM
|
||||
|
||||
|
And so now to the scratch building of the larger plate,
 for which I've first cut the floor plates (7 mm x 6 mm) from Evergreen Styrene (0,3 mm), on which I now only have to accommodate all puzzle pieces. for which I've first cut the floor plates (7 mm x 6 mm) from Evergreen Styrene (0,3 mm), on which I now only have to accommodate all puzzle pieces. 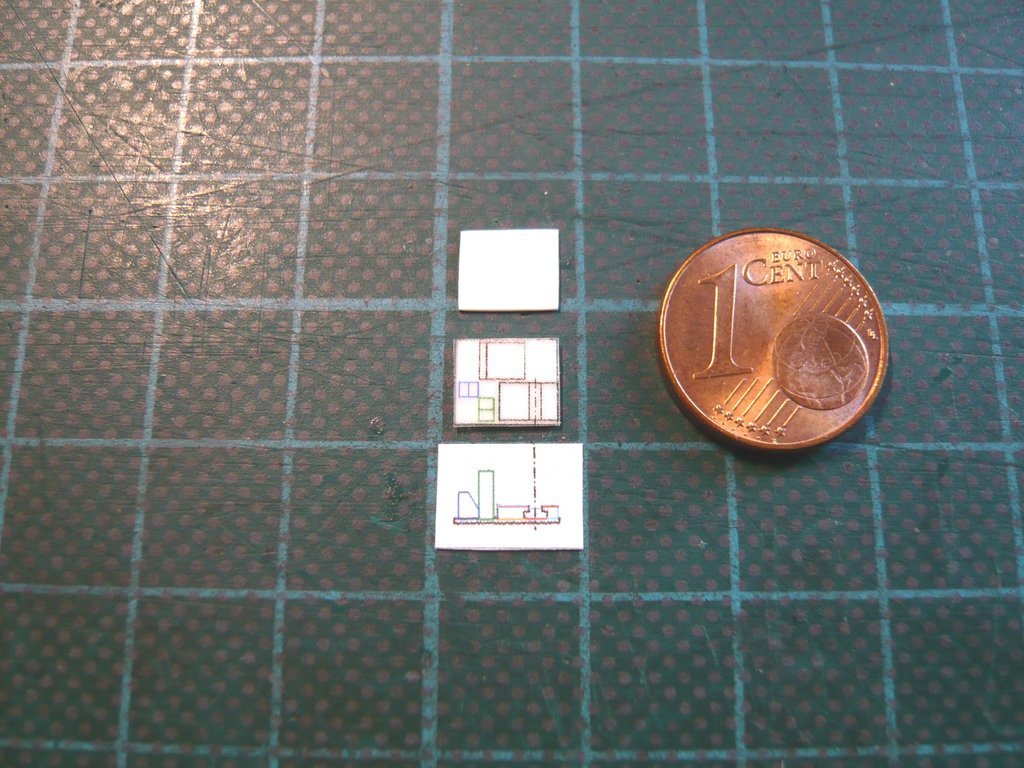 Next, I will look for suitable Evergreen profiles so that I especially don't have to file both tricky brackets out of the whole.
__________________
Greetings from Germany Manfred Under construction: Launch Pad 39A with Challenger STS-6 (1:144)
|
|
#2665
07-12-2022, 06:46 AM
|
||||
|
||||
|
Hello friends,
the night before last I prepared the first two floor plates (6 mm x 7 mm) that were on the table in front of me. 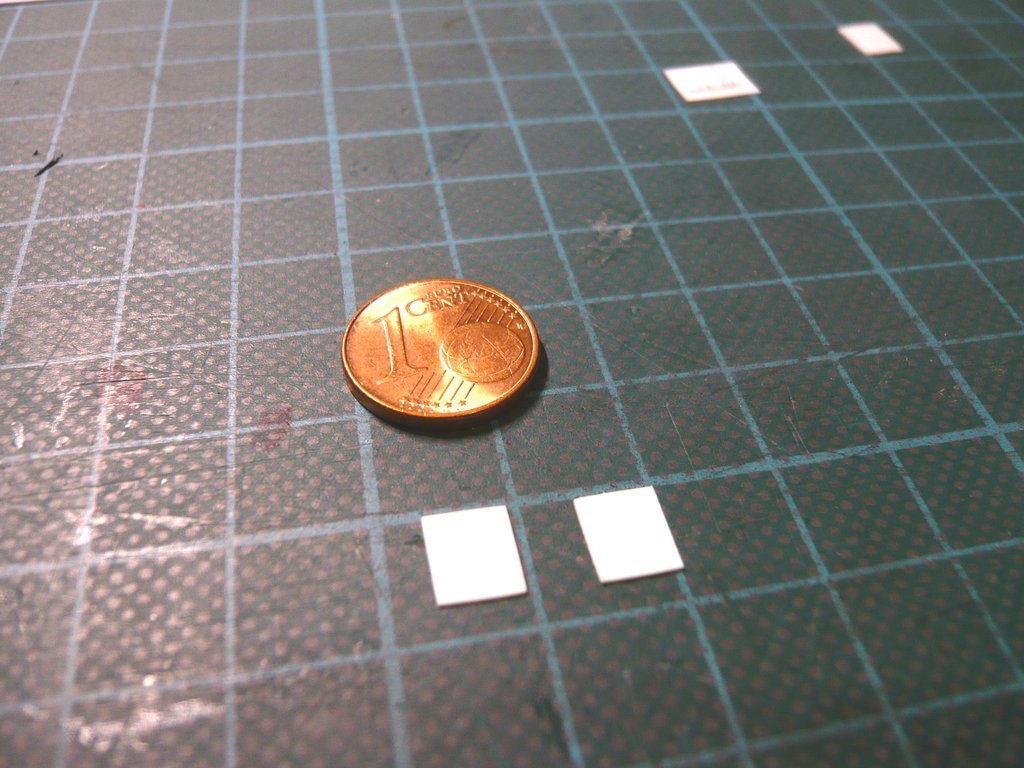 Then I was still looking at some printed photos and working for a while on the computer.  And when I wanted to continue with the two plates, there was only one plate left! And when I wanted to continue with the two plates, there was only one plate left!  I thought that can't be true and started searching, first on the table, then on the floor, under the table, around a chair, but the plate was gone. I could have flown off the handle,  but I was so fed up that I only still wanted to bed because it was late again ... but I was so fed up that I only still wanted to bed because it was late again ...  Yesterday afternoon I already wanted to cut a new plate. When I came back again into my study, I thought, that can't be true.  There this damn Styrene plate did lay in front of the room door, about 3 m away from my desk. There this damn Styrene plate did lay in front of the room door, about 3 m away from my desk.  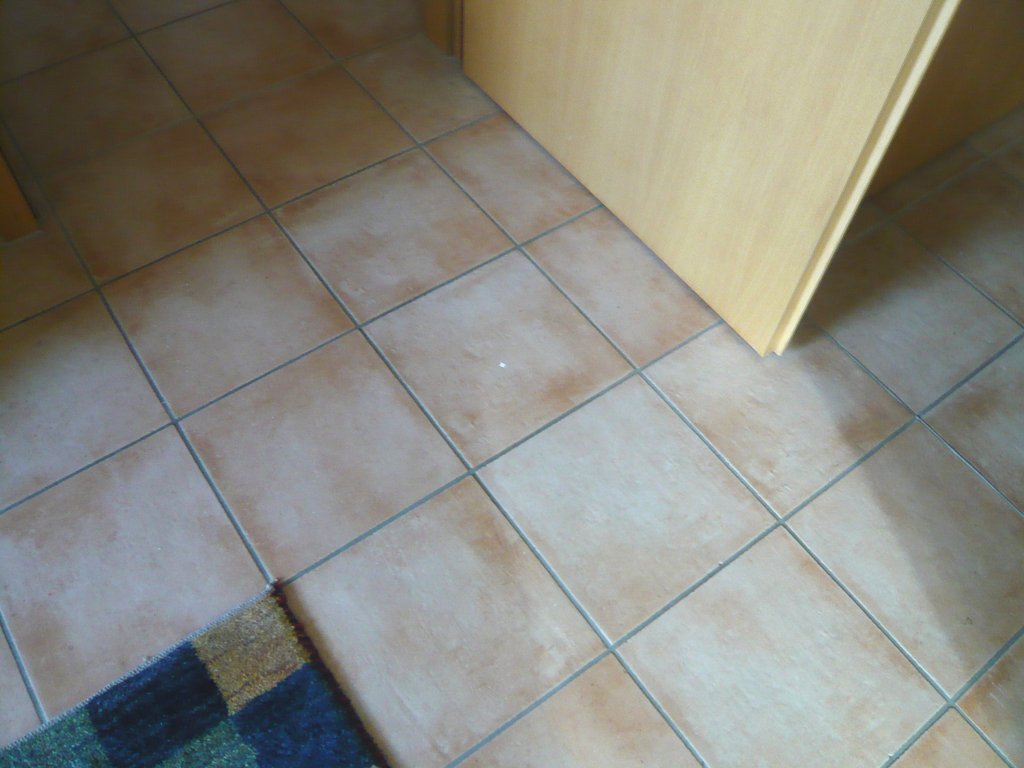 For size comparison here with my EUR cent. 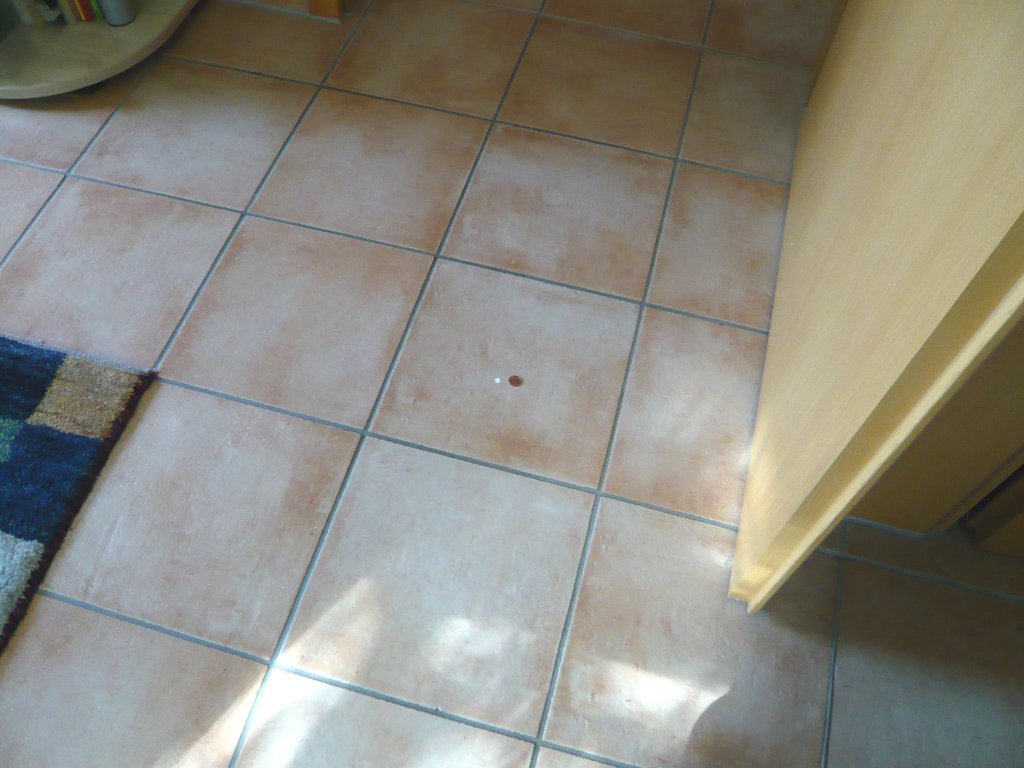 But I had walked past that several times before, while the plate wasn't lying there. Strange ...  There are things between heaven and earth that don't exist, or maybe do too ...  Since in another forum the notorious carpet monster has already been alluded to, there must be a tile monster in my room ...  Anyway, I was glad the plate was back and I didn't have to cut out a new one.
__________________
Greetings from Germany Manfred Under construction: Launch Pad 39A with Challenger STS-6 (1:144)
|
|
#2666
07-13-2022, 05:55 PM
|
||||
|
||||
|
Hello everybody,
I haven't gotten very far, however, because there are actually hardly any suitable profiles from which I could scratch-build the brackets of the Clevis holders. Here you can at least see the beginning with the strips from which I could assemble the right bracket. 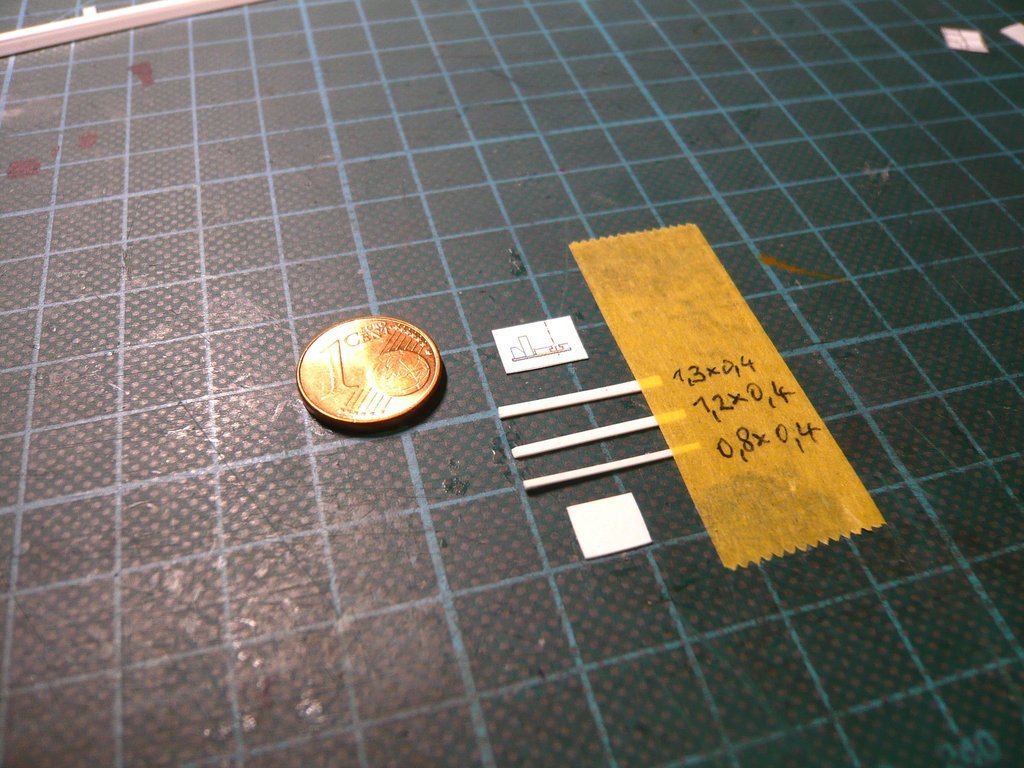 An Evergreen strip (0,4 mm x 0,8 mm) fits for the lower part. On it I can stick a strip (0,4 mm x 1,2 mm), for which I've sanded an E-Strip (0,4 mm x 1,5 mm) a bit narrower, wherewith at least would finish this bracket. Since I also need the same brackets for the smaller transportation plates, which all have to be 2,6 mm long, I have prepared sufficient lengths right away. The top strip was made the same way and is designated for the base plate of the Hold-down Clevis (0,4mm x 1,3 x 2,6mm) which must fit into the opening (1,4 mm) between the brackets. The left bracket, on the other hand, still gives me a headache. For that I could use a E-Strip (1 mm x 2 mm), but I would have to file it flat to 0,8 mm and file out a corner (0,3 mm x 0,4 mm). Or I find a E-Strip (0,8 mm x 2 mm), onto which I then could stick a narrower filed strip (0,8 mm x 1,8 mm), but what I still have to check first.  So much for a start, it's rather a tricky business.
__________________
Greetings from Germany Manfred Under construction: Launch Pad 39A with Challenger STS-6 (1:144)
|
|
#2667
07-17-2022, 05:42 PM
|
||||
|
||||
|
Hello friends,
before we continue with these miniatures, a nice story to relax. A friend on the ARC Forums pointed out to me that every time he listens to "Countdown" by Rush, this project comes to mind.  And after watching the awesome video, it would go well with my introduction. While intended as a homage to Columbia's legendary maiden flight (April 12, 1981), in that sense it would also fit as a Tribute to Challenger's Maiden Flight - STS-6 (April 4, 1983).  I didn't know that the band were guests of NASA for the launch at Kennedy Space Center in Florida and saw it from Red Sector A. I was even more surprised when I saw my long slim friend Scott "Shuttleman" Phillips jumping for joy in the video shortly after takeoff.   Great memories forever!
__________________
Greetings from Germany Manfred Under construction: Launch Pad 39A with Challenger STS-6 (1:144)
|
|
#2668
07-20-2022, 05:49 AM
|
||||
|
||||
|
Hello again,
even with these tropical temperatures there's no reason for sitting back and take things easy, 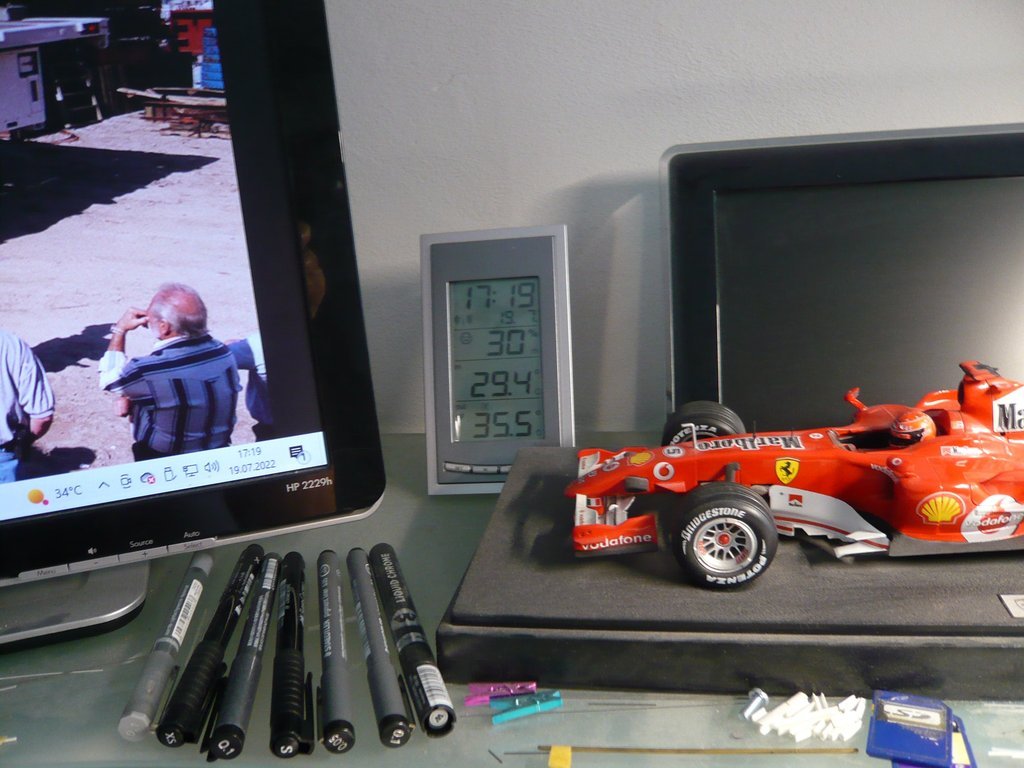 Nevertheless, it has to go on somehow, otherwise I'll slowly lose the common thread myself. - But where there's a will, there's a way! To better follow the further processes, here is the drawing of the larger Transportation Plate with the Clevis brackets again. 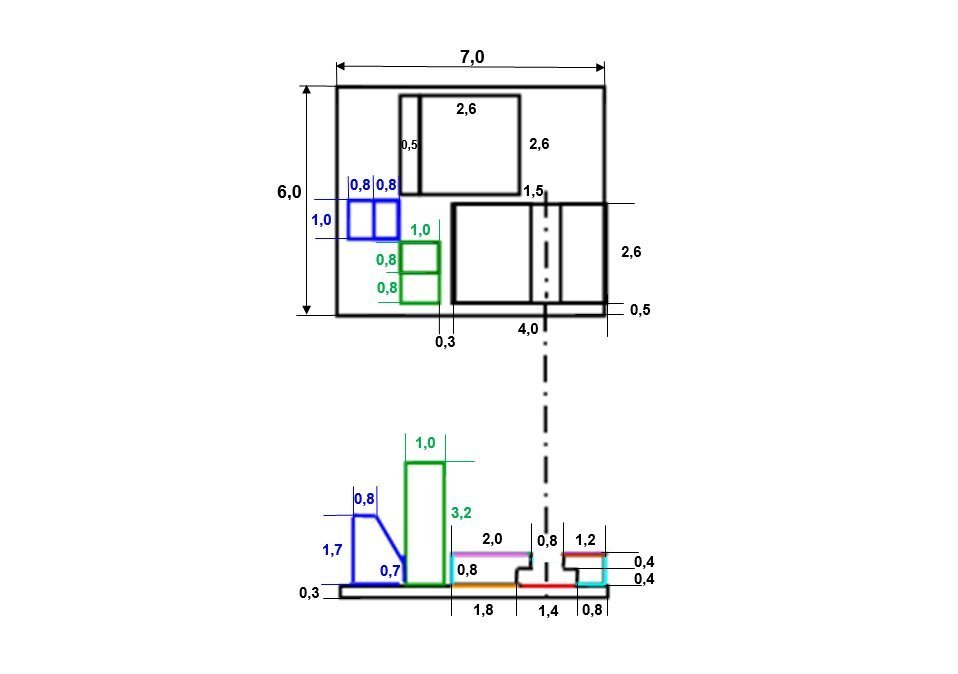 First I glued the two prepared strips (0,4 mm height) together for the right part of the Clevis bracket which, as expected, had the required height of 0,8 mm.  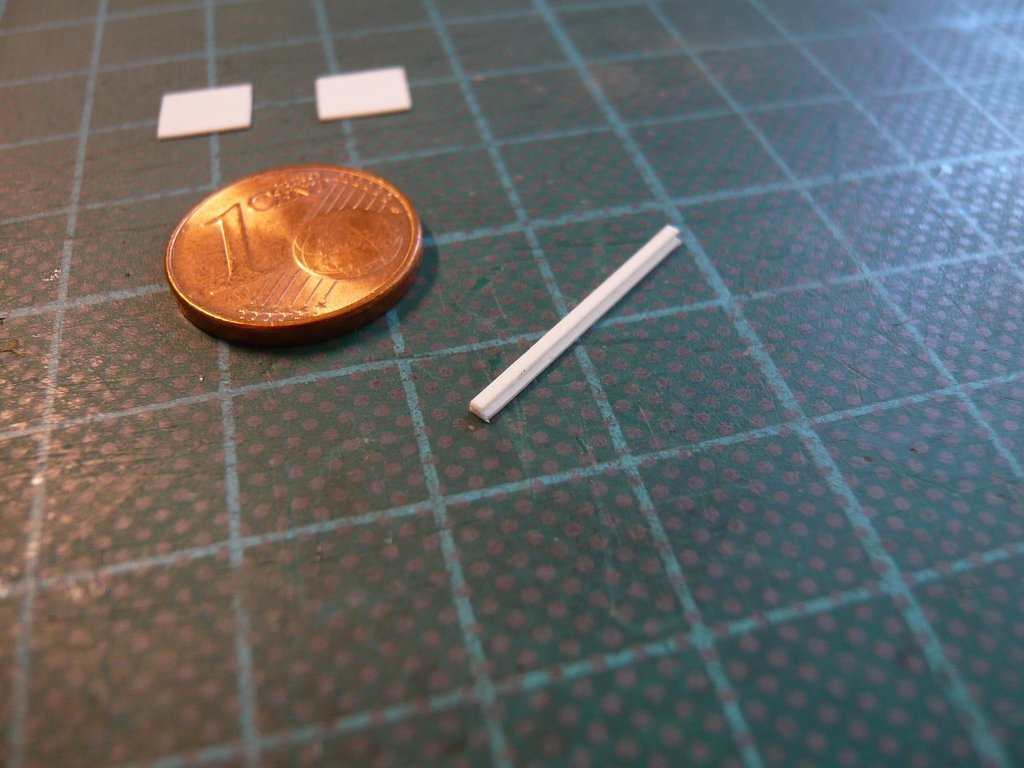 But already for cutting to the required length (2.6 mm), a defined stop was required, for what I first made several test cuts with a dummy strip, to be sure and not bungle the angle profile. 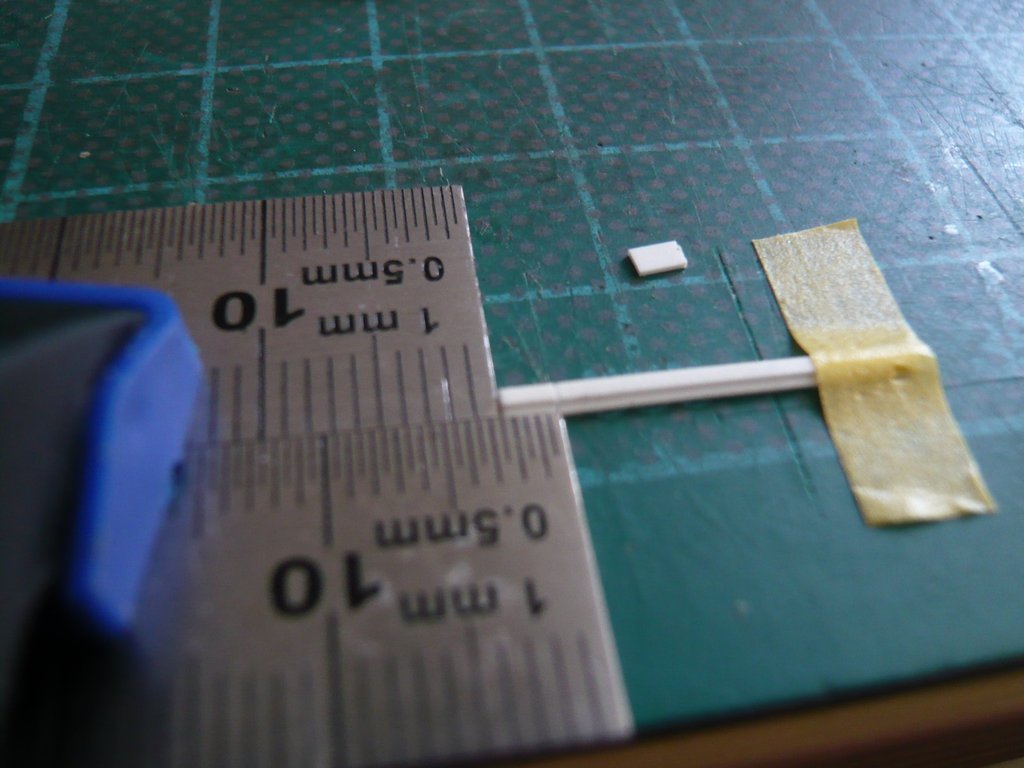 But despite the greatest care, it was not possible to cut off sections of the same length with the chisel cutter due to the difference in height, which is why I switched to a different solution.  For this I prepared a new strip (0,4 mm x 1,2 mm), and from the narrow strip (0,4 mm x 0,8 mm) I've also cut off 2,6 mm long pieces at the ruler stop, which I then glued individually to the wider strip and then have only cut off behind the narrow strip, which resulted in evenly long angles. 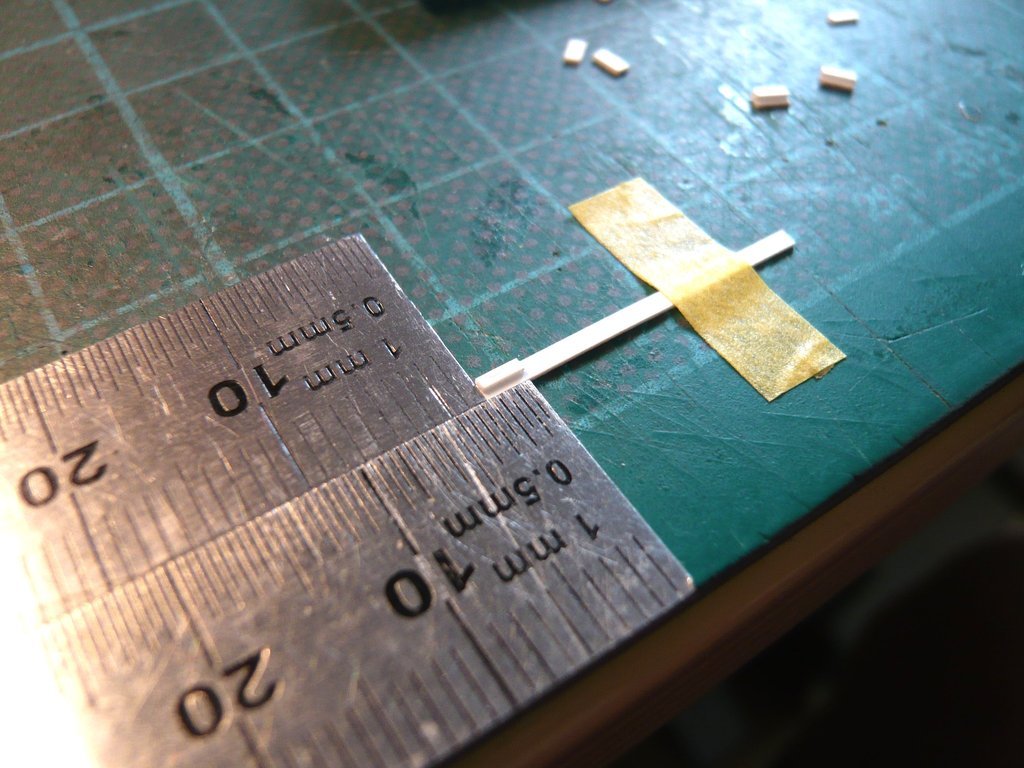 With these angles I then immediately tested the width of the holders of the smaller Transportation plate, 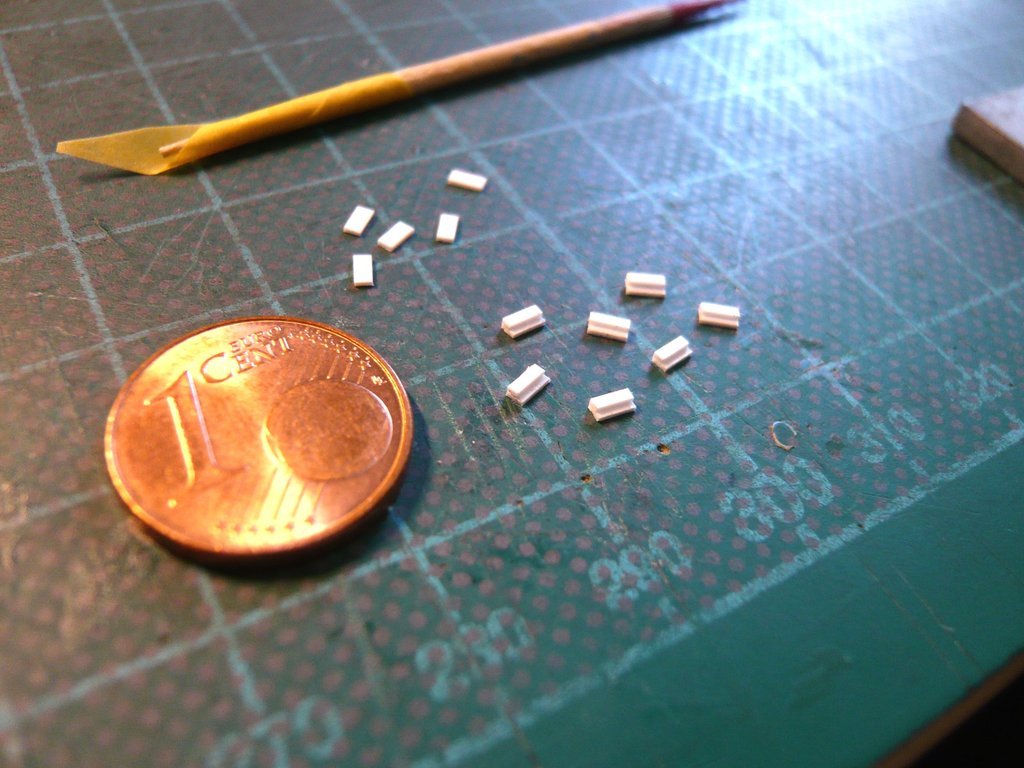 for what the strip (0,4 mm x 1,3 mm) for the base plate of the Hold-down Clevis was inserted, which can be seen here in the view from below. 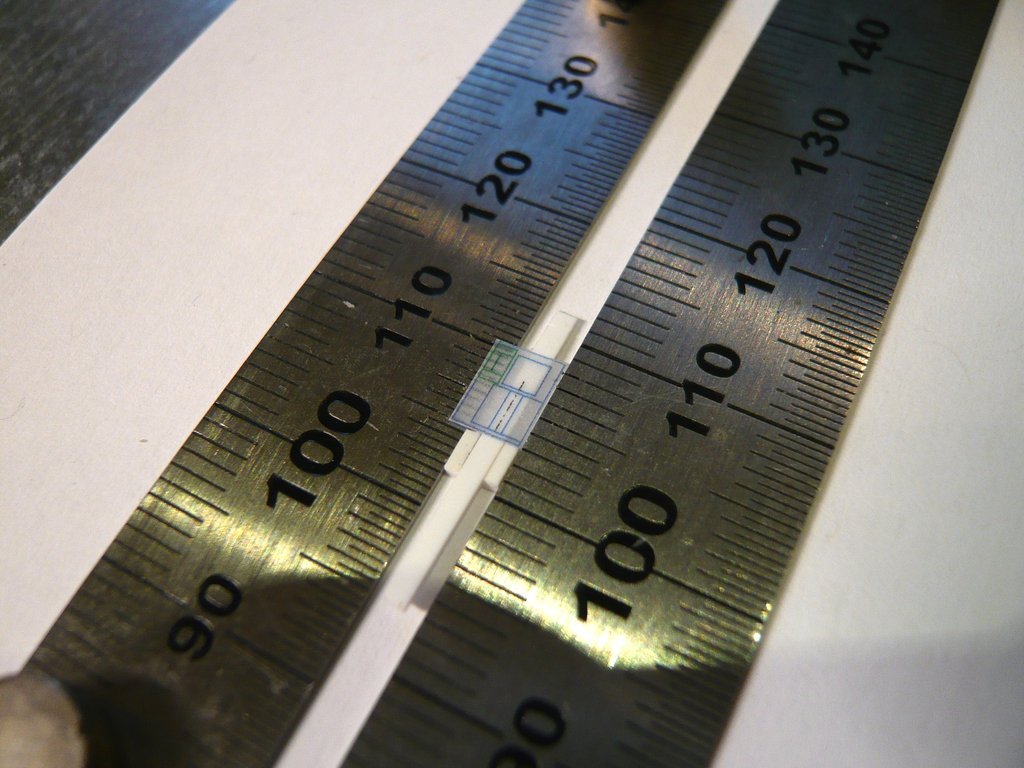 And in fact I came up with the intended width of the brackets of 2,9 mm, what was difficult to photograph, but is just about recognizable, at least I hope so. For better orientation I have put down the drawing of the small transport plate to it.  This is the same arrangement of the brackets, only seen from above. 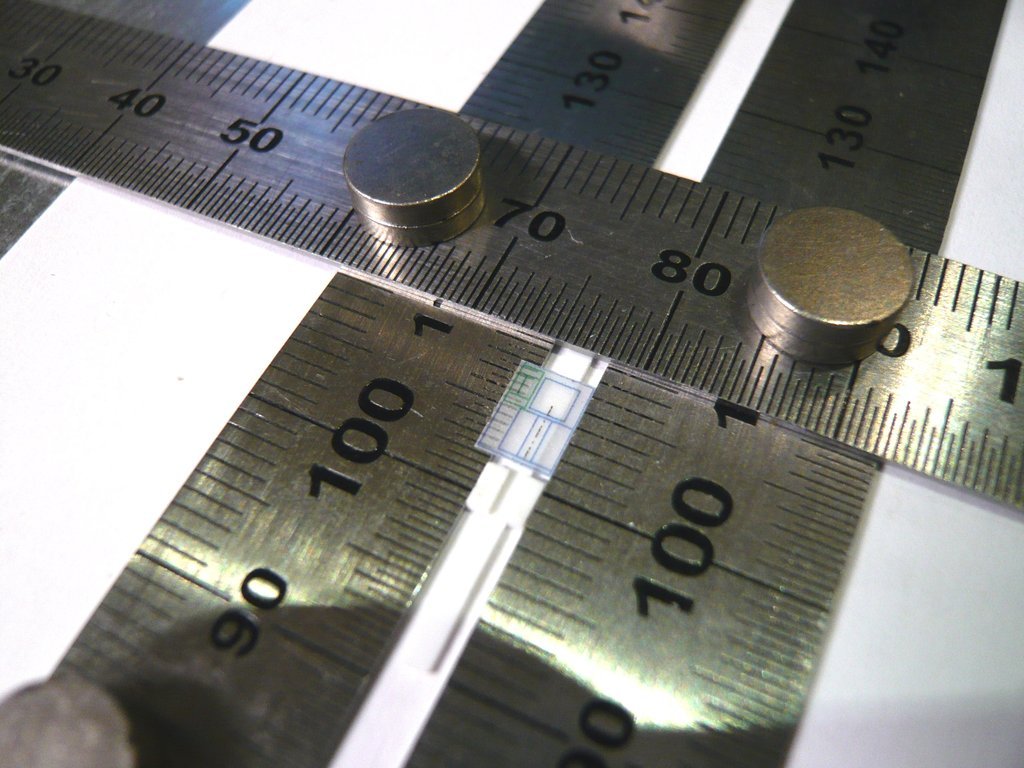
__________________
Greetings from Germany Manfred Under construction: Launch Pad 39A with Challenger STS-6 (1:144)
|
|
#2669
07-20-2022, 05:50 AM
|
||||
|
||||
|
And in the resulting gap (0,8 mm) the Hold-down Clevis has to fit, which consists of two plates, as can be seen in this photo,
Source: NASA (STS-122) between which the Tie-down Lug Plate still has to fit, which in turn consists of three discs, Source: NASA (STS-114) which illustrates the whole difficulty of further scratch building. And when working with these mini-particles, I usually can't do without my headset glasses, which my helpful assistant always keeps ready.  But I have to go through,  since the mouse bites from no thread. since the mouse bites from no thread.
__________________
Greetings from Germany Manfred Under construction: Launch Pad 39A with Challenger STS-6 (1:144)
|
|
#2670
07-22-2022, 12:17 PM
|
||||
|
||||
|
Hello everybody,
next I tried to arrange the brackets on the bottom plate of the smaller transportation plate (4 mm x 5,5 mm) which is so small that it has place on the globe of the cent coin. 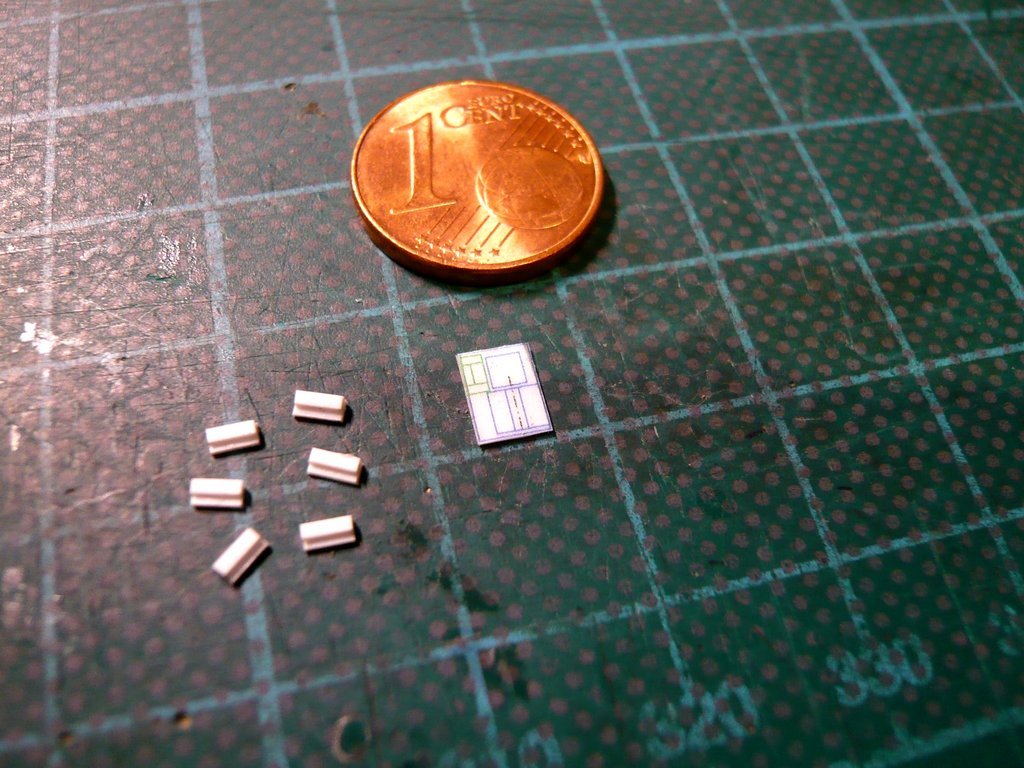 And as it quickly turned out, it's not that easy and requires a certain amount of dexterity when using the pointed tweezers, since you sometimes can't get hold of the tiny parts and there is a risk that they will suddenly jump away, whereon the Tile Monster is just waiting. 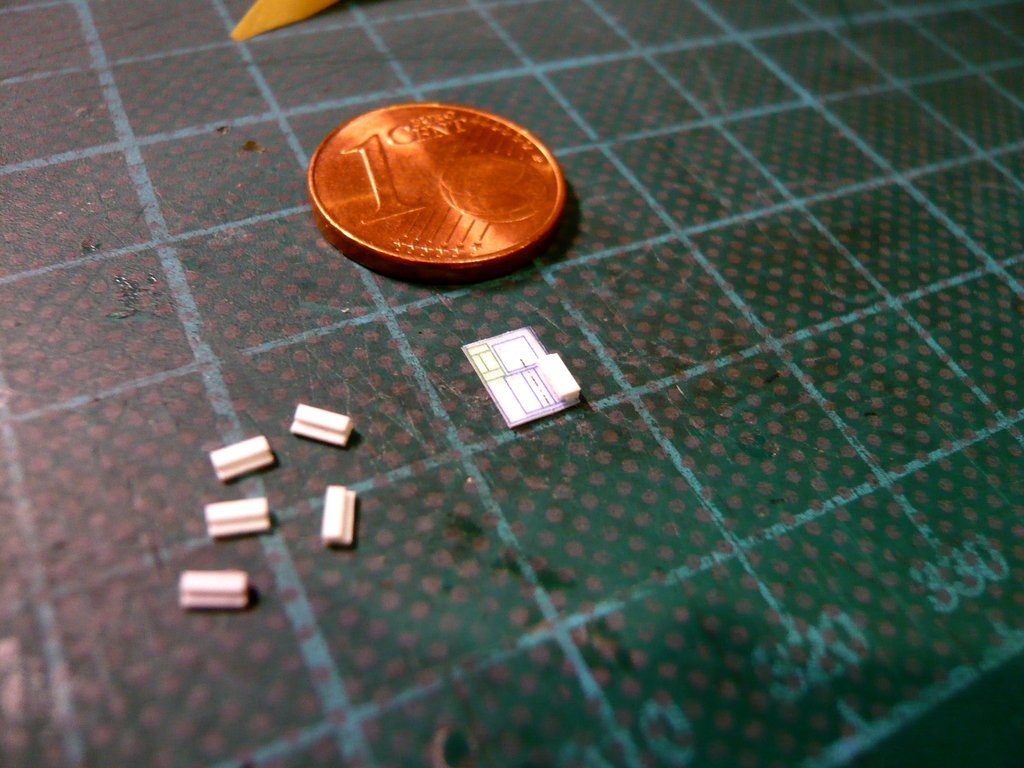 But the space check was at least satisfactory and showed that the space conditions on the drawing is sufficient. 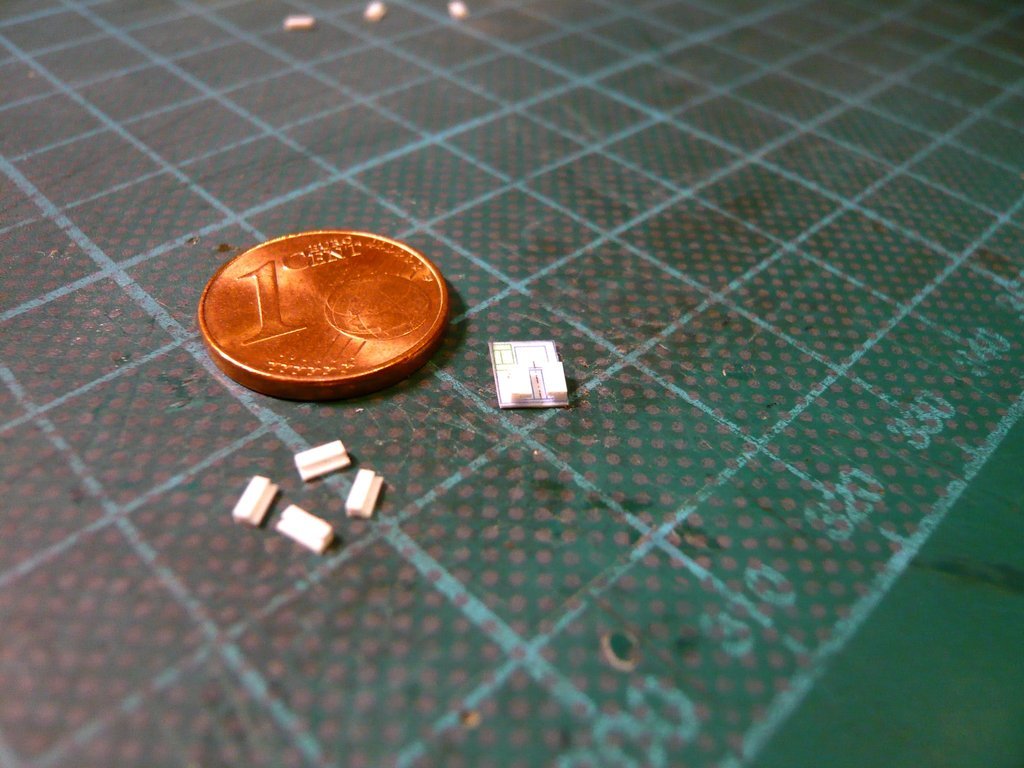 However, I can't yet glue the brackets to the floor plate because I need to know how wide the Hold-down Clevis with the inserted Tie-down Lug Plate is, that needs to fit into the narrow gap (0,8 mm) between the two plates. So I first had to use various detailed photos to scratch the appropriate parts in order to be able to carry out a 'real' space check. And those were the plates for the Clevis, which I need in total 8 x, the dimensions of which I determined in this and other photos.  Source: NASA (STS-132) This image shows the prototype of the plate and the prepared base plates (0,4 mm x 1,3 mm x 2,6 mm). Above that is my first sample of the Tie-down Lug Plate, which I still have to modify a bit, as subsequent measurements have shown that the plate is a bit too small and too thick. 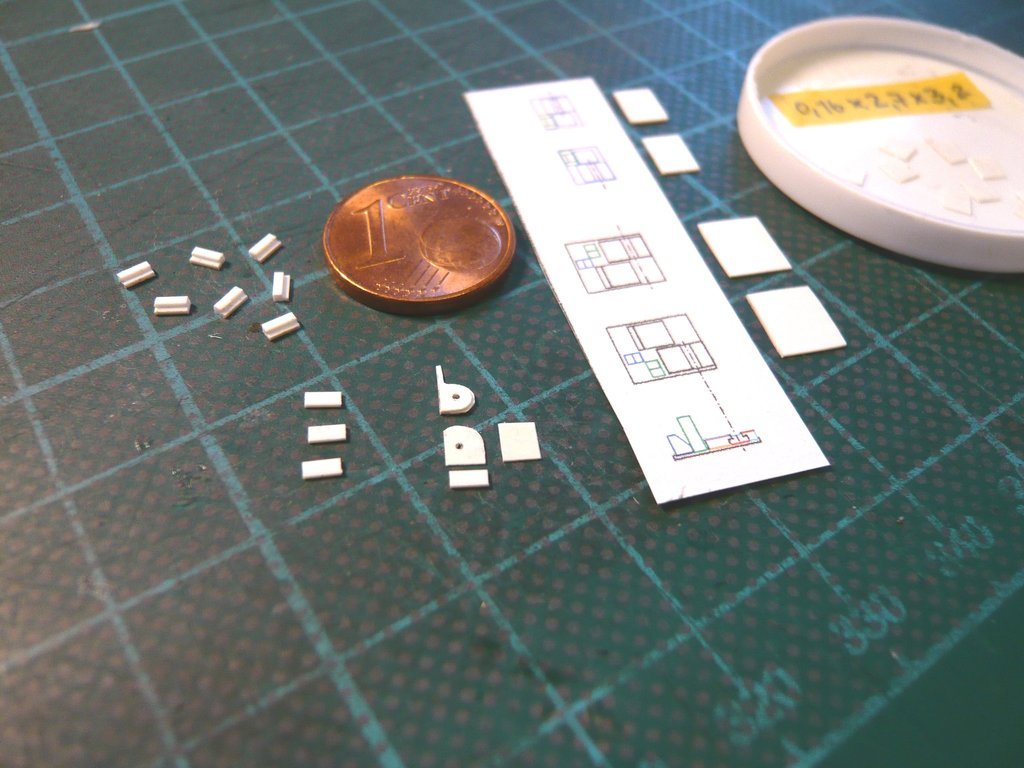 So I used the first one as a template to prepare another Clevis plate to test the fork, 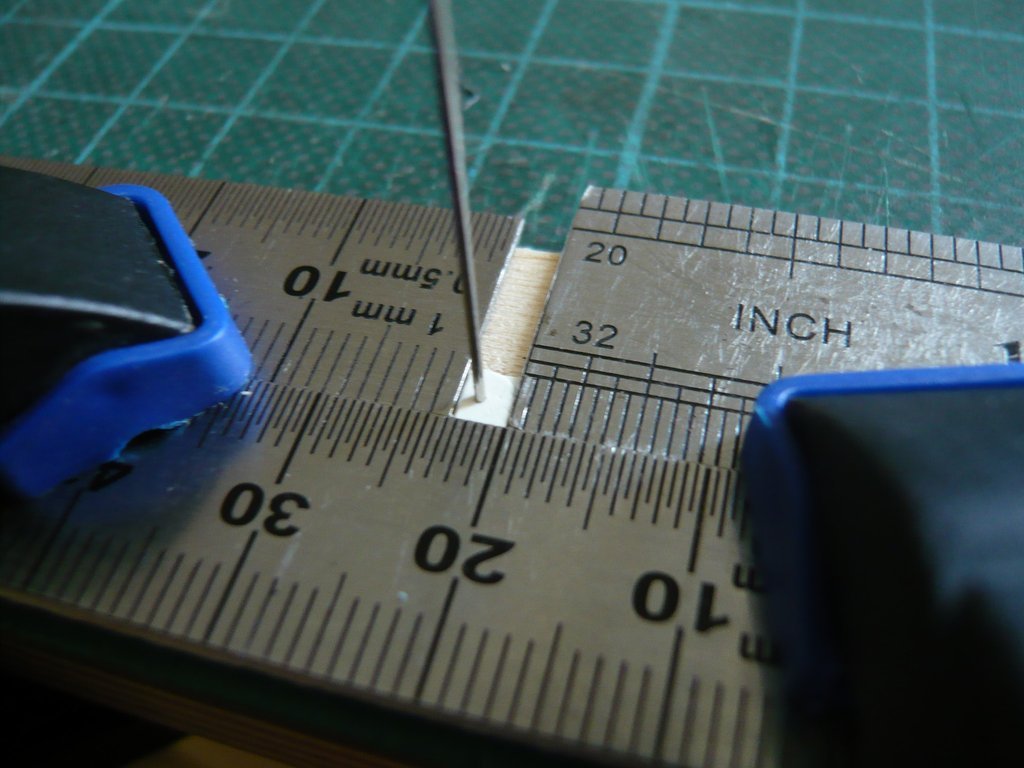 and have cut off and pre-drilled the remaining six plates. Furthermore, one can also see on this image the modified Tie-down Lug Plate with the two outer discs, all three made of Evergreen Styrene (0,13 mm) so that the finished plate also fits into the Clevis. What to think all about ...  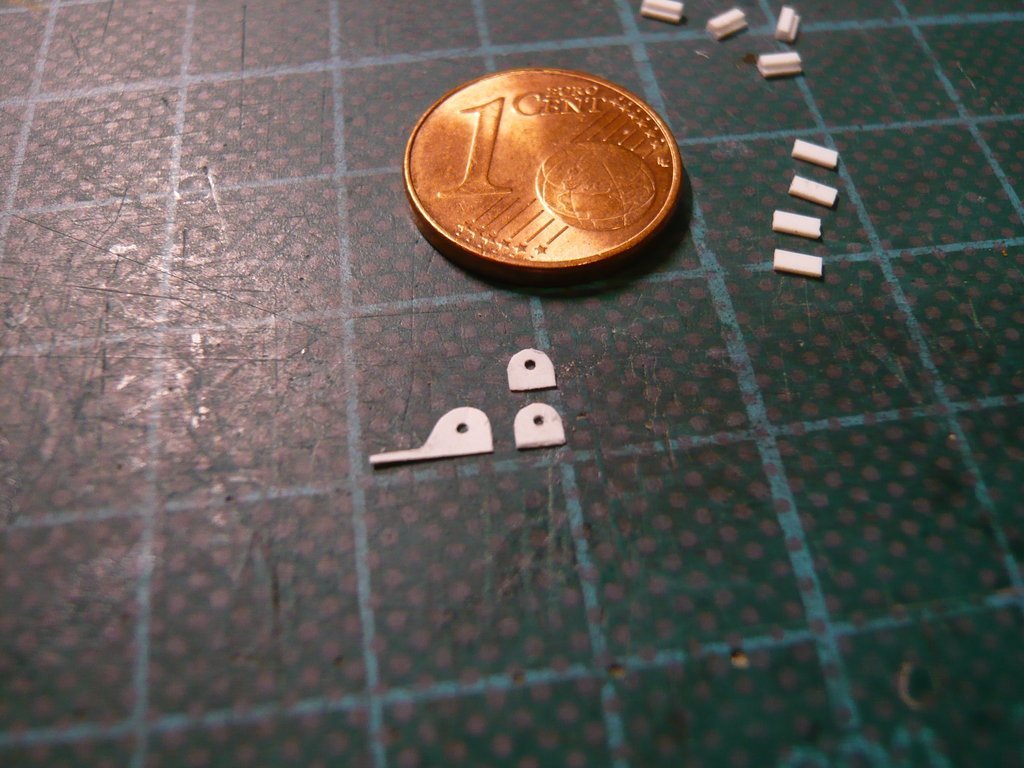 And because I was there once, I also prepared the remaining Lug plates, 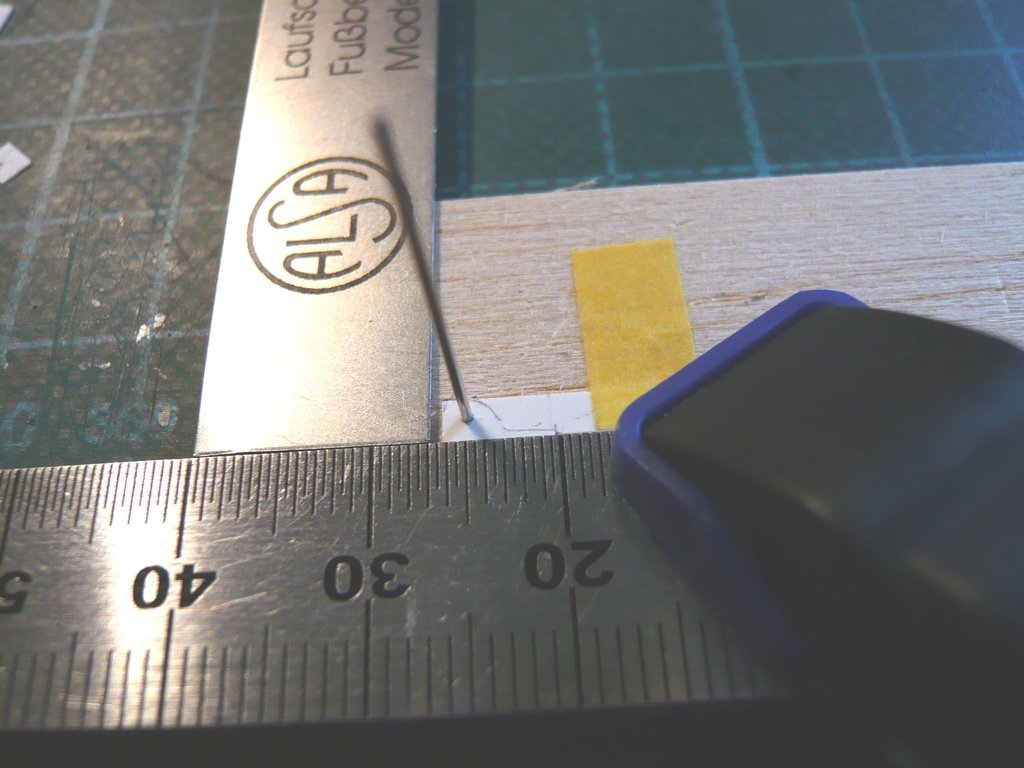 which I need 4 x. 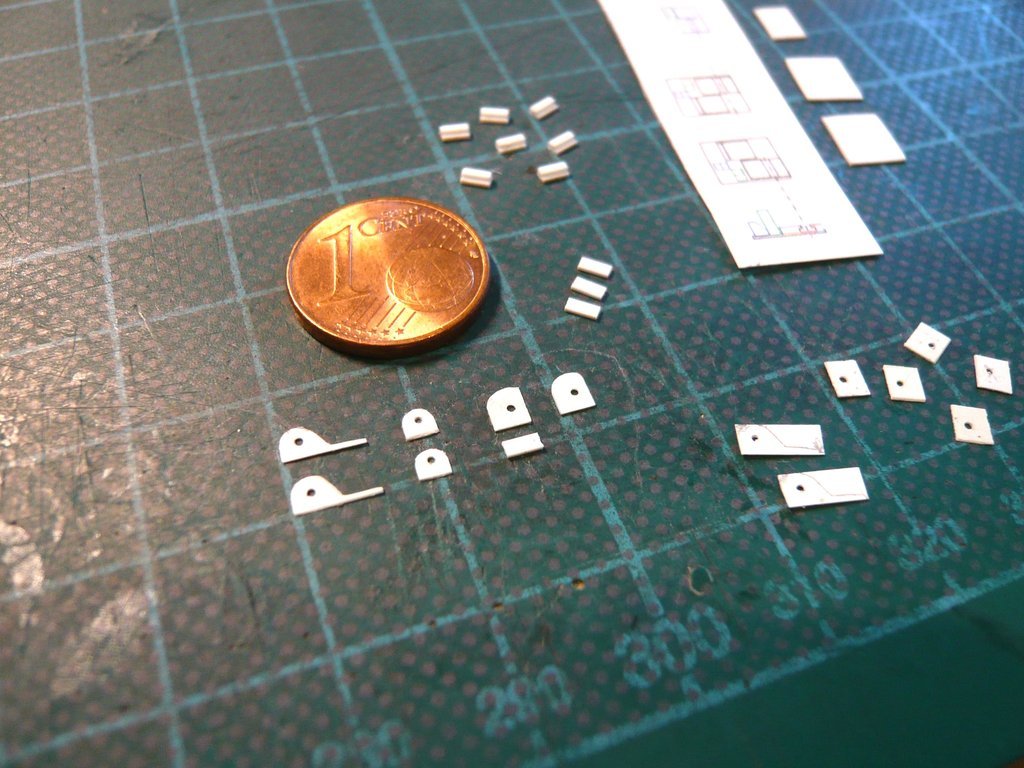 But that's enough of the preparation, next comes the practice test.
__________________
Greetings from Germany Manfred Under construction: Launch Pad 39A with Challenger STS-6 (1:144)
|
 |
|
|


 Linear Mode

