


|
|
|
#2791
 03-17-2023, 01:32 PM
|
||||
|
||||
|
Okay, if I ever have time for that after I have finished the Payload Canister ...
 
__________________
Greetings from Germany Manfred Under construction: Launch Pad 39A with Challenger STS-6 (1:144) 
|
|
#2792
03-17-2023, 01:34 PM
|
||||
|
||||
|
Hello everybody,
originally I had immediately thought of my narrowest Evergreen profiles,  but both the H profiles and the U profiles are 1,5 mm wide, which would not match to the filigree handrails. but both the H profiles and the U profiles are 1,5 mm wide, which would not match to the filigree handrails.  Then I've compared a Channel profile (1,3 mm) with my planned four-part variant (right), which, when using strips (0,2 mm x 0,75 mm) for the sides, is approx. 0,9 mm wide, which looks more pleasing in combination with the round rod (Ø 0,45 mm) of the handrail struts.  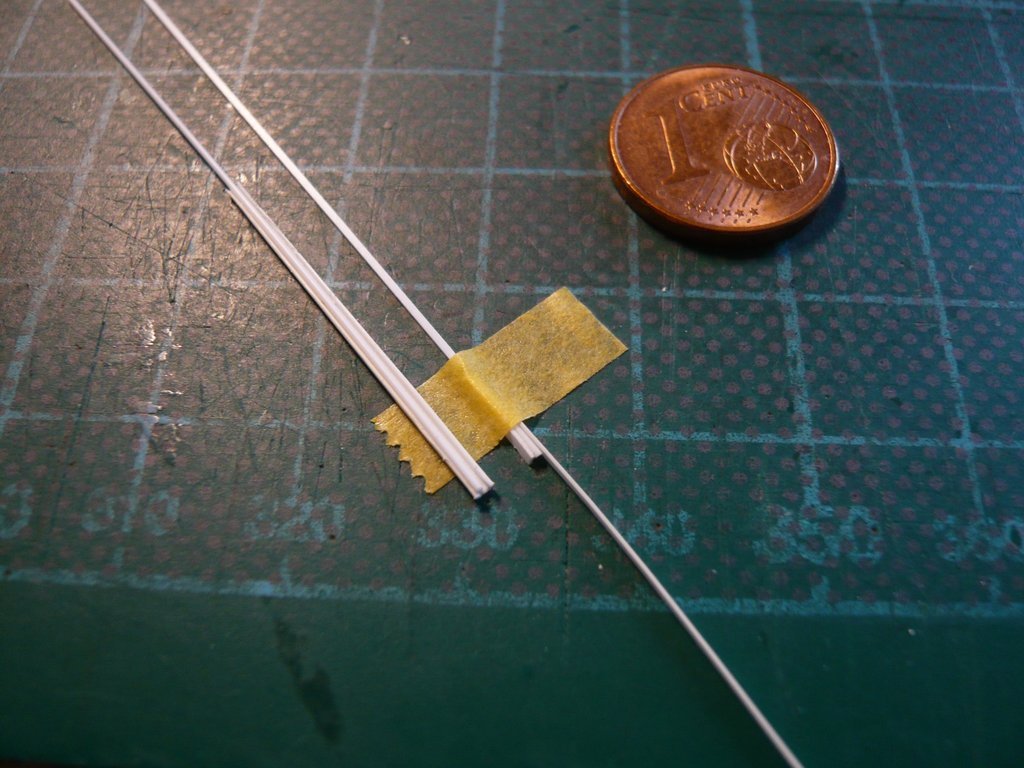 And if I would cut a Styrene strip (0,13mm x 0,75mm) for the sides, it should look even better and even closer to the size specified in the NASA drawing get there, what would mean a bit more effort.  So I've tried to scratch such a Prototype. But it's already not easy to cut a 0,75 mm wide strip, but which I managed to do. I then placed this strip upright on the ruler angle, clamped the Base strip (0,25 mm x 0,5 mm) in front of it and then both strips were carefully glued by using MEK at their connecting line. Then I glued a small strip onto the other side, 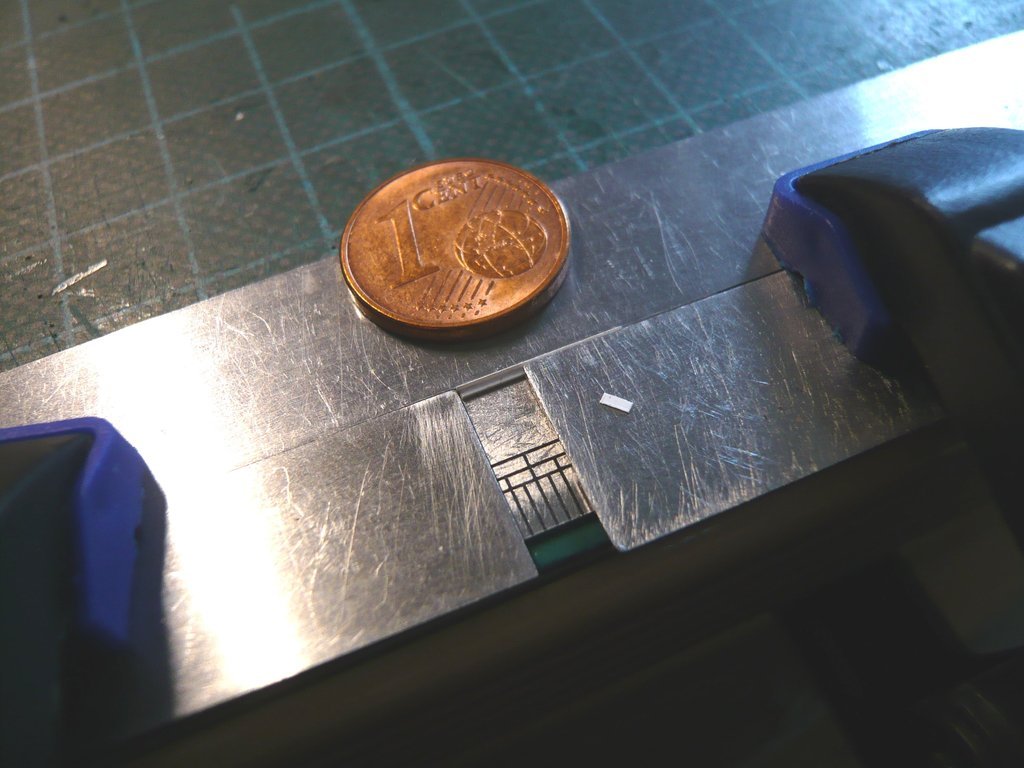 and let it dry. 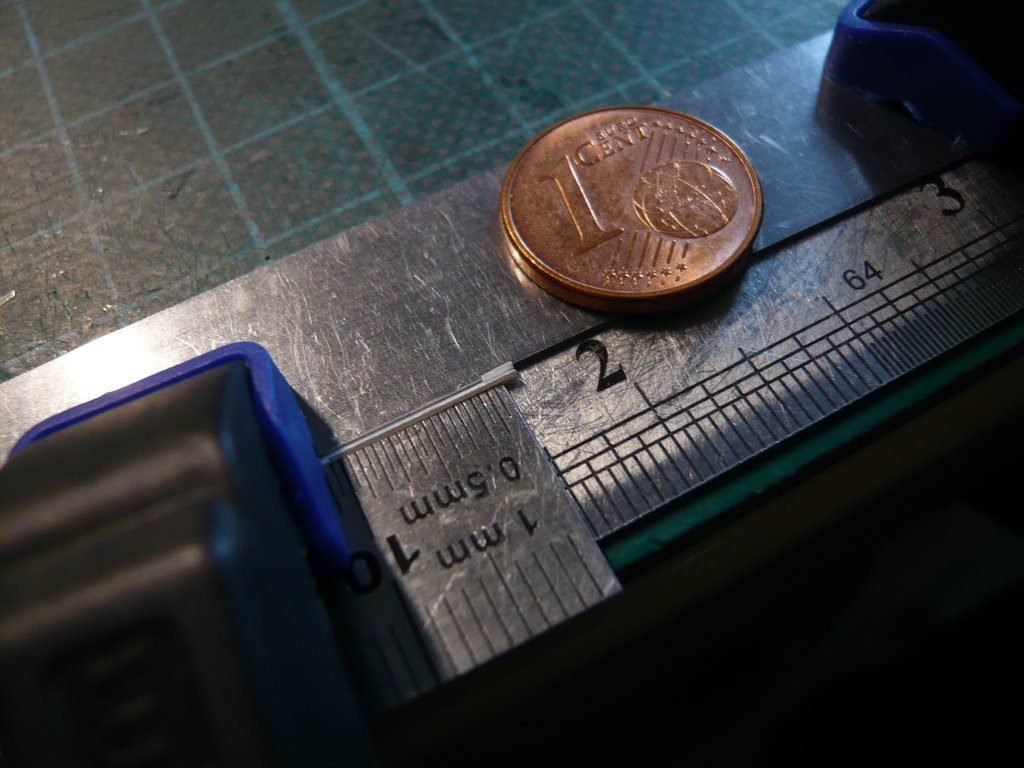 Then I've carefully cut off a 1 mm long part from this U profile with a razor blade, 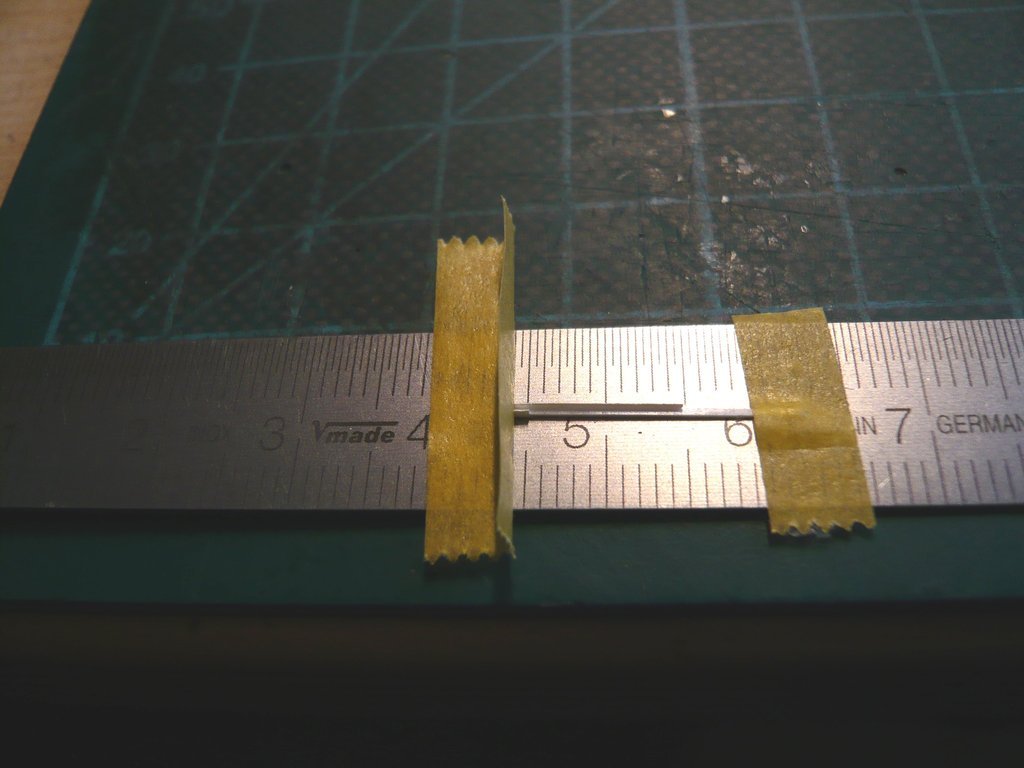 which actually succeeded with the precautionary placed Jump away-Protection tape (left). 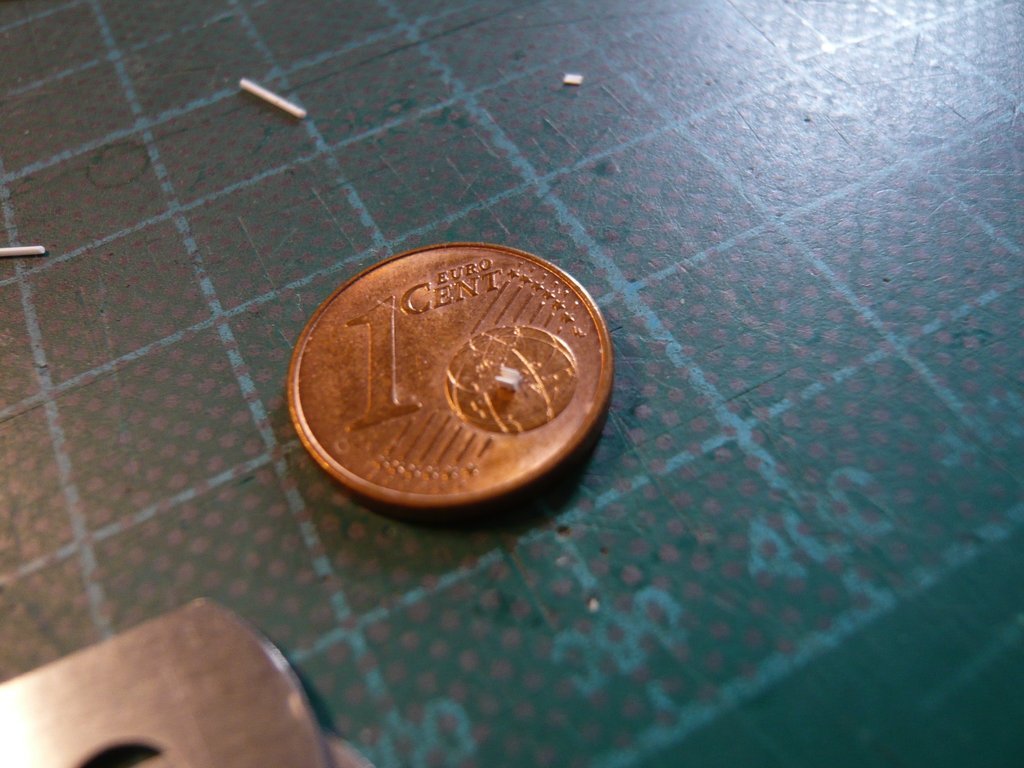 Now only the small end piece had to be glued and trimmed, 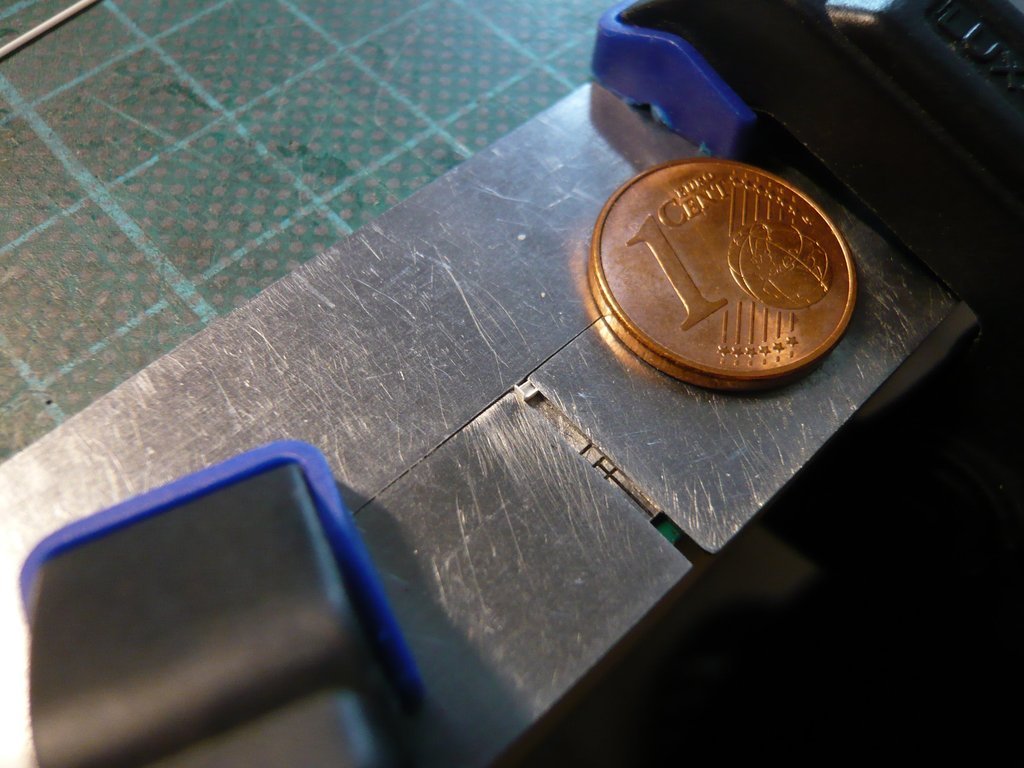 whereupon the test fitting of the first Mount on the handrail could take place.  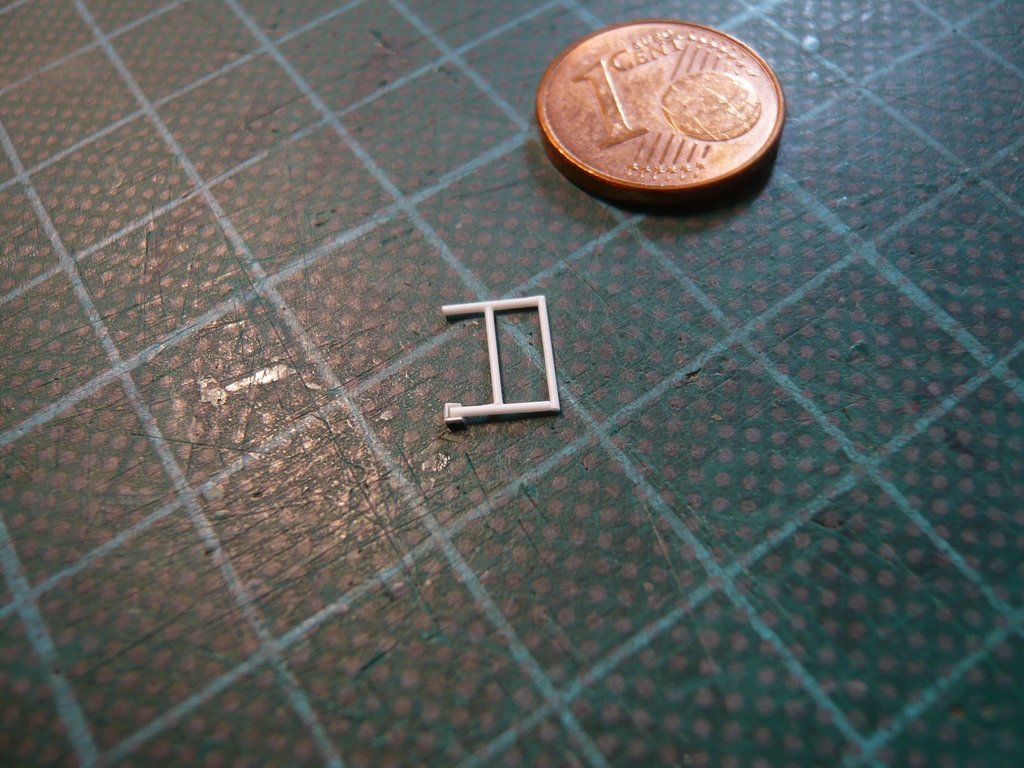 Although the feasibility of the Prototype could be shown in principle, I have in mind a smarter solution for scratching of the remaining 17 mounts, by what the effort should let be reduce.
__________________
Greetings from Germany Manfred Under construction: Launch Pad 39A with Challenger STS-6 (1:144)
|
|
#2793
03-18-2023, 03:45 AM
|
||||
|
||||
|
Hello everybody, is there anybody in there?
And thus to this new variant for the production of the Handrail brackets that I have been thinking about.  The idea behind it is actually simple and based on the production of such a U profile with a greater length, from which I then carefully cut off small 1 mm long pieces and close on one side.  Thought and done, gluing the side strips (0,13 mm x 0,75 mm) to the base strip (0,25 mm x 0,5 mm) took place again in the proven manner by fixing between the rulers. 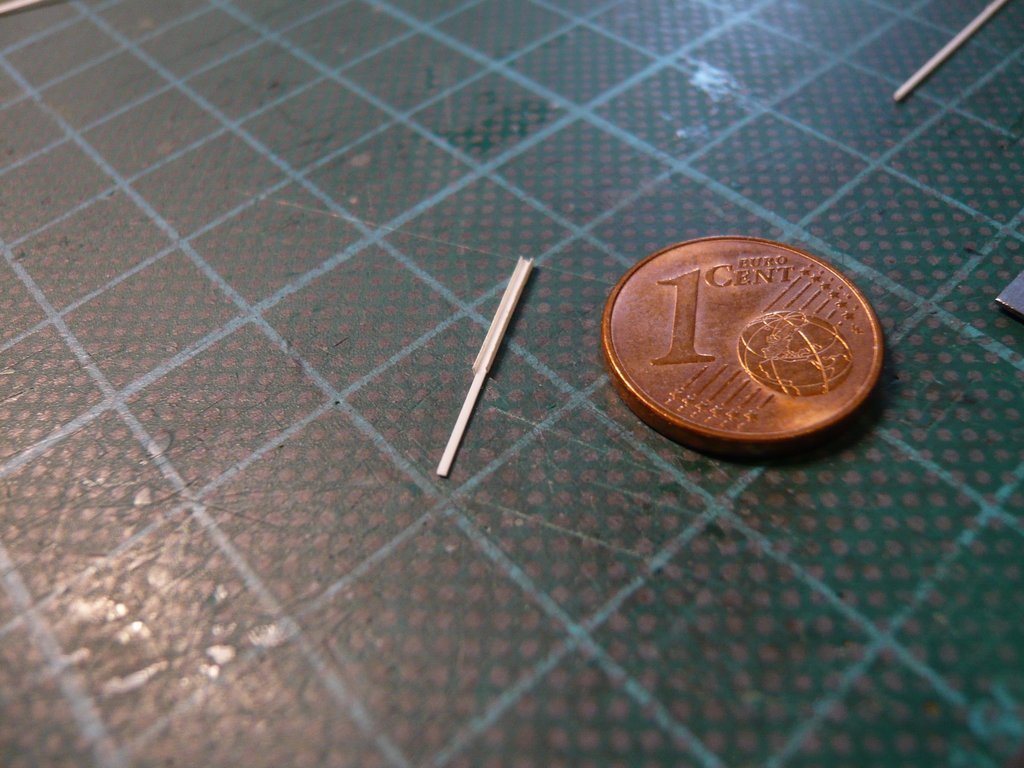 Such a Steel ruler is also ideal for aligning the U profile, which happens to be 0,5 mm thick as on commission.  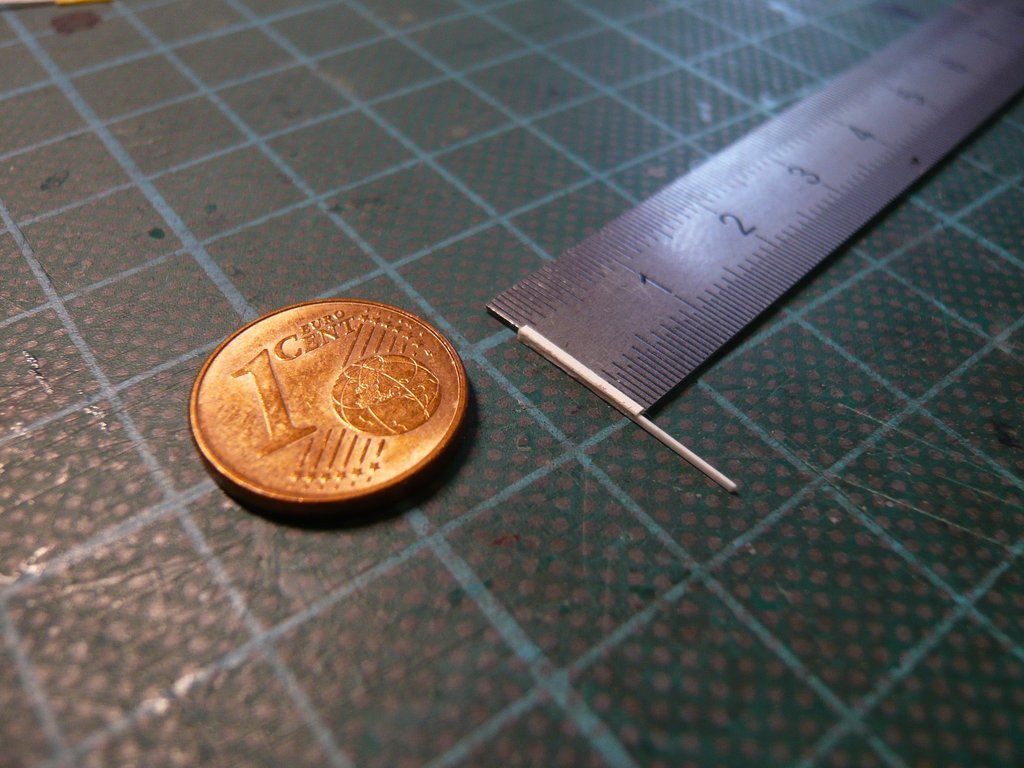 Then the U profile was glued to the end strip (0,13 mm x 0,8 mm), which I deliberately left a little longer and fixed flat.  However, since my steel angle for the vertical alignment of the U profile offers much more support, I then chose this arrangement, which made the gluing much easier. 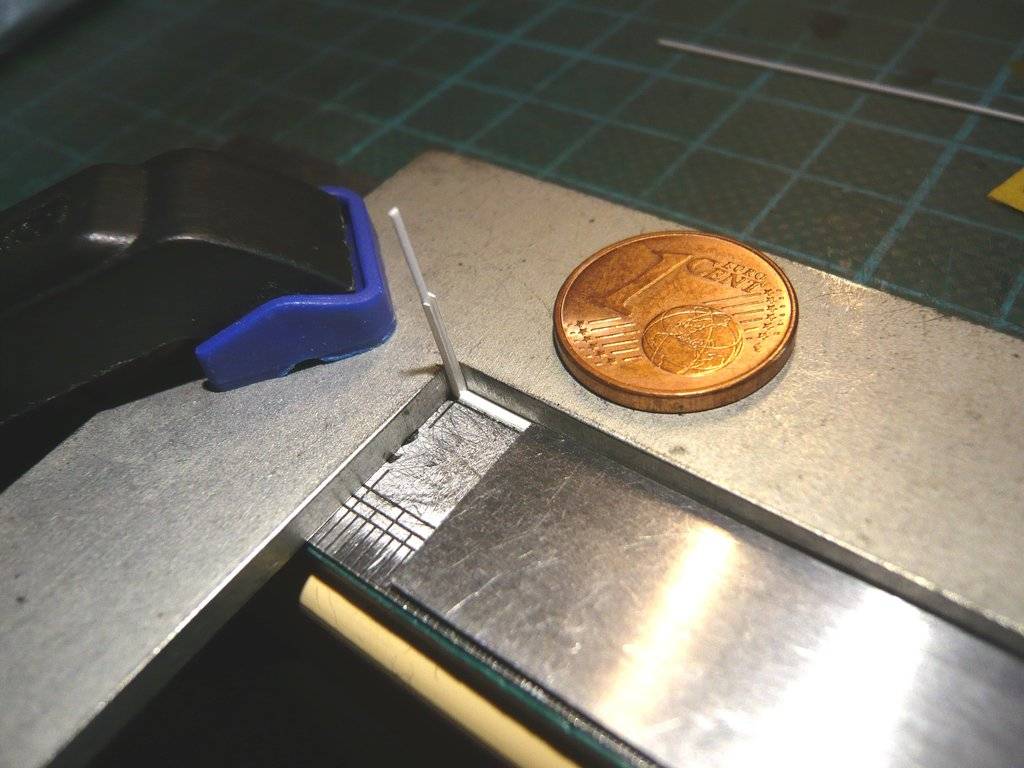 For final fixation while the Revell glue was drying, the deck ruler was moved to the stop,  whereby the U profile was glued perfectly.  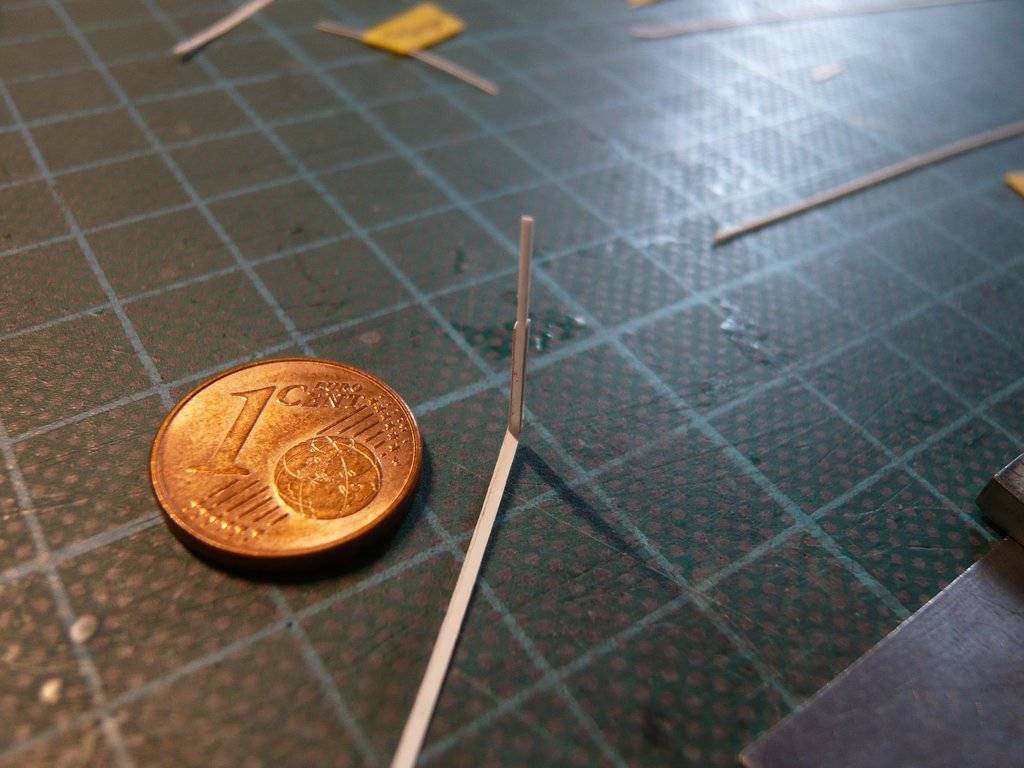 For the separation of the end strip I've thought about this special fixation on a small steel block, 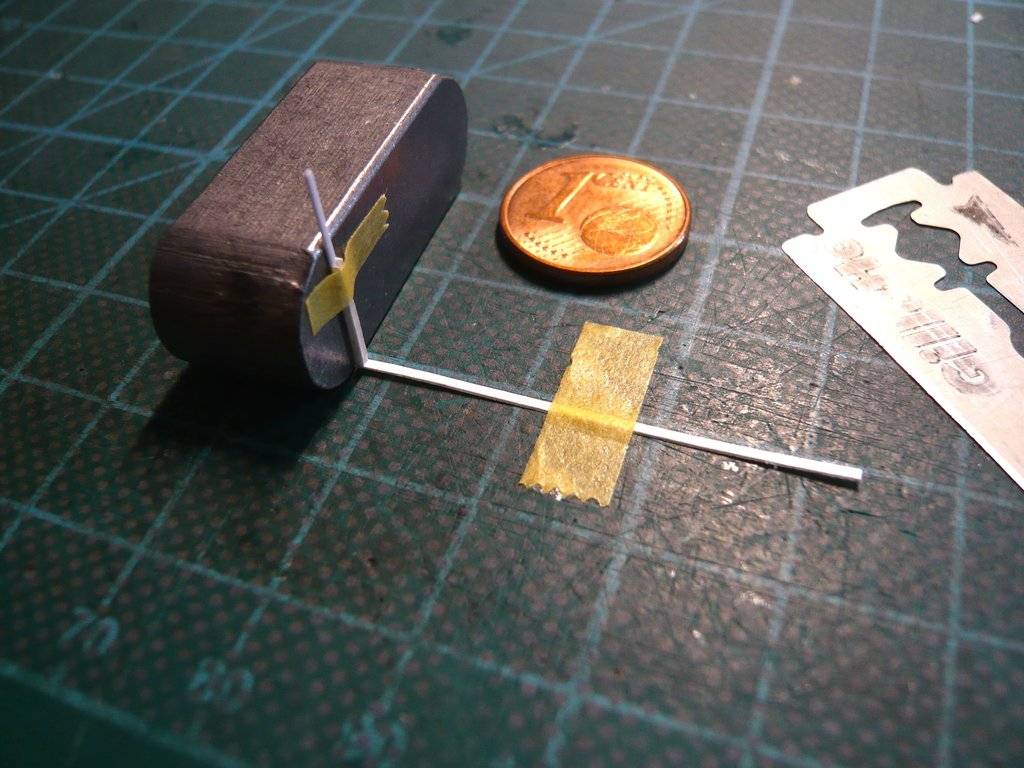 after which the razor blade was used. 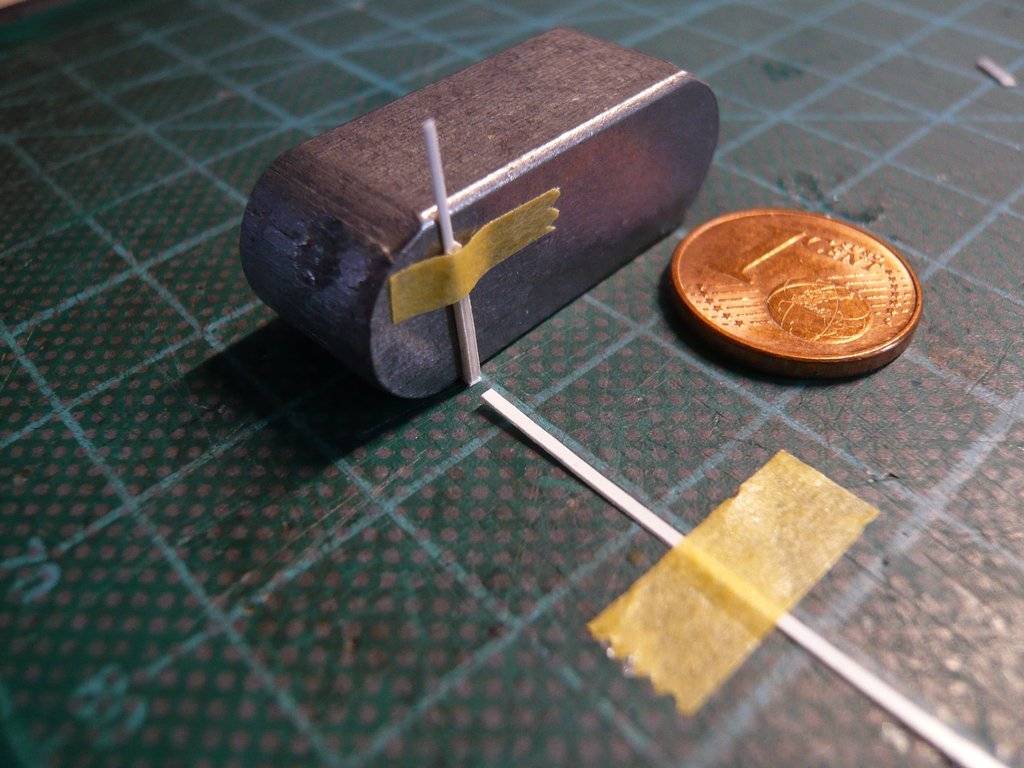 To complete the bracket, only the end piece (1 mm) had to be separated from the U profile, 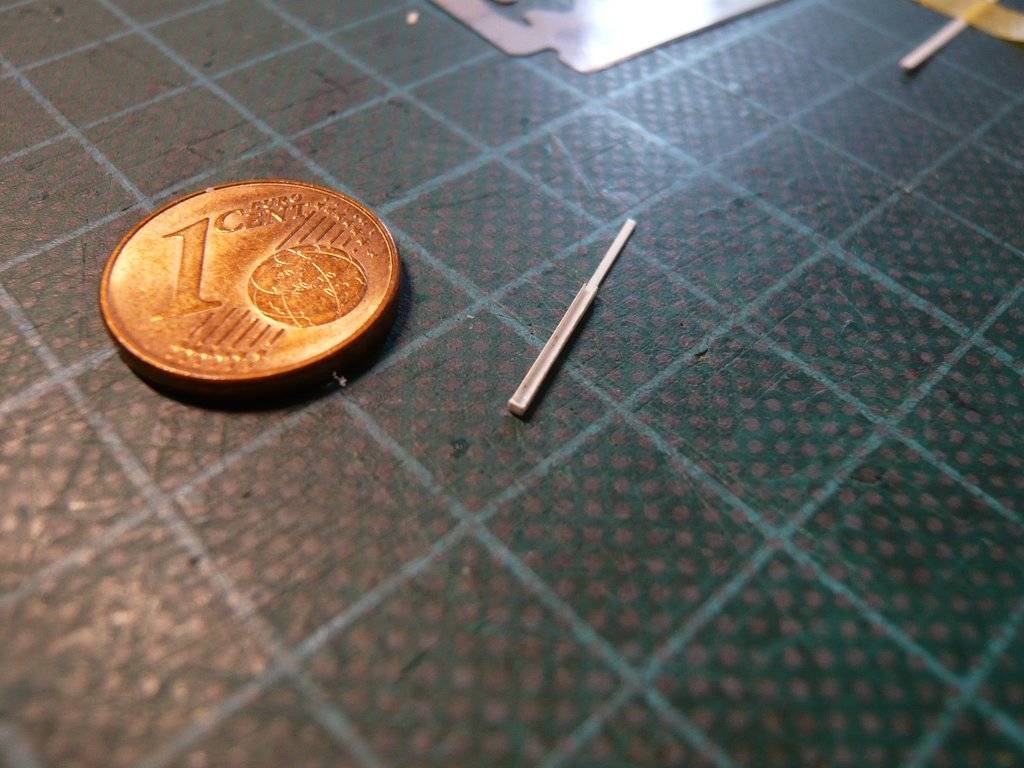 for what I needed five rulers for fixation,  which I arranged in such a way that I could now use the razor blade to score at least the upper edge of the two side strips on the 1 mm line, which only has a minimal overhang (0,25 mm), which I arranged in such a way that I could now use the razor blade to score at least the upper edge of the two side strips on the 1 mm line, which only has a minimal overhang (0,25 mm), 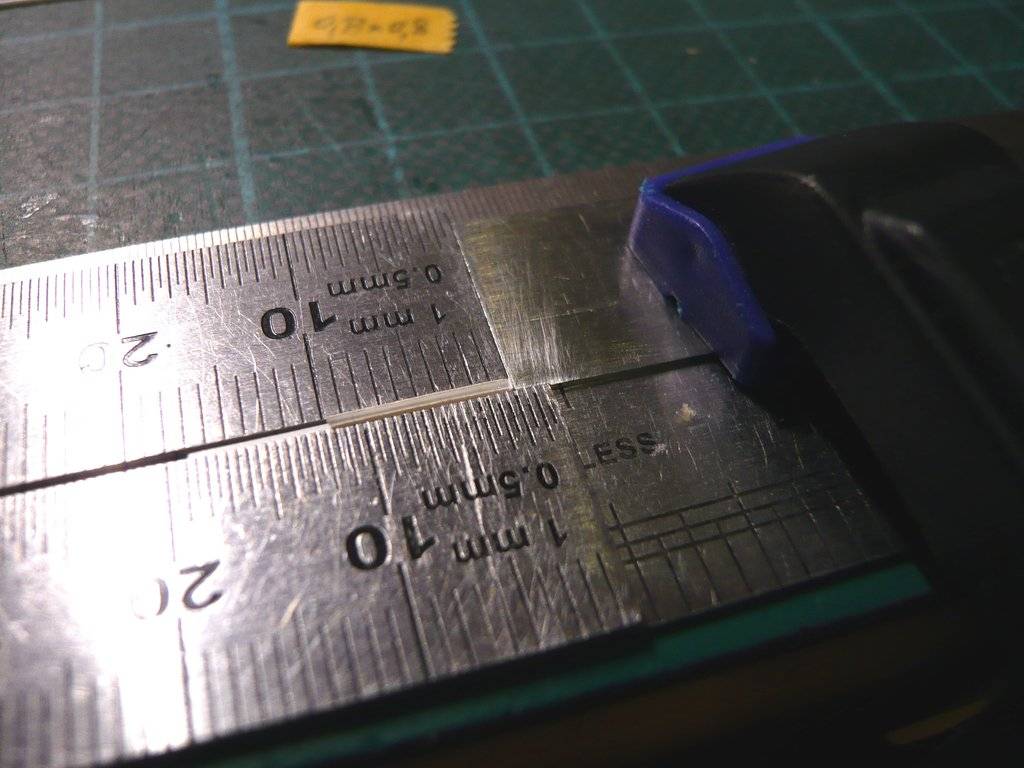 wherefore I had to take a close look myself with the headset magnifying glass over my glasses, assuming a steady hand.  
__________________
Greetings from Germany Manfred Under construction: Launch Pad 39A with Challenger STS-6 (1:144)
|
|
#2794
03-18-2023, 03:46 AM
|
||||
|
||||
|
For the final separation of the mount I only had to be able to recognize these fine incisions,
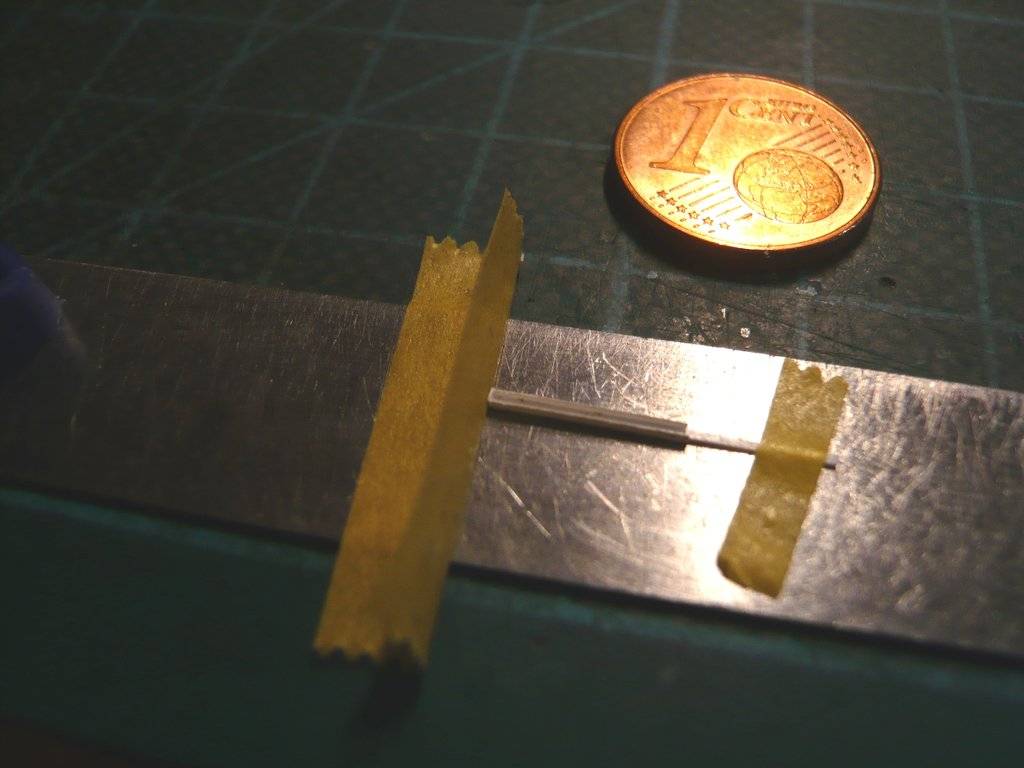 which is perhaps just visible here on this macro shot at an enlargement of 3553x2665,  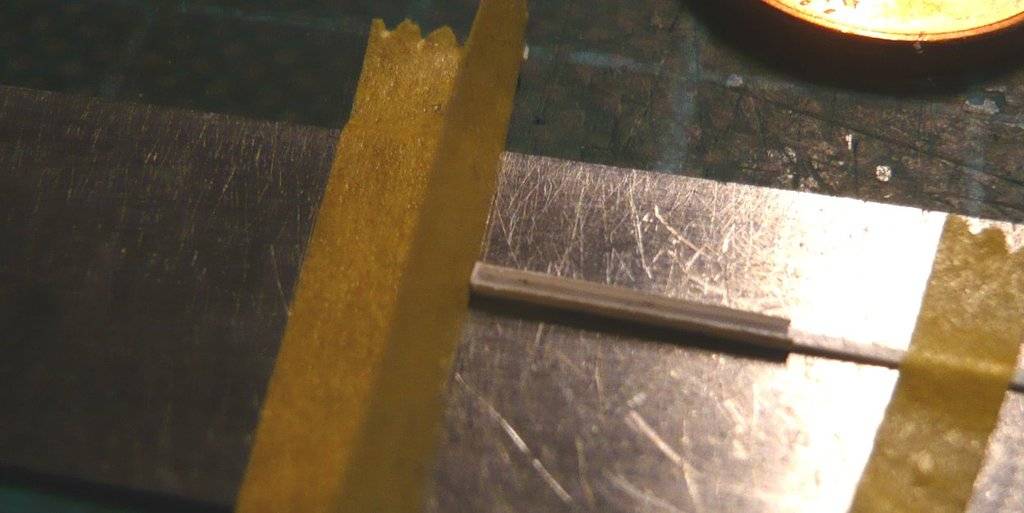 therefore here again somewhat larger with marking.  When making a cut with a razor blade, the Jump away Protection tape is important in addition to a steady hand, which again has proven itself!  The advantage of this variant is that I can now use the remaining U profile to make another nine mounts in the same way, 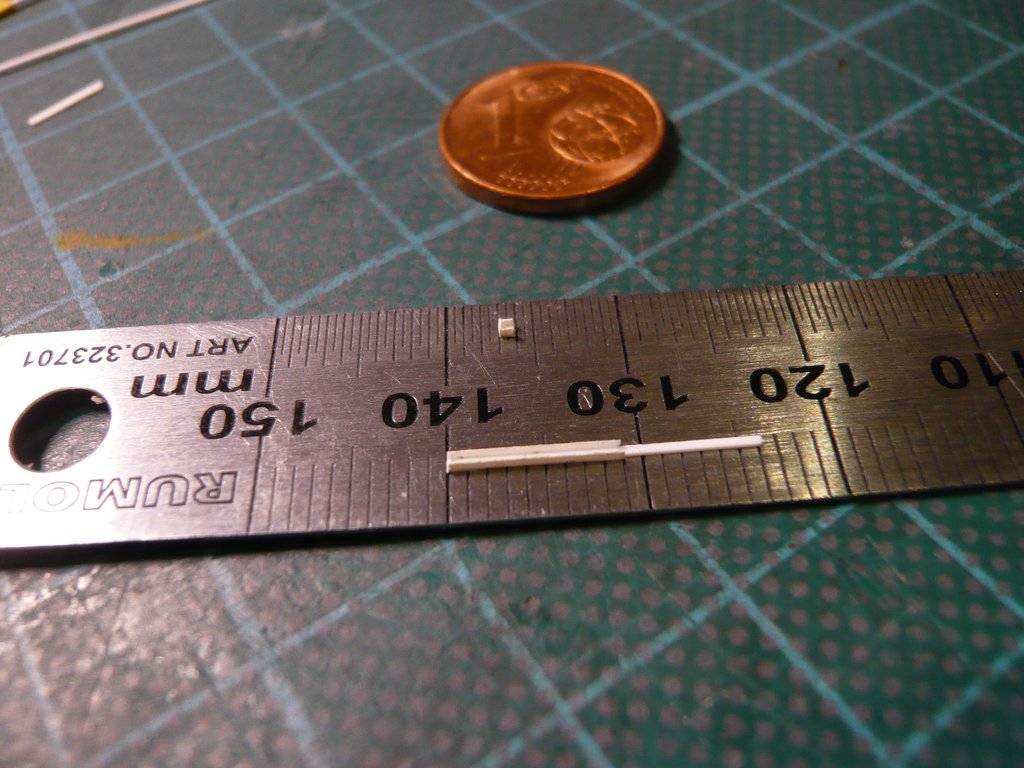 wherewith the half would be done already.
__________________
Greetings from Germany Manfred Under construction: Launch Pad 39A with Challenger STS-6 (1:144)
|
|
#2795
03-18-2023, 06:50 AM
|
|||
|
|||
|
|
|
#2796
03-18-2023, 08:21 AM
|
||||
|
||||
|
Yeah, yeah, yeah!
 Just saw Pink Floyd's awesome song Comfortably Numb and was inspired again, hence the question, if there is anybody in there ...
__________________
Greetings from Germany Manfred Under construction: Launch Pad 39A with Challenger STS-6 (1:144)
|
|
#2797
03-21-2023, 05:05 PM
|
||||
|
||||
|
Hello everybody,
let's go on with the production of the tiny Handrail brackets, which are held up the progress quite a bit, since you always have to let the glue dry before you can handle them any further. In the meantime I have arranged the steel block the other way around when cutting off the end strip, as this way I can better control the cut with the razor blade. 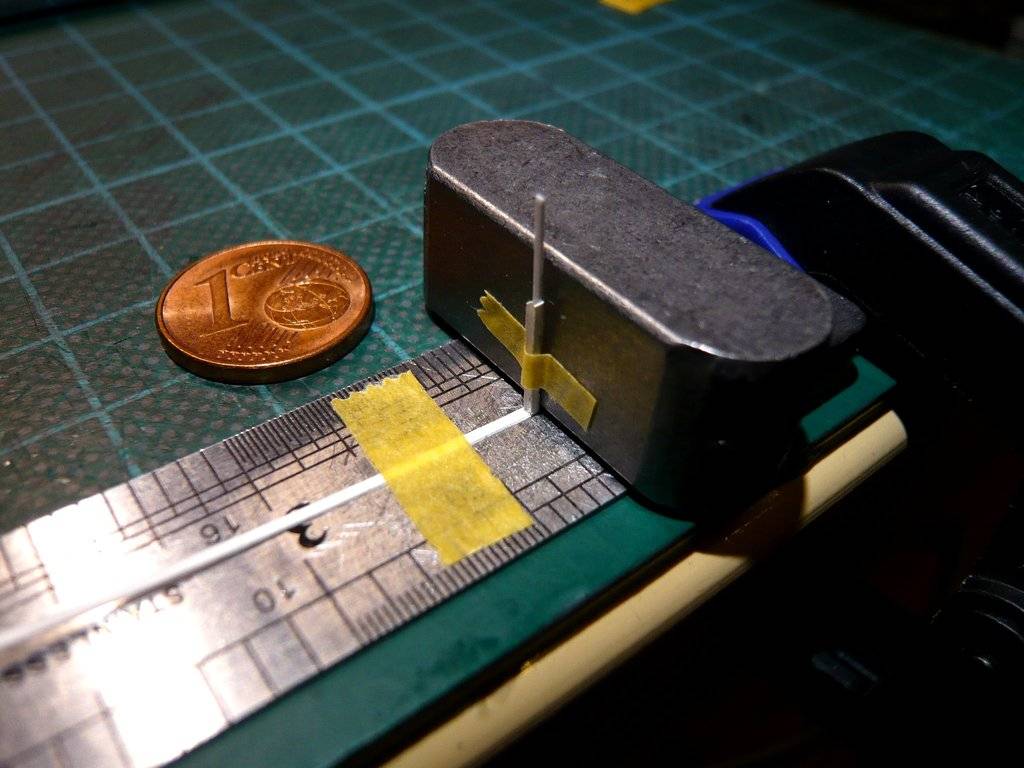 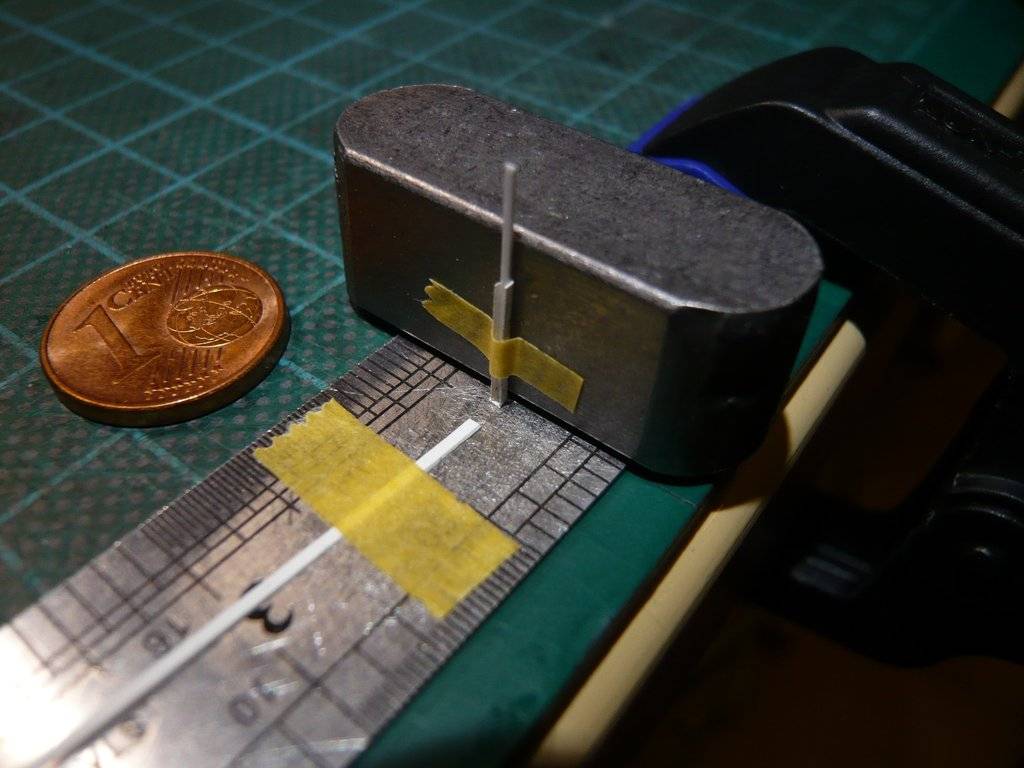 The tricky separation of the U-profile can also be done in different ways, which is why I tried out a few things and switched to a larger sheet of steel as a base, which makes handling easier. 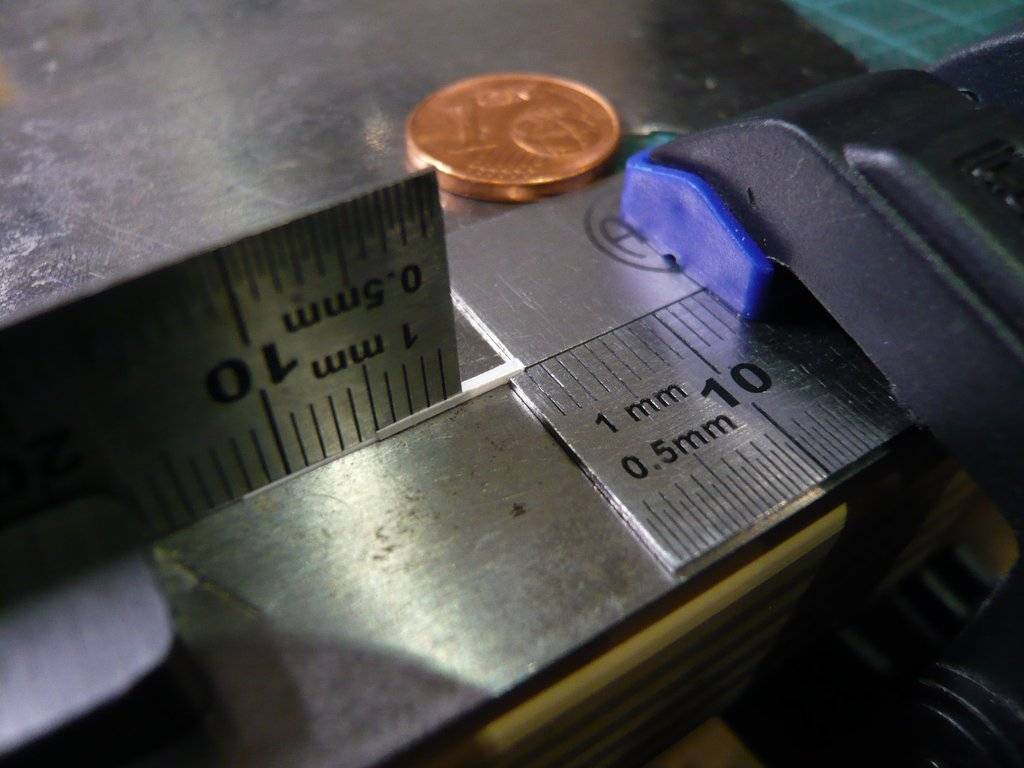 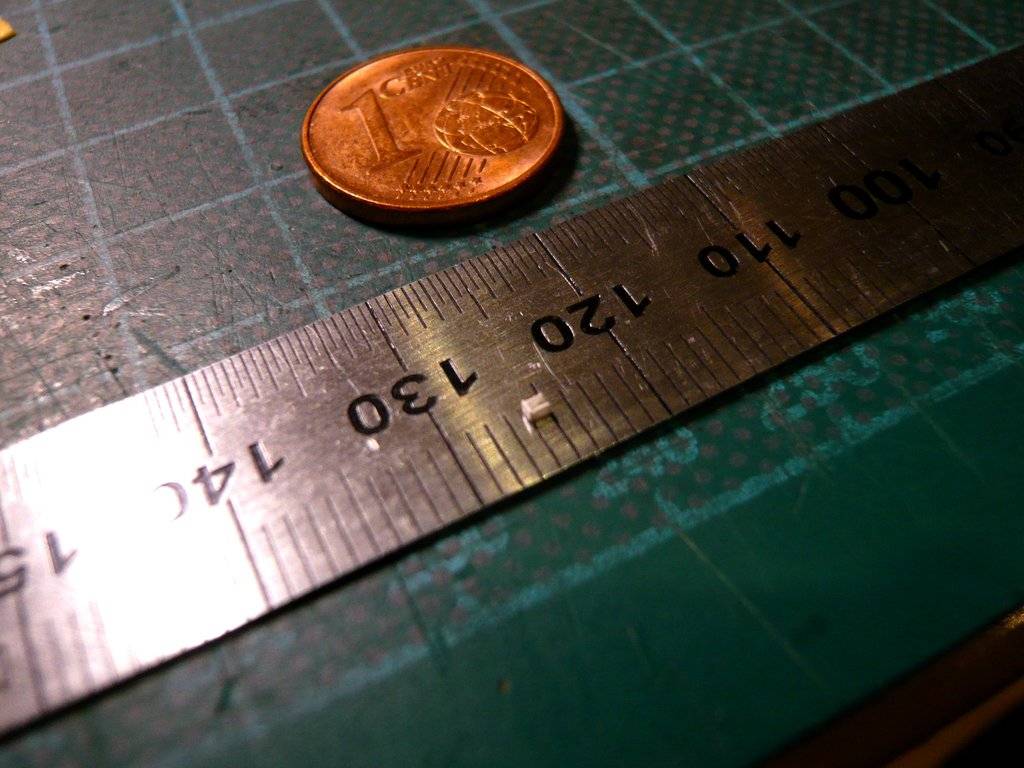 And so it goes on step by step, re-clamping everything again and fixing it differently, over and over again, just don't let up ... 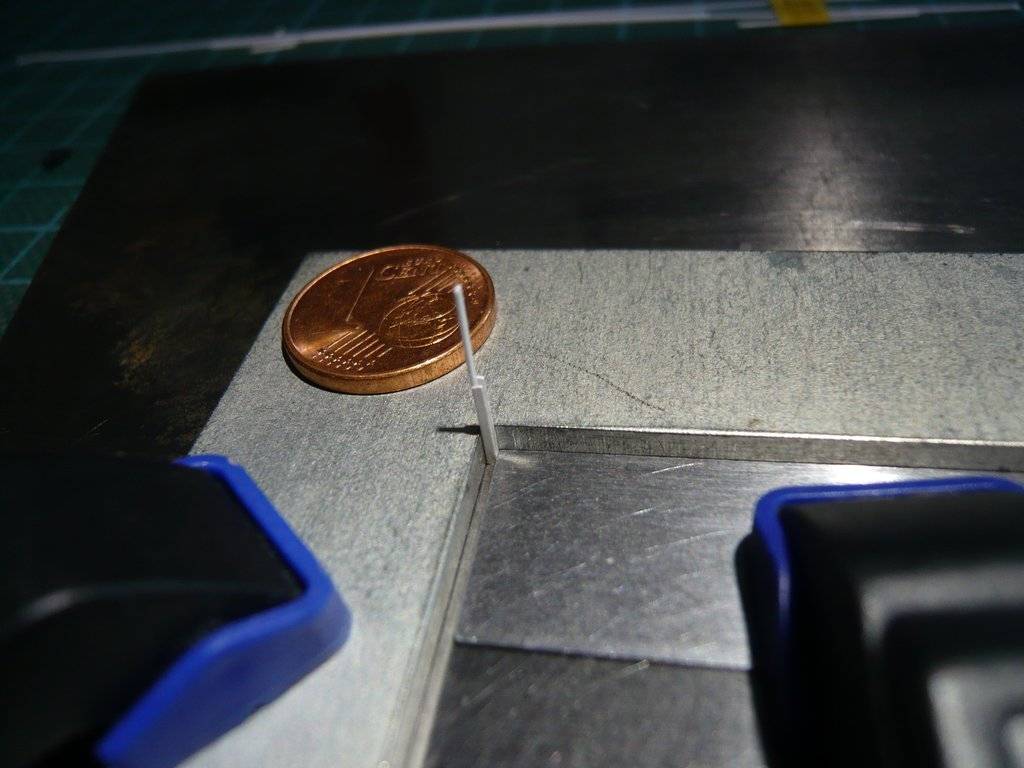 Now it's also easier to score and cut off the tiny ones, and the U-profile is getting shorter and shorter ... 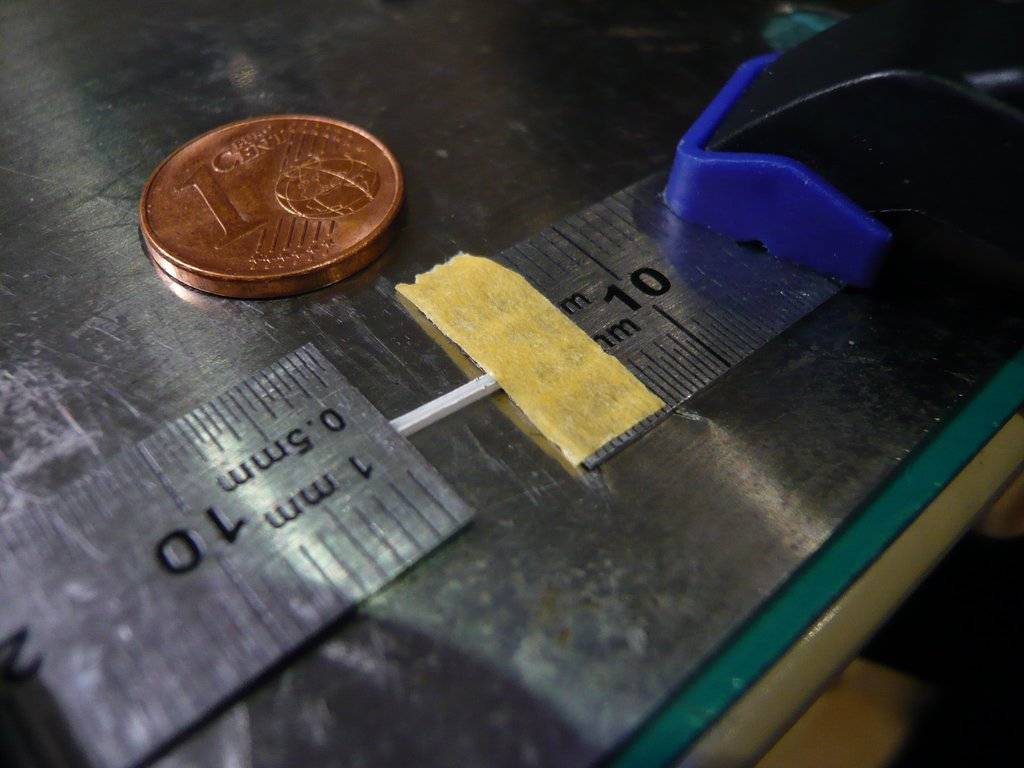  The half is done, but a few brackets are also a little on the short side, and some still need to be adjusted in length, but which is doable. 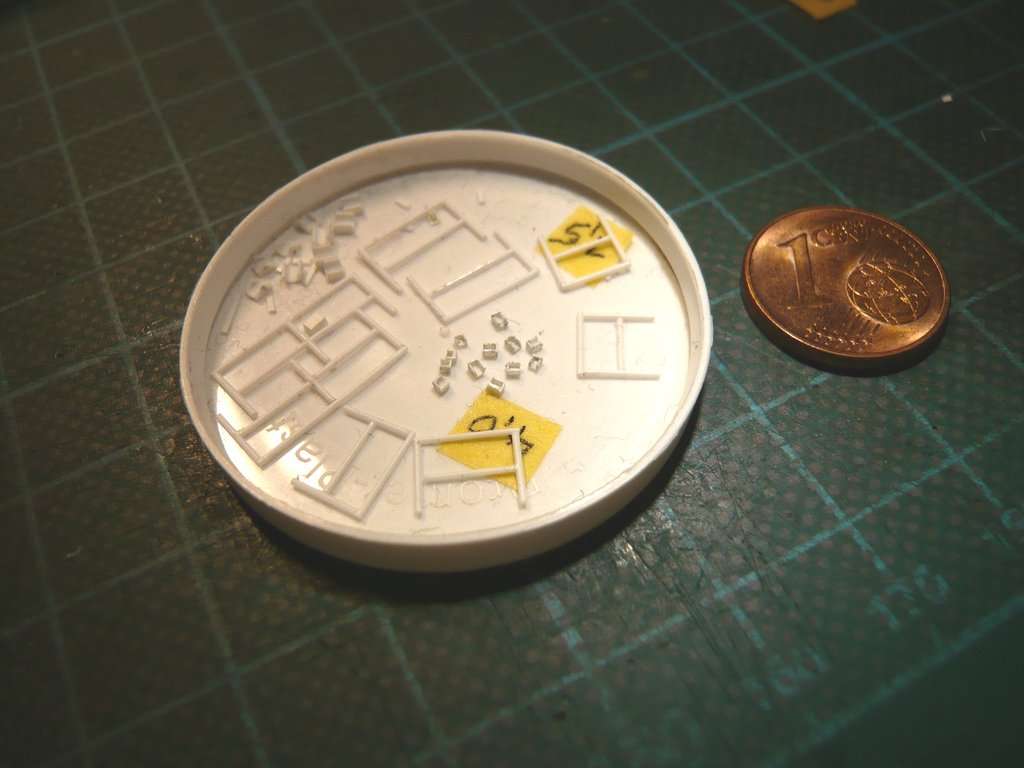 That's why I've prepared another U-profile, 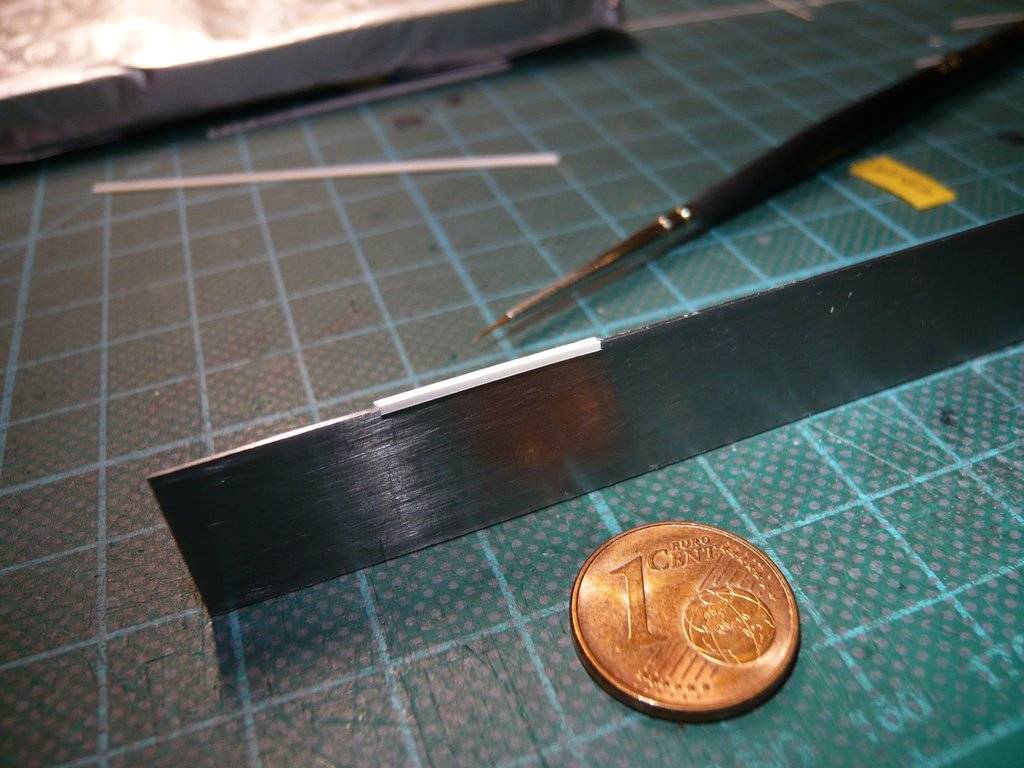 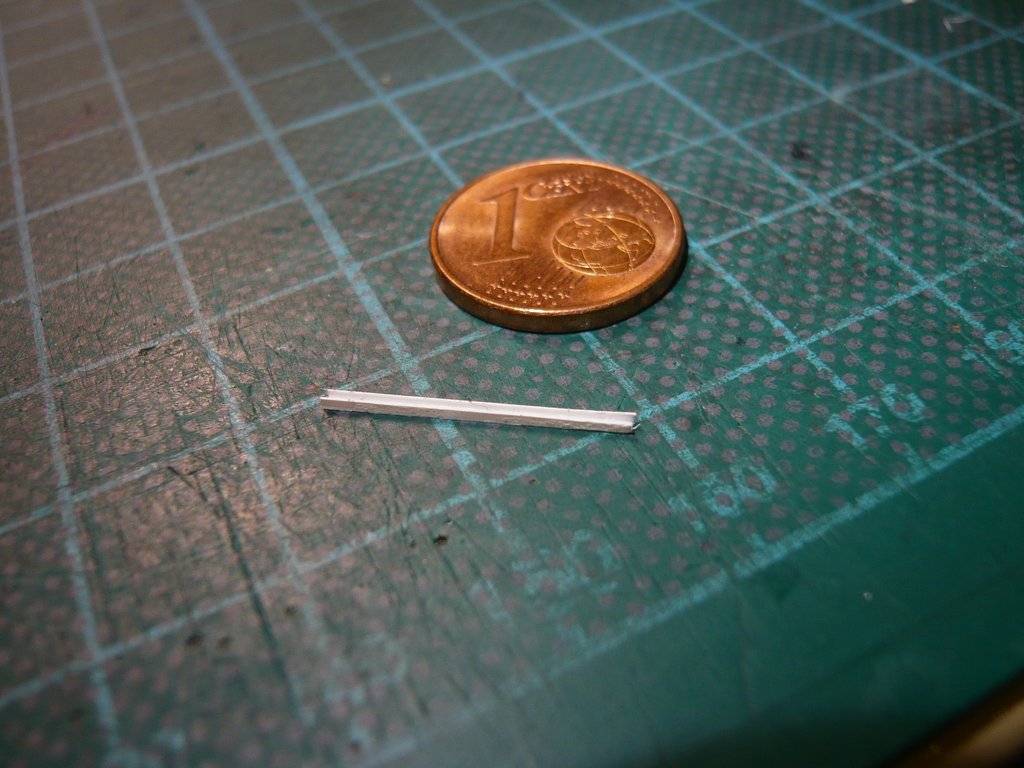 which I can now use to tackle the second half of the brackets, so hopefully I'll end up with 18 usable parts for the 8 Handrails.
__________________
Greetings from Germany Manfred Under construction: Launch Pad 39A with Challenger STS-6 (1:144)
|
|
#2798
03-23-2023, 06:31 PM
|
||||
|
||||
|
Hello everybody,
and with it to the Final Cutdown. This was the arrangement I chose for the second half of the brackets for cutting through the U-profiles (1 mm) that I had previously scratched and marked with a pencil, 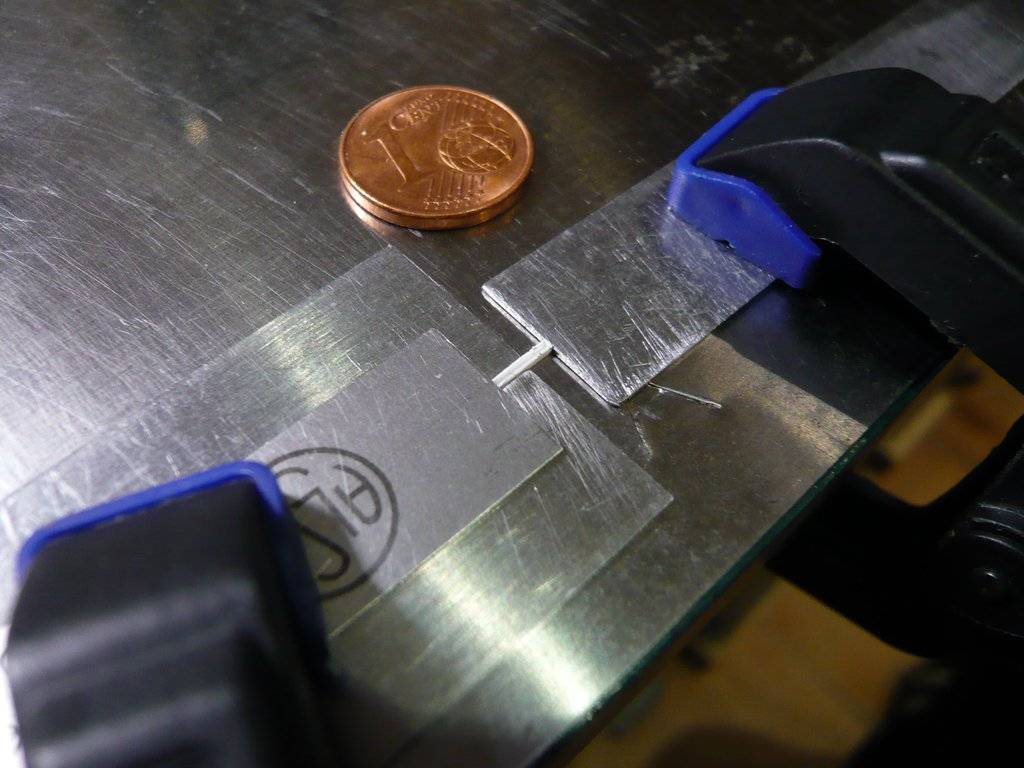 here after careful cutting with a razor blade under sharp eagle eyes.  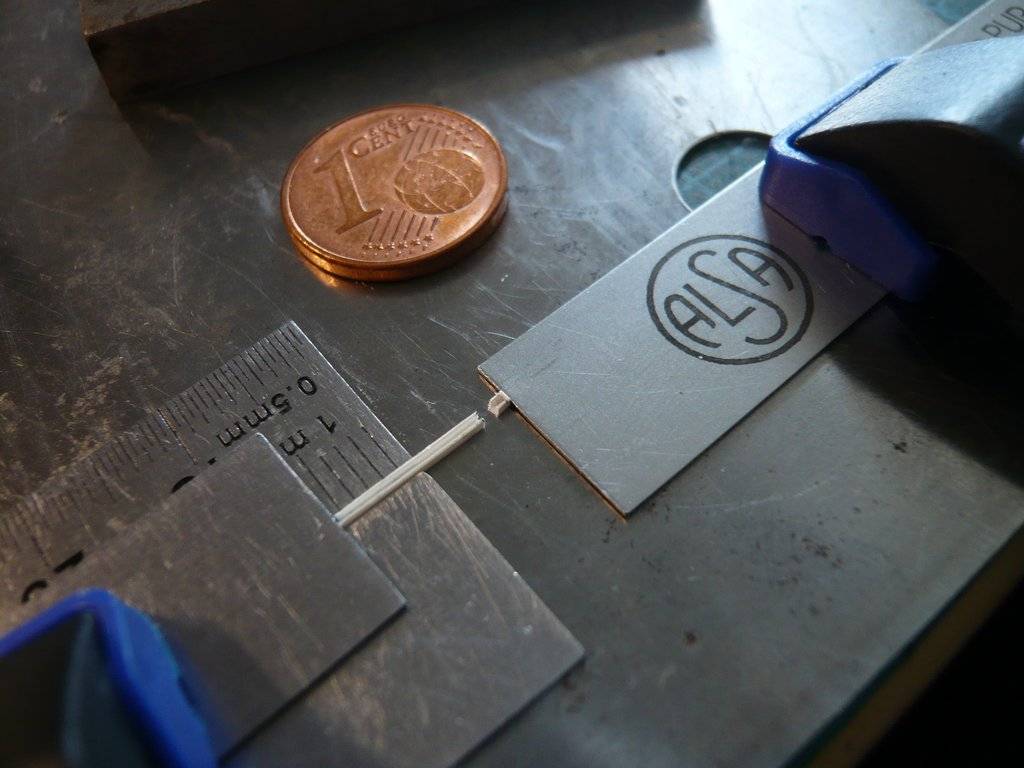 And that's my valuable yield of 20 mounts (2 reserve) with approximately the same size. 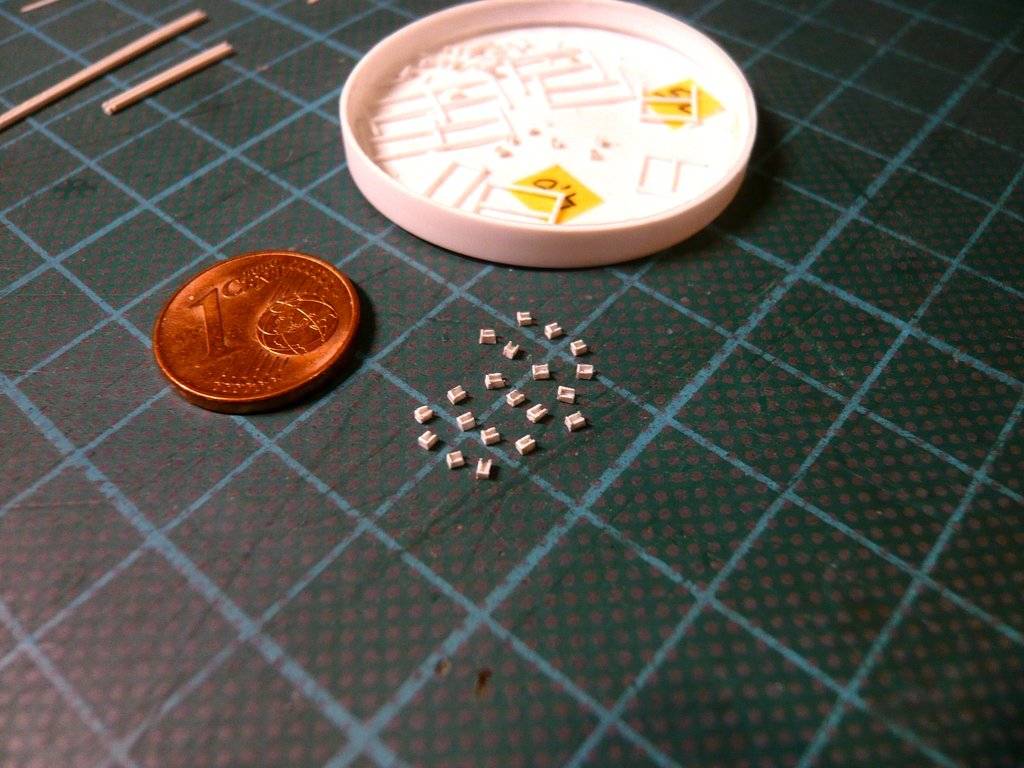 I had imagined the gluing of the mounts onto the handrails to be a little easier, but firstly it turns out differently, and secondly than you might think. As you can see in this image, the mounts are open at the front, so I have to glue the handrails rotated 90°, unlike what I thought before. How good that I compared again.  Source: forum.nasaspaceflight.com (STS-9, Ares67) The consequence of this, however, is that the gluing again requires a special fixation and I have to be hellishly careful that no holder flies away.  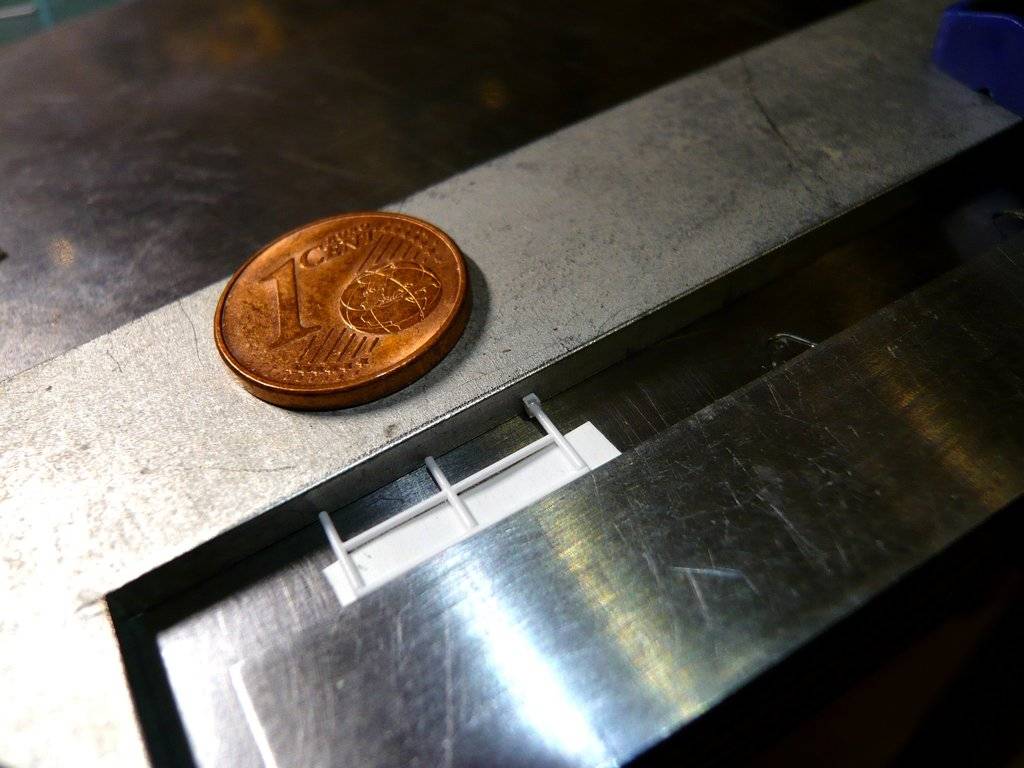 That's why I have to glue each holder individually and with great sensitivity by using MEK, whether I want to or not. 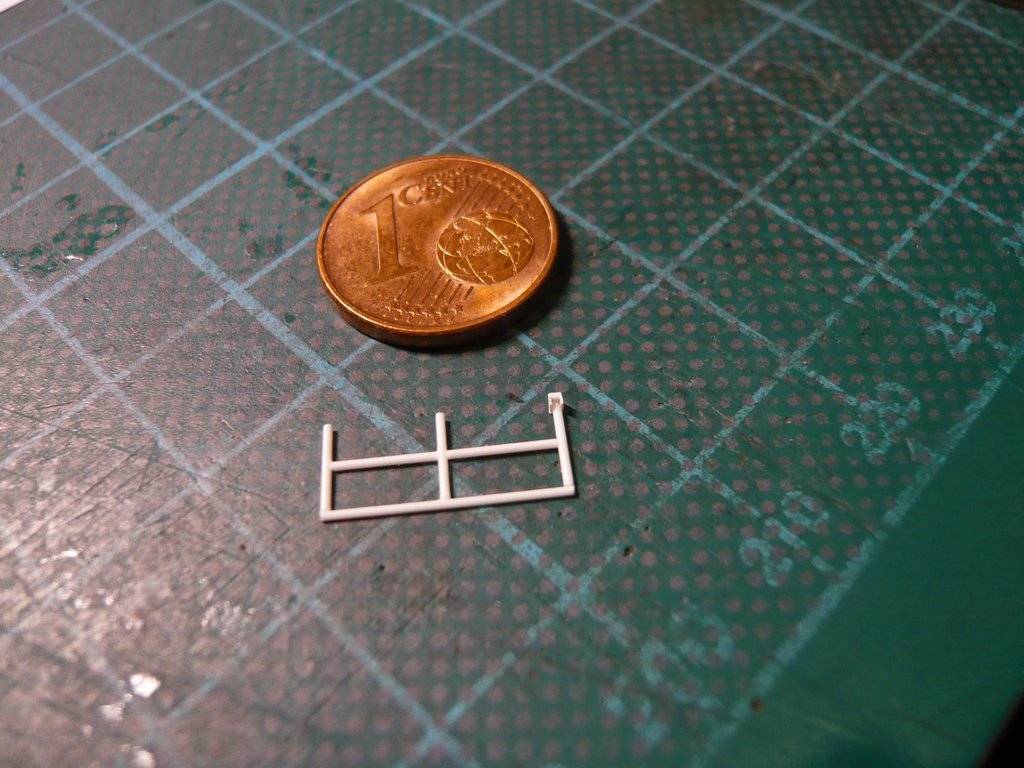 Although handling these tinies is indeed quite a fiddling, 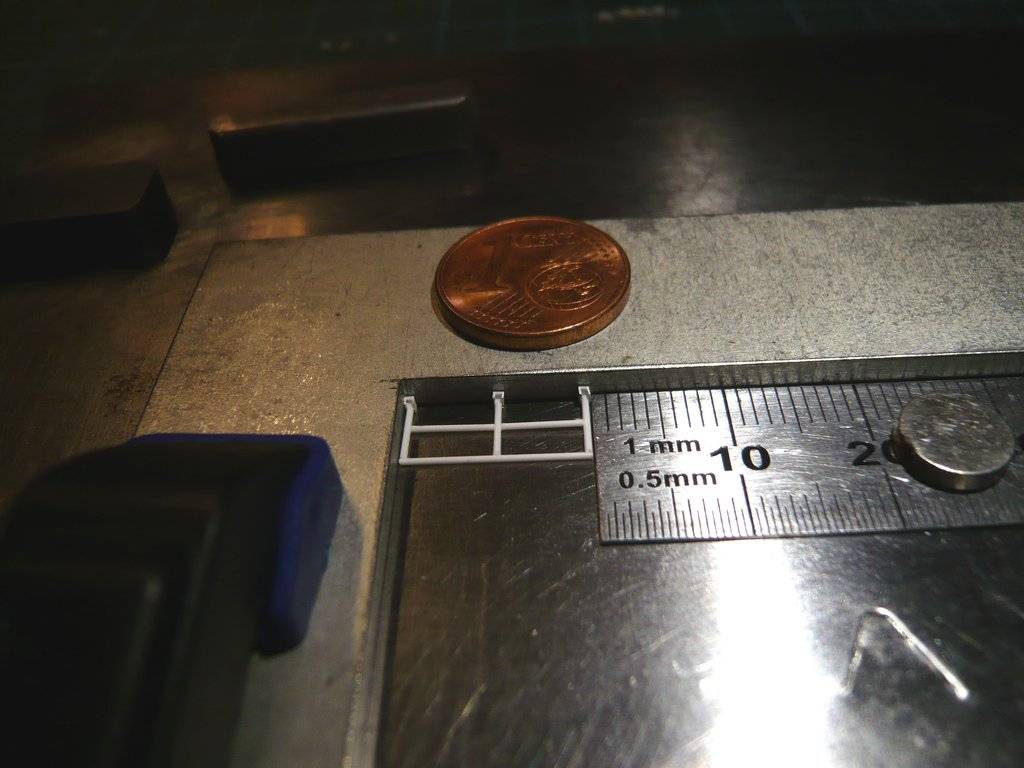 with the necessary calm and concentration one can do it! 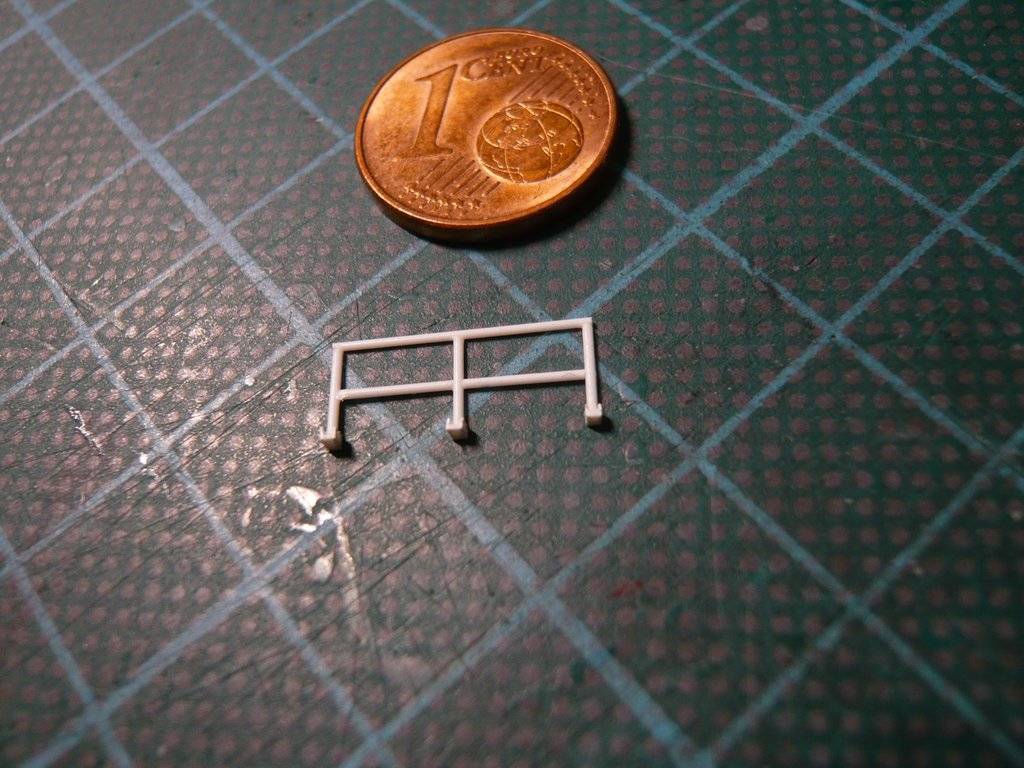 And so the handrail can then be glued to the Payload Canister. 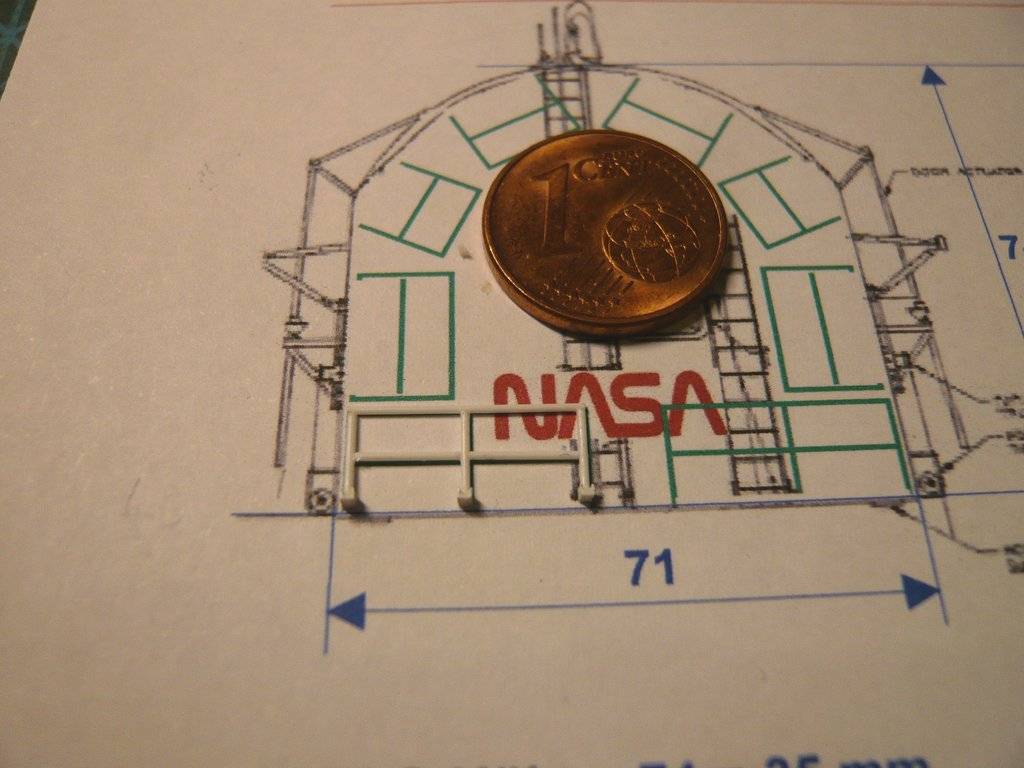 That's why I always say: Nothing is impossible! One just shouldn't set any limits!
__________________
Greetings from Germany Manfred Under construction: Launch Pad 39A with Challenger STS-6 (1:144)
|
|
#2799
03-24-2023, 06:15 PM
|
||||
|
||||
|
Hello everybody,
today the Mounts were glued to the other three-legged handrail, 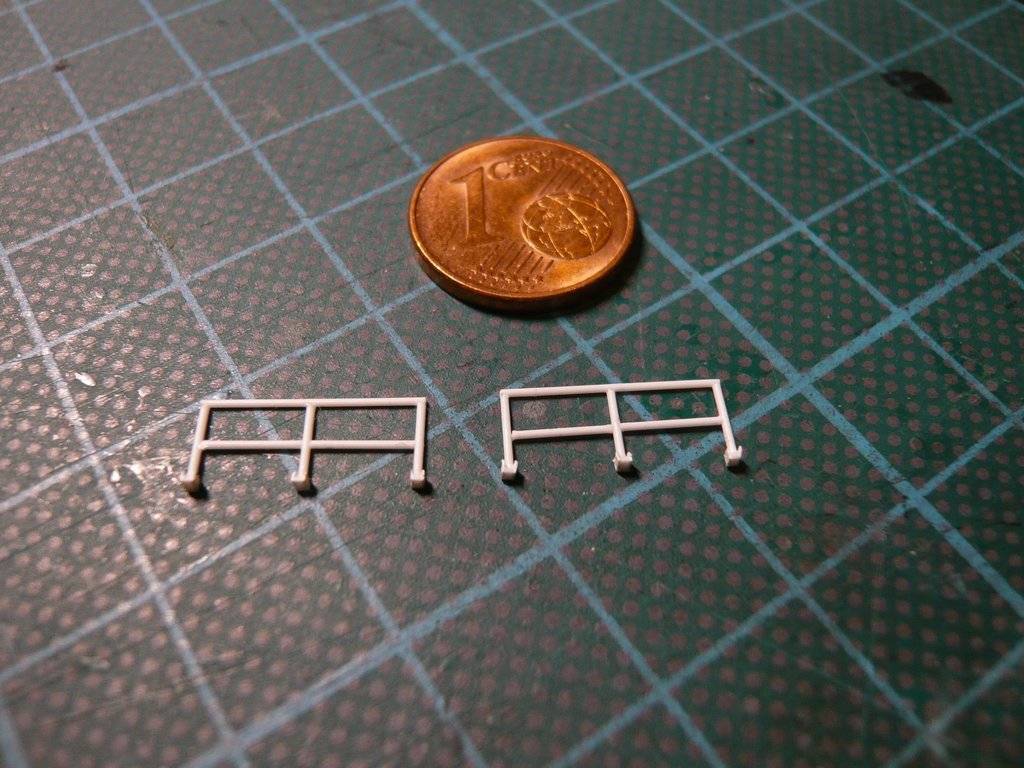 wherewith the row at the bottom of the canister is complete. 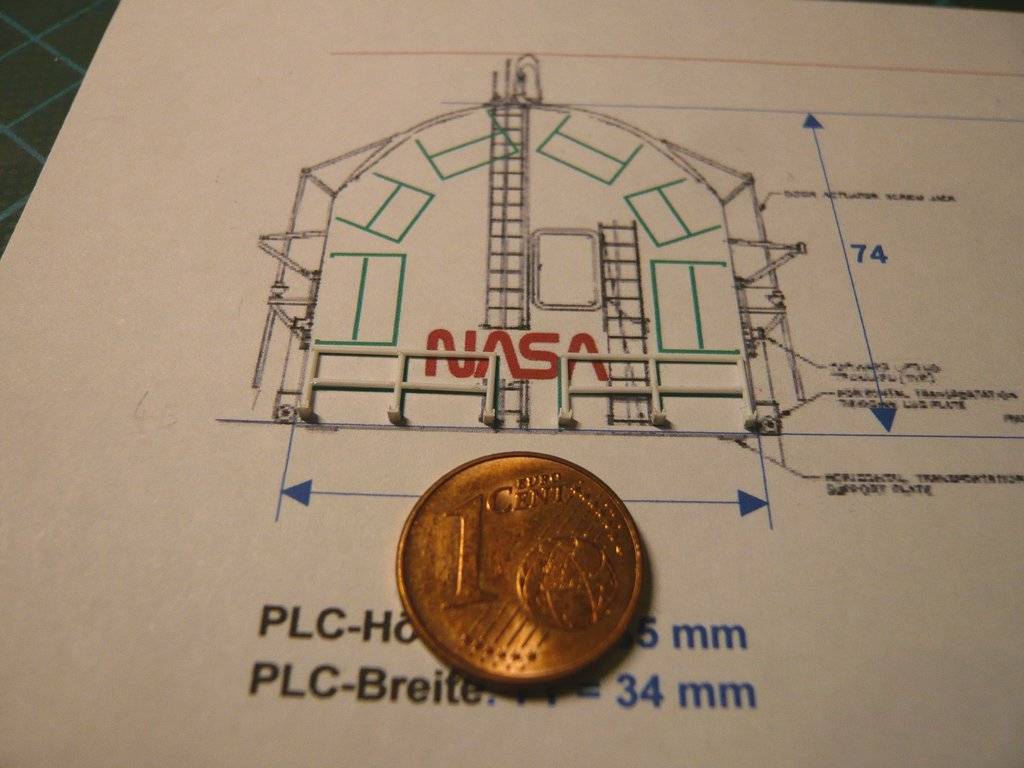 Then it was the turn of the two vertically arranged handrails above it, which have two mounts and were done more quickly. 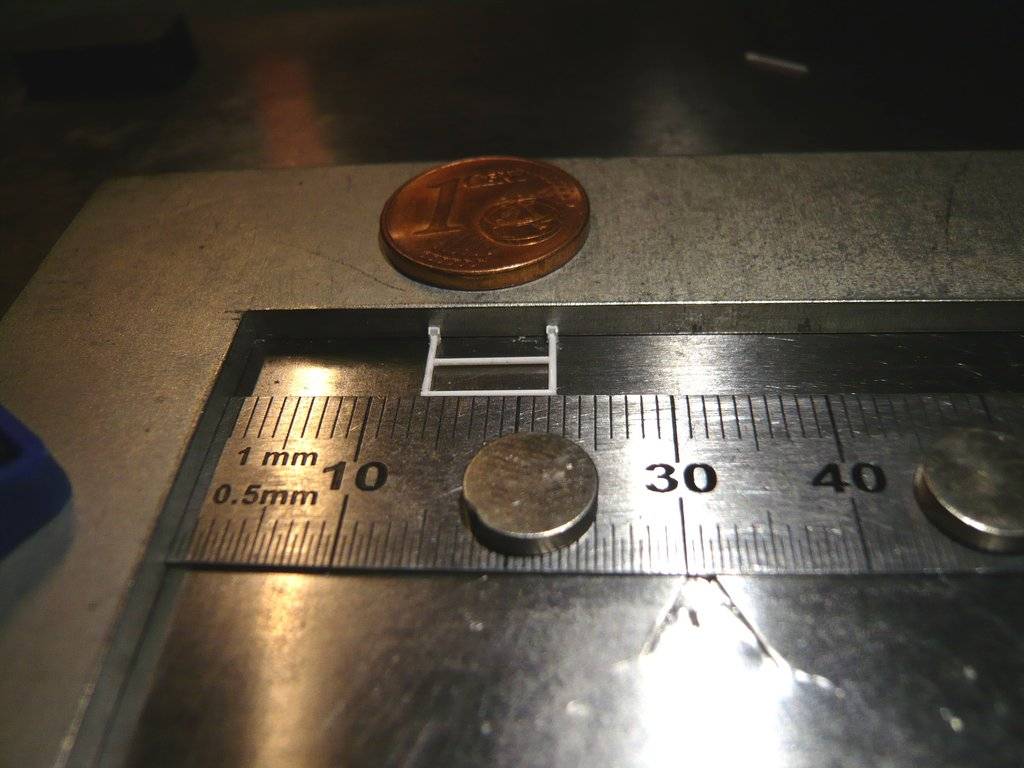 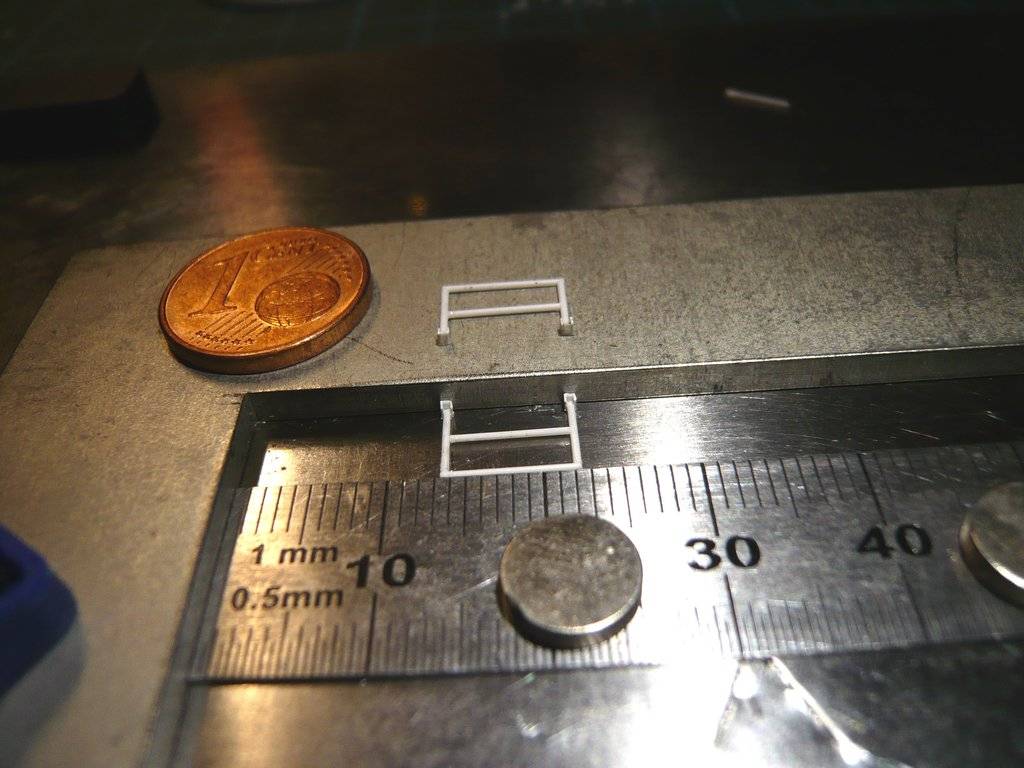  And so the image slowly completes, whereby I also still hinted the Personnel door through which one can arrive the Canister Payload Bay.  Now only the mounts on the four upper railings are missing.
__________________
Greetings from Germany Manfred Under construction: Launch Pad 39A with Challenger STS-6 (1:144)
|
|
#2800
03-26-2023, 07:41 AM
|
||||
|
||||
|
Hello everybody,
and these Mounts were glued today. At it the most difficult step was pushing the Handrail feet into the tiny mounts, which is why I "sharpened" them slightly. Then the gluing followed with MEK by carefully wetting the mounts with the finest red sable brush (10/0). 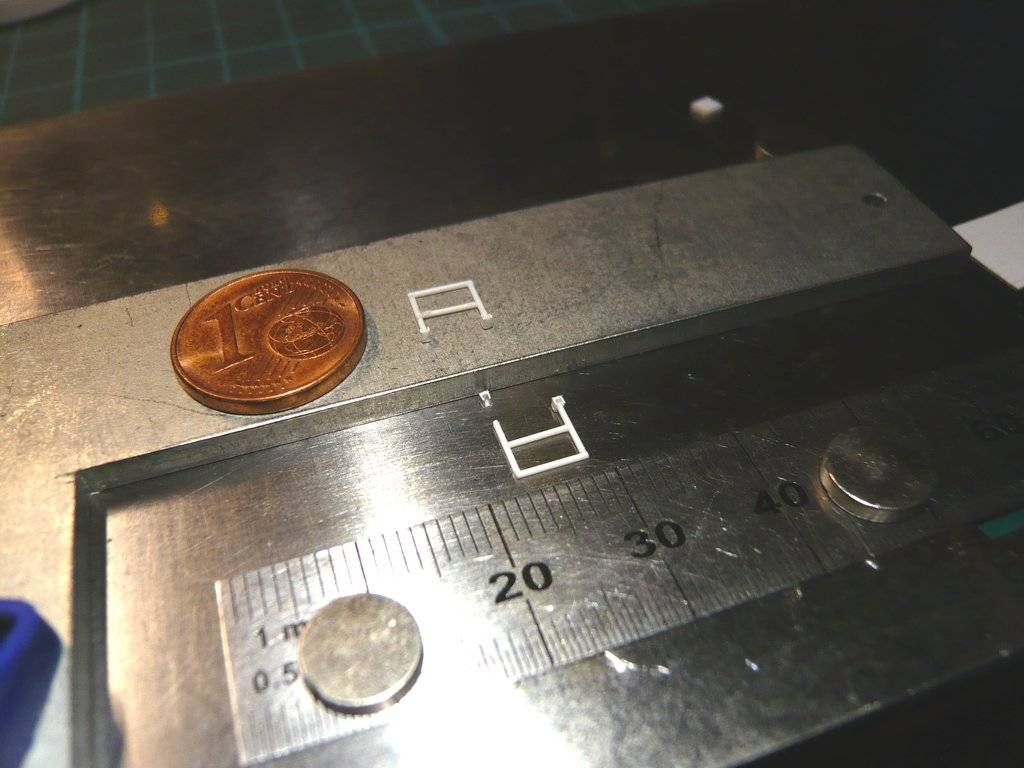  This also finished the third Handrail pair, 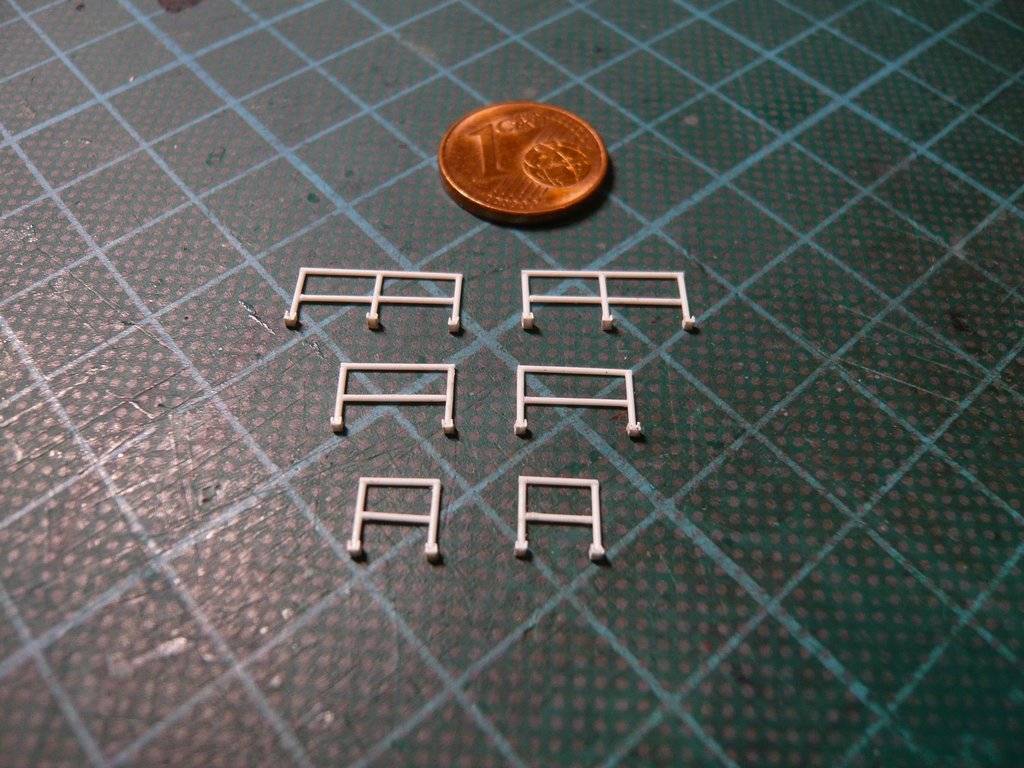 and could be placed on the template for fitting. 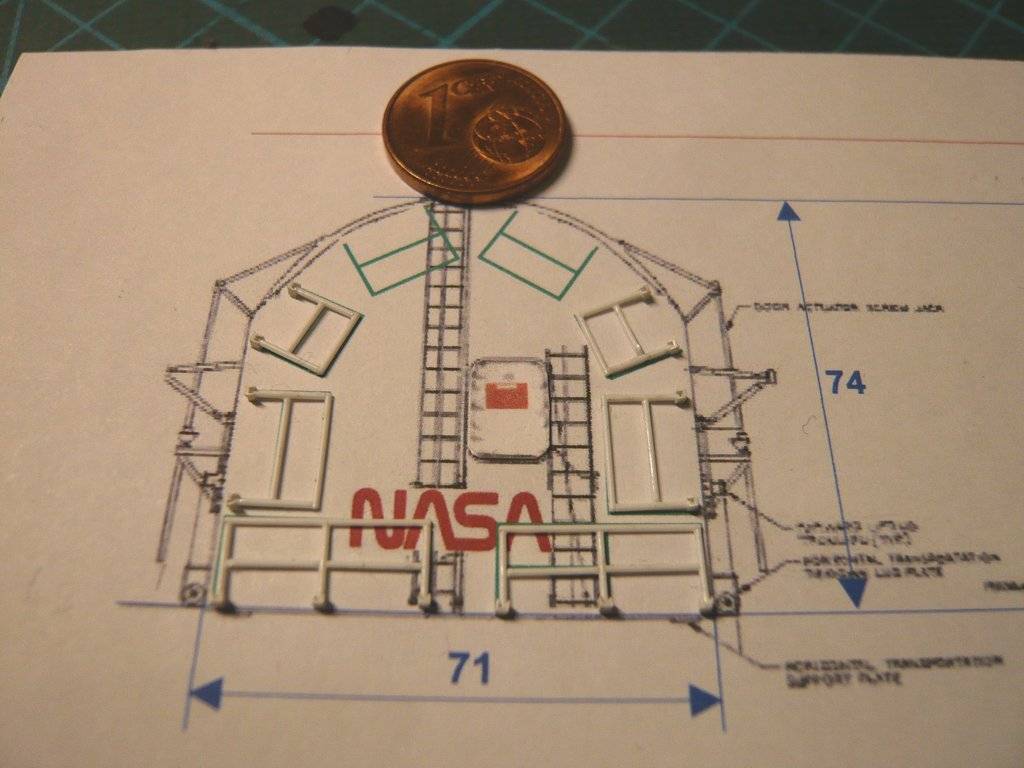 It was finally the turn of the last couple, 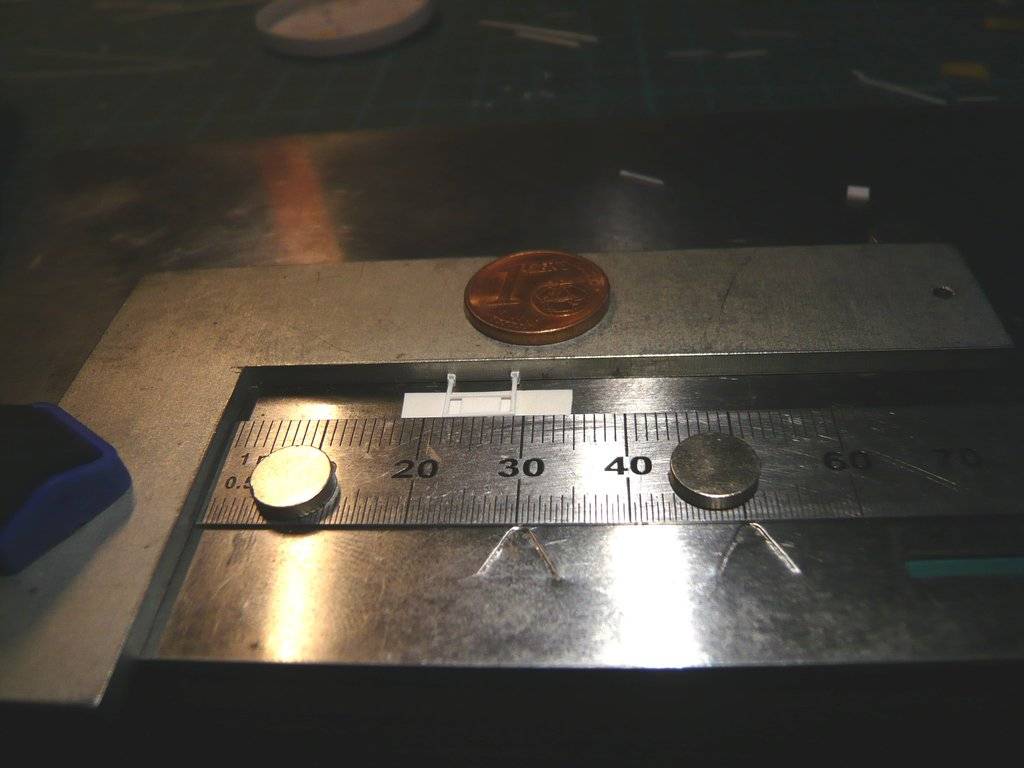  whereby the whole set is finally complete. 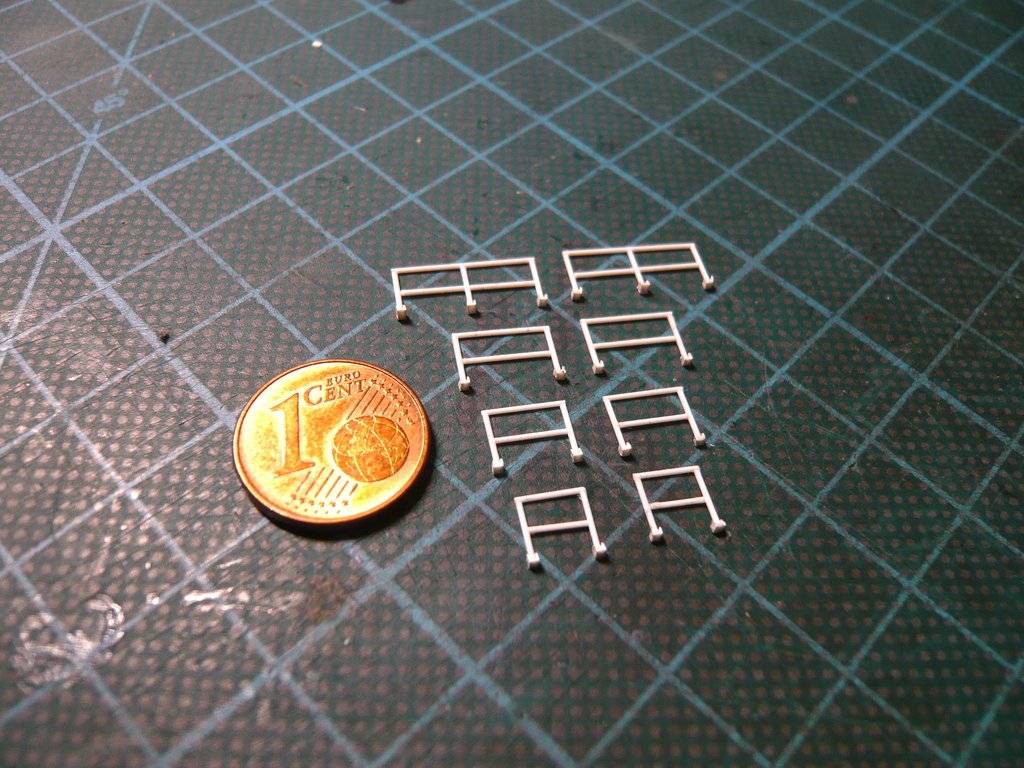 And in this arrangement, all eight Handrails could soon be glued to the canister, as well as the Personnel door. 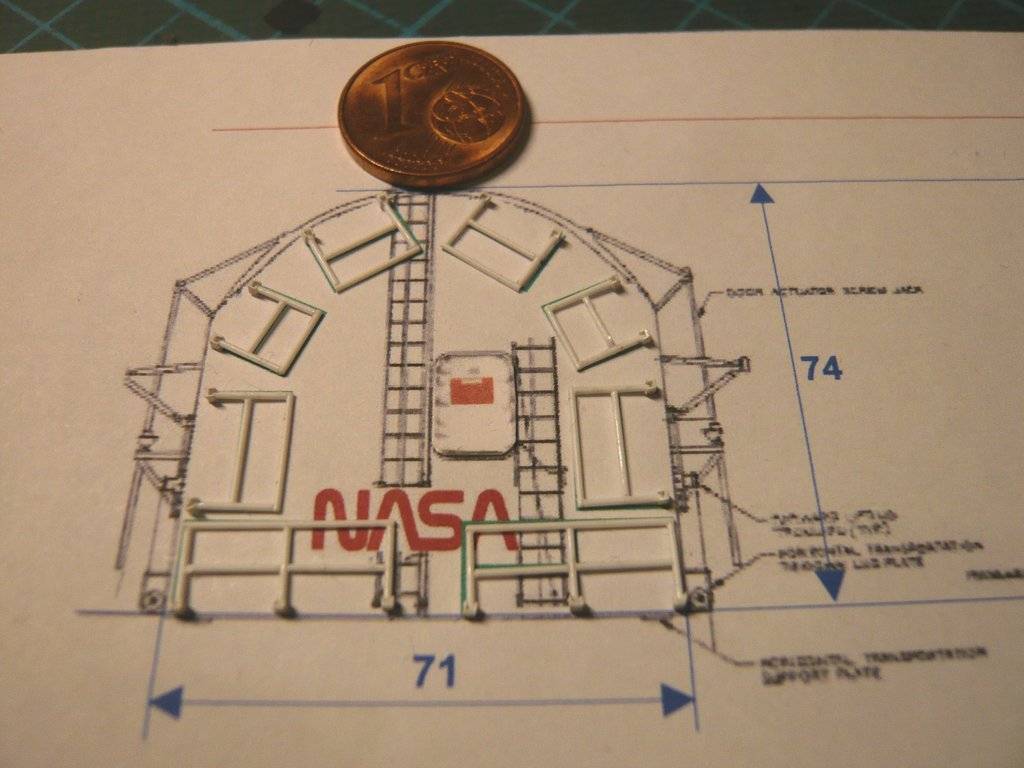 So that nothing happens to them until then, I quickly brought them to safety in this little box.  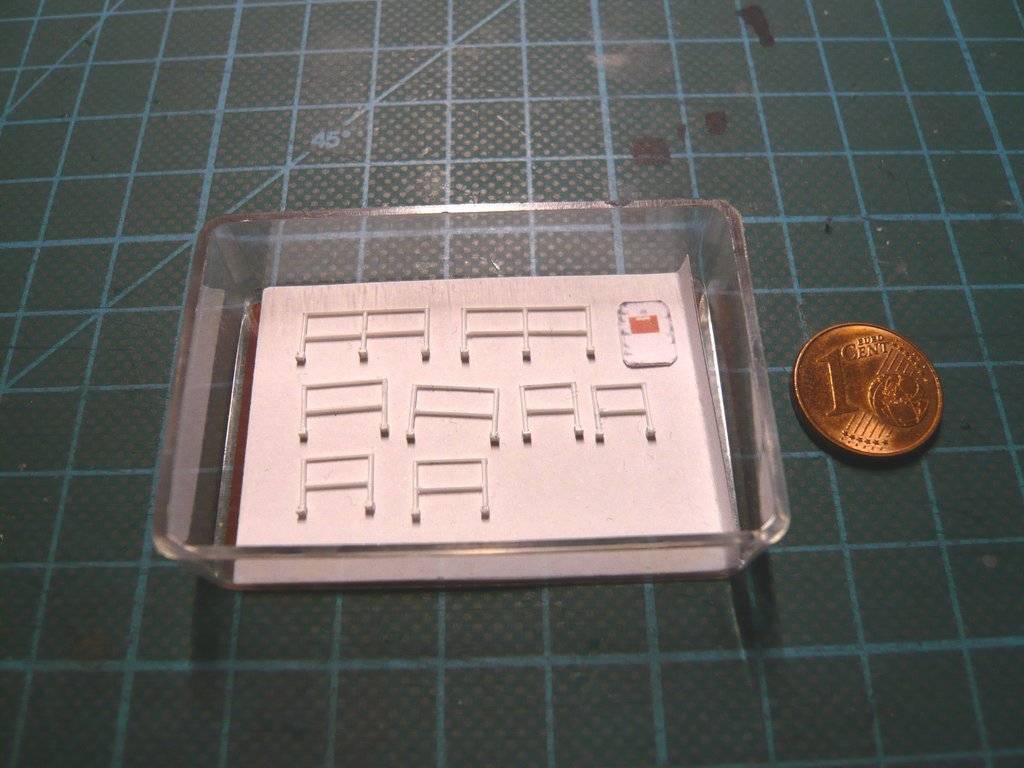 That's it then again.
__________________
Greetings from Germany Manfred Under construction: Launch Pad 39A with Challenger STS-6 (1:144)
|
 |
|
|


 Linear Mode

