


|
|
|
#2811
 04-19-2023, 09:11 AM
|
||||
|
||||
|
Hello everybody,
here is still a small addendum to a detail on the Port Side, where below the Personnel Door is still located this Access Platform Mounting Bracket, which I have added.   Source: NASA (STS-125) The Bracket (0,13 mm x 7 mm) stands on tiny Base plates (0,13 mm x 0,5 mm x 1,5 mm), 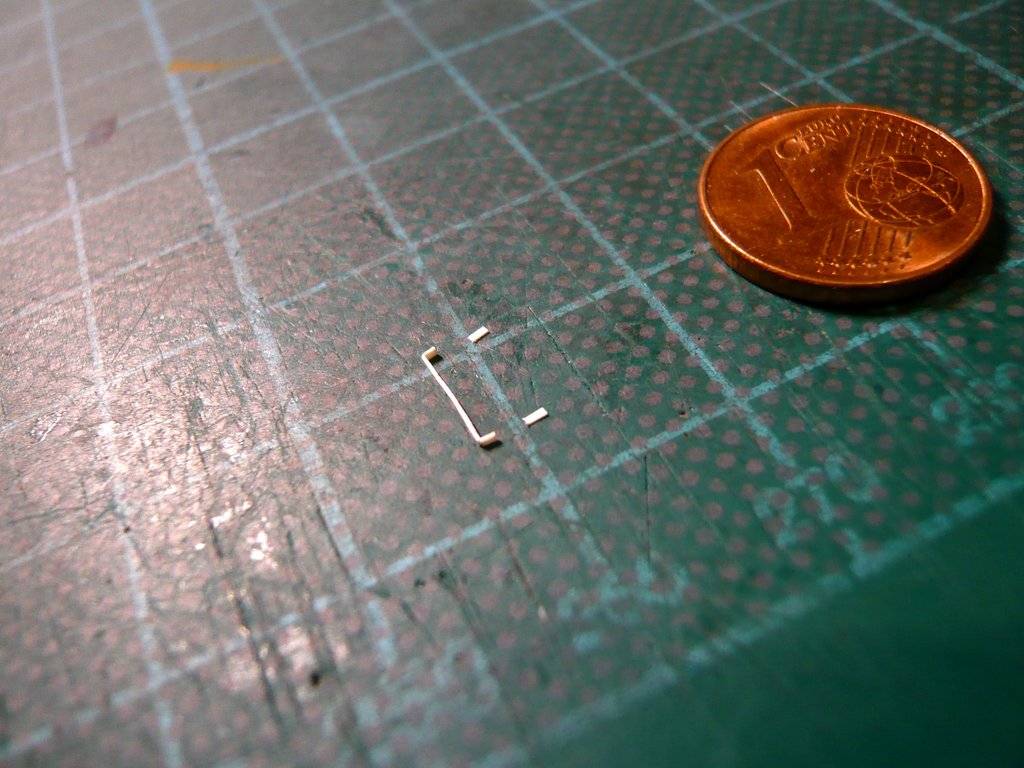 whose gluing together was quite tricky.  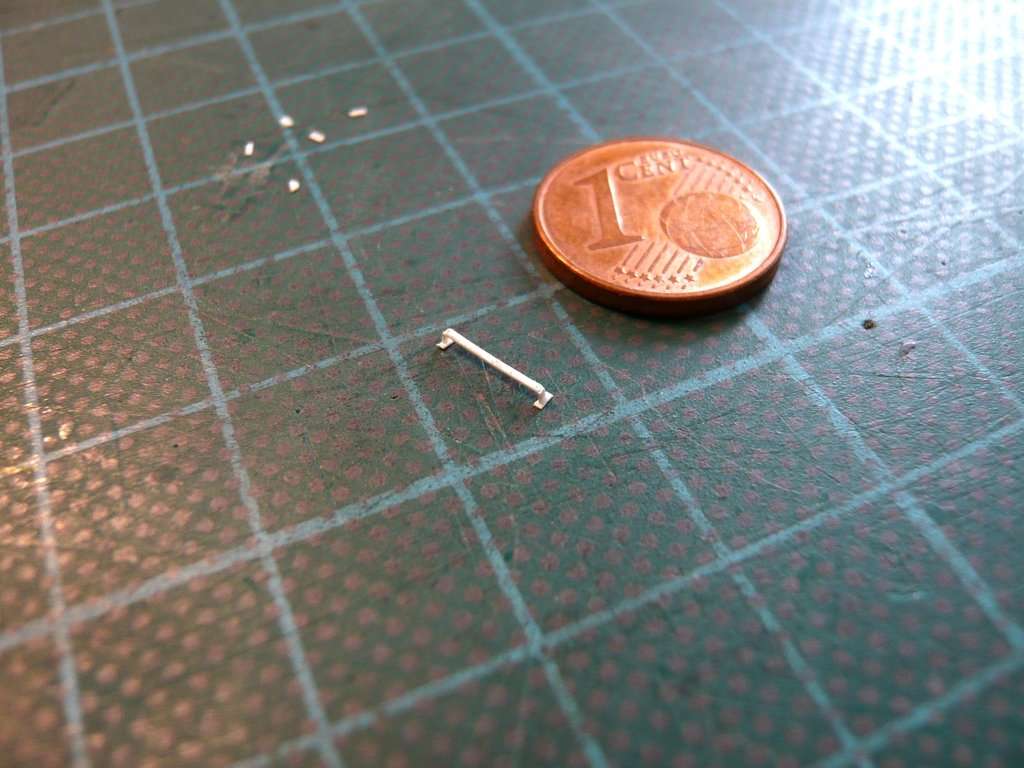 Here is the test fitting on the canister together with the two ECS Ducts.  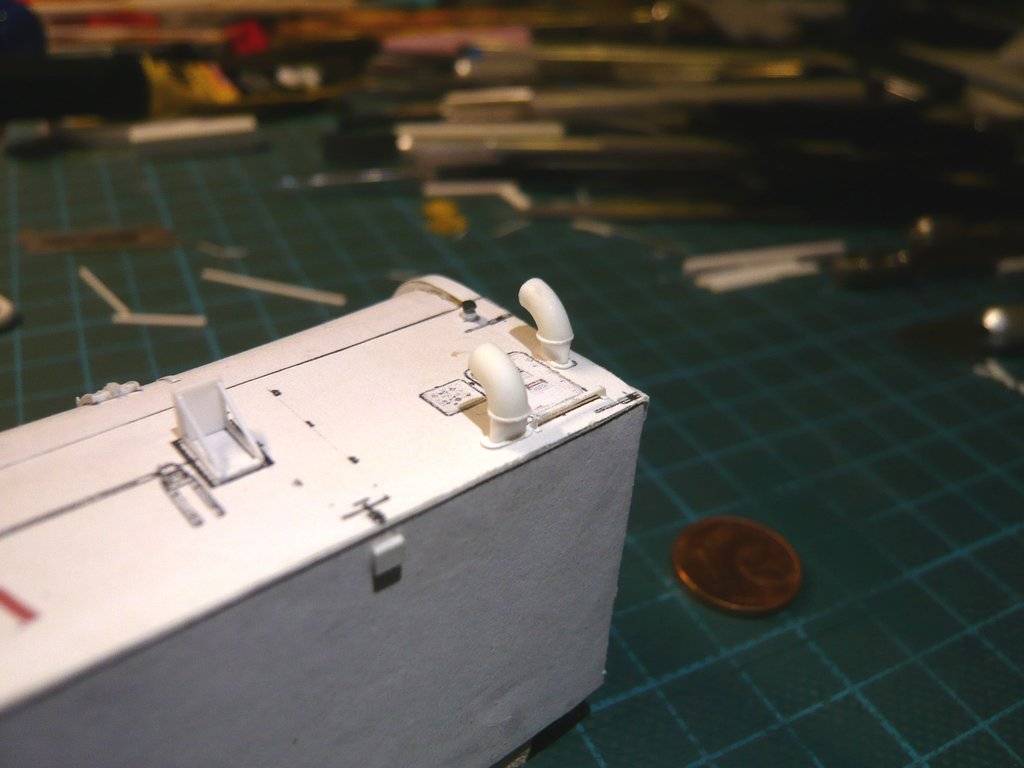 And then there are still these Horizontal Transportation Tie-down Lug Plates, whose rungs lead to the Ladders laying above them.   Source: NASA (STS-135) The hold-downs are indeed tiny, but I wanted to at least try it.  The markings on the canister I should have covered better.  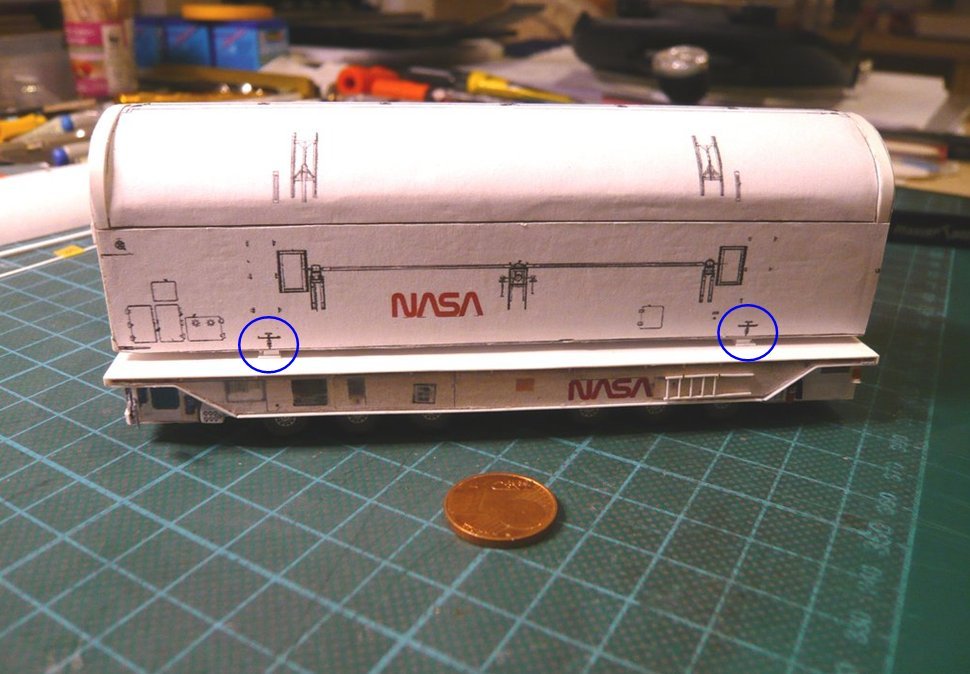 And these are the individual parts, all made of Evergreen Sheet Styrene (0,13 mm). The two lateral discs (Ø 1,2 mm) at the hold-downs received a centered drilling (Ø 0,5 mm) and were then glued one after the other onto both sides of the hold-down strip, which was also drilled through in between. For the passing Rung I will use a Nickel silver rod (Ø 0,2 mm x 3,5 mm), which is slightly angled at the ends. 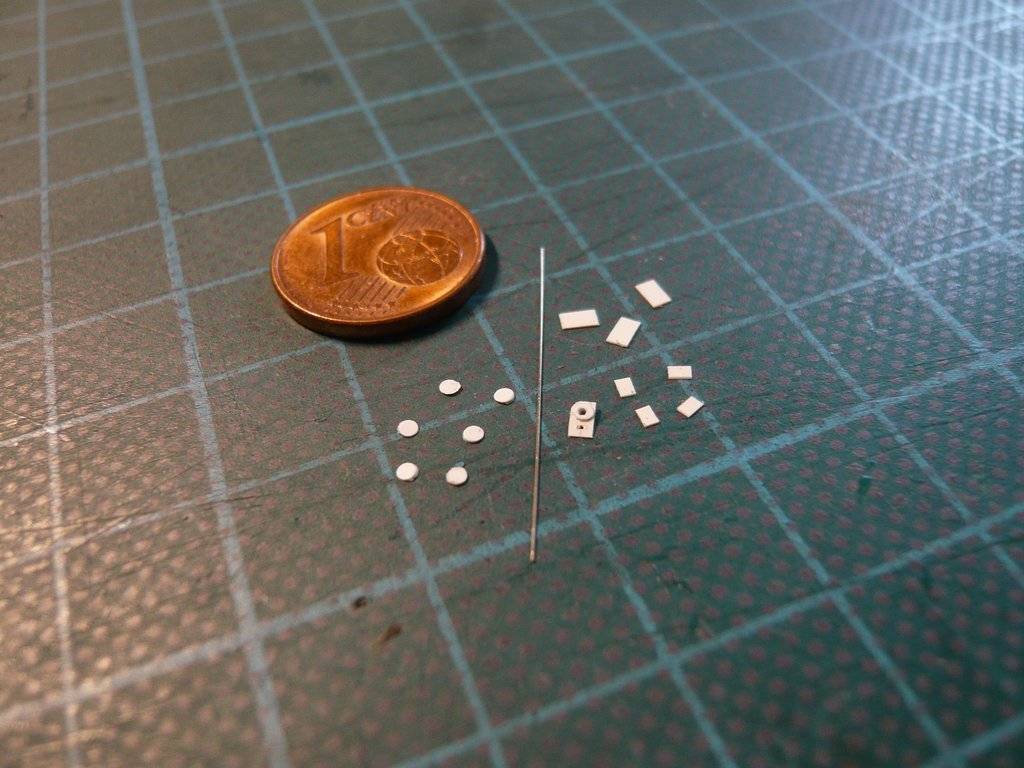 For the gluing of the cover strip the hold-down was fixed again. 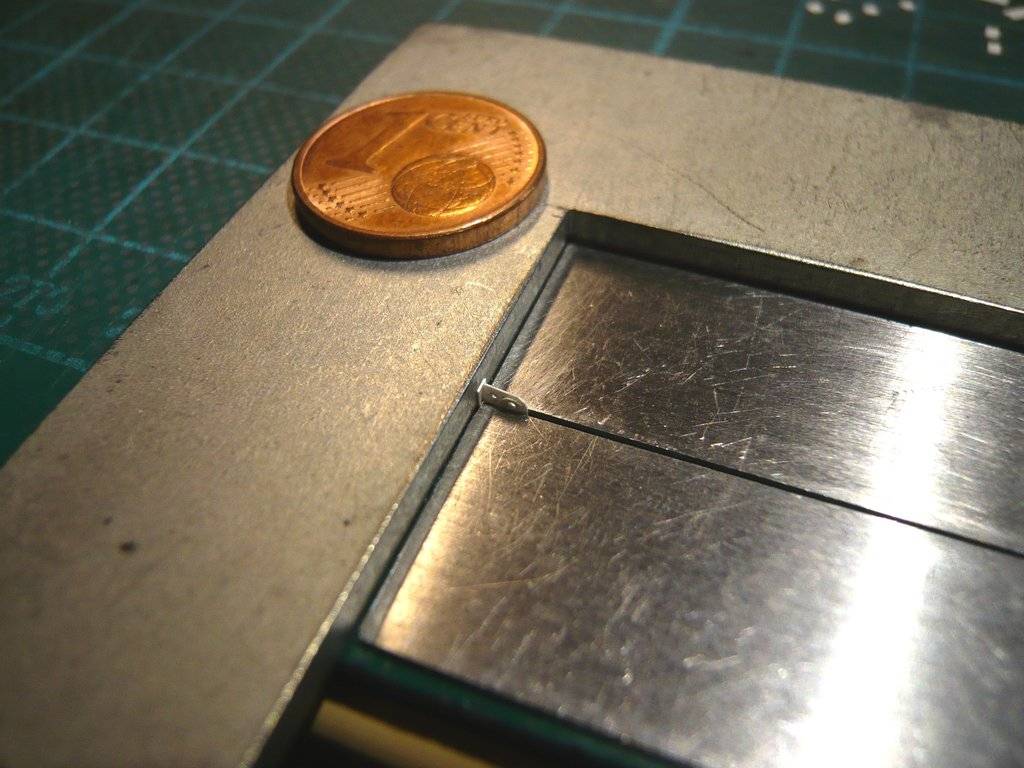 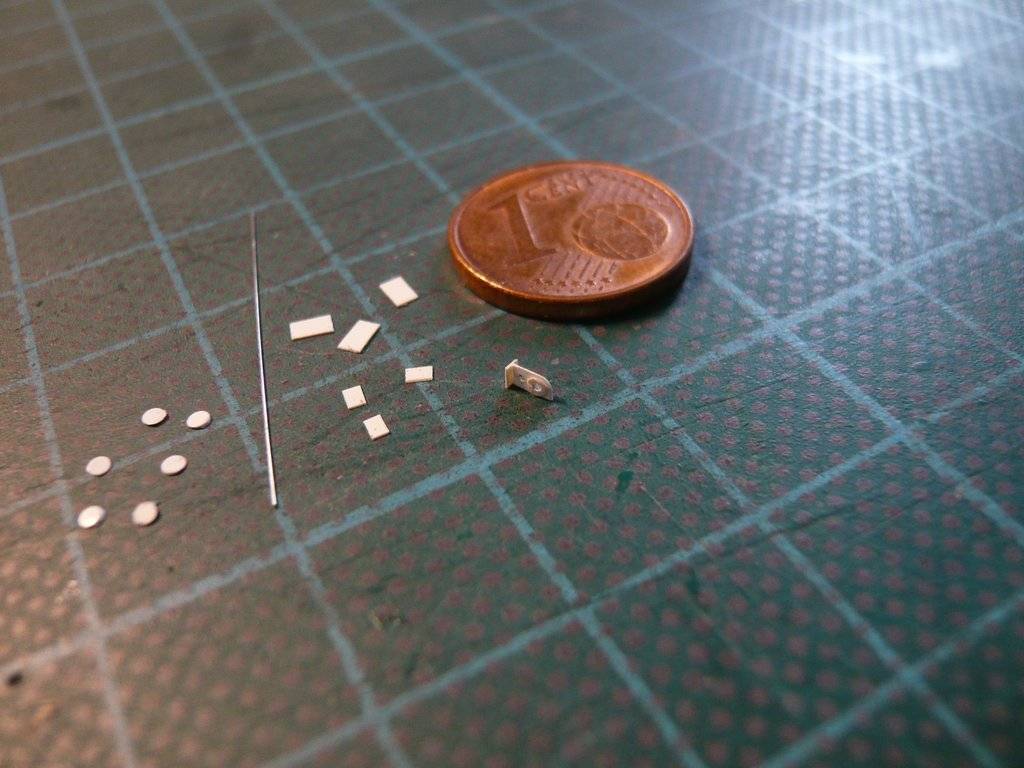 When bending the rungs, I was helped by the fact that my try square had exactly the required thickness (3 mm), with a corresponding overhang at the ends being important again, 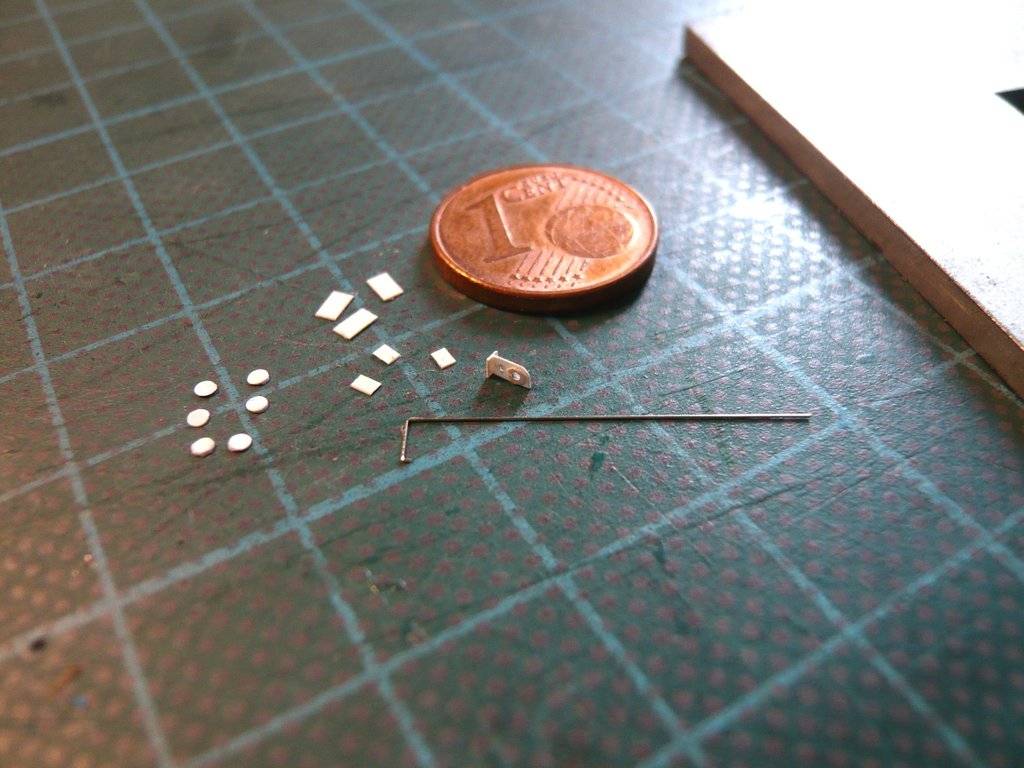 so that the angled ends can be trimmed to final length.  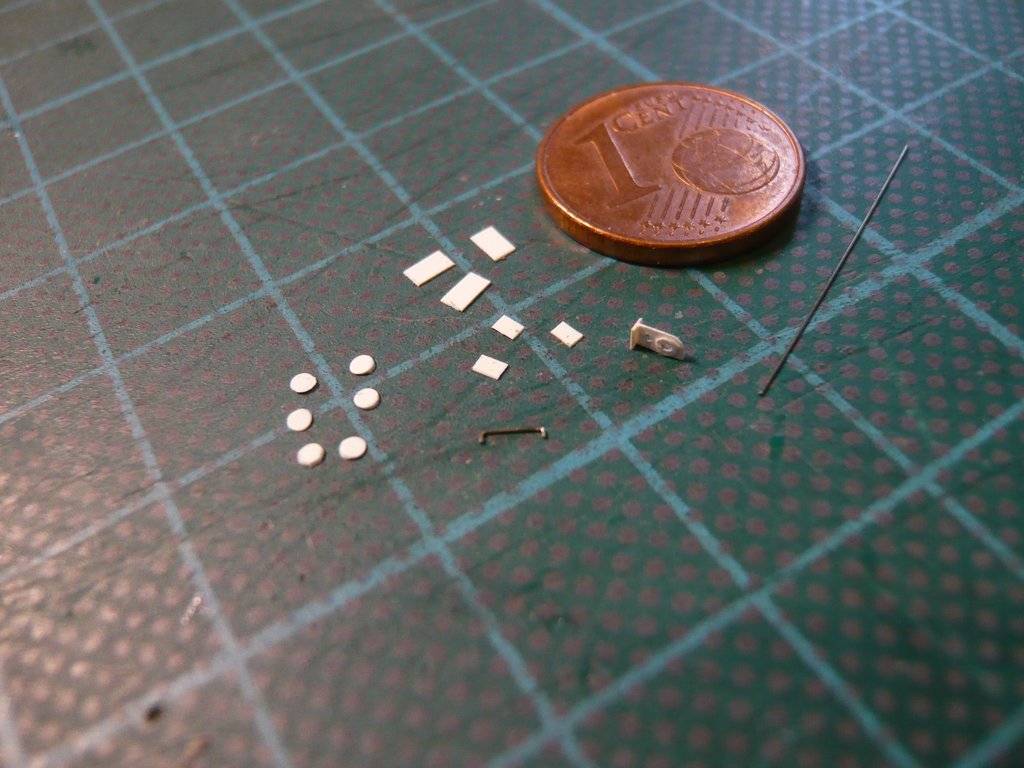
__________________
Greetings from Germany Manfred Under construction: Launch Pad 39A with Challenger STS-6 (1:144) 
|
|
#2812
04-19-2023, 09:11 AM
|
||||
|
||||
|
Then came the trickiest thing, threading the rungs into the small hole (Ø 0,25 mm), aligning them in the middle and gluing them.
 And that's not easy because the rung has a little too much clearance in the hole. And that's not easy because the rung has a little too much clearance in the hole.  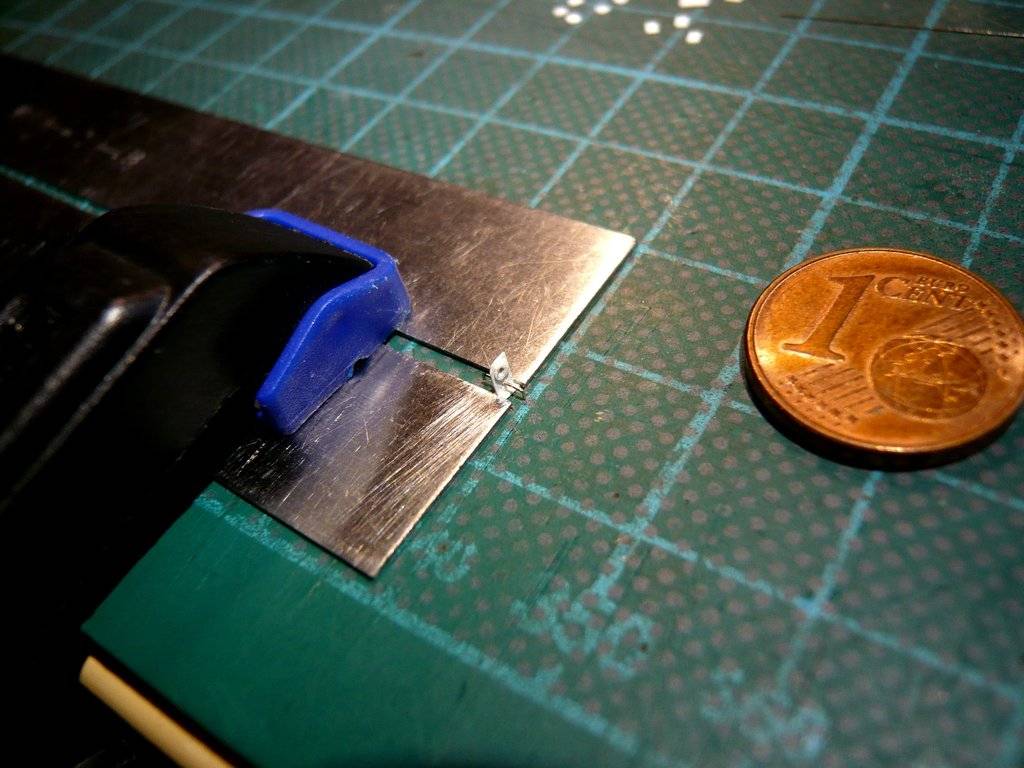 In the end I did manage to dab some UHU-Super-CA onto the splice, which doesn't set immediately, which means that minor corrections are still possible. 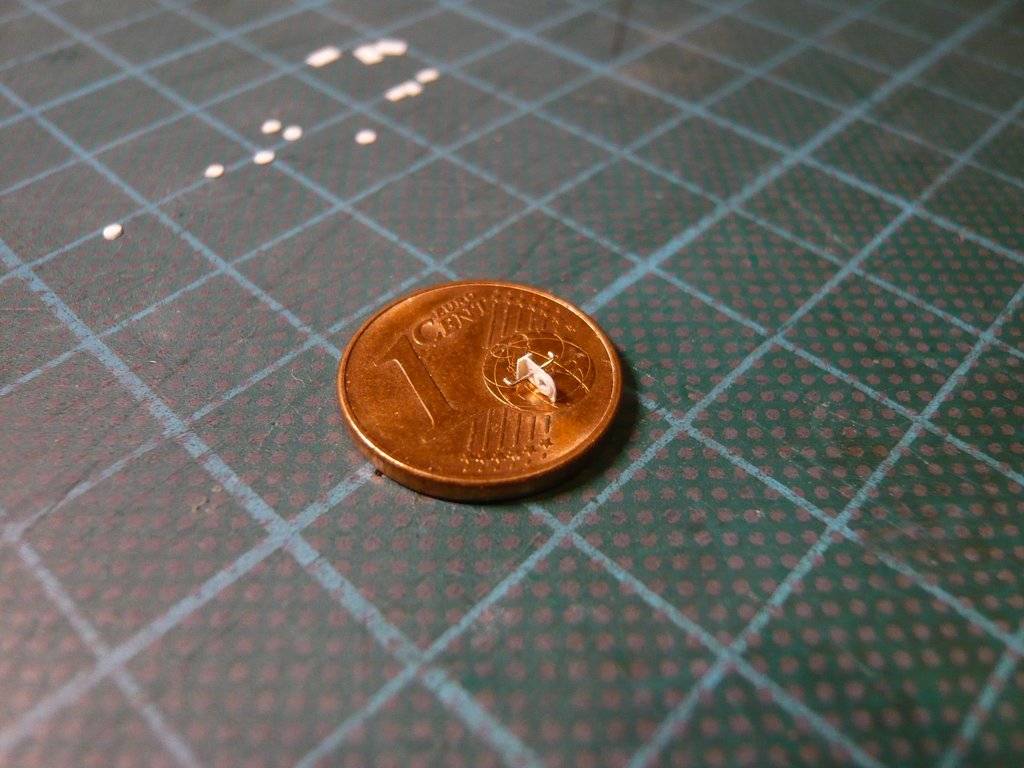 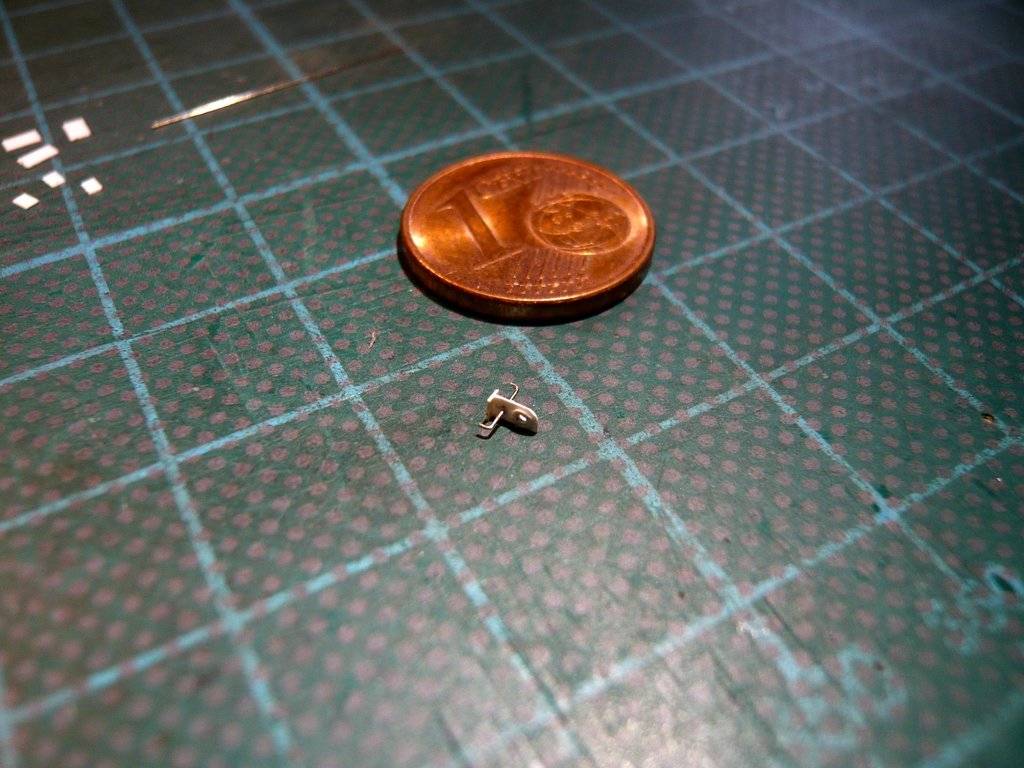 And this is again the obligatory test fitting of the hold-down on the canister. 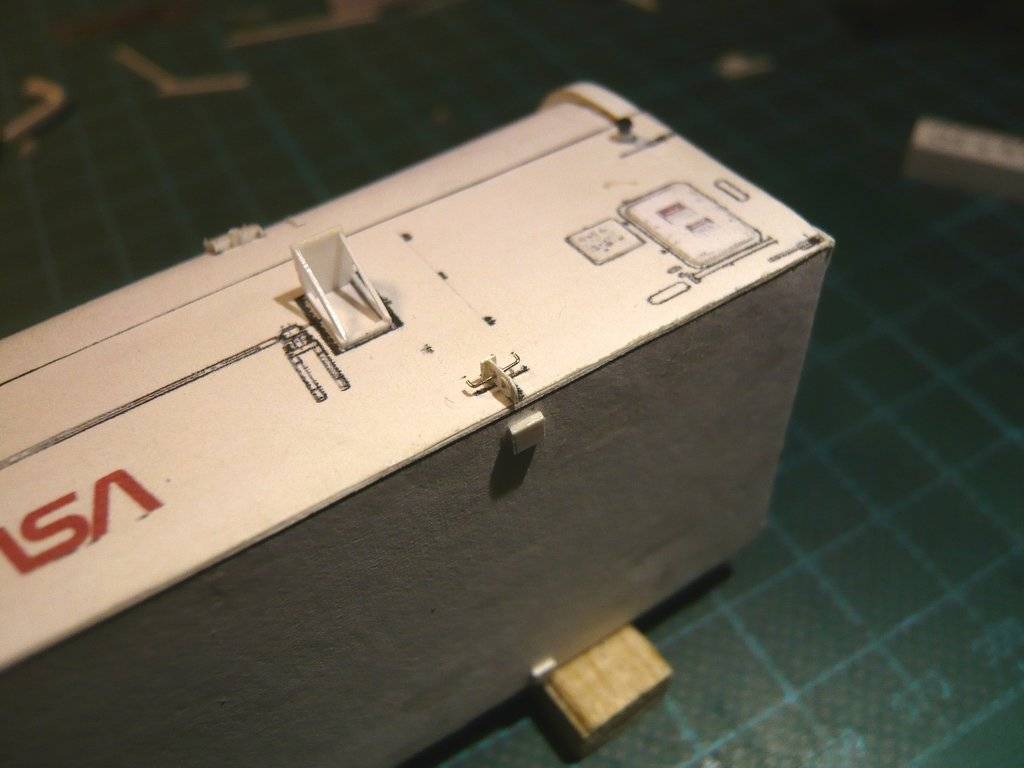 For the next three hold-downs, I will use my finest drill (Ø 0,2 mm) in the hope that the rungs will then have a little less clearance and therefore a tighter seat.  
__________________
Greetings from Germany Manfred Under construction: Launch Pad 39A with Challenger STS-6 (1:144)
|
|
#2813
04-28-2023, 05:09 PM
|
||||
|
||||
|
Hello everybody,
and finally to the remaining three hold-downs, which I've put off for as long as possible because of the stressful fiddling. First I've bent all Rungs (Ø 0,2 mm) and didn't even notice that I already had one too many, but better than one too few. 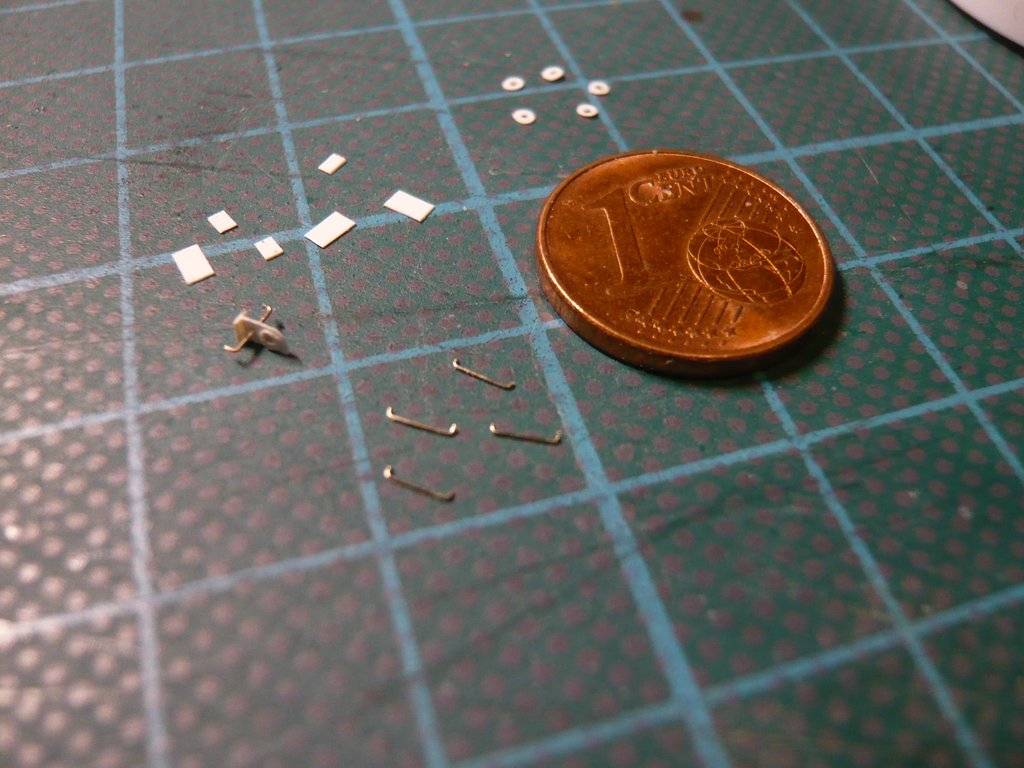 After the lateral discs were glued and drilled out, the marking of the midpoints for the rung drilling followed, for which I used a pin. But even this simple matter is not trivial and didn't want to work right away, because it's about tenths of a millimeter and one needs a steady hand and sharp eagle eyes under the Headset magnifying glass.  For the Rung drilling this time I used my finest drill bit (Ø 0,2 mm), but I had to be extremely careful not to break away the fragile midget. 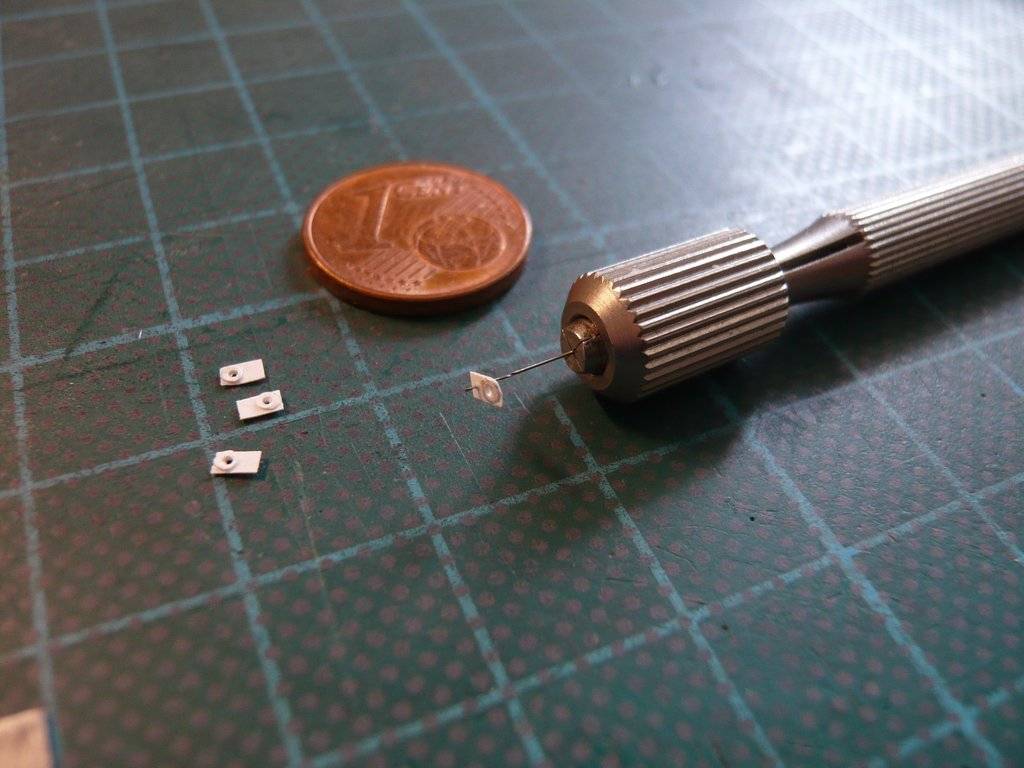 For gluing the cover strips, the hold-downs were again fixed between steel rulers as before.  But that was all harmless compared to the next step, threading the rungs into these tiny holes,  whereby fixing the hold-downs in the tweezers alone was a stressful affair, especially since the rungs kept turning sideways when being threaded into their tweezers, which almost made me despair. whereby fixing the hold-downs in the tweezers alone was a stressful affair, especially since the rungs kept turning sideways when being threaded into their tweezers, which almost made me despair.  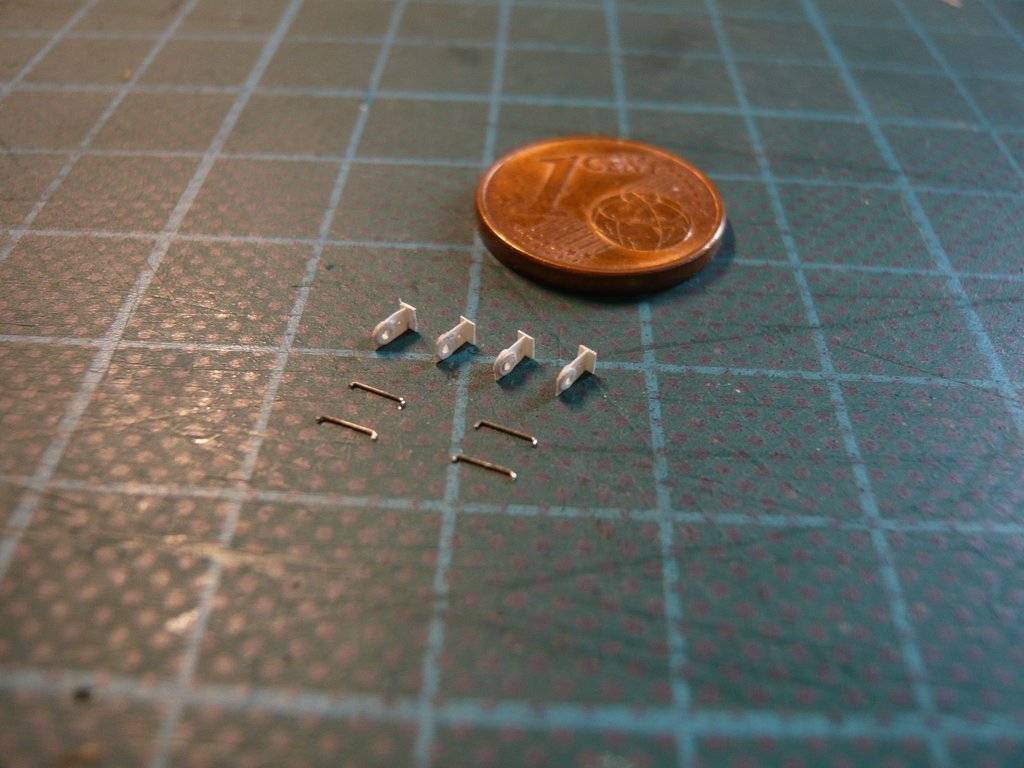 Only after carefully deburring the angled end did I succeed in threading the rungs in at least as far as behind the kink, but that was only half the battle, since they had to be aligned centered before gluing, which is why I've again used a fixation between steel rulers. For this the rungs had to be carefully balanced and in this position, as for the prototype, dabbed with mini-droplets UHU-Super-CA from both sides using an acupuncture needles,  what surprisingly has worked. what surprisingly has worked. 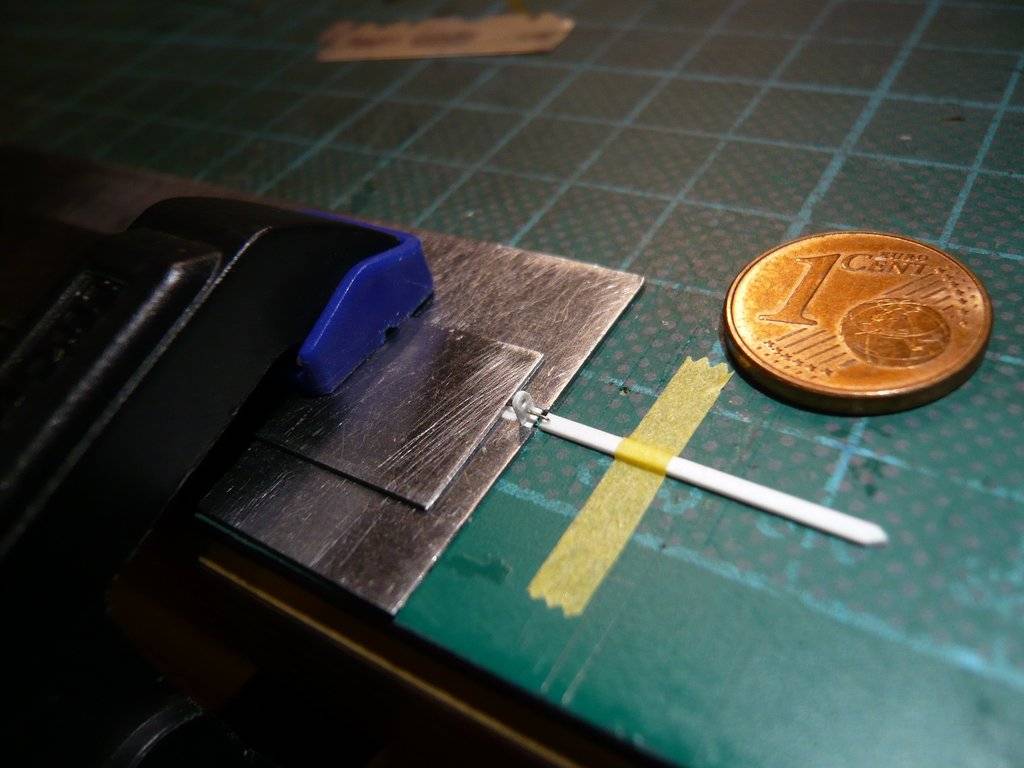 The rungs were then be briefly aligned in the tweezers. 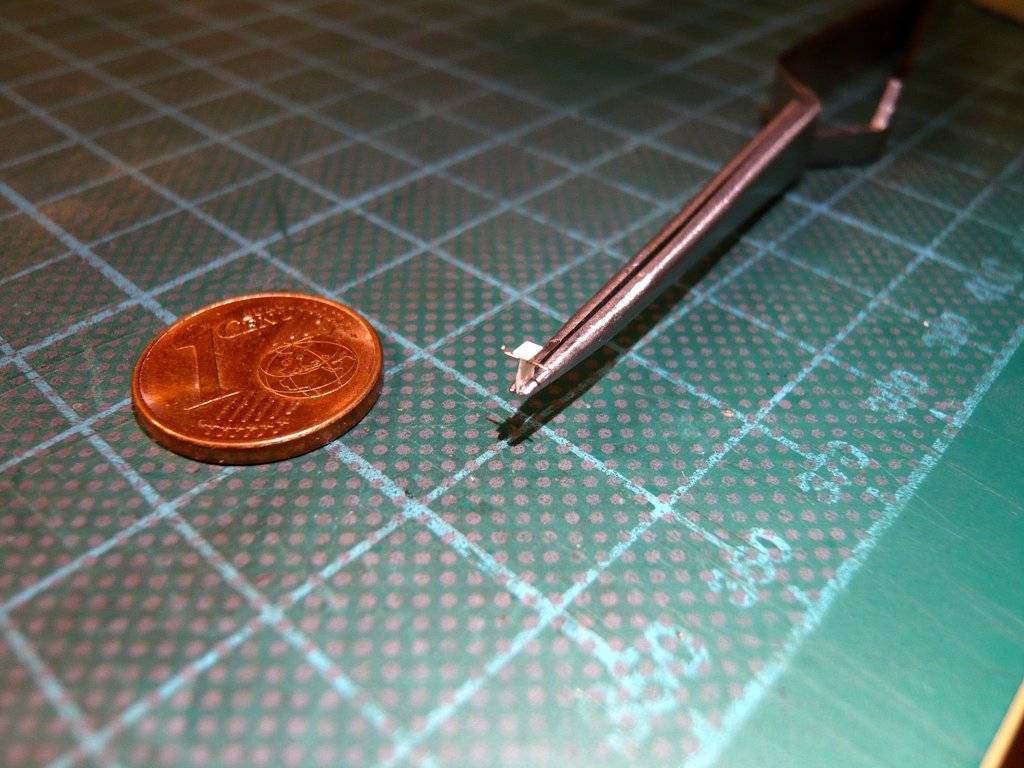 And so at least two hold-downs were already completed, 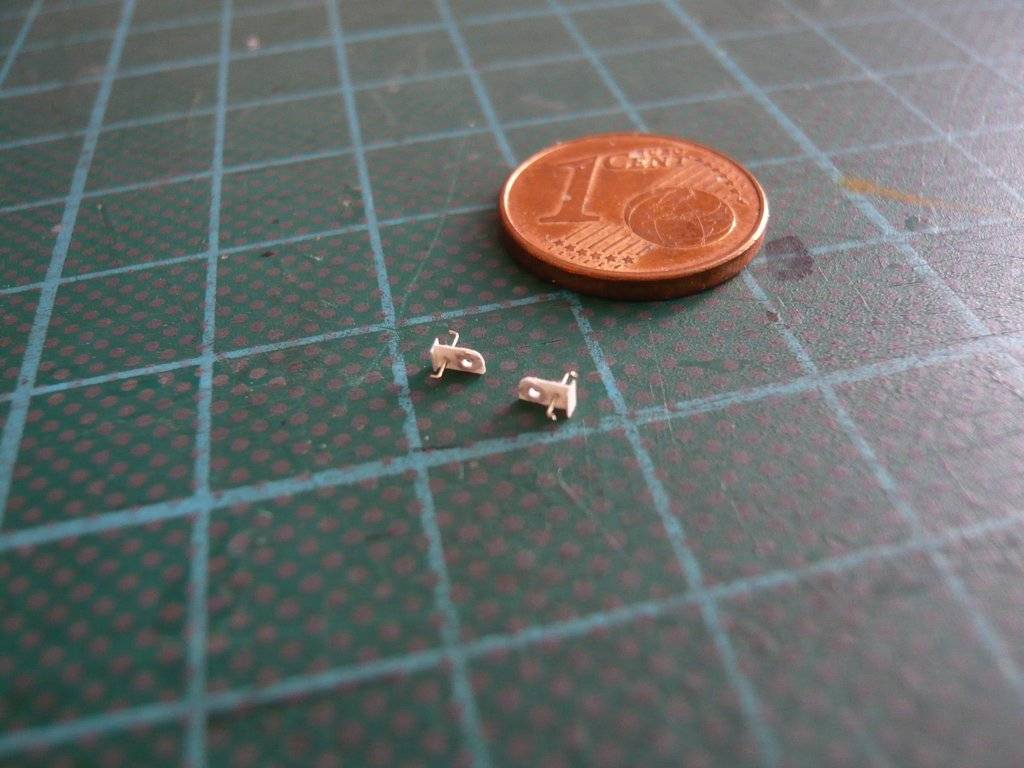 and after a lot of sweaty work, a total of five hold-down devices were done, and so did I myself. 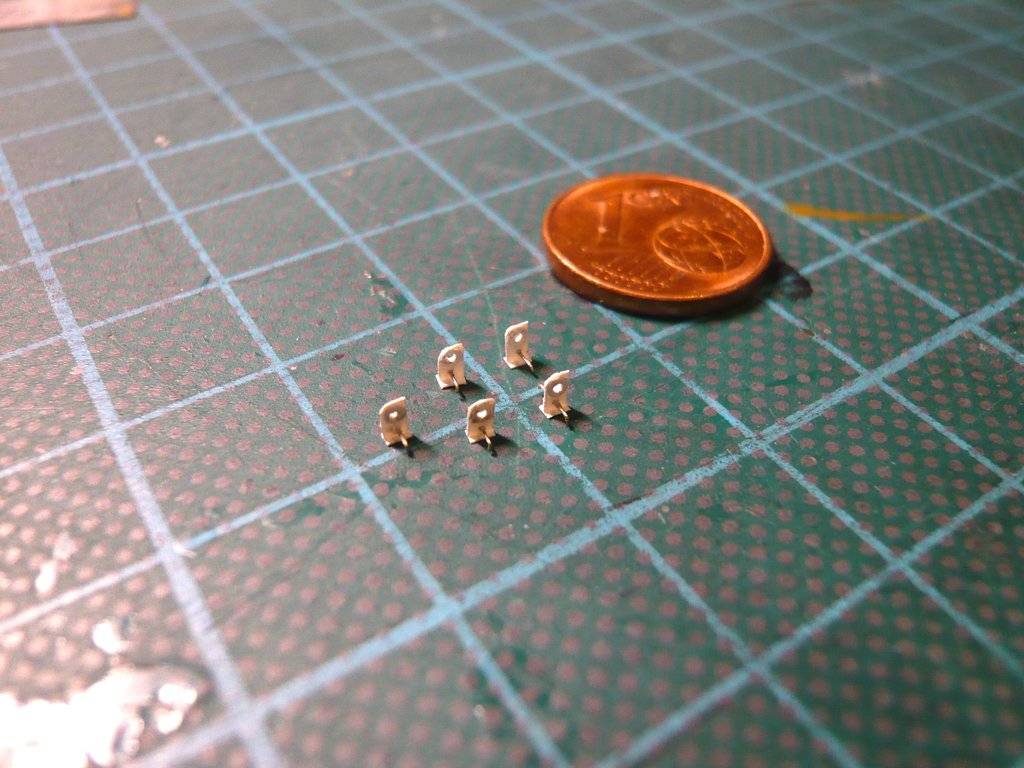 Next I will deal with the laying of the Pipes (blue arrows) between the Pneumatic Door Drive and the Screw Jacks as well as with the Pneumatic Lines (red arrow),  Source: NASA (STS-135) which allows my badly strained eagle eyes to recover a little.
__________________
Greetings from Germany Manfred Under construction: Launch Pad 39A with Challenger STS-6 (1:144)
|
|
#2814
05-02-2023, 11:53 AM
|
||||
|
||||
|
Amazing progress as always!!!
Any prognosis when completion for the "Build of The Decade" is meant to be? 
__________________
Finished projects: RMS Mauretania 1/250; SS Canberra 1/250; Toyota Hilux Overdrive; Current projects: SS Michelangelo 1/250
|
|
#2815
05-02-2023, 05:06 PM
|
||||
|
||||
|
Hello everybody,
and thus a look at the next details, which are first the two white Pipes of the Output shafts on both sides of the Bevel Gearbox, as well as the two Pneumatic lines, whose dimensions I have determined in this image.  Source: NASA (STS-135) After that, the pipes have a diameter of Ø 0,3 mm, and the pneumatic lines are still a little thinner with Ø 0,2 mm. For this I will use the thinnest available Styrene rods (Ø 0,3 mm) and Nickel Silver rods (Ø 0,2 mm). 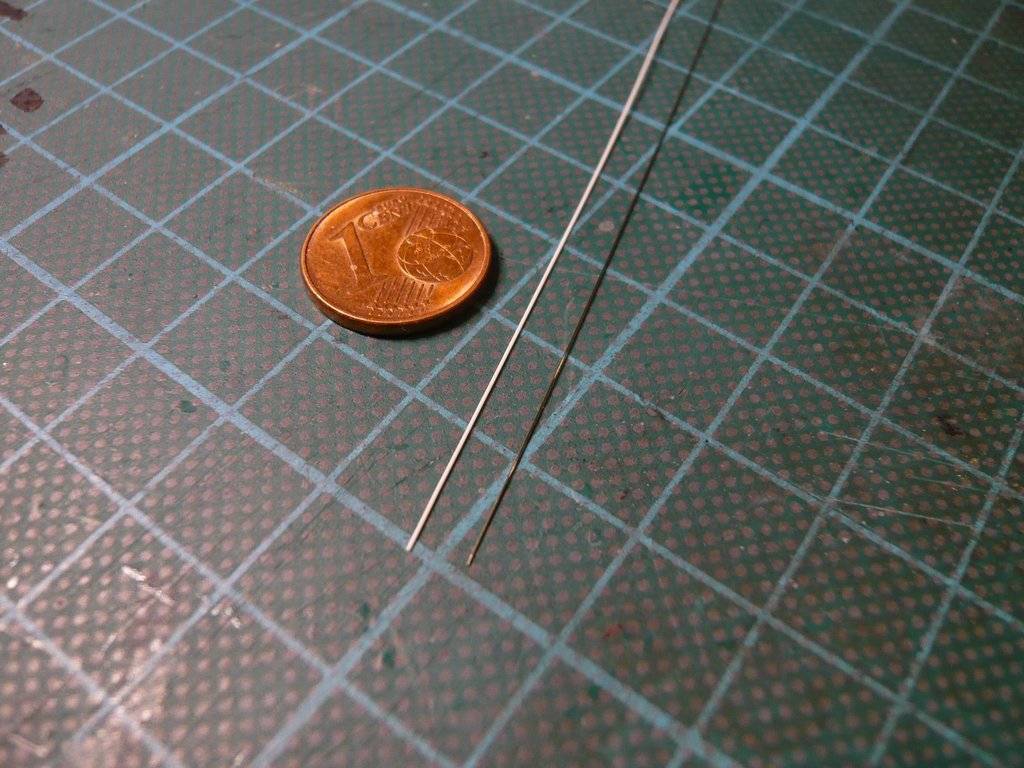 But before I lay those pipes and lines, I'll first deal with the four Ladders on the canister sides, 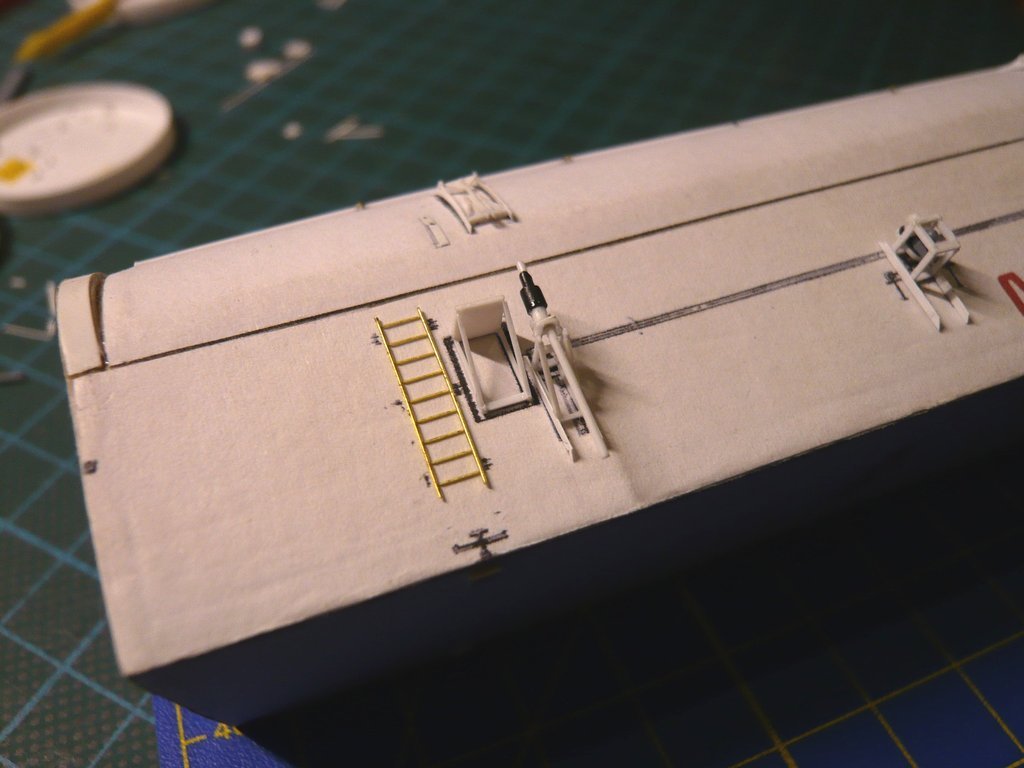 for which I will use PE Ladders (ABER) that I have already presented earlier. 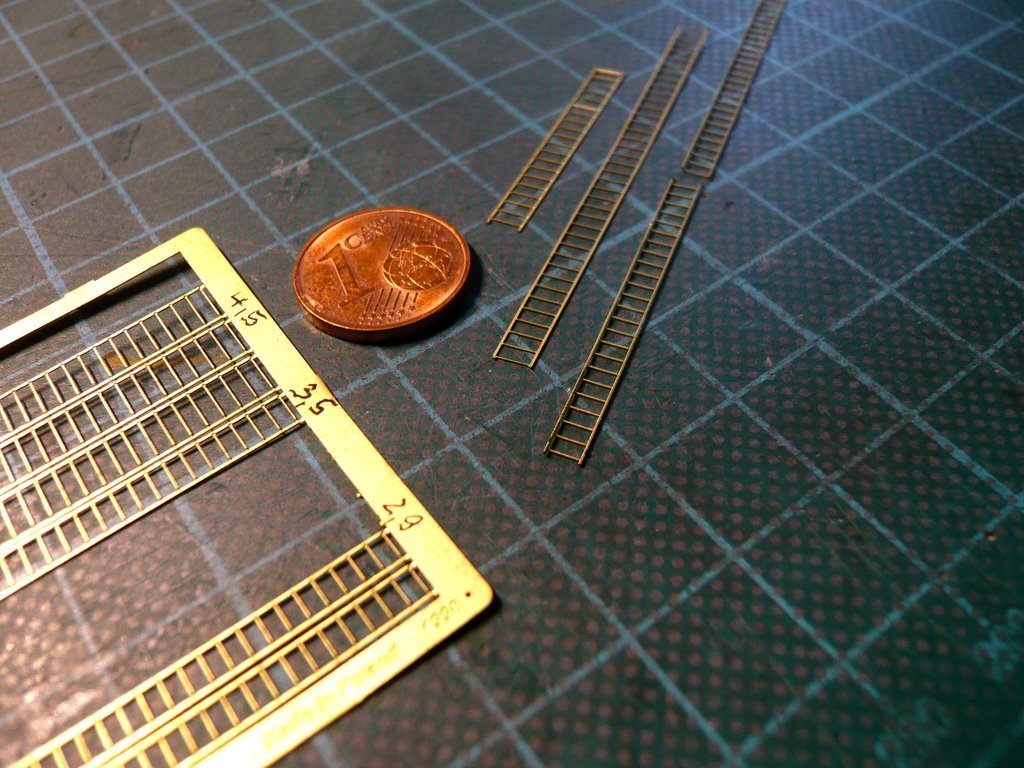 And their dimensions I've determined once again more precisely in this image.  Source: NASA (STS-125) For the feet that are attached to the outside of the ladder bars, I'll use brass strips (0,2 mm x 1,0 mm x 1,5 mm). 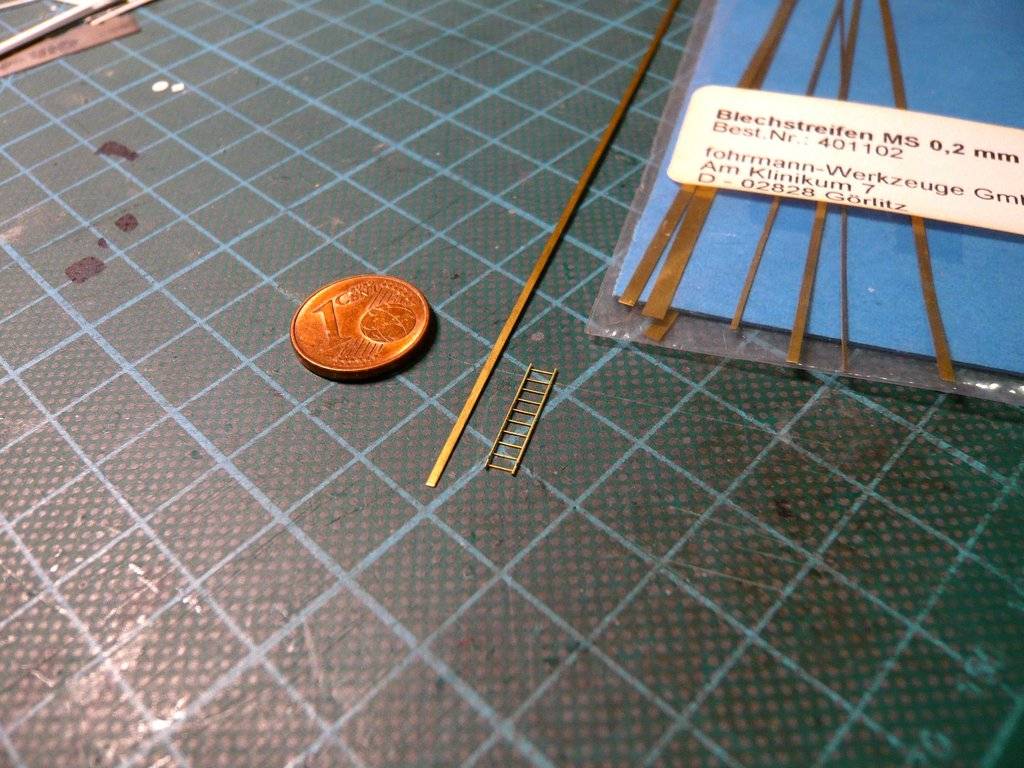 And as one can easily see from the dimensions, it will be quite a fiddly thing again to attach these six strips, which are only 1,5 mm long, to the ladder bars without bending the filigree and fragile ladder.  Conceivable is a gluing with UHU-Super-CA, which I'll try out. So let's wait and see.
__________________
Greetings from Germany Manfred Under construction: Launch Pad 39A with Challenger STS-6 (1:144)
|
|
#2816
05-06-2023, 06:36 AM
|
||||
|
||||
|
Hello everybody,
after trying hard but ultimately unsuccessfully to cut feet of the same length out of the brass strip (0,2 mm x 1 mm), 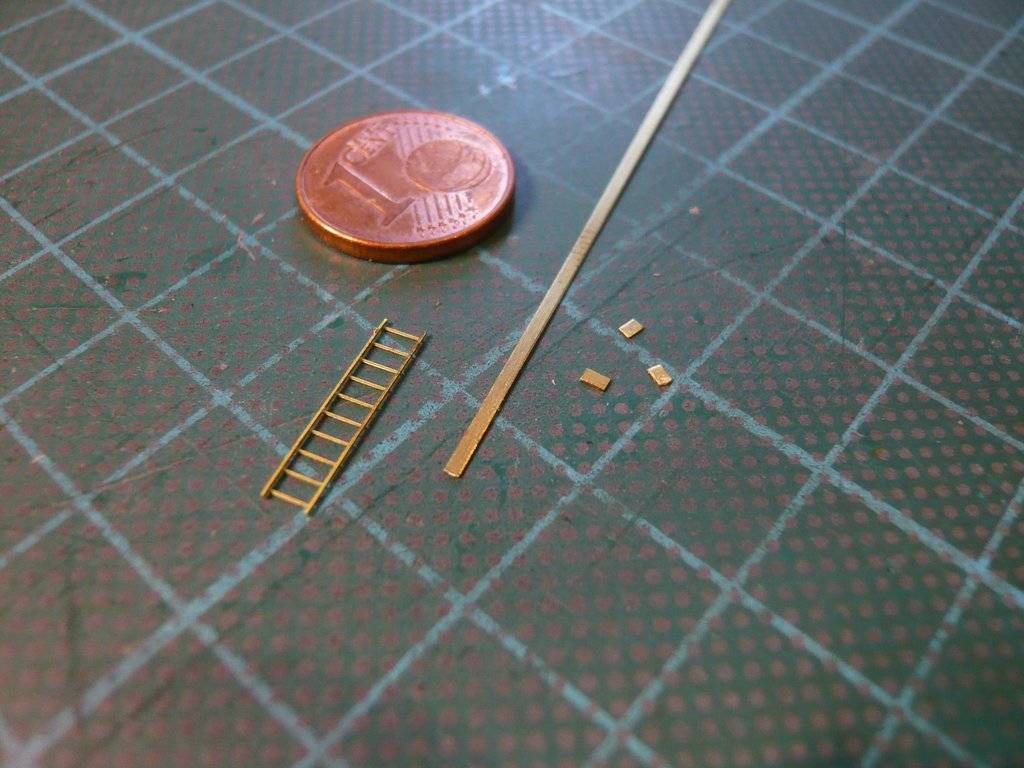 I changed my mind and cut out a Styrene strip (0,15 mm x 1 mm) instead, from which I then cut the 1,5 mm long feet with the Chisel cutter at the Ruler angle stop. 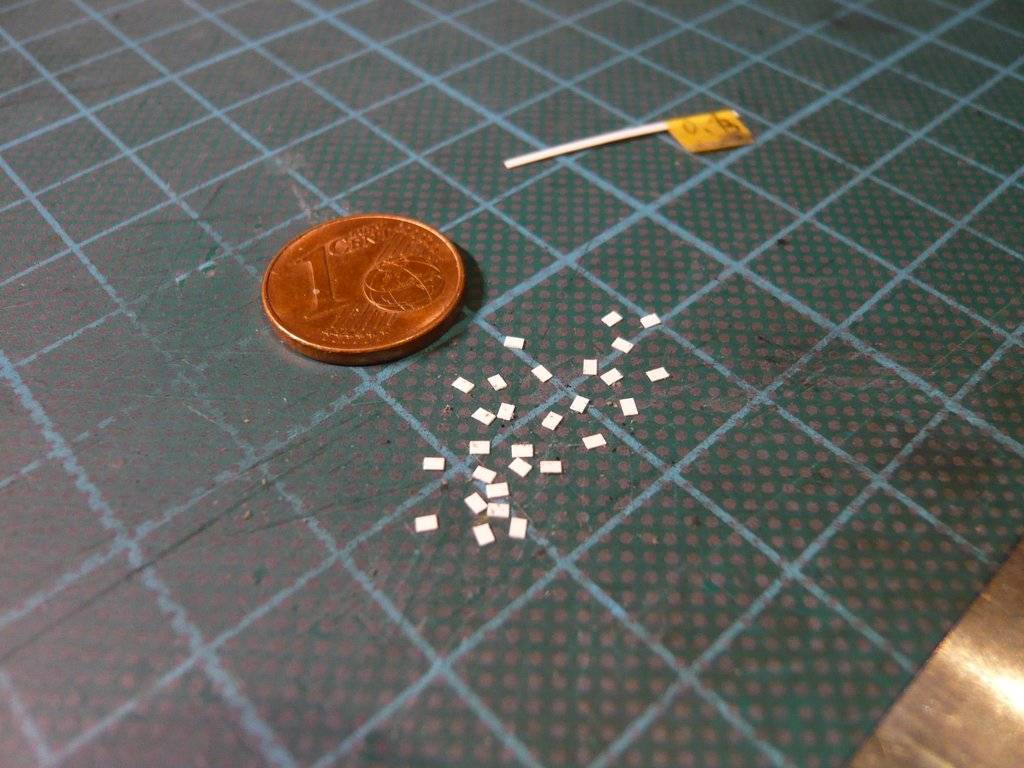 The feet were glued to the ladder rails according to my tested fixation between several rulers, whereby the underside of the ladder with the rungs must point upwards so that the feet are flush with the top edge of the rails. Great care was required because the filigree PE Ladders can quickly bend. 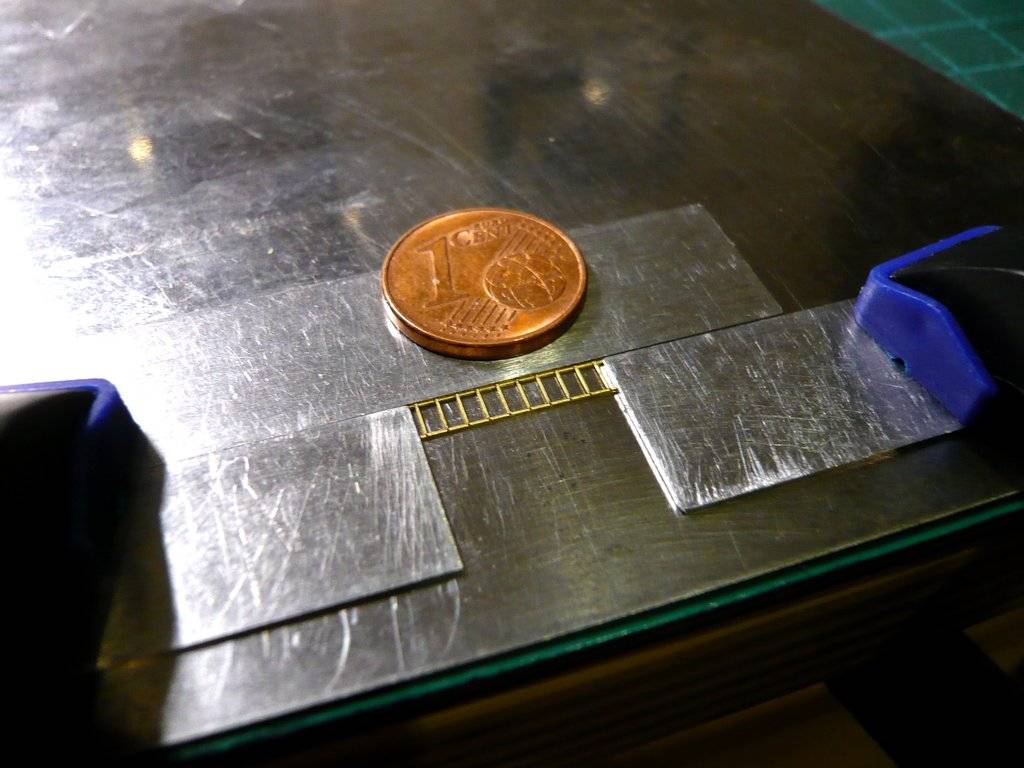 For the gluing, I used a new UHU-CA-Easy, which is thin and can be corrected. 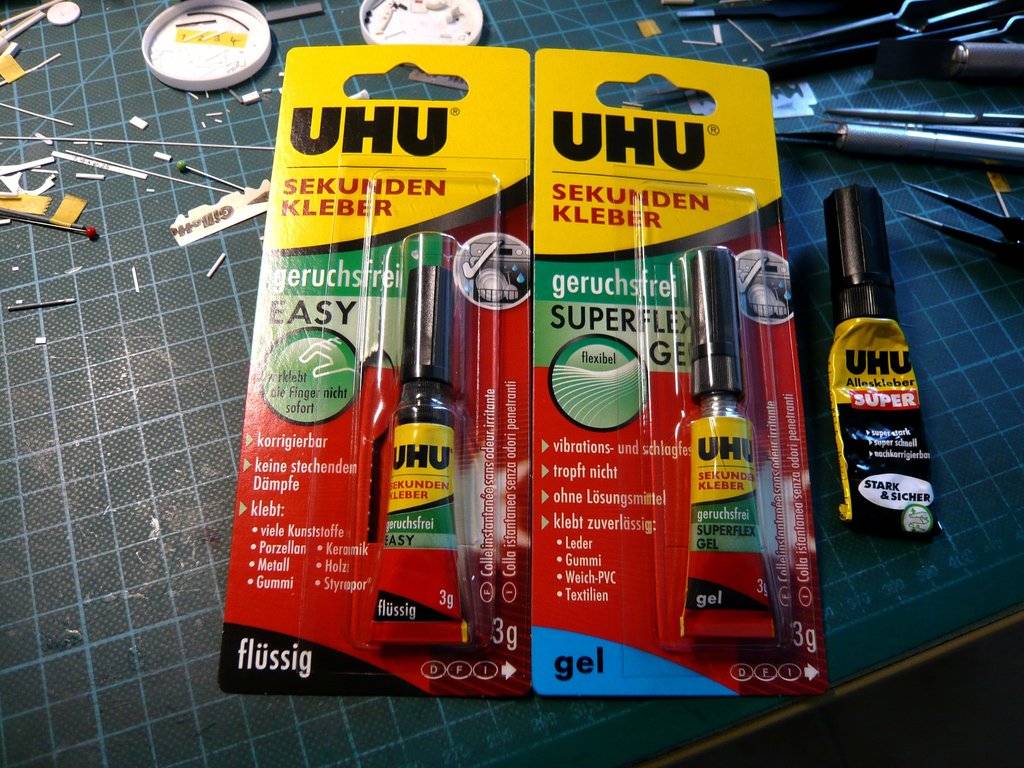 The gluing of the feet held in the pointed tweezers is not for the faint of heart and shaky hands, especially since at the same time with the other hand a tiny droplet of CA has to be dabbed onto the lower edge of the feet with the Acupuncture needle and then the foot has to be glued to the ladder rail. To do this, I carefully pressed the foot against the rail with the steel ruler and aligned it out a bit, which can be seen better in the picture after the next. 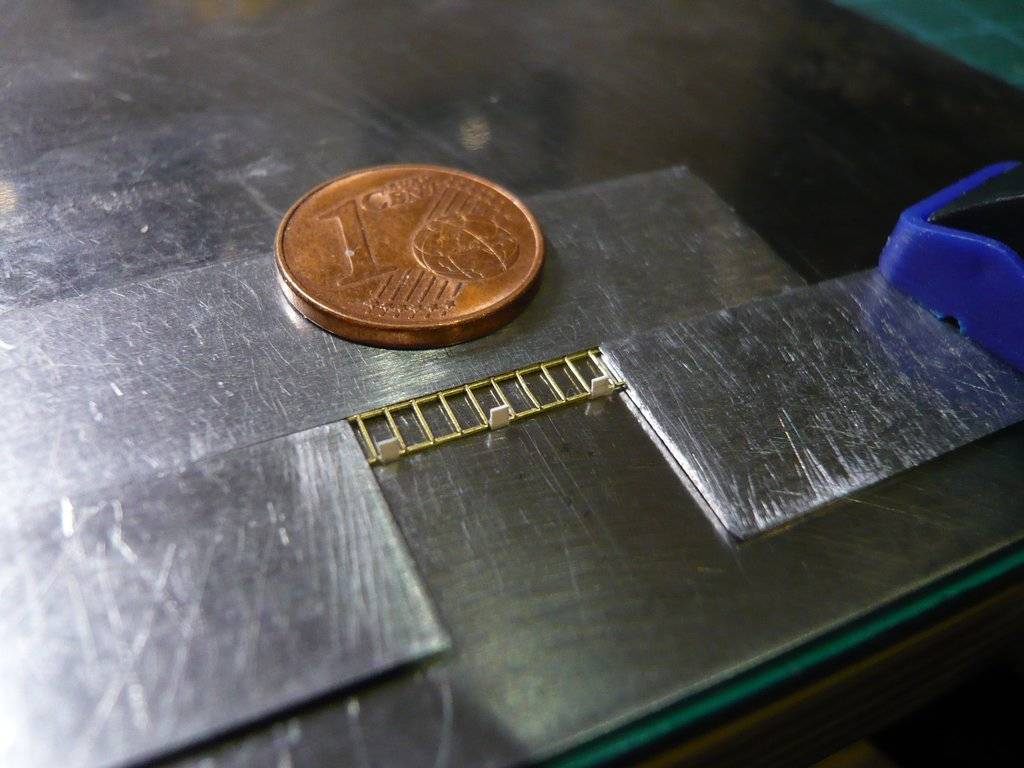 Doing so it is advisable to move the ladder carefully immediately after gluing so that it does not stick to the base, which can happen. 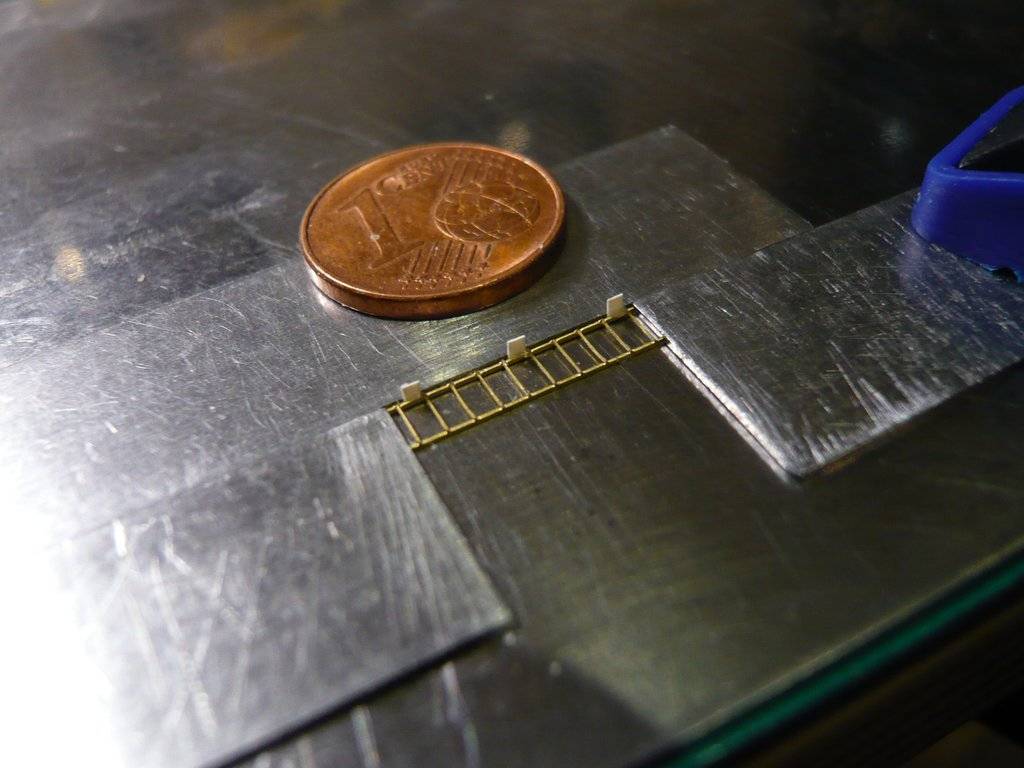 Fixing the rulers with magnets is very helpful. 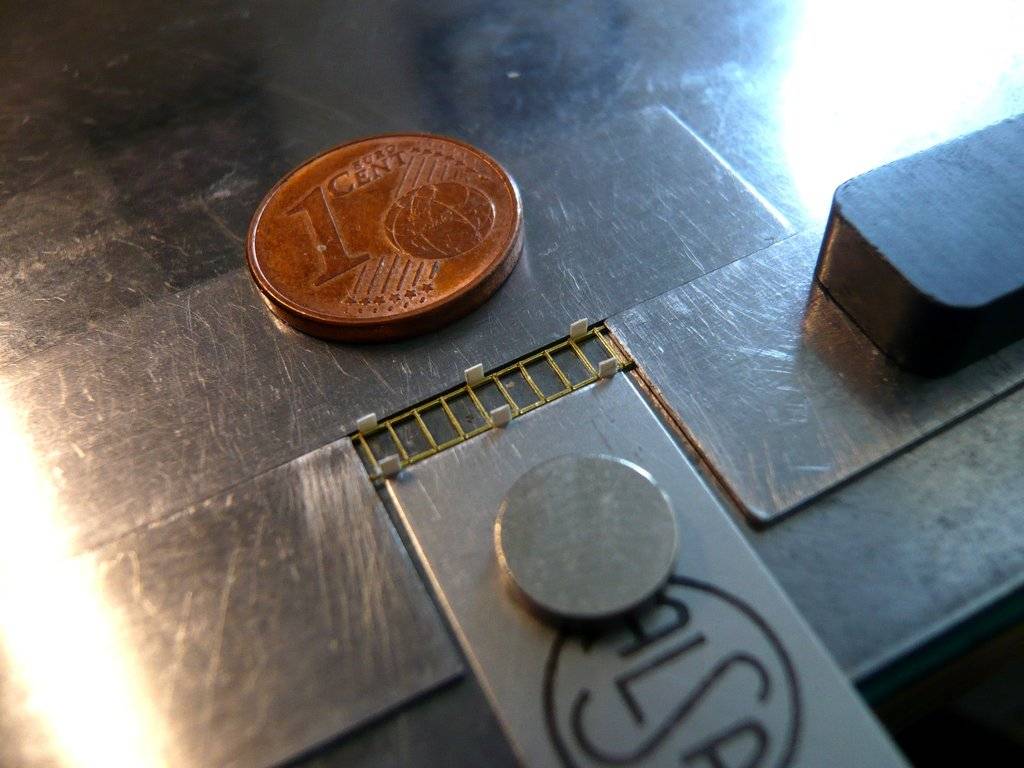 And that was the result, roughly how I had imagined it.   And the test fitting on the canister is okay so far too.  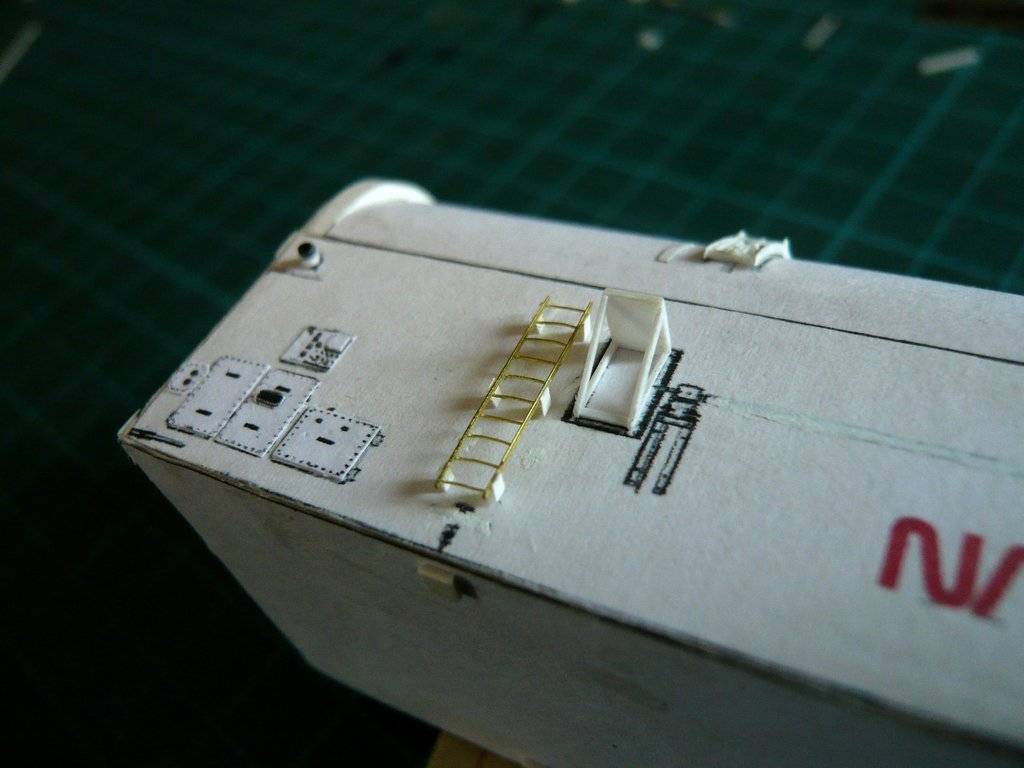 Maybe I still can work out the remaining three ladders a little bit better.
__________________
Greetings from Germany Manfred Under construction: Launch Pad 39A with Challenger STS-6 (1:144)
|
|
#2817
05-06-2023, 05:01 PM
|
||||
|
||||
|
Hello everybody,
initially I've cut the remaining three ladders to the length (14,5 mm) with a side cutter. 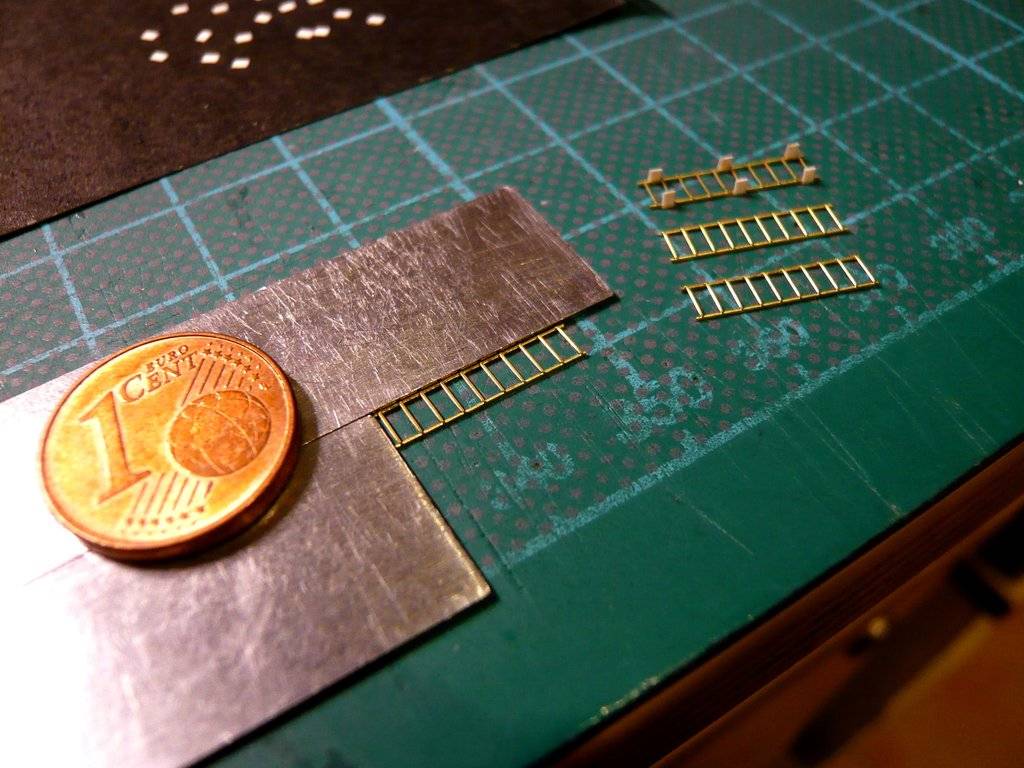 And therewith without many words to the next ladder, which truly went a little easier because I knew what I had to pay particular attention to. Nevertheless, two feet didn't want to glue at the ladder stringer straight away, which is why I first had to carefully remove the old CA from the foot before the second gluing could take place, which then worked well. 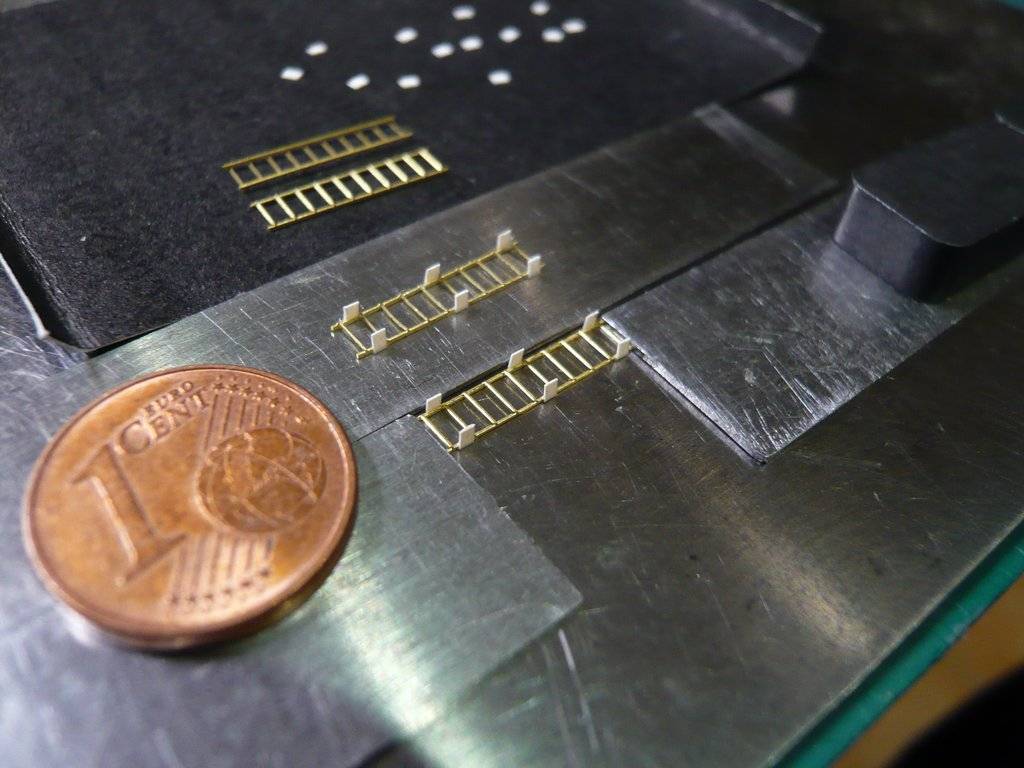 But one shouldn't let that impress you, otherwise things would go too smoothly. 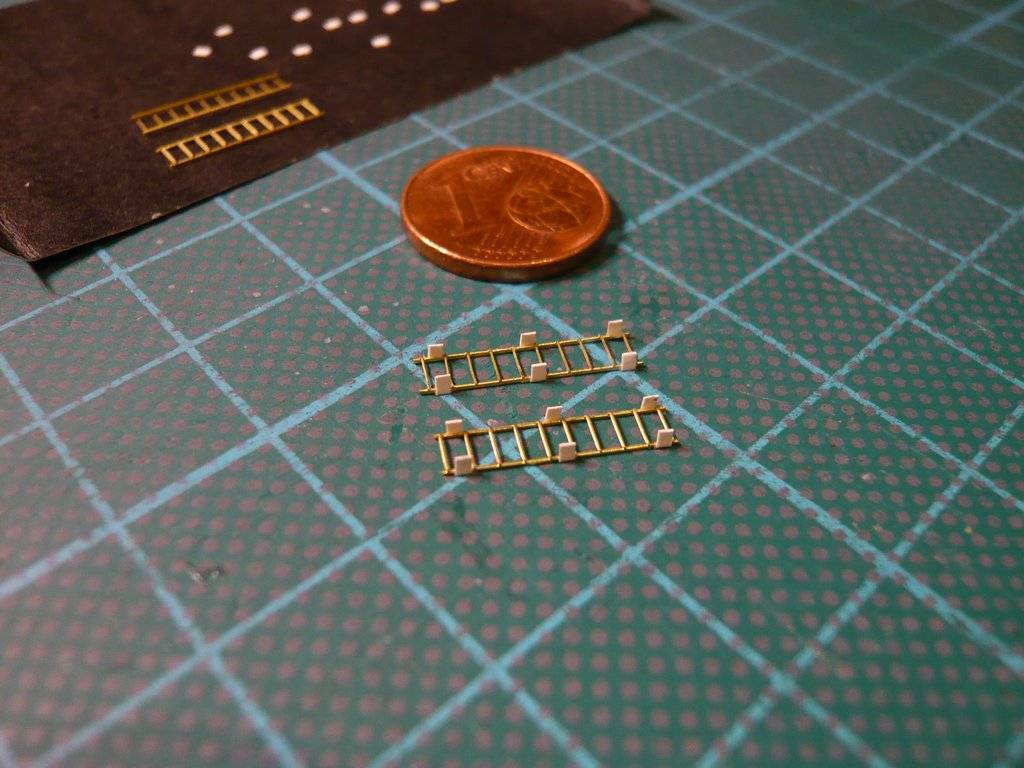 And that's already half of the short ladders done, 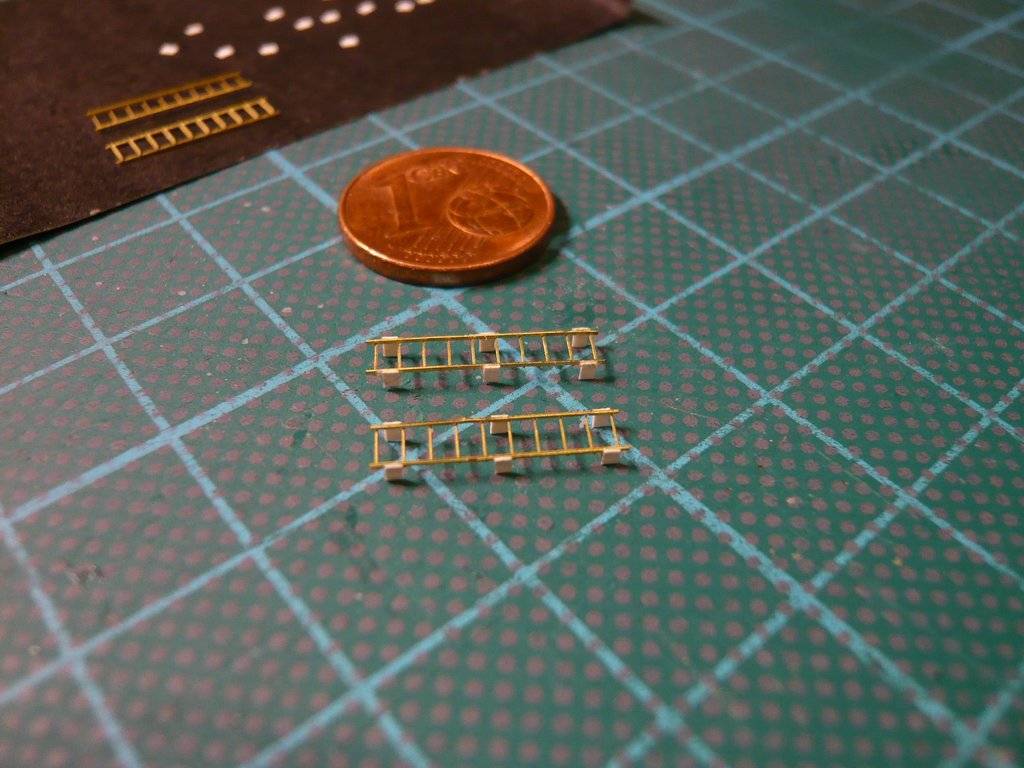 and the remaining two ladders can follow.
__________________
Greetings from Germany Manfred Under construction: Launch Pad 39A with Challenger STS-6 (1:144)
|
|
#2818
05-07-2023, 09:06 AM
|
|||
|
|||
|
Perfect as always!
|
|
#2819
05-08-2023, 04:30 AM
|
||||
|
||||
|
Thanks Marcell for looking in on me again,
 I don't want to disappoint my true friends.
__________________
Greetings from Germany Manfred Under construction: Launch Pad 39A with Challenger STS-6 (1:144)
|
|
#2820
05-09-2023, 06:03 AM
|
||||
|
||||
|
Hello everybody,
and now to the Final Ladder Countdown. This will be the 3rd Ladder, scratched as usual. 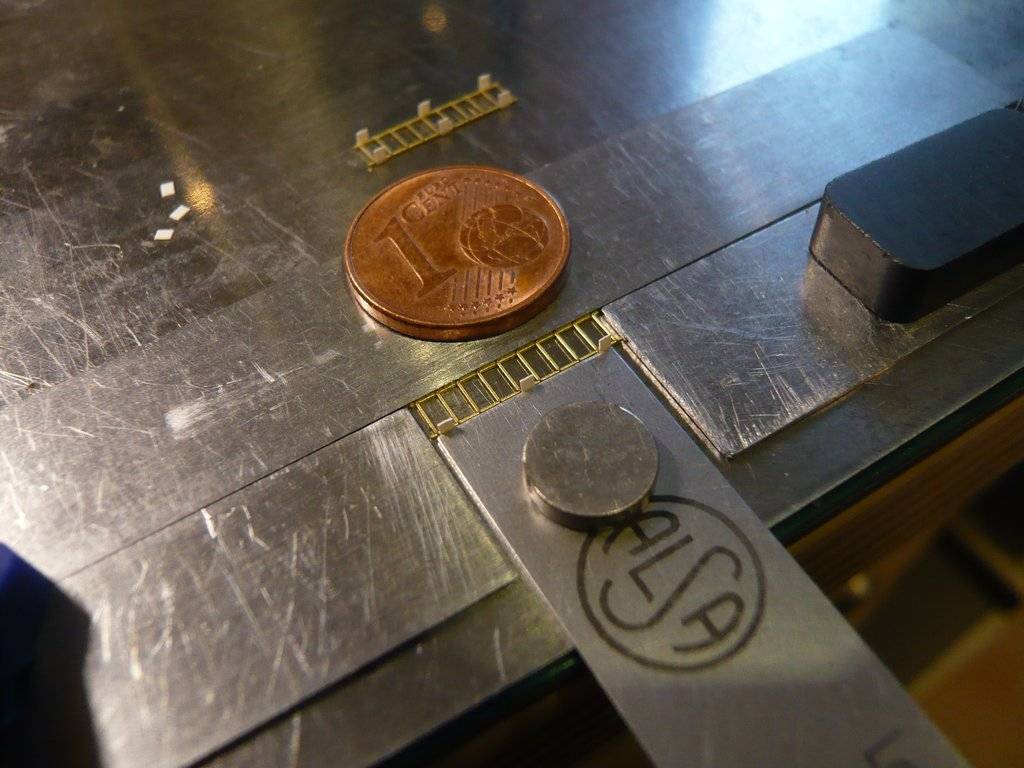 This image shows how quickly the rulers can slip as I was not careful when photographing the three finished ladders next to the fixed 4th Ladder. 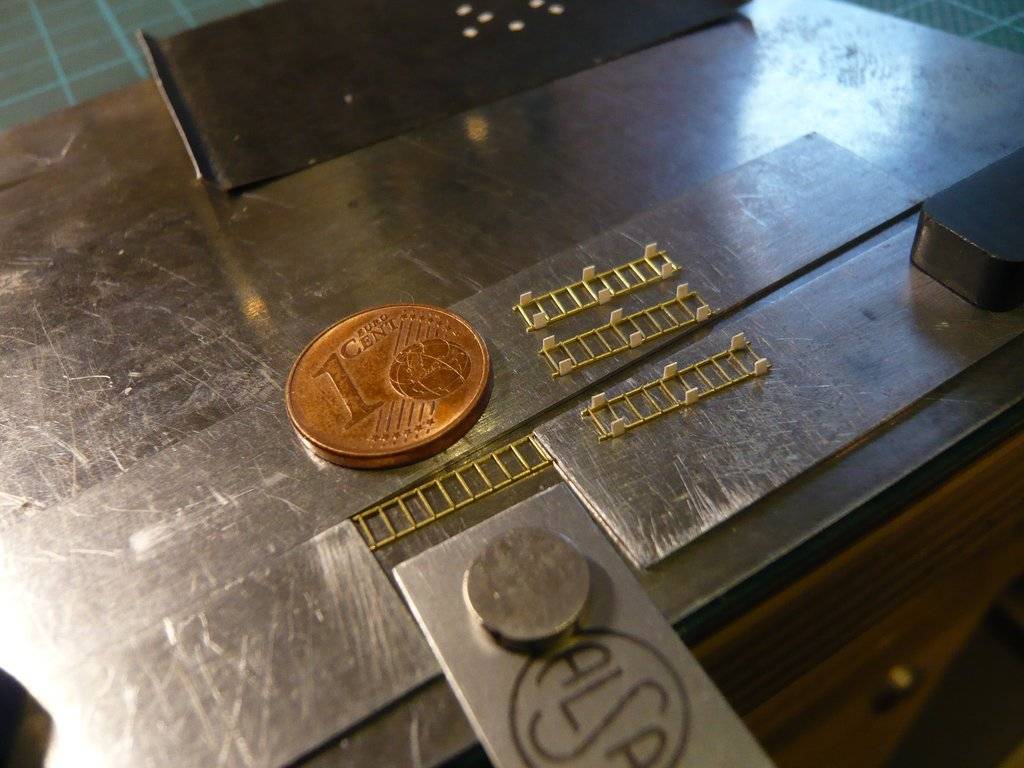 So it's better to put the finished ladders aside quickly and fix the ladder once again. 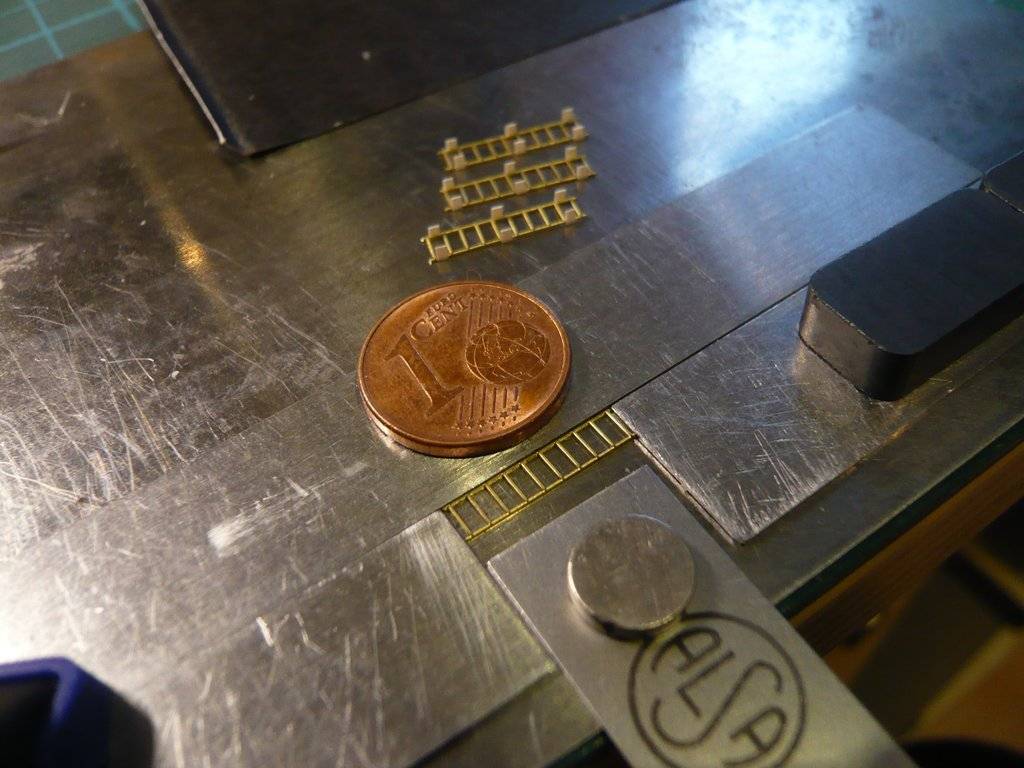 This now completes all four ladders for the side walls of the canister, 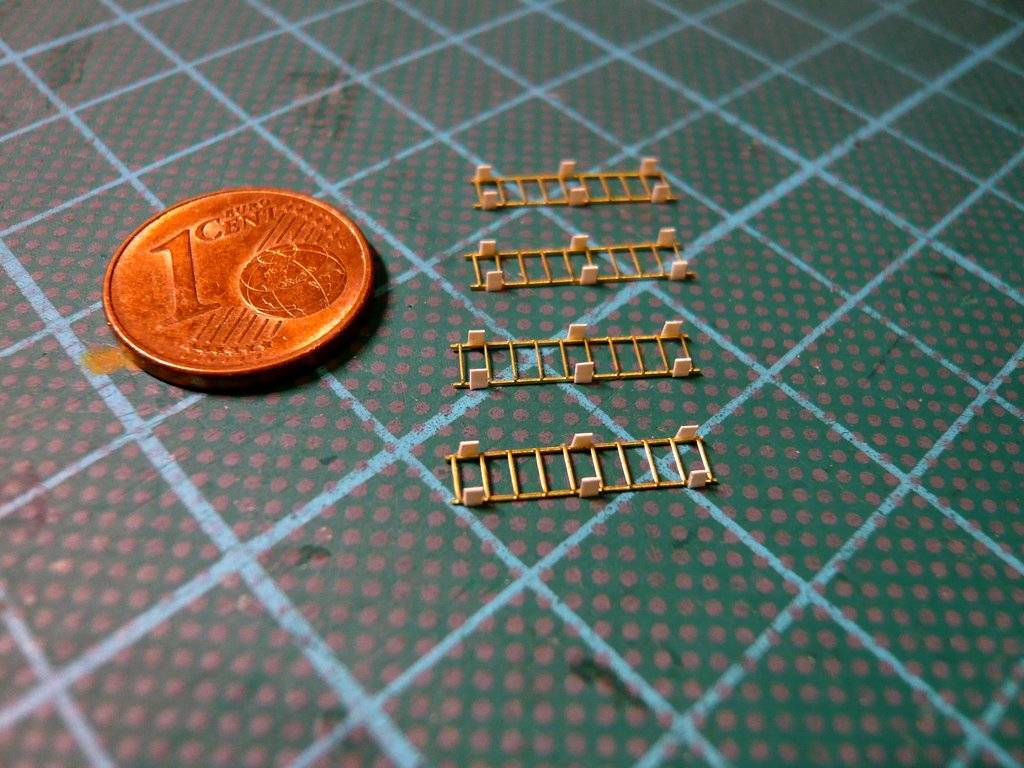 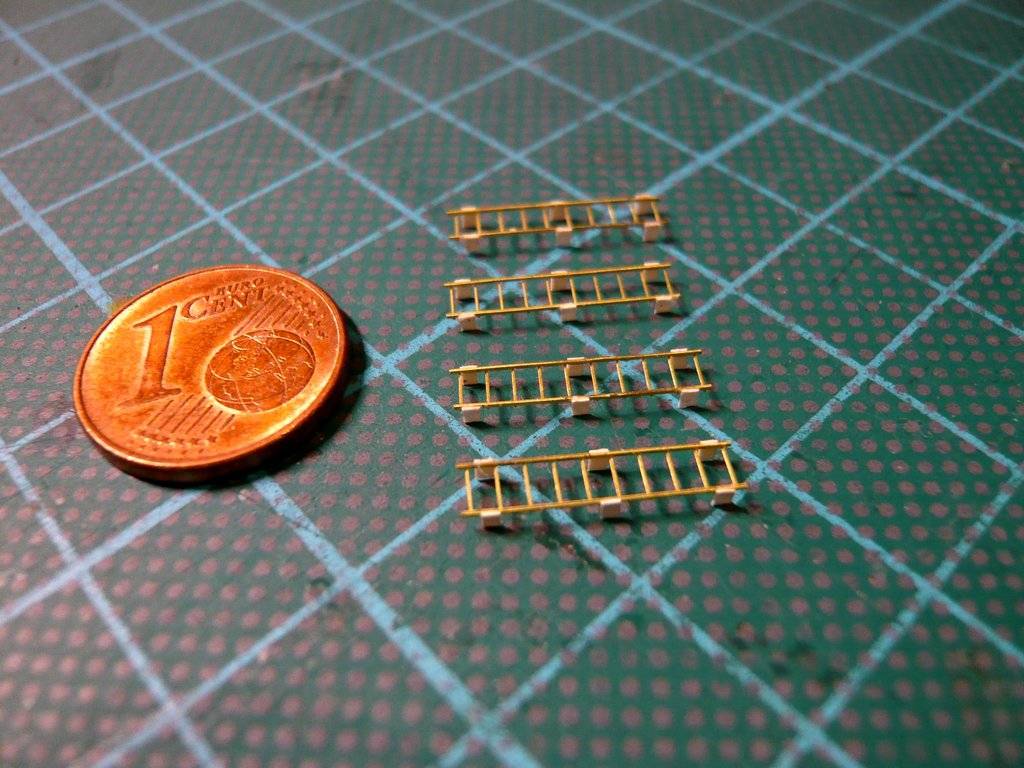 and were safely stowed away until their Airbrush painting,  for which I still have to think about a clever way of holding these filigree and extremely fragile parts.
__________________
Greetings from Germany Manfred Under construction: Launch Pad 39A with Challenger STS-6 (1:144)
|
 |
|
|


 Linear Mode

