


|
|
|
#971
 03-02-2016, 11:07 AM
|
||||
|
||||
|
Thanks Guys for your nice words.
 There is still a long way to go, but the goal I have clearly in mind.  
__________________
Greetings from Germany Manfred Under construction: Launch Pad 39A with Challenger STS-6 (1:144) 
|
|
#972
03-04-2016, 05:29 PM
|
||||
|
||||
|
Hello everybody,
With the assembly of the T-profiles it wanted initially not work so well, because their positioning was pretty stressful already during the fitting between the H-profile and the screws ring, let alone only when gluing.  That's why I first times tried the fit with an Evergreen H-beam, especially because the belt protruded outwards even something over the screws circle, 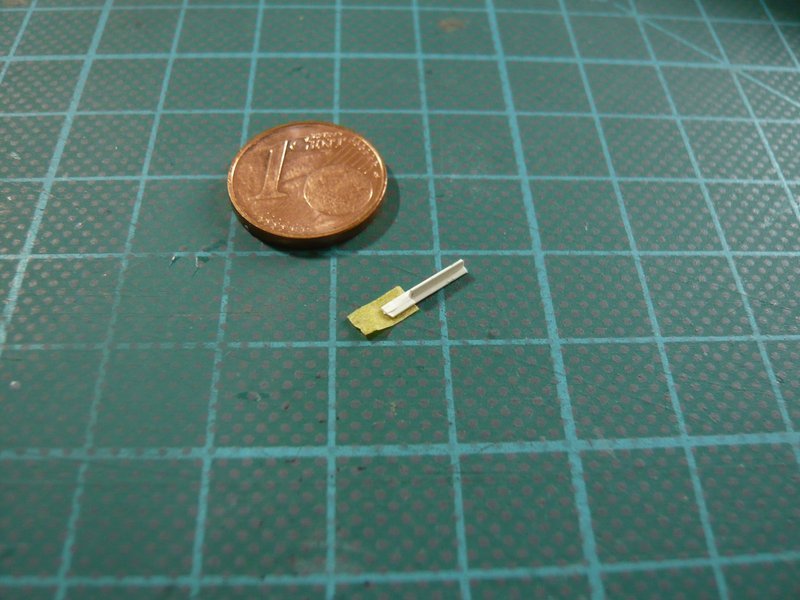 which is why I initially left something supernatant in order to remeasure everything again. 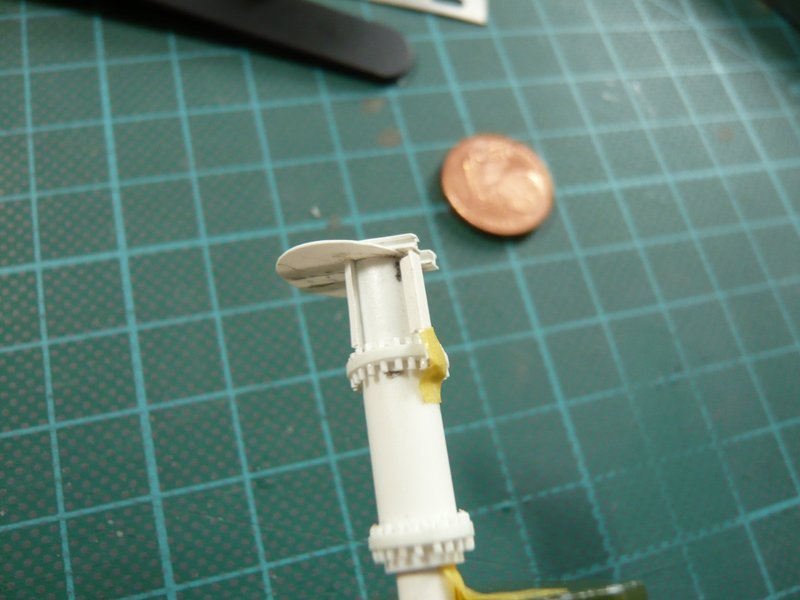 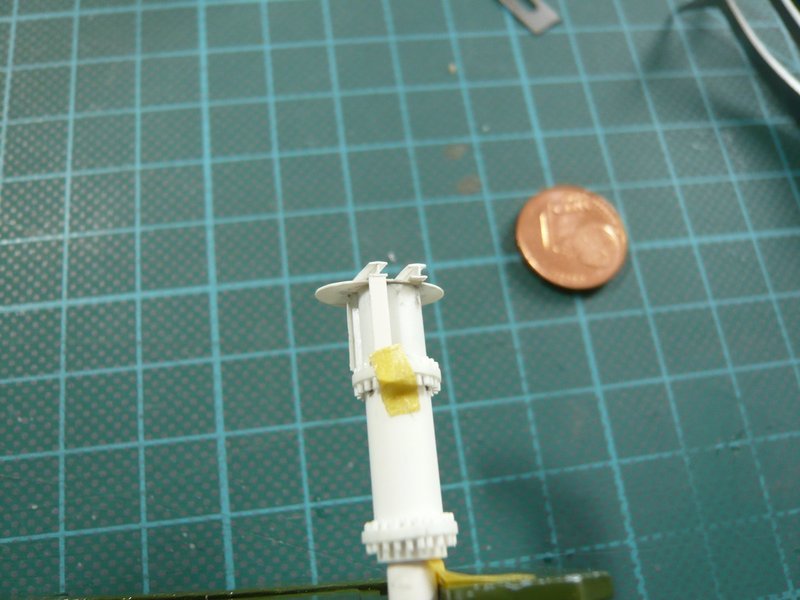 Since the subsequent experiments with the scratched T-beams were not very successful, I simply have rearranged the mounting and built the profile directly at the tube and firstly have glued the webs. 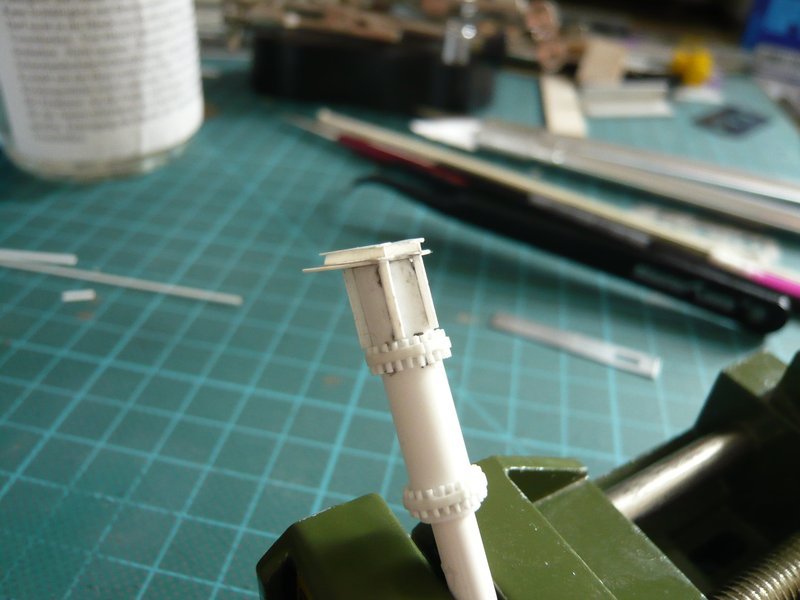 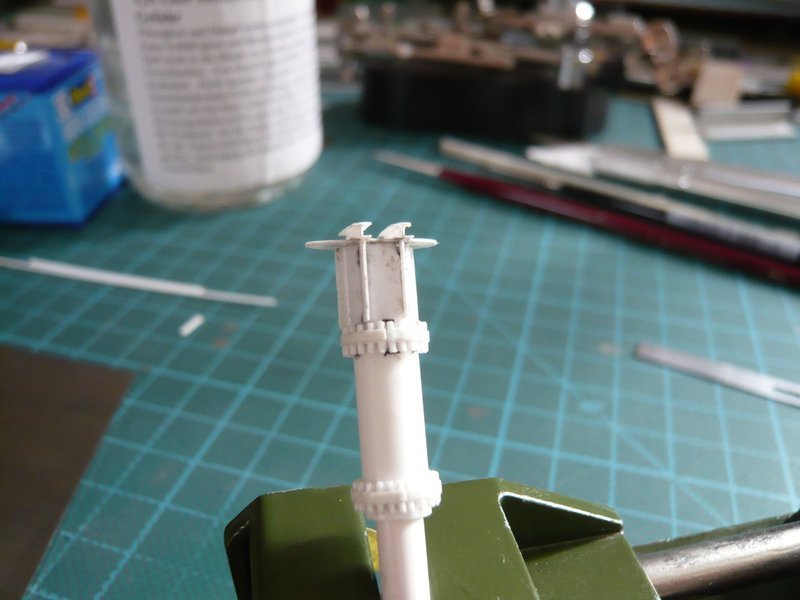 Subsequently I glued the flanges on the webs that have been fixed with tape and then had been aligned. 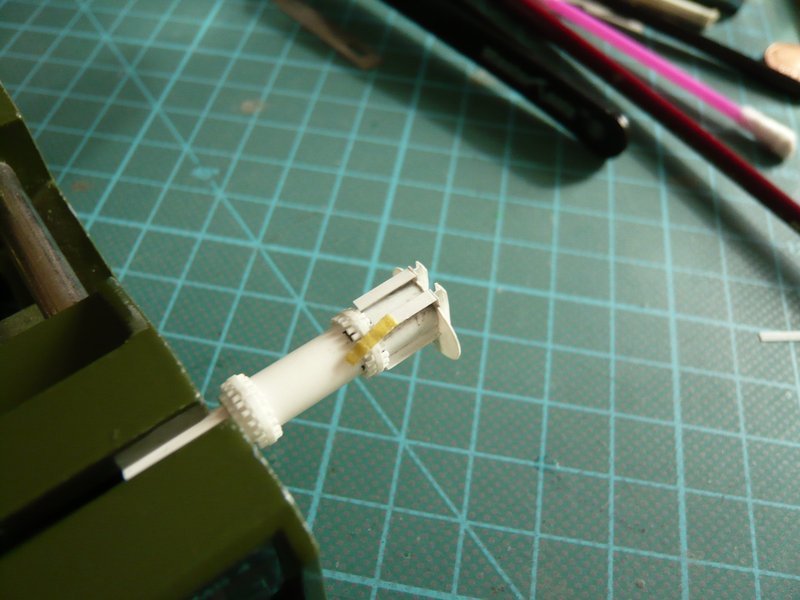 And so the mounting went really better. 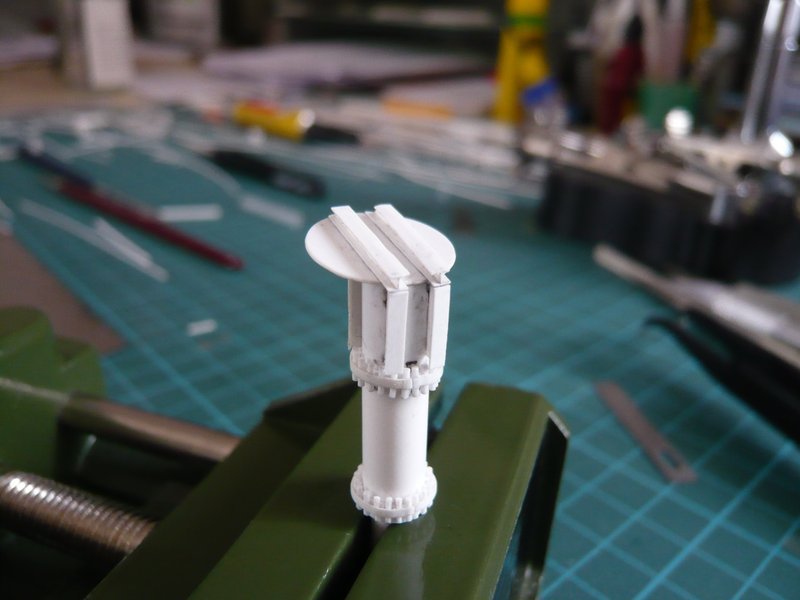 And so would the Rainbird B-1 actually finished, 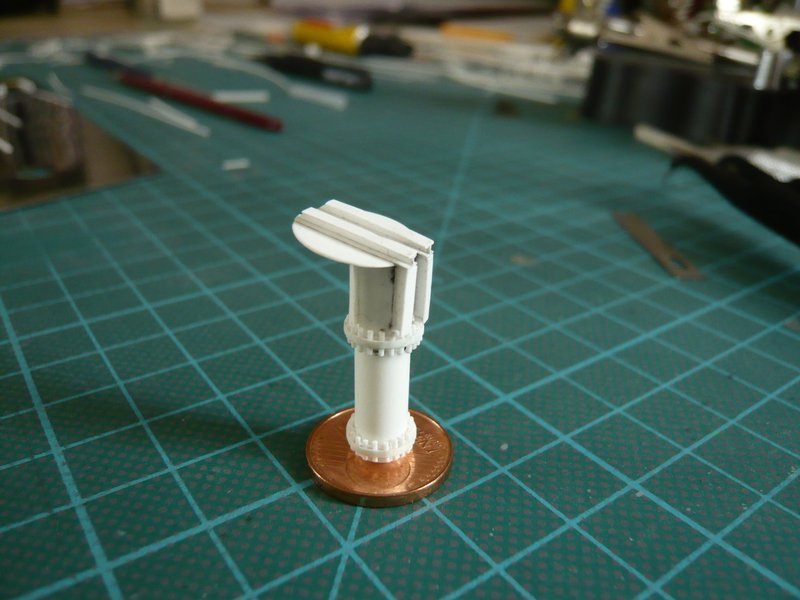 and looks pretty nice, 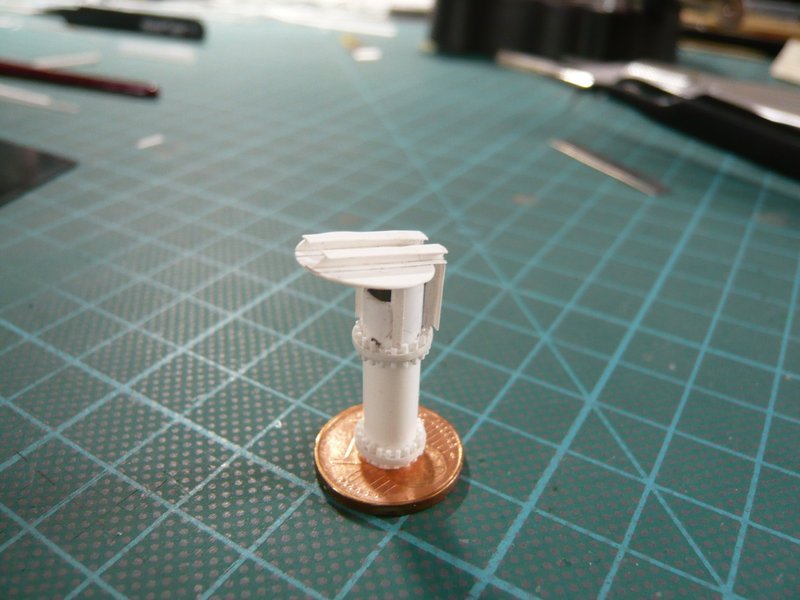 especially when one compares it with the paper bird from Maier's Paper kit.  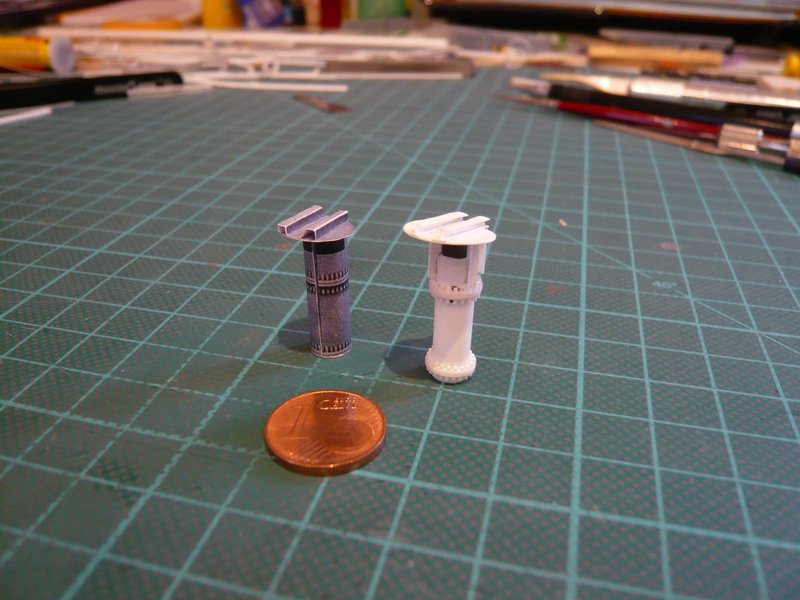 However, a tiny detail is lacking, because all Rainbirds have these two transport-rings on the hood between the H-beams that I wanted to try at least once. 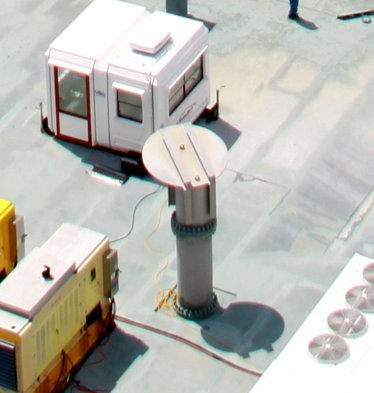 Source: NASA The diameter should be about 0.7 mm, for which I have cut off these tiny rings from my thinnest insulating tube. Okay, I hear almost your outcry ...  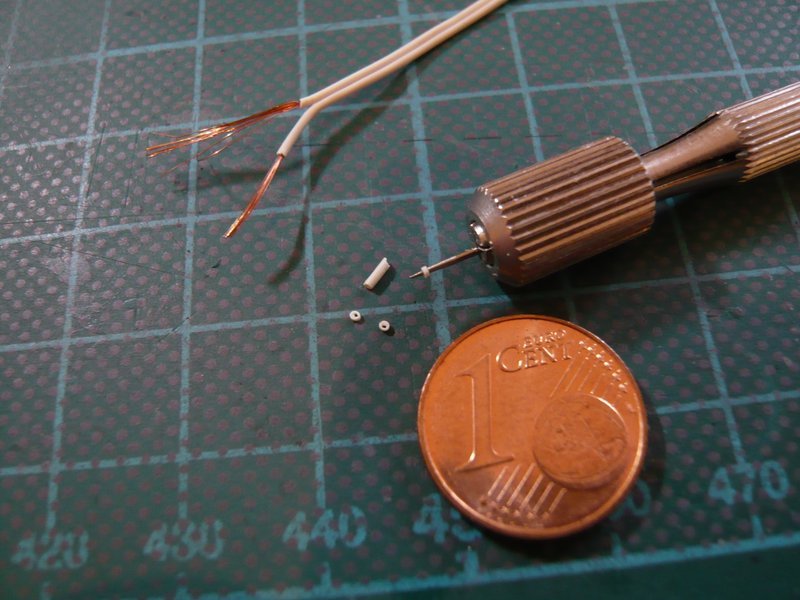 And these crumbs actually still could be glued under the magnifier.  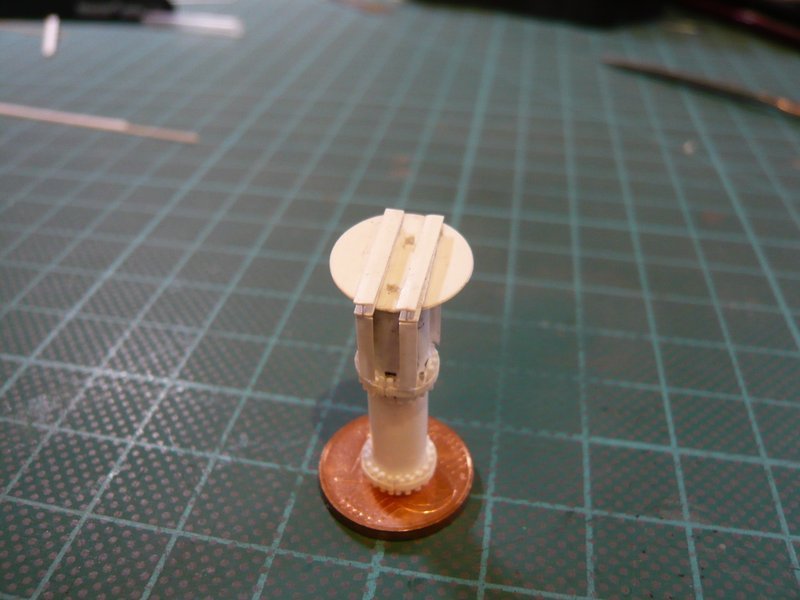 So, it is now well enough of this crazy stuff. Here is a picture of the little bird on the MLP, which was so long not to see. 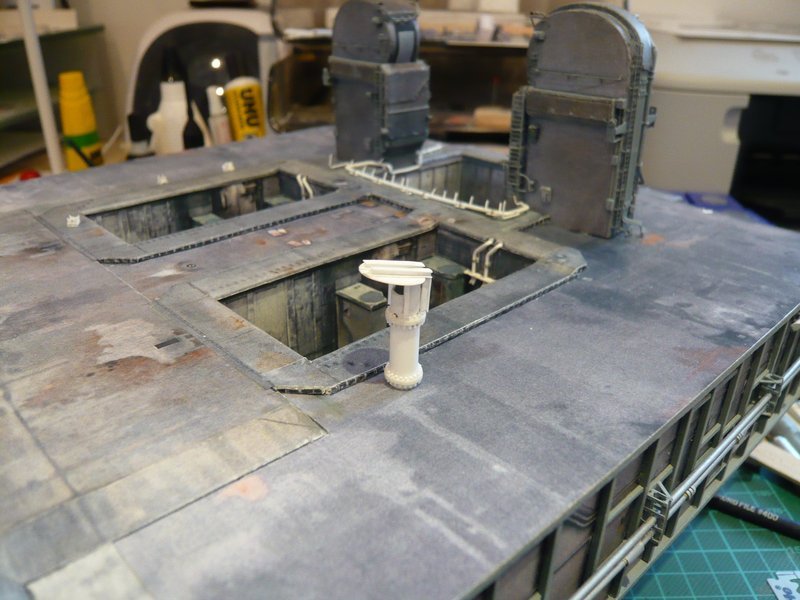 And so already times a nice weekend. 
__________________
Greetings from Germany Manfred Under construction: Launch Pad 39A with Challenger STS-6 (1:144) Last edited by spacerunner; 09-25-2016 at 03:18 PM.
|
|
#974
03-05-2016, 12:18 AM
|
||||
|
||||
|
Thanks David for your kind words,
 yeah, I can not complain about boredom ...  Thanks for watching and stay tuned, it remains exciting!
__________________
Greetings from Germany Manfred Under construction: Launch Pad 39A with Challenger STS-6 (1:144)
|
|
#976
03-05-2016, 01:18 AM
|
||||
|
||||
|
Thanks for your nice comment too.
Well, as the title suggests already, it's the maiden flight of the Challenger (STS-6).
__________________
Greetings from Germany Manfred Under construction: Launch Pad 39A with Challenger STS-6 (1:144)
|
|
#977
03-05-2016, 01:26 AM
|
||||
|
||||
|
Quote:
__________________
Dong-Woo Kang 
|
|
#978
03-05-2016, 01:39 AM
|
||||
|
||||
|
Okay, no problem. I will use the Airfix Shuttle stack (1:144).
__________________
Greetings from Germany Manfred Under construction: Launch Pad 39A with Challenger STS-6 (1:144)
|
|
#979
03-18-2016, 02:41 AM
|
||||
|
||||
|
Hello everybody,
so, now it's about time for the remaining five hoods that should get their H-beams and lifting rings.  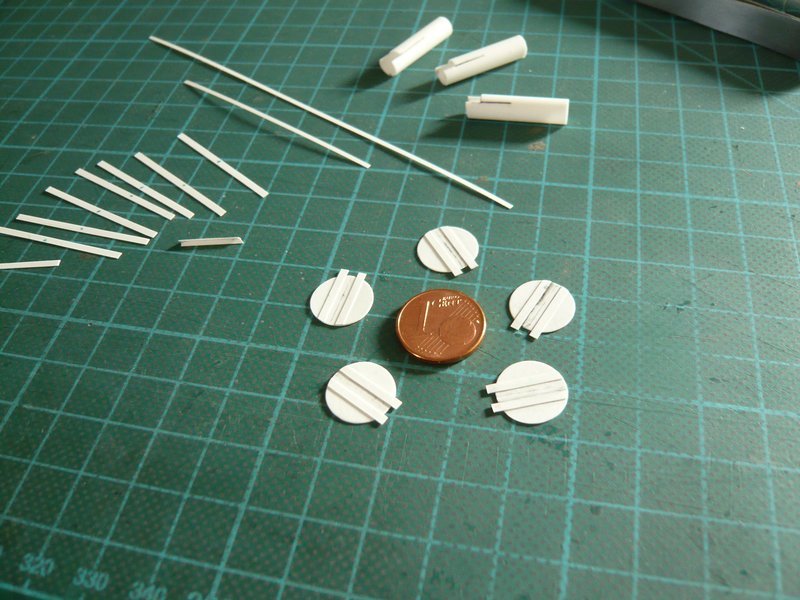 For tricky sticking the profile webs on the upper belts I've been thinking this new support, for which I have used these two magnets. They are not as strong as the small neodym magnets which almost the tweezers wrench out of hand when handling next to them. 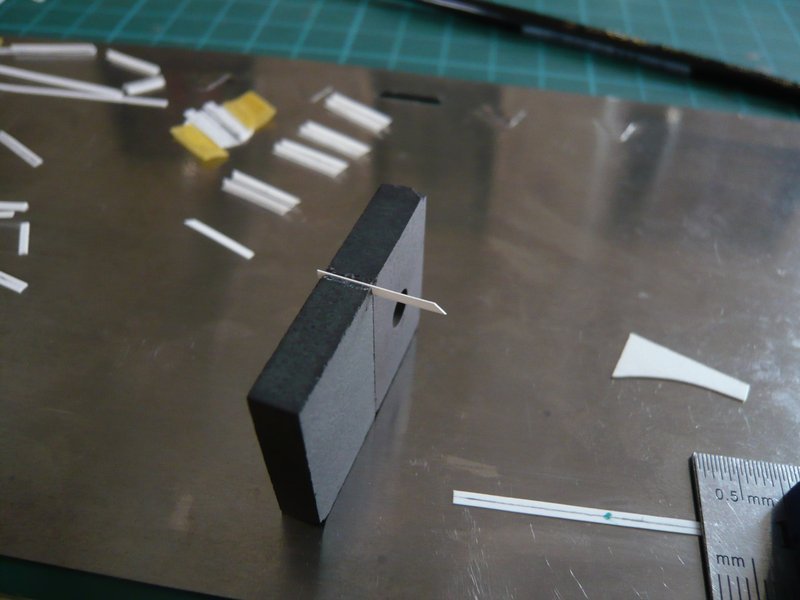 And with these weaker magnets one can align the clamped webs on the belt very precisely centrally and then glue on both sides with MEK.  But because of the creeping behaviour of the MEK along the contact zone one must pay attention to that one not too close comes with the MEK brush to the magnets because the Styrene otherwise remains sticking to it, what surprised me initially. But because of the creeping behaviour of the MEK along the contact zone one must pay attention to that one not too close comes with the MEK brush to the magnets because the Styrene otherwise remains sticking to it, what surprised me initially.  Therefore one can always glue only a small area, approximately half the length, and must turn the profile and then glue the end, after having readjusted the central position if necessary. So all in all still enough tricky fiddling, but it works well. 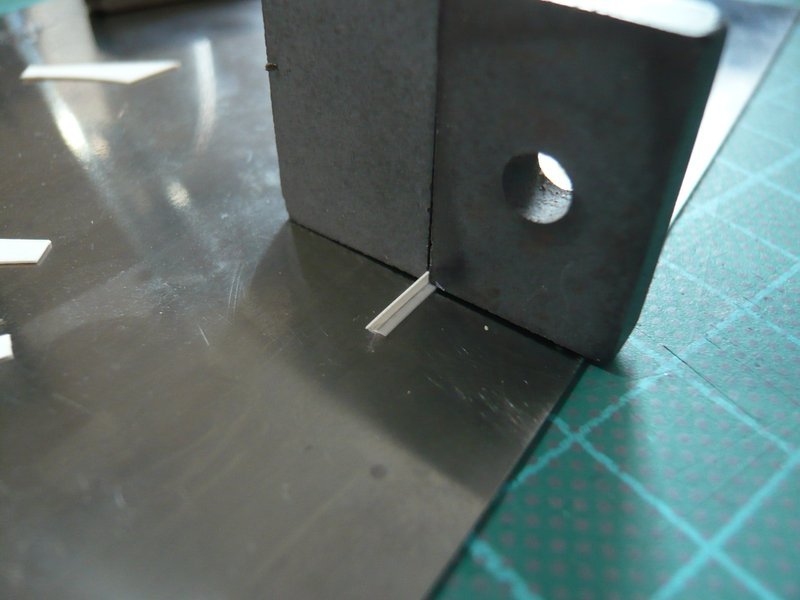 Now follows with the glueing of these "T-profiles" on the bottom belt the more difficult part of the exercise. And right next to it are already waiting the tiny lifting rings.  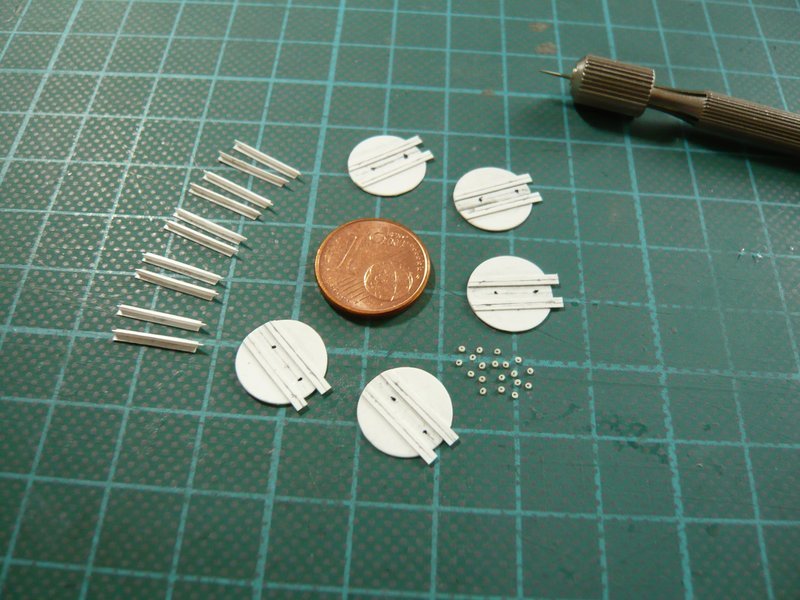 And for this fiddling I have used small ferrite magnets. While the first profile can still relatively easy be fixed between two stops, aligned and glued, 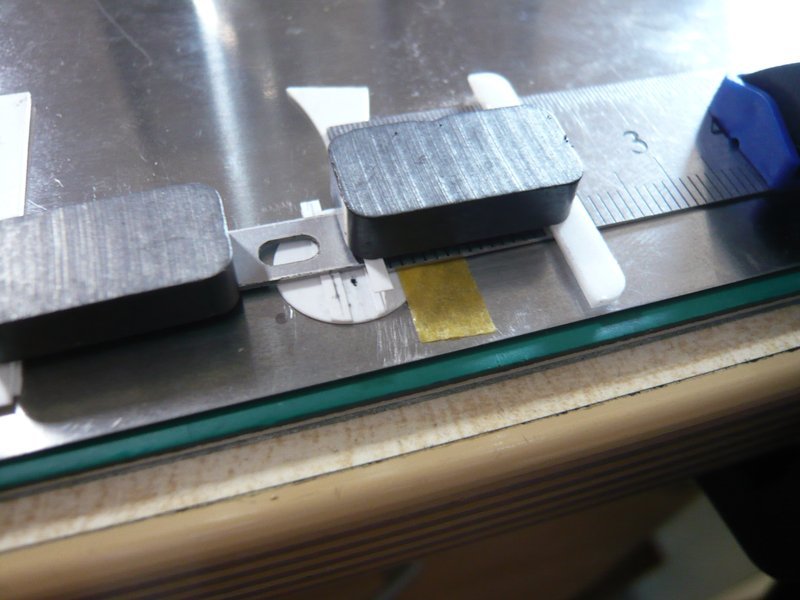 for the second profile one needs a bit more feeling and patience, in order to position it centrally as well as vertically.  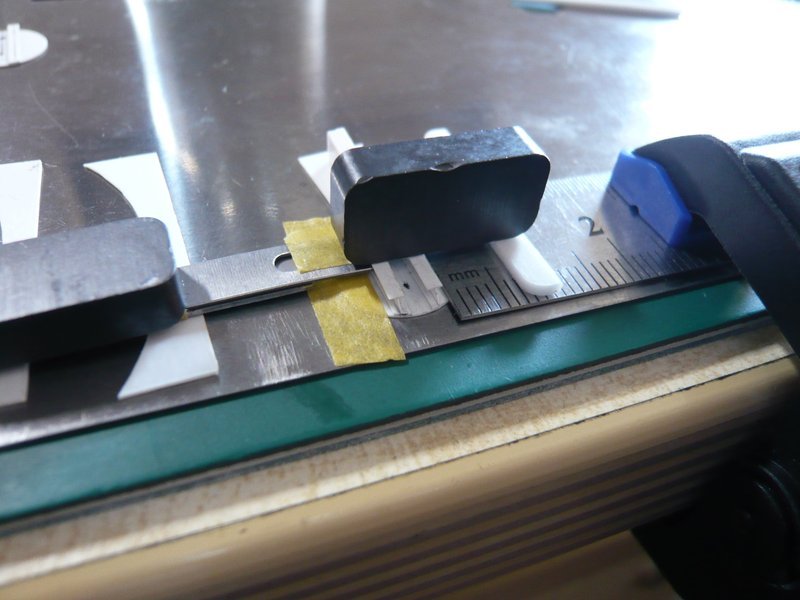 But even that has finally worked out, 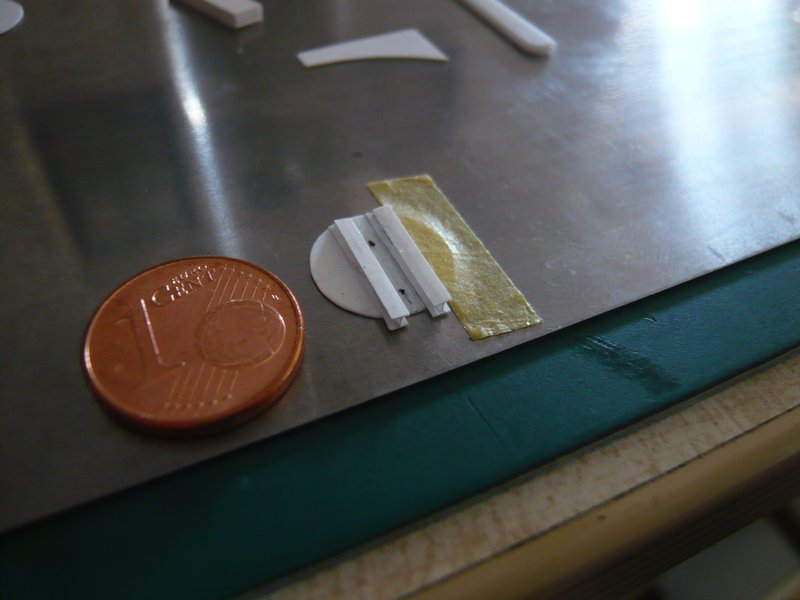 and also the glueing of the small lifting rings with CA, 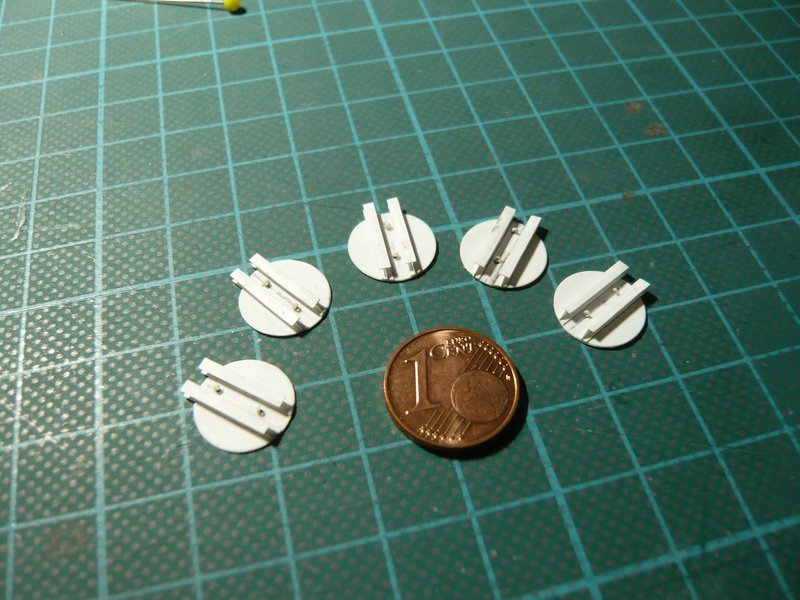 and so again a small step was taken. 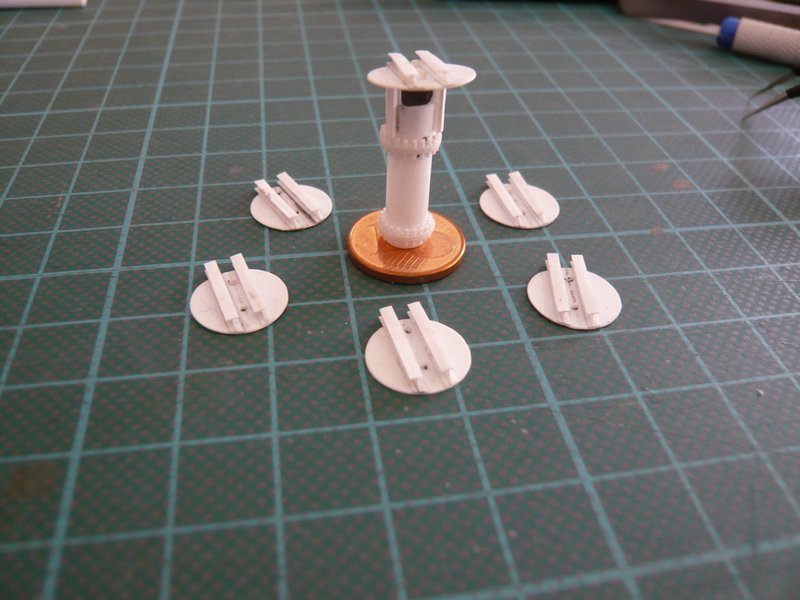 In the next round it goes back to the tricky "cartridge belts".
__________________
Greetings from Germany Manfred Under construction: Launch Pad 39A with Challenger STS-6 (1:144) Last edited by spacerunner; 09-25-2016 at 02:56 PM.
|
|
#980
03-18-2016, 11:44 AM
|
|||
|
|||
|
Another ingenious solution, using magnets as clamps, Manfred!
__________________
This is a great hobby for the retiree - interesting, time-consuming, rewarding - and about as inexpensive a hobby as you can find. Shamelessly stolen from a post by rockpaperscissor 
|
 |
|
|


 Linear Mode

