


|
|
|
#2441
 06-08-2021, 12:51 AM
|
|||
|
|||
|
Fantastic work Manfred on the crawler. Great learning about your model and the real thing. Somehow it seems right that this monster machine with all its parts "on steroids" is celebrated by your amazingly small detailed model.
Delving into the secret life of the crawler I came across this video (but am sure you know all the videos about the crawler) Keep up the great work Regards Kevin
__________________
Normally the most advanced tech I use is a pencil. 
|
|
#2442
06-09-2021, 11:38 AM
|
||||
|
||||
|
Thanks Kevin for your nice compliments.
 Yep, Learning by doing and looking is always worthwhile.  This interesting video comes at exactly the right time, as I'm currently working more intensively on the Drive motors and the Gear cases and due to the dismantling of the gearbox one can have a look at details that are otherwise mostly hidden.  
__________________
Greetings from Germany Manfred Under construction: Launch Pad 39A with Challenger STS-6 (1:144)
|
|
#2443
06-11-2021, 05:01 PM
|
||||
|
||||
|
Hello everybody,
sorry, but because of the many sporting events (Soccer U21 European championship, Ice hockey World championship, Tennis, etc.)  I was a bit distracted, but in between it goes on with the Gear case now. I was a bit distracted, but in between it goes on with the Gear case now.  After the basic body was so far finished, I've started with the smaller dome-shaped attachment, through which the rear end of the Propel motor shaft extends into the gear, what has been already shown in this image. 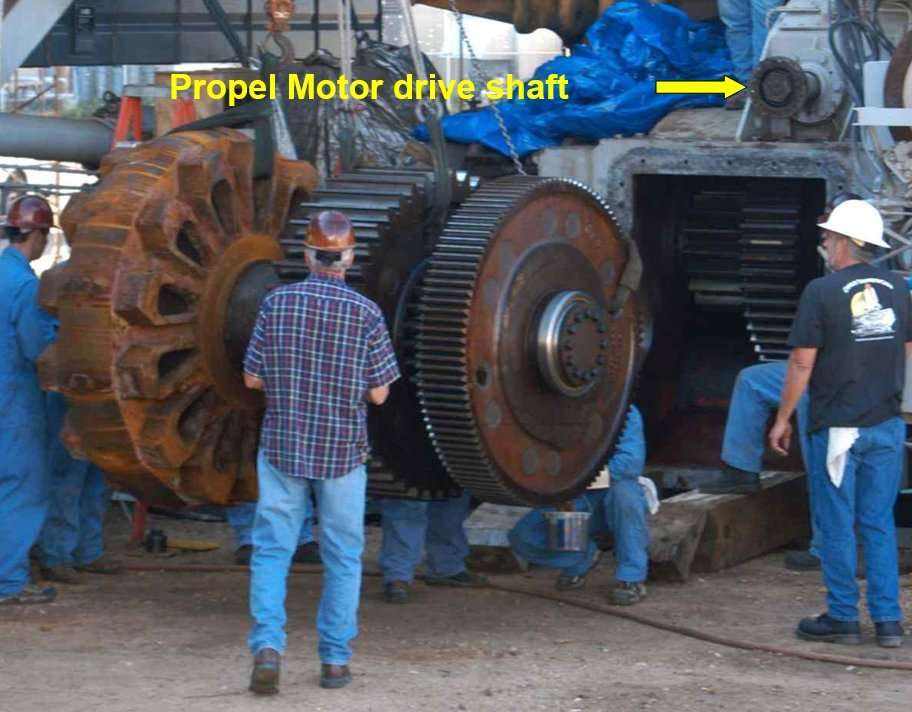 Source: forum.nasaspaceflight.com (JayP) And with that away from the original and down to the model level 1/160, and I can only say what's coming next is small, but oh my!!!  First I've transferred the paper template from the Outlines PDF onto Styrene (0,15 mm) and partially cut it out or carefully punched out with the chisel cutter.  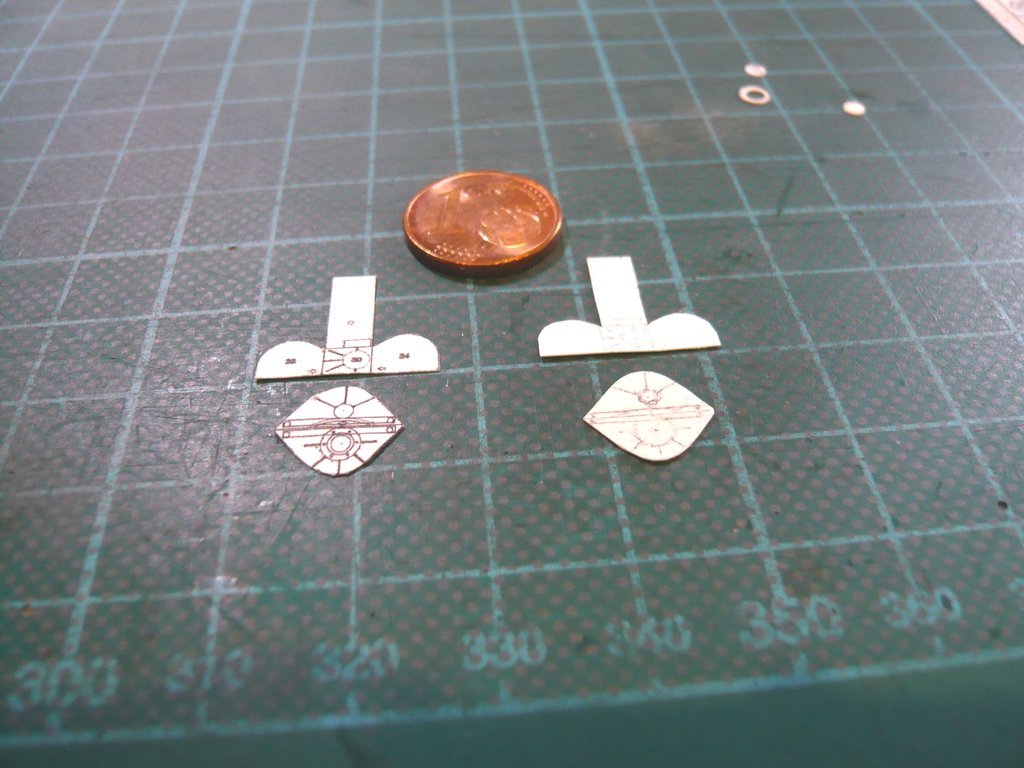 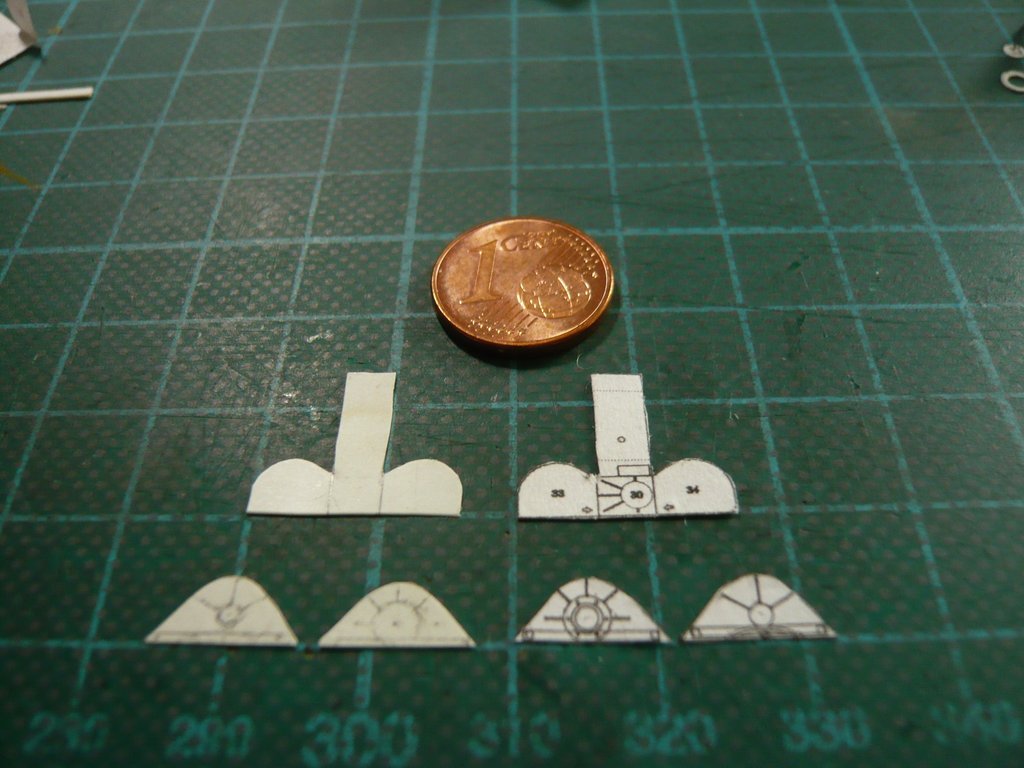 Then I've folded the dome, so far, so good. Since direct gluing of this part should be almost hopeless, I thought about a solution with internal support struts.  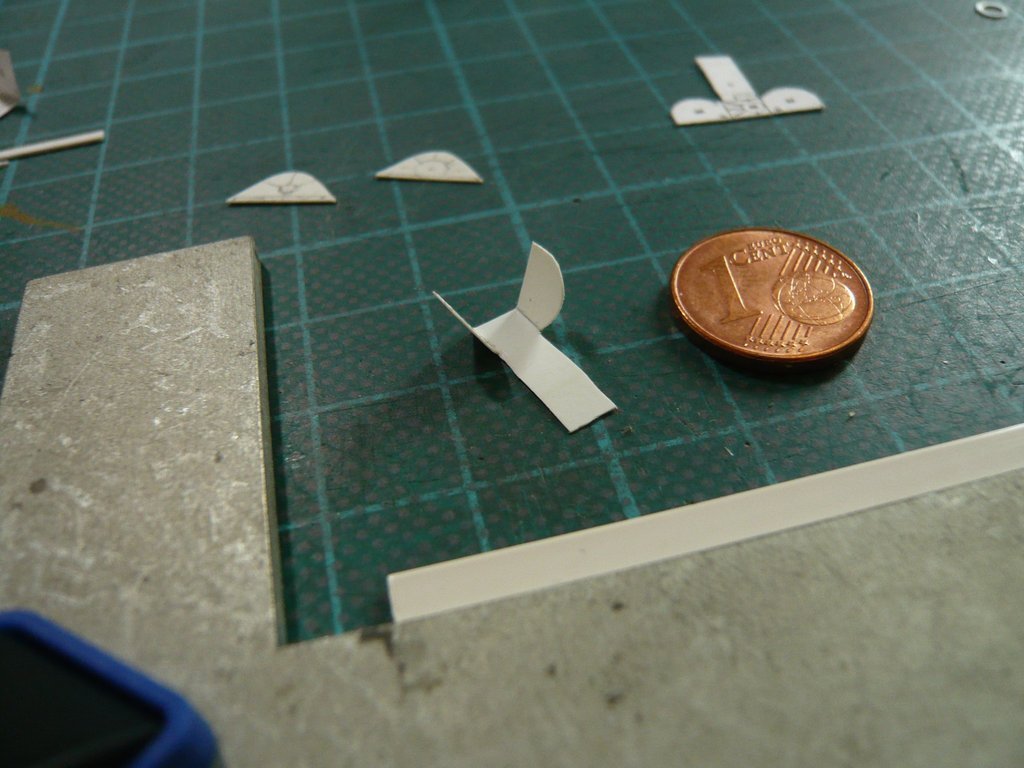 To stabilize the small case, I've first glued in a base plate (1 x 4 mm), which requires a firm stop so that nothing can slip.  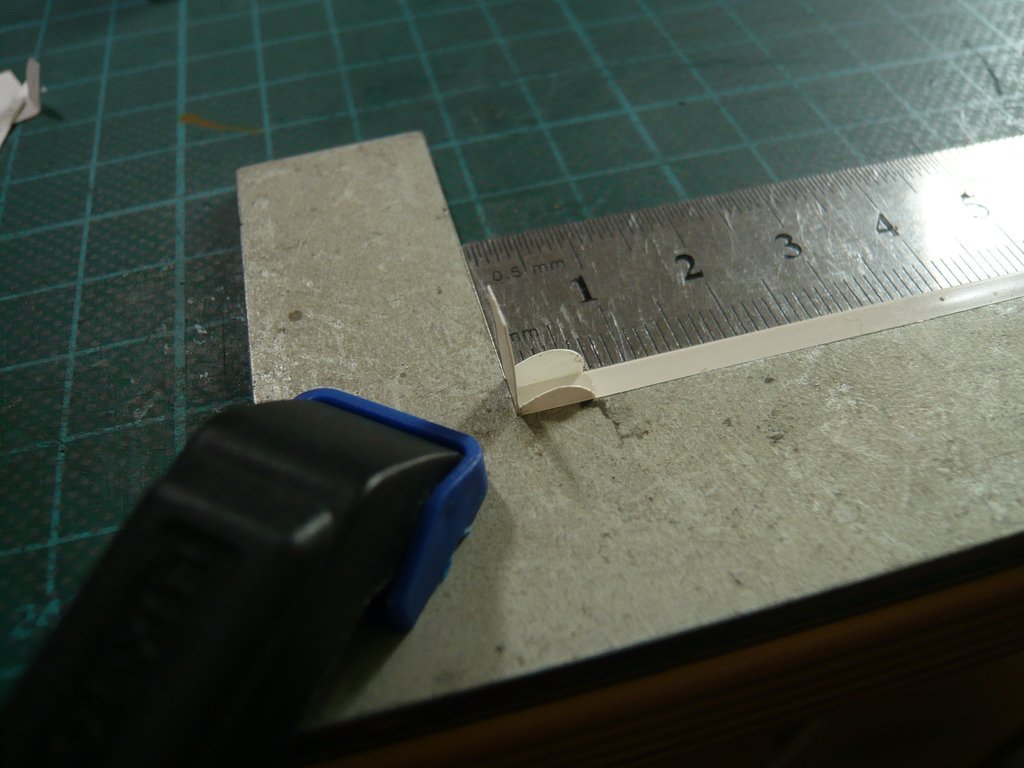 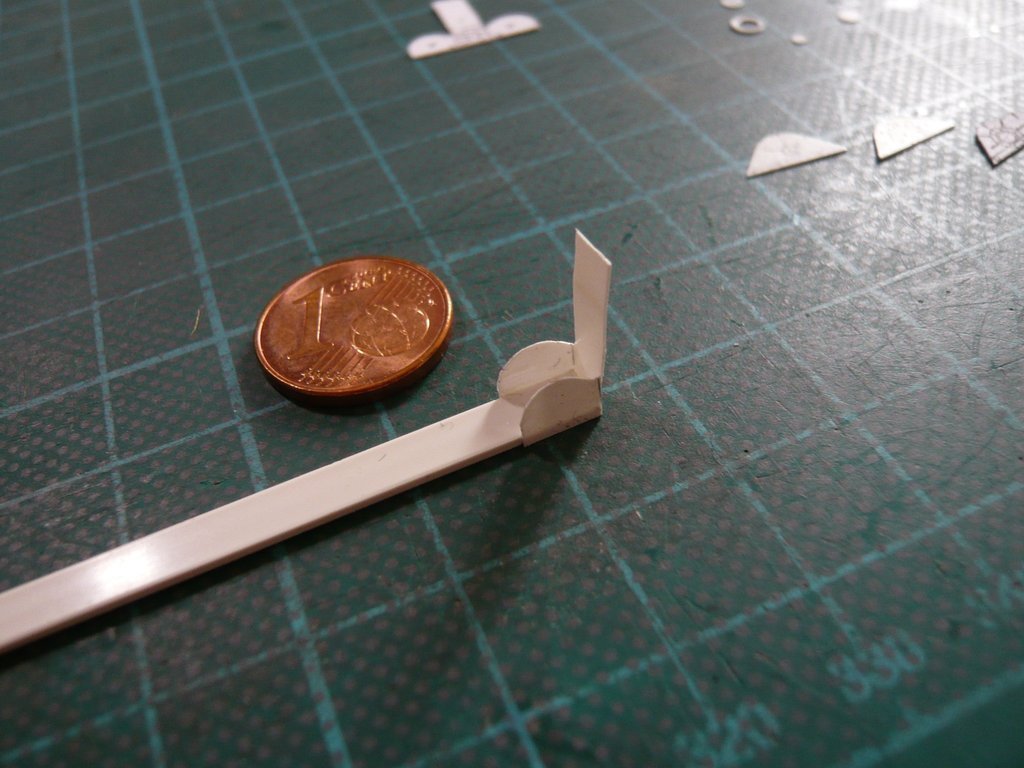 With the help of the supports glued in on the inside, I was able to glue the pre-curved arch, whereby the strip had to be fixed at the lower end until the glue set.  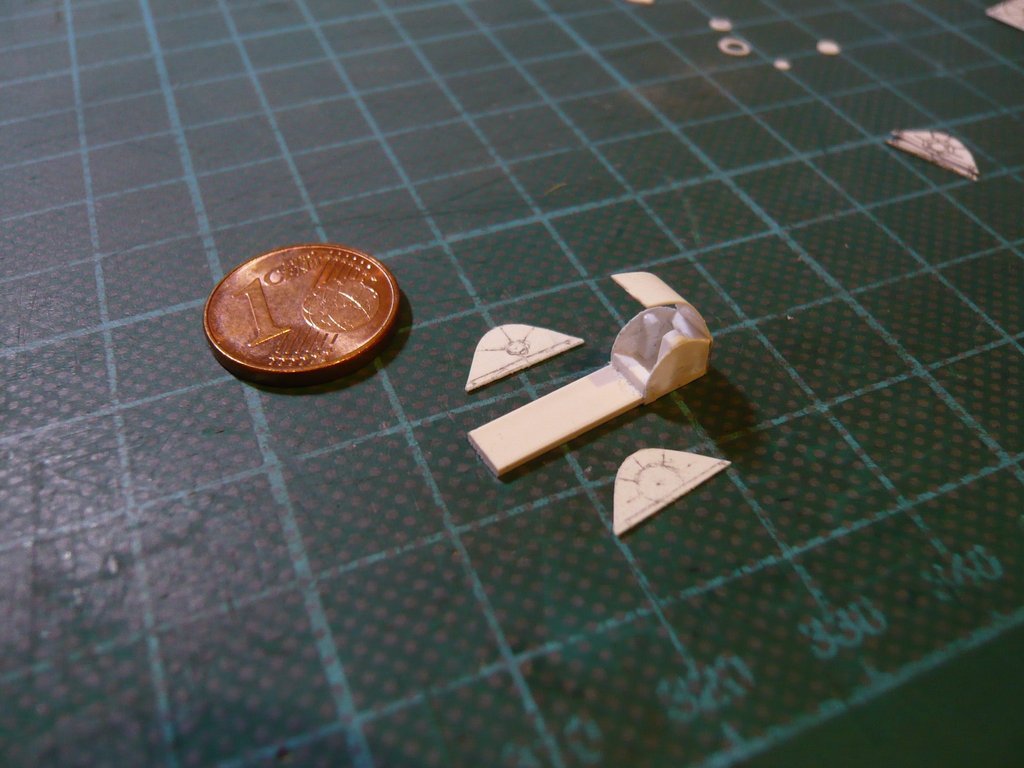 Even if this procedure may seem a bit laborious at first glance, it was successful and definitely gave me courage, especially since the test fitting on the gearbox looked quite acceptable.  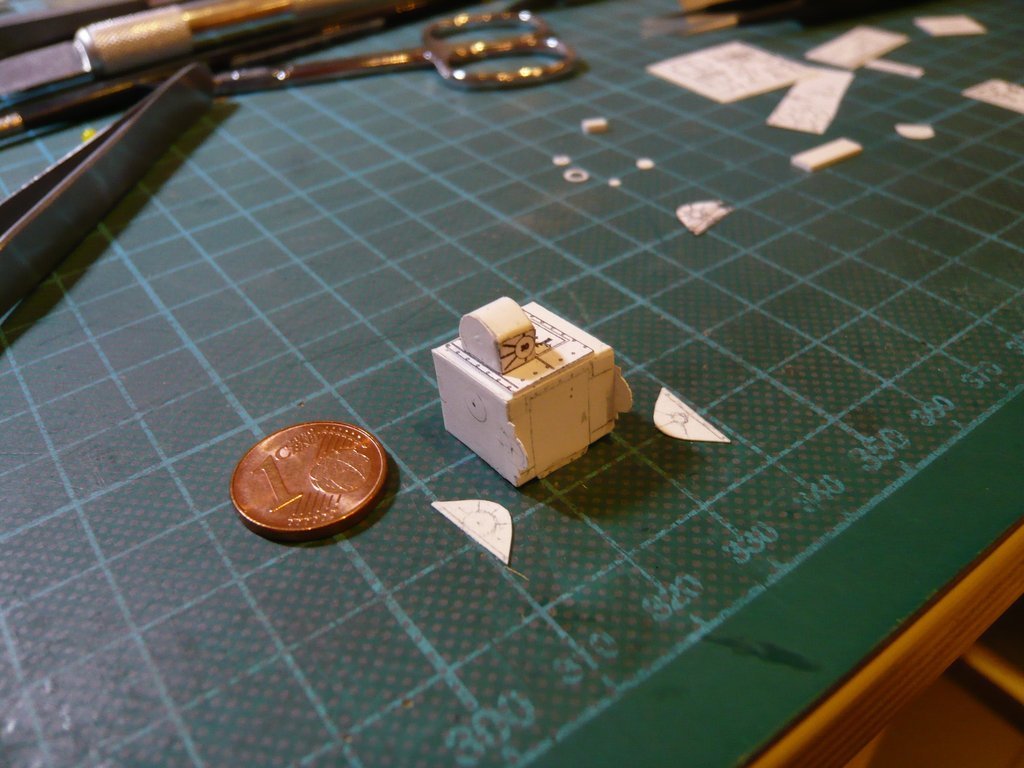 Then the side walls were glued on, 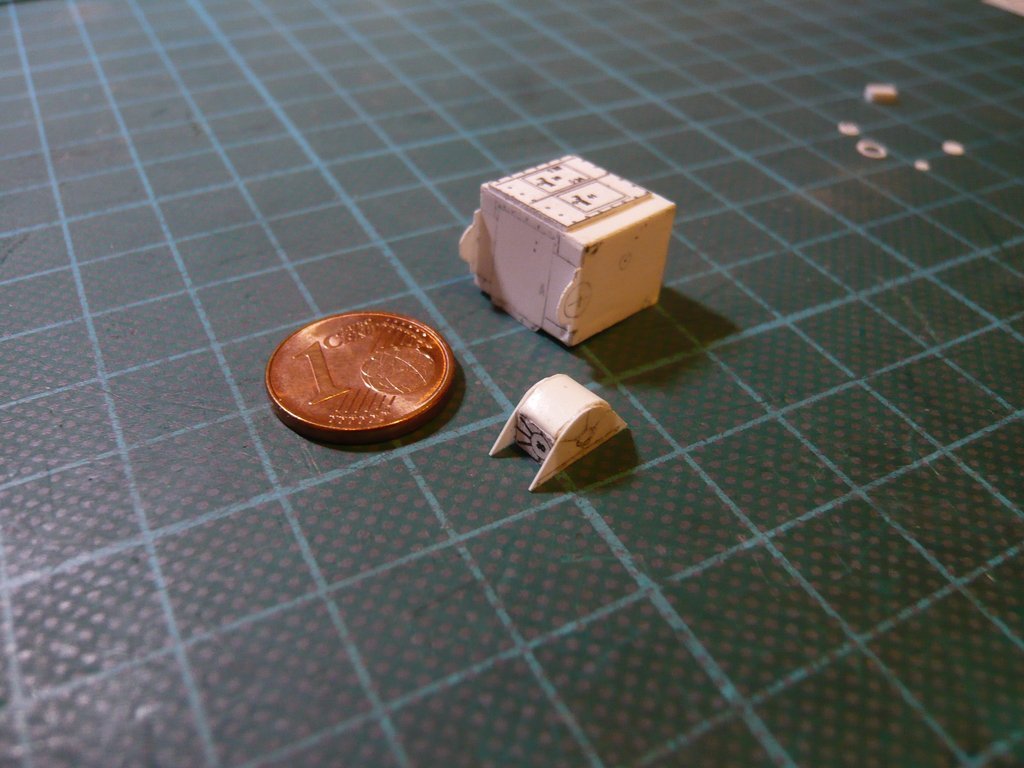 whereby the gear case took on more and more shape.  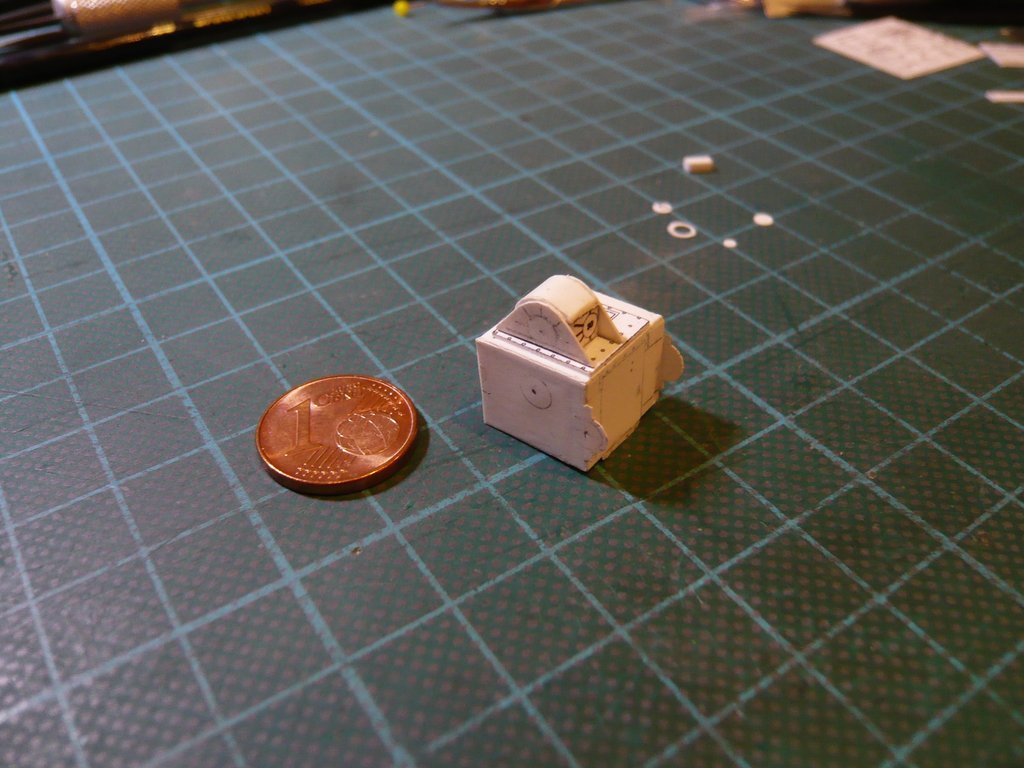
__________________
Greetings from Germany Manfred Under construction: Launch Pad 39A with Challenger STS-6 (1:144) Last edited by spacerunner; 06-11-2021 at 05:20 PM.
|
|
#2444
06-11-2021, 05:02 PM
|
||||
|
||||
|
From now on it will get smaller and smaller, and in the end there will even be midgets < 1 mm, although I still don't know, how to handle it when gluing into place ...
 As one can see in this image, there are a number of details on the outer side of the case in the form of attached discs, rings and wedge-shaped struts, which I'm scratching one after the other, first the ones in the red border (Parts 36-40). 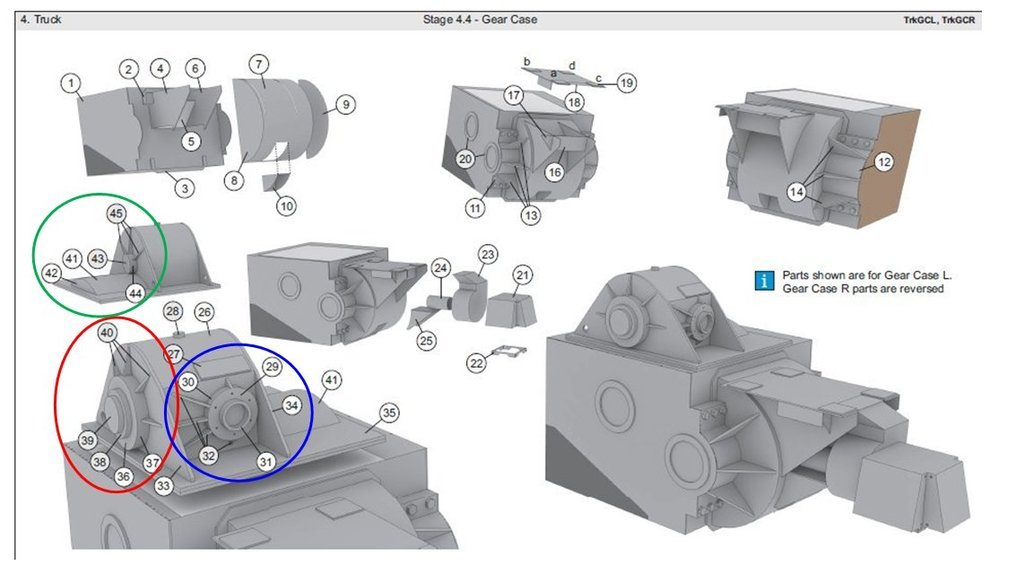 Source: Micro Artwork, Mischa Klement (cyana) There are these three discs there with different diameters (Ø 3,4 mm, 2,0 mm, 1,5 mm) which I've punched out of styrene of different thicknesses by using my Punch & Die Set. 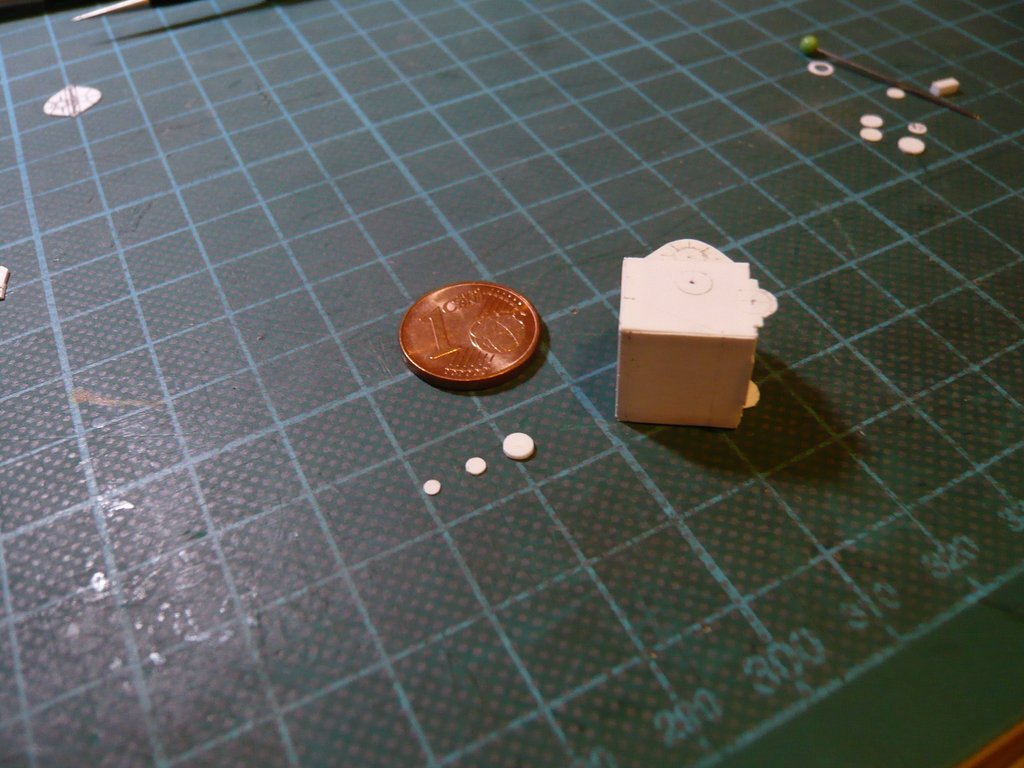 Then I've glued them onto each other,  and glued them at the side wall of the dome. I still have problems with these Rings (Parts 20), whose inner diameter (Ø 2,5 mm) I can punch out, while I still have to rework the outer diameter (Ø 3,4 mm) a little bit. 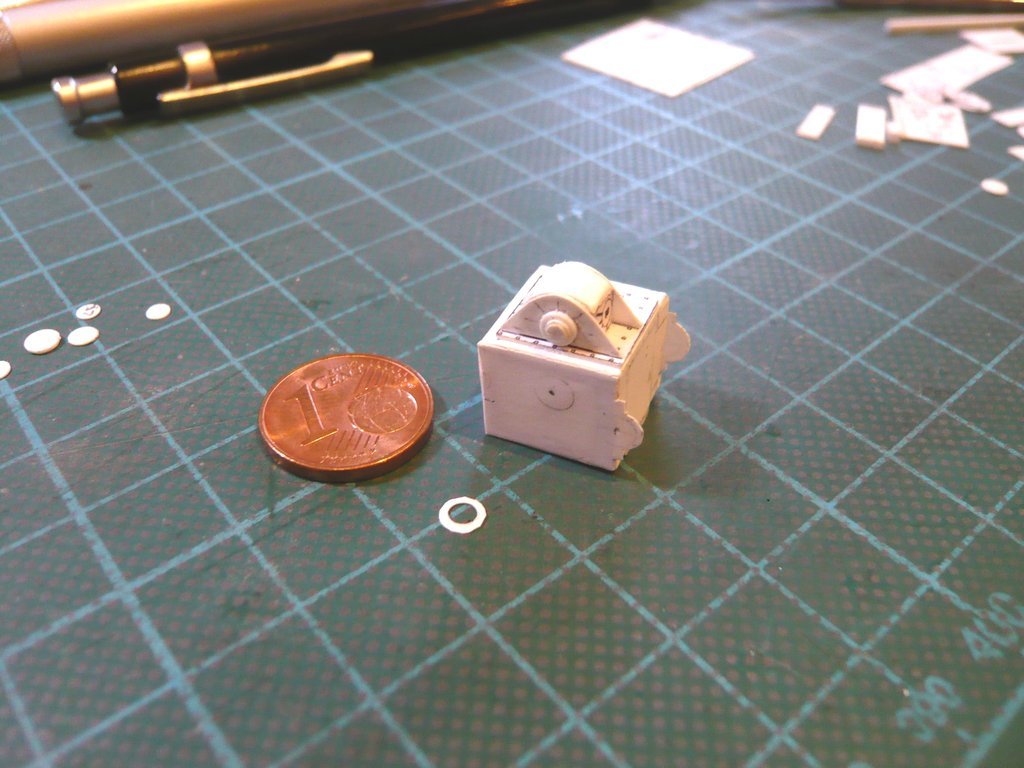 And on the other side of the case there are the details circled in green, (Parts 41-45), whereby I've first puzzled over awhile how to build and glue this flat, curved cover (1 x 5 mm),  until I came up with a solution. until I came up with a solution. 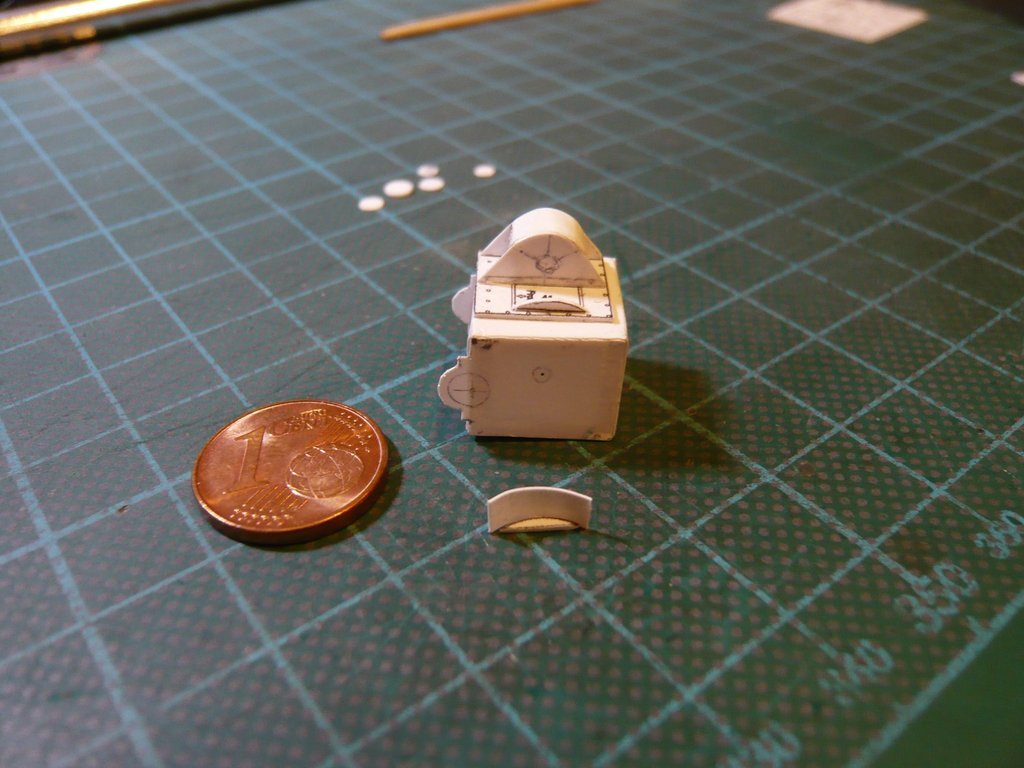 And that will be the next step.
__________________
Greetings from Germany Manfred Under construction: Launch Pad 39A with Challenger STS-6 (1:144)
|
|
#2445
06-13-2021, 05:01 PM
|
||||
|
||||
|
Hello everybody,
for gluing of the 3 parts for the arched cladding I've cut out small supports again, for the middle a flat profile (0,75 x 1 mm), and for the two ends a Triangular profile (1 x 1 mm) so that the pre-curved strip cannot be pressed in when gluing. 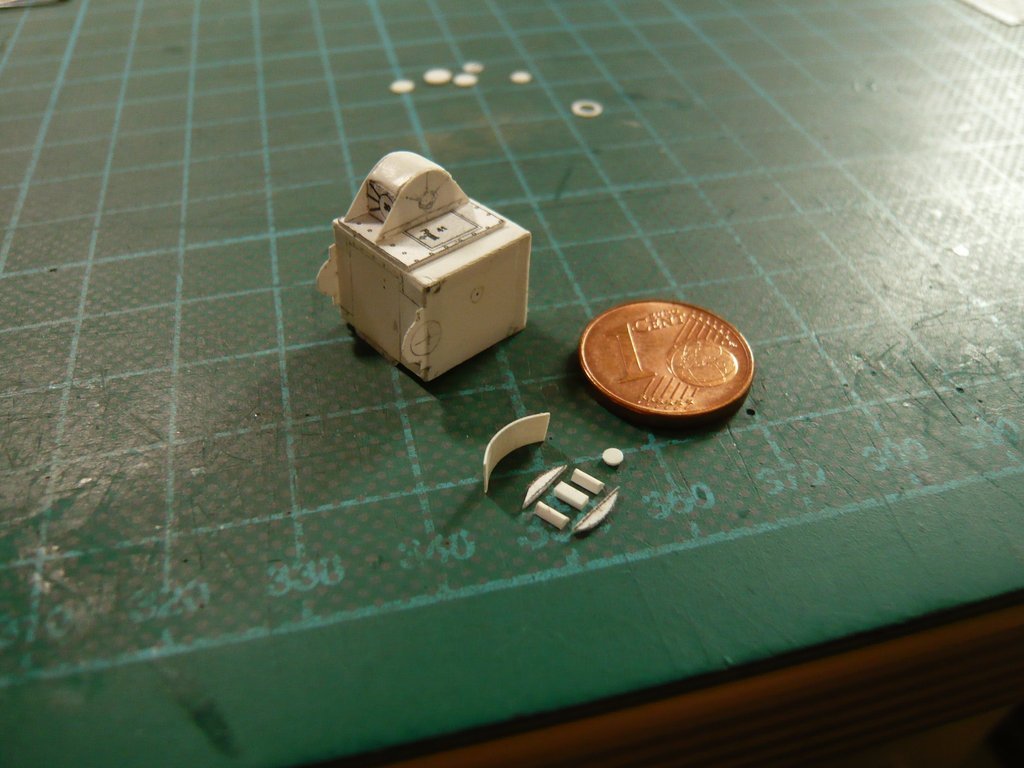 Then I've first glued the two side parts with the supports, fixed by a magnet stop,  and then have glued this structure to the curved strip, with a little overhang on both sides so that the ends could be cut off exactly after the adhesive had set. 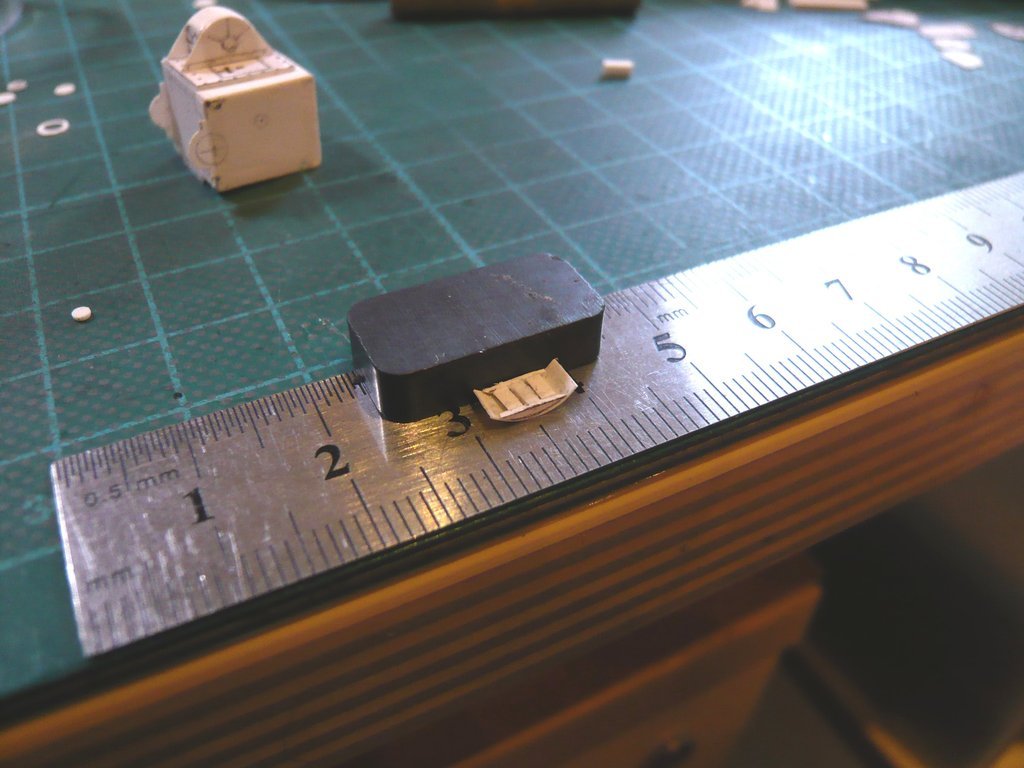 In the image on the left the small disc (Part 43, Ø 1,5 mm) could just be seen yet, which together with the 3 wedges (Parts 45) must be glued to the side wall of the dome, which suddenly had been disappeared, never to be seen again,  wherefore I had to punch them out once again. wherefore I had to punch them out once again. But after I had prepared the drop of glue, this disc was gone too - I thought I was going to lose control!  And suddenly I happened to see the disc hanging under my little finger, as if there were evil forces at work!  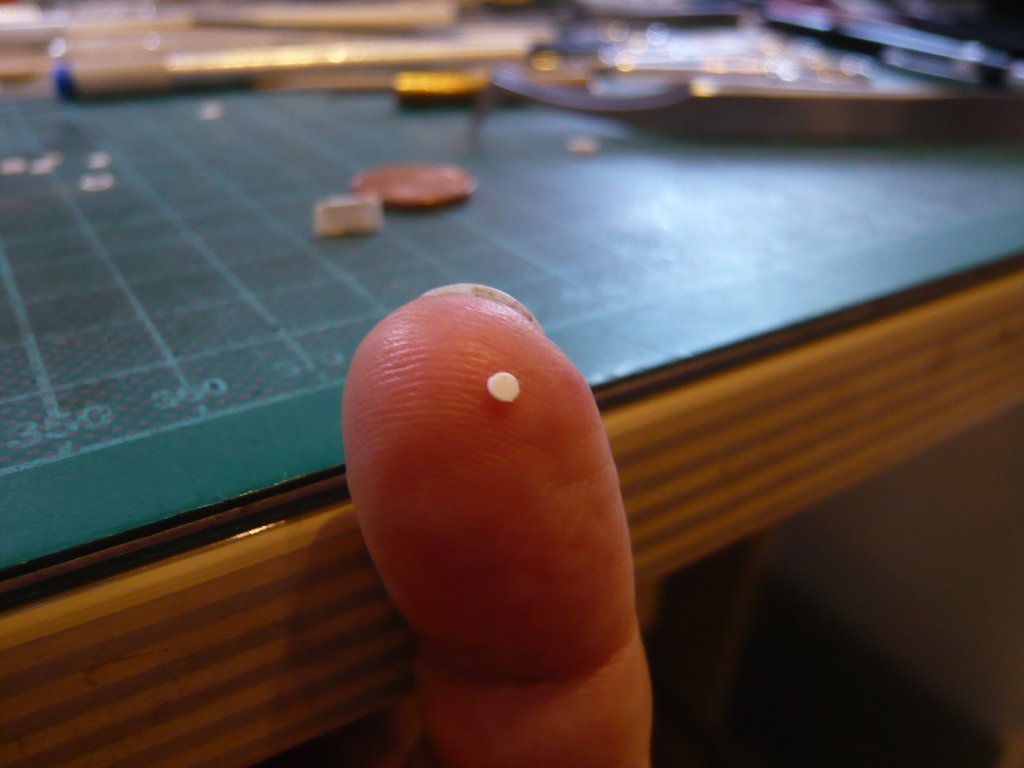 After I had digested the renewed horror and had blown off my steam again, I've cut off the protruding parts of the glued cladding with the cutter, 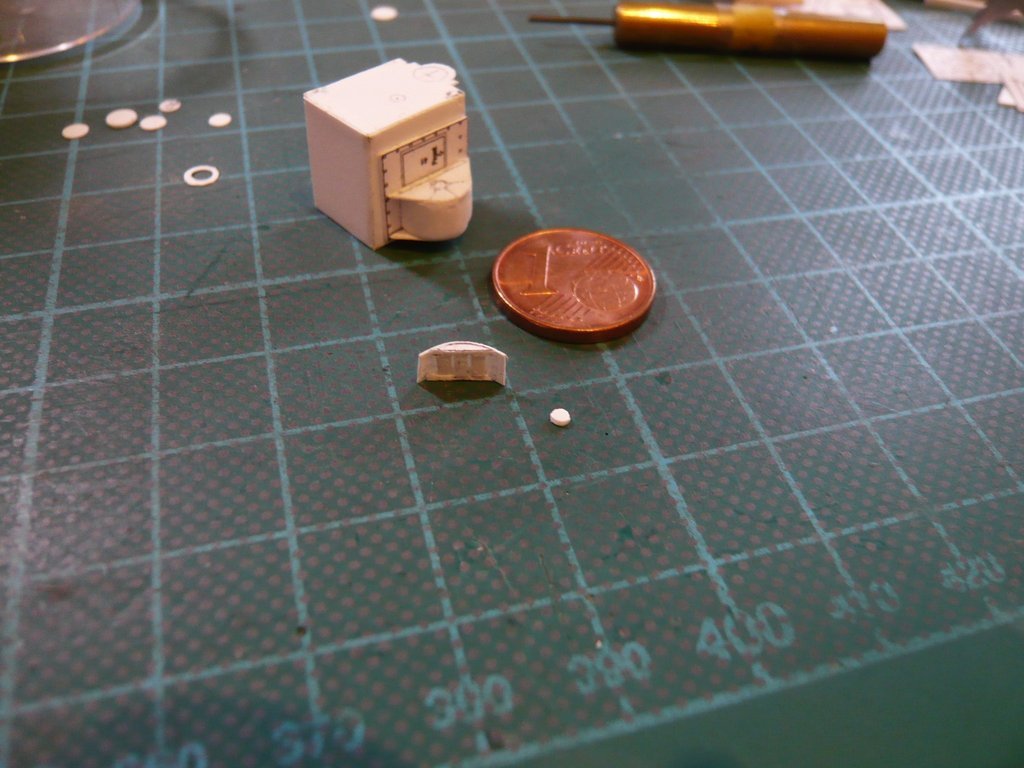 and have glued it together with the small disc on the side wall. 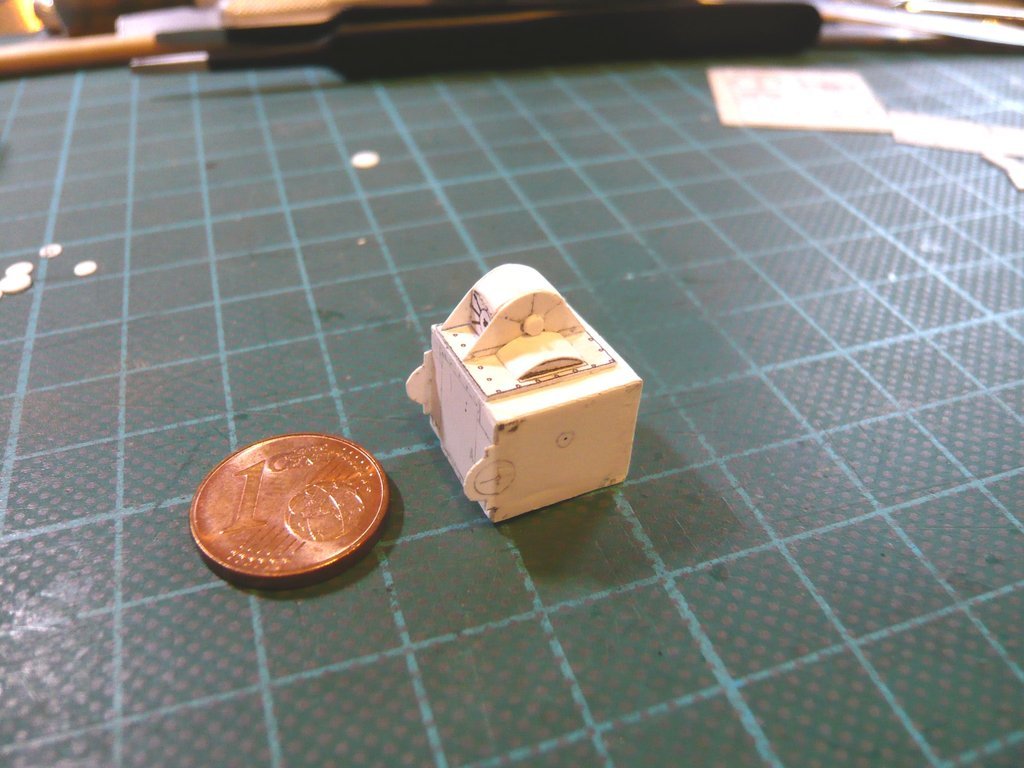 And with that now to the green circled 3 wedges (Parts 45), 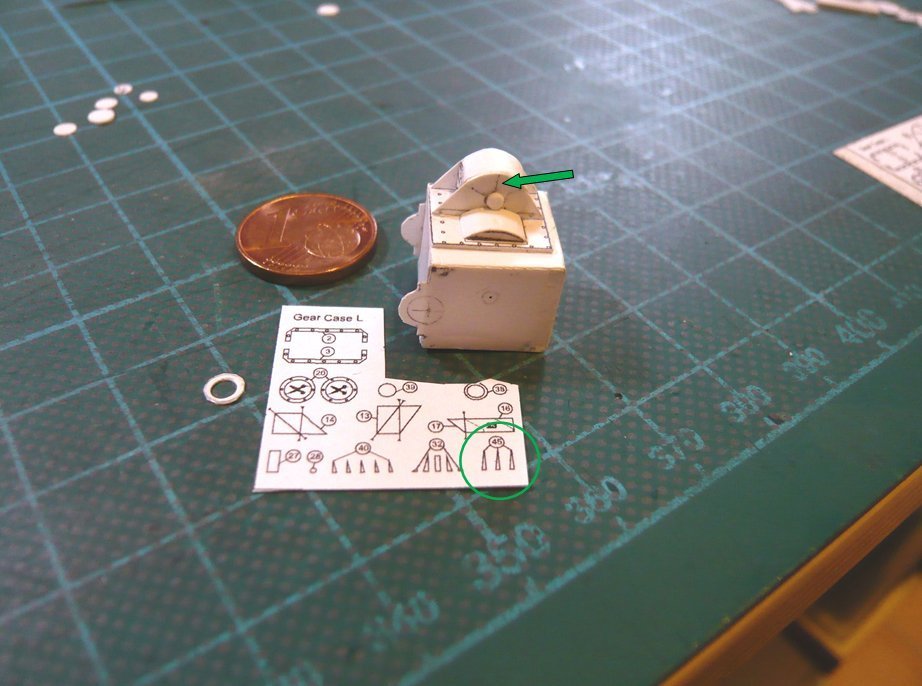 for which I've cut a narrow sheet strip (0,15 mm), 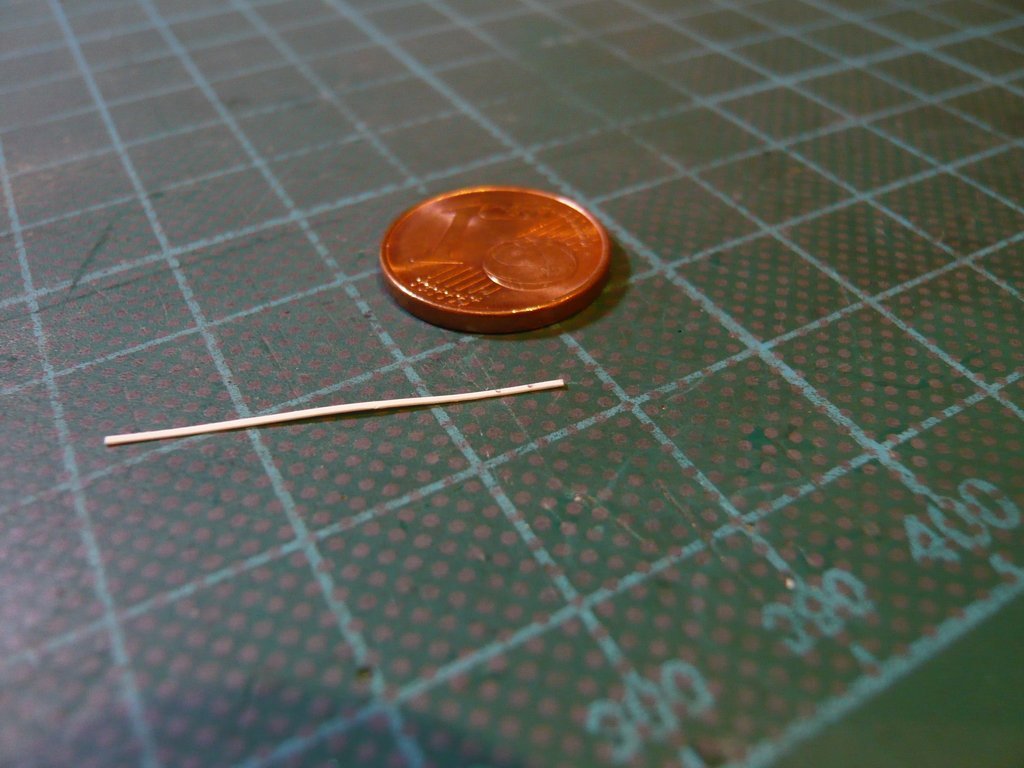 which I've cut diagonally in half with the chisel cutter at a distance of 2 mm, which resulted in these mini wedges. 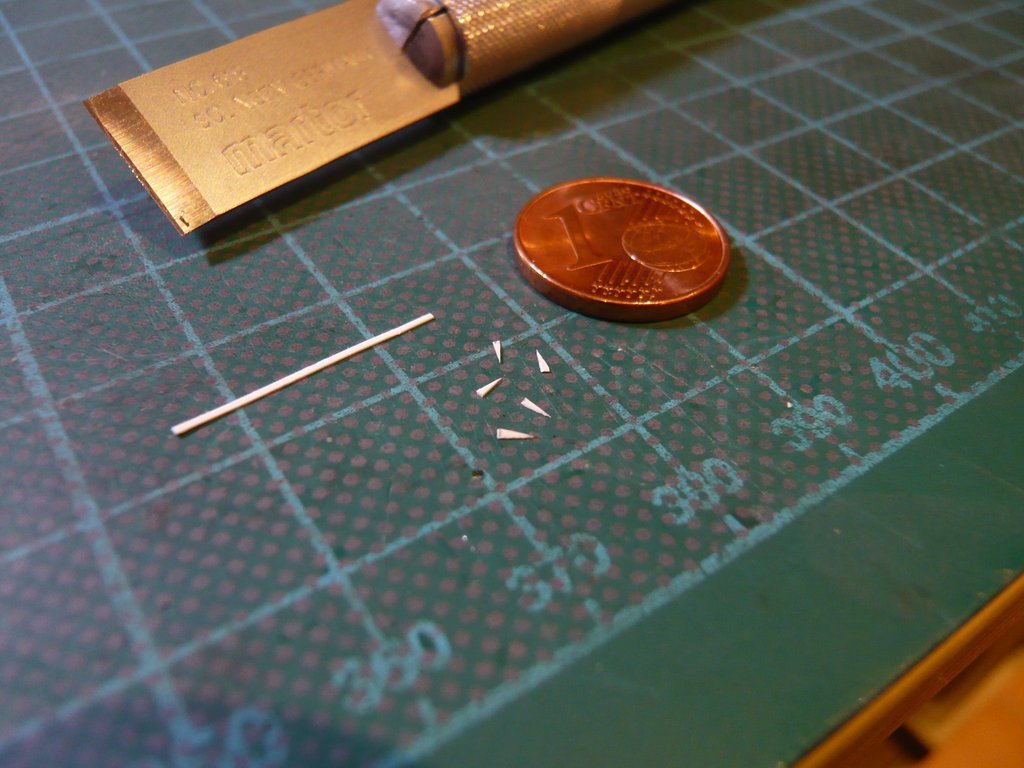 Now I just had to somehow glue these snippets onto the side wall, just wondering how, since even taking them up in the pointed tweezers is extremely problematic and stressful.  To be able to grab them at all, they have to stand upright, which is why I wedged them between two steel rulers. Actually, however, they have to be clamped in exactly the other way around so that they can be attached with the wide side onto the disc, which of course did not work right away. 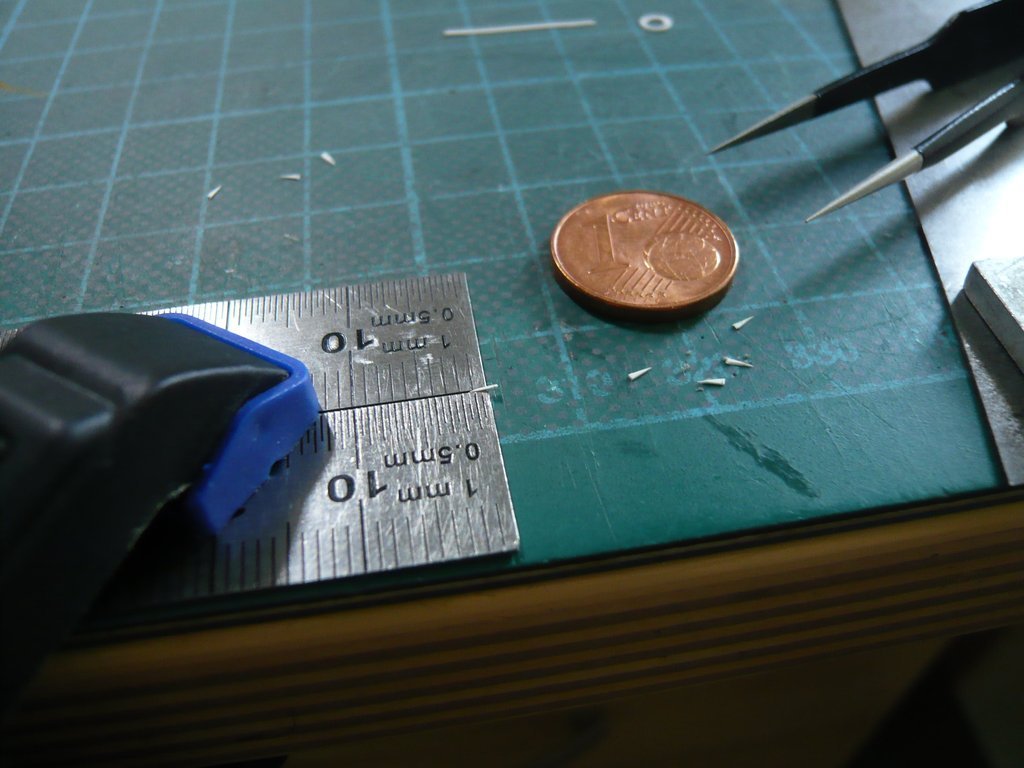
__________________
Greetings from Germany Manfred Under construction: Launch Pad 39A with Challenger STS-6 (1:144)
|
|
#2446
06-13-2021, 05:01 PM
|
||||
|
||||
|
Finally I've put it on my fingertip, carefully gripped it with the tweezers, picked up a touch of glue and then carefully glued it on the side wall.
  After this was finally done, it can now continue on the other side of the case, on which similarly cute details await me, whereby the red circled 5 mini struts (Parts 40) on this dome side with 0,3 x 1,5 mm are even tinier!   Now I'm stretched like grandma's garter belts whether I can somehow get hold of them in order to be able to glue them ...
__________________
Greetings from Germany Manfred Under construction: Launch Pad 39A with Challenger STS-6 (1:144)
|
|
#2447
06-16-2021, 03:52 PM
|
||||
|
||||
|
Hello everybody,
here is a look at the measurement of the Mini-Struts (Parts 40) circled in red in the last post, wherewith I've been dealing now. 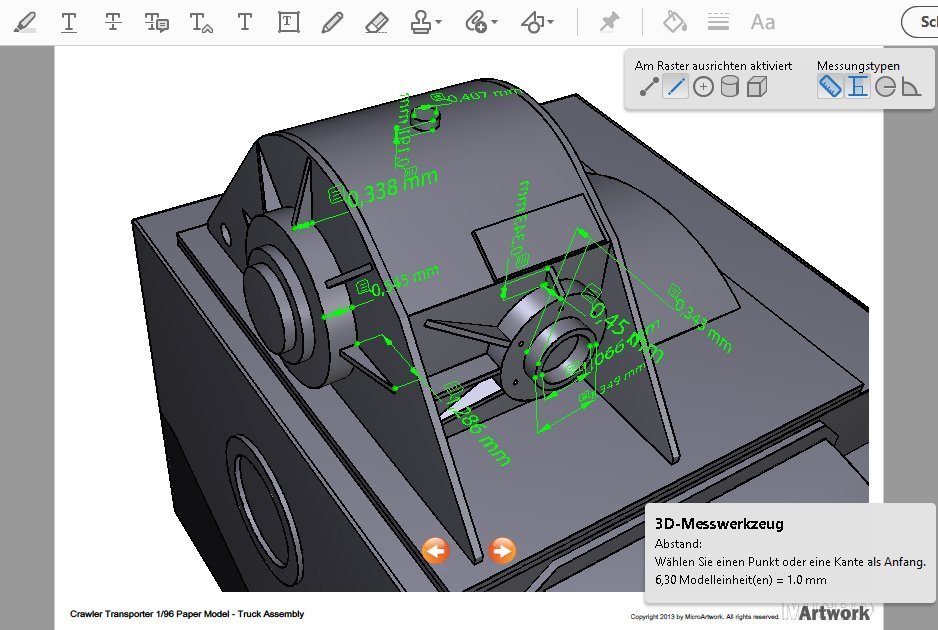 Source: Micro Artwork, Mischa Klement (cyana) And as one can see, these tiny pieces (0,3 x 1,3 mm) would hardly be able to be handled safely, let alone glued, even with my sharpest tweezers. 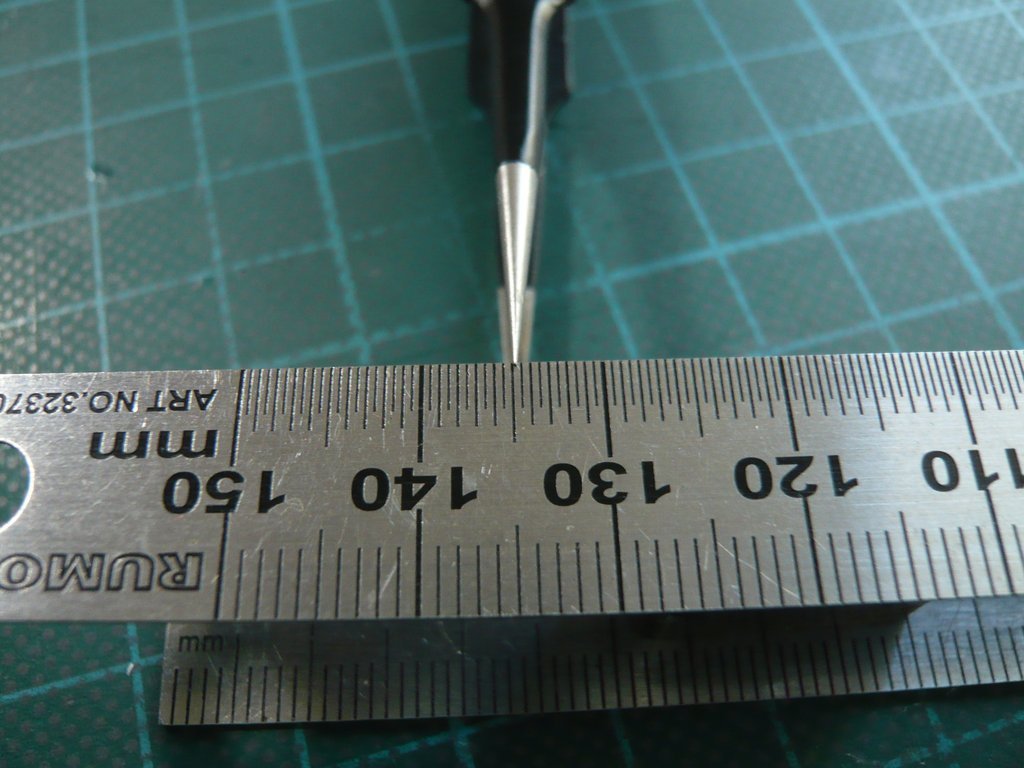 That's why I've remembered my Strip technique, I used at the time (2016) for the SSWS Inlet pipes in the corners of the SRB Chambers, long long ago ...  The trick with this solution is that one at first cuts longer strips than necessary, with the appropriate width (0,3 mm), which so are much easier to grasp and glue.  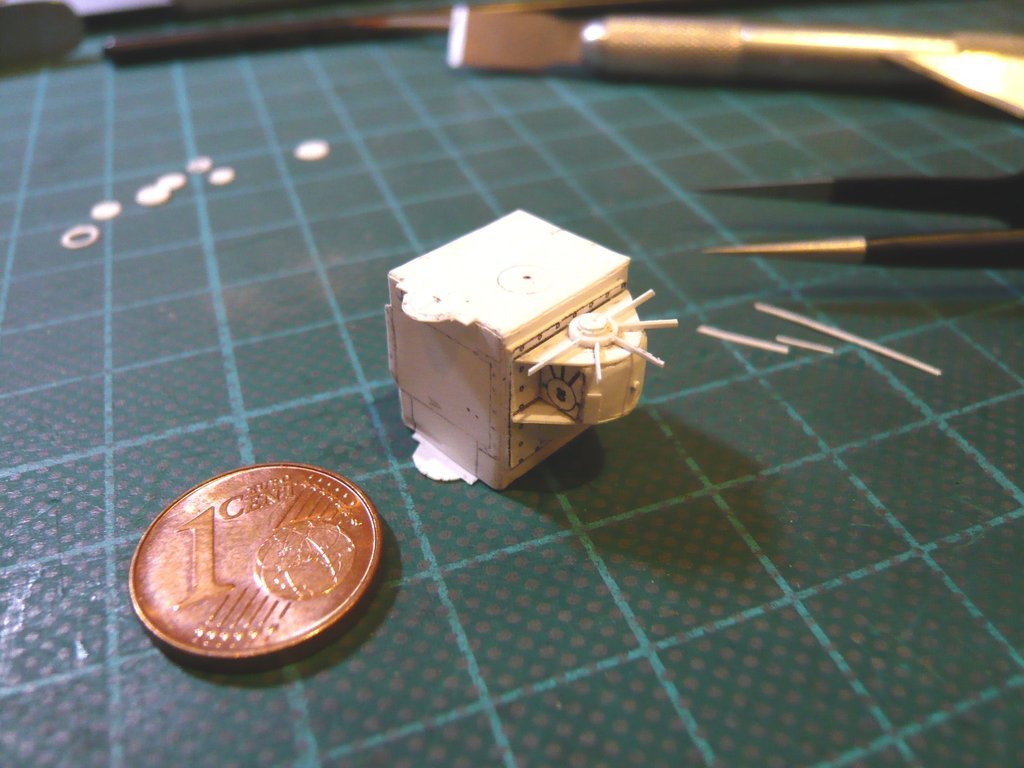 After the adhesive had hardened, I've carefully shortened these strips to their final length of 1,3 mm with the razor blade, and have also beveled them from the outside to the inside, what I've actually succeeded in doing. 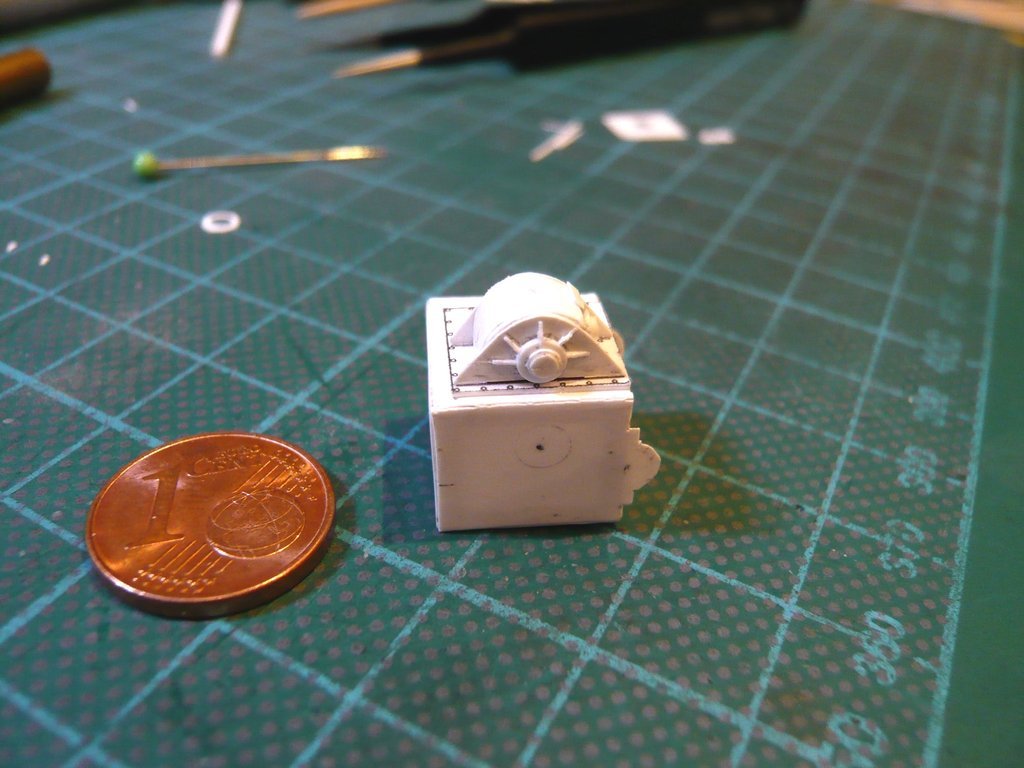 And in the same way I've proceeded on the front of the Dome attachment, on which there are the details circled in blue (Parts 29-32), for which I would have to move further down my previous handling limit, Source: Micro Artwork, Mischa Klement (cyana) since the dimensions of the two outer Mini struts (Parts 32) with 0,3 x 0,5 mm are clearly < 1 mm. 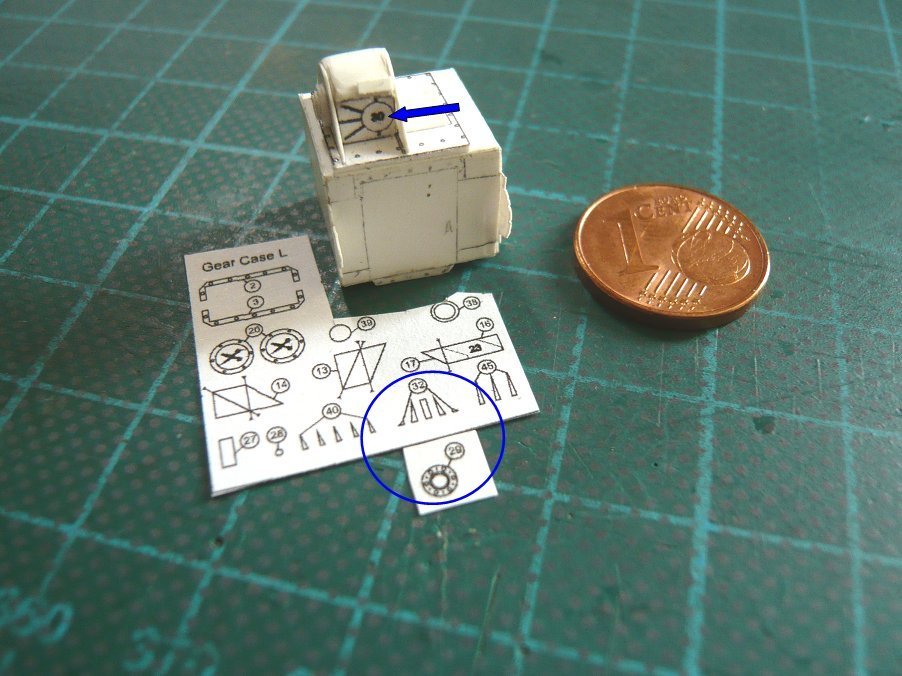 Then there is also this Ring (Part 31) there, into which the drive shaft of the motor (Ø 0,8 mm) ends, whose dimensions with Øo 1,3 mm and Øi 1,0 mm, as well as a height of only 0,3 mm was a bit of a headache at first. But I've also found a solution for this, because I've thought of the thin Shrink tubing that I had initially tested for the small lamps on the Crawler truck sides. For this purpose, I made a first shrink attempt on the Punch (Ø 1,2 mm) with a tube (Ø 2,0 mm) which has shrunken under the heat gun to Øo 1,6 mm, which was still a bit too large for me. 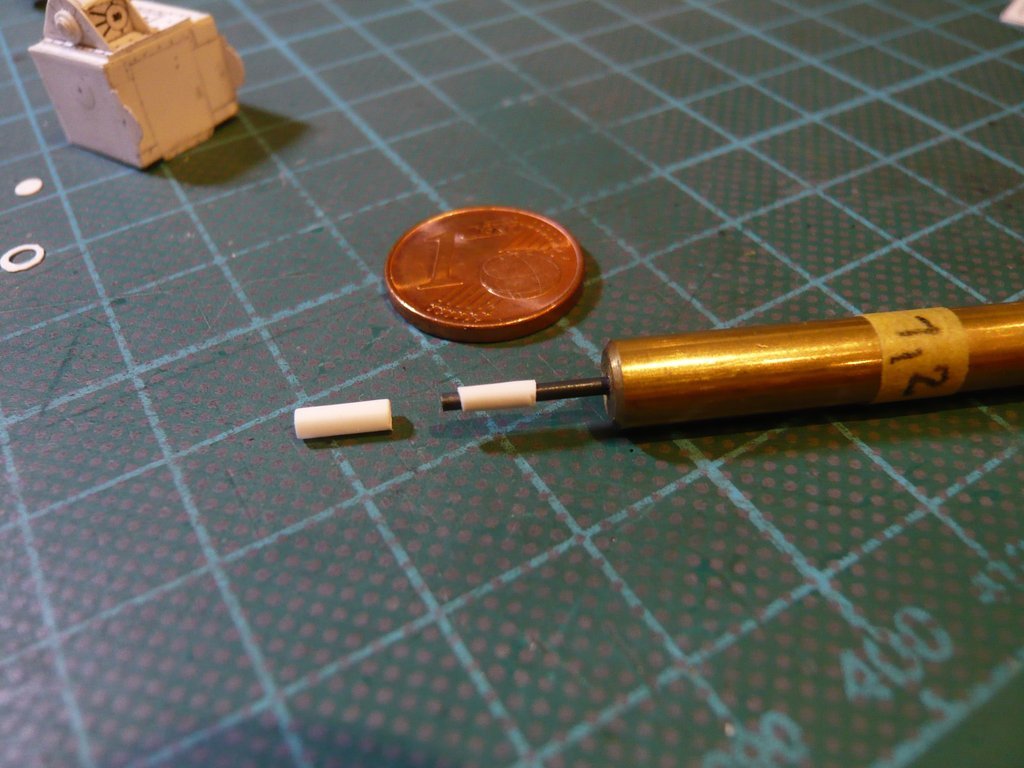
__________________
Greetings from Germany Manfred Under construction: Launch Pad 39A with Challenger STS-6 (1:144)
|
|
#2448
06-16-2021, 03:54 PM
|
||||
|
||||
|
In the next test I've used the punch with Ø 1,0 mm, with whose shrinking result (Øo 1,3 mm) I was completely satisfied then,
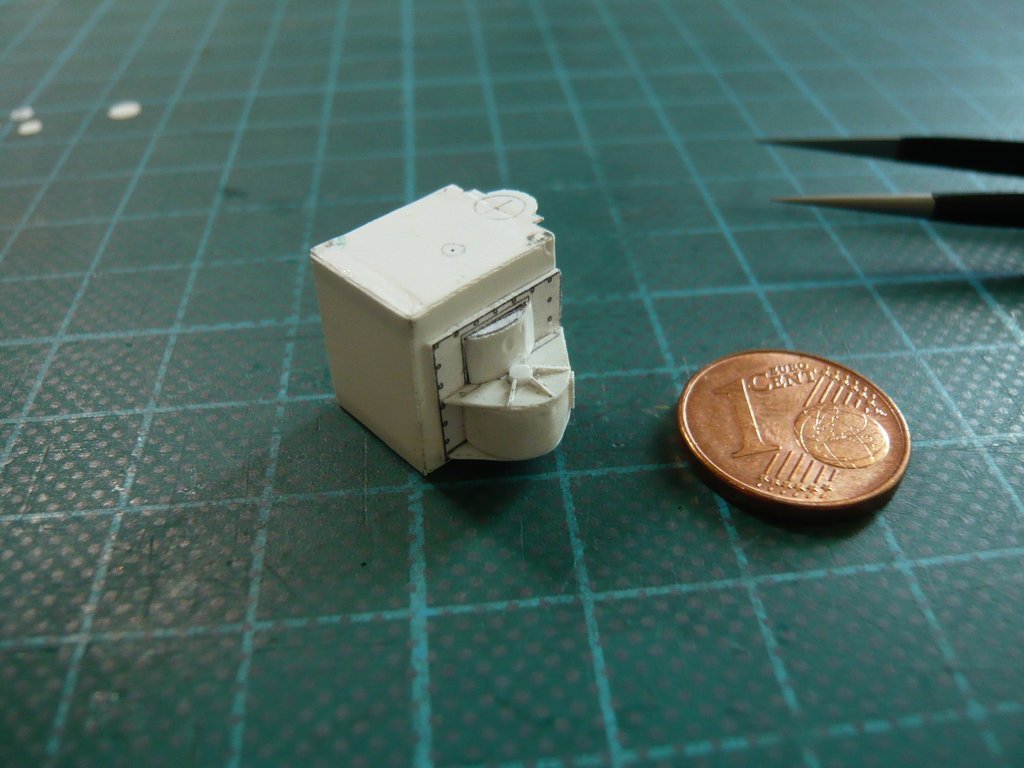
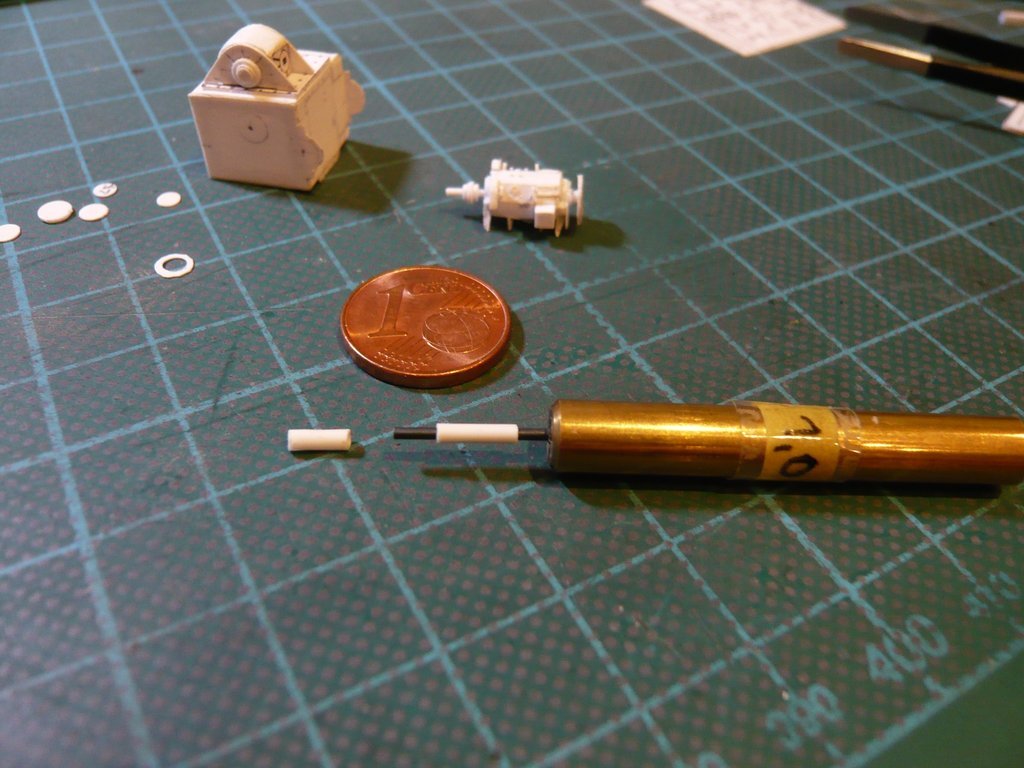 because the shaft of the Propel motor fits perfectly into the ring and also still has some clearance. 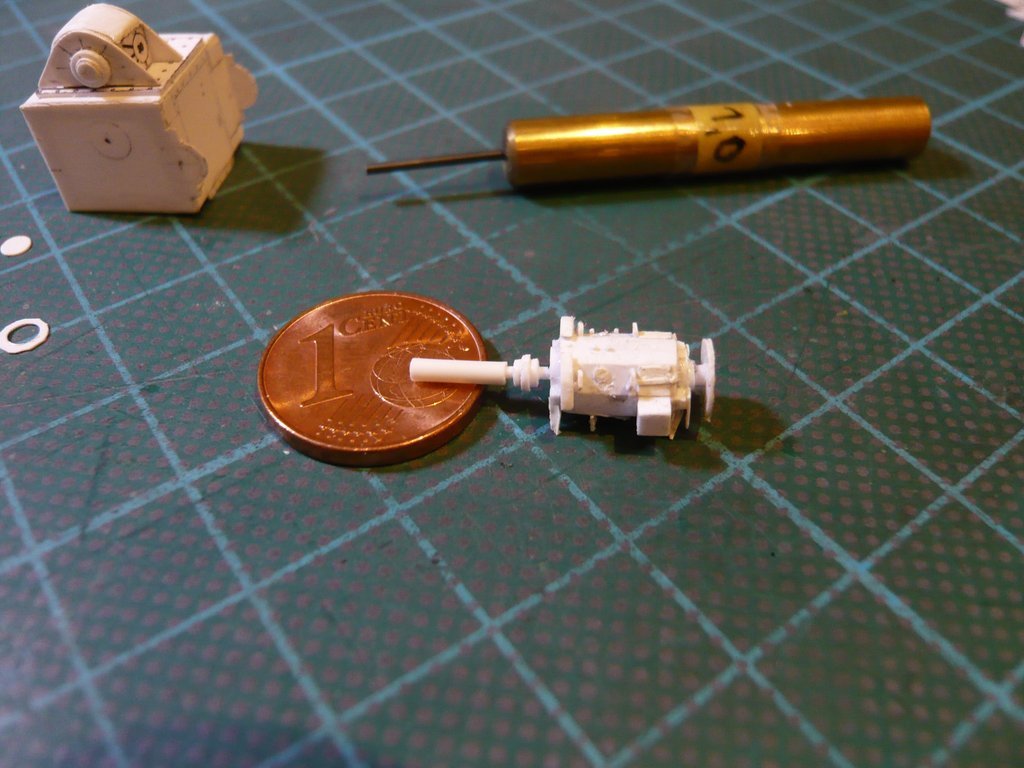 Using this tube I've cut a Ring (0,3 mm), 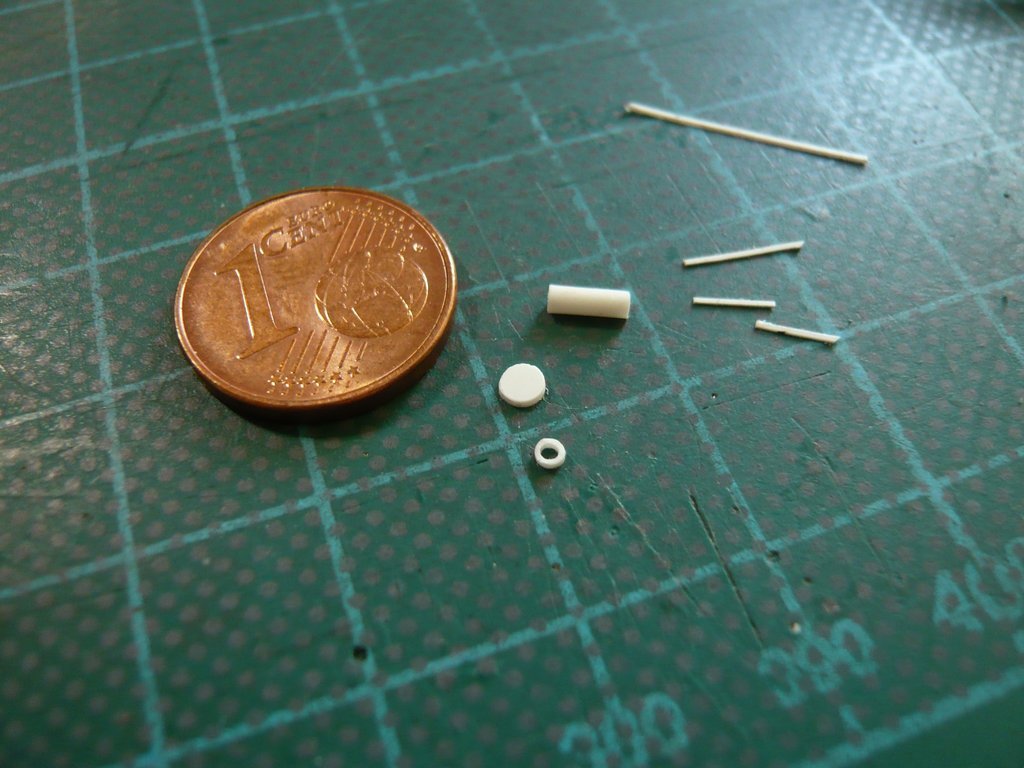 and have glued it together with the Disc (Ø 2,5 x 0,5 mm) to the front side of the dome. Then the surrounding struts were glued, wherewith also the front side is completed now. 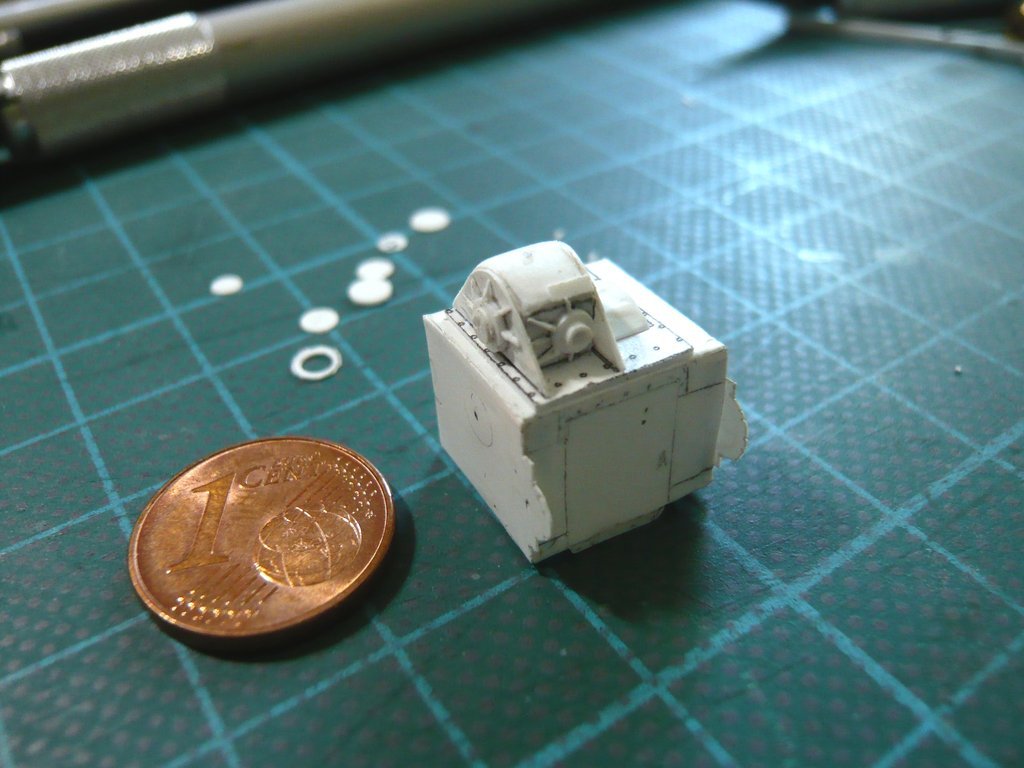 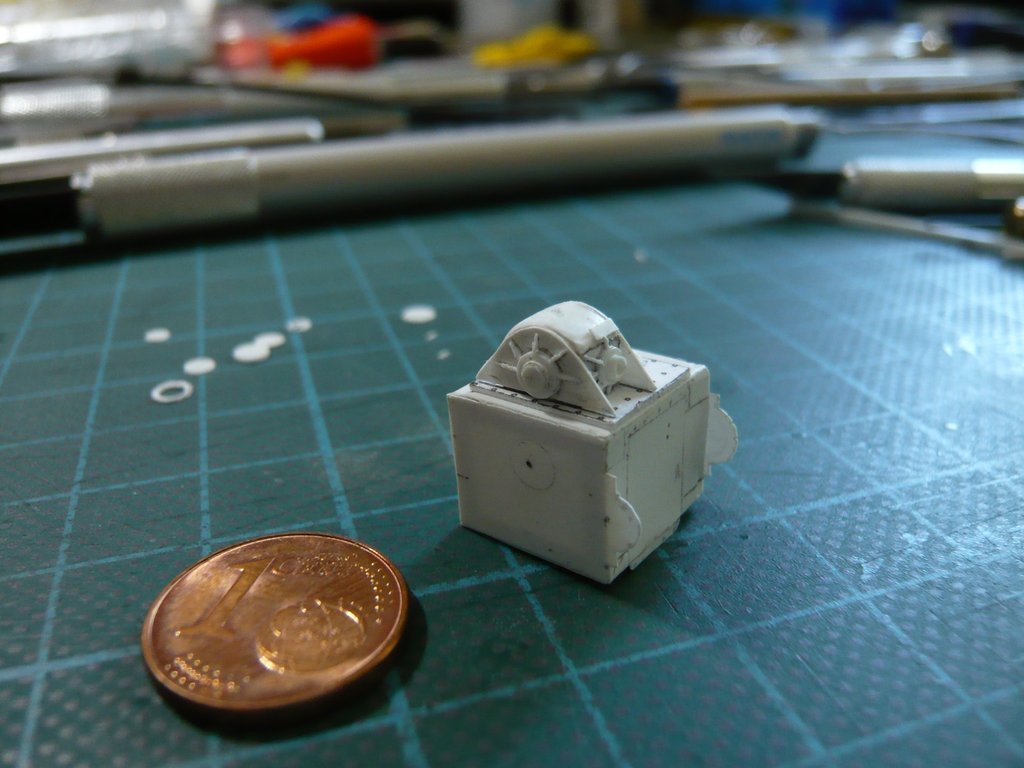 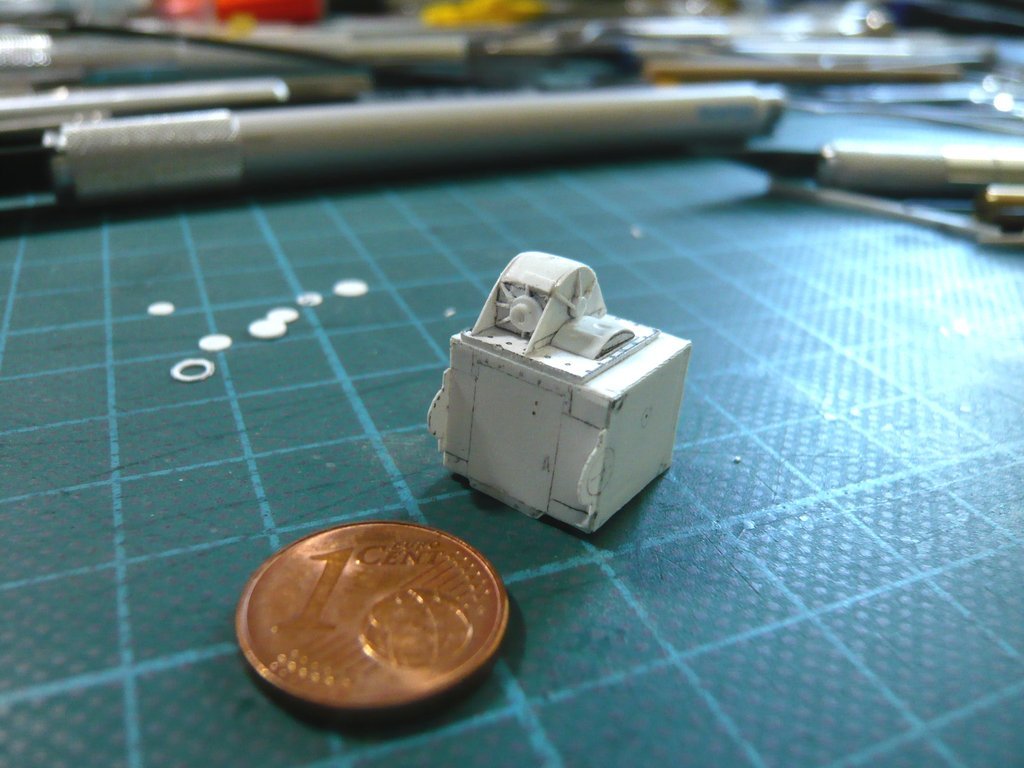 Before that I had also still glued this Mini disc (Ø 0,6 mm x 0,2 mm) to the dome. 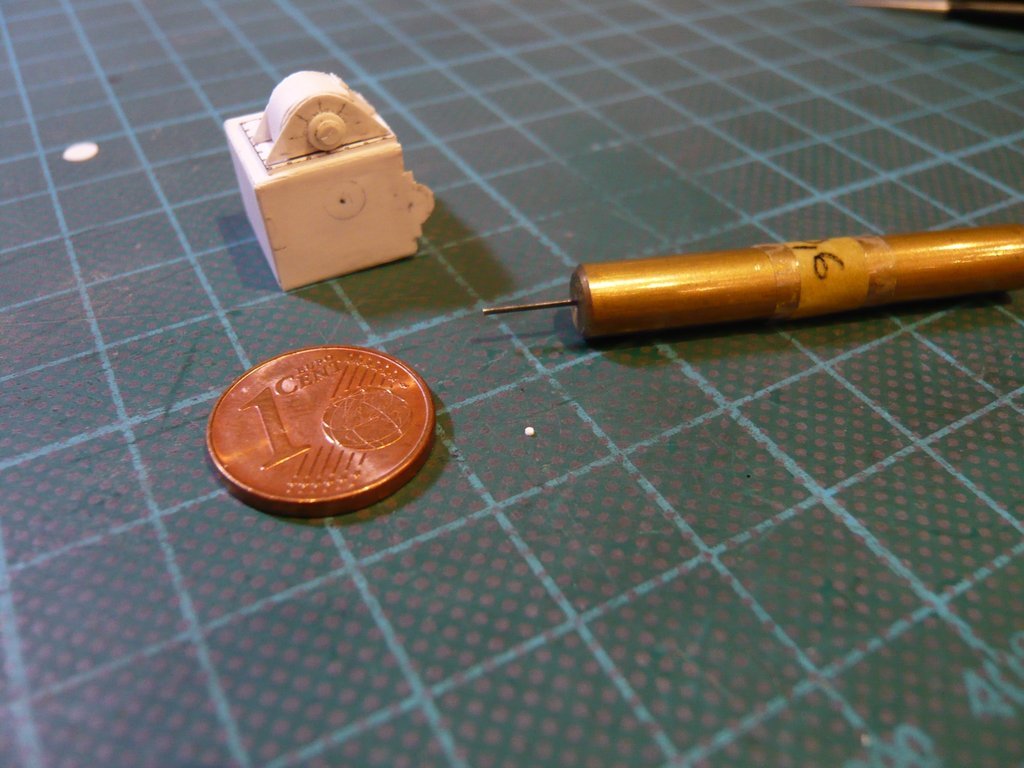 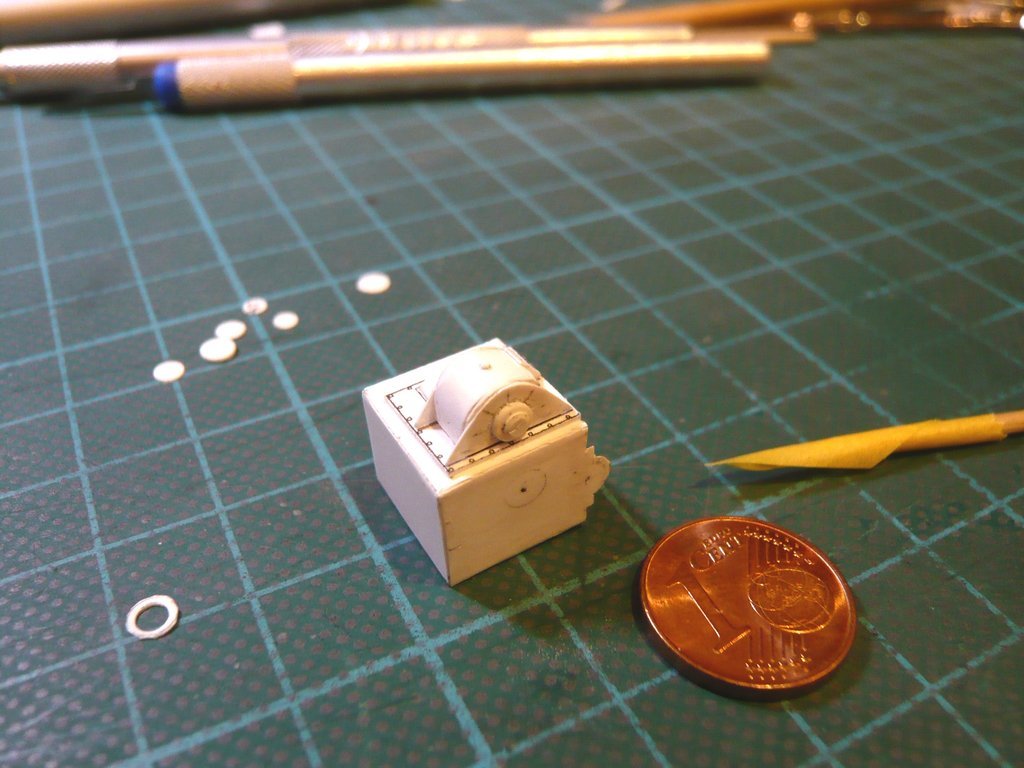 Now the orange marked front part of the Gear case is still missing, 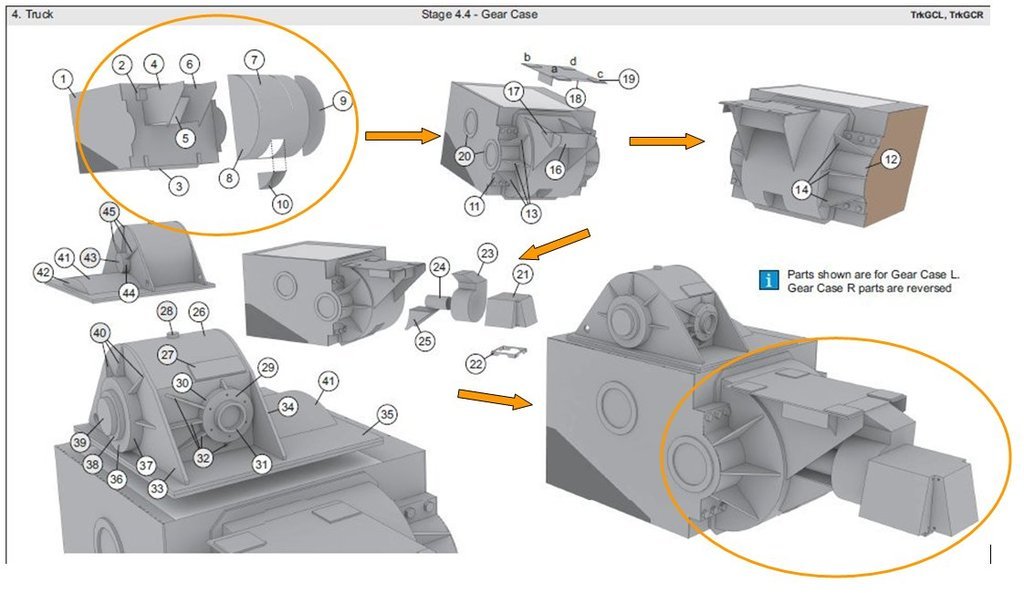 Source: Micro Artwork, Mischa Klement (cyana) which is next in line. 
__________________
Greetings from Germany Manfred Under construction: Launch Pad 39A with Challenger STS-6 (1:144)
|
|
#2449
06-18-2021, 06:43 AM
|
|||
|
|||
|
Guys, I told you, one day this beast will roll around on the desk by itself!!!

|
|
#2450
06-19-2021, 03:25 AM
|
||||
|
||||
 Marcell, Marcell,if so, then on my Diorama, cause there is more space than on my desk!
__________________
Greetings from Germany Manfred Under construction: Launch Pad 39A with Challenger STS-6 (1:144) Last edited by spacerunner; 06-19-2021 at 05:12 PM.
|
 |
| Thread Tools | |
| Display Modes | |
|
|


 Linear Mode

