


|
|
|
#2471
 07-16-2021, 05:32 AM
|
||||
|
||||
|
Hello everybody,
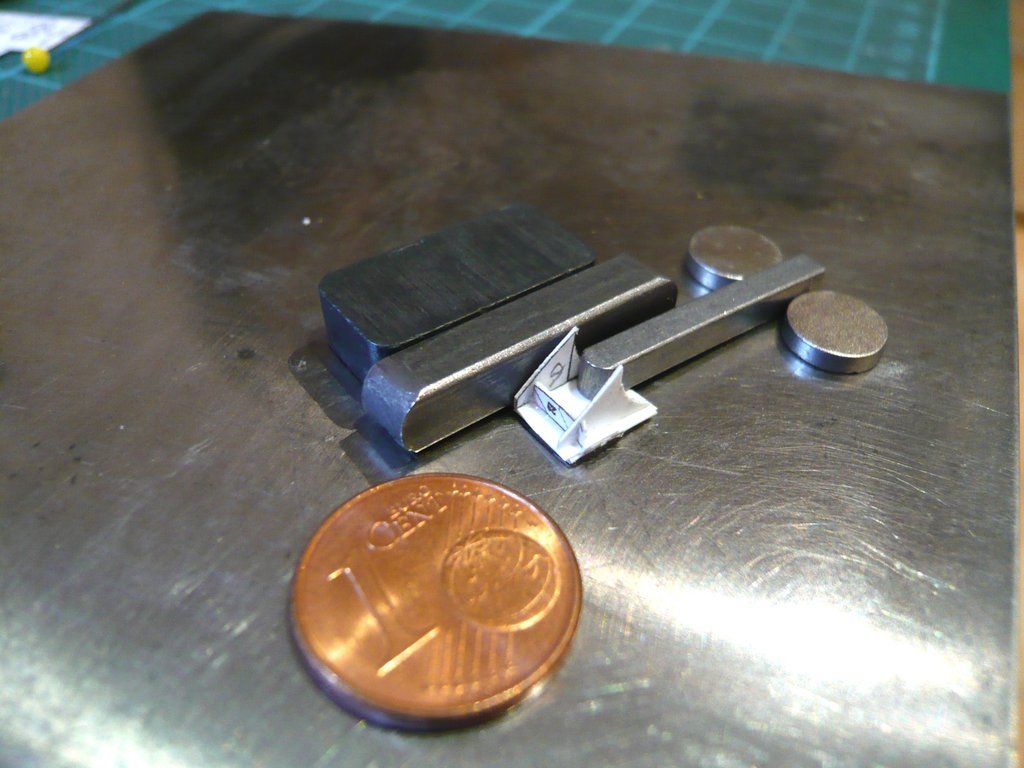
after longer being busy with different Crawler assemblies now a change of scene, and thus after several earlier attempts back to the lighting of the MLP to finally bring light into the darkness on the Side 1.  After I finally had decided on the cabling interface between the Pad and Crawler at the Pedestal 6 next to the FSS tower, I've defined once again the last division of the LED circles more precisely, based on my STS-6 reference photo.  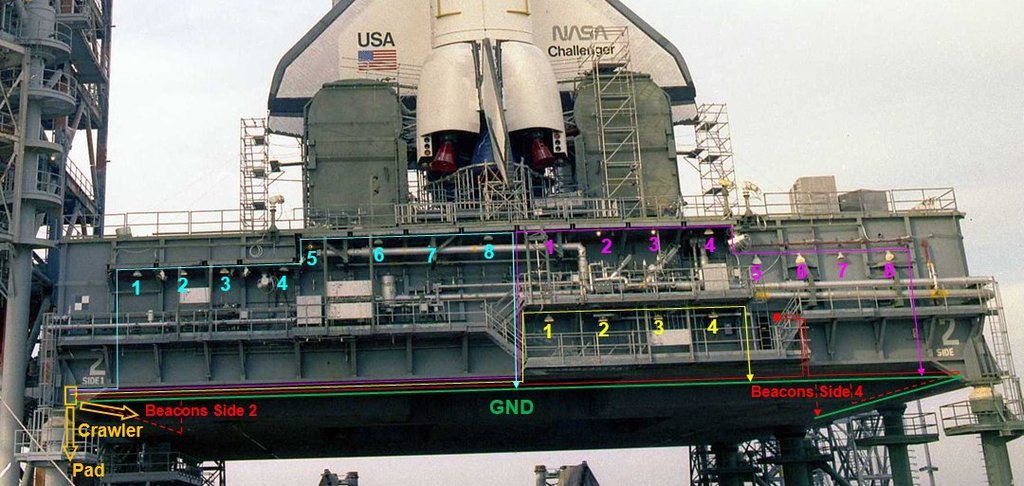 Source: retrospaceimages.com (STS-6) And this is exactly how it looks on my MLP. 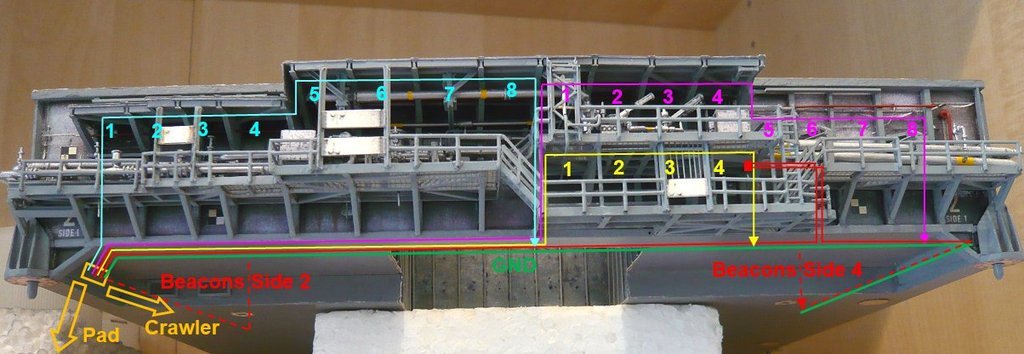 So I've rummaged out the utensils from that time and tried to gradually recapitulate the handling steps, which took some time.  At first, however, I proceeded rather naively, held the toothpick with the impaled ferrule in my right hand, held the tip in my left hand with tweezers and then carefully began to separate with a slight advance, which initially led to some losses, Bang - up and away ...  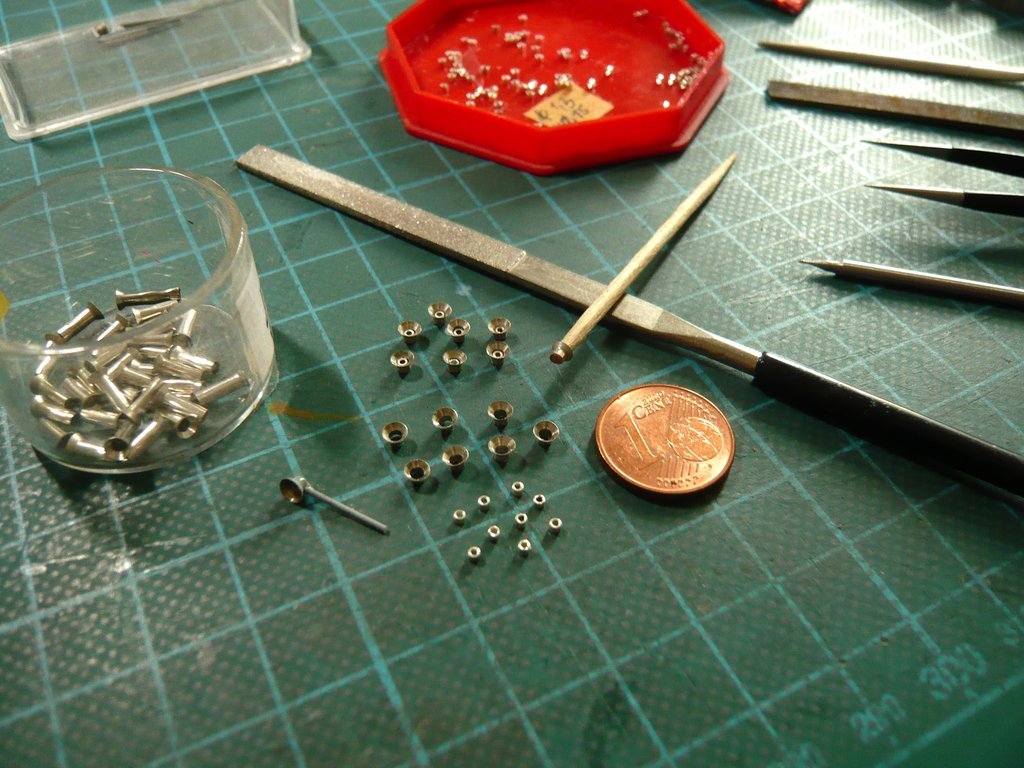 To avoid that, I then put a kind of collecting cage under the cutting disc and held the tip with a pair of pliers, which then worked better. 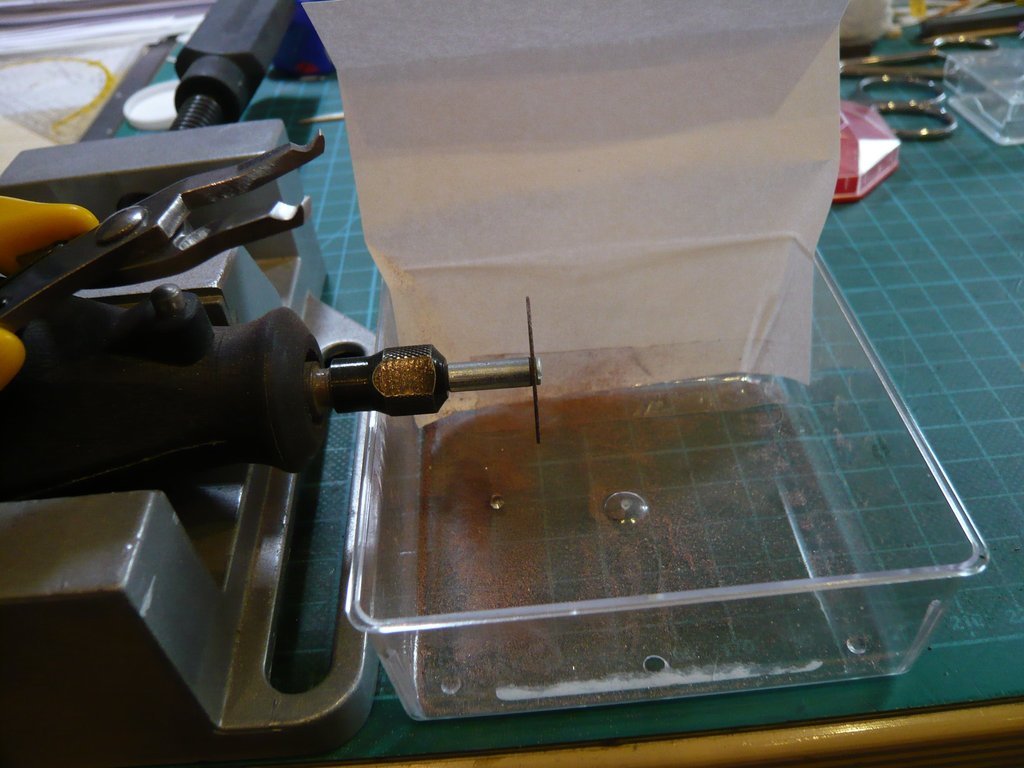 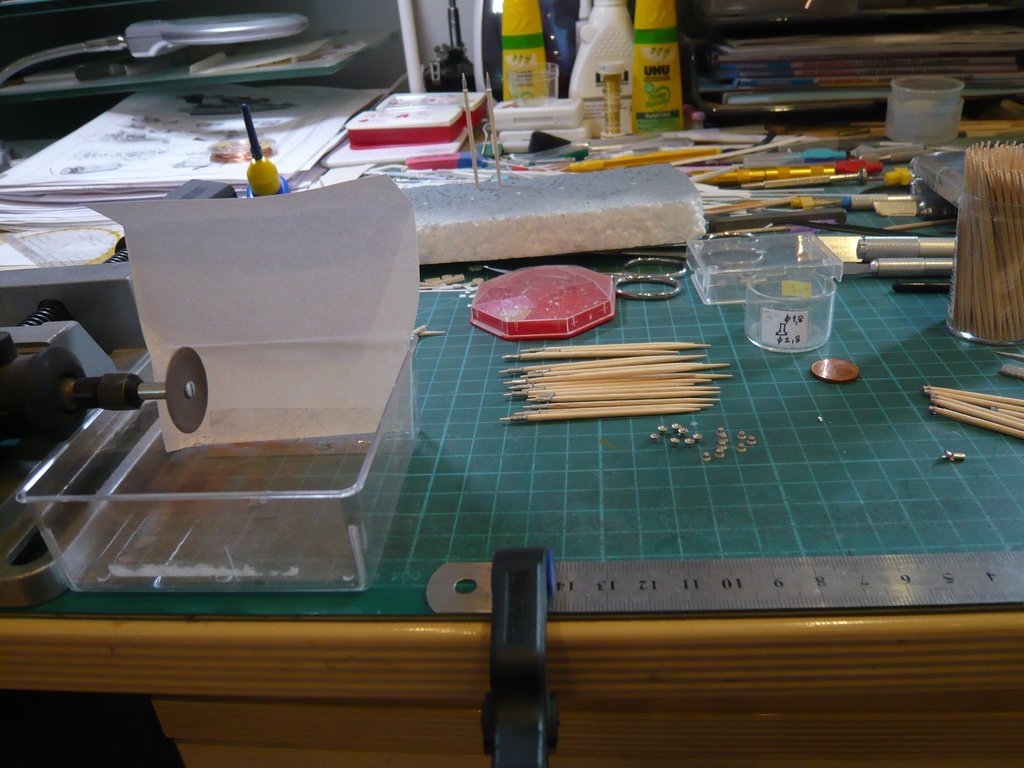 Then I've searched my URL-Screenshot directory of my Building-report, which is meanwhile 120 pages long, and came across my Separation technique from the previous year, which had proven itself, because it was much more solid, but unfortunately no longer in my mind ...  Back then I had clamped the toothpick with the impaled sleeve in a small vise, held the tip of the sleeve with pliers, and then carefully pushed the vise towards the cutting disc, which worked well.  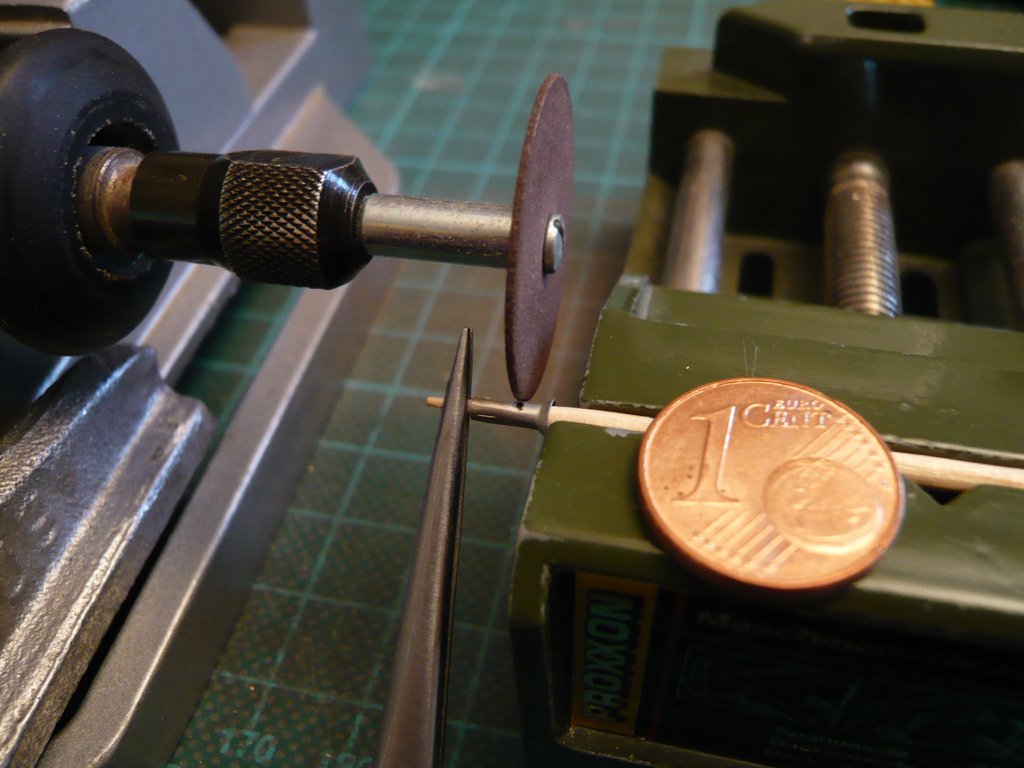 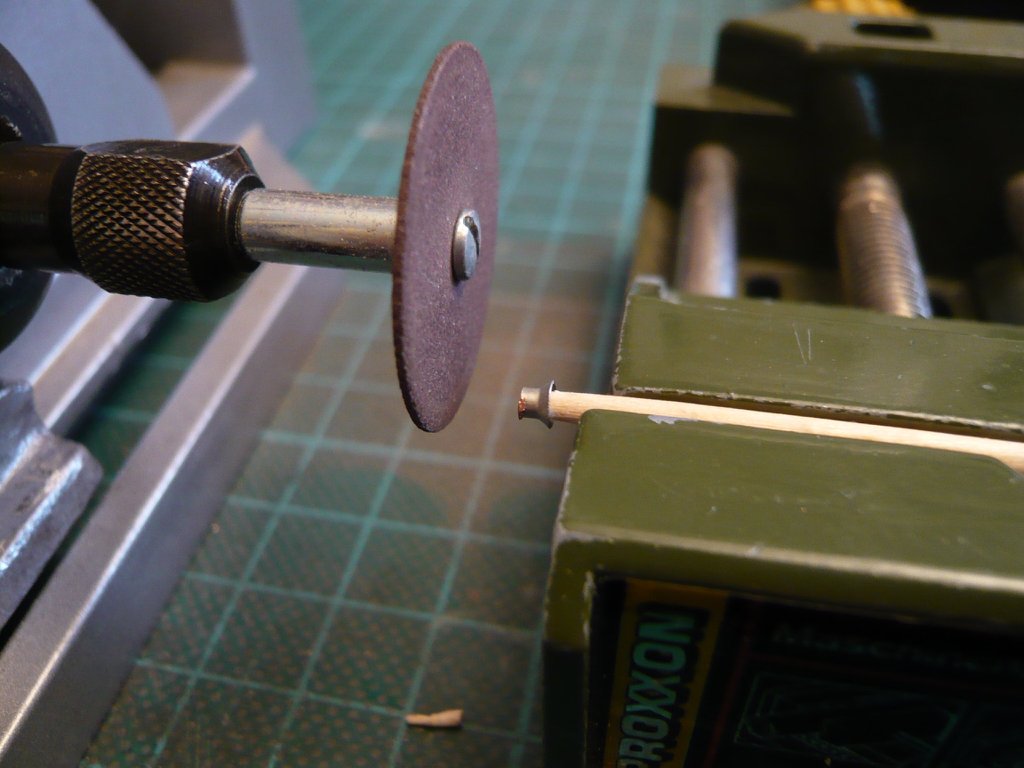 After the separation, the sleeves must then be deburred by carefully sanding. 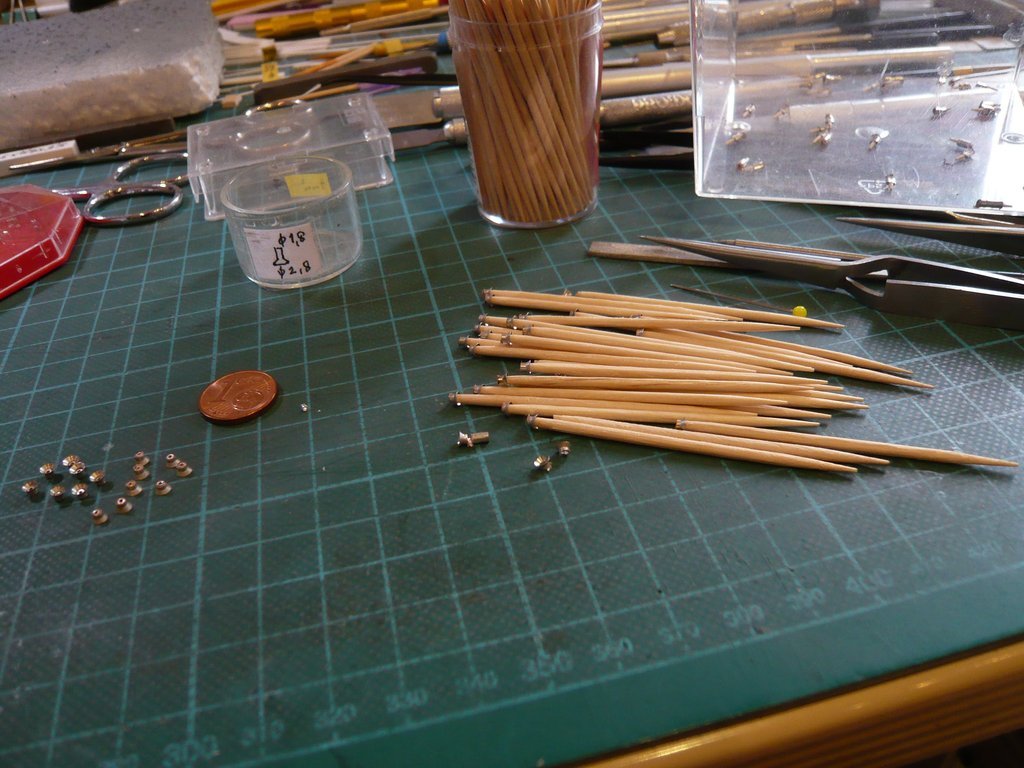 Then a small bead (Ø 1,3 mm x 1 mm) is glued with CA into each of the shades for better guidance of the LED wires, 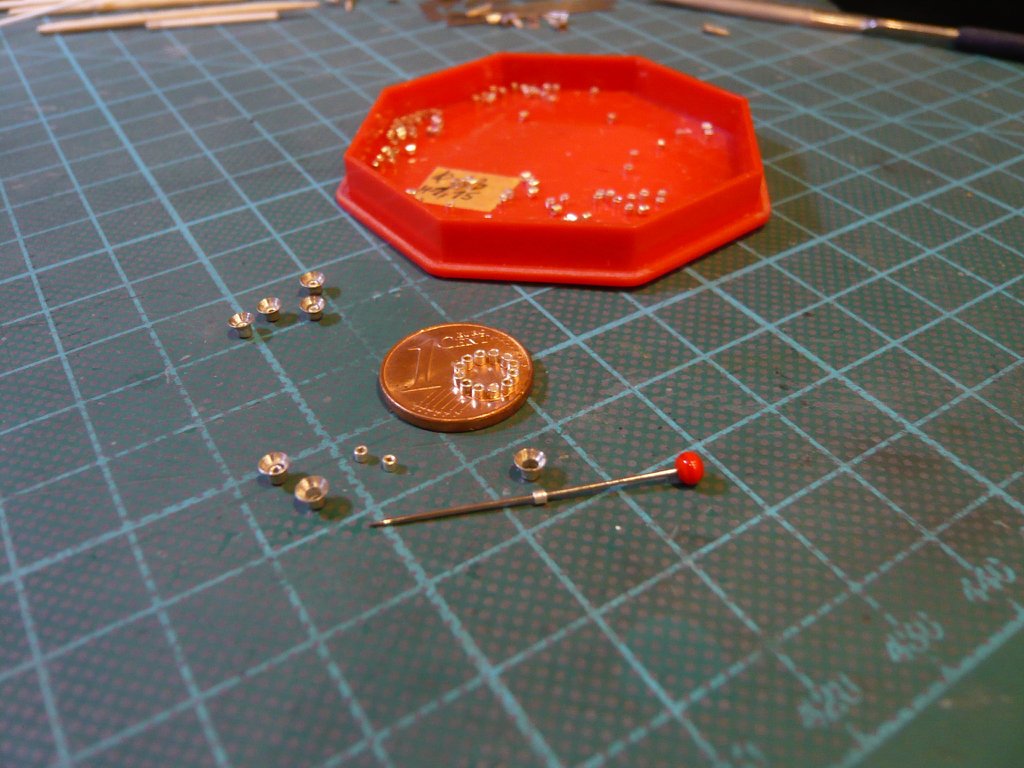 what I'm going to do next.  As a lesson from this dilemma, I have meanwhile begun to add matching keywords to my URL-Screenshot directory to create an smart Report-Index, what should need some time, so that I can directly search for it in future research and get to my goal faster.  After painting the 20 lampshades required for the Side 1, the LED wires are threaded into them, followed by gluing the LEDs in the shades with Bondic UV adhesive and thus sealed at the same time.  Together with the appropriate dimensions I then send them to my friend Arno, who will then professionally solder up the 4 LED circles, which I can then lay and test on the Side 1.  
__________________
Greetings from Germany Manfred Under construction: Launch Pad 39A with Challenger STS-6 (1:144) 
|
|
#2472
07-16-2021, 05:43 AM
|
|||
|
|||
|
Great technique to remember Manfred.
:calling out: Honey, I need another bench clamp. :answering: Why? :texted from the car on the way to the hobby shop: Tool envy!
__________________
Happy Crafting - Scot On the Bench: Planck and Hershcel
|
|
#2473
07-16-2021, 10:13 AM
|
||||
|
||||
|
In default of a soul the devil puts up with a fly!
__________________
Greetings from Germany Manfred Under construction: Launch Pad 39A with Challenger STS-6 (1:144)
|
|
#2474
07-17-2021, 09:12 AM
|
|||
|
|||
|
Quote:
Regards Kevin
__________________
Normally the most advanced tech I use is a pencil.
|
|
#2475
07-17-2021, 04:12 PM
|
||||
|
||||
|
Thanks Kevin for your nice compliment,
 this subassembly was really a very time-consuming challenge at the border of what was feasible, for which I had to grit my teeth over and over and overcome myself not to give up.  But first of all I wanted to prove it to myself, and then of course to prove it to all of you too, and that's why it was worth the effort.
__________________
Greetings from Germany Manfred Under construction: Launch Pad 39A with Challenger STS-6 (1:144)
|
|
#2476
07-21-2021, 05:21 PM
|
||||
|
||||
|
Hello everybody,
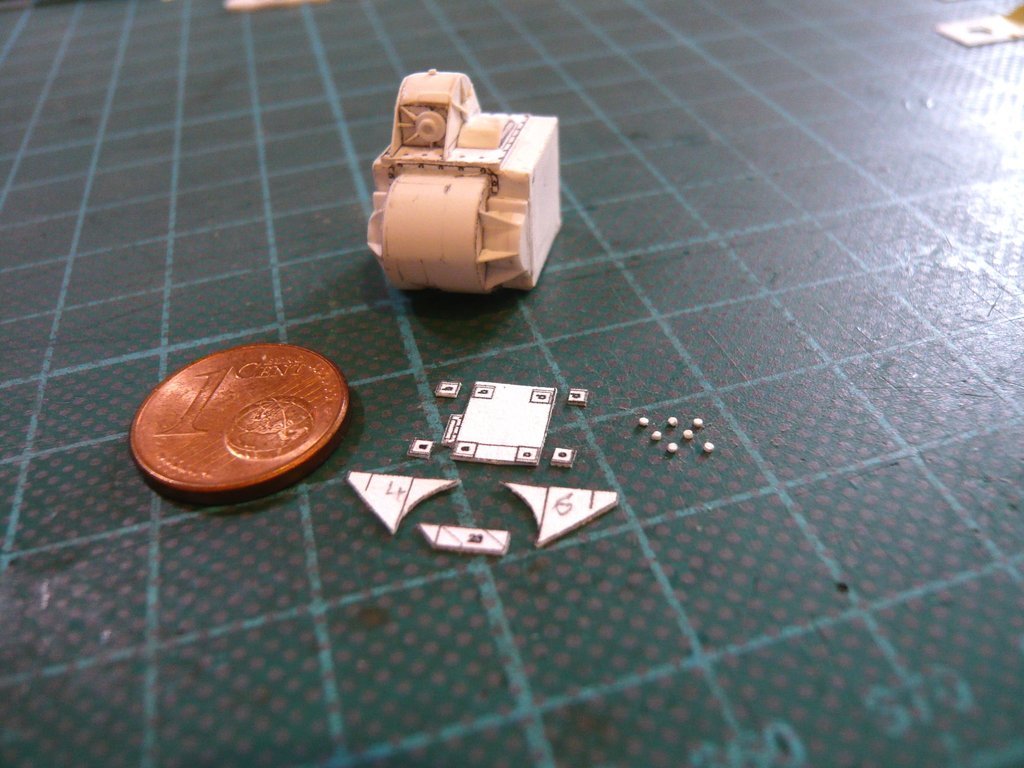
the next step was filing down the lampshades, which had been cut off but still sitting on the toothpicks, to a length of approx. 1,8 mm, as well as the subsequent deburring.  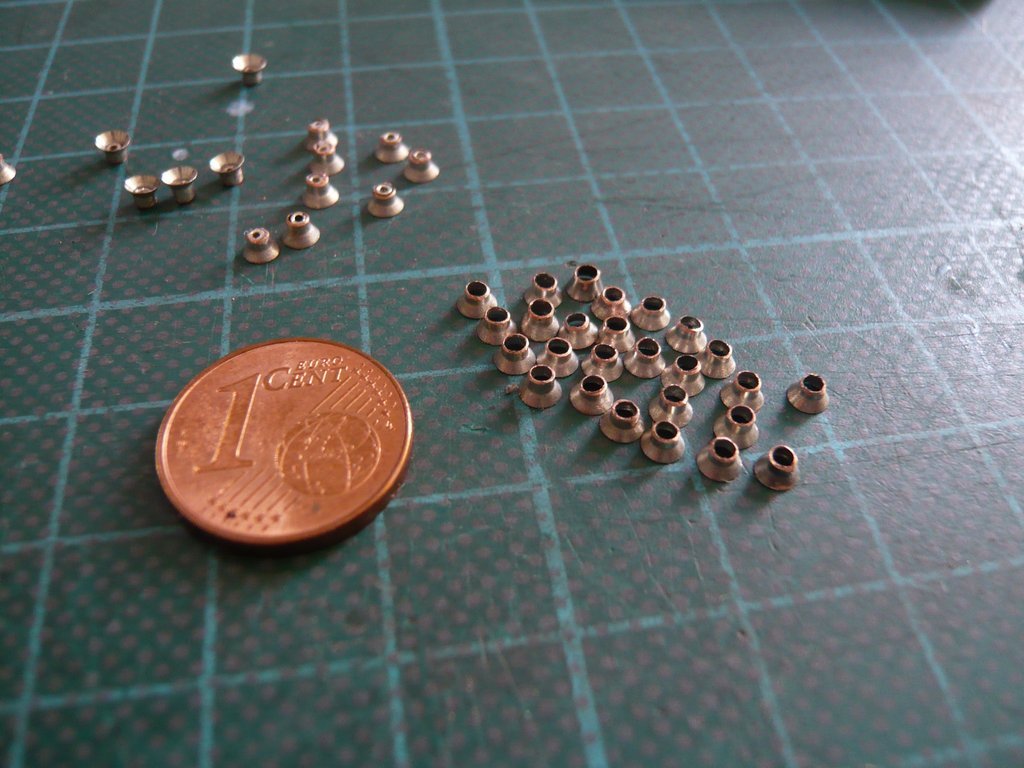 Since the small beads for protection and better guidance of the LED wires were glued in with Pattex-CA, I have put a Teflon foil underneath as adhesive protection again in the tried and tested way.  The lampshades could only be held in a scissors tweezer to glue them in, 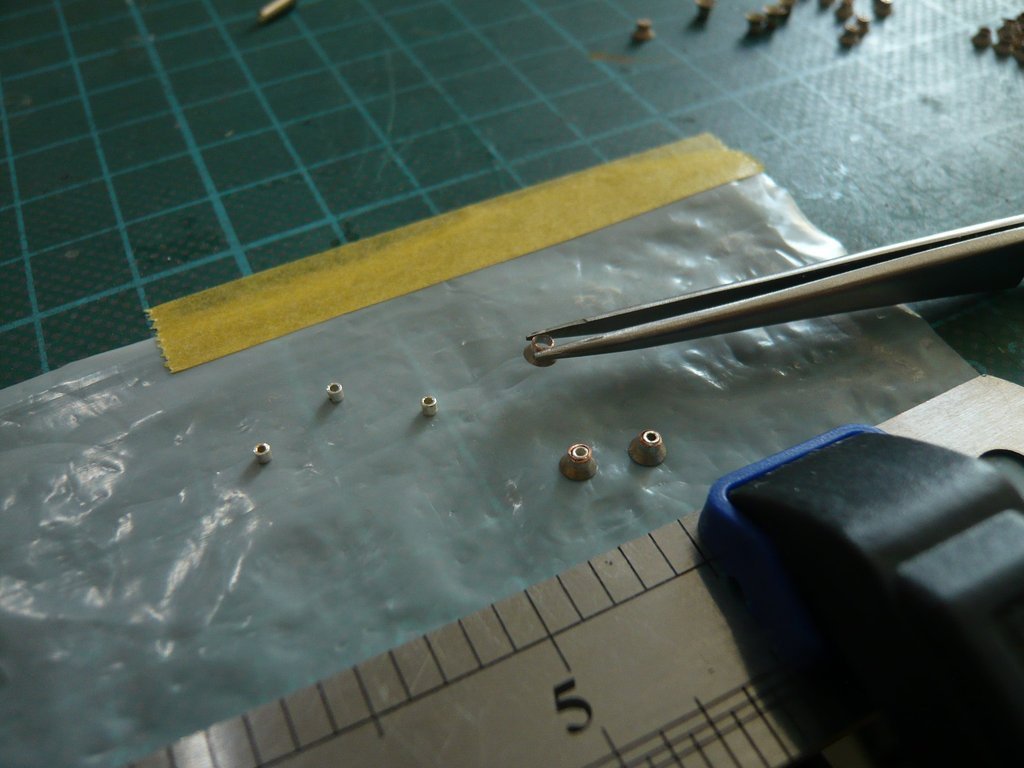 and in this position could be carefully dabbed with CA on the inner edge with a acupuncture needle, 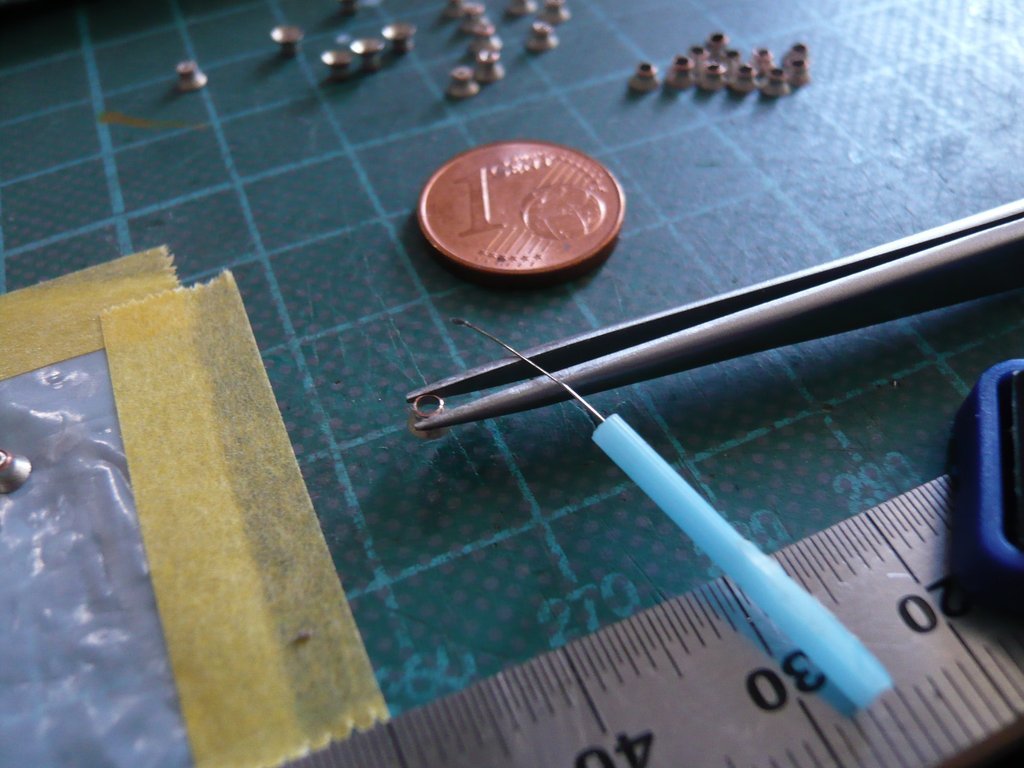 and then to put it over the upright standing beads, what had to work at the first go,  which, with a few exceptions, also succeeded. which, with a few exceptions, also succeeded.  Then the shades were turned upside down and pressed onto the top with the end of the cutter holder in order to level out any minimal overhang of the beads. 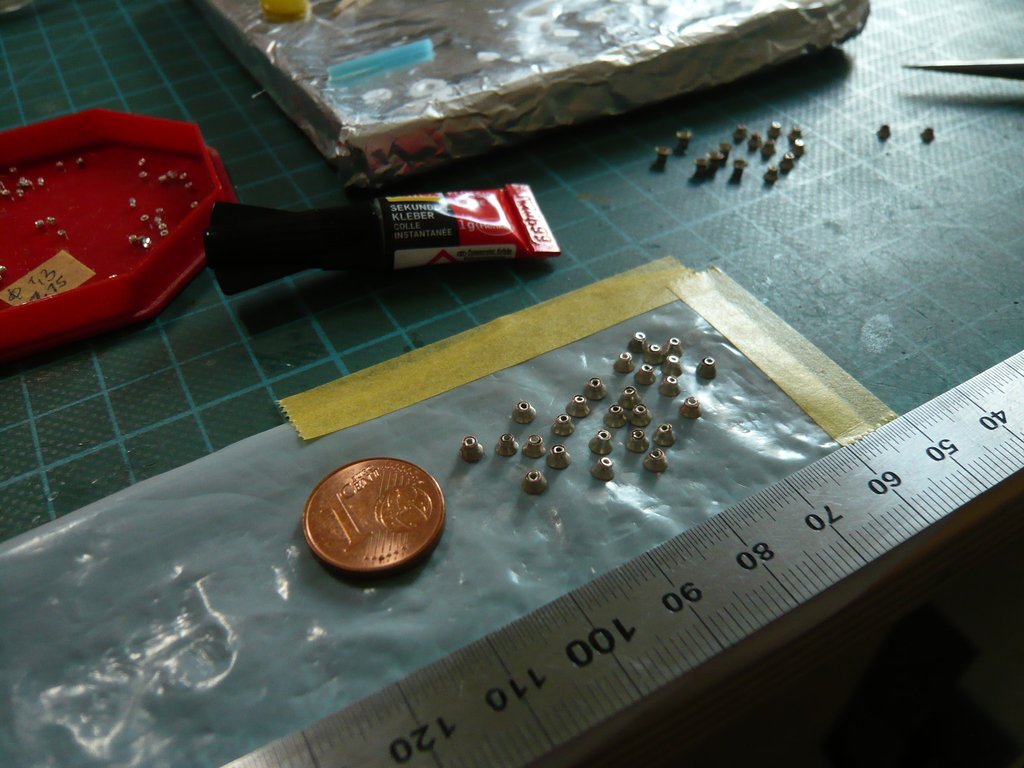 With that the preparation for the upcoming airbrushing was almost finished. 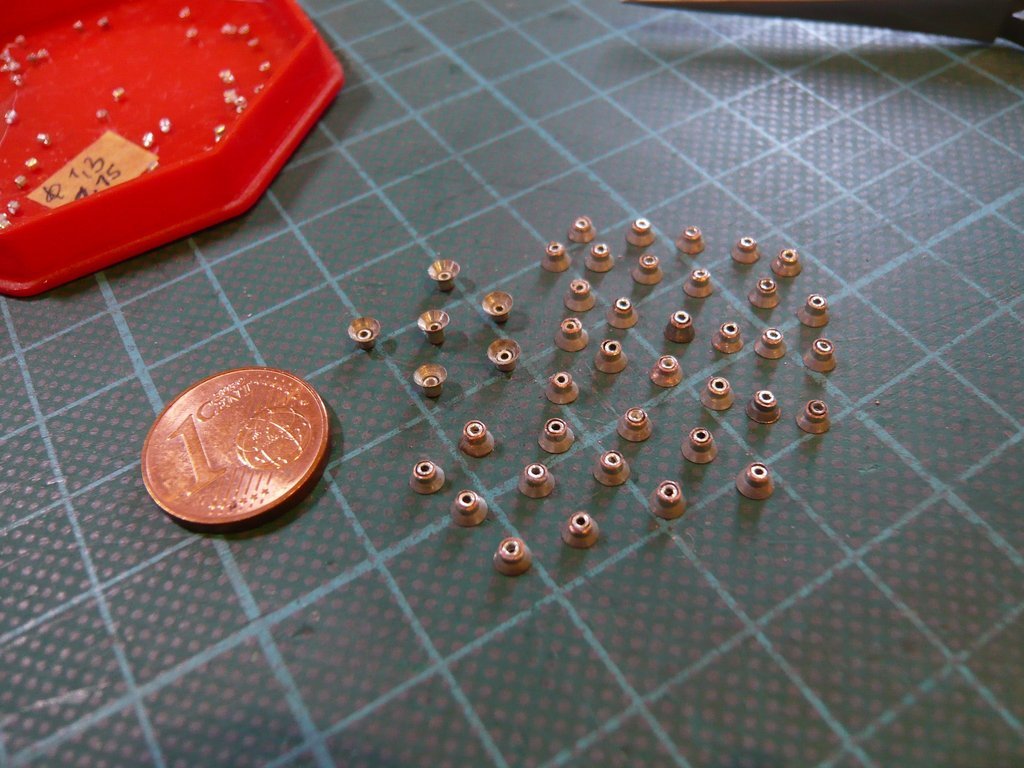 After I had found my well-stowed needle ledge from the first paint job, only the paint residue on the tips had to be removed, otherwise the needles would not have fit through the beads. And in a small box of course I've kept the ferrules with plastic collars, 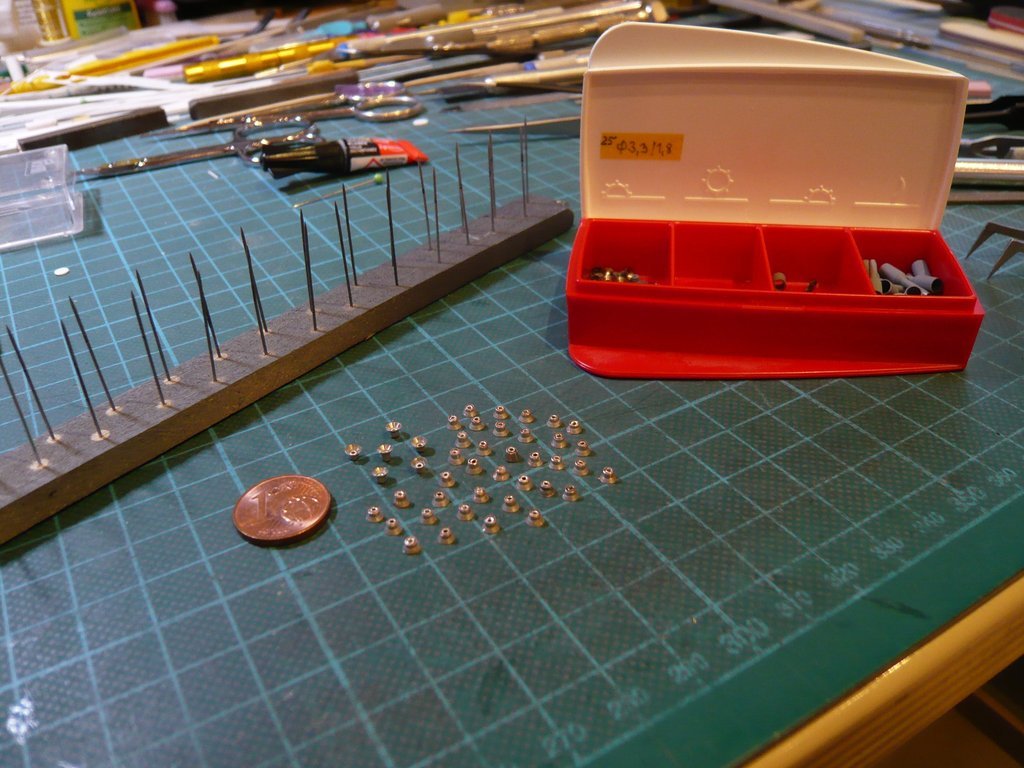 which were now threaded onto the needles as spacers to prevent the shades from sticking to the Balsa ledge. Since it was already foreseeable at that time that I would have to paint further lampshade series, I had already marked further slots in wise foresight.  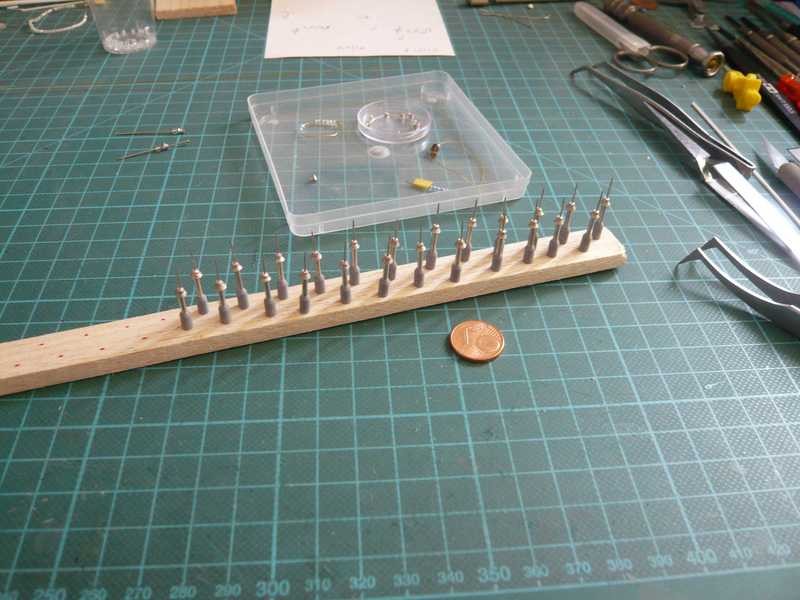 And since I've prepared twice the number of umbrellas this time, I only needed to expand the needle ledge accordingly and found and used both the pins and ferrules that were used at the time. 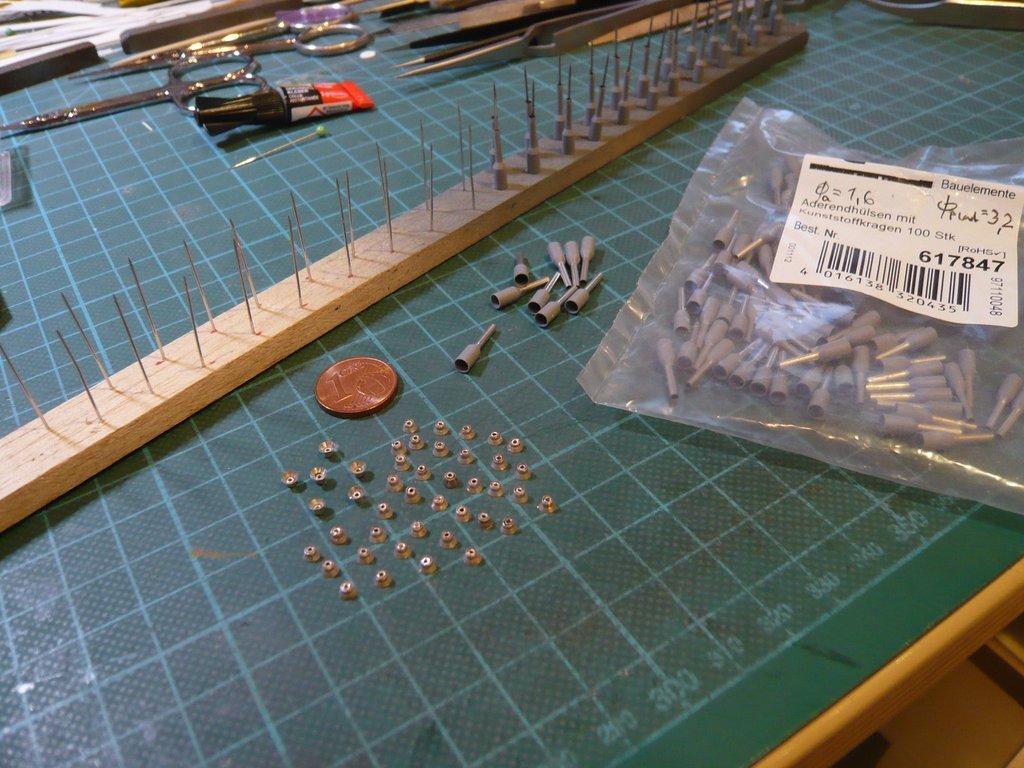 Now only the shades had to be threaded onto the needles. 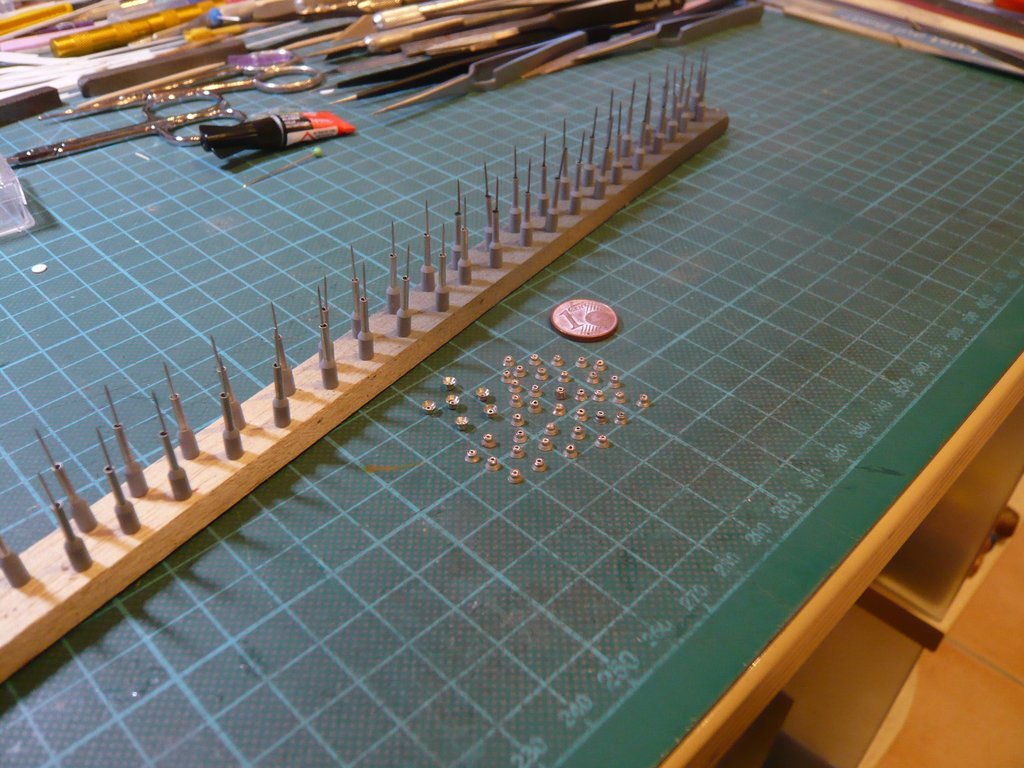 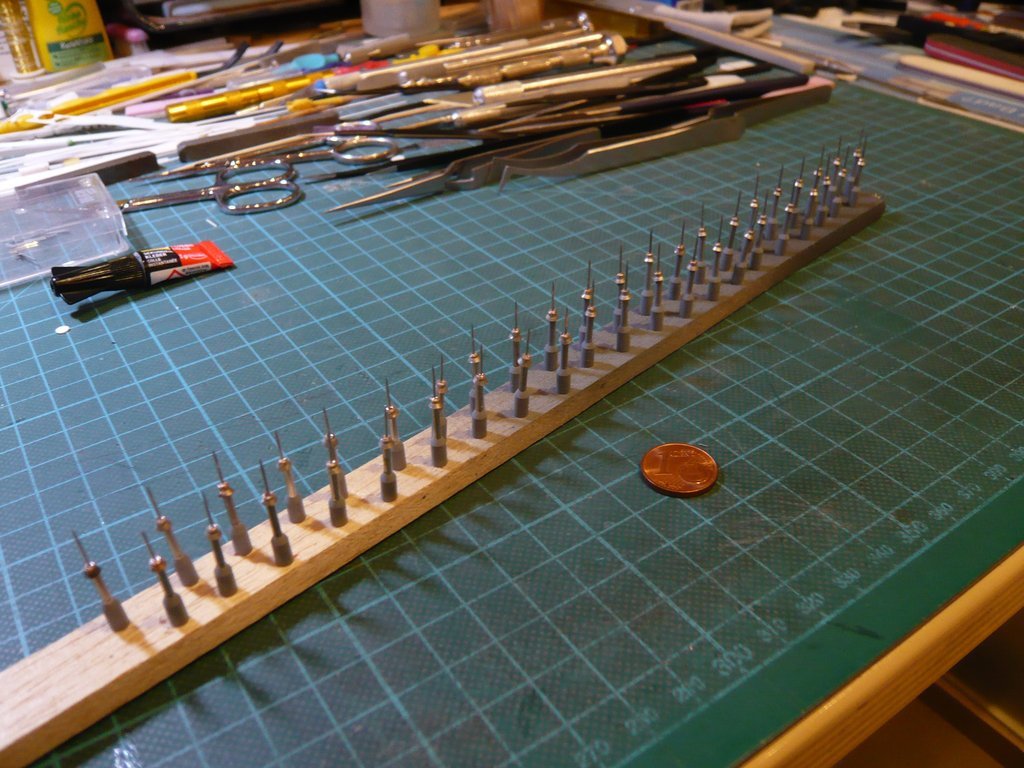
__________________
Greetings from Germany Manfred Under construction: Launch Pad 39A with Challenger STS-6 (1:144)
|
|
#2477
07-21-2021, 05:22 PM
|
||||
|
||||
|
In order to avoid a later light emission upwards, I brushed the shades with black paint again as I did back then.
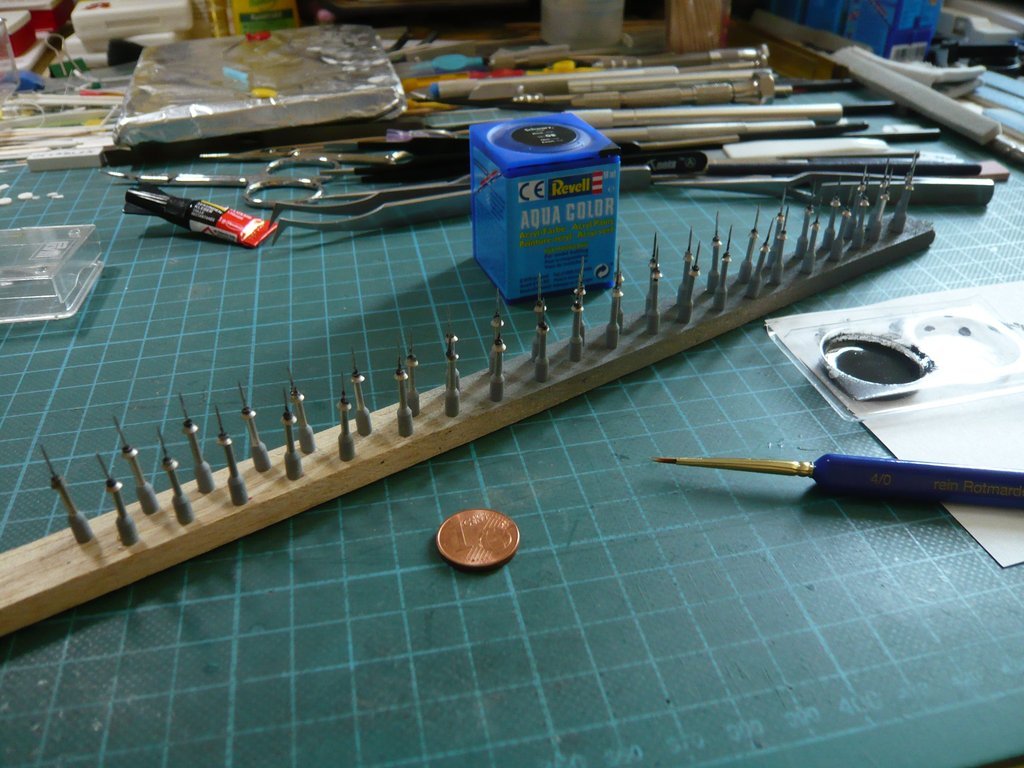 Although the autofocus of my digicam already had its problems with this macro shot,  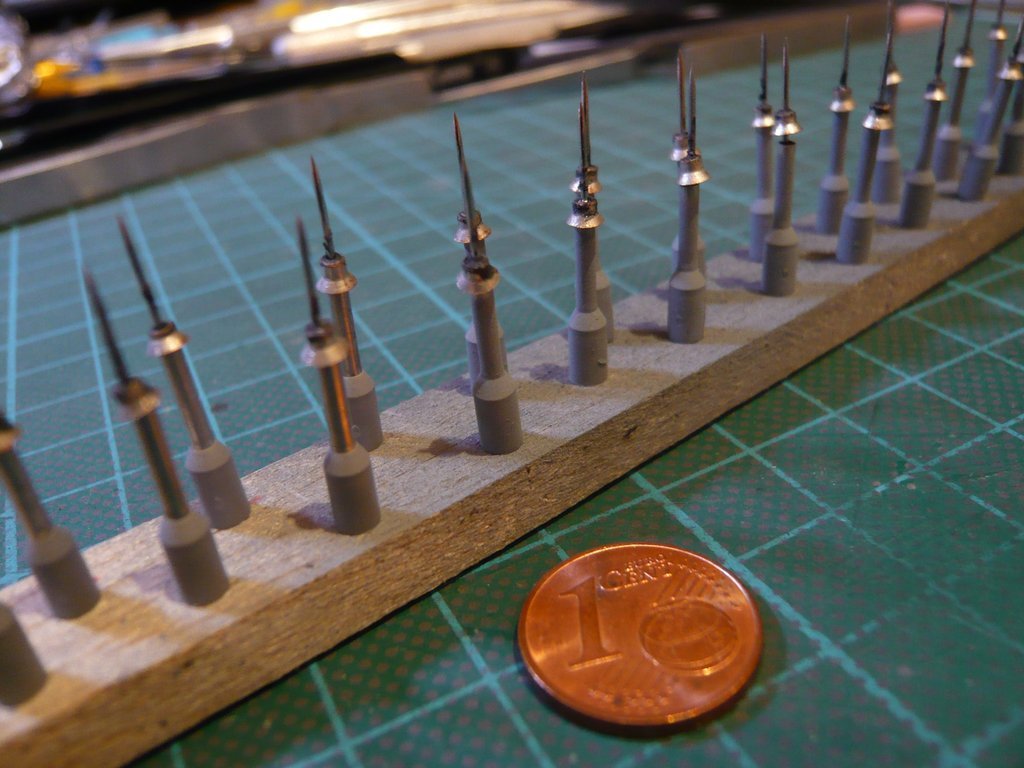 I didn't want to withhold it from you, especially since you can see a bit more like that, at least I imagine it. 
__________________
Greetings from Germany Manfred Under construction: Launch Pad 39A with Challenger STS-6 (1:144)
|
|
#2478
07-26-2021, 04:26 PM
|
||||
|
||||
|
Hello everybody,
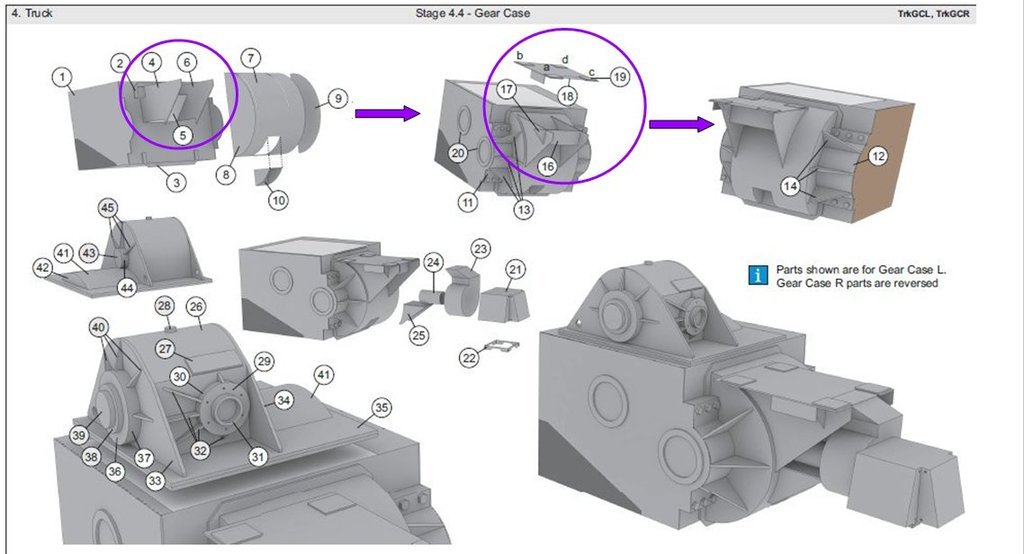
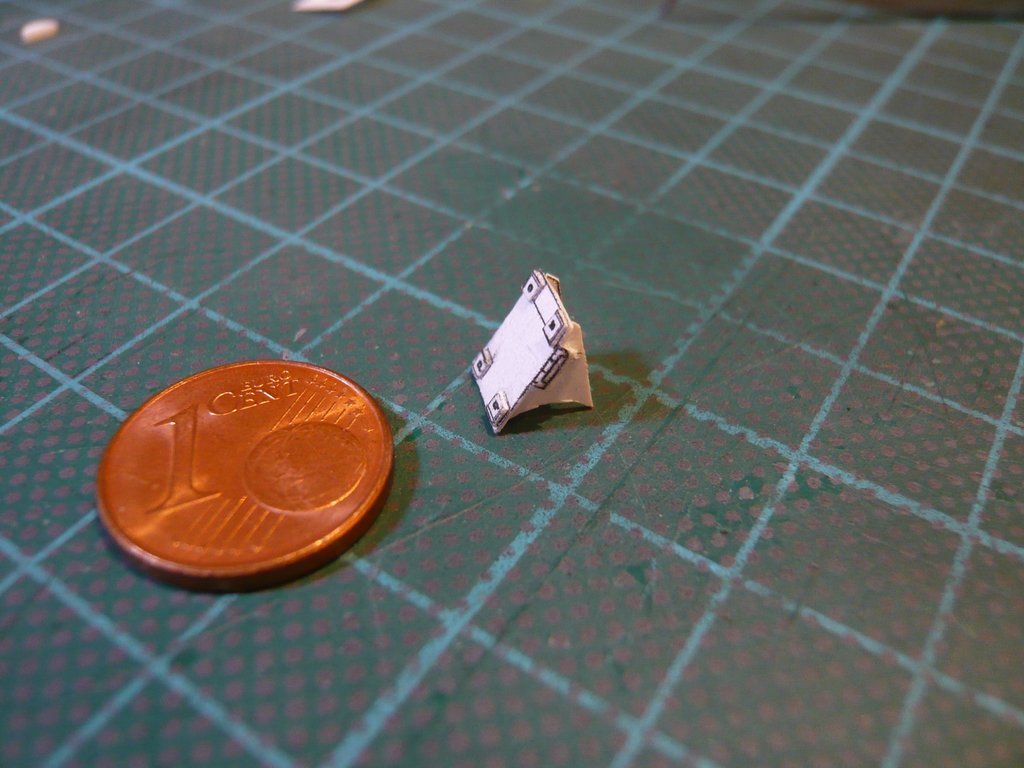
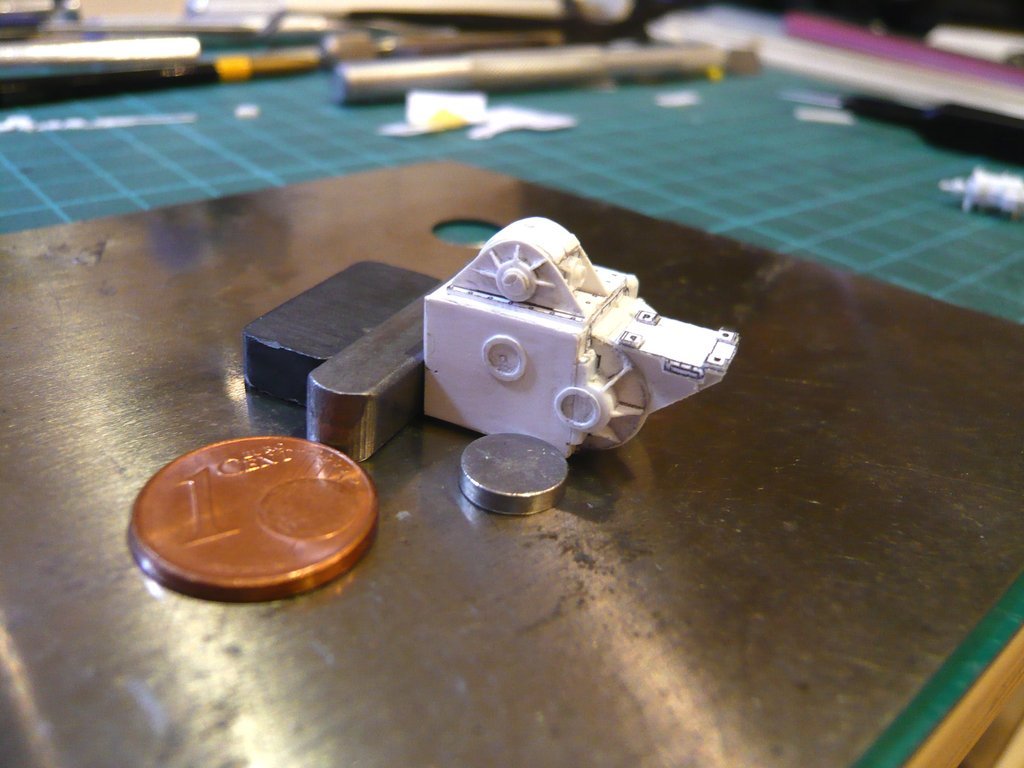
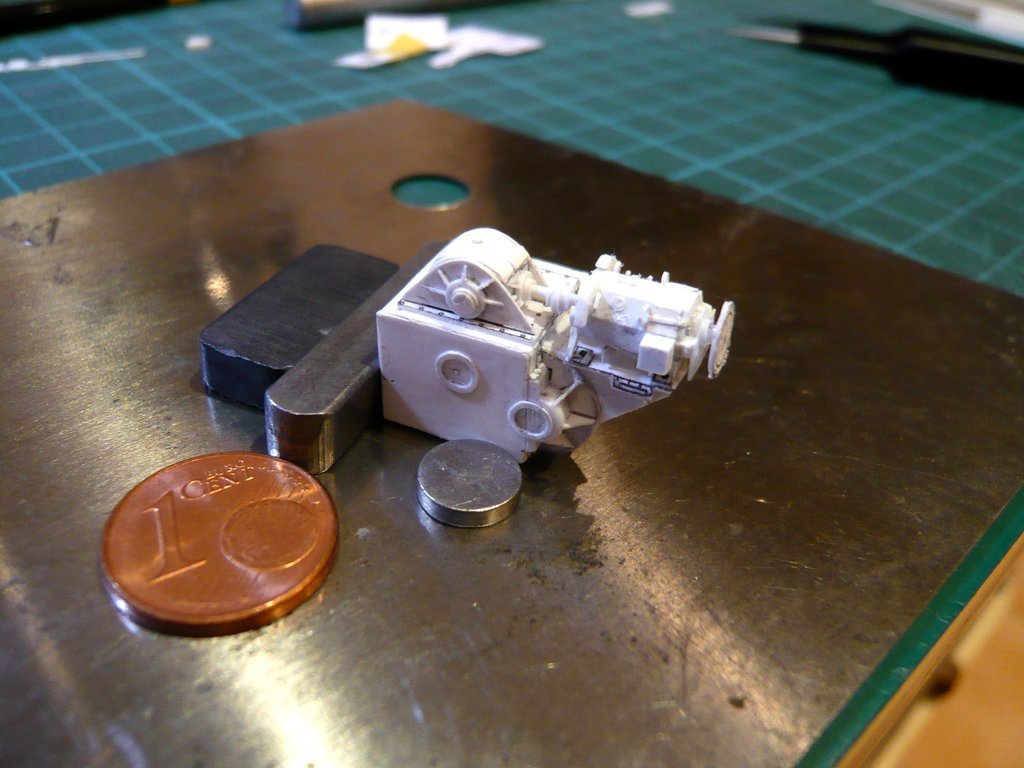
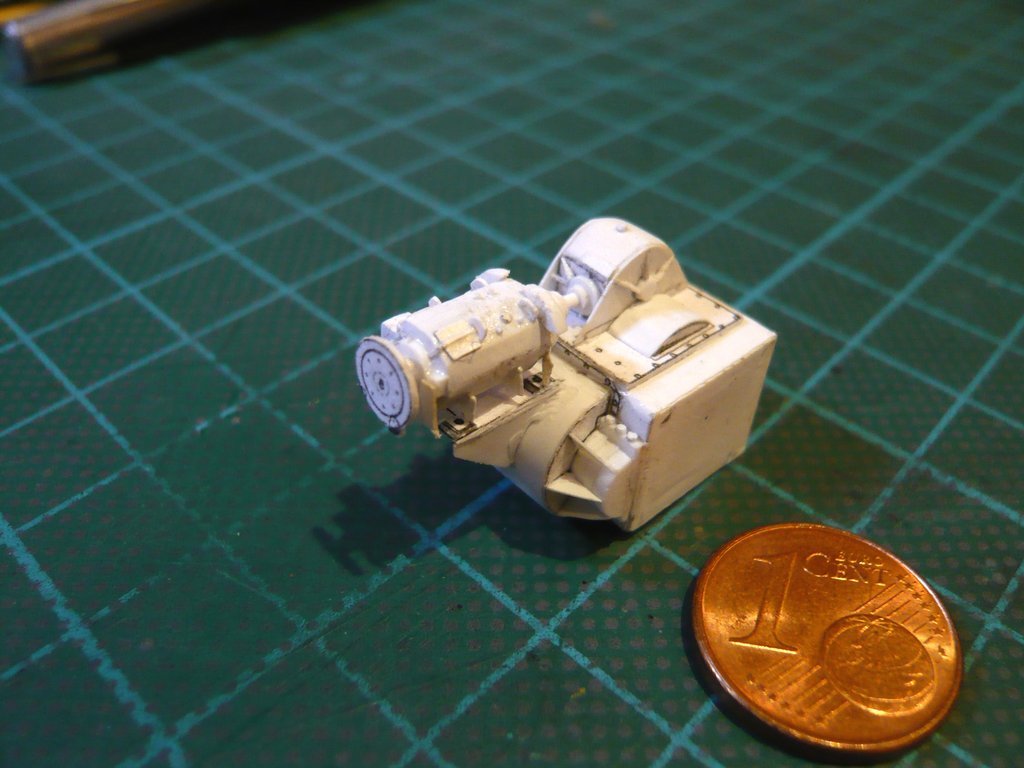
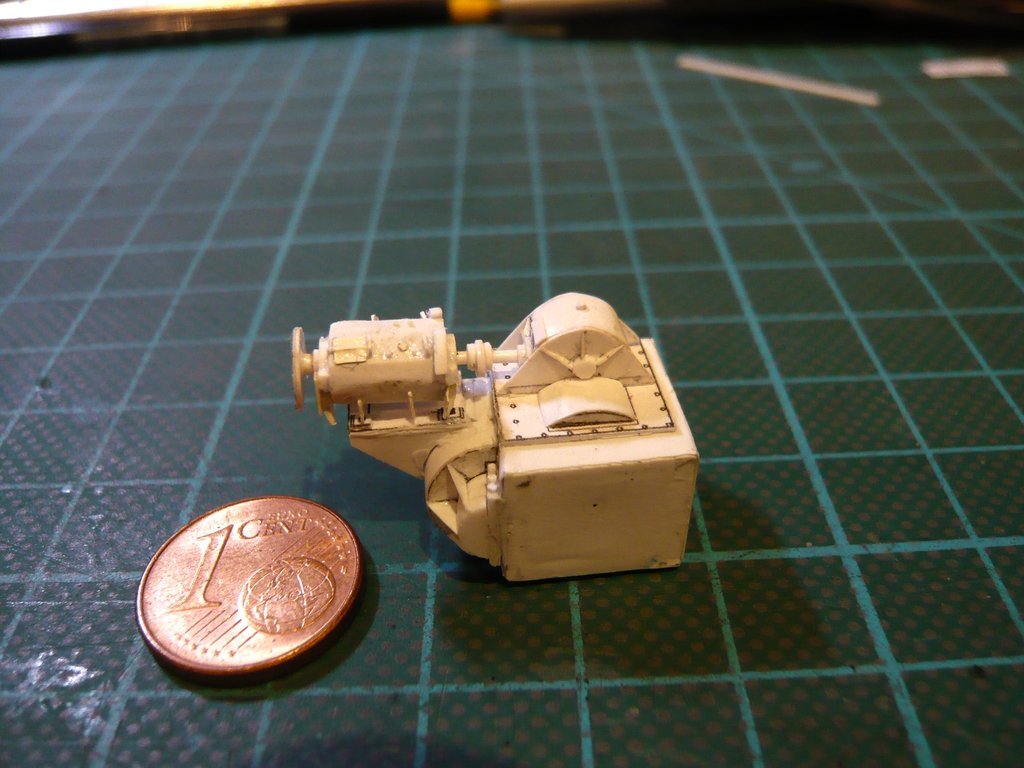
given the occasion, now still once more a swivel back to the Crawler, because the 3D printing of the Gear housings & Propel motors enters the decisive phase. In the meantime, my ARC friend Joe (crackerjazz) has thought about what he should hollow out on the gear case to save material and what small details he should fill out. Since filling out would take a lot of work, he agreed to my suggestion just to upload the model with the hollowed-out case and see if/what Shapeways would undertake with it. In this context he asked me which side of the gear case he should leave open, the rear side or the underside, as one can see in this image, wherewith he pleasantly surprised me, since he's apparently intending to upload and let print the entire unit of housing & motor.  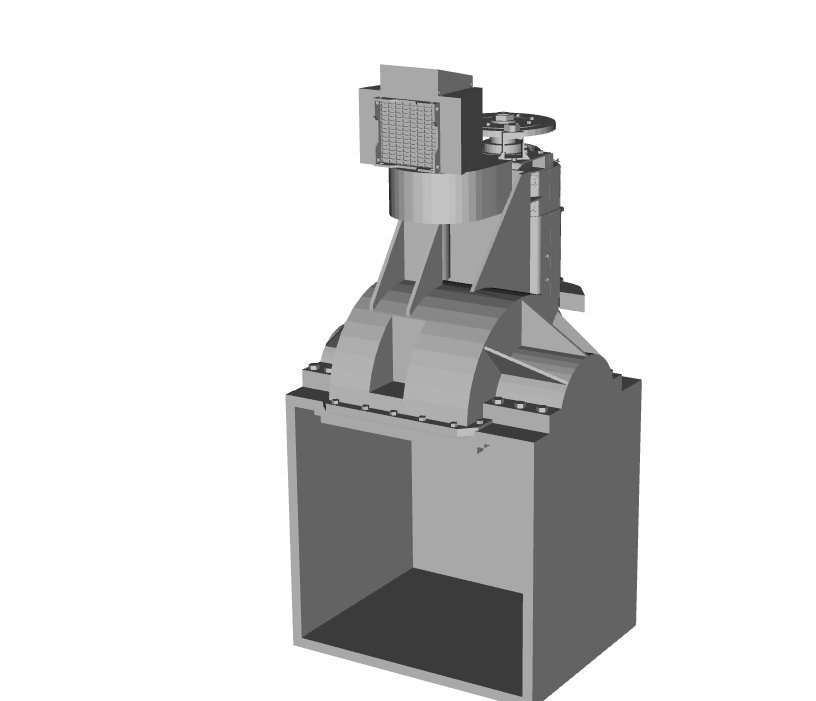 Source: ARC Forums (crackerjazz) Thereupon I looked again at the corresponding Crawler videos by Jürgen Ziegler (FADDA), 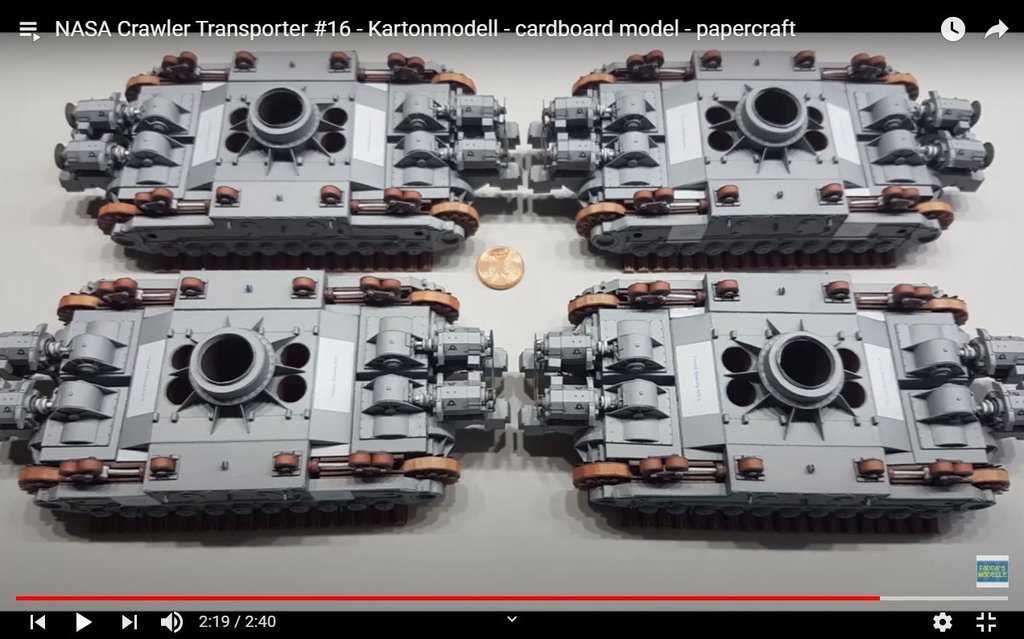 Source: Jürgen Ziegler (FADDA) - YouTube 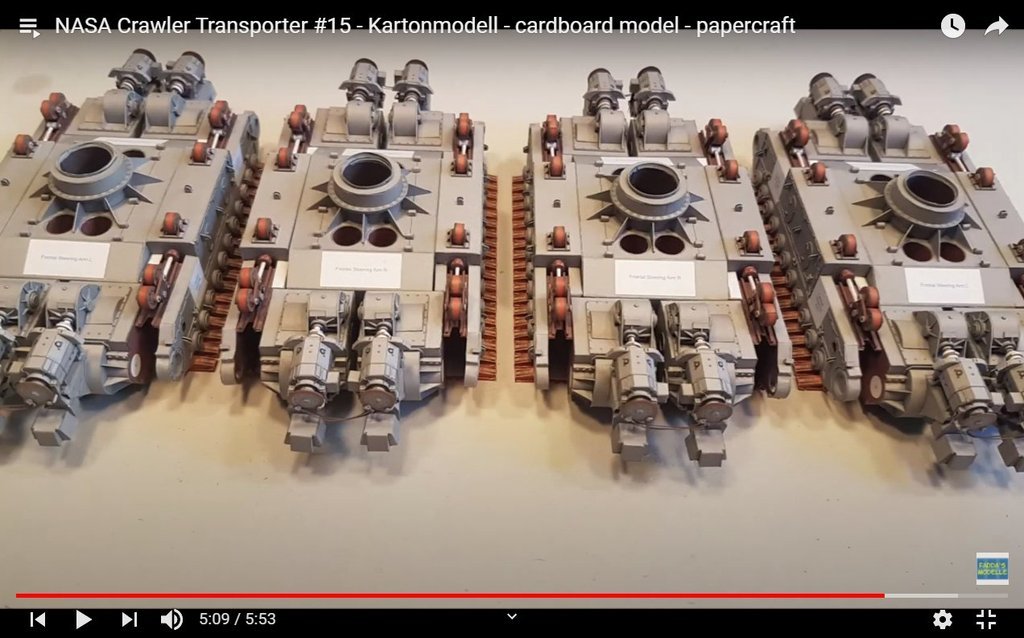 Source: Jürgen Ziegler (FADDA) - YouTube and have proposed him to leave the Rear wall open, as the case would be glued directly onto the truck's Center structure, as one can see in the two screenshots. He agreed to this suggestion and has uploaded his 3D model file to Shapeways. Unfortunately, the link shows the worst possible view of the model, namely from the bottom, which unfortunately almost completely covers the motor. But in the 3D view one can turn in any view you want, which I once did here.  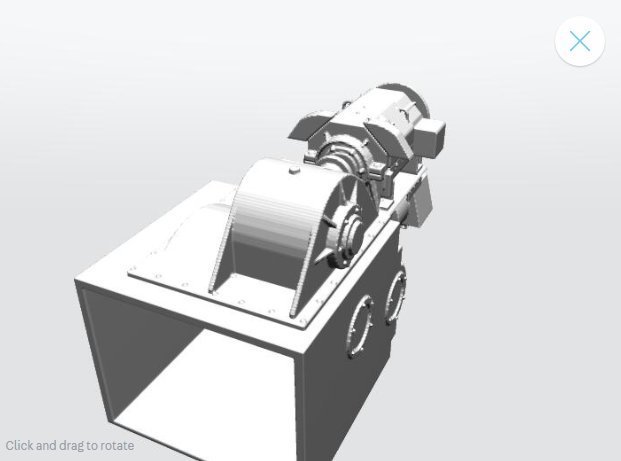 In the best print quality Smoothest Fine Detail Plastic one unit costs 10.01, and I've ordered one right away so that Shapeways' procedure of Processing and testing etc. can go started, which could lead to complaints about the printability of too small details, what we don't want to hope. BTW, I was shocked by the high Shipping costs, which are just as high as the production costs. Now we can just wait and keep our fingers crossed.
__________________
Greetings from Germany Manfred Under construction: Launch Pad 39A with Challenger STS-6 (1:144)
|
|
#2479
07-28-2021, 03:41 PM
|
||||
|
||||
|
Hello everybody,
as a result of an initial review (Processing) by Shapeways (SW) the model was initially put on hold by production because of design issues. SW wrote to me this: This marketplace model is not printable in this material per our design guidelines. The designer has been contacted and has 7 days to correct the model, or it will be removed from this order. SW has contacted the designer, my ARC friend Joe (crackerjazz), so he could decide what action to take on this model, they say. I hope that SW has given some tips on necessary changes/adjustments and have asked Joe to forward the SW answer to me, so that we can think together how we should deal with it. Perhaps the combination gearbox/motor is too complicated for 3D print.  If that were the case, one could have both parts printed separately. If that were the case, one could have both parts printed separately. So let's wait ...
__________________
Greetings from Germany Manfred Under construction: Launch Pad 39A with Challenger STS-6 (1:144)
|
 |
| Thread Tools | |
| Display Modes | |
|
|


 Linear Mode

