


|
|
|
#651
 01-24-2020, 02:16 AM
|
|||
|
|||
|
Quote:
Regards Kevin
__________________
Normally the most advanced tech I use is a pencil. 
|
|
#652
01-24-2020, 02:40 AM
|
|||
|
|||
|
1/24 internal structure of interstage 2-3
Dear all
So I have managed to find time to take the struts and ribs I made for the interstage 2-3 and try and glue them in place. However before doing this I first placed some roughly in place to see if they fitted. Here is a photo  On seeing this I just thought it looks clumsy, clunky and ugly. It seems totally out of keeping with the rest of the model. For example compared to the interstage 1-2 (but equally applies to any other part of the model).    The whole model is so well designed and finished (in my opinion) and it is clear what I have tried to do for this interstage is not remotely what the real thing would have looked like. It just spoils the model I think. So I have decided not to include these struts and ribs. Ideally what I want to do, is have this part of the model with a realistic internal support structure as well as the 4 retro rocket motors. The only picture I can find of the inside of this intersatge is a still from a video of an actual staging of a Saturn V and it is here Rockets and Propulsion – AEROSS and this is the still 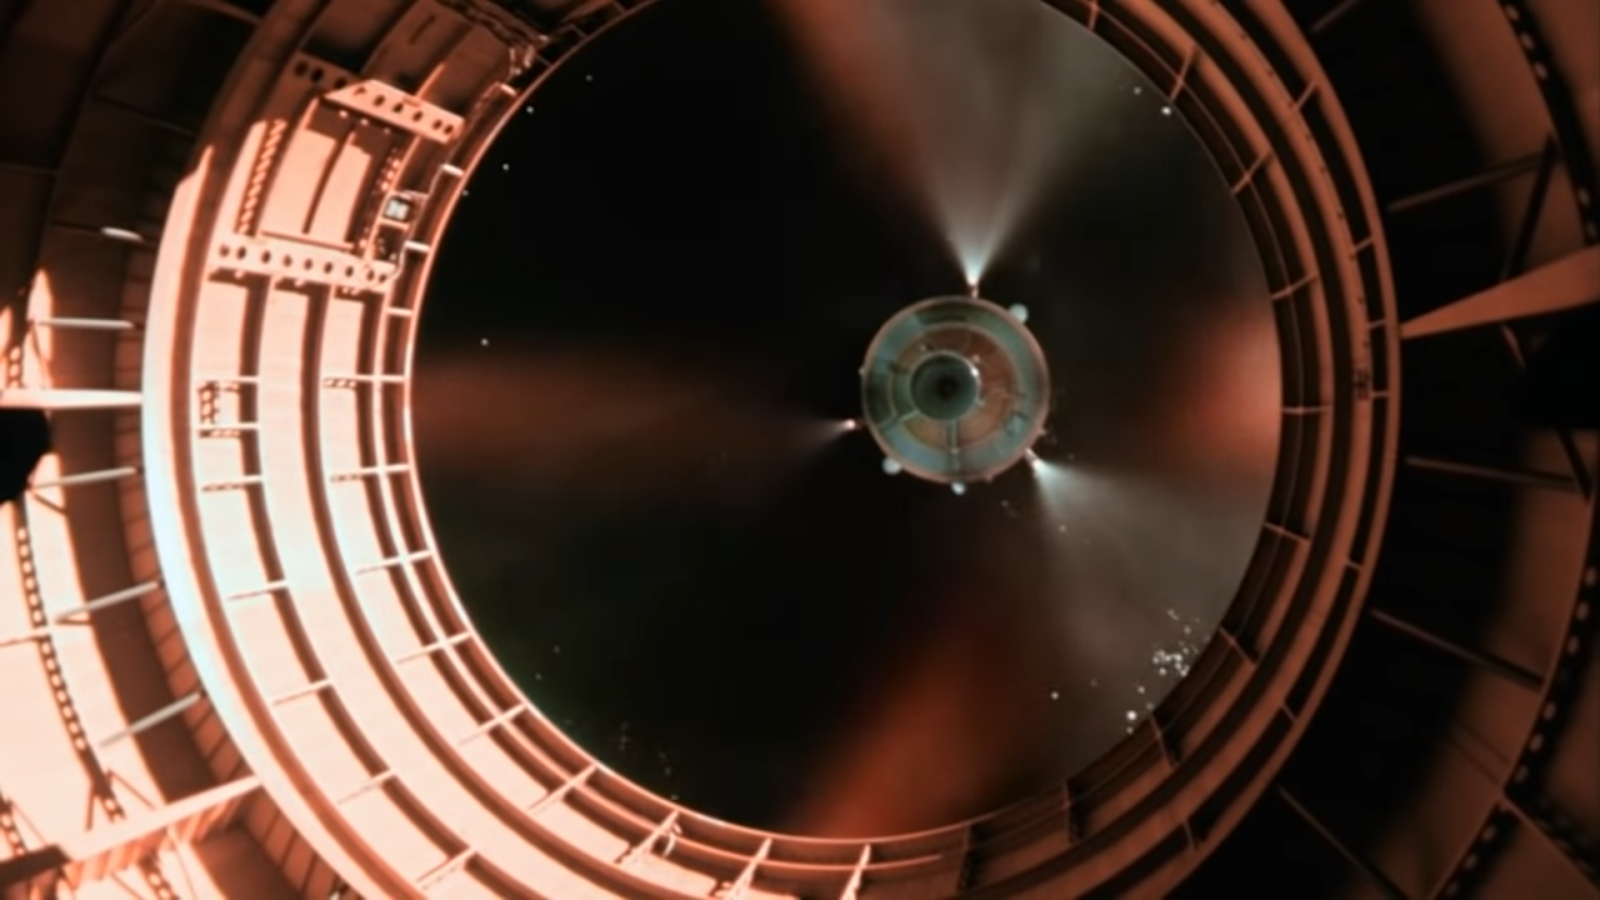 (the video is in a previous post) I have a memory (but who knows if it is real) of some photos showing the inside of this intersage but try as I might I cannot find them now. Does anyone know of any reference material which show the inside of this interstage? If you do I would be very grateful if let me know. So as things stand, this now means that inside of the interstage 2-3 will have no detail (which is exactly as per the downloadable model) and all that remains for the interstage 2-3 to be finished is the outside to have the sway targets and fairings of the retro rocket motors put on. So that is what to do next. Regards Kevin Kevin
__________________
Normally the most advanced tech I use is a pencil.
|
|
#653
01-24-2020, 02:51 AM
|
||||
|
||||
|
Must say You really succeed with your improvements. The section looks great.
__________________
Finished projects: RMS Mauretania 1/250; SS Canberra 1/250; Toyota Hilux Overdrive; Current projects: SS Michelangelo 1/250
|
|
#654
01-24-2020, 03:48 AM
|
||||
|
||||
|
Fantabulous build so far!
As most know I love this subject matter. I'll be researching my archive tonight for you . I think David weeks did a fantastic job on details in his blueprints. I think I have a set of those on a old drive. Please give me till Saturday morning and I'll have something that may help. Fly safe!
|
|
#655
01-24-2020, 02:35 PM
|
||||
|
||||
|
Archive Stuff
See attached.
Hope this helps. Fly Safe!
|
|
#656
01-24-2020, 02:36 PM
|
||||
|
||||
|
I'll do some more digging if you need more.
|
|
#657
01-27-2020, 01:40 AM
|
|||
|
|||
|
Quote:
Regards Kevin
__________________
Normally the most advanced tech I use is a pencil.
|
|
#658
01-27-2020, 01:48 AM
|
|||
|
|||
|
Quote:
Much appreciated Kevin
__________________
Normally the most advanced tech I use is a pencil.
|
|
#659
01-27-2020, 06:46 AM
|
||||
|
||||
|
No Prob!
I'll be watching this one. Just let me know if I can be of further assistance. Fly Safe!
|
|
#660
02-01-2020, 08:37 AM
|
|||
|
|||
|
This is an amazing build. I'm doing my own 1:48 scale and I've only just now realised how much was missing from the Lower Hudson Valley's version, especially with the S-II stage. A bit of extra printing to do! I also realised way too late that there was only one set of sway markings, so I guess I'll be covering up the other one with a strip of white paper xD
But your build quality far exceeds mine, you're an inspiration to us all. BTW, you mentioned far back you had the PDFs for the S-IVB IU. Can you please share them, as I'd like to have that addition to mine as well =D
|
 |
| Tags |
| apollo, moon, rocket, saturn v |
|
|


 Linear Mode

