


|
|
|
#121
 05-03-2020, 10:27 AM
|
|||
|
|||
|
Life-Size shoulders of Neil
Dear all
So it came to adding the shoulders to Neil. But before starting on the shoulders I added disks to where the mission patches holes were (the same method as for the umbilical holes). Then after this was done it was onto the left shoulder. Blimey! This turned out to be a glue and a half! First of all the parts were continuously changing from valley to mountain. Then they were flopping all over the place. Getting a start seemed hard, as well as deciding what order to add the parts was best. Everything seemed to need something that was not added to anchor it (if you follow what I mean). In the end I went for a bit of some part then a bit of another and so on, as what seemed best. Anyway I got there as you can see below     And here is the finished left shoulder  However what was the hardest thing about doing the shoulders (and I had never thought about this until now) was having to hold the torso in one hand in such a way that I could both see and reach the tabs I was gluing at that moment. To give you a feel, here a photo of the position I used for part of the right shoulder.  As you can see my head is quite a way from where I am gluing and it is a bit of a reach. I would get a couple of tabs done and then it was readjusting to find another position to do the next few tabs. Anyway, eventually managed both shoulders so the torso looked like this  So next was to join the back panel to the shoulders. Since the "ends" had to finish at a very precise point on the shoulders, I joined those tabs first and then "worked back". I took this slow to be as accurate as possible, since this would set the size of the neck hole and the curve of the back, which for the Apollo astronauts is a very characteristic and particular shape. Here is the result  So next up is the neck ring, which needs to be exactly the same size as the neck hole otherwise it will not join properly. It is looking okay but I will only know once I cut out the neck ring and try to join it. So onto that next. Regards and take care Kevin
__________________
Normally the most advanced tech I use is a pencil. 
|
|
#122
05-06-2020, 04:10 PM
|
|||
|
|||
|
Life-Size torso of Neil continued
Dear all
So it was onto the neck ring for Neil. A long part this turned out to be and needed to be spread over 4 parts   When formed into the ring it was still a big part as shown below, with Gene for scale.  I then cut out the (large) former, still using 2 mm thick card. I really took my time since I though it important it look as round as possible. I so wanted a good fit, so slightly nervously glued it in place  As you can see it went in like a dream. Now just to attach it to the torso. What a nightmare! Just to see each tab to get glue on it was difficult. Some of them seemed impossible to hold the torso, see the tab and squeeze the glue. Here is one "typical" position  I would have to use a combination of a hand, elbow, head and even my nose at one point, to "hold" the torso, sometimes peering out the edge of my eye. The other arm fully outstretch holding the glue near the bottom of the tube, coming in at odd angles (through the arm hole in this case). When I tried to squeeze the glue tube, I could just about manage it and my hand was shaking all over the place. I really thought a few time it was not going to be possible. However, down to a lot of luck I just about managed to get glue on all the tabs. So here is the neck ring attached looking from underneath  and then looking down through the neck hole  I am very relieved. There were a couple of times I though that joining the torso parts together to prove to be a mistake and not be manageable. Regards and take care Kevin
__________________
Normally the most advanced tech I use is a pencil.
|
|
#123
05-06-2020, 04:21 PM
|
|||
|
|||
|
Some photos of life-size Neil
Dear all
So after the stress of the neck ring of Neil I took some time to photo Neil's torso.     I like the way the model has that iconic Apollo space suit shape.Nothing seems to have been lost in the scaling up process. It really is a wonderfully designed model I think. I then decided to indulge a little bit. So here is my tea mug, Gene and the 1/4 shins, knees, thighs and torso of Neil (resting on each other).  And then here they are all again along with the life-size version of Neil.  I hope you like the photo Regards and take care Kevin
__________________
Normally the most advanced tech I use is a pencil. Last edited by Algebraist; 05-06-2020 at 04:22 PM. Reason: spelling corrections
|
|
#124
05-06-2020, 04:50 PM
|
||||
|
||||
|
Shaping up nicely, sir.
And nice photos
__________________
A fine is a tax when you do wrong. A tax is a fine when you do well.
|
|
#125
05-07-2020, 08:11 AM
|
|||
|
|||
|
HOLY CRAP that is awesome
|
| Google Adsense |
|
#126
05-07-2020, 04:28 PM
|
||||
|
||||
|
Dear Algebraist:
Are you keeping track of how many sheets of card stock you are using on this Project and how much of each thickness? My fingers are cringing just thinking of all the cutting. you talk about 2mm material with what are you cutting that with? Will you take a picture of your project tool kit? Wonderful, Miles
__________________
If man could be crossed with the cat it would improve man, but it would deteriorate the cat. - Mark Twain Notebook, 1894
|
|
#127
05-11-2020, 12:35 PM
|
|||
|
|||
|
Quote:
Regards and take care Kevin
__________________
Normally the most advanced tech I use is a pencil.
|
|
#128
05-11-2020, 12:37 PM
|
|||
|
|||
|
Quote:
Regards and take care Kevin
__________________
Normally the most advanced tech I use is a pencil.
|
|
#129
05-11-2020, 01:05 PM
|
|||
|
|||
|
Quote:
So far to cut out all the parts for the shins, knees, thighs and torso of both astronauts (which includes some bits not yet assembled like pockets etc) has taken 268 sheets of A3 paper. All these parts have been from the same type of paper which is 250 gsm. When starting this project I knew it would use quite a bit of paper so I bought a bulk load of these A3 sheets, namely one box which contained 6 packs of 125 sheets per pack from here https://purelypaper.co.uk/Image-Digi...m-Box-6-Packs/ Here is a picture of a pack 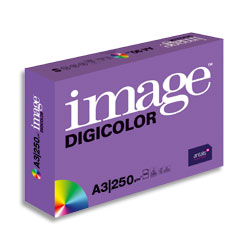 I think the model will use most but not all of this box of paper. I know it was a lot of money to spend on the paper, but looking at how much it costs per hour of fun building the model, it is very good value I think (and will probably cost less than 10 pence per hour!) It has turned out to be a very "efficient" model too (more by good luck than judgement). Virtually all of the off cuts have been used to make the inner two supporting layers and strengthening strips. Having now read your question about the card thickness and cutting it, I will put together a couple of photos as requested and answer your question next time I log on. Regards and take care Kevin
__________________
Normally the most advanced tech I use is a pencil.
|
 |
| Tags |
| apollo, astronaut, buzz aldrin, moon, neil armstrong |
|
|


 Linear Mode

