
 |
|
#11
|
||||
|
||||
|
More on the Hubble.
Something I missed to tell is that the diagrams have an X in the center on each ring and circle... well, sort of... because, as Indy said to his pupils... the X not always marks the spot, and in this case, the X do not mark the center. So my Olfa circular cutter didn't like the X's. I had to calculate the center of one ring and circle, and so I got the Olfa cutter work for me. Alas, if you use scissors or the good old cutter, you won't have this problem. Let's give this Hubble some brains. The computers on the telescope have too much work, specially on the image analysis and making the Hubble stable. Here they are... I'm adding a door on each computer section in the last picture. Instructions say "optional" for the doors, but I really recommend them. |
|
#12
|
||||
|
||||
|
Great work! Looking forward to more!
Yogi |
|
#13
|
||||
|
||||
|
Milenio,
Excellent thread as usual. Your pictures tell the story well. |
|
#14
|
||||
|
||||
|
Gerardo,
There are several ways to calculate the center of a circle. Can you share with us what method you use? It will be great info for those who don't know how as well. Thanks.
__________________
Last Build - 1:48 F1 Engine Current Build - Mammoth Tank (Scale unknown) Next Build - P-3 Orion (VQ-1 livery) |
|
#15
|
||||
|
||||
|
Thank you very much, Yogi, SAustin for the encouraging words!
Gideon, I traced a couple of tangents to the circle, and made circles from there. An image worth...  To bring up the Engineer in you (or to remember primary school), if you trace a couple lines (3 would be better) inside the circle, and trace a perpendicular line from each line's center (90 degrees to the line), this perpendicular lines will match the center of the circle. The image I found it on St Google, because I don't photographed mine. But same idea. Also same idea that Eratosthenes of Cyrene (276-195 BC) found the size circunference of Earth... sort of. More on the Hubble. 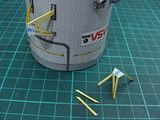 Here we have more of the Grapple fixture, used to attach the Canadarm on the Shuttle. Here we have more of the Grapple fixture, used to attach the Canadarm on the Shuttle. 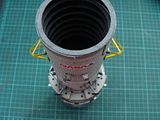 A view from above... or below? Mmmhh... does the Hubble has an "up"or "down"? A view from above... or below? Mmmhh... does the Hubble has an "up"or "down"?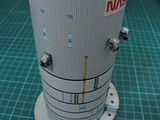 Some clamps installed. Some clamps installed. 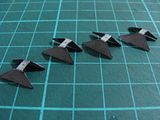 These are the magnetic torquers bases. These are the magnetic torquers bases. 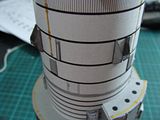 Installed on the exterior, and no problems here. The only trick is to have the right angle of each base, so the torquers go from one to the other. Installed on the exterior, and no problems here. The only trick is to have the right angle of each base, so the torquers go from one to the other. 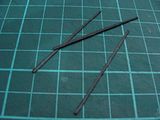 The magnetic torquers are pieces of paper. I painted them black. The magnetic torquers are pieces of paper. I painted them black. 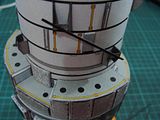 One magnetic torquer installed. One magnetic torquer installed. 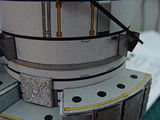 A detail. A detail.
|
| Google Adsense |
|
#16
|
||||
|
||||
|
Nice set of pictures and looks like a nice build too.
I have downloaded this and done some cut outs but not yet started it. Your pictures are going to be a great help when I get started. Many thanks for these. Jim |
|
#17
|
||||
|
||||
|
Hi Gerardo, how are you compadre? Your build looks very nice and sharp. Thanks for the tips about the build.
__________________
Mate Amargo models. |
|
#18
|
||||
|
||||
|
Thank you very much, friends! I really hope my thread would help other modelers of this Hubble.
Now the Hubble door. The first photo shows the hinges to use for the door. The second photo shows a couple of little triangles beside each hinge that give the door its exact angle. The door itself has a pyramidal part where the hinges and the little triangles go attached. The door in its position. A word of warning. This will help you to put the door in its place, but it won't help to keep it there. What I did is to insert a couple of metal wires in the hinges and into the pyramidal part of the door to keep it stable. I really can't say if and how other modelers tackle this problem. But my "wire" method worked, and the wires won't show. |
|
#19
|
||||
|
||||
|
These section is for the solar panel arms.
First, I make the solar array connector. What I did was to open the base (square) of the connector with a punch-out tool, then insert the little cylinder on it. Ton's instructions say that you just glue the cylinder... but that way it won't support the arm. In fact, I modified the building of all the solar panels arm section. Maybe somebody else can build it exactly as Ton's instructions say. |
|
#20
|
||||
|
||||
|
This is what I mean by "modify" the building of this model.
Photo 1. Instructions say that the connectors of the solar panels are made of a couple of circles, one with a slot. What I did was to laminate each of these 2 pieces with 3 layers of cardstock. Photo 2 and 3. Directions mention a narrow tube of paper. Again, the weight here on Earth of the solar panel arrays were going to be so big that they would fall as soon as I put them on the model. My modification (and yes, I'm guilty of not being purist here) was to put a plastic coffee remover... yes... plastic!! I know!! Don't say it...! Anyway, it does the job. Photo 4. Not happy with the plastic sin in my model, I also added a wire to the solar panel arm, that goes out for the solar panel array to be installed. Photo 5. As you can see, up to this point I haven't glue the 2 sections of the model. |
| Google Adsense |
 |
|
|