


|
|
|
#21
 10-26-2010, 11:03 AM
|
||||
|
||||
|
Your ship looks great so far, I like the feature of thinking ahead for the display base, as the wood modelers often due (I think due to the heavier weight of the materials, though)
(I have had to resort to putty and paint to get a fair hull myself, but the same needs for sealing the paper apply perfectly if you use a water based latex putty...)
__________________
regards Glen 
|
|
#22
11-18-2010, 09:21 PM
|
|||
|
|||
|
The hull goes green
Hi,
I have been diverted by a funeral (bad) and a wedding (very good) but I am back to see what I can do with the hull. I am going to first show what I have finally ended up with for the green hull and then trace back my steps and missteps. First, a few pictures: 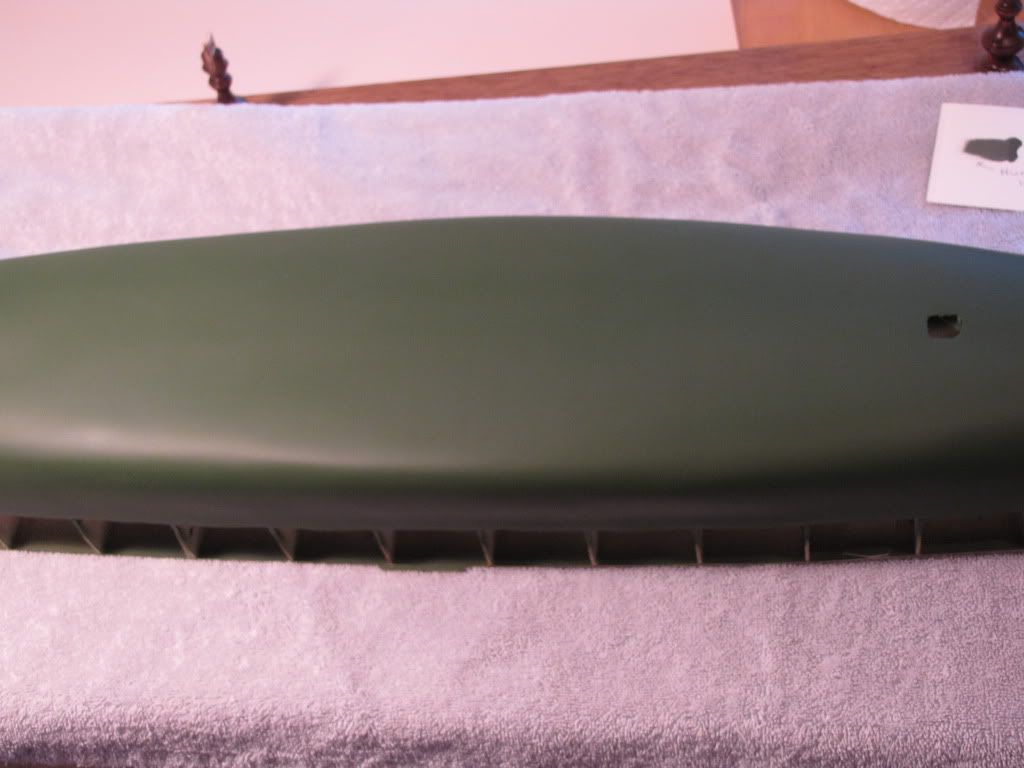 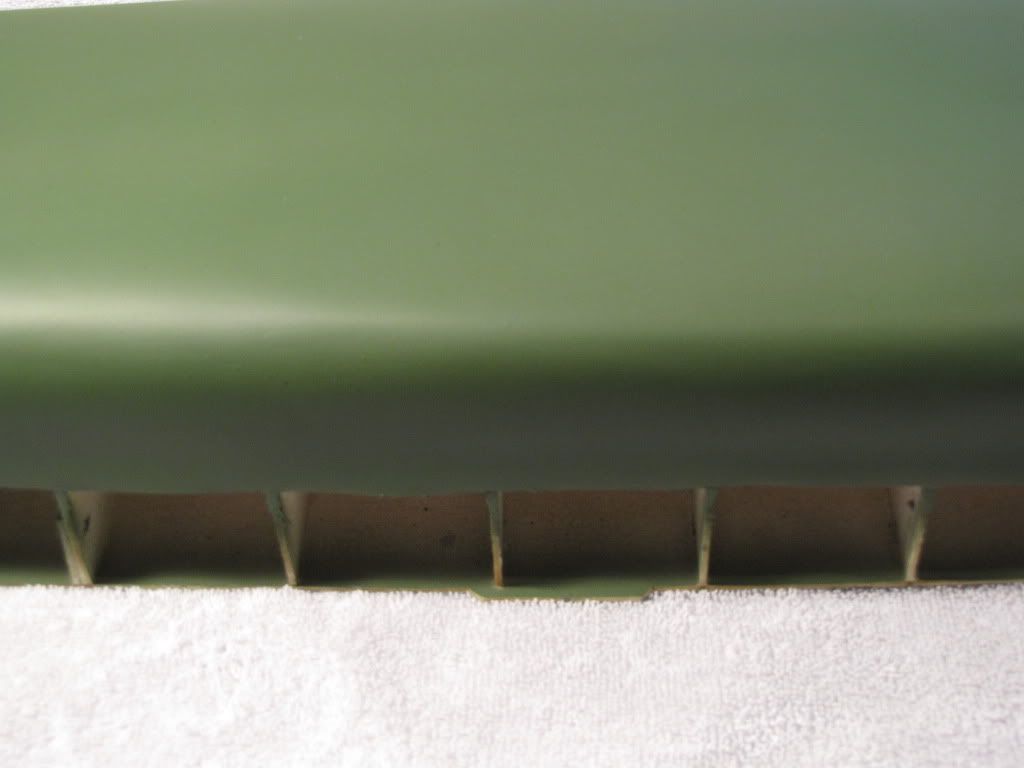 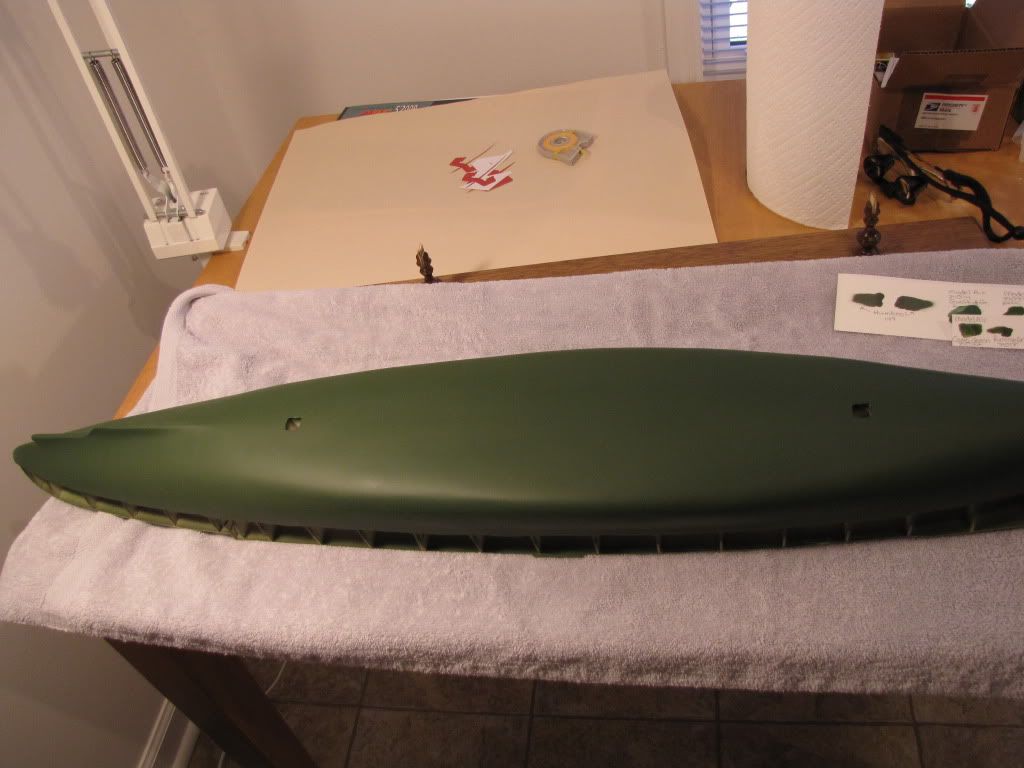 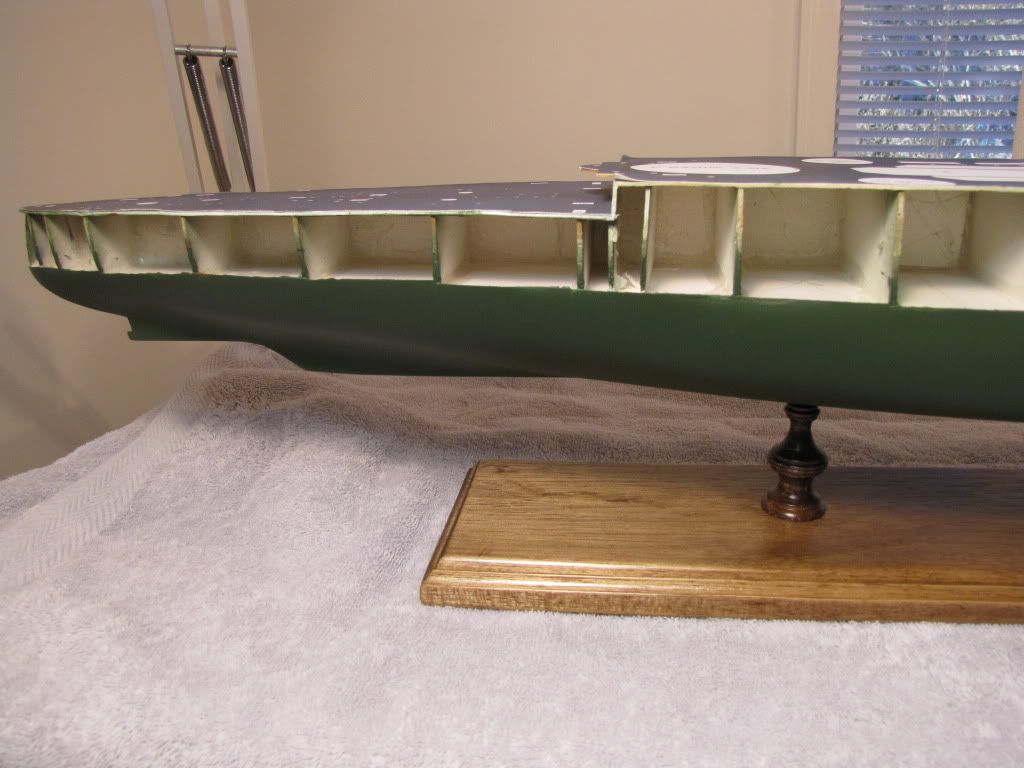 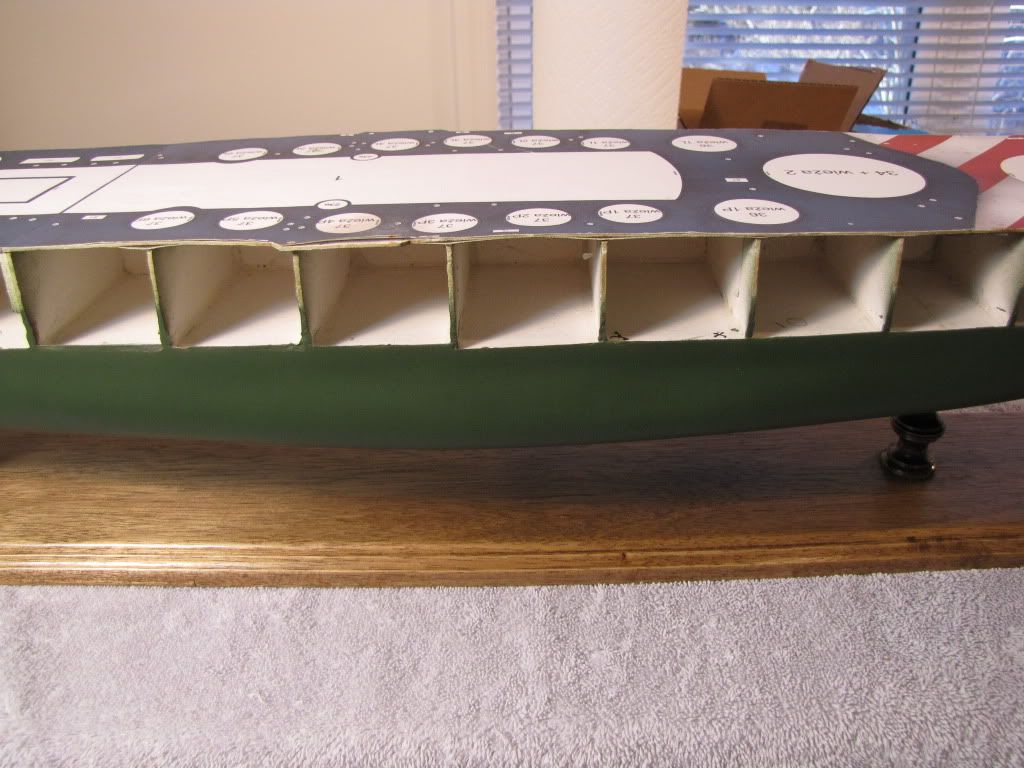 I used Vallejo Model Air Camo Green #71022 because I liked the color as it appears under the lights where it will be displayed. I do not have a clue if it is even close to the original paint color of the ship. The only reference to a specific brand and stock number for a paint for the Roma hull was Humbrol enamel 149. The Ship Model Forum • View topic - Calling all RM Vittorio Veneto-class fans! Once I was able to get my hands on a tin of Humbrol 149 and painted a test spot of color, I realized that it was not going to work for me. Shown below is the test strip with Humbrol 149. 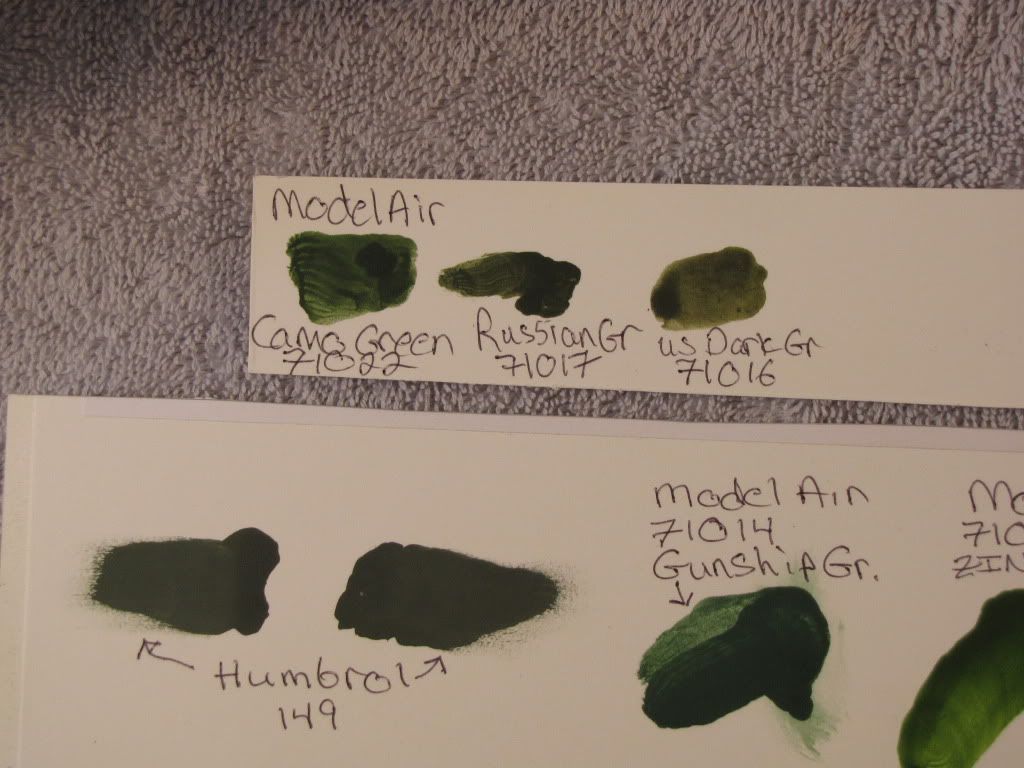 The color was a very, very dark black green under incandescent light. I don't think anybody would even think of it as a green hull if I used this color. (The color shift of greens under different types of light can be very dramatic whether in a painting or, as I am finding out, on a model.) Again, I went with the model air camo green because it was a nice looking green (to me) without too much shift to yellow or blue. Now back to the how I handled the hull. I used soft body Liquitex paint for my initial coat of acrylic paint. It really seemed to make the seams and undulations of the paper stand out. With the light glancing across the hull you can see the problems. 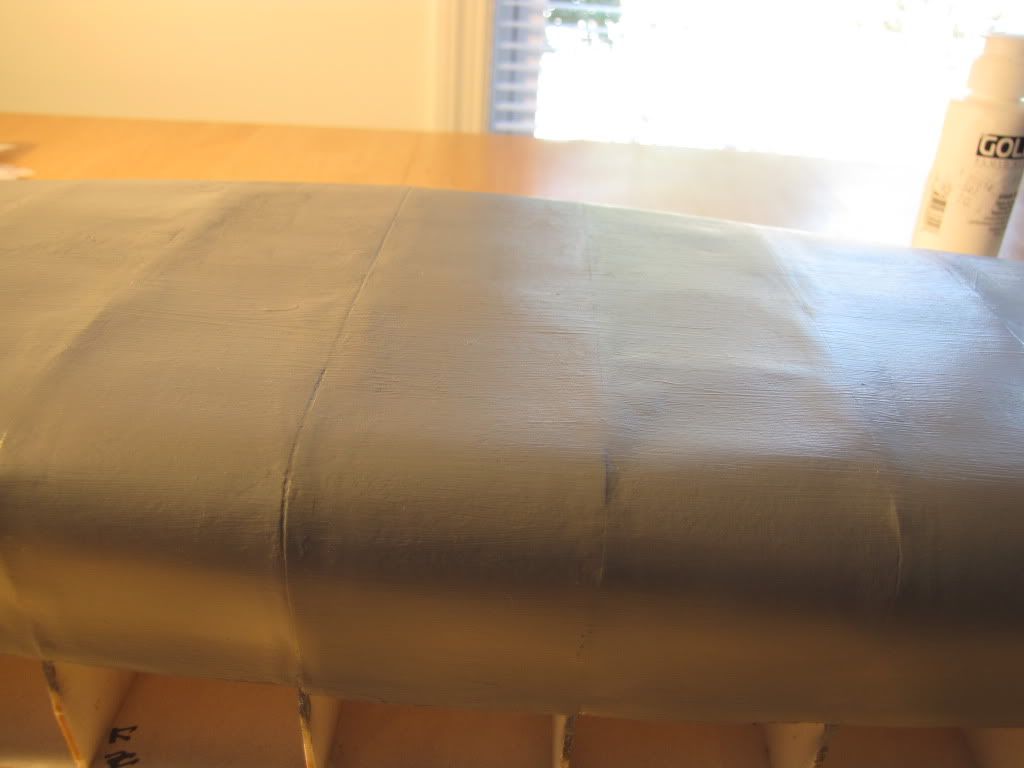 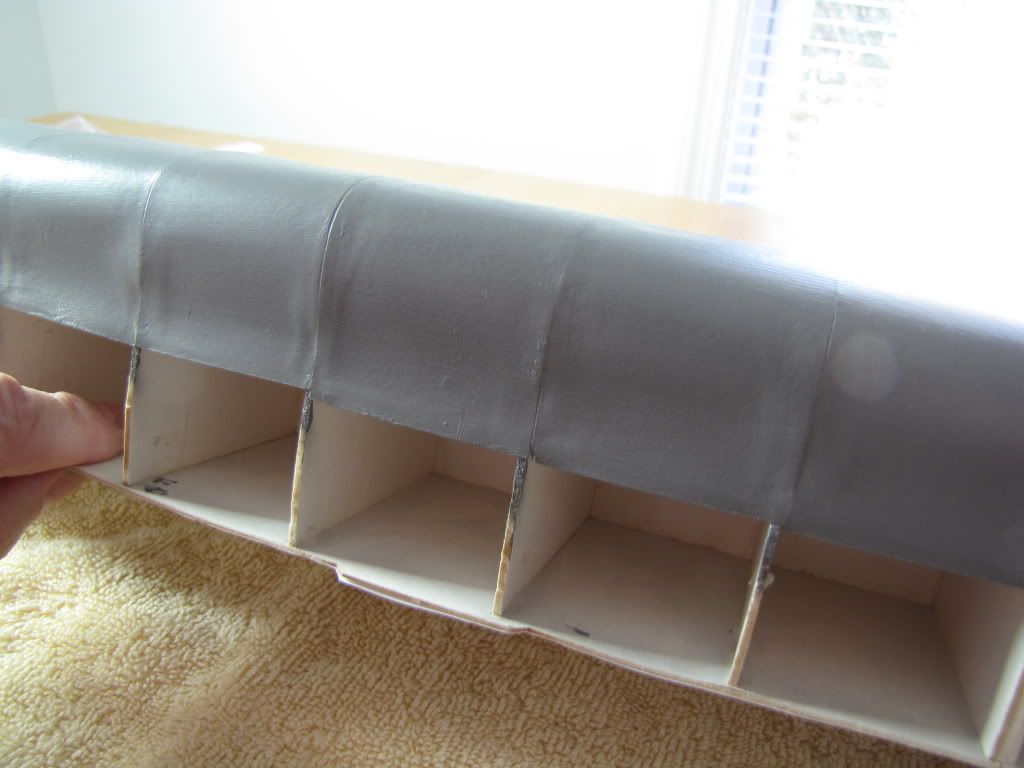 I have to add that under normal lighting conditions the hull did not look that bad. I used Liquitex acrylic ultra matte gel and a palate knife to fill the open seams and smooth out the undulations. In my first attempts, I applied the material fairly thickly.  This thick application led to a lot of unnecessary sanding so I soon switched to applying multiple thin layers to get the contours I wanted. This was much quicker and easier to smooth down. Then I put on a few layers of Liquitex soft body green (I was using up the last of various greens I had on hand so you will see different hues in places.) I repeated the application of the Liquitex gel and sanded again. 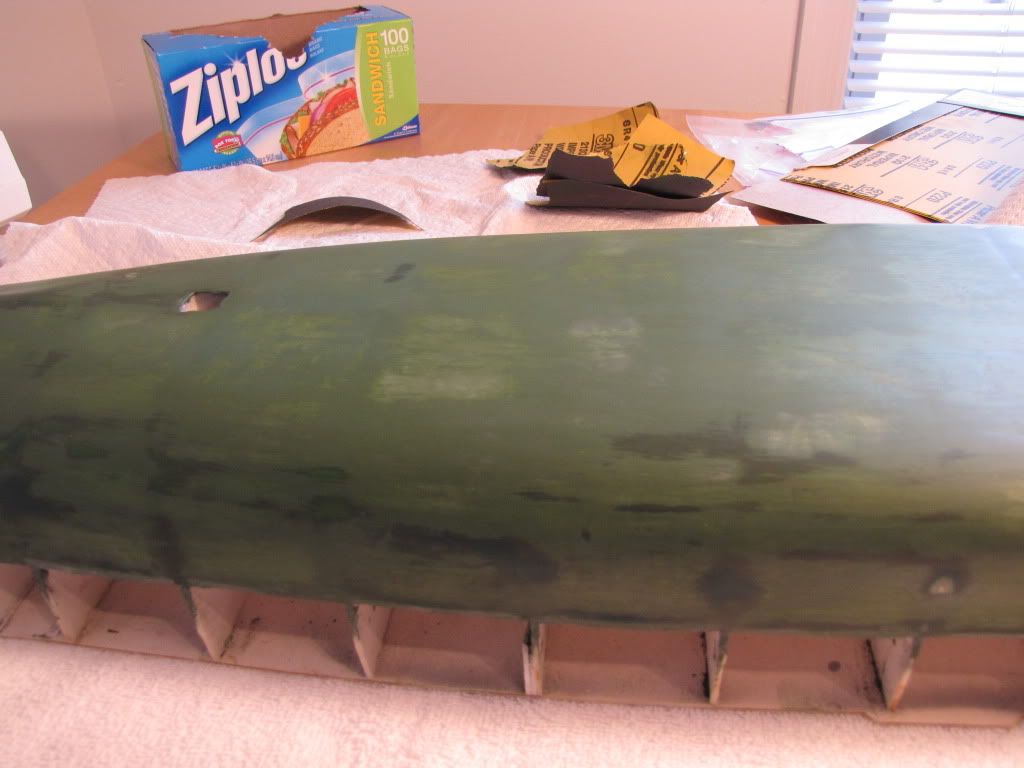 Finally, I airbrushed the Model Air Camo Green. The improvement in the appearance of the hull was I thought fairly dramatic. But not perfect! In a glancing light some seams do show (see toward the stern). If I was a perfectionist, I would repeat the process with the Liquitex gel but I am going to stop here and accept some imperfections. 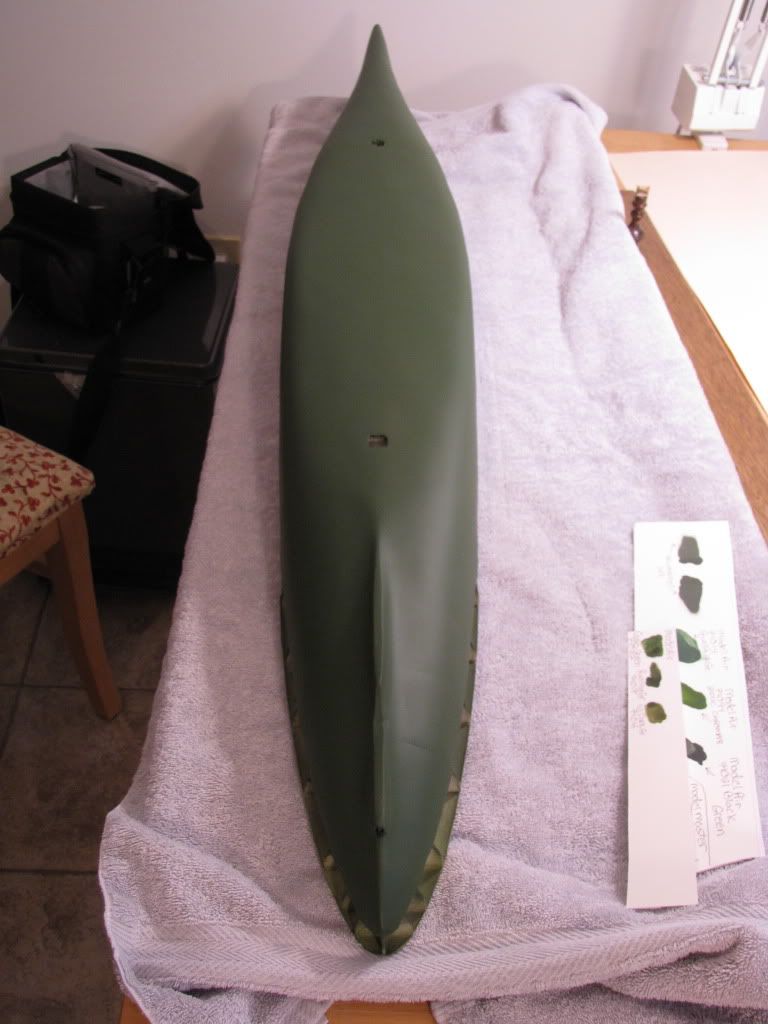 . .Along the way in preparing and painting the hull, I experimented with different viscosities of acrylics for treating the seams and undulations of the paper. If you have never handled different viscosity acrylics, it is an interesting experience as there are paints that are very thin like model master acrylics, somewhat thicker like Liquitex soft body acrylics (this is like many craft acrylics), thicker like heavy body Liquitex acrylics and very thick like Liquitex ultra matt gel. 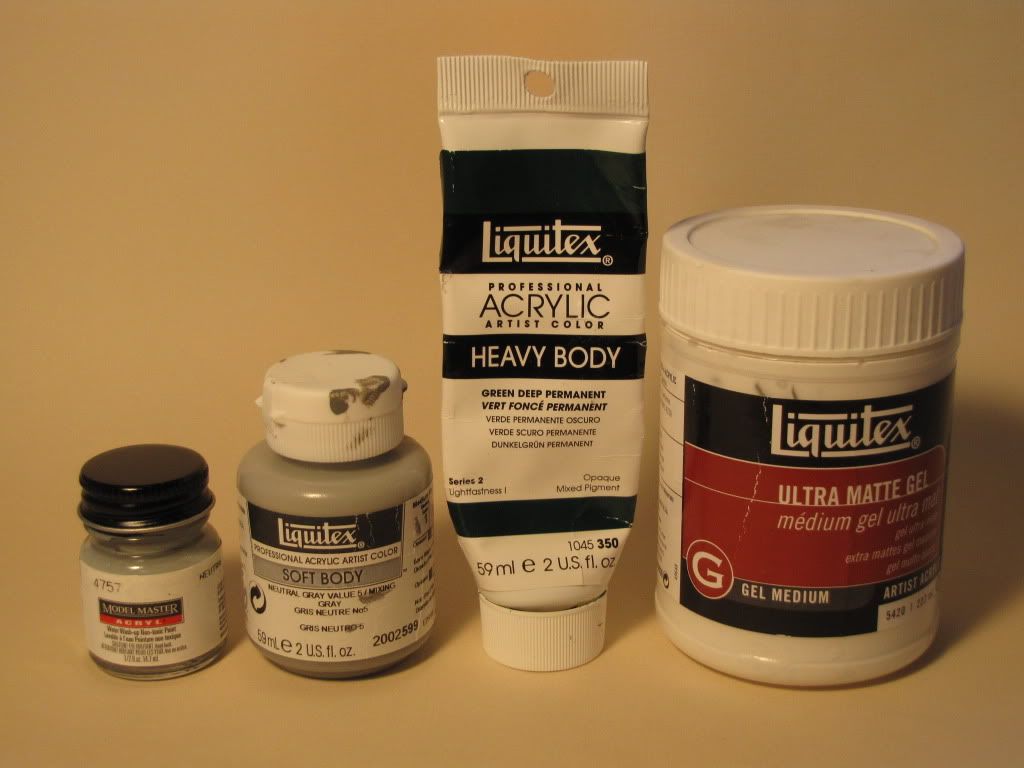 The heavy body acrylics and acrylic gels can be built up in thick layers using palette knives or even the edge of a credit card. 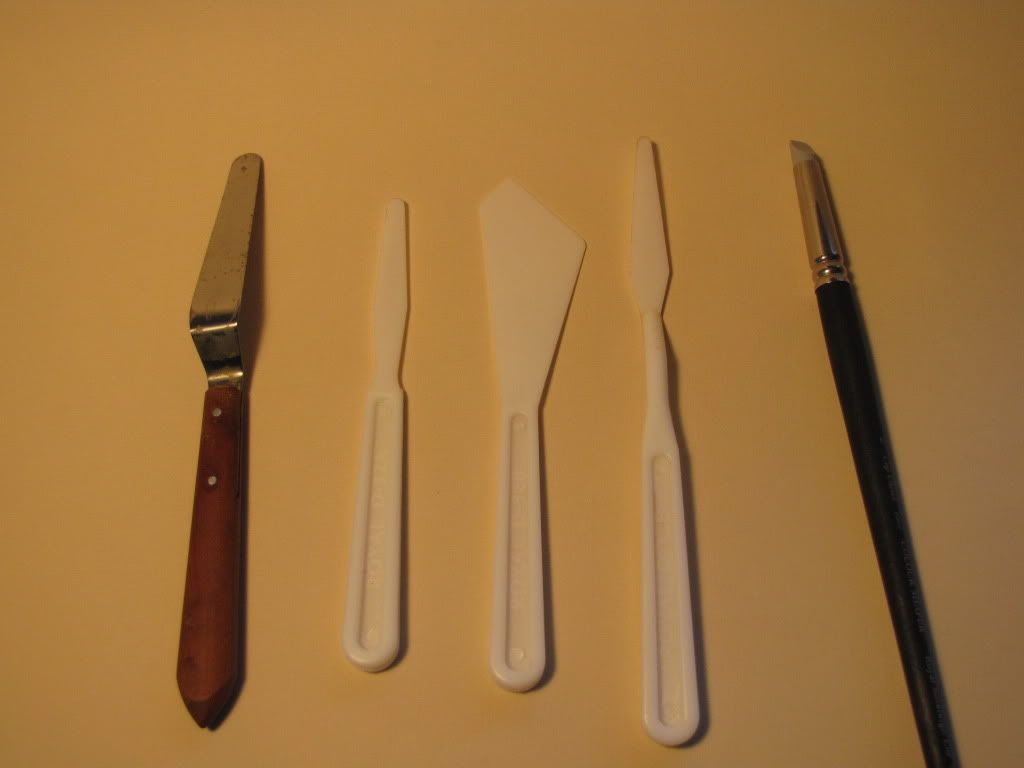 The plastic palette knives (center) are very inexpensive at any hobby shop and offer the advantage with acrylics that they do not rust. The real advantage I found of using the Liquitex ultra matte gel on the hull was that it sanded much more easily than, for instance, the heavy body acrylics. It is very dense and, with the thicknesses I used on the hull, did not shrink much. It bonds very strongly to underlying acrylic paint layers and can be easily painted. I don't know if it offers advantages over other products that can be used to fill seams, etc but with a little experience I found it to be easy to use. Next: Hull parts such as the rudders and first attempts at weathering the green. Greg
|
|
#23
11-19-2010, 07:27 AM
|
||||
|
||||
|
That's pretty stellar. You can't see the seams without your direction there at the aft. Major accomplishment. One of the better sand-fill-n-paint jobs I've seen in a while. Well done.
Good choice on the green. Sometimes you have to take artistic privilege to get the proper tone. There is a such thing as "scale color".
__________________
Recently Completed: 1/700 USS Nevada (resin) In the Shipyard: 1/350 USS Washington (resin) On the Horizon: Dom Bumagi USS Helena 1/200 (60% complete)
|
|
#24
11-19-2010, 07:55 AM
|
||||
|
||||
|
Heck of a job there Greg. I know how you must have felt when you saw all those ripples and edges jumping out at you. It looks like you pretty well whipped it into shape though.
I have a couple of auto body putty spreaders that are flexible soft plastic that taper to a fine edge that I use to apply fillers for big jobs like that. You can usually find them in sets of three at places like Pep Boys, Auto Zone and such.
__________________
Jay Massey treadhead1952 Las Vegas, NV
|
|
#25
11-19-2010, 09:55 AM
|
||||
|
||||
|
Hello Greg,
I think that is a beautiful hull. Very instructive. Mike
|
| Google Adsense |
|
#26
11-20-2010, 06:15 AM
|
||||
|
||||
|
Hi Greg,
rarely i've seen such a smooth hull! Very good work on that, congratulations! And most valuable info on the Japanese book drill, thank you. Maybe, i'll try that too. Until now, i used a so-called "Punch&Die-Set" where you put the hull with the portholes between a u-shaped metal plate and an acryl-glass cover. Then you use a stencil in the desired size to "punch out" the hole. However, it's not that accurate as your device, as you can have difficulties placing the stencil on the exact location. I attached two pics of this set and would be grateful for your opinion when comparing both devices. Keep going, this is a wonderful and informative report  Kind regards Lars
__________________
"The quiet ones are the ones that change the universe, the loud ones only take the credit."
|
|
#27
11-24-2010, 06:01 PM
|
|||
|
|||
|
Hi guys,
Thank you for your comments. The question of using a punch and die set versus a book drill is a good one. Before I purchased a book drill, I had intended to use a Waldron punch and die set but when I went to use it on Roma I realized there was a problem. Here are a few photos of the Waldron punch and die set for those who have not seen it. 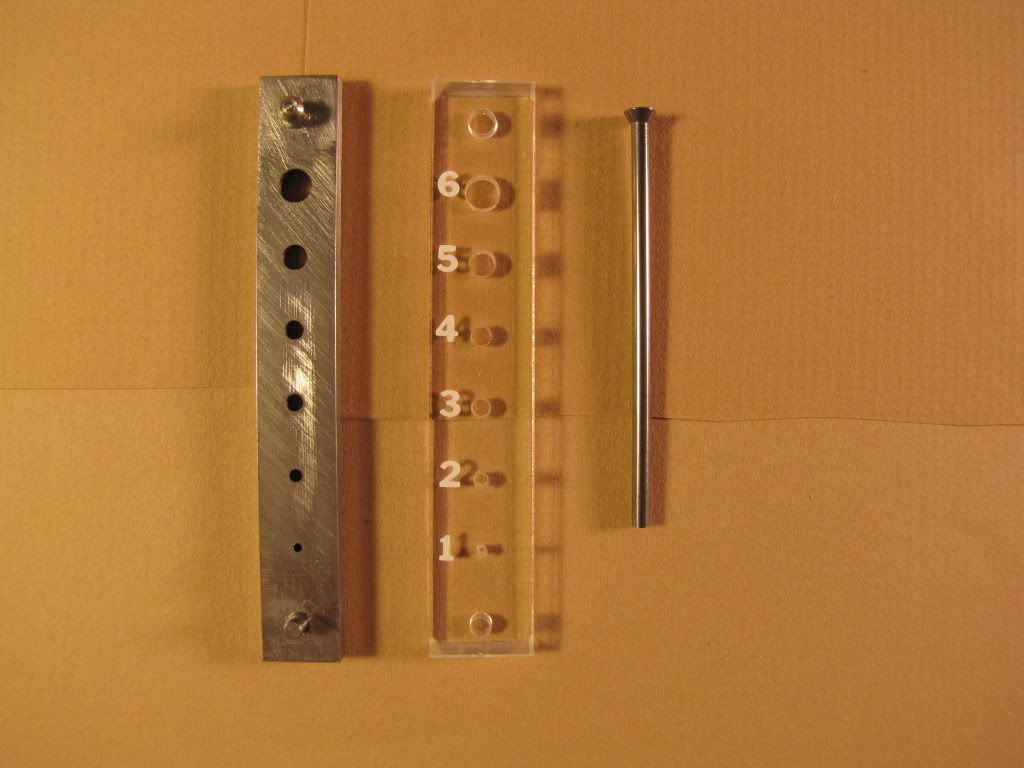 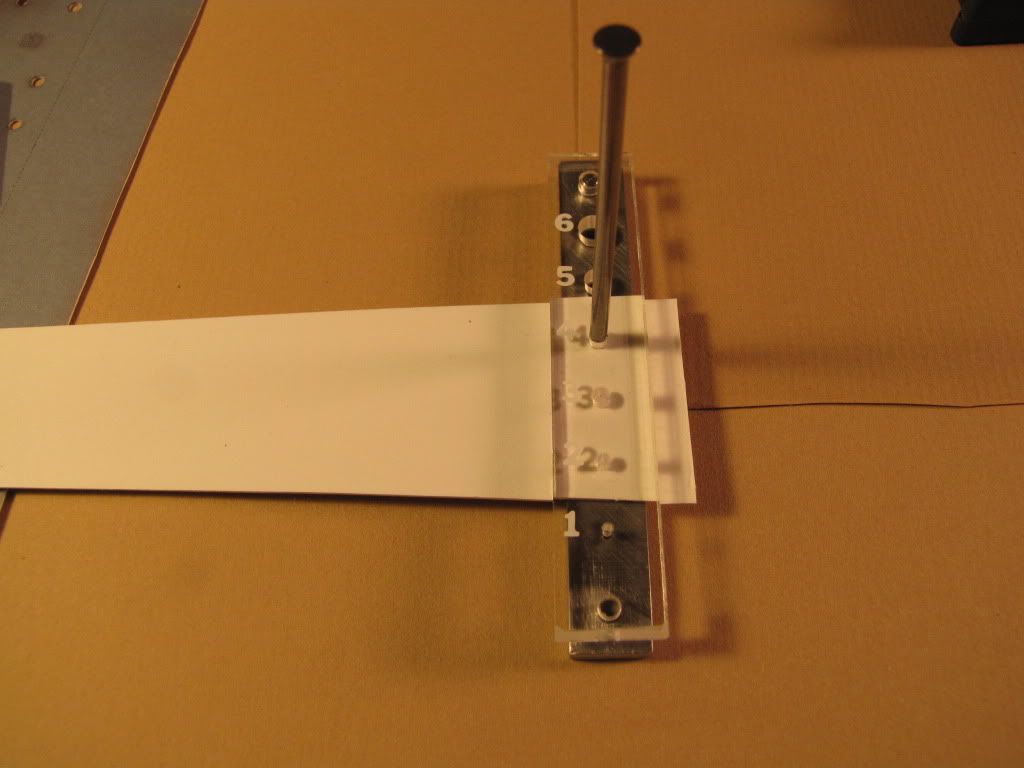 The pins at the ends of the metal piece must be inserted into the plastic piece to guide the punch into position. When I went to try to punch the port holes in the Roma, I found that the paper pieces were so wide that they blocked out one of the pins needed to position the plastic guide for the punch. 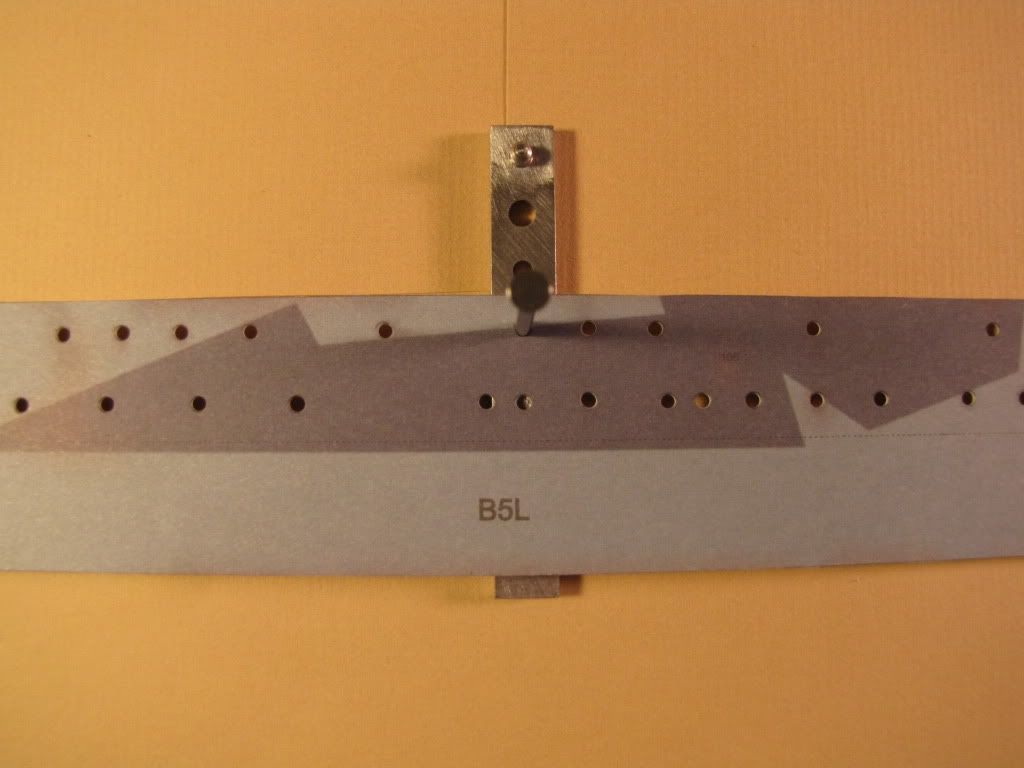 In the picture above the guide pin at the bottom is blocked by the paper. So there was no way to position the plastic guide. There may be a work around for this problem but I was stuck and bought the book drill. Lars, Your punch and die set looks different so it might very well work in this case. In general I think positioning the book drill tip is much easier and quicker than lining up the punch and die set but I don't have enough experience to make an informed recommendation. Best wishes, Greg
|
|
#28
11-25-2010, 03:18 AM
|
|||
|
|||
|
Hi Greg!
That is one of the smoothest hulls I've ever seen!  Impressive! Really great work and good instruction! Thanks! Impressive! Really great work and good instruction! Thanks!Regards, Radek
__________________
On the Ocean: Koga Elbląska, Mayflower On the Rollfield: Horten GO-229 In the Shipyard: Neptune, Een Hollandse Tweedekker In the Garage: PANHARD AML20
|
|
#29
11-25-2010, 10:32 AM
|
||||
|
||||
|
Hi Greg,
thank you for your descriptions and pics of your "P&D-Set". I don't have the problem with the pin hindering the card as there are only two pins to fix the glass-plate at one end of the profile. The other end stays clear to shove in the cardboard there. I read that your japanese drill uses tips for 1,5mm and more but so far, i discovered only 2,0mm and more while cruising the WWW... As i build in 1:250, 1,5mm (or even 1,0mm) would be perfect and i'd really consider this item for christmas But i don't know, if any shop in germany sells this kind of thing... If you know a source, i'd really appreciate it. Thanks again for the additional infos. Kind regards Lars
__________________
"The quiet ones are the ones that change the universe, the loud ones only take the credit."
|
|
#30
11-25-2010, 11:37 AM
|
||||
|
||||
|
And one other question (sorry): Do you use a speacial underlay when cutting out the holes with the drill or do you use the common modelers pad?
__________________
"The quiet ones are the ones that change the universe, the loud ones only take the credit."
|
| Google Adsense |
 |
|
|


 Linear Mode

