


|
|
|
#21
 07-22-2012, 04:15 PM
|
||||
|
||||
|
Some Progress...
Thanks, Jeff!
The next installment follows: As could be expected, the next phase of the work was to glue the hull spine (as it is called in the instructions) to a thin cardboard backing. I didn't wan't it to be too thick (nor the backing of the bulkhead formers) so I used card that is just under 0,5mm, making the finished parts about 0,5mm in thickness. It's really good to work on this marble board, and easy to align everything perfectly. I let it dry between two plastic rulers, which I fixed in place with the clamps in the background. The result was completely straight. I also added backing to all the bulkhead formers, and as you can see, I have added tabs ('feet'!) to the bottom, to add structural strength and, hopefully, to avoid twisting or bending of the finished hull: 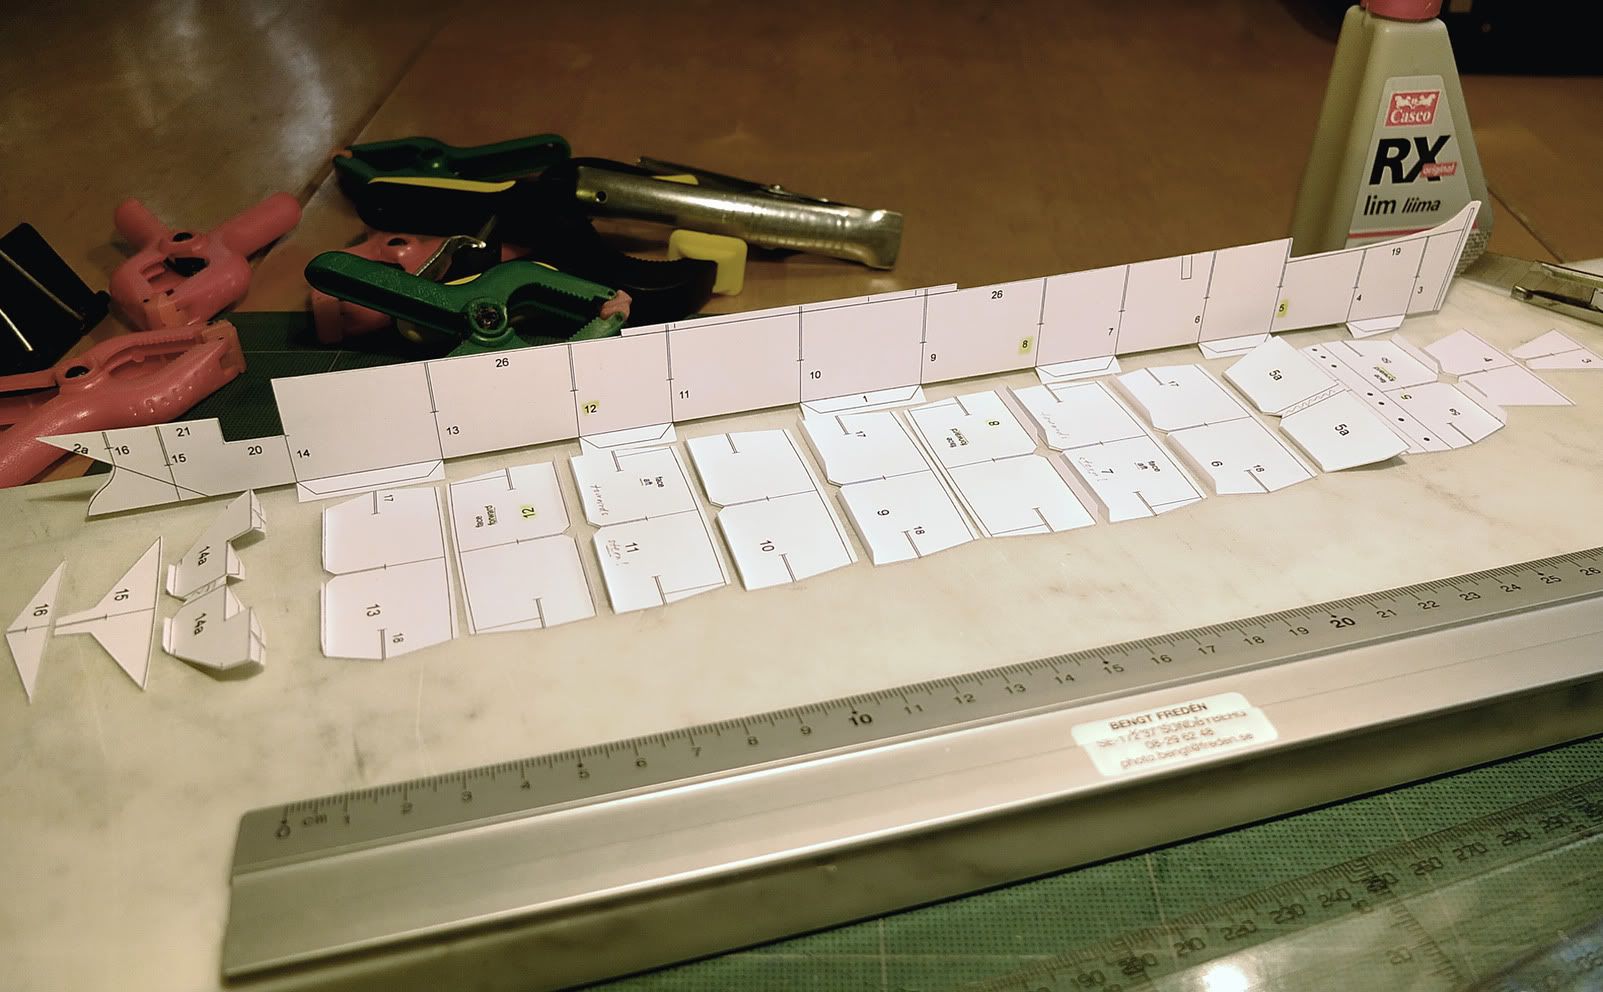 After a break (and a meal), all the glued parts had dried and the outer contours could be cut, with a pair of sharp Fiskars scissors and a knife (except to top line, which I adjust inwards as I go - it's easier to cut away material than to add!). There are not many straight lines - even the lines that look straight are very gently curved (as it should be on a ship). I then started cutting out the narrow tracks (or slits) for the 90° joining of the parts and that took some time - to make two exactly parallel cuts within a space of 0,5mm is quite challenging, to say the least! However, working slowly, I made some progress and this is the result: (this photo is again in b&w, because the colors go kaputt when the last daylight is gone - I get BOTH magenta and green, which is impossible to correct. I obviously have to get another working lamp later on): 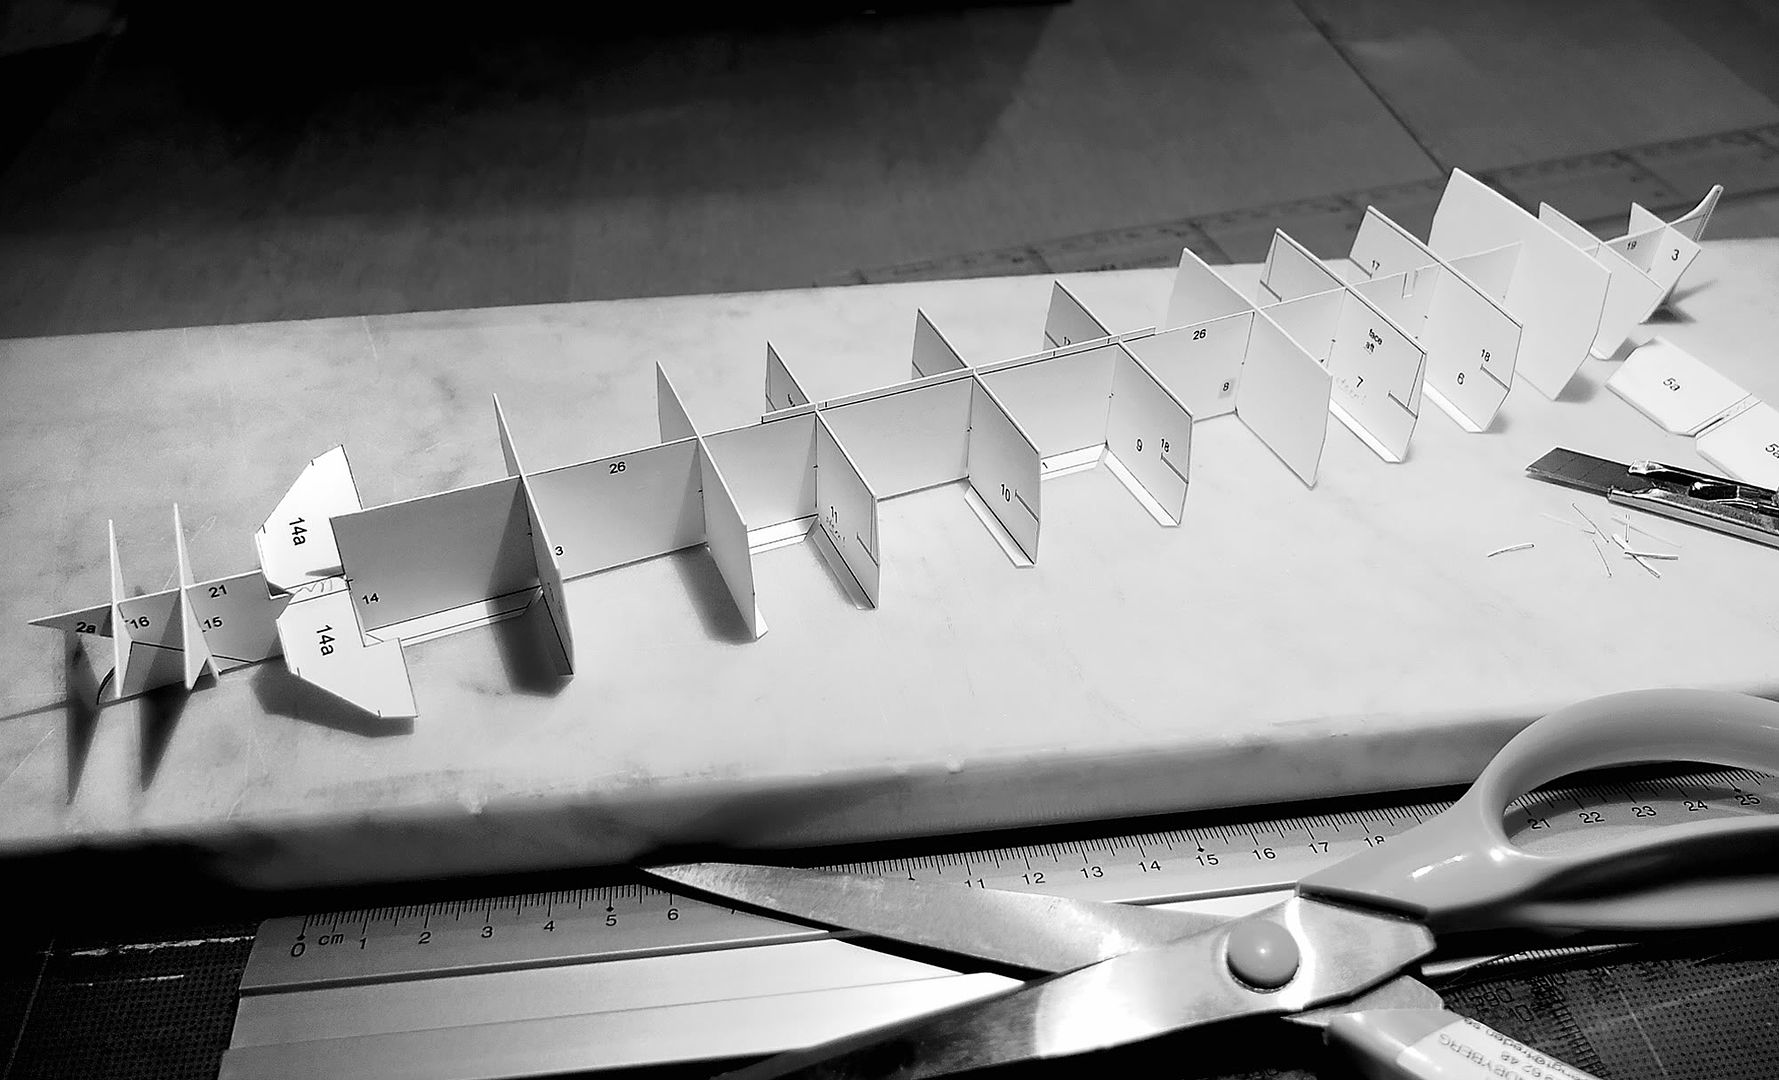 All the best for now - good night from Sweden! Bengt ")

|
|
#22
07-23-2012, 04:37 AM
|
||||
|
||||
|
SS Nomadic Art - "Call at Cherbourg" by Michel Guyot
Hi all sea dogs!
I have now some additional information re. the beautiful painting (Nr.2) on page 2 of this thread: MaritimeQuest - Exclusive Art by Michel Guyot It is made by French artist Michel Guyot in 2008 and depicts RMS Titanic as she makes her very first call of port (between c:a 5.30 and 8.30 pm) at Cherbourg harbor, where the SS Nomadic comes out to meet her and deliver about 120 passengers, among them the 'unsinkable' Molly Brown, the wealthy industrialist John Jacob Astor and his young wife, Benjamin Guggenheim and his mistress, the Duff-Gordon couple and others in 1st and 2nd class, traveling to Cherbourg by train from Paris. The smaller White Star (3rd class) tender SS Traffic can be seen on Titanic's port side: 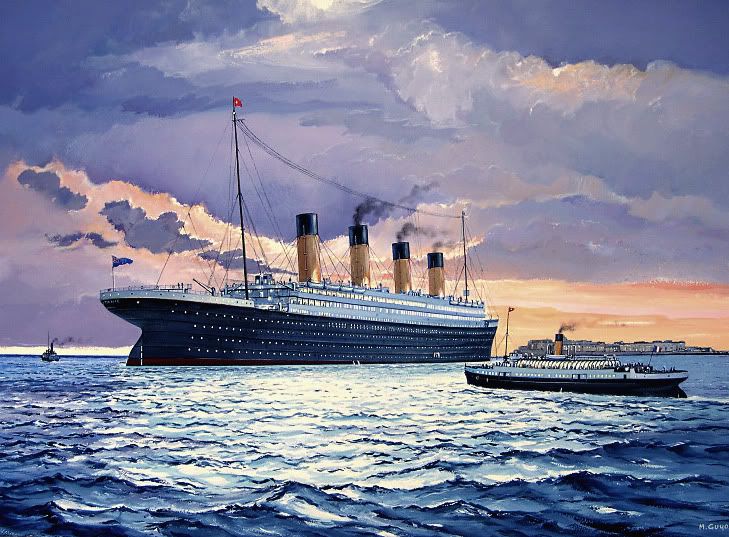 I have of course ordered a print and I just got word that it is on it's way! (Photo Nr.3 is, by the way, a screen capture from James Cameron's blockbuster movie "Titanic"). Bengt
Last edited by Bengt Fredén; 07-23-2012 at 04:49 AM. Reason: Added info.
|
|
#23
08-01-2012, 04:13 PM
|
||||
|
||||
|
A Little Progress
Hi all,
I got the print above the other day, and it is a very high quality, big ink jet print. I also got a few other very nice limited edition prints from The Nomadic Preservation Society, which I will frame later on. The profile print of the SS Nomadic will aid me in the building process. Yesterday evening, I laminated the two long side formers for the hull construction. I used a slightly thicker cardstock (for added longitudal strength), and I therefore had to cut slightly wider grooves for them in the standing bulkhead formers. I did a 'dry fit' and it looks quite good overall (nothing is glued in place yet): 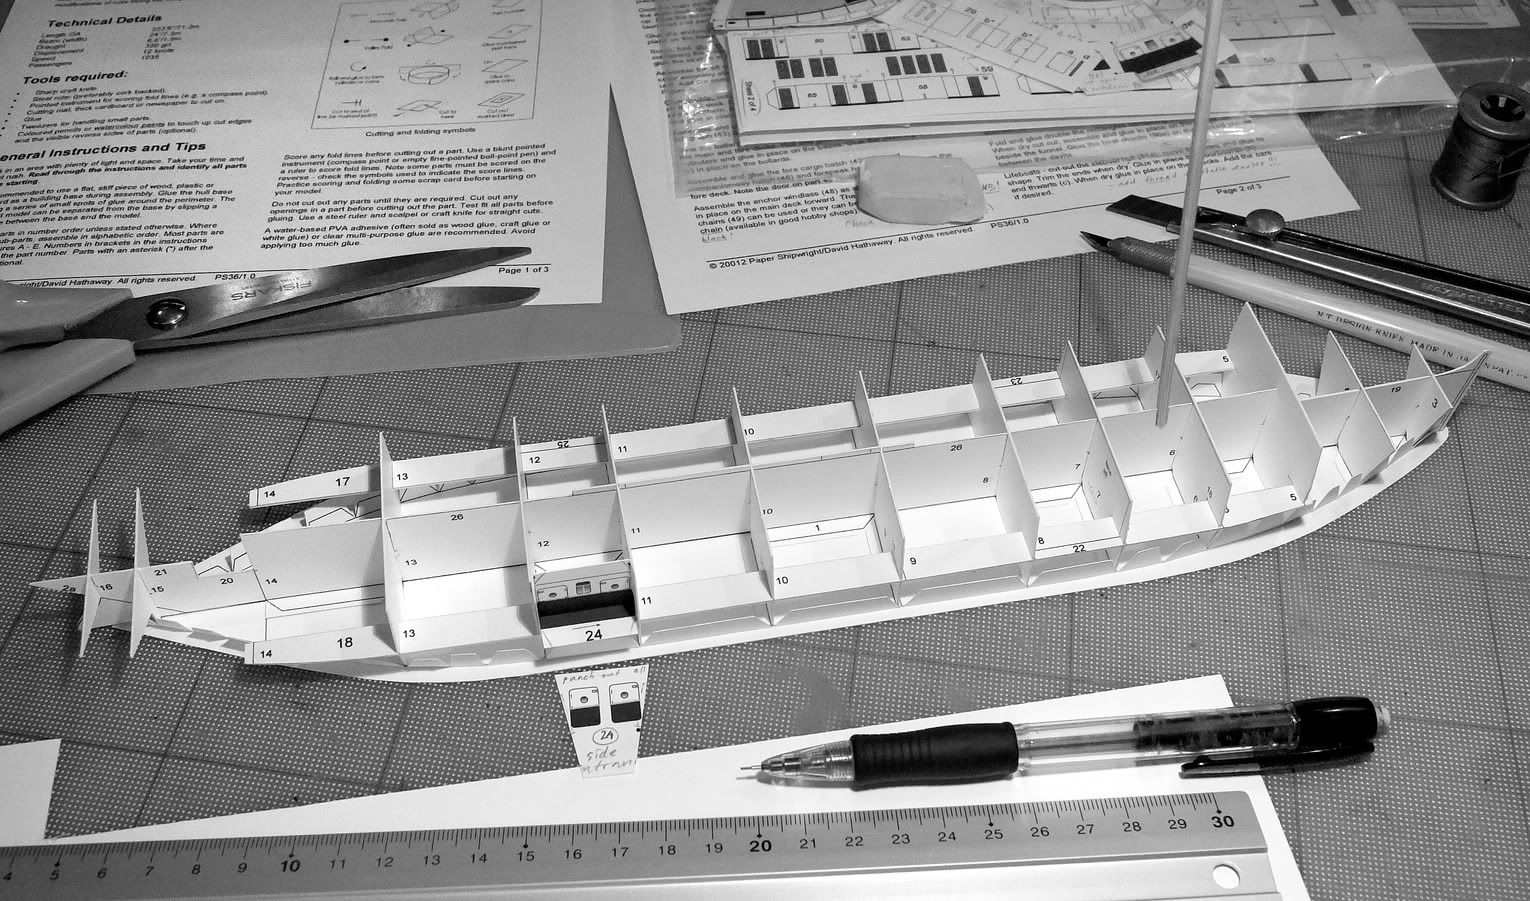 I also roughly cut one of the access door elements, that will be recessed into the side of the hull (there are four of them), and tried it for size in one of the side openings. There are very small separate doors to cut also. This small part also fits very good: 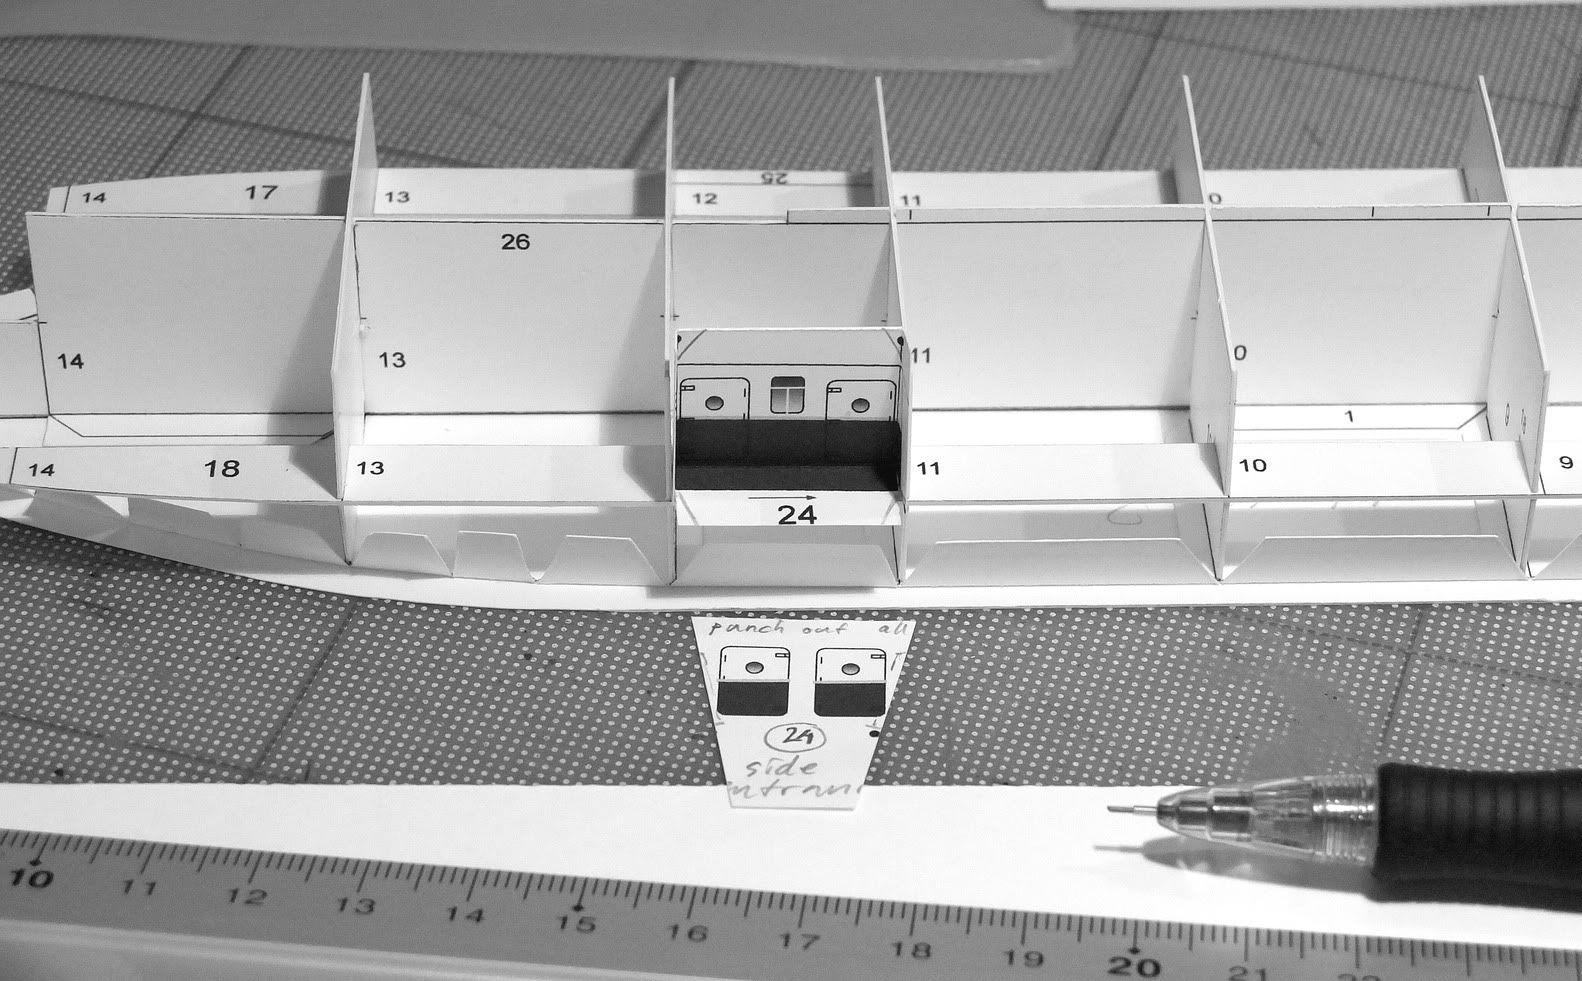 Today, I took a photo of a couple of the numbered prints and the model that is now underway - as a comparison. As you can see, I have found a short skewer stick, from which I will shape a tapered fore mast - it has to be quite a bit shorter, and it will be furnished with a very small end knob above the White Star Line flag (compare with the profile print above the model). It sits perfectly (without any glue) in the small cut paper groove in the mid rib former: 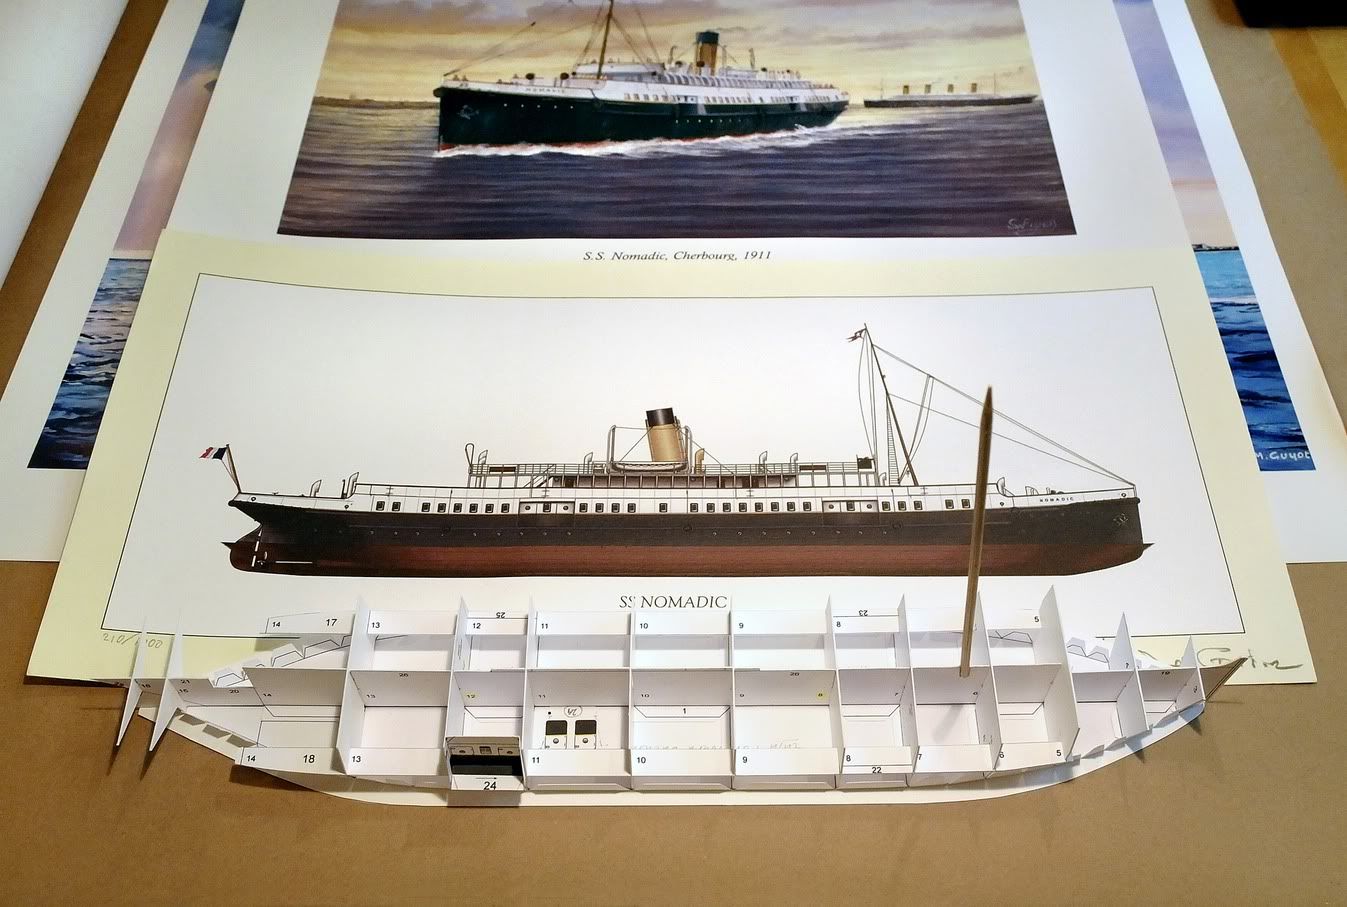 Ahoy! Bengt
|
|
#24
08-01-2012, 04:19 PM
|
||||
|
||||
|
A Quick One...
Hi again,
I took this photo of the hull parts, which I quickly threw together, to get a feel for the finished shape - it's slowly beginning to look like a ship: 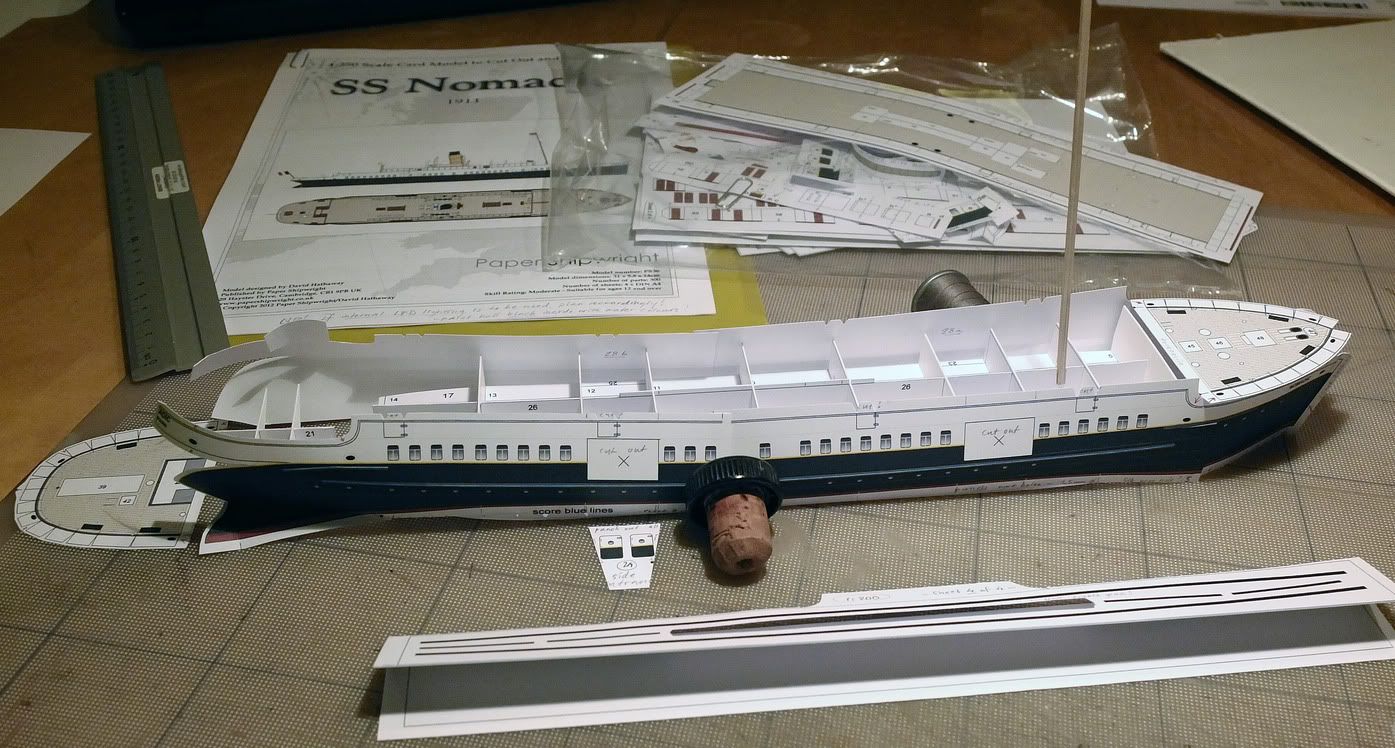 Bengt
|
|
#26
08-01-2012, 08:19 PM
|
||||
|
||||
|
Agreed. This model is really coming together nicely!
Jeff
|
|
#27
08-02-2012, 07:27 PM
|
||||
|
||||
|
Very nice hull frame Bengt.
She has a bit more beam than is evident in the paintings. Mike
|
|
#28
08-03-2012, 06:15 AM
|
||||
|
||||
|
SS Nomadic Hull Shape
Yes, Mike,
You are right there. She looks a little bit like a barge, with that broad hull shape. This tender is probably very steady in the water, even if loaded to the maximum with hundreds of passengers on every standing space. Although, I doubt very much that we will ever see that again. She will probably remain in the Hamilton dry dock in Belfast. She is not equipped with the twin steam engines anymore, and the new funnel which was installed last fall is just a dummy, I believe: 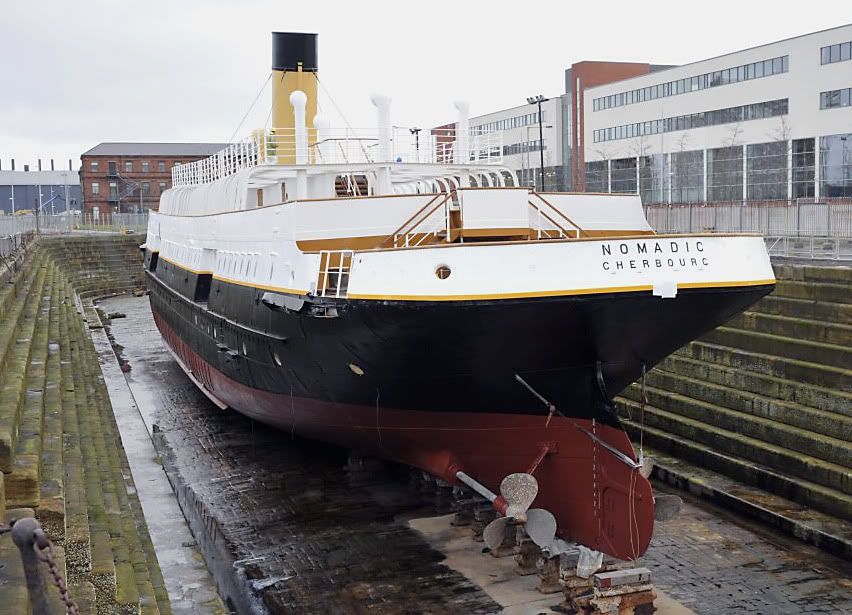 If you like, take a virtual tour of her two decks and you can appreciate how wide she really is inside: Virtual Virtual Visit - S.S Nomadic - Belfast, Northern Ireland All the best, Bengt PS. In the lower deck of the virtual tour, you can see a small model in a glass cabinet, and one of the prints that I just got the other day.
|
|
#29
08-03-2012, 10:51 AM
|
||||
|
||||
|
The "virtual tour" is excellent.
Mike
|
|
#30
08-17-2012, 10:46 PM
|
||||
|
||||
|
The Last Bulkhead Made
A little installment tonight;
I reinforced and cut the important last bulkhead or wall which will face the after deck, and I also began cutting out the openings for the entrance doors on the both of the hull sides. Nothing is glued yet, of course - only a dry-fitting so far. I haven't made the final contour cut yet, which I will do later with a new, thin scalpel blade, so this first rough cut is about a millimeter or so from the drawn lines. Here in the photo is the last (aft-facing) bulkhead): 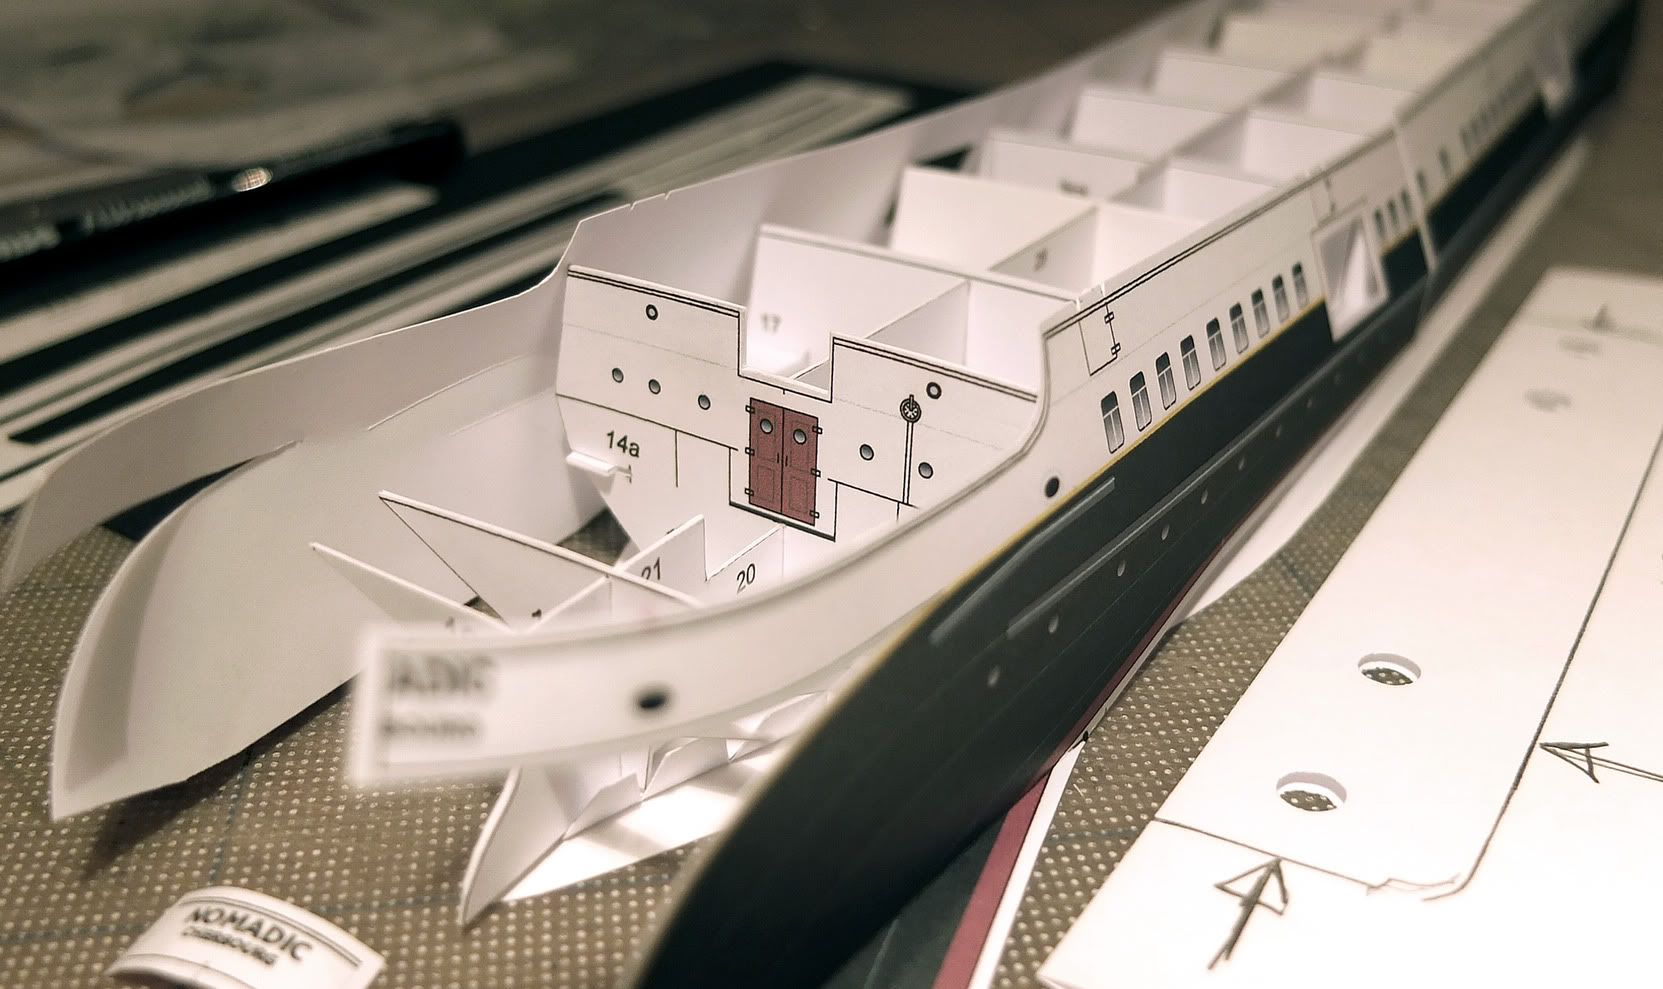 Above you can also perhaps see that I separated the small part that will sit at the aft end of the stern, where the name of the ship is - N O M A D I C - C H E R B O U R G, and rounded it off for later. There are long sections of black bumper rails (steel plate) along the sides of the ship, and I colored the backside of these parts with a black Sharpie, and will reinforce them with several layers of black card to the correct thickness later. They are to be bevelled or rounded off at the ends. When the model is finished, I will also try to find eight tiny rubber tires, from some small scale model cars or trucks, to hang in thin threads around the hull, just like the tire bumpers on the real ship. Here are the rough-cut holes for the mid deck entrance doors: 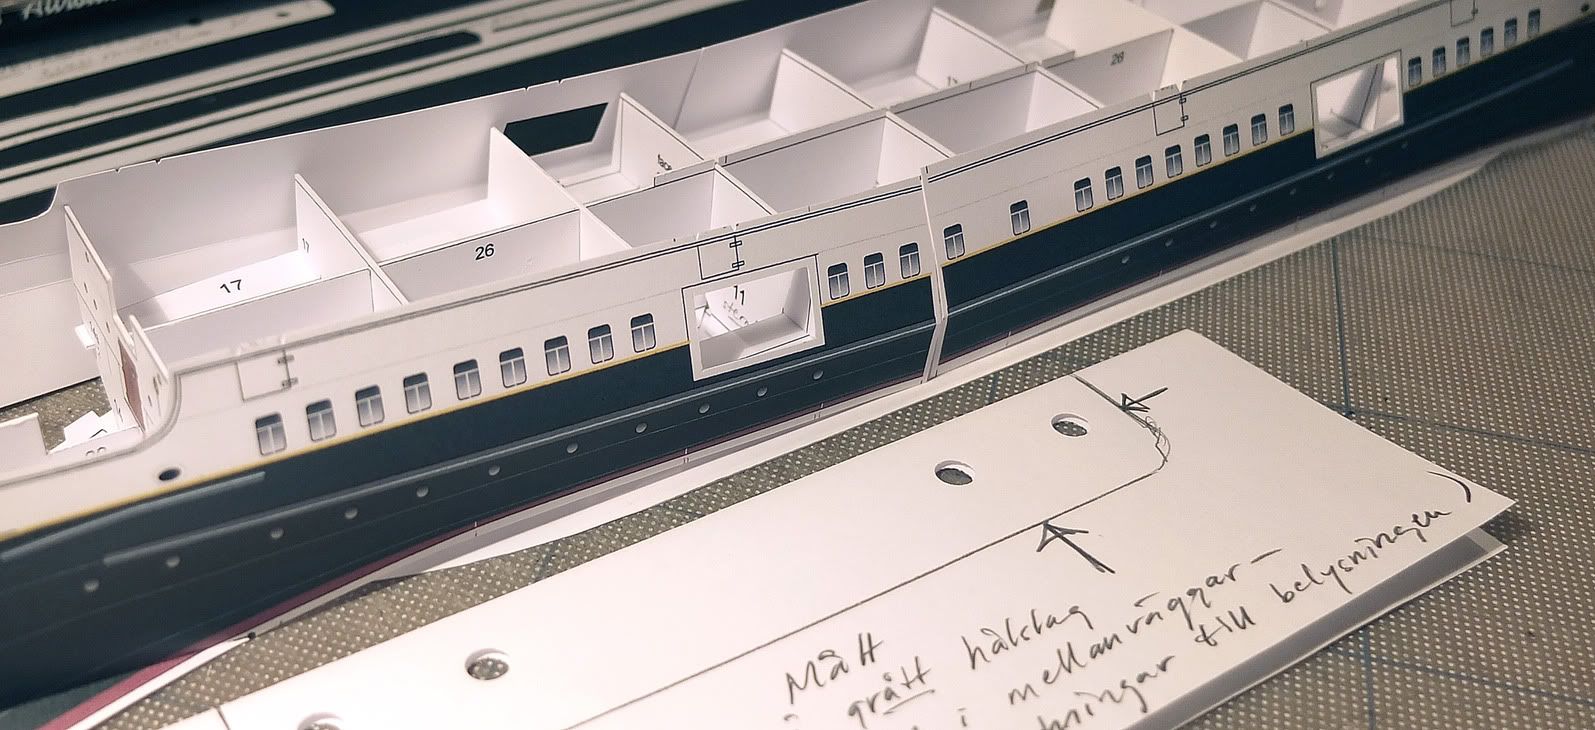 I also started thinking about making provisions for electrical wiring at the bottom of the hull. I haven't yet decided if I should go down the path of internal lights, but I might as well make holes in the bulkeads and in the bottom plate at this point. If I do go ahead with this, I will have to put a very thin black foil or paper on the inside of the hull halves, before punching any portholes and cutting any windows. To the left of the model are the long 'bumper' irons: 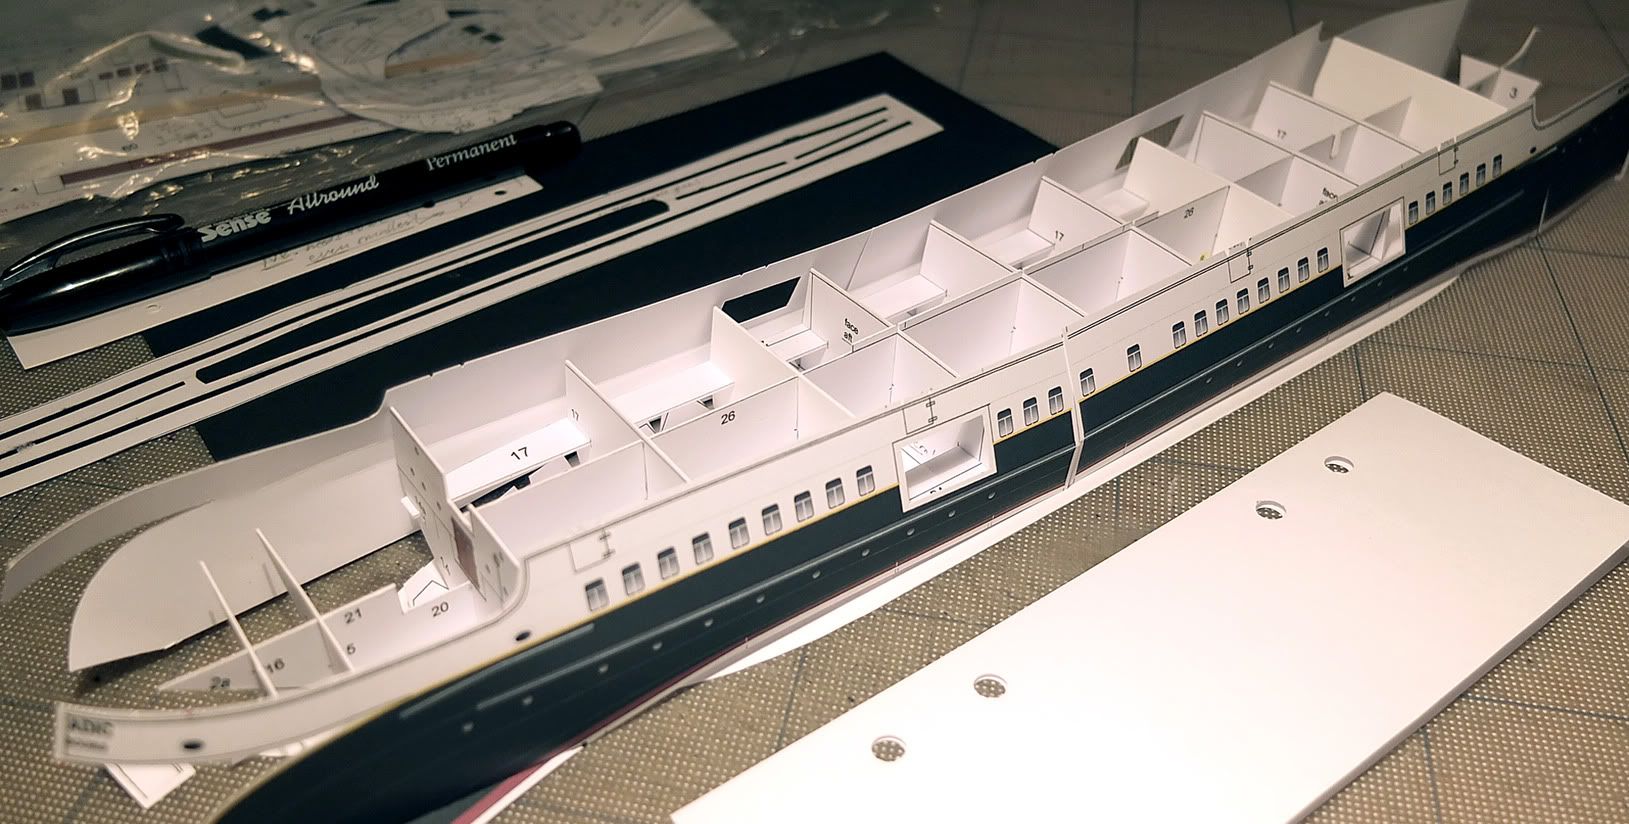 You can see the hole 'test punch' in the paper to the right, made with a regular A4 paper filing hole puncher. I have decided, by the way, to make the bottom plate from a colored card that has the same color as the dark rust-red antifouling color of the lower hull at the waterline. This will be visible and I don't know at this point how I will make the water around the model in the future sea diorama next year, but it would be very nice to NOT have a thin line of white paper shining through... And now for some sleep - good night, Bengt
|
| Google Adsense |
 |
|
|


 Linear Mode

