


|
|
|
#191
 08-30-2016, 05:53 PM
|
||||
|
||||
|
Step ....next step...this step....
Lets set the Body aside and build the "Chassis". This a fairly simple Chassis with flat 2D wheels. You already scored the Chassis Box right? Both Parts? Its very important that you scored those vertical folds parallel to each other. We need the box to fold properly or else one or more wheels will not sit flat. You also need to score the Roof Tabs. These tabs will contact the inside of the Roof and will glue into place. 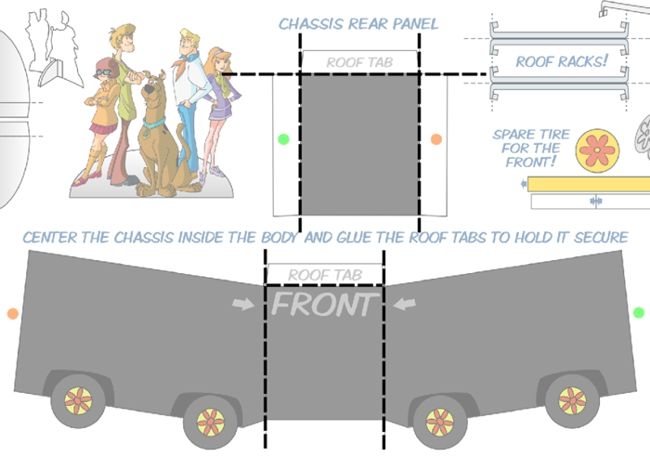 ... Once again, you should use a straight edge to cut out the two Parts of the Chassis. But you will need to freehand cut the Wheel shapes. Be as precise as possible...I used my sharp fine pointed Hobby Knife for this area. 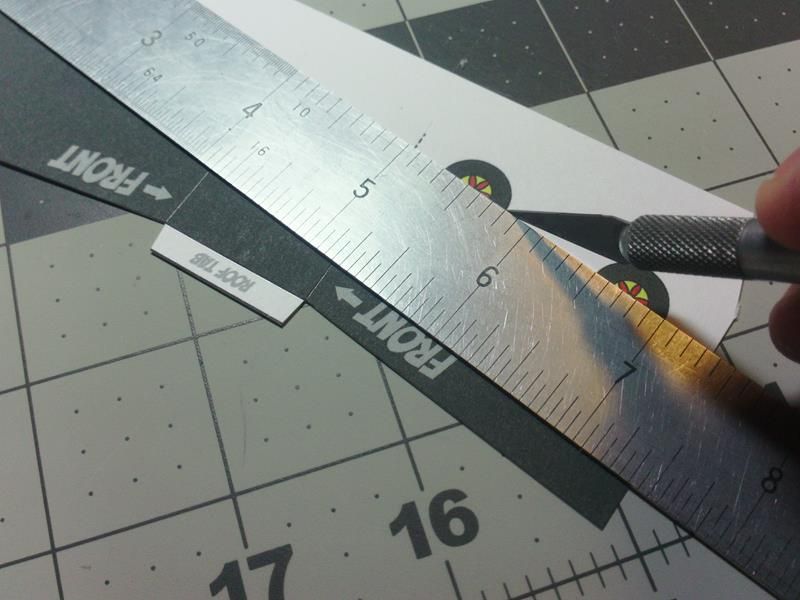 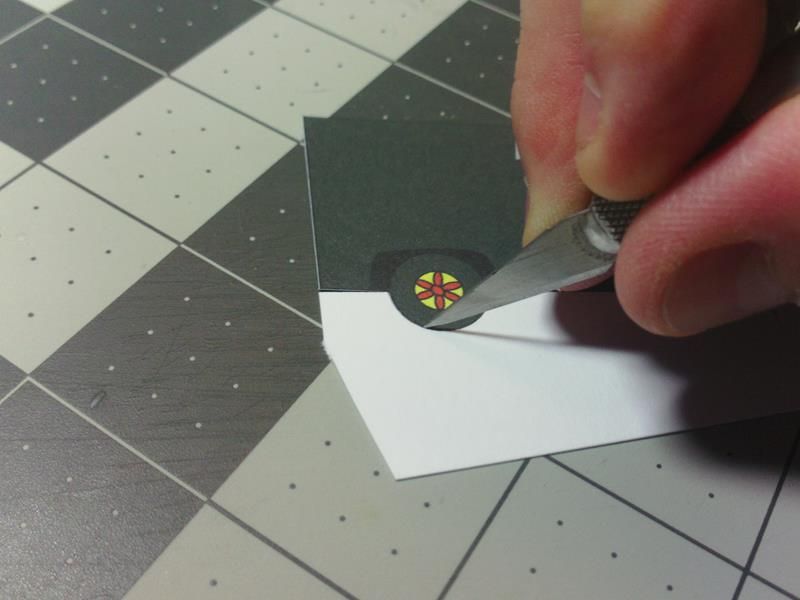 ... Ready for assembly... 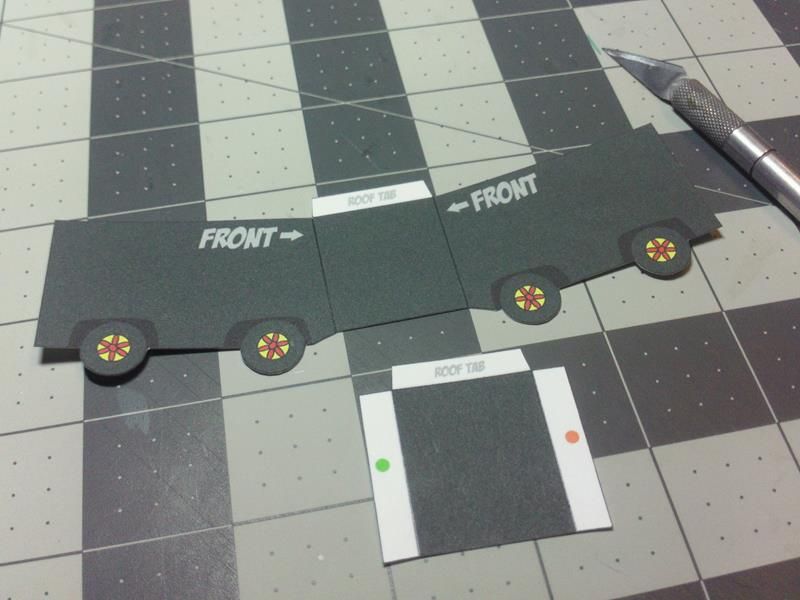 ... Oh, almost forgot...you can edge colour (if you like). I focus mainly on the lower edges , especially the wheels. The wheels are pretty much the only thing that is visible under the Body. 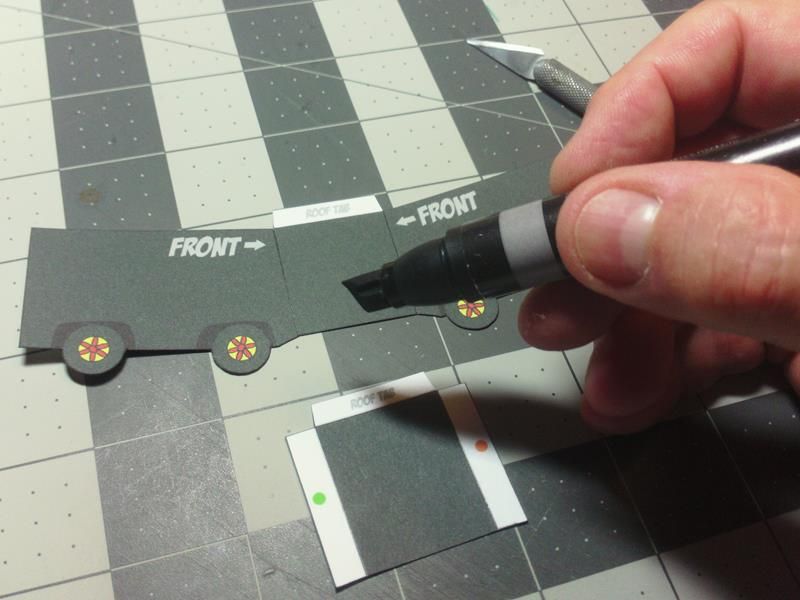 ... Start by folding the Parts. As I said, its important that the folds are parallel and all four wheels contact the ground. And...ready the Rear Panel to attach. Notice I folded the Roof Tabs inwards. 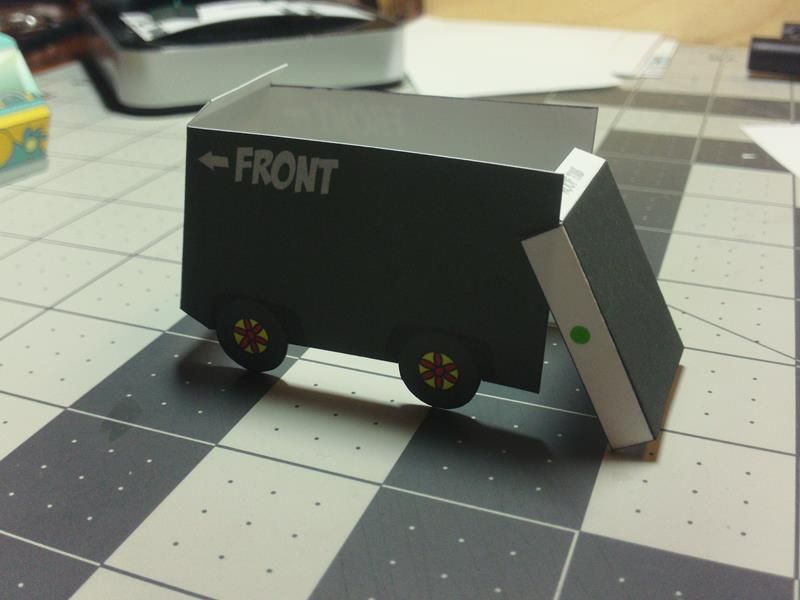 ... The Rear Panel needs to attach perfectly or it will twist the Chassis box. Line up the top OR the bottom edge of one side and glue into place... then align the opposite side the same way (focusing on the same top or bottom edge) Do your best to align the Parts vertically. 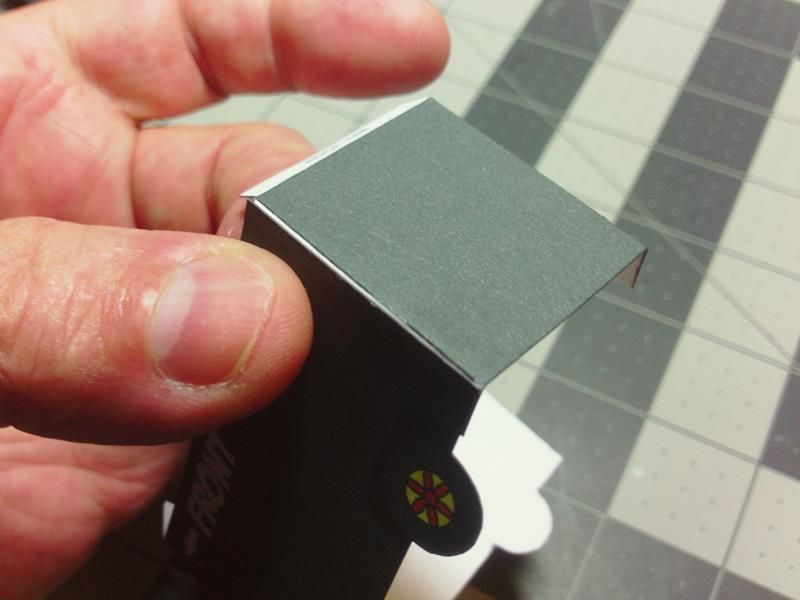 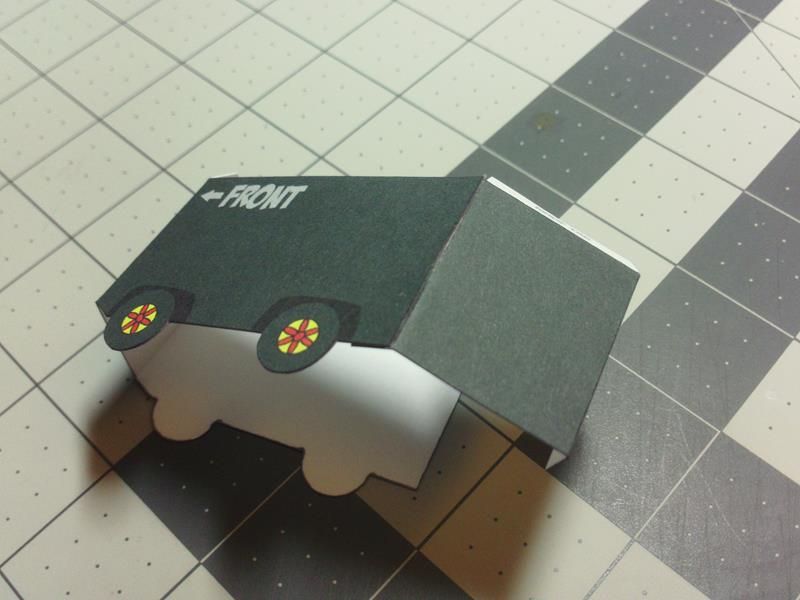 ... As before, I apply Glue to the inside of the receiving Part and then press the Glue tab onto it. 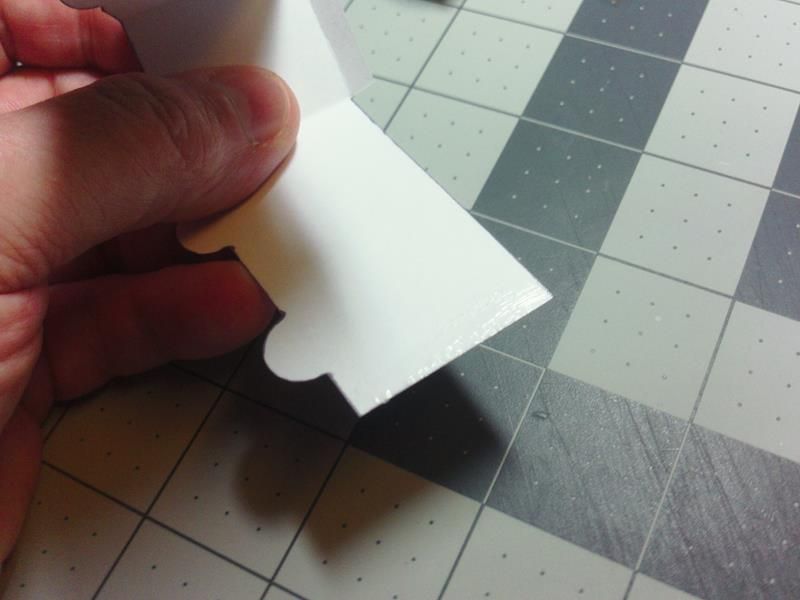
__________________
SUPPORT ME PLEASE: PaperModelShop Or, my models at ecardmodels: Dave'sCardCreations 
|
|
#192
08-30-2016, 05:55 PM
|
||||
|
||||
|
...
And...your Chassis should look like this... 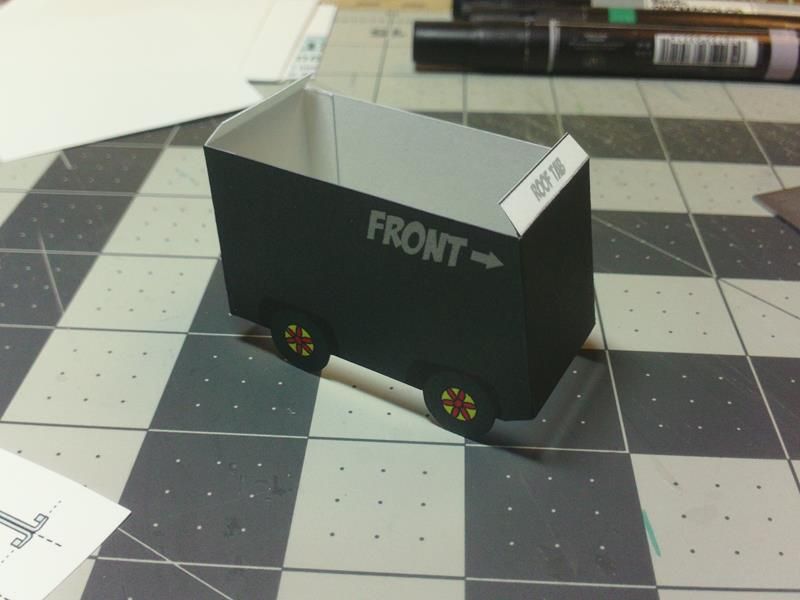 ... The Chassis can now be fitted into the Body. The front and rear upper edges of the Chassis box will fit into the front and rear corners of the Body. This locates the Chassis front to back (within the Body). The Chassis must contact the Roof at both ends. Test fit it, and get a feel for how it positions inside the Body. When you install into the body, it is up to you to center the Chassis side to side. Just position the Chassis with the same space on either side of the Body. Its only about 1 or 2 millimetres on either side, but it tucks the wheels in a bit (from the Body). 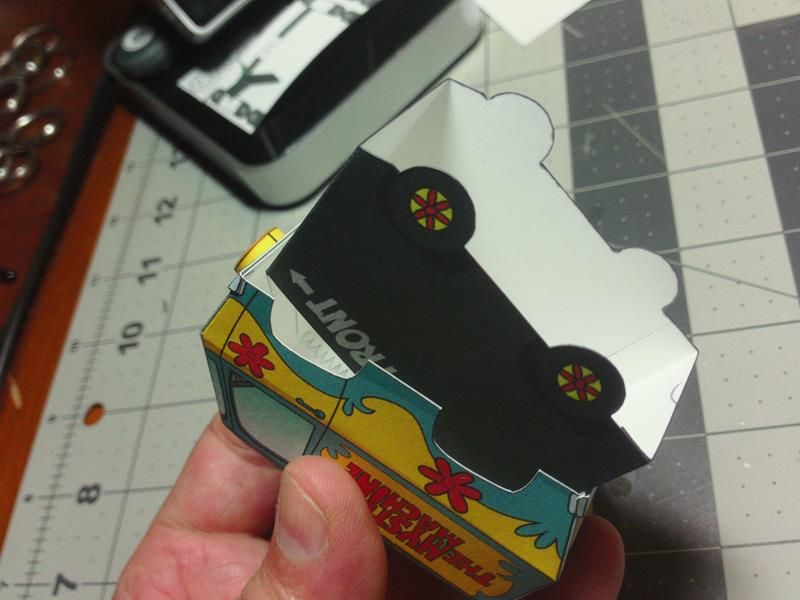 ... Once you understand the placement of the Chassis, remove it from the Body and prepare it by folding the Roof tabs inwards. 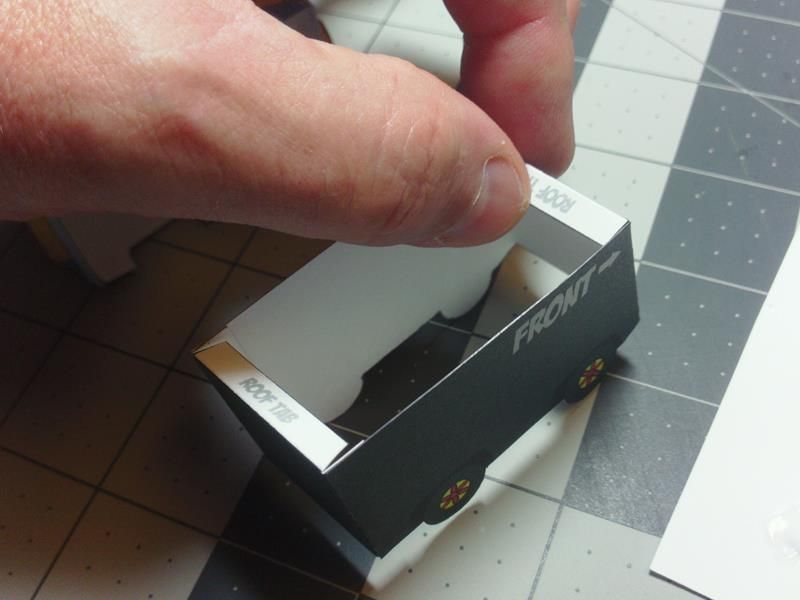 ... Now apply a good dollup of glue along the Roof tabs. A little more is better here because it will give you more time to position the chassis. (unless you are using some really watery glue, then you need to be careful not to saturate the card.) 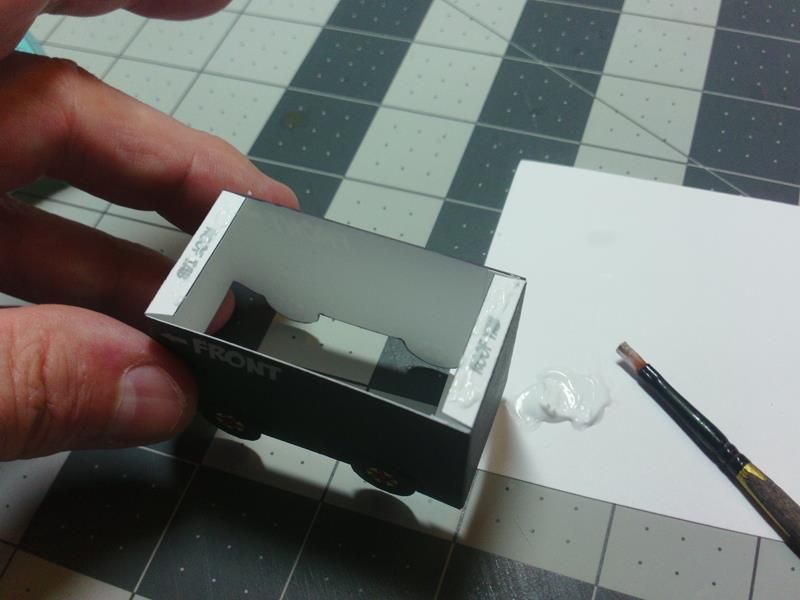 ... Place the Chassis back into the body and position it as you did during your test fit. Center it side to side and press the Roof tabs against the inside of the Roof panel. 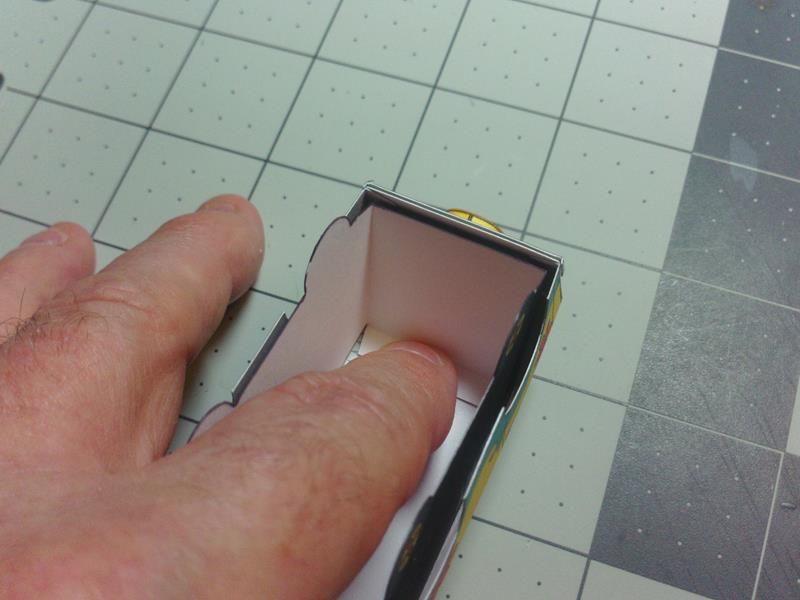 Hold until the glue sets, while keeping an eye on the side to side placement. This will lock the Chassis in place. Pressure makes your glue grab quicker, but be carefull not to distort the outer Body! Don't dent or crush your Roof! 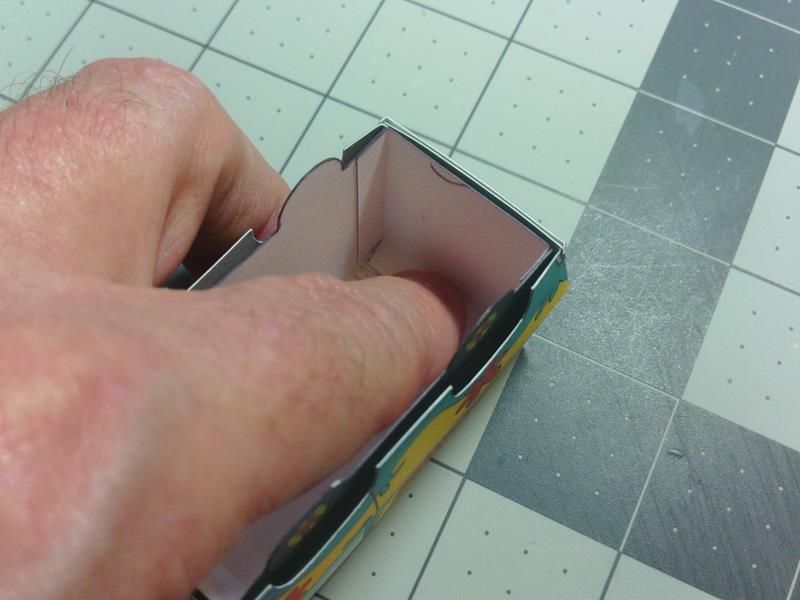 ... The Chassis and Body are now connected!  ... Hopefully your vehicle sits flat on all four wheels?!! 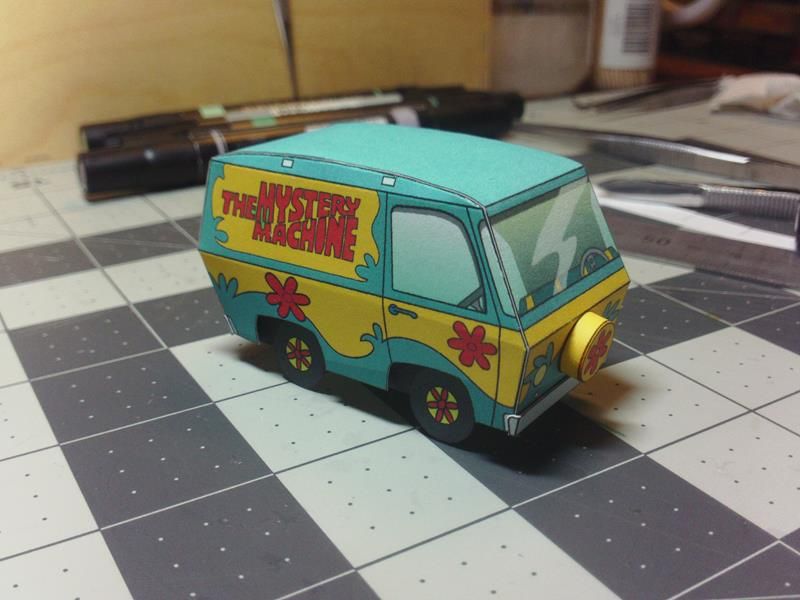
__________________
SUPPORT ME PLEASE: PaperModelShop Or, my models at ecardmodels: Dave'sCardCreations
|
|
#193
08-30-2016, 07:07 PM
|
||||
|
||||
|
I'm wildly excited. I always have trouble getting four-wheeled vehicles to have all four wheels touching the surface. Usually, my cars and trucks bear a sad resemblance to a dog lifting his leg to a fire hydrant. Dave has seen a particularly tragic example of one of my builds of another of his KoolWheelz (to his credit, he was a perfect gentleman about it, though he must have been cringing inside). But my Mystery Machine has beat the curse and sits neatly with all four wheels solidly in contact. Yippee! (Note: it's better centered than it appears in the second photo.)
|
|
#194
08-30-2016, 07:56 PM
|
||||
|
||||
|
The Chassis is Installed, and she sits on all four Wheels!
 Maybe it's me, but it feels as if the MM has gained a little heft through the process of this Build... that's nice! Alan
|
|
#195
08-30-2016, 08:24 PM
|
||||
|
||||
|
Don and Lil Catch Up
Dave and Fellow Acolytes
Lil and I finally managed to catch up. We followed Daves instructions precisely, except that, since we are United Statesians, we colored our edges instead of colouring them. The first image shows one of our roofs being rolled over a doll eyeball sizer: a useful tool I learned about from Swampfox. He uses them mostly for burnishing compound curves, but they can also be used for rolling. Available from Kemper doll supplies Doll Eye Sizers. The gray pad is a SpeedBall linoleum printing block. Ideal for rolling and burnishing. I learned about these from Mark Becht (who used to be Shrike in this Forum). One source: Speedball Speedy Carve Blocks - BLICK art materials For coloring the edges of the roof after gluing, we used Caran dAche Neocolor II water soluble wax crayons, which fill in any little gaps (our roof lines still look kind of Raggedy Andy). We learned about these from Alan Wheeler. One source is Blick art supplies, where we also get the Faber-Castell Pitt and Tombow artist brush pens. Caran d'Ache Neocolor II Artists' Crayons - BLICK art materials Tombow Dual Brush Pens - BLICK art materials The third image shows me using a dowel with a tapered end to burnish down the glue joint. The other end of the dowel can be used to tamp down a glue joint in a tight place. We always used toothpicks to apply glue, but being good students of AirDave, we took a Grumbacher No. 4 water color brush from the art supply box and used it to apply the glue. Tostitos supplied the water jar. We are now converted to applying glue with a brush. Image 7 shows one other minor deviation from Daves recommendations. We used a Shrike RolyStyk (no longer available, alas) and the linoleum block to roll the hoops for the spare tire (or tyre). One final lapse: while Lil was slooooowly scoring, cutting, folding, and pasting, I got antsy and cut out the little figures of Velma, Shaggy, Scooby, Fred, and Daphne. I promise that I will not get ahead of the instruction any more. Don PS: Great work, Anne! We will have a nice little collection of Mystery Machines to show off at Sterling in October.
|
| Google Adsense |
|
#196
08-30-2016, 09:37 PM
|
||||
|
||||
|
Nice job, Don & Lil!
I saw the RolyStyk thread, and was sad to see they're no longer available... I wonder if there's enough 411 in there to see if a machinist friend could 're-create' one? It just seems like such a useful tool to have, but I've been finding things around the house that appear to work just fine; paintbrush handles, AA batteries... Alan
|
|
#197
08-31-2016, 05:58 AM
|
||||
|
||||
|
Chasis in place and all four wheels on the ground.
 I also blackened the back of the tires and a small strip along the bottom edge of the chasis for esthetic reasons (or is that aesthetic?).
__________________
~Doug~ AC010505 EAMUS CATULI! Audere est Facere THFC 19**-20** R.I.P. it up, Tear it up, Have a Ball
|
|
#198
08-31-2016, 07:07 AM
|
||||
|
||||
|
Six days straight at work without a day off, until today, so catching up. Getting there. Will most probably build the new green version later, as I am not too happy with my quality of work. Another lesson learned here, don't build when you're tired.
__________________
"It's all in the reflexes."
|
|
#199
08-31-2016, 07:09 AM
|
||||
|
||||
|
Now it's ready to roll.
Gary
__________________
"Fast is fine, but accuracy is everything" - Wyatt Earp Design Group Alpha https://ecardmodels.com/vendors/design-group-alpha
|
|
#200
08-31-2016, 11:59 AM
|
|||
|
|||
|
Sorry I'm a bit late !
Hi everyone,
Firstly, thanks to everyone who's worked to get this wonderful thread together, it is EXACTLY what I needed to get started. I would have been on board sooner, but you know how it is, I just COULD NOT decide what to wear ! Anyway, now that's sorted and my printer's talking to me again (actually, after what I called it last Thursday when it ran out of ink AGAIN, I'm surprised it hasn't packed up and left home). Apart from some strange tweezers I have all the tools and I intend to go right through the thread a couple of times and then photo my build so if I make another mess I hope I can ask where I went wrong. Thanks to all again Liz
__________________
Sprogs
|
| Google Adsense |
 |
|
|


 Linear Mode

