PaperModelers.com

Go Back   PaperModelers.com > Card Models > Model Builds > The Zoo

Reply
 
Thread Tools Display Modes
  #11  
Old 08-22-2014, 07:50 AM
eatcrow2's Avatar
eatcrow2 eatcrow2 is offline
Member
 
Join Date: Jul 2007
Location: Santa Monica, CA
Posts: 2,590
Total Downloaded: 2.24 GB
moving along...

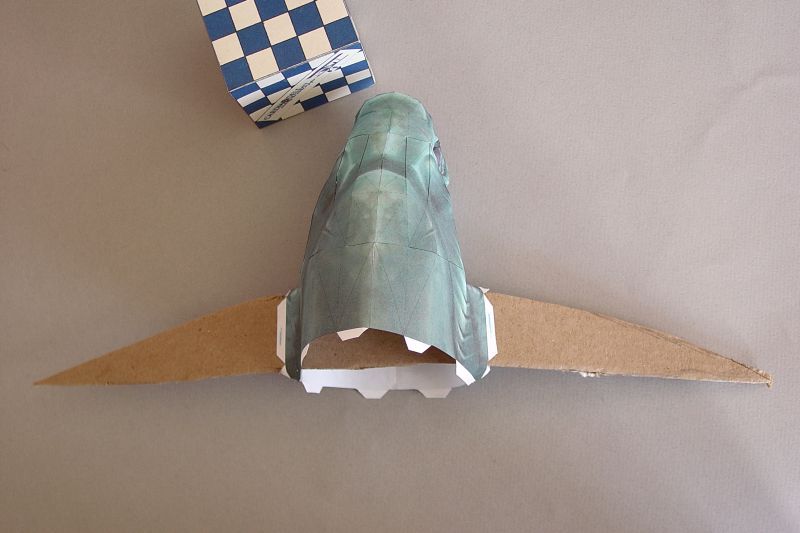
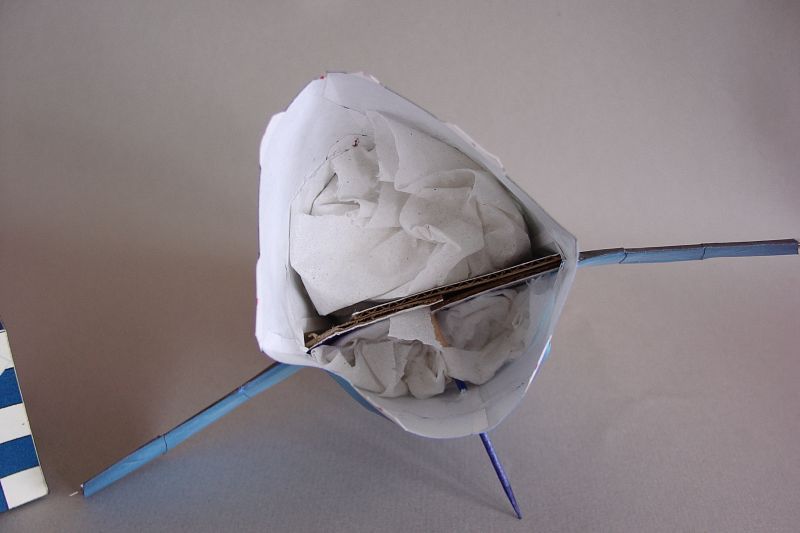
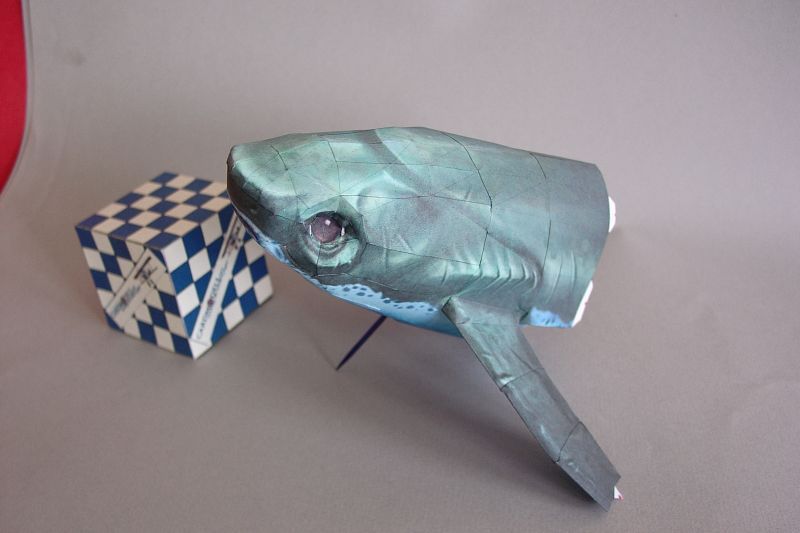
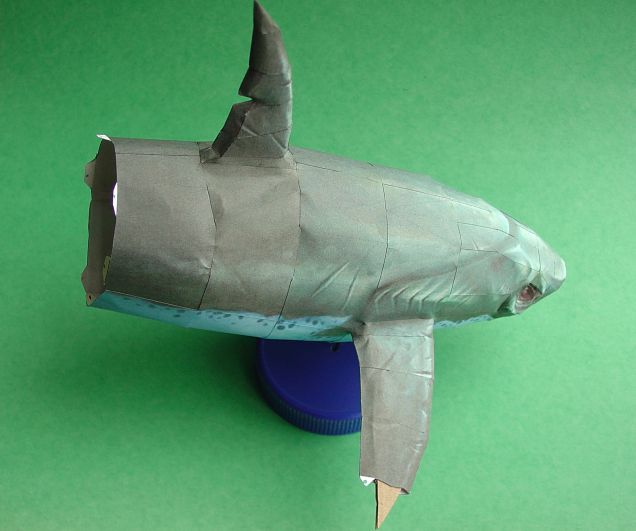
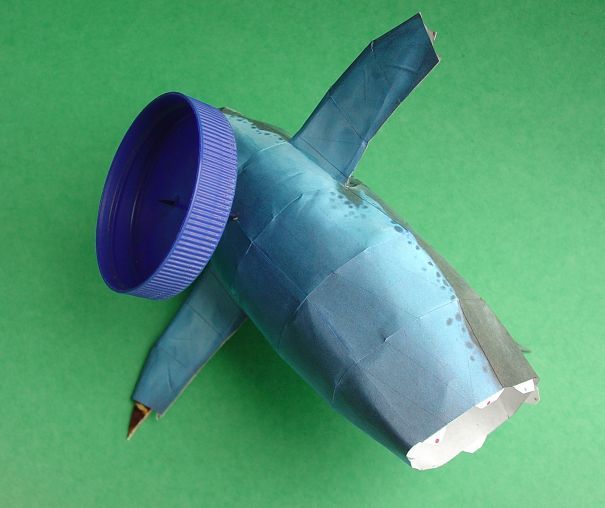
Starting to move my way back along the body.. The front fins/flukes have to be added at this point I think.. would be way to much of a hassle to glue later, as they are quite long, I decided to give them some support by adding a card spar. Will trim as needed as I add parts.. Stuffing is a definite need. As big as this is, it would buckle inward with even moderate handling..
Nice to know that I have the mouth right, even though it still looks weird!!


Reply With Quote
  #12  
Old 08-22-2014, 12:51 PM
SCEtoAUX's Avatar
SCEtoAUX SCEtoAUX is offline
Member
 
Join Date: Jul 2007
Location: USA
Posts: 7,806
Total Downloaded: 567.16 MB
Quote:
Originally Posted by eatcrow2 View Post
Tip of the Week!!! (in my book).. That works great.. Definitely a save for future use. Thanks for posting!!
It looks like if you set the transparency to 100% that the glue tabs will be removed also. 90% will tone down the lines on the graphics but they will still be there. Seems some sort of choice needs to be made for the pdo models that do not have the option of no lines. Either accept no glue tabs, accept toned down lines on the graphics, draw your own glue tabs, or use joining strips. Those last two choices would be quite an undertaking for some of the more elaborate pdo models. One method would be to print the pdo with no lines (transparency at 100%) then reset the transparency so glue tabs show then when cutting the parts you could cut the glue tabs using the lined pdo on the screen as a guide. Or maybe there is another method out there to be used.
__________________
~Doug~
AC010505 EAMUS CATULI! Audere est Facere THFC 19**-20** R.I.P. it up, Tear it up, Have a Ball
Reply With Quote
  #13  
Old 08-22-2014, 02:43 PM
JohnM's Avatar
JohnM JohnM is offline
Member
 
Join Date: Jan 2011
Location: Snowdonia, North Wales, UK.
Posts: 4,641
Total Downloaded: 648.57 MB
Quote:
Originally Posted by eatcrow2 View Post
Tip of the Week!!! (in my book).. That works great.. Definitely a save for future use. Thanks for posting!!
Seconded ... I'm orf to give that go right now. Cheers Doug!

I've also just received a reply from Dennis at Game Papercraft who is going to send me the line-less .pdo files. It's always worth asking the designer. Cheers Dennis ... if you've used my link to tune in.

Keep on snippin' ... Johnny.
Reply With Quote
  #14  
Old 08-22-2014, 05:25 PM
JohnM's Avatar
JohnM JohnM is offline
Member
 
Join Date: Jan 2011
Location: Snowdonia, North Wales, UK.
Posts: 4,641
Total Downloaded: 648.57 MB
That worked a treat Doug. Working on a hairy dog figure (Malamute puppy), backing the transparency off to 80% blended the fold lines into the fur nicely, but retained enough of the tab outlines to see them.

I do already have a line-less .pdo of this file though, which has strong tab outlines. So I'm guessing there must be a way to remove the fold lines without removing the tabs. Probably within 'Designer'' I'd think.

Using this tip at 100% will give me a clean tab-less print that will be ideal to use with tapes, to get better flush seams.

I must make the effort to learn to use the Designer app. I've had it installed for months. Just been to preoccupied elsewhere to sit and learn it.

Keep on snippin' ... Johnny.

PS: Nice work on the shark Peter. Keep it going. It is gonna big though ain't it.
Reply With Quote
  #15  
Old 08-23-2014, 06:13 AM
SCEtoAUX's Avatar
SCEtoAUX SCEtoAUX is offline
Member
 
Join Date: Jul 2007
Location: USA
Posts: 7,806
Total Downloaded: 567.16 MB
The thresher shark is turning out good. The shark is going to be big. Should look nice hanging from the ceiling in a menacing pose.

Using tissue inside is a good idea. I have used that technique before after having rounded parts get dimpled from handling. Tissue low in the model also helps in lowering the center of gravity to help some models stand on their own.

Seems like Pepakura Designer would work to alter the lines. Can pdo files be locked by the original designer so no alterations can be made?
__________________
~Doug~
AC010505 EAMUS CATULI! Audere est Facere THFC 19**-20** R.I.P. it up, Tear it up, Have a Ball
Reply With Quote
Google Adsense
  #16  
Old 08-23-2014, 06:24 AM
legion's Avatar
legion legion is offline
Member
 
Join Date: Jun 2009
Posts: 1,560
Total Downloaded: 2.53 MB
Quote:
Originally Posted by JohnM View Post
That worked a treat Doug. Working on a hairy dog figure (Malamute puppy), backing the transparency off to 80% blended the fold lines into the fur nicely, but retained enough of the tab outlines to see them.

I do already have a line-less .pdo of this file though, which has strong tab outlines. So I'm guessing there must be a way to remove the fold lines without removing the tabs. Probably within 'Designer'' I'd think.

Using this tip at 100% will give me a clean tab-less print that will be ideal to use with tapes, to get better flush seams.

I must make the effort to learn to use the Designer app. I've had it installed for months. Just been to preoccupied elsewhere to sit and learn it.

Keep on snippin' ... Johnny.

PS: Nice work on the shark Peter. Keep it going. It is gonna big though ain't it.

The 'Set Edge Color' has an eraser option, you can use that to remove lines. Nice work on the Thresher, btw. It is one of the very few good (read: realistic) shark models out there.
__________________
print, cut, score, fold, glue, gloat.
Total Annihilation paper models
Current wip: Scaldis De Ruyter, Sword Impulse [PR]
Reply With Quote
  #17  
Old 08-23-2014, 08:24 AM
JohnM's Avatar
JohnM JohnM is offline
Member
 
Join Date: Jan 2011
Location: Snowdonia, North Wales, UK.
Posts: 4,641
Total Downloaded: 648.57 MB
Quote:
Originally Posted by legion View Post
The 'Set Edge Color' has an eraser option, you can use that to remove lines. Nice work on the Thresher, btw. It is one of the very few good (read: realistic) shark models out there.
I assume that setting is in Designer, as I can't find it in Reader.
Elsewhere I've just learned that the Free copy of Designer is an incomplete trial copy, with some facilities removed. There is a paid for Pro version on offer. I thought they must be selling something to fund the software development.

Sorry for the diversion Peter ... You're doing great on the shark, I'l keep quite now and just chuck in the odd compliments. If anyone wants to go further on the subject, head over here ... Pepakura

Keep on snippin' ... Johnny
Reply With Quote
  #18  
Old 08-23-2014, 08:38 AM
eatcrow2's Avatar
eatcrow2 eatcrow2 is offline
Member
 
Join Date: Jul 2007
Location: Santa Monica, CA
Posts: 2,590
Total Downloaded: 2.24 GB
Quote:
Originally Posted by JohnM View Post
I assume that setting is in Designer, as I can't find it in Reader.
Elsewhere I've just learned that the Free copy of Designer is an incomplete trial copy, with some facilities removed. There is a paid for Pro version on offer. I thought they must be selling something to fund the software development.

Sorry for the diversion Peter ... You're doing great on the shark, I'l keep quite now and just chuck in the odd compliments. If anyone wants to go further on the subject, head over here ... Pepakura

Keep on snippin' ... Johnny
I have no problem with the diversions.. all the useful insights and discussions I consider a win/win on my part!! I appreciate all the input..
Reply With Quote
  #19  
Old 08-23-2014, 08:59 AM
eatcrow2's Avatar
eatcrow2 eatcrow2 is offline
Member
 
Join Date: Jul 2007
Location: Santa Monica, CA
Posts: 2,590
Total Downloaded: 2.24 GB
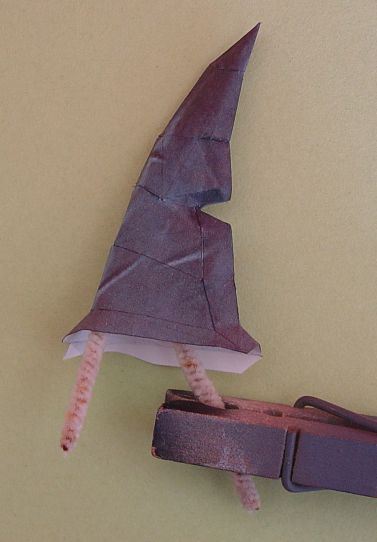
Fin...

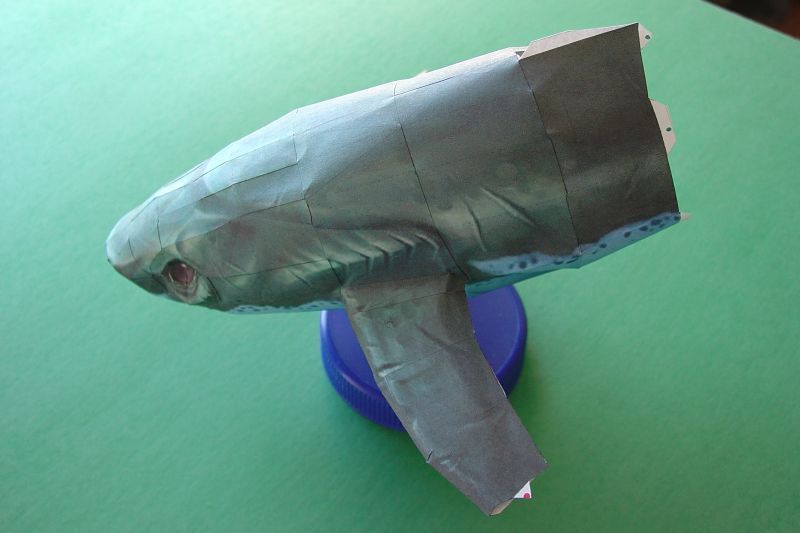
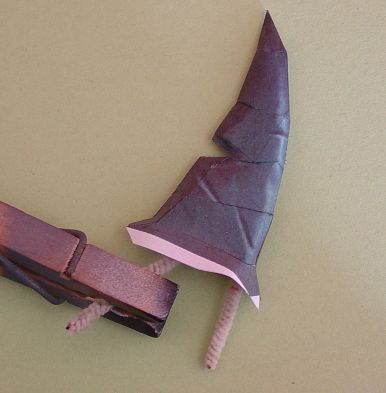
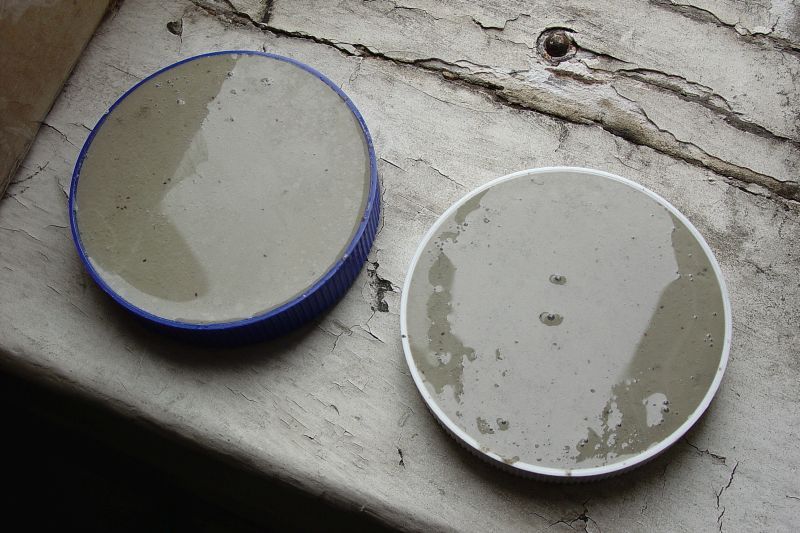
I'm realizing at this point, that this model will be very.. very big. As I want to display it on the top shelve, I'm thinking ahead to the base. Will use a lid from a jar filled with a cement/sand mix for weight and stability. Just testing at the moment to see how it looks. Leaving the ends off of the flukes until later, as I don't want to damage the tips with handling.


On the main fin, I've bent a pipe cleaner in half and shaped it to fit.. stuffing with tissue around it.

Reply With Quote
  #20  
Old 08-24-2014, 06:06 AM
eatcrow2's Avatar
eatcrow2 eatcrow2 is offline
Member
 
Join Date: Jul 2007
Location: Santa Monica, CA
Posts: 2,590
Total Downloaded: 2.24 GB
Base...

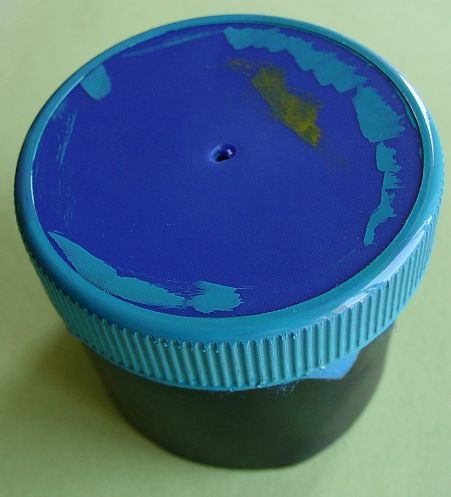
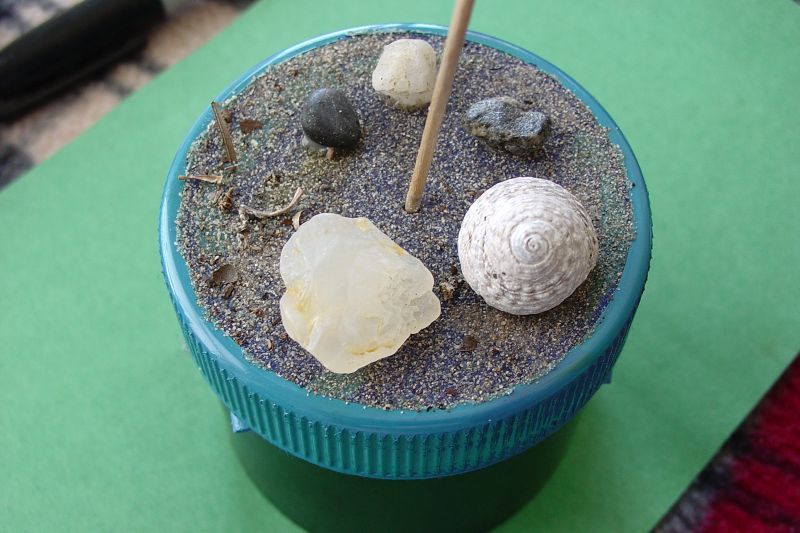
Making up the base.. filled the insides with a quick setting cement/sand mix.. when dry, but not yet cured I take it outside and rub it on a flat concrete surface to even it out.. glue on a scrape piece of felt, and then trim to the base.

Painted with Extra Color "Bright Blue" enamel.. added some sand and assorted bits from the beach. Will fill it out with more later on.


Reply With Quote
Google Adsense
Reply


Posting Rules
You may not post new threads
You may not post replies
You may not post attachments
You may not edit your posts

BB code is On
Smilies are On
[IMG] code is On
HTML code is Off

Forum Jump


All times are GMT -6. The time now is 05:49 AM.


Powered by vBulletin®
Copyright ©2000 - 2024, Jelsoft Enterprises Ltd.

Parts of this site powered by vBulletin Mods & Addons from DragonByte Technologies Ltd. (Details)
Copyright © 2007-2023, PaperModelers.com