


|
|
|
#1
 11-25-2014, 02:03 PM
|
||||
|
||||
|
Johan Scherft's Barn Owl "De Kerkuil"
so, last year I posted a video of the IPMC meet
...and my Mother politely watched on Youtube. Being a bird and Owl lover, of course she spots the big Barn Owl paper model sitting on Pete Ansoff's table! I decided to make her a couple of small Scherft birds for Mother's Day and her Birthday...and while at the IPMC again this year, I picked up a small "Bird Mobile" Robin by the late Malcolm Topp. I also made a point of grabbing a copy of Johan Scherft's big Barn Owl kit (from Pete Heesch) ...and my plan is to build it as a Xmas present. I'm hoping to make up a small shelf that will fit up in the corner of her sun-room ...so the Owl can gaze down over the room. Since it is lifesize, its a bit too big for anywhere else. ... Anyway, the kit says "Easy To Make" on the cover...which I was thrilled to see ...but I've already run into problems on the first assembly step! lol So this will be a build thread, as well as a "help me!" thread. For those of you who don't know the kit... its three sheets of parts plus a cover page. A total of about 34 parts. Its a semi-gloss kind of paper...not really cardstock, more like heavy paper. The sheets are large 12" x 17". The artwork is very realistic looking...but not photographic, it has a definite painted artwork look to it. The cover page also has multi language information on the reverse side including a very small set of assembly diagrams.  ... I plan on scanning the model in case I mess up and need to print a replacement part but the pages are too big for my currently operating scanner. (I have a larger flatbed scanner, but it stopped working with Windows 7, so I am using my Brother Printer/Scanner). Anyway, I'll just cut out the parts and scan each as I proceed through the assembly. But the very first thing I scan is the reverse side of the cover sheet, and enlarge those difficult to see assembly diagrams! With such a large sheet to work with, I don't know why the diagrams are printed so small? I printed out a new Instructions sheet, and I'm ready for Step 1! 
__________________
SUPPORT ME PLEASE: PaperModelShop Or, my models at ecardmodels: Dave'sCardCreations 
|
| Google Adsense |
|
#2
11-25-2014, 02:17 PM
|
||||
|
||||
|
Looking forward to this one. I believe I either read it or saw in a video, that he uses paper that is thinner than cardstock so that you can coax shapes easier.
__________________
A fine is a tax when you do wrong. A tax is a fine when you do well.
|
|
#3
11-25-2014, 02:37 PM
|
||||
|
||||
|
Step 1....according to the supplied assembly diagrams...
Cut out Part 1...its probably the biggest part in the kit. I think its most of the main body of the Owl. Its got the biggest glue tabs I ever cut out! There are quite a few little cuts you have to make in the part for all the overlapping feathers and a few smaller inside cuts. 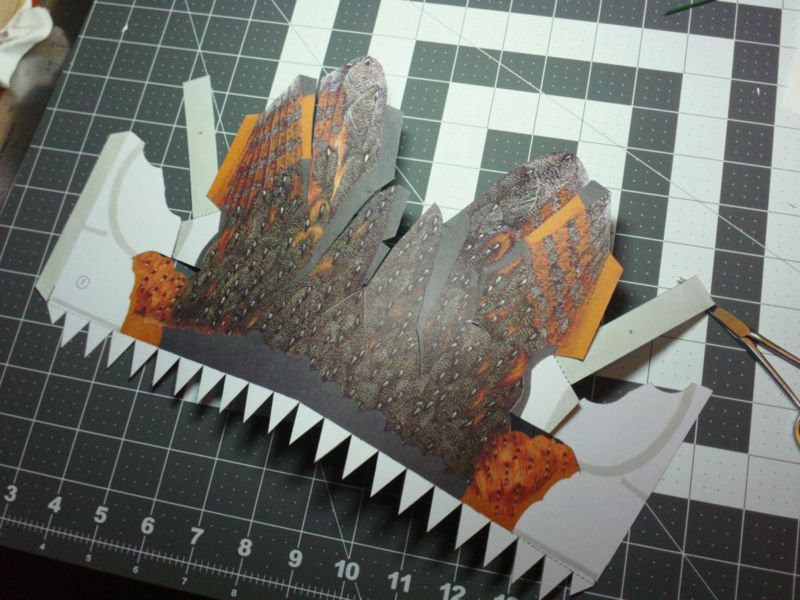 ... Before proceeding, I scan the part... a bit too big for the scanner, so I'll do it in two parts and join the scans back together in PhotoPaint. 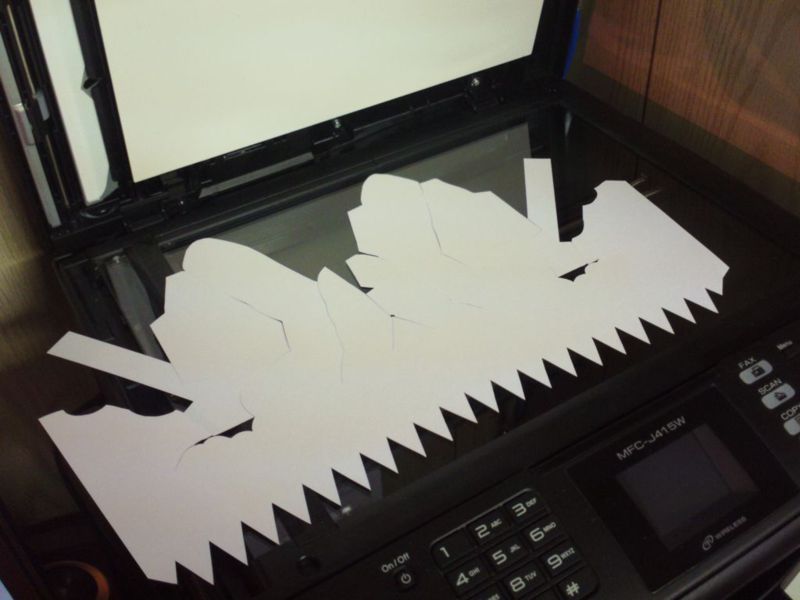 ... I also do a little edge colouring, but nothing too extensive. For most edges, I will use a middle gray art-marker. I've also got some sand and yellow ocher markers at hand. I like markers because they are quick. Just don't hold them in any one spot for too long (too avoid ink bleeding). 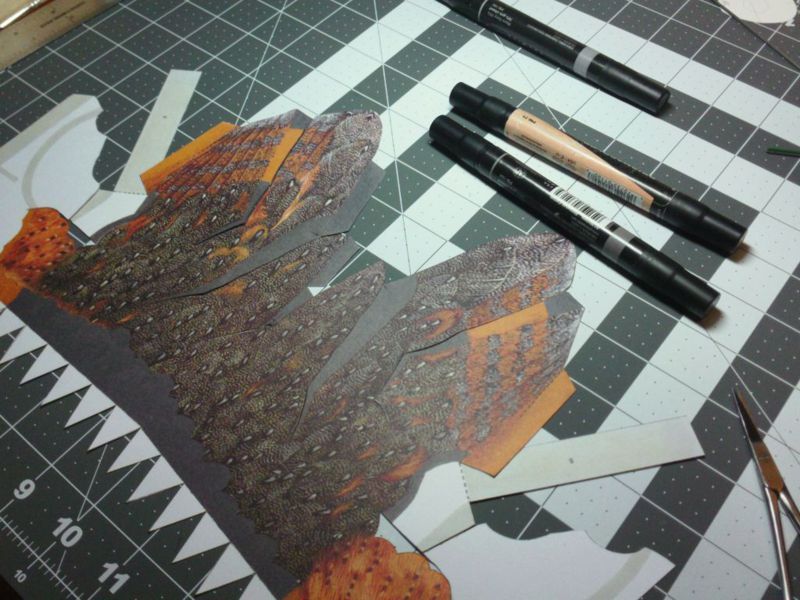 ... And according to the assembly diagrams, I overlap and glue all the cut feathers. There is an "a,b,c,d..." sequence shown. If you've got any experience with Johan's models, you will already understand how he does all the cuts and overlaps and forms things into round shapes. I would say practicing on one of his small free bird download models is a good idea. 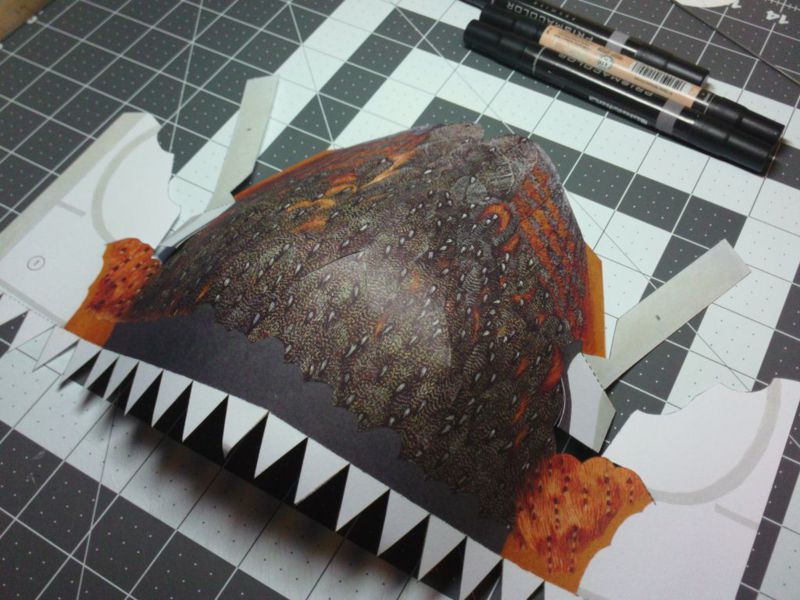
__________________
SUPPORT ME PLEASE: PaperModelShop Or, my models at ecardmodels: Dave'sCardCreations
|
|
#5
11-25-2014, 02:51 PM
|
||||
|
||||
|
Step 1 continued...
all the feather overlaps done and the part is now curving as it should. 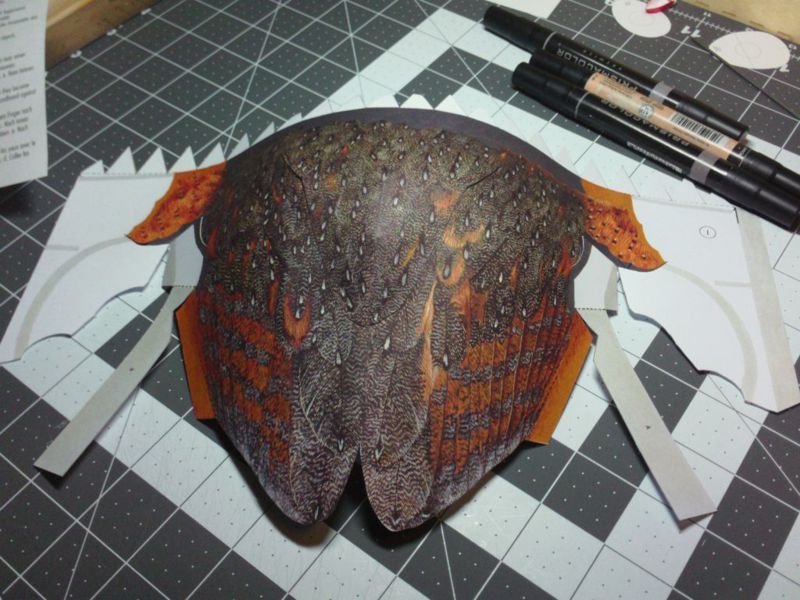 ... Step 2 (II) according to the instructions... and this is where I start to run into problems. LOL Maybe its just me? haha Roll Part 1 and overlap the two main glue tabs, forming a cylindrical shape. I assume this is the main body. Part #2 is a disc-like piece, like a former? ...that glues to the big glue tabs at the rounded end of Part#1. At least thats what I think. And it appears to be positioned inside Part 1, not outside...? I'm not sure...the diagram isn't too clear on this. I haven't glued it in yet, because I'm unsure. 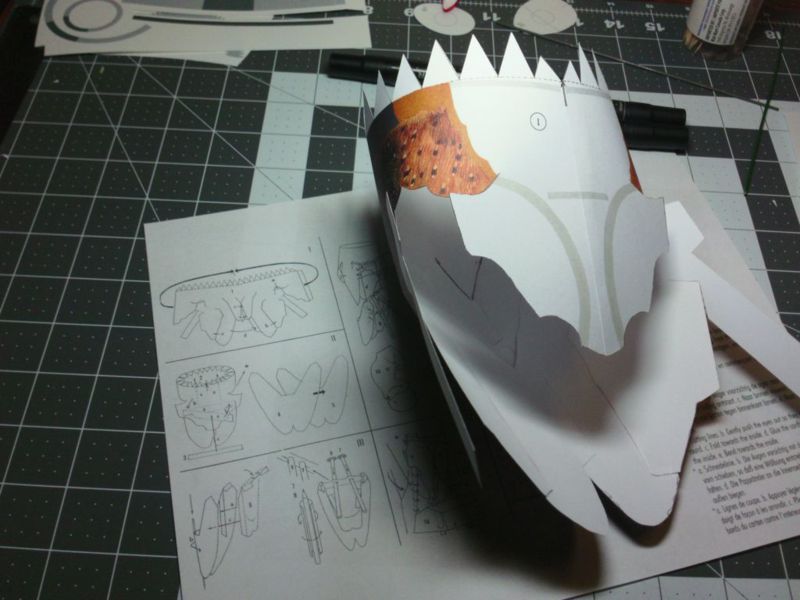 ... And then...theres these two long straight tabs, marked "a" and "b" that appear to fold inwards, overlap and connect (glued). ?? And Part 3 is just a straight strip of paper, that (I think) glues on top of the overlapped a and b strips/tabs? (I won't mention how tricky it is to get all three of these strips to line up neatly! I didn't accomplish this!) 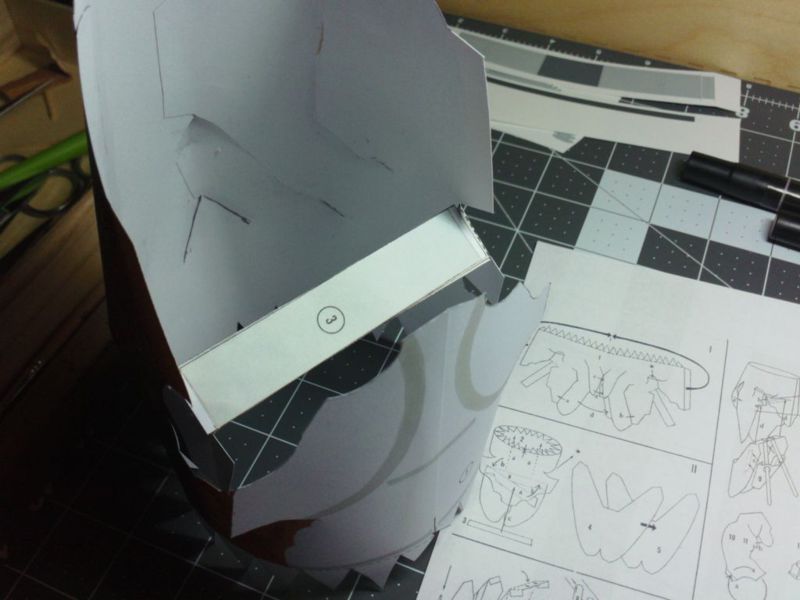
__________________
SUPPORT ME PLEASE: PaperModelShop Or, my models at ecardmodels: Dave'sCardCreations
|
| Google Adsense |
|
#6
11-25-2014, 03:13 PM
|
||||
|
||||
|
also, a question, for those in the know...
if I am correct, that Part#2 fits inside Part#1, up against all those tabs, then, can I laminate Part#2 to some thicker card for rigidity? 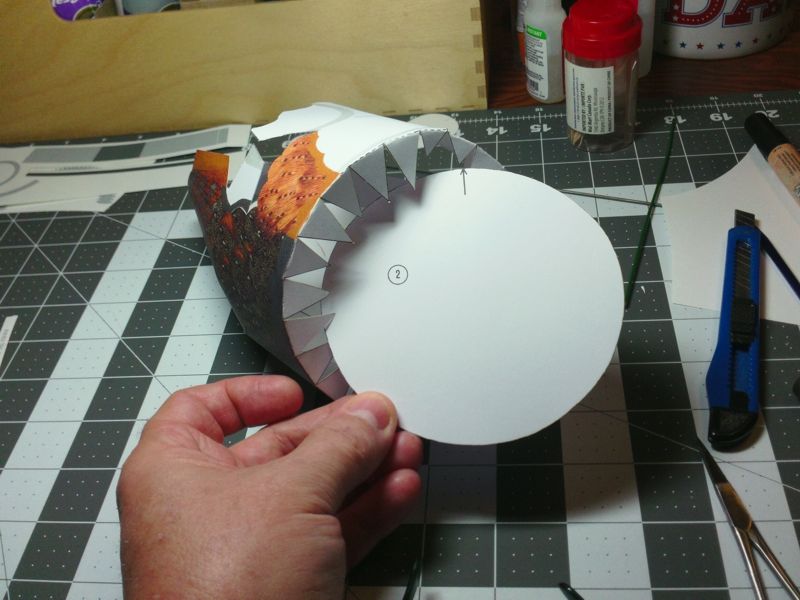
__________________
SUPPORT ME PLEASE: PaperModelShop Or, my models at ecardmodels: Dave'sCardCreations
|
|
#7
11-25-2014, 03:18 PM
|
|||
|
|||
|
I have the same kit.
This summer I startend the build. IT is indead no cardstock Bud thick paper. I make him becous I like the barn owl. I got a real one.
|
|
#8
11-25-2014, 03:27 PM
|
||||
|
||||
|
Sorry Dave ... You're on yer own on this one. It's one of Johan's model birds that I haven't built. Dunno why but I just didn't fancy this or the Hopo. Both a bit too big for my available display space.
I'll be watching the thread with interest though, and just may be tempted to buy one if your build goes well. Johan is a PM forum member (firecrest), so if you're lucky, you may find him chipping in some advice or comments. Best of luck with it. Johnny.
|
|
#9
11-25-2014, 07:04 PM
|
||||
|
||||
|
Great job Dave. I've only built the Firecrest, and it turned out great. Your owl is looking nice so far.
Gary
__________________
"Fast is fine, but accuracy is everything" - Wyatt Earp Design Group Alpha https://ecardmodels.com/vendors/design-group-alpha
|
|
#10
11-26-2014, 01:17 PM
|
||||
|
||||
|
boy oh boy, you guys aren't much help on this one! lol
I thought I would get all kinds of bird builders offering tips. okay, so back to Step 2... and I glued Part#2 to some thicker card for rigidity and glued it in place inside Part#1. I don't know if this is correct...its the best I can surmise from the instructions.  ... Also, in step 2, you need to cut out and assemble Parts #4 and #5. These are inside and outside wing parts. You need to pay attention to the Instructions here. Just looking at the part, it would be very easy to follow the wing outline and cut off all the surrounding white area. But if you look at the instructions closely, you will notice that some of that surrounding white area needs to stay! Honestly, I looked back and forth a few times before I was sure of exactly how to cut out these parts. 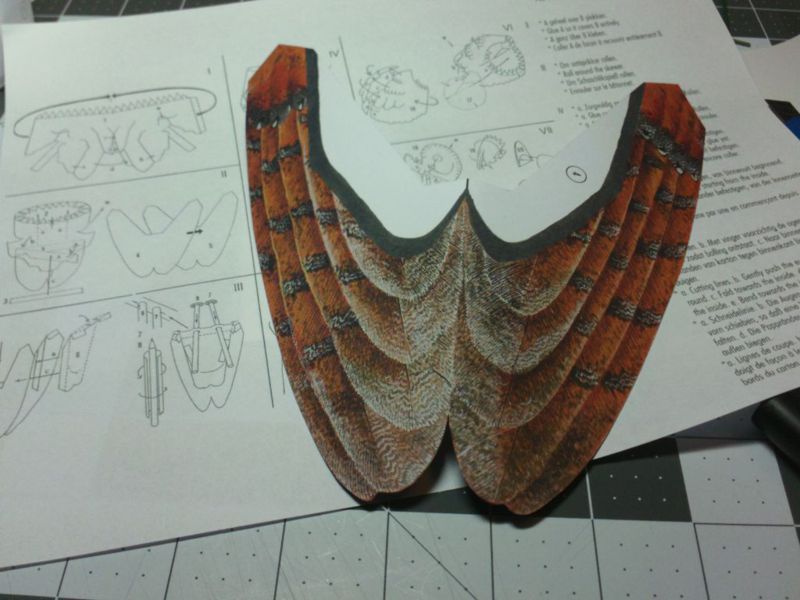 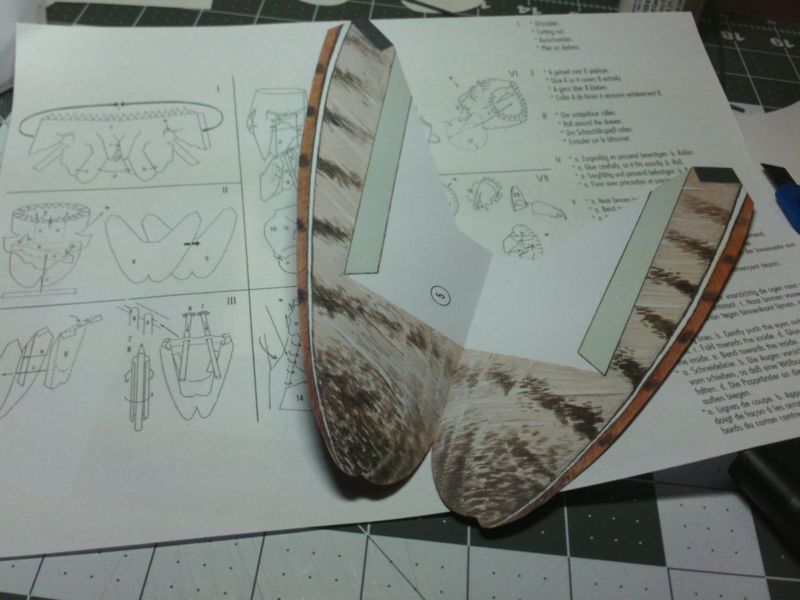 ... So, you glue Parts #4 and #5 back to back and give it a little crease up the center. Note: There is a marked line for you to crease (on Part #4), but in the next assembly step diagram it shows using a dowel or rod to make the crease. So I am unsure if its supposed to be a sharp crease, a rolled edge, or both? I creased...and then rolled on a dowel...then pretended I knew what I was doing. Anyway, you now attach the folded and shaped Part #6 to the inside of the "folded" Wing part (#4 + #5). There are shaded areas on Part #5 (that show you where to glue Part #6) and then after your connections are strong and secure you can bend and attach the two end tabs. (I had to use some clamps for those tabs, because there is some tension from the wings.) 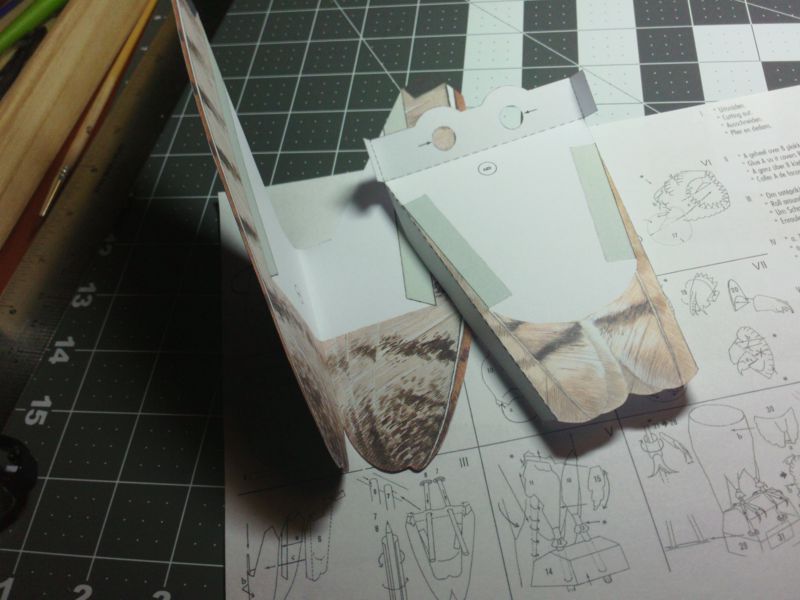 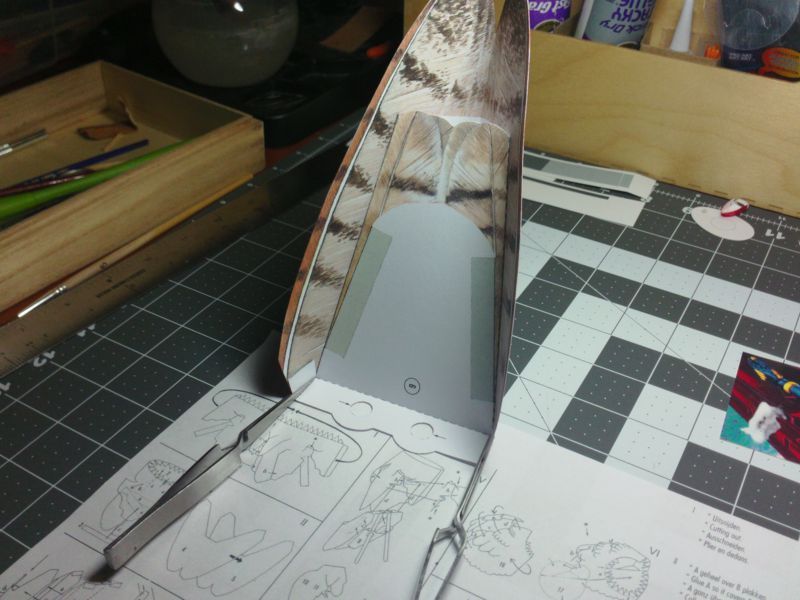
__________________
SUPPORT ME PLEASE: PaperModelShop Or, my models at ecardmodels: Dave'sCardCreations
|
| Google Adsense |
 |
|
|


 Linear Mode

